How to Generate 100% Unique Articles Using Pabbly Connect

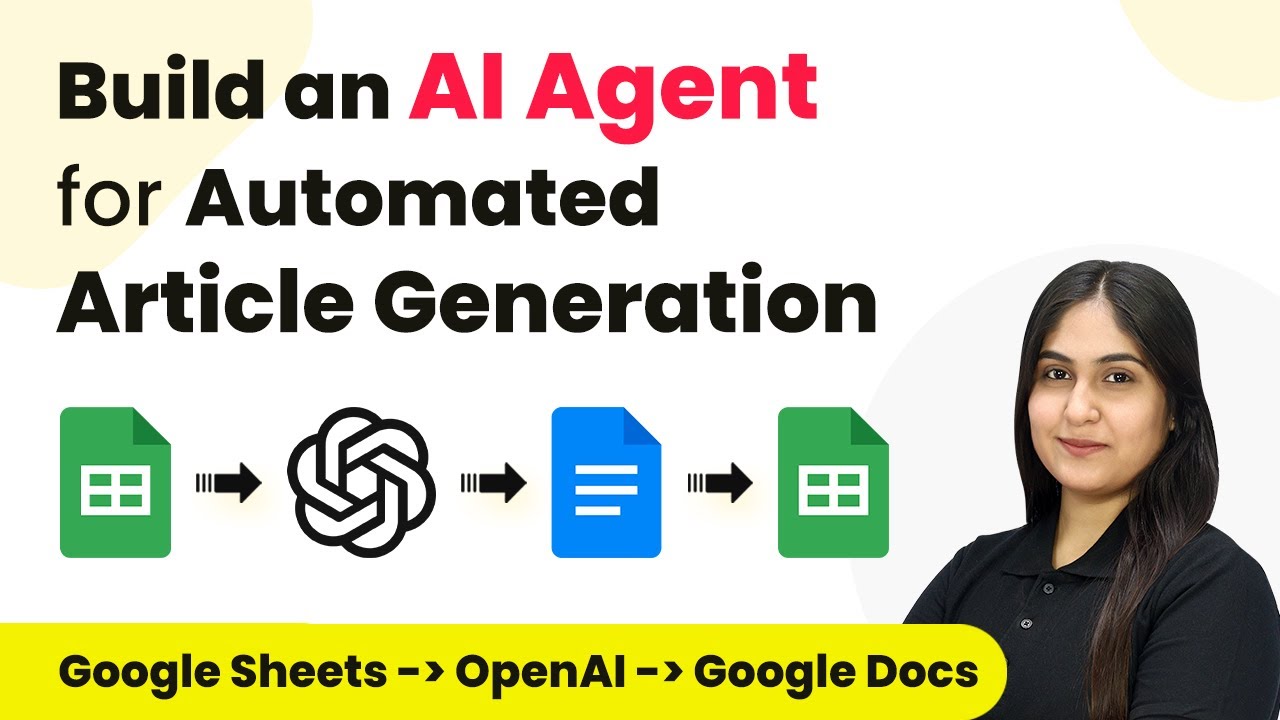
Learn how to generate unique articles using Pabbly Connect by integrating Google Sheets, Google Docs, and WordPress seamlessly. Develop expertise in application integration and learn how to design streamlined automation workflows using proven, simplified approaches.

Watch Step By Step Video Tutorial Below


1. Setting Up Pabbly Connect for Article Generation

To generate unique articles, the first step is to set up Pabbly Connect. This integration platform allows you to connect various applications seamlessly. Start by signing up for a free account on Pabbly Connect, which can be done in just a few minutes.

Once you have created your account, navigate to the dashboard. Click on the ‘Create Workflow’ button to initiate a new workflow. Name your workflow, for example, ‘AI Agent to Generate Articles,’ and select the appropriate folder for your Pabbly account.


2. Integrating Google Sheets with Pabbly Connect

The next step involves integrating Google Sheets with Pabbly Connect. This is crucial as it allows you to input article topics directly into a spreadsheet. In your workflow, add a trigger by selecting Google Sheets as the application.

  • Choose the trigger event as ‘New or Updated Spreadsheet Row’.
  • Copy the webhook URL provided by Pabbly Connect.
  • Open Google Sheets, go to Extensions, then Add-ons, and click on Get Add-ons.
  • Search for ‘Pabbly Connect Webhooks’ and install it.

After installation, refresh your Google Sheets. Go back to Extensions, hover over Pabbly Connect Webhooks, and select ‘Initial Setup’. In the dialog box, select your sheet, paste the webhook URL, and set the trigger column to the last column where data will be entered.


3. Sending Data to AI for Content Generation

Now that Google Sheets is integrated with Pabbly Connect, the next step is to send the article title to an AI platform for content generation. In the action step of your workflow, search for OpenAI and select it as the application.

For the action event, choose ‘Chat GPT’ and connect your OpenAI account by entering your API key. To obtain the API key, log into your OpenAI account, navigate to the API Keys section, and create a new secret key. Copy this key and paste it into Pabbly Connect.

  • Select the AI model you want to use for content generation.
  • In the prompt field, write your instructions for the AI, including the title from Google Sheets.

Click on ‘Save and Send Test Request’ to generate the article. The AI will return a unique article formatted in HTML, ready for posting.


4. Creating a Post on WordPress

With the unique article generated, the next step is to create a post on WordPress through Pabbly Connect. Add another action step and select WordPress as the application. Choose the action event ‘Create a Post’.

Connect your WordPress account by entering your username, password, and base URL. The base URL is the part of your WordPress site before ‘/wp-admin’. After connecting, you will need to map the title and content fields using the responses from the previous steps.

Select the post type, such as ‘Standard’. Map the post title and content from the AI response. Set the status of the post based on the selection in Google Sheets.

Once all fields are filled, click on ‘Save and Send Test Request’. This will create the post in your WordPress account, and you will receive a confirmation response.


5. Updating Google Sheets with the Post Link

The final step involves updating your Google Sheets with the link to the newly created post, ensuring easy access to your articles. Add another action step in Pabbly Connect and select Google Sheets again.

Choose the action event ‘Update Row’. Connect your Google Sheets account and select the spreadsheet and sheet you are working with. For the row index, map it from the trigger step to ensure you are updating the correct row.

Map the post link from the WordPress response to the appropriate field in Google Sheets. Click on ‘Save and Send Test Request’ to complete the process.

Once completed, the link to your WordPress post will be updated in Google Sheets, allowing for quick access to your articles.


Conclusion

In this tutorial, we explored how to use Pabbly Connect to generate 100% unique articles by integrating Google Sheets, OpenAI, and WordPress. This automated process streamlines content creation, making it efficient and effective. By following the steps outlined, you can easily set up your own AI agent for article generation.

Ensure you check out Pabbly Connect to create business automation workflows and reduce manual tasks. Pabbly Connect currently offer integration with 2,000+ applications.

How to Post YouTube Videos on Social Media Using Pabbly Connect and AI Agent

Learn how to use Pabbly Connect to automatically post YouTube videos on social media platforms like Facebook, Instagram, and LinkedIn with an AI agent. Develop expertise in application integration and learn how to design streamlined automation workflows using proven, simplified approaches.

Watch Step By Step Video Tutorial Below


1. Accessing Pabbly Connect for Integration

To start using Pabbly Connect for posting YouTube videos on social media, first, visit the Pabbly Connect website. Here, you can sign up for a new account or log into an existing one. If you’re a new user, you can enjoy 100 free tasks every month, which is perfect for testing out the platform.

After signing in, you will see the dashboard where all Pabbly applications are listed. Click on the Pabbly Connect option to access the integration features. This is where you will create a workflow that automates posting your YouTube videos across various social media platforms.


2. Creating a Workflow in Pabbly Connect

To create a new workflow in Pabbly Connect, click on the ‘Create Workflow’ button located in the top right corner. You will be prompted to enter a name for your workflow. For example, you can name it ‘Post YouTube Video on Social Media Using AI Agent’. Choose a folder to save your workflow; you might want to create a specific folder for AI agent automations.

  • Enter a descriptive name for your workflow.
  • Select an appropriate folder for organization.
  • Click the ‘Create’ button to finalize your workflow setup.

Once your workflow is created, you will see two sections: Trigger and Action. The trigger will detect when a new video is published on YouTube, and the action will post this video on your selected social media platforms using the AI agent.


3. Setting Up the YouTube Trigger in Pabbly Connect

In the trigger section of your workflow, select YouTube as your trigger application. The event you need is ‘New Video in Channel’. This will allow Pabbly Connect to capture the details of any new video published on your YouTube channel automatically.

After selecting the trigger, click on the connect button. If you haven’t connected your YouTube account before, you will need to authorize it. Once authorized, select your YouTube channel from the dropdown list to ensure that Pabbly Connect is monitoring the correct channel.

  • Select ‘YouTube’ as the trigger application.
  • Choose the event ‘New Video in Channel’.
  • Authorize your YouTube account for connection.

Once the trigger is set, Pabbly Connect will automatically capture the video details like title, description, and URL whenever a new video is published. This is crucial for the next steps in your workflow.


4. Filtering Video Types for Posting

To ensure that only specific video types are shared on social media, add a filter step in your workflow. This is done by selecting ‘Filter by Pabbly’ as your action application. Here, you will set a condition to check if the video type is a standard YouTube video rather than a short.

For the filter condition, select the ‘Kind’ label from the previous response and set the value to ‘YouTube#Video’. This ensures that only regular videos will proceed to the next step of posting on social media via Pabbly Connect.

Add a filter step after the YouTube trigger. Set the condition to check for ‘YouTube#Video’. Test the filter to ensure it works correctly.

This filtering step is essential for maintaining the relevance of your posts on social media platforms. If the condition is true, the workflow will continue to the next action of generating captions.


5. Generating Captions Using AI Agent

Next, you will set up another action step to generate captions for your video using an AI agent. Choose ‘OpenAI’ as the action application and select ‘ChatGPT’ as the action event. This will allow Pabbly Connect to create engaging captions based on the video title and description.

In the prompt section, you need to provide specific instructions for the AI. For example, you can write: ‘I own a business and regularly post content on my YouTube channel. Generate a short, trendy caption summarizing the video title and description with relevant hashtags.’ This will ensure that the AI generates a suitable caption for your audience.

Set OpenAI as the action application. Use the prompt to guide the AI in generating captions. Map the video title and description for dynamic content.

Once the AI generates the caption, you can proceed to post this content on your social media platforms using Pabbly Connect. This automation minimizes the effort needed for social media engagement while maximizing reach and interaction.


Conclusion

Using Pabbly Connect, you can effortlessly automate the process of posting YouTube videos on various social media platforms. By setting up a workflow that includes triggers, filters, and AI-generated captions, you can enhance your audience engagement with minimal effort. This integration not only saves time but also ensures that your content reaches a broader audience effectively.

Ensure you check out Pabbly Connect to create business automation workflows and reduce manual tasks. Pabbly Connect currently offer integration with 2,000+ applications.

Automate Article Generation Using Pabbly Connect: Google Sheets to Google Docs

Learn how to automate article generation using Pabbly Connect to integrate Google Sheets and Google Docs seamlessly. Revolutionize your productivity approach with just a few strategic clicks. Uncover professional methods for connecting applications and creating workflows that reclaim hours of your week.

Watch Step By Step Video Tutorial Below


1. Introduction to Pabbly Connect for Article Generation

Pabbly Connect is a powerful automation platform that facilitates seamless integration between Google Sheets and Google Docs. In this tutorial, we will explore how to build an AI agent for automated article generation. using Pabbly Connect

To get started, visit the Pabbly Connect website, sign up or log in, and navigate to the dashboard. Here, you can create workflows that automate tasks between various applications.


2. Setting Up Pabbly Connect Workflow

First, we need to create a new workflow in Pabbly Connect. Click on the ‘Create Workflow’ button at the top right corner of the dashboard. Name your workflow as ‘AI Agent for Automated Article Generation’. using Pabbly Connect

Next, select Google Sheets as the trigger application. Choose the trigger event as ‘New or Updated Spreadsheet Row’. This setup will allow Pabbly Connect to monitor changes in your Google Sheets for article generation.

  • Click on ‘Create Workflow’.
  • Name your workflow appropriately.
  • Select Google Sheets as the trigger application.
  • Choose ‘New or Updated Spreadsheet Row’ as the trigger event.

After setting the trigger, you will need to connect your Google Sheets account to Pabbly Connect. Follow the on-screen instructions to authorize the connection.


3. Configuring Google Sheets in Pabbly Connect

Once your Google Sheets account is connected, specify the spreadsheet you want to monitor. Select the relevant spreadsheet and worksheet where you will input your article topics. using Pabbly Connect

Next, ensure that you have the necessary columns in your sheet for the title, keywords, and target audience. This data will be used to generate articles automatically. After setting up the spreadsheet, you can test the trigger to confirm that Pabbly Connect is receiving data correctly.

  • Select the specific spreadsheet and worksheet.
  • Ensure the necessary columns are in place.
  • Test the trigger to verify data reception.

With the trigger configured, you are now ready to integrate the next step in your workflow.


4. Integrating OpenAI with Pabbly Connect

Now, we will add an action step to connect OpenAI for article generation. Choose OpenAI as the action application and select the action event ‘Create Content’. This allows Pabbly Connect to send the data from Google Sheets to OpenAI. using Pabbly Connect

In this step, you will map the data from your Google Sheets to the OpenAI prompt. Enter the details such as the title, keywords, and target audience. This mapping process is crucial as it dictates how the content will be generated.

Select OpenAI as the action application. Choose ‘Create Content’ as the action event. Map data from Google Sheets to the OpenAI prompt.

After mapping the data, you can test this action to ensure that OpenAI generates the content correctly based on the provided inputs.


5. Finalizing Document Creation in Google Docs

After generating content with OpenAI, the next step is to create a document in Google Docs. Select Google Docs as the action application and choose ‘Create Document’ as the action event. using Pabbly Connect

Map the content generated by OpenAI to the new document. You can also specify the document name based on the title from your Google Sheets. Finally, test this action to confirm that the document is created successfully in your Google Docs.

Select Google Docs as the action application. Choose ‘Create Document’ as the action event. Map the content from OpenAI to the new document.

With this final step, you have successfully set up an automated workflow using Pabbly Connect, enabling seamless article generation from Google Sheets to Google Docs.


Conclusion

By utilizing Pabbly Connect, you can automate the article generation process efficiently. This integration between Google Sheets and Google Docs streamlines your content creation, saving time and ensuring consistency in publishing.

Ensure you check out Pabbly Connect to create business automation workflows and reduce manual tasks. Pabbly Connect currently offer integration with 2,000+ applications.

How to Create ClickFunnels Contact from Calendly Invitee Using Pabbly Connect

Learn how to automate creating ClickFunnels contacts from Calendly invitees using Pabbly Connect in this detailed step-by-step tutorial. Implement the precise methodologies leading organizations use to automate repetitive tasks, illustrated with practical examples designed for immediate application.

Watch Step By Step Video Tutorial Below


1. Accessing Pabbly Connect for Integration

To create a ClickFunnels contact from a Calendly invitee, you must first access Pabbly Connect. Begin by visiting the Pabbly website and signing in to your account. If you are a new user, you can sign up for a free account, which provides 100 tasks monthly.

Once logged in, navigate to the Pabbly Connect dashboard. Here, you can create a new workflow that will automate the process of adding a new contact to ClickFunnels whenever a new invite is scheduled in Calendly. This integration is crucial for streamlining your event management.


2. Creating a New Workflow in Pabbly Connect

After accessing your dashboard, you need to create a new workflow in Pabbly Connect. Click on the ‘Create Workflow’ button and provide a name for your workflow, such as ‘Create ClickFunnels Contact from Calendly Invite.’ Select an appropriate folder to save your workflow.

  • Click on the ‘Create’ button to finalize your workflow setup.
  • You will see two boxes: Trigger and Action.
  • Set your Trigger application to Calendly and Action application to ClickFunnels.

These steps will establish the foundation of your automation. The trigger will activate whenever a new event is scheduled in Calendly, prompting the action of creating a new contact in ClickFunnels.


3. Setting Up Trigger with Calendly

To set up the trigger in Pabbly Connect, select Calendly as your trigger application. Choose the event type ‘Invitee Created’ to capture new invitees. Then, click on ‘Connect’ to link your Calendly account.

If you don’t have an existing connection, click on ‘Add New Connection’. After authorizing the connection, you will see options to select your organization and user. Ensure that the correct details are populated automatically, then click on ‘Save and Send Test Request’ to test the connection.

The workflow will now wait for a response from Calendly. Schedule a test event in Calendly to confirm that the connection works correctly. Once you receive a response, it indicates that the integration between Calendly and Pabbly Connect is successful.


4. Setting Up Action to Create ClickFunnels Contact

Next, you will set the action in Pabbly Connect to create a contact in ClickFunnels. Select ClickFunnels as your action application and choose the event type ‘Create Contact’. Click on ‘Connect’ to link your ClickFunnels account.

  • Enter the API token and subdomain from your ClickFunnels account.
  • Select the team and workspace where the contact should be created.
  • Map the fields from the Calendly response to ClickFunnels fields.

This mapping ensures that the information from the new invitee is accurately transferred to ClickFunnels. After mapping the required fields, click on ‘Save and Send Test Request’ to create the contact.


5. Confirming the Integration Works

Once you have set up the action, it’s time to confirm that the integration between Pabbly Connect, Calendly, and ClickFunnels works as intended. Head to your ClickFunnels account and check the contacts section to see if the new contact has been created successfully.

After scheduling a test event in Calendly, you should see the new contact with the details you entered. This confirms that your automation is working correctly, allowing you to focus on other aspects of your event planning business.

By following these steps, you have successfully created an automated workflow using Pabbly Connect to integrate Calendly with ClickFunnels, enhancing your productivity and efficiency.


Conclusion

In this tutorial, we explored how to use Pabbly Connect to automate the creation of ClickFunnels contacts from Calendly invitees. By following the detailed steps, you can streamline your workflow and save valuable time.

Ensure you check out Pabbly Connect to create business automation workflows and reduce manual tasks. Pabbly Connect currently offer integration with 2,000+ applications.

How to Send WhatsApp Messages to IndiaMART Leads Using Pabbly Connect

Learn how to send automated WhatsApp messages to IndiaMART leads for your renewable energy business using Pabbly Connect and Pabbly Connect. Step-by-step guide included. Explore efficient methods for automating routine tasks with clear, concise instructions suited for both newcomers and experienced professionals.

Watch Step By Step Video Tutorial Below


1. Overview of Pabbly Connect for WhatsApp Integration

Pabbly Connect is an essential tool that facilitates the integration of various applications, allowing businesses to automate their workflows. In this tutorial, we will explore how to send WhatsApp messages to IndiaMART leads using Pabbly Connect. Automating this process can significantly enhance customer engagement and streamline communications for your renewable energy business.

To begin, access Pabbly Connect by visiting the Pabbly website. If you are a new user, you can sign up for a free account to explore the features offered. Existing users can simply log in to their dashboard and proceed to create a new workflow.


2. Creating a Workflow in Pabbly Connect

Once you are logged into Pabbly Connect, click on the ‘Create Workflow’ button. You will be prompted to name your workflow and select a folder to save it. Name your workflow something descriptive, such as ‘Send WhatsApp Message to IndiaMART Leads’. This helps in organizing your automations efficiently.

After naming your workflow, you will enter the workflow window, which is crucial for setting up triggers and actions. The trigger defines when the workflow will start, while actions are the tasks that follow. In this case, we will set IndiaMART as our trigger application.

  • Click on the ‘Select App’ dropdown and search for ‘IndiaMART’.
  • Choose the trigger event as ‘New Lead’.
  • Copy the webhook URL provided for the next steps.

This setup prepares your workflow to respond to new leads from IndiaMART automatically, using the powerful capabilities of Pabbly Connect.


3. Setting Up IndiaMART for Webhook Integration

To connect IndiaMART with Pabbly Connect, log into your IndiaMART account. Navigate to the Lead Manager section from the left sidebar and select ‘Import/Export Leads’. From the menu, choose ‘Push API’ to set up the webhook.

In the Push API settings, select ‘Other’ as the source and enter ‘Pabbly Connect’ as the CRM platform name. Paste the webhook URL you copied earlier into the Webhook Listener URL field. Finally, save the details to establish the connection.

  • Choose ‘Other’ as the source.
  • Enter ‘Pabbly Connect’ in the CRM platform name.
  • Click ‘Save Details’ to finalize the setup.

After saving, you will see a confirmation indicating that the webhook URL has been successfully added. This integration allows Pabbly Connect to receive data whenever a new lead is generated on IndiaMART.


4. Testing the Webhook Connection

Now that the webhook is set up, it’s time to test the connection. Go back to Pabbly Connect and ensure it is waiting for a webhook response. To do this, you need to perform a test submission from IndiaMART.

In your IndiaMART Push API settings, click on the ‘Test Your Webhook Listener URL’ button. This will send a test lead to Pabbly Connect, which should capture the response. You will see the details of the test lead, including unique query ID, subject, and contact information.

Click ‘Test Your Webhook Listener URL’ in IndiaMART. Check Pabbly Connect for the captured response. Verify that all lead details are received correctly.

This step ensures that your integration is functioning correctly, allowing Pabbly Connect to respond to new leads with automated WhatsApp messages.


5. Sending Automated WhatsApp Messages Using Pabbly Chatflow

With the webhook tested successfully, the next step is to send WhatsApp messages to your leads. For this, we will use Pabbly Chatflow, which allows you to create automated WhatsApp messages easily. Select Pabbly Chatflow as your action application in Pabbly Connect.

Choose the action event as ‘Send Template Message’. If you haven’t connected Pabbly Chatflow yet, you will need to create a new connection by entering your API token from your Pabbly Chatflow account settings. This token is essential for authenticating your requests.

Select ‘Pabbly Chatflow’ as the action application. Enter your API token to connect. Map the recipient’s mobile number from the previous step.

This setup allows you to send personalized WhatsApp messages to each lead automatically. By using Pabbly Connect and Pabbly Chatflow, you ensure that your communication is timely and effective, enhancing customer experience.


Conclusion

In this tutorial, we explored how to send automated WhatsApp messages to IndiaMART leads using Pabbly Connect and Pabbly Chatflow. By following these steps, you can streamline your communication process, ensuring that potential customers receive timely responses. Automating this workflow not only saves time but also enhances customer engagement for your renewable energy business.

Ensure you check out Pabbly Connect to create business automation workflows and reduce manual tasks. Pabbly Connect currently offer integration with 2,000+ applications.

How to Add Facebook Leads to Mailchimp After Verifying Emails with Pabbly Email Verification

Learn to automate adding Facebook leads to Mailchimp using Pabbly Connect and Pabbly Connect in this detailed tutorial. Explore efficient methods for automating routine tasks with clear, concise instructions suited for both newcomers and experienced professionals.

Watch Step By Step Video Tutorial Below


1. Setting Up Pabbly Connect for Automation

To begin automating the process of adding Facebook leads to Mailchimp, the first step is to set up Pabbly Connect. This platform allows you to create workflows that integrate various applications seamlessly. After signing up for Pabbly Connect, log into your dashboard and click on the ‘Create Workflow’ button.

Next, name your workflow, for example, ‘Facebook Leads to Pabbly Email Verification to Mailchimp’. Choose a folder for your workflow and click on ‘Create’. This opens a new workflow window where you will define the trigger and actions needed for the integration.


2. Connecting Facebook Lead Ads to Pabbly Connect

In this section, you will connect your Facebook Lead Ads account to Pabbly Connect. Start by selecting Facebook Lead Ads as your trigger app. Choose the trigger event as ‘New Lead Instant’ from the dropdown menu. Click on ‘Connect’ and select ‘Add New Connection’ to link your Facebook account.

  • Click the ‘Connect with Facebook Lead Ads’ button.
  • When prompted, click ‘Continue’ to allow Pabbly Connect access to your Facebook account.
  • Select the Facebook page from which you want to capture leads.

After selecting your Facebook page, choose the lead generation form you want to use. You can select a specific form or opt for ‘All Lead Gen Forms’. Once done, click on ‘Save and Send Test Request’ to ensure the connection is working properly.


3. Verifying Emails with Pabbly Email Verification

Now that you have connected Facebook Lead Ads to Pabbly Connect, the next step is to verify the email addresses using Pabbly Email Verification. Add an action step in your workflow and select Pabbly Email Verification as the app. Choose the action event ‘Verify Single Email Address’.

Connect your Pabbly Email Verification account by entering your API key and secret key. To find these keys, navigate to your Pabbly Email Verification account settings, then to the API section. Copy the keys and paste them into the respective fields in Pabbly Connect.

  • Map the email address from the Facebook lead response to the email verification field.
  • Click on ‘Save and Send Test Request’ to verify the email address.

Once verified, you will receive a response indicating whether the email address is deliverable. This step is crucial to ensure that only valid emails are added to your Mailchimp account.


4. Adding Verified Leads to Mailchimp

After verifying the email addresses, the final step is to add the leads to Mailchimp using Pabbly Connect. Add another action step and select Mailchimp as the app. Choose the action event ‘Add New Member with Custom Fields’.

Connect your Mailchimp account by entering the API key and the data center name. The data center can be found in the Mailchimp URL after the ‘https://’. After connecting, select the audience list where you want to add the new contacts.

Map the email address and other lead details from the Facebook lead response. Ensure to set the subscriber status to ‘Subscribed’.

Once all details are mapped, click on ‘Save and Send Test Request’ to add the lead to Mailchimp. If successful, you will see the new contact in your Mailchimp account.


5. Testing and Verifying the Automation

To ensure that your automation workflow is functioning correctly, it’s important to test it. You can use the Meta Lead Testing Tool to generate a test lead. Select your Facebook page and lead form, fill in the details, and submit the form. using Pabbly Connect

After submitting, check your Pabbly Connect workflow. You should see the new lead captured in the trigger step. Verify that the email address was checked and validated through Pabbly Email Verification, and then ensure it was added to Mailchimp.

Delete any previous test leads before generating a new one. Refresh your Mailchimp contacts to verify the new lead has been added.

This complete automation ensures that only verified leads are added to your Mailchimp account, enhancing the quality of your email list.


Conclusion

In this tutorial, we demonstrated how to automate the process of adding Facebook leads to Mailchimp after verifying emails using Pabbly Connect and Pabbly Email Verification. By following these steps, you can ensure that your email marketing efforts are supported by a clean and verified contact list.

Ensure you check out Pabbly Connect to create business automation workflows and reduce manual tasks. Pabbly Connect currently offer integration with 2,000+ applications.

Utilizing Pabbly Connect for this integration streamlines your workflow and enhances your marketing efficiency, making it easier to manage your leads effectively.

How to Build an AI Agent to Extract Data from Medical Reports Using Pabbly Connect

Learn how to build an AI agent to extract data from medical reports using Pabbly Connect. This detailed tutorial covers integration with Google Drive, Google Sheets, and OpenAI.

Watch Step By Step Video Tutorial Below


1. Setting Up Pabbly Connect for Medical Report Automation

To build an AI agent that extracts data from medical reports, we first need to set up Pabbly Connect. This platform will automate the workflow by connecting Google Drive, OpenAI, and Google Sheets.

Start by creating a free account on Pabbly Connect. Once registered, log in to the dashboard and click on the ‘Create Workflow’ button. Name your workflow, for example, ‘AI Agent to Extract Medical Records,’ and select the appropriate folder to store your workflow.


2. Triggering the Workflow with Google Drive

The next step involves setting up the trigger in Pabbly Connect to monitor a specific Google Drive folder for new medical reports. Select Google Drive as the app and choose the trigger event as ‘New File in Specific Folder’.

  • Connect your Google Drive account by clicking ‘Sign in with Google’.
  • Select the folder where you will upload medical reports, named ‘Medical Reports’.
  • Click on ‘Save and Send Test Request’ to ensure the connection is successful.

After uploading a sample medical report to the designated folder, click the ‘Save and Send Test Request’ button again. You should see the details of the uploaded file in the response, confirming that the trigger is set up correctly.


3. Integrating OpenAI to Extract Data

With the trigger set up, the next step is to configure the action to send the medical report to OpenAI for data extraction. In Pabbly Connect, select OpenAI as the app and choose the action event ‘Extract Content from PDF or Image’.

Connect your OpenAI account by entering your API key. You can obtain this key from your OpenAI account under the API section. After connecting, you will need to map the file URL from the Google Drive response to the OpenAI action step.

  • Set the prompt to instruct OpenAI to extract details from the medical report.
  • Enter a JSON schema in the structured output field to define the expected format of the extracted data.
  • Click ‘Save and Send Test Request’ to verify the extraction process.

Once the test request is successful, you will receive structured data extracted from the medical report, which can now be passed to Google Sheets.


4. Adding Extracted Data to Google Sheets

Now that we have the extracted data, it’s time to add it to Google Sheets. In Pabbly Connect, select Google Sheets as the app and choose the action event ‘Add New Row’.

Connect your Google Sheets account by signing in and selecting the spreadsheet where you want to store the extracted data. Map the fields from the OpenAI response to the corresponding columns in your Google Sheet.

Map the patient name, date of birth, gender, and other details as per the structured output. Click ‘Save and Send Test Request’ to add the data to your Google Sheet. Check your Google Sheet to confirm that the data has been added successfully.

The integration is now complete, and you can see the extracted medical report details populated in your Google Sheet.


5. Testing the AI Agent Workflow

To ensure that the AI agent works as expected, upload another medical report to the Google Drive folder. The Pabbly Connect workflow will automatically trigger and extract the data from the new report.

Since the connection is polling-based, it may take a few minutes for the new data to appear in your Google Sheet. After waiting, check your Google Sheet to see if the new patient details have been added.

By following these steps, you can confirm that the AI agent built with Pabbly Connect is functioning correctly, continuously extracting data from medical reports and updating your Google Sheets in real-time.


Conclusion

In this tutorial, we demonstrated how to build an AI agent using Pabbly Connect to automate the extraction of data from medical reports. This integration not only saves time but also ensures accuracy in managing patient data.

Ensure you check out Pabbly Connect to create business automation workflows and reduce manual tasks. Pabbly Connect currently offer integration with 2,000+ applications.

By following the exact steps outlined, you can easily set up similar workflows to enhance your operational efficiency.

Automatically Generate Images and Texts Using Pabbly Connect and AI Agent

Learn how to automatically generate images and texts using Pabbly Connect with AI Agent integration. Step-by-step tutorial for seamless automation. Develop expertise in application integration and learn how to design streamlined automation workflows using proven, simplified approaches.

Watch Step By Step Video Tutorial Below


1. Setting Up Pabbly Connect for AI Agent Integration

To start using Pabbly Connect for generating images and texts automatically, first, you need to access the platform. Create a free account using the link provided in the description. After account creation, log in to your Pabbly Connect dashboard.

In your dashboard, click on the ‘Create Workflow’ button. Name your workflow, for example, ‘AI Agent for Image and Content Generation.’ Select the appropriate folder in your Pabbly Connect account and click on ‘Create’ to initiate the workflow setup.


2. Connecting Google Sheets with Pabbly Connect

The next step involves connecting Google Sheets to Pabbly Connect. In the trigger step of the workflow, select Google Sheets as the application. Choose the event as ‘New or Updated Spreadsheet Row’ to trigger the workflow whenever new data is entered.

  • Select Google Sheets as the application.
  • Choose the event: New or Updated Spreadsheet Row.
  • Copy the webhook URL provided by Pabbly Connect.

After copying the webhook URL, go to your Google Sheets, navigate to Extensions, and select Add-ons. Install the Pabbly Connect Webhooks add-on if you haven’t done so already. Once installed, refresh your Google Sheets and set up the initial configuration with the copied webhook URL.


3. Setting Up Filtering Conditions in Pabbly Connect

Now that Google Sheets is connected, you need to establish filtering conditions in Pabbly Connect. This is crucial for ensuring that the AI agent generates content only when the status is set to ‘Generate’. In the action step, select ‘Filter’ as your next action.

  • Choose the label: Status.
  • Set the filter type to ‘Equals’.
  • Enter the value as ‘Generate’.

After setting the filter, click on ‘Save and Test Request’. This ensures that the workflow will only proceed if the status is correctly set to generate the content and images.


4. Generating Content and Images Using AI Agent

With the filtering condition set, the next step is to generate the content and images using the AI agent integrated through Pabbly Connect. For generating content, select OpenAI as your action application and choose the event ‘Generate Content’.

Connect your OpenAI account by entering the API key. Once connected, specify the AI model you wish to use, such as GPT-4. Set the prompt for content generation based on the topic provided in Google Sheets. Use the mapping feature to insert the topic directly from the trigger step.

Next, for image generation, add another action step to select OpenAI again, this time for generating images. Choose the event ‘Generate Image’ and map the image description from Google Sheets. Specify the model (like DALL-E 3) and other parameters such as image size and quality.


5. Updating Google Sheets with Generated Content and Images

Finally, you need to update the Google Sheets with the generated content and images using Pabbly Connect. Add a new action step, select Google Sheets, and choose the ‘Update Row’ event. Connect your Google Sheets account and specify the spreadsheet and row index where the data needs to be updated.

Map the generated content and image URL obtained from the previous steps into their respective fields. After mapping these details, click on ‘Save and Send Test Request’ to ensure that the updates are correctly reflected in your Google Sheets.

Check your Google Sheets to confirm that the generated content and image URLs appear in the correct rows, demonstrating that the AI agent functions perfectly through Pabbly Connect.


Conclusion

Using Pabbly Connect, you can automate the process of generating images and texts effortlessly. This integration with Google Sheets and AI Agent streamlines content creation, allowing for efficient management of your projects.

Ensure you check out Pabbly Connect to create business automation workflows and reduce manual tasks. Pabbly Connect currently offer integration with 2,000+ applications.

By following this detailed tutorial, you can set up your own AI agent for automatic image and text generation, enhancing productivity and creativity in your workflows.

Automate Instagram Posts Using Pabbly Connect and AI

Learn how to use Pabbly Connect to automate Instagram post creation and sharing using AI tools. Step-by-step tutorial for seamless integration. Master proven automation processes with practical implementation examples and strategic recommendations you can apply immediately in your workflow.

Watch Step By Step Video Tutorial Below


1. Accessing Pabbly Connect for Instagram Automation

To start automating your Instagram posts, you first need to access Pabbly Connect. This powerful automation tool allows you to connect various applications seamlessly. Visit the Pabbly Connect homepage by entering Pabbly.com/connect in your browser.

Once on the homepage, you can either sign in if you’re an existing user or click on ‘Sign Up Free’ to create a new account. After logging in, you will be directed to your dashboard where you can create a new workflow to automate your Instagram posts.


2. Creating a Workflow in Pabbly Connect

The first step to automate your Instagram posts is to create a new workflow in Pabbly Connect. Click on the ‘Create Workflow’ button located at the top right corner of your dashboard. Name your workflow something descriptive, such as ‘Use AI Agent to Automatically Create and Share Instagram Post’.

Next, select a folder to save your workflow. You can choose an existing folder or create a new one. This organization helps keep your workflows manageable. Once your workflow is created, you can set up the trigger and actions needed for automation.

  • Click on ‘Create Workflow’.
  • Name your workflow appropriately.
  • Select a folder for organization.

After setting up your workflow’s name and folder, proceed to set up the trigger for your automation. This is where you will define what event will initiate the workflow.


3. Setting Up the Trigger for Instagram Posts

In this step, you will configure the trigger that will start your workflow in Pabbly Connect. For this automation, select ‘Scheduled by Pabbly’ as your trigger application. This feature allows you to schedule tasks at specific times.

Set the trigger event to ‘Schedule Workflow’. You will then specify how often you want this workflow to run. For instance, choose to run the workflow daily at a specific time, such as 10:00 AM. This ensures that your Instagram post is published consistently every day.

  • Select ‘Scheduled by Pabbly’ as the trigger application.
  • Choose the trigger event ‘Schedule Workflow’.
  • Set the time for the workflow to run daily.

After configuring the trigger, save your settings. You should see a confirmation message indicating that the trigger has been successfully set up.


4. Connecting OpenAI for Content Generation

Now that your trigger is set, the next step involves connecting OpenAI to generate the content for your Instagram post using Pabbly Connect. Select OpenAI as your action application and choose the action event ‘ChatGPT’ to generate captions.

To connect OpenAI, you will need to enter your OpenAI API key. If you don’t have one, create it from your OpenAI account. Once you enter the key, select the AI model you want to use, such as GPT-4, and enter a prompt that instructs the AI on what to generate. For example, you could use a prompt like ‘Generate an engaging Instagram caption for a fitness influencer’.

Select OpenAI as the action application. Enter your OpenAI API key for authentication. Provide a suitable prompt for content generation.

After entering the prompt, save the action step. You should receive a successful response with the generated content, which will be used for your Instagram post.


5. Posting Automatically on Instagram

With the content generated, you are now ready to automate the posting process on Instagram using Pabbly Connect. Select Instagram for Business as your action application and choose the action event ‘Publish Photo’.

Connect your Instagram account to Pabbly Connect. Make sure you are logged into your Instagram account to facilitate a smooth connection. After successful connection, you will be prompted to enter the photo URL and the caption generated from the previous steps. Map these fields to ensure the correct data is sent to Instagram.

Select Instagram for Business as the action application. Choose the action event ‘Publish Photo’. Map the photo URL and caption fields.

Once all details are filled in, save the action step. Upon successful execution, your Instagram post will be published automatically at the scheduled time, ensuring your audience remains engaged with fresh content daily.


Conclusion

In this tutorial, we explored how to use Pabbly Connect to automate the creation and sharing of Instagram posts. By leveraging OpenAI for content generation and scheduling features, you can maintain a consistent online presence effortlessly. Automate your Instagram strategy today to engage your audience effectively!

Ensure you check out Pabbly Connect to create business automation workflows and reduce manual tasks. Pabbly Connect currently offer integration with 2,000+ applications.

Automate WhatsApp Messages to IndiaMART Leads with Pabbly Connect

Learn how to send WhatsApp messages to IndiaMART leads using Pabbly Connect and streamline your tax consultancy services with this step-by-step tutorial. Explore efficient methods for automating routine tasks with clear, concise instructions suited for both newcomers and experienced professionals.

Watch Step By Step Video Tutorial Below


1. Introduction to Pabbly Connect for IndiaMART Leads

In this tutorial, we will explore how to send WhatsApp messages to IndiaMART leads using Pabbly Connect. This integration will help tax consultants streamline their communication with potential clients.

By automating the process, you can instantly acknowledge inquiries and improve client satisfaction. Using Pabbly Connect, we will connect your IndiaMART account with WhatsApp to enhance your response time and efficiency.


2. Setting Up Pabbly Connect for Automation

To start, access Pabbly Connect by visiting the Pabbly website. If you’re a new user, sign up for a free account to explore the features available.

Once you are logged in, navigate to the dashboard and click on the ‘Create Workflow’ button. Name your workflow, for instance, ‘Send WhatsApp Message to IndiaMART Leads’. Select the appropriate folder to save your workflow.

  • Click on the ‘Create’ button to set up your workflow.
  • Choose the trigger application as IndiaMART.
  • Select the trigger event as ‘New Leads’.

With these steps, your Pabbly Connect workflow will be ready to capture new leads from IndiaMART.


3. Connecting IndiaMART with Pabbly Connect

After setting up your trigger, you will receive a webhook URL from Pabbly Connect. This URL is essential for connecting your IndiaMART account with the automation.

Log in to your IndiaMART seller account, navigate to the Lead Manager, and select ‘Import/Export Leads’. Choose the ‘Push API’ option and enter the webhook URL you copied from Pabbly Connect.

  • Set the source as ‘Other’.
  • Enter your CRM platform name as ‘Pabbly Connect’.
  • Save the details and generate an OTP for activation.

Once the webhook is set up, your IndiaMART account will be successfully integrated with Pabbly Connect, allowing it to capture new leads automatically.


4. Sending WhatsApp Messages with Pabbly Chatflow

Next, we will set up Pabbly Chatflow to send WhatsApp messages to the leads captured by Pabbly Connect. Start by accessing your Pabbly Chatflow account.

In your Chatflow dashboard, click on ‘Add a WhatsApp Number’ and enter the required details, including the Meta Access Token and Phone Number ID. This step is crucial for enabling WhatsApp messaging through Pabbly Connect.

Ensure your WhatsApp Cloud API account is set up to obtain the necessary credentials. Select the appropriate folder for your WhatsApp number. Click ‘Next’ to finalize the addition of your WhatsApp number.

Now, your Pabbly Chatflow account is ready to send automated messages to leads through Pabbly Connect.


5. Testing the Automation Workflow

To ensure everything is functioning correctly, generate a test lead in your IndiaMART account. This will trigger the automation you set up with Pabbly Connect.

After submitting a test inquiry, check your WhatsApp to confirm the automated message has been sent. The message should acknowledge the inquiry and provide information about your services.

With this setup, you will receive immediate notifications for new leads, enhancing your client engagement. This process not only saves time but also improves conversion rates for your tax consultancy services.


Conclusion

In conclusion, using Pabbly Connect and Pabbly Chatflow to automate WhatsApp messaging for IndiaMART leads significantly enhances client communication. By following the steps outlined in this tutorial, you can streamline your tax consultancy services and improve client satisfaction.

Ensure you check out Pabbly Connect to create business automation workflows and reduce manual tasks. Pabbly Connect currently offer integration with 2,000+ applications.