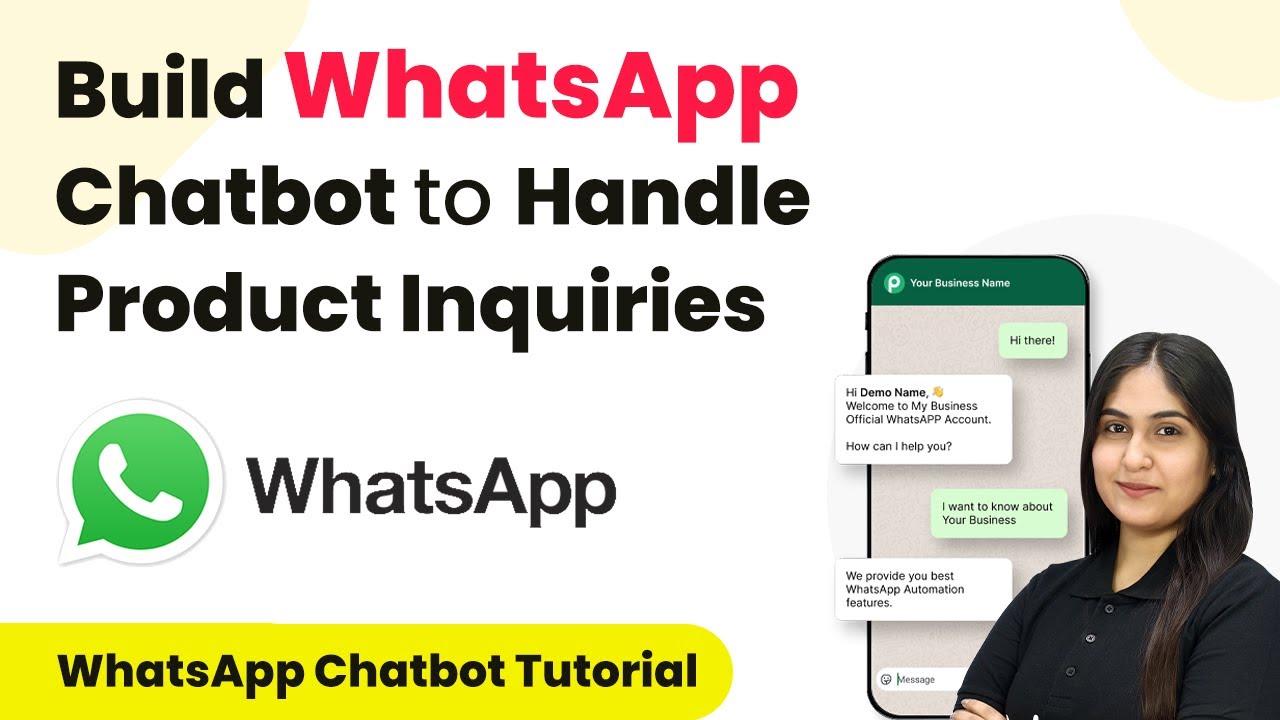
How to Build a WhatsApp Chatbot for Service Inquiries & Instant Business Info Using Pabbly Chatflow

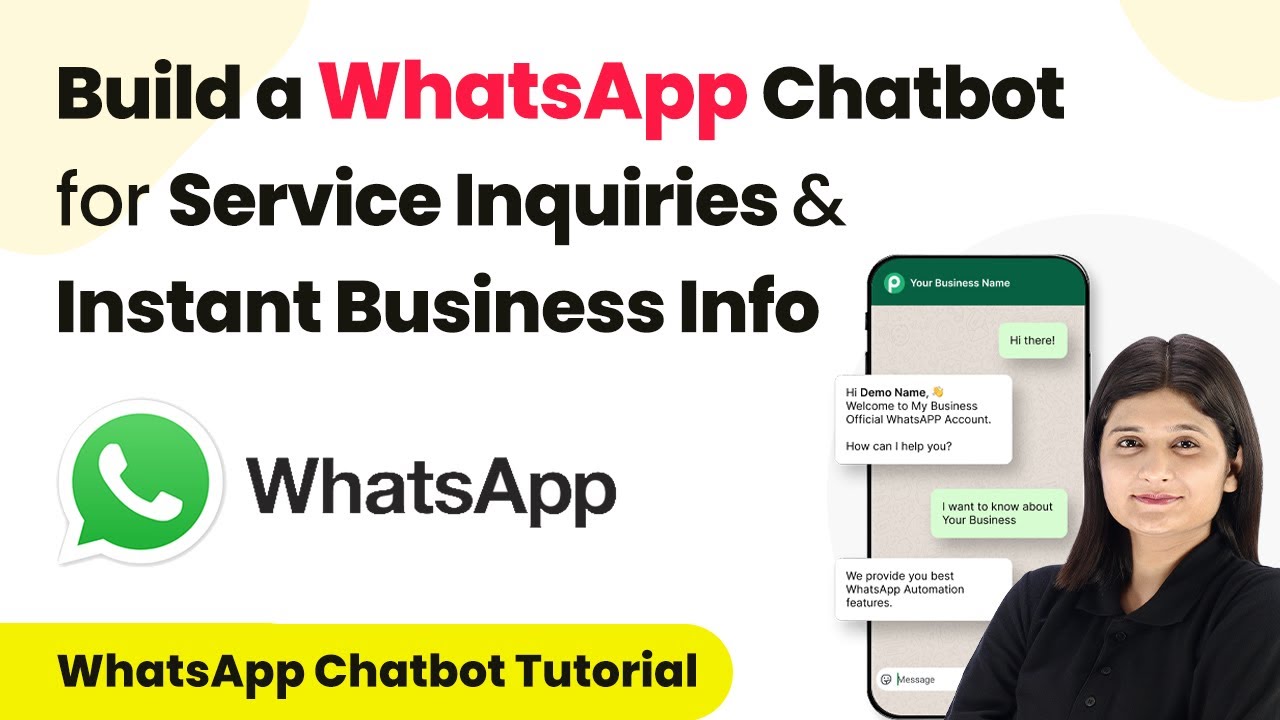
Learn how to create a WhatsApp chatbot for service inquiries and instant business info using Pabbly Chatflow. Step-by-step tutorial included! Discover how to design chat experiences that feel personal and responsive while handling customer inquiries automatically around the clock.

Watch Step By Step Video Tutorial Below


1. Introduction to Pabbly Chatflow for WhatsApp Chatbot

Pabbly Chatflow is a powerful platform that allows businesses to create WhatsApp chatbots for handling service inquiries and providing instant business info. In this tutorial, we will guide you through the steps to set up a WhatsApp chatbot using Pabbly Chatflow.

By automating responses to frequently asked questions, you can save time and enhance customer experience. This guide will cover the exact steps to create a chatbot that responds instantly to customer inquiries through WhatsApp.


2. Accessing Pabbly Chatflow Dashboard

To get started with building your WhatsApp chatbot, first, log in to your Pabbly Chatflow account. Once logged in, navigate to the dashboard where you will see various options for creating flows.

Follow these steps to access the flow builder:

  • Click on ‘Flows’ from the left-hand menu.
  • Select ‘Create New Flow’ to start building your chatbot.
  • Name your flow appropriately, e.g., ‘Service Inquiry Bot’.

Now that you have created a new flow, you can start adding triggers and actions to automate responses.


3. Setting Up Triggers in Pabbly Chatflow

The first step in creating your WhatsApp chatbot is to set up triggers that will activate the chatbot when users send messages. In Pabbly Chatflow, triggers are essential for determining when the bot should respond.

To set up triggers, perform the following steps:

  • Select the ‘Trigger’ option from the flow builder.
  • Add keywords such as ‘Hi’ or ‘Hello’ that users might send to initiate the conversation.
  • Enable the ‘Regex’ option to allow for variations in user messages.

By setting these triggers, your chatbot will be able to recognize different variations of greetings and respond accordingly.


4. Creating Response Actions in Pabbly Chatflow

Once you have set up the triggers, the next step is to define the actions that your WhatsApp chatbot will take in response to user inquiries. This is where Pabbly Chatflow shines, allowing you to create personalized messages.

To create response actions, follow these steps:

Click on ‘Actions’ in the flow builder. Choose the type of message you want to send, like text, media, or templates. Draft your response message, such as ‘Welcome to our fitness center! How can I assist you today?’.

These actions will help guide the conversation and provide users with the information they need instantly, enhancing their experience with your service.


5. Testing and Finalizing Your WhatsApp Chatbot

After setting up triggers and actions, it’s crucial to test your WhatsApp chatbot to ensure it functions as intended. In Pabbly Chatflow, you can simulate user interactions to validate your flow.

To test your chatbot, follow these steps:

Use the ‘Test’ feature in the flow builder to send messages as a user. Check if the responses are accurate and relevant to the inquiries. Make any necessary adjustments based on the test results.

Testing ensures that your chatbot is ready to handle real customer inquiries efficiently, providing instant business info and support.


Conclusion

In this tutorial, we demonstrated how to create a WhatsApp chatbot for service inquiries and instant business info using Pabbly Chatflow. This integration allows businesses to automate responses, saving time and improving customer service. By following the steps outlined, you can enhance your business’s efficiency and customer engagement.

Ensure you check out Pabbly Connect to create business automation workflows and reduce manual tasks. Pabbly Connect currently offer integration with 2,000+ applications.

How to Use Pabbly Connect for YouTube Title, Description & Keyword Generation

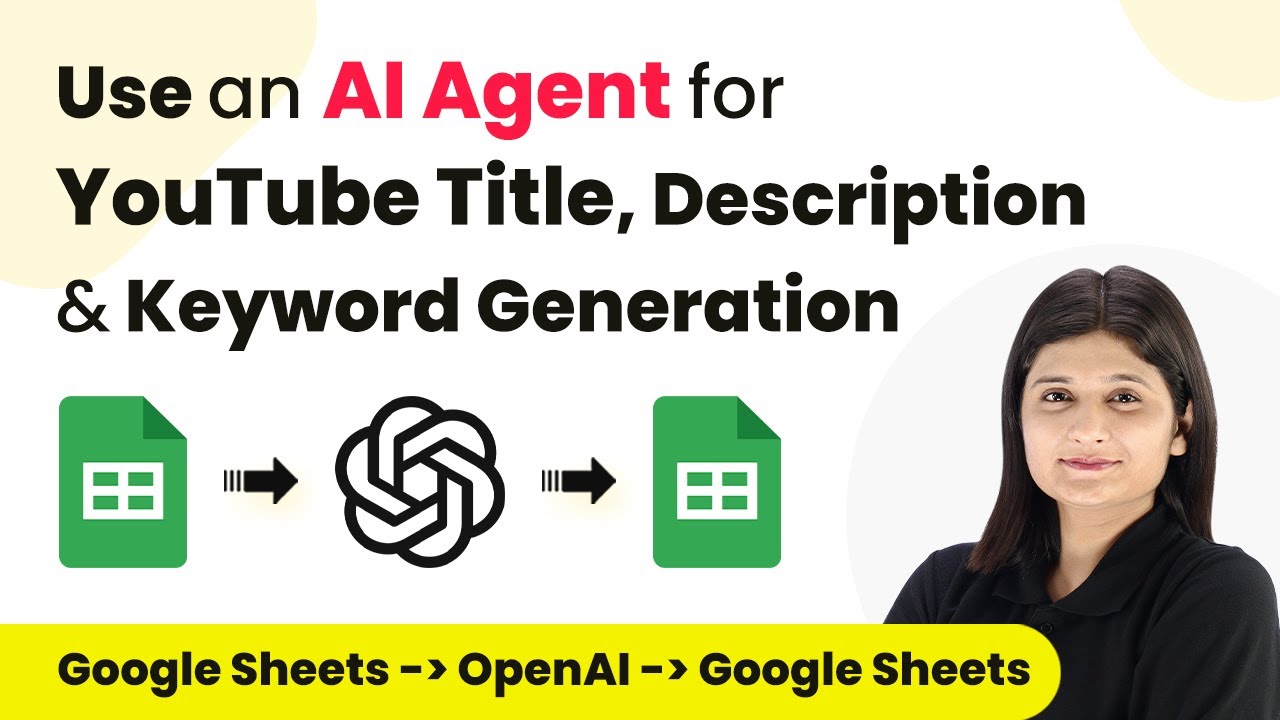
Learn how to automate YouTube title, description, and keyword generation using Pabbly Connect with Google Sheets and AI agents. Follow this definitive guide to creating powerful automated workflows with straightforward, efficiency-focused solutions that save valuable time.

Watch Step By Step Video Tutorial Below


1. Accessing Pabbly Connect for YouTube Automation

To begin the automation process for YouTube title, description, and keyword generation, you need to access Pabbly Connect. Start by visiting the Pabbly Connect website and signing in with your existing account or creating a new one if you are a first-time user.

Once logged in, navigate to the dashboard where you can create new workflows. This platform simplifies the process of connecting multiple applications, making it ideal for integrating Google Sheets with AI agents to automate your YouTube content creation.


2. Creating a New Workflow in Pabbly Connect

Next, you will create a new workflow in Pabbly Connect. Click on the ‘Create Workflow’ button to initiate the setup process. You will be prompted to name your workflow; for this tutorial, let’s name it ‘YouTube Title and Description Generation’.

  • Name your workflow appropriately.
  • Select the folder where you want to save it.

After setting the name and folder, you will see options for selecting a trigger and action. In this case, choose ‘Google Sheets’ as the trigger application. This integration will allow you to automatically send data from your spreadsheet to generate titles and descriptions for your YouTube videos.


3. Setting Up the Trigger for Google Sheets

In this step, you will set up the trigger for your Google Sheets integration using Pabbly Connect. Select the event that will trigger the automation; typically, this would be when a new row is added to your Google Sheet. This means that whenever you add a new idea for a video, the workflow will automatically start.

To configure the trigger, you will need to connect your Google account to Pabbly Connect. This allows the platform to access your Google Sheets and monitor for new entries. Once connected, choose the specific spreadsheet you want to work with and the worksheet that contains your video ideas.


4. Configuring the AI Agent for Title and Description Generation

Now that your trigger is set, it’s time to configure the AI agent that will generate the titles and descriptions for your YouTube videos using Pabbly Connect. Select ‘OpenAI’ as the action application. This AI agent will process the data received from Google Sheets and generate the necessary content.

In the action settings, you will need to provide your OpenAI API key to authenticate the connection. Once authenticated, set the model to use (e.g., GPT-4) and enter a prompt that instructs the AI on what to generate. For example, you might enter: ‘Generate a catchy title and description for a YouTube video about [insert topic].’


5. Testing and Activating Your Workflow

After configuring both the trigger and the action, it’s time to test your workflow in Pabbly Connect. Click on the ‘Test’ button to send a sample data entry from your Google Sheet to the AI agent. This will allow you to see if the integration works as expected and if the AI generates the content correctly.

  • Verify that the generated title and description appear correctly.
  • Make any necessary adjustments to the prompt or settings.

If everything is functioning properly, click on the ‘Activate’ button to enable your workflow. From now on, every time you add a new idea in your Google Sheet, Pabbly Connect will automatically generate the title, description, and keywords for your YouTube video.


Conclusion

Using Pabbly Connect for YouTube title, description, and keyword generation streamlines your content creation process. By integrating Google Sheets with AI agents, you can automate repetitive tasks and focus on producing high-quality videos.

Ensure you check out Pabbly Connect to create business automation workflows and reduce manual tasks. Pabbly Connect currently offer integration with 2,000+ applications.

How to Connect Unlimited WhatsApp Numbers in a Single Account Using Pabbly Connect

Learn how to connect unlimited WhatsApp numbers in a single account with Pabbly Connect and Pabbly Connect without any extra cost. Follow our detailed tutorial!

Watch Step By Step Video Tutorial Below


1. Introduction to Pabbly Connect and WhatsApp Integration

Pabbly Connect is an automation platform that enables users to connect unlimited WhatsApp numbers seamlessly. This feature allows businesses to manage multiple WhatsApp accounts from a single Pabbly Chatflow account without incurring additional costs. In this tutorial, we will explore how to set up and connect these accounts effectively. using Pabbly Connect

To begin, ensure that you have a Pabbly Connect account and have set up your WhatsApp Cloud API accounts. With Pabbly Connect, you can easily integrate these accounts and manage them from one place. This integration is particularly beneficial for businesses that require multiple WhatsApp accounts for different purposes.


2. Setting Up Your WhatsApp Cloud API Account

Before connecting your WhatsApp numbers, you must set up your WhatsApp Cloud API account. This step is crucial as it provides the necessary credentials for integration with Pabbly Connect. Ensure you have the permanent access token, phone number ID, and WhatsApp business account ID ready.

  • Create your WhatsApp Cloud API account.
  • Obtain your permanent access token, phone number ID, and WhatsApp business account ID.
  • Log in to your Pabbly Connect account.

Once you have these details, you can proceed to connect your WhatsApp Cloud API account with Pabbly Connect by following the steps outlined in the next section.


3. Connecting WhatsApp Numbers in Pabbly Connect

To connect your WhatsApp numbers, navigate to the Pabbly Chatflow dashboard. Click on the ‘Add WhatsApp Number’ button to initiate the connection process. You will be prompted to enter your WhatsApp Cloud API credentials, which include the permanent access token, phone number ID, and WhatsApp business account ID. using Pabbly Connect

After entering the required information, select the folder in your Pabbly Chatflow account where you want to connect this WhatsApp number. Click on ‘Next’ to receive the webhook callback URL and webhook token that you will need to configure in your WhatsApp Cloud API account.


4. Configuring Webhook in WhatsApp Cloud API

After receiving the callback URL and webhook token from Pabbly Connect, you need to configure these in your WhatsApp Cloud API account. Go to the configuration section of your WhatsApp Cloud API account and paste the callback URL into the designated field.

  • Paste the callback URL in the callback URL field.
  • Enter the webhook token in the verify token field.
  • Click on the ‘Verify and Save’ button.

Once you have saved these settings, your WhatsApp number will be successfully connected to Pabbly Connect. You can now manage your WhatsApp messages and updates through your Pabbly Chatflow account.


5. Managing Multiple WhatsApp Accounts

After connecting your WhatsApp accounts, you can easily manage them from your Pabbly Chatflow dashboard. If you have multiple WhatsApp numbers connected, you can access the inbox of any specific account by clicking on the ‘Access Inbox’ button next to the respective account.

This feature allows you to handle customer interactions efficiently from a single platform. With Pabbly Connect, you can monitor all your WhatsApp accounts, ensuring that no messages go unanswered and that customer engagement remains high.


Conclusion

In conclusion, using Pabbly Connect to connect unlimited WhatsApp numbers in a single account is a cost-effective solution for businesses. By following the steps outlined in this tutorial, you can easily integrate multiple WhatsApp accounts and manage them efficiently. This integration enhances customer communication and streamlines your business operations.

Ensure you check out Pabbly Connect to create business automation workflows and reduce manual tasks. Pabbly Connect currently offer integration with 2,000+ applications.

How to Build an AI Agent to Create WordPress Blogs from YouTube Videos Using Pabbly Connect

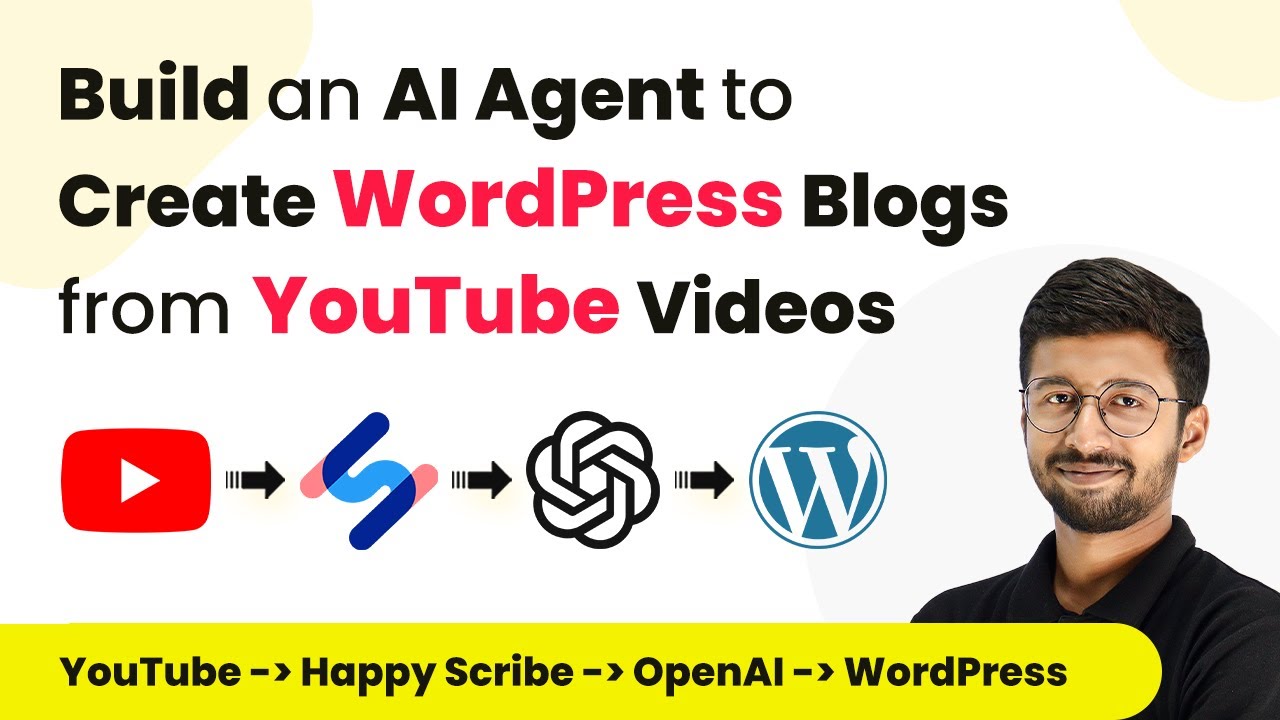
Learn how to automate the creation of WordPress blogs from YouTube videos using Pabbly Connect. Step-by-step guide to integrate YouTube, Happy Scribe, OpenAI, and WordPress.

Watch Step By Step Video Tutorial Below


1. Accessing Pabbly Connect to Set Up Your AI Agent

To build an AI agent that creates WordPress blogs from YouTube videos, you first need to access Pabbly Connect. Start by signing up for a free account, which takes just a few minutes. Once registered, log into your Pabbly Connect dashboard to begin the integration process.

After logging in, click on the ‘Create Workflow’ button. You can name your workflow anything you like, such as ‘AI Agent for Blogs from YouTube Videos’. Select the folder where you want to save this workflow and then click ‘Create’. This sets the stage for connecting various applications through Pabbly Connect.


2. Triggering the Workflow with YouTube

The next step involves connecting your YouTube account to Pabbly Connect. In the trigger window, search for YouTube and select it as the app. Choose the trigger event as ‘New Video in Channel with Video URL’. This configuration allows Pabbly Connect to capture details of any new videos uploaded to your channel.

  • Select ‘Connect’ and then ‘Add New Connection’.
  • Choose your YouTube account and click ‘Continue’.
  • Select the channel from which you want to capture new videos.

Once connected, click on ‘Save and Send Test Request’. This action allows Pabbly Connect to retrieve the latest video details, including the video URL and title, which will be used in subsequent steps.


3. Transcribing Video Content with Happy Scribe

After successfully capturing the video details, the next step is to send this information to Happy Scribe for transcription. In the action step, search for Happy Scribe and select it as the app. Choose the action event as ‘Create Transcription’. using Pabbly Connect

Connect your Happy Scribe account by entering your API key and organization ID. You can find these in your Happy Scribe account settings. Once connected, enter the transcription name using the video title captured in the previous step. Specify the language of the video, which is Indian English in this case, and map the media URL from the YouTube trigger response.


4. Generating Blog Content with OpenAI

Once the transcription is ready, the next step involves using OpenAI to generate the blog content. Add a new action step and search for OpenAI. Choose the action event ‘Extract Content from PDF’ to process the transcription document. using Pabbly Connect

Connect your OpenAI account by providing the API key. After connecting, select the model you want to use for content extraction. Map the PDF URL from the previous Happy Scribe step and provide a detailed prompt to instruct OpenAI on how to structure the blog post. This prompt should request a well-structured blog post in HTML format, including a suitable title and proper formatting.


5. Creating a WordPress Post

The final step is to create a blog post on your WordPress site using the content generated by OpenAI. In Pabbly Connect, add another action step and select WordPress. Choose the action event ‘Create Post’ and connect your WordPress account using your username, password, and base URL.

Map the title and content fields from the OpenAI response into the WordPress action. Set the post status to draft, allowing you to review the content before publishing. Finally, click on ‘Save and Send Test Request’. This will create a new draft blog post on your WordPress site, completing the automation process.


Conclusion

In this tutorial, we explored how to build an AI agent using Pabbly Connect to automate the creation of WordPress blogs from YouTube videos. By integrating YouTube, Happy Scribe, OpenAI, and WordPress, you can streamline the entire process, saving time and effort while ensuring high-quality content generation.

Ensure you check out Pabbly Connect to create business automation workflows and reduce manual tasks. Pabbly Connect currently offer integration with 2,000+ applications.

How to Create an Email Marketing AI Agent Using Pabbly Connect: A Step-by-Step Guide

Learn how to create an Email Marketing AI Agent using Pabbly Connect to integrate Gmail, Facebook, and more for automated email marketing. Explore efficient methods for automating routine tasks with clear, concise instructions suited for both newcomers and experienced professionals.

Watch Step By Step Video Tutorial Below


1. Accessing Pabbly Connect for Email Marketing AI Agent

To create an Email Marketing AI Agent, the first step is to access Pabbly Connect. This platform allows you to integrate various applications seamlessly without any coding skills.

Visit the Pabbly Connect website by typing ‘Pabbly.com/connect’ in your browser. Here, you can either sign in if you already have an account or click on ‘Sign Up for Free’ to create a new account. New users will receive 100 free tasks monthly to explore the platform.


2. Creating a New Workflow in Pabbly Connect

Once logged into Pabbly Connect, navigate to the dashboard where you can see all your workflows. To create a new workflow, click on the ‘Create Workflow’ option. This is essential for setting up your Email Marketing AI Agent.

  • Click on ‘Create Workflow’
  • Name your workflow (e.g., ‘Create an Email Marketing AI Agent’)
  • Select the folder for your automation

After setting the name and folder, click on ‘Create’. This will open a blank workflow where you can define the trigger and action for your automation.


3. Setting Up Trigger with Typeform in Pabbly Connect

The next step involves setting up the trigger in Pabbly Connect. Select Typeform as your trigger application. This is where you will capture the lead information submitted through your inquiry form.

Choose the trigger event ‘New Entry’ to ensure the workflow starts whenever a new form submission occurs. After selecting Typeform, click on ‘Connect’. You will need to authorize Pabbly Connect to access your Typeform account.

  • Select ‘Add New Connection’
  • Authorize Pabbly Connect to access Typeform
  • Select the specific form you want to connect

Once the connection is established, you can test the trigger to ensure it captures the lead details correctly.


4. Integrating OpenAI as the AI Agent in Pabbly Connect

After setting up the trigger, the next step is to integrate OpenAI as your AI agent in Pabbly Connect. This will allow you to generate personalized emails based on the lead information captured from Typeform.

Select OpenAI as your action application. Choose the action event ‘Send Prompt’ to instruct the AI to create an email based on the parameters you provide. You will need to connect your OpenAI account to Pabbly Connect.

Select ‘Add New Connection’ for OpenAI Provide your OpenAI API key Set the model to be used (e.g., GPT-3)

In the prompt section, provide clear instructions on how you want the email to be generated, including the necessary details such as the lead’s name and business needs.


5. Sending Emails via Gmail Using Pabbly Connect

The final step is to set up Gmail as the action step in Pabbly Connect to send the generated emails to your leads. Select Gmail and choose the action event ‘Send Email’. This will allow you to send personalized emails automatically.

Connect your Gmail account to Pabbly Connect and fill in the required fields such as recipient email, subject, and body content. Use the mapped fields from the previous steps to ensure the correct information is included in the emails.

Map the recipient email address from Typeform Use the generated subject and email content from OpenAI Click on ‘Save and Send Test Request’

Once the email is sent successfully, your Email Marketing AI Agent is fully operational. Each time a new lead submits the form, a personalized email will be generated and sent automatically.


Conclusion

In this tutorial, we demonstrated how to create an Email Marketing AI Agent using Pabbly Connect. By integrating Typeform, OpenAI, and Gmail, you can automate the process of sending personalized emails to leads efficiently.

Ensure you check out Pabbly Connect to create business automation workflows and reduce manual tasks. Pabbly Connect currently offer integration with 2,000+ applications.

This setup not only streamlines your email marketing efforts but also enhances engagement with potential clients through tailored communication. Start using Pabbly Connect today to simplify your workflow and improve your marketing strategies.

How to Send WhatsApp Messages to IndiaMART Leads Using Pabbly Connect

Learn how to automate sending WhatsApp messages to IndiaMART leads using Pabbly Connect and Pabbly Connect. Follow this detailed tutorial for seamless integration. Discover hidden automation capabilities within your existing tools. This guide shows you how to connect your essential applications and permanently eliminate redundant manual processes.

Watch Step By Step Video Tutorial Below


1. Accessing Pabbly Connect for Automation

To send WhatsApp messages to IndiaMART leads, you will first need to access Pabbly Connect. Start by visiting the Pabbly Connect website and signing in to your account. If you’re new, you can sign up for free and get started with 100 monthly tasks.

Once logged in, navigate to the Pabbly Connect dashboard. Here, you can create a new workflow specifically for sending WhatsApp messages to your leads. Click on the ‘Create Workflow’ button, name it appropriately, and select the folder for organization.


2. Setting Up the Trigger with IndiaMART Leads

In this section, you will set up the trigger event in Pabbly Connect to capture new leads from IndiaMART. Choose IndiaMART as your trigger application and select the event as ‘New Leads’. This configuration ensures that every time a new lead is generated, it triggers the workflow.

  • Select IndiaMART as the trigger application.
  • Choose ‘New Leads’ as the trigger event.
  • Copy the Webhook URL provided by Pabbly Connect.

Next, go to your IndiaMART dashboard. Access the lead manager, and under the push API section, paste the copied Webhook URL. This step is crucial as it connects IndiaMART to Pabbly Connect, allowing lead information to be sent automatically.


3. Testing the Connection Between IndiaMART and Pabbly Connect

Once you have configured the Webhook URL in IndiaMART, it’s time to test the connection. Perform a test submission by creating a new inquiry on your IndiaMART profile. This action will send data to Pabbly Connect and confirm that the integration is functioning correctly.

After submitting a test inquiry, return to your Pabbly Connect dashboard. You should see the response captured in the workflow. This response will include all the details of the lead, confirming that the connection is successfully established.

  • Check the status of the connection in Pabbly Connect.
  • Ensure that all lead details are accurately reflected in the response.

With the successful test response, you are now ready to move to the next step of sending WhatsApp messages using Pabbly Chatflow.


4. Sending WhatsApp Messages Using Pabbly Chatflow

Now that your trigger is set up, the next step is to configure the action to send WhatsApp messages. In Pabbly Connect, select Pabbly Chatflow as your action application and choose ‘Send Template Message’ as the action event. This allows you to send pre-defined messages to your leads.

Before sending the message, create a WhatsApp template in your Pabbly Chatflow account. Ensure that the template includes dynamic variables for personalization, such as the lead’s name. After creating the template, return to Pabbly Connect and map the required fields, including the recipient’s phone number and the template name.

Select the recipient’s mobile number from the IndiaMART lead response. Choose the WhatsApp template you created in Pabbly Chatflow. Map any custom variables to personalize the message.

After mapping all necessary fields, click ‘Save and Send Test Request’. This action will send the WhatsApp message to the lead using the configured template.


5. Verifying the WhatsApp Message Delivery

After sending the test message, check your WhatsApp to confirm delivery. You should receive the message with the lead’s name and other personalized details. This verification ensures that your automation workflow is functioning as expected using Pabbly Connect.

Additionally, you can log into your Pabbly Chatflow account to check the message status. Click on the inbox section to view all sent messages and their statuses. This feature allows you to track the performance of your WhatsApp communications.

By successfully integrating IndiaMART with WhatsApp through Pabbly Connect, you can efficiently manage your leads and enhance your customer engagement.


Conclusion

In this tutorial, we explored how to automate sending WhatsApp messages to IndiaMART leads using Pabbly Connect and Pabbly Chatflow. By following the detailed steps, you can streamline your communication process and ensure timely responses to inquiries, significantly improving your web development services outreach.

Ensure you check out Pabbly Connect to create business automation workflows and reduce manual tasks. Pabbly Connect currently offer integration with 2,000+ applications.

How to Create an AI Agent for Automated Email Extraction with Pabbly Connect

Learn how to automate email extraction using Pabbly Connect, integrating Gmail, Open AI, and Salesforce for efficient lead management. Eliminate manual repetitive tasks from your workflow. Discover proven automation methods with intuitive steps designed for efficiency-minded professionals.

Watch Step By Step Video Tutorial Below


1. Accessing Pabbly Connect for Email Automation

To start creating an AI agent for automated email extraction, first access Pabbly Connect. Navigate to the homepage by entering the URL Pabbly.com/connect in your browser. This platform allows you to automate tasks without coding, making it user-friendly for everyone.

Once on the homepage, you will see options to sign in or sign up for free. If you’re a new user, click on sign up for free to create a new account. As an existing user, click on sign in to log into your account. After signing in, access the dashboard where you can manage your workflows.


2. Creating a New Workflow in Pabbly Connect

In the Pabbly Connect dashboard, you can create a new workflow by clicking on the create workflow option. This opens a dialog box where you can name your workflow. For this tutorial, name it Create an AI Agent to Extract Emails.

  • Select a folder for organization, such as AI Automations.
  • Click on create to proceed.

After creating the workflow, you will see two main sections: Trigger and Action. The trigger initiates the workflow, while the action is the response to that trigger. For this integration, you will set Gmail as the trigger application.


3. Setting Up Gmail as the Trigger Application

To set up Gmail as your trigger application in Pabbly Connect, select Email Parser by Pabbly as the trigger application. Choose the trigger event as New Email Received. This allows Pabbly Connect to react to incoming emails.

Next, you will receive an email parser address (email hook) that connects your Gmail account with Pabbly Connect. Copy this email hook and go to your Gmail settings. Under the Forwarding and POP/IMAP tab, add the email hook to enable email forwarding.

  • Click on Add a Forwarding Address.
  • Paste the email hook and proceed with the verification process.

Once verified, enable forwarding for incoming emails to the email parser address. This setup ensures that every email received in your Gmail account is captured by Pabbly Connect for further processing.


4. Integrating Open AI for Email Extraction

With Gmail set up as the trigger, the next step is to integrate Open AI as the action application in Pabbly Connect. Select Open AI and choose the action event as Chat GPT for extracting email details.

To connect Open AI, you need an API key. Click on Add New Connection and follow the instructions to obtain your API key from the Open AI platform. Once obtained, paste the key into Pabbly Connect and save the connection.

Select the model you want to use, typically the latest version available. Provide a prompt that instructs Open AI to extract details from the email.

For example, the prompt could be: Extract the details from this email and provide them in JSON format. This instruction helps the AI understand what information to retrieve from the email.


5. Adding Extracted Details to Salesforce CRM

After extracting the email details, the final step is to send this information to your Salesforce CRM. In Pabbly Connect, select Salesforce as the action application and choose Create Record as the action event.

Connect your Salesforce account to Pabbly Connect by allowing the necessary permissions. Once connected, map the fields from the extracted email details to the corresponding fields in Salesforce, such as first name, last name, email address, and inquiry details.

Ensure all mandatory fields are filled in Salesforce. Click on Save and Send Test Request to verify that the record is created successfully.

Once the record is created, you can check your Salesforce CRM to confirm that the lead details have been added correctly. This automation streamlines the process of managing incoming inquiries and enhances your lead management efficiency.


Conclusion

In this tutorial, we explored how to create an AI agent for automated email extraction using Pabbly Connect. By integrating Gmail, Open AI, and Salesforce, you can efficiently manage leads without any coding. Automate your email workflows today for improved productivity!

Ensure you check out Pabbly Connect to create business automation workflows and reduce manual tasks. Pabbly Connect currently offer integration with 2,000+ applications.

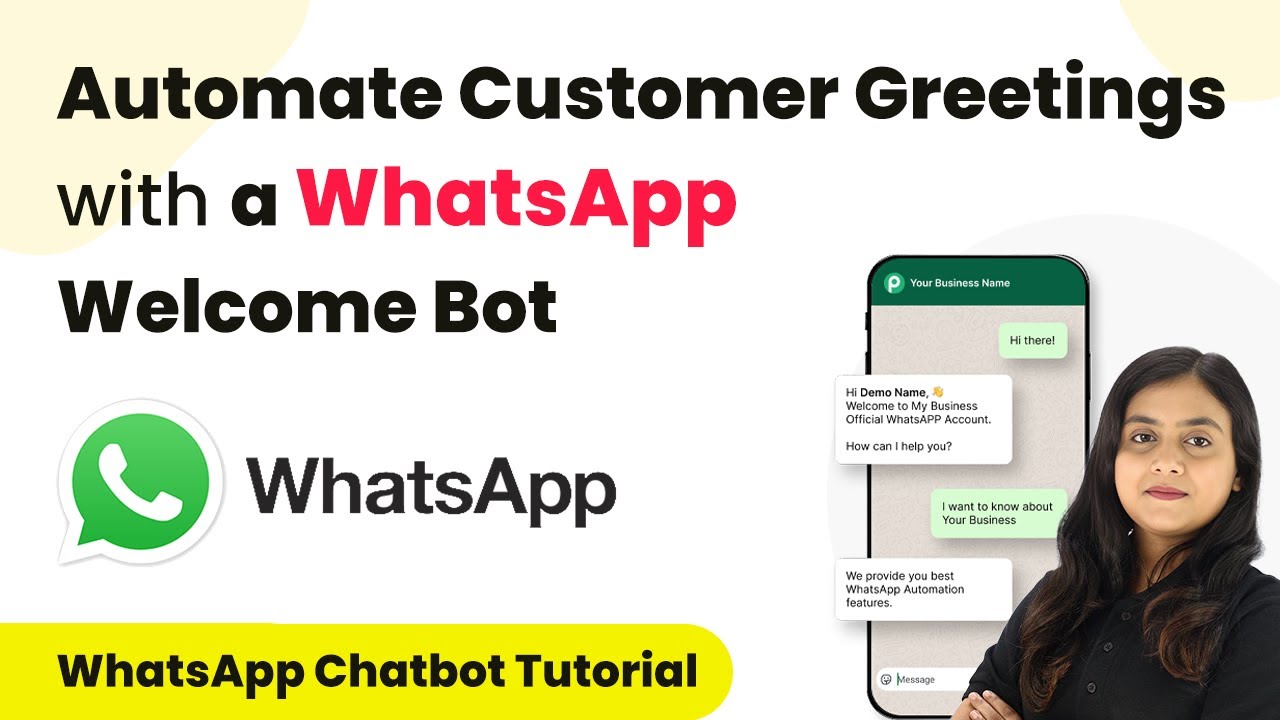
Creating a WhatsApp Chatbot for Automated Customer Greetings using Pabbly Chatflow

Learn how to create a WhatsApp chatbot for automated customer greetings using Pabbly Chatflow. Follow our step-by-step guide to streamline customer interactions. Discover how to design chat experiences that feel personal and responsive while handling customer inquiries automatically around the clock.

Watch Step By Step Video Tutorial Below


1. Setting Up Pabbly Chatflow for WhatsApp Automation

To create a WhatsApp chatbot for automated customer greetings, the first step is to access Pabbly Chatflow. This platform allows you to build and manage your chatbot effectively. Begin by logging into your Pabbly Chatflow account and navigating to the dashboard.

In the dashboard, locate the ‘Flows’ section on the left panel. Click on it to access the flow builder, where you will create a new flow specifically for your WhatsApp greetings. This flow will automate customer interactions seamlessly.


2. Creating Your Flow in Pabbly Chatflow

Once you are in the flow builder of Pabbly Chatflow, click on the ‘Add Flow’ button located in the top right corner. A new flow creation page will appear, prompting you to name your flow. Enter a suitable name, such as ‘Welcome Message Flow’.

After naming your flow, you will set up the trigger for this automation. The trigger will be a keyword that customers send to initiate the welcome message. Enter keywords like ‘hi’ and ‘hello’ in the designated field. This setup ensures that whenever a customer sends a message containing these keywords, the flow will activate automatically.

  • Click on ‘Add Flow’ to create a new flow.
  • Name your flow, e.g., ‘Welcome Message Flow’.
  • Set keywords like ‘hi’ or ‘hello’ as triggers.

By completing these steps, you have successfully set up the initial flow in Pabbly Chatflow. This flow will now respond to customer greetings automatically.


3. Designing the Welcome Message

In this section, you will design the welcome message that your customers will receive when they initiate contact. Drag and drop the ‘Text’ button from the options onto the flow canvas. In the message box, input a warm welcome message such as, ‘Hello! Welcome to Natural Glow Skincare. We believe in natural beauty. How can we assist you today?’ using Pabbly Connect

To enhance customer interaction, you will add buttons for different options. Click on the ‘Add Button’ option to create buttons for ‘Product List’, ‘Recommended Skincare’, and ‘Talk to Expert’. These buttons will provide customers with easy navigation through your services.

  • Create a welcome message text.
  • Add buttons for customer options like ‘Product List’.
  • Ensure the buttons link to the relevant sections in the flow.

After designing the welcome message and adding the buttons, connect the flow start to the message node. This connection ensures that when a customer sends a greeting, they receive your welcome message immediately.


4. Adding Product List and Skincare Options

Next, you will add a product list that customers can view when they select the ‘Product List’ button. Drag the ‘List’ option onto the flow and connect it to the product list button. Enter a header for the list, such as ‘Explore Our Bestselling Skincare Essentials’.

In the body section of the list, describe the products available, such as ‘From cleansers to serums, find the perfect products tailored to your skin needs.’ You can also add multiple sections within the list for different product categories like cleansers, moisturizers, and sunscreens.

Add a product list section with a descriptive header. Include multiple sections for various product categories. Connect product items to their respective descriptions.

By following these steps, you will create a detailed product list that enhances customer engagement through Pabbly Chatflow.


5. Testing and Launching Your Chatbot

After setting up the flow, it’s time to test your WhatsApp chatbot. Send a test message from your WhatsApp to your business number using one of the trigger keywords you defined earlier. Observe how quickly the welcome message and options appear.

If everything works correctly, your customers will receive instant responses, improving their experience with your brand. Once you confirm the flow is operational, save your flow in Pabbly Chatflow by clicking the ‘Save’ button. This ensures all your configurations are stored and ready for use.

Now that your WhatsApp chatbot is live, you can monitor customer interactions through the inbox feature in Pabbly Chatflow. This allows you to see how customers engage with the bot and make necessary adjustments to improve their experience.


Conclusion

In conclusion, creating a WhatsApp chatbot for automated customer greetings using Pabbly Chatflow streamlines customer interactions and enhances engagement. By following the outlined steps, you can set up an efficient greeting system that responds immediately to customer inquiries.

Ensure you check out Pabbly Connect to create business automation workflows and reduce manual tasks. Pabbly Connect currently offer integration with 2,000+ applications.

Utilizing Pabbly Chatflow for your business not only saves time but also improves customer satisfaction, making it a valuable tool for any brand looking to enhance their customer service.

How to Create a WhatsApp Chatbot to Handle Product Inquiries Automatically Using Pabbly Chatflow

Learn how to create a WhatsApp chatbot to automate product inquiries using Pabbly Chatflow. Follow these detailed steps for seamless integration. Learn step-by-step how to create, test, and optimize chatbots that enhance customer experience while reducing support workload.

Watch Step By Step Video Tutorial Below


1. Introduction to Pabbly Chatflow for WhatsApp Automation

Pabbly Chatflow is an essential tool for automating WhatsApp interactions, especially for handling product inquiries. By using Pabbly Chatflow, businesses can streamline customer support and enhance user engagement. This tutorial will guide you through creating a WhatsApp chatbot to manage product inquiries automatically.

As a business owner, receiving numerous product inquiries can be overwhelming. Implementing a chatbot via Pabbly Chatflow allows for instant responses, significantly improving customer satisfaction and operational efficiency. This way, you can focus on other critical aspects of your business while the chatbot handles inquiries.


2. Setting Up Your Pabbly Chatflow Account

To get started, you need to access your Pabbly Chatflow account. Once logged in, navigate to the flows section via the left sidebar. This is where you will create a new flow specifically for handling product inquiries.

Follow these steps to set up your account and create a flow:

  • Log in to your Pabbly Chatflow account.
  • Click on the ‘Add a Flow’ button in the top right corner.
  • Name your flow (e.g., ‘Product Info Bot’).

After creating your flow, you will set up the initial trigger that activates the chatbot when a user sends a message on WhatsApp.


3. Configuring the Trigger for Your Chatbot

The next step in using Pabbly Chatflow is to configure the trigger for your chatbot. This trigger will define the keywords that activate the chatbot when a customer sends a message. Start by entering keywords like ‘hi’, ‘hello’, and ‘hey’ to initiate the conversation.

Additionally, you will set up regular expressions (regex) to capture various inquiries. Here’s how:

  • Input keywords that customers might use to start a conversation.
  • Add regex patterns to capture variations of product-related inquiries.
  • Enable the toggle for case-sensitive regex if necessary.

>Once the trigger is configured, your chatbot will be ready to respond to customer inquiries based on the keywords and regex patterns you set up.


4. Designing the Chatbot Conversation Flow

Now that you have set up the trigger, it’s time to design the conversation flow in Pabbly Chatflow. Start by adding an action to ask for the customer’s name. Use the ‘Ask a Question’ feature and customize the message to greet the customer and request their name.

To enhance the interaction, follow these steps:

Drag and drop the ‘Ask a Question’ action into your flow. Set the message to ‘Hello, welcome to Tech Gadget store! May I know your good name, please?’. Connect this action to the next step in the flow.

>Once the customer provides their name, you can ask how you can assist them today, offering options like ‘About the Company’ or ‘Products We Offer’. This structure keeps the conversation engaging and user-friendly.


5. Testing Your WhatsApp Chatbot

With your chatbot flow designed, it’s crucial to test its functionality. Use your WhatsApp number connected to Pabbly Chatflow to send a message and see how the chatbot responds. For example, send a message like ‘Hey, I am interested in your products’ to initiate the interaction.

Observe the responses generated by your chatbot:

The chatbot should greet you and ask for your name. After providing your name, the chatbot will ask how it can assist you. Selecting options should lead to specific product details or company information.

>Testing ensures that your chatbot operates smoothly and meets customer expectations. If any adjustments are needed, return to Pabbly Chatflow to modify the flow accordingly.


Conclusion

Creating a WhatsApp chatbot using Pabbly Chatflow is a powerful way to automate product inquiries. This tutorial provided detailed steps for setting up your chatbot, from configuring triggers to designing conversation flows. By implementing a chatbot, you can enhance customer engagement and streamline your business operations.

Ensure you check out Pabbly Connect to create business automation workflows and reduce manual tasks. Pabbly Connect currently offer integration with 2,000+ applications.

Automate ClickFunnels Contacts from LinkedIn Lead Gen Forms Using Pabbly Connect

Learn how to automate ClickFunnels contacts from LinkedIn Lead Gen Forms using Pabbly Connect. Step-by-step tutorial for seamless integration. Master proven automation processes with practical implementation examples and strategic recommendations you can apply immediately in your workflow.

Watch Step By Step Video Tutorial Below


1. Accessing Pabbly Connect for Integration

To start automating the process of creating ClickFunnels contacts from LinkedIn Lead Gen Forms leads, you will need to access Pabbly Connect. Begin by visiting the Pabbly Connect website and signing in to your account. If you are a new user, you can sign up for free and explore the platform with 100 tasks each month.

Once signed in, you will see various applications offered by Pabbly. Click on the ‘Access Now’ button for Pabbly Connect to open your dashboard. From here, you can create a new workflow, which will facilitate the integration between LinkedIn and ClickFunnels.


2. Creating a New Workflow in Pabbly Connect

In this step, you will create a new workflow in Pabbly Connect for the automation process. Click on the ‘Create Workflow’ button, and you will be prompted to name your workflow. Name it as ‘Create ClickFunnels Contact from LinkedIn Lead Gen Forms Leads’ and select the appropriate folder for organization.

  • Click on the ‘Create’ button to proceed.
  • This opens the workflow window where you can set up triggers and actions.

In this workflow, you will set LinkedIn Lead Gen Forms as the trigger application, which will initiate the process whenever a new lead is generated. This allows for seamless automation and eliminates the need for manual data entry into ClickFunnels.


3. Setting Up the Trigger: LinkedIn Lead Gen Forms

Now, select LinkedIn Lead Gen Forms as your trigger application in Pabbly Connect. Choose the trigger event as ‘New Lead Form Response’ to capture leads from your LinkedIn forms. Click on the ‘Connect’ button to establish this connection.

If you have not previously connected your LinkedIn account, click on ‘Add New Connection’ and follow the prompts to sign in. Once connected, select your LinkedIn account and the specific lead form you wish to use for this automation.

  • Make sure to click ‘Save and Send Test Request’ to test the connection.
  • Pabbly Connect will pull the latest lead information for verification.

By following these steps, you ensure that your LinkedIn leads are effectively captured and prepared for the next stage of the automation process.


4. Setting Up the Action: Creating ClickFunnels Contact

In this section, you will set ClickFunnels as the action application in Pabbly Connect. Select ‘ClickFunnels’ and choose the action event as ‘Create Contact’. This will allow you to automatically add new leads from LinkedIn to your ClickFunnels account.

Click on the ‘Connect’ button and, similar to the previous step, either select an existing connection or add a new one. To connect, you will need your API access token and subdomain from ClickFunnels. Navigate to your ClickFunnels account settings to retrieve this information.

Go to Team Settings in ClickFunnels and then to the Developer Portal. Create a new platform for LinkedIn and copy the API token provided.

After entering the API token and subdomain in Pabbly Connect, click ‘Save’. This will establish the connection between ClickFunnels and Pabbly Connect, allowing the automation to proceed.


5. Mapping Fields for Automation

Once the connection is established, the next step in Pabbly Connect is to map the fields from your LinkedIn Lead Gen Forms to ClickFunnels. This is crucial for ensuring that the correct data is transferred automatically.

In the mapping section, you will see fields for email address, first name, last name, and phone number. Use the mapping feature to pull data from the LinkedIn lead response directly into these fields. This allows for dynamic data transfer each time a new lead is generated.

Select the corresponding fields from the LinkedIn response for mapping. Click on ‘Save and Send Test Request’ to verify that the contact is created successfully in ClickFunnels.

When you check your ClickFunnels account, you will see that a new contact has been created with the information from your LinkedIn lead. This confirms that the automation is functioning correctly, and new leads will be added automatically from LinkedIn to ClickFunnels without any manual intervention.


Conclusion

By following this tutorial, you can effectively automate the process of creating ClickFunnels contacts from LinkedIn Lead Gen Forms using Pabbly Connect. This integration not only saves time but also ensures that your leads are promptly added to your marketing funnel for better follow-up and nurturing.

Ensure you check out Pabbly Connect to create business automation workflows and reduce manual tasks. Pabbly Connect currently offer integration with 2,000+ applications.

Utilizing Pabbly Connect for this automation enhances your workflow efficiency, allowing you to focus on other important aspects of your business. Start leveraging this powerful integration today!