How to Create an Automated Feedback System using Pabbly Connect and AI Agent

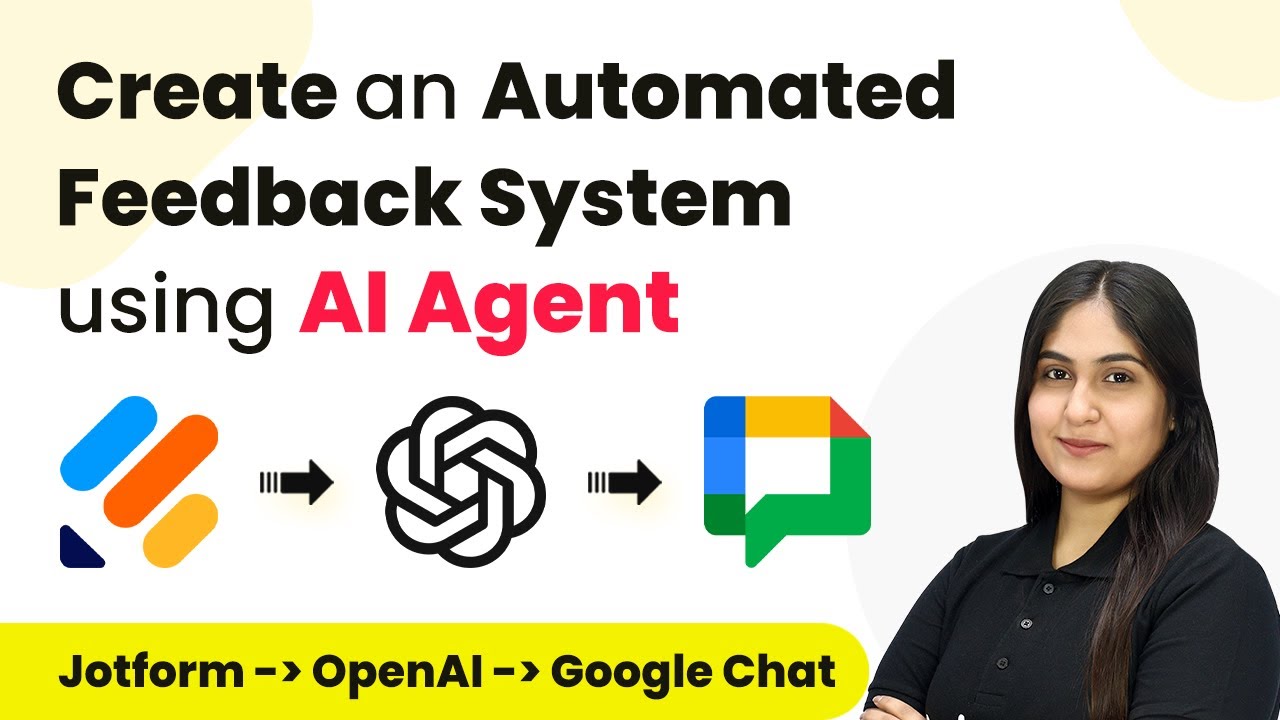
Learn how to automate your feedback system using Pabbly Connect, Google Chat, and AI Agent. This tutorial covers step-by-step integration for efficient feedback management. Build sophisticated automated workflows in less time than you think. This guide translates complex integrations into straightforward steps for immediate implementation.

Watch Step By Step Video Tutorial Below


1. Accessing Pabbly Connect for Feedback Automation

To create an automated feedback system using Pabbly Connect, first access the platform by visiting the Pabbly Connect homepage. Here, you can either sign up for a free account or log in if you’re an existing user. Pabbly Connect serves as the central hub for integrating various applications, including Jotform, Google Chat, and AI Agent. using Pabbly Connect

Once logged in, you will be directed to the Pabbly Connect dashboard. From here, you can create a new workflow by clicking on the ‘Create Workflow’ button. This is where you will set up the automation to manage customer feedback efficiently.


2. Creating a Workflow in Pabbly Connect

After accessing the Pabbly Connect dashboard, it’s time to create a workflow for your automated feedback system. Click on the ‘Create Workflow’ button, and a dialog box will appear prompting you to name your workflow. Name it something descriptive like ‘Automated Feedback System using AI Agent’. using Pabbly Connect

  • Click on the ‘Create’ button to finalize the workflow name.
  • Select a folder to organize your workflow, such as ‘Automations’.
  • Familiarize yourself with the two main components: Trigger and Action.

In this workflow, the trigger will be a new response from Jotform, and the action will involve using OpenAI to generate a summary of the feedback. Pabbly Connect will facilitate this entire process seamlessly.


3. Setting Up Jotform as the Trigger in Pabbly Connect

To set up Jotform as the trigger application, select Jotform from the list of applications in Pabbly Connect. Choose the trigger event as ‘New Response’ so that every time a customer submits feedback, Pabbly Connect captures this response automatically. using Pabbly Connect

Once the trigger is set, you will receive a webhook URL from Pabbly Connect. Copy this URL, then navigate to your Jotform account. In Jotform, go to the settings of your feedback form, find the Integrations tab, and select Webhooks. Here, paste the copied webhook URL to connect Jotform with Pabbly Connect.


4. Integrating OpenAI for Feedback Analysis

After setting up Jotform as the trigger, the next step is to integrate OpenAI to analyze the feedback. In the action step of your workflow, select OpenAI as the application and choose the action event as ‘Test ChatGPT’. This will allow Pabbly Connect to use OpenAI to generate a brief summary of the feedback received. using Pabbly Connect

  • Click ‘Connect’ to link your OpenAI account with Pabbly Connect.
  • Enter your OpenAI API token to establish the connection.
  • Select the AI model, typically GPT-4, for generating the summary.

Once connected, you will need to create a prompt that instructs OpenAI on how to summarize the feedback. This prompt will include dynamic fields mapped from the Jotform response, ensuring that each summary is tailored to the specific feedback received.


5. Notifying the Team on Google Chat

The final step in your automated feedback system is to notify your team via Google Chat. In the next action step, select Google Chat as the application and choose ‘Create Message’ as the action event. This will allow Pabbly Connect to send the generated feedback summary directly to your team. using Pabbly Connect

To set this up, you will need to create a webhook URL in Google Chat. Navigate to your Google Chat space settings, find the Webhooks section, and create a new webhook. Copy this URL and paste it into Pabbly Connect, along with a message template that includes the customer details and feedback summary.

Once all details are mapped correctly, Pabbly Connect will send a message to your Google Chat every time new feedback is received, ensuring your team stays informed and can take timely action.


Conclusion

In this tutorial, you learned how to create an automated feedback system using Pabbly Connect, integrating Jotform, OpenAI, and Google Chat. This setup will help streamline your feedback management process, allowing your team to respond quickly and effectively to customer input.

Ensure you check out Pabbly Connect to create business automation workflows and reduce manual tasks. Pabbly Connect currently offer integration with 2,000+ applications.

How to Build a WhatsApp Chatbot to Send Event Updates Using Pabbly Chatflow

Learn how to build a WhatsApp chatbot for event updates using Pabbly Chatflow. Follow this detailed tutorial shows you how to build powerful chat automation that engages visitors and converts prospects—without any coding required.

Watch Step By Step Video Tutorial Below


1. Overview of Pabbly Chatflow for WhatsApp Chatbot

In this section, we will explore how to use Pabbly Chatflow to create a WhatsApp chatbot for sending event updates. Pabbly Chatflow is an all-in-one solution designed for WhatsApp communication, allowing you to automate interactions with your audience efficiently.

As an event organizer, keeping attendees informed is crucial. By utilizing Pabbly Chatflow, you can automate the process of sending reminders and updates, thus saving time and minimizing errors. This tutorial will guide you through the process step by step.


2. Setting Up Your Pabbly Chatflow Account

To get started, you need to access your Pabbly Chatflow account. If you haven’t created one yet, sign up on the Pabbly website. Once logged in, navigate to the dashboard where you can manage your flows.

  • Log into your Pabbly Chatflow account.
  • Go to the ‘Flows’ section in the left sidebar.
  • Create a new flow by clicking on the ‘Add Flow’ button.

After creating a flow, you need to name it, for example, ‘Event Updates.’ This will help you identify the flow later. Ensure that you select the appropriate trigger for your flow, which in this case will be a template message to initiate the conversation.


3. Creating the WhatsApp Chatbot Flow

Now that your flow is set up, it’s time to create the WhatsApp chatbot. In this step, you will configure the messages that will be sent to your attendees. Start by selecting the template message you want to use for the initial outreach. using Pabbly Connect

For this example, choose the template named ‘Event Notification’ that contains details about your upcoming event. This template should include essential information such as the event date, time, and location. You can also add quick reply buttons for users to request more information or to learn how to register.

  • Select the ‘Event Notification’ template.
  • Add quick reply buttons for ‘More Information’ and ‘How to Register.’

By adding these buttons, you can streamline the communication process, allowing attendees to easily get the information they need.


4. Finalizing Your Pabbly Chatflow Setup

Once you have added the buttons, it’s time to finalize the flow. You need to set up responses for each quick reply button. For example, if a user selects ‘More Information,’ provide answers to common questions such as venue location, parking availability, and event schedule. using Pabbly Connect

For each question, add a message box that contains the relevant information. Ensure that you also include a ‘Contact Us’ button in each response, allowing users to reach out for more assistance. This setup enhances user experience and ensures that attendees can easily find the information they need.

Set up message responses for venue location, parking, and schedule. Add a ‘Contact Us’ button in every message for further inquiries.

After completing these steps, save your flow and test it to ensure everything works correctly.


5. Testing Your WhatsApp Chatbot

To ensure your WhatsApp chatbot is functioning as intended, you need to test the flow you have created in Pabbly Chatflow. Send a test message to your WhatsApp number using the broadcast feature you set up earlier.

Once you receive the test message, interact with the chatbot by selecting the quick reply buttons. Check that the responses are accurate and that the flow navigates correctly between messages. This step is crucial to ensure a smooth experience for your attendees during the actual event.

After testing, you can make any necessary adjustments based on the feedback received during the testing phase. This will help optimize the chatbot for better performance.


Conclusion

In this tutorial, we explored how to build a WhatsApp chatbot using Pabbly Chatflow to send event updates and notifications. By following the steps outlined, you can automate communication with your attendees, ensuring they receive timely information about your events. This not only saves time but also enhances attendee engagement.

Ensure you check out Pabbly Connect to create business automation workflows and reduce manual tasks. Pabbly Connect currently offer integration with 2,000+ applications.

Utilizing Pabbly Chatflow for your WhatsApp chatbot needs can significantly improve your event management process, making it smoother and more efficient. Start building your chatbot today to streamline your event communications!

How to Use Pabbly Connect to Boost Lead Generation Effortlessly

Learn how to use Pabbly Connect for seamless integration between Facebook, Gmail, and AI agents to enhance your lead generation process effortlessly. Explore efficient methods for automating routine tasks with clear, concise instructions suited for both newcomers and experienced professionals.

Watch Step By Step Video Tutorial Below


1. Accessing Pabbly Connect for Lead Generation

To start using Pabbly Connect for boosting lead generation, first, visit the Pabbly website. Simply type Pabbly.com in your browser to access the platform.

Once on the site, you can either sign in if you are an existing user or click on ‘Sign up for free’ to create a new account. Signing up gives you access to 100 tasks free on a monthly basis.


2. Creating a Workflow in Pabbly Connect

After logging into Pabbly Connect, navigate to the dashboard where you will see options to create workflows. Click on ‘Create Workflow’ to begin setting up your automation.

  • Provide a name for your workflow, such as ‘Using AI Agents to Boost Lead Generation Effortlessly’.
  • Select the folder where you want to save this workflow.
  • Click on the ‘Create’ button to finalize your workflow setup.

Your workflow is now created, and you will see two boxes: one for the trigger and another for the action. This is where you will define what happens when a lead is captured.


3. Setting Up Trigger for Facebook Leads

In this section, you will configure the trigger for your workflow using Pabbly Connect. The trigger will activate whenever a new lead is captured from Facebook Ads.

Choose ‘Facebook Lead Ads’ as your trigger application. You will then need to connect your Facebook account by clicking on the ‘Connect’ button. If you have an existing connection, select it; otherwise, create a new connection.

  • Authorize Pabbly Connect to access your Facebook account.
  • Select the page and the lead form you want to use.

Once your Facebook account is connected, you can test the trigger to ensure it captures leads correctly. This step is crucial for ensuring that your workflow functions seamlessly.


4. Configuring Action Steps in Pabbly Connect

Now that your trigger is set, the next step in Pabbly Connect is to configure the action steps that will occur once a new lead is captured. First, select ‘OpenAI’ as your action application.

Connect your OpenAI account by entering the required API key. This key allows Pabbly Connect to communicate with OpenAI and generate personalized emails for your leads.

Choose the AI model you want to use, such as GPT-4. Draft your email prompt using the lead details captured from Facebook.

After setting up the prompt, test this action step to ensure that the email is generated correctly based on the lead’s information.


5. Sending Email and Creating Lead in CRM

The final step involves sending the generated email using Gmail and creating the lead in your CRM system. In this case, we will use SalesForce as the CRM.

First, select ‘Gmail’ as your action application in Pabbly Connect. Connect your Gmail account and map the recipient email address from the previous OpenAI step.

Enter the subject and body of the email using the details generated by OpenAI. Send a test email to confirm everything is working correctly.

Next, select ‘SalesForce’ as the action application to create a new lead. Map the required fields with the data captured from the Facebook lead form. Finally, test this action to ensure that a new lead is created in your CRM every time a new lead is captured from Facebook.


Conclusion

Using Pabbly Connect, you can effortlessly boost your lead generation process by integrating Facebook, Gmail, and AI agents. This automation allows you to streamline communication and capture leads effectively.

Ensure you check out Pabbly Connect to create business automation workflows and reduce manual tasks. Pabbly Connect currently offer integration with 2,000+ applications.

How to Build a WhatsApp Chatbot for Product Catalogs Using Pabbly Chatflow

Learn how to build a WhatsApp chatbot for product catalogs, brochures, and pricing using Pabbly Chatflow. Step-by-step guide included. Explore how leading businesses automate customer interactions with carefully designed chat sequences that feel natural and helpful.

Watch Step By Step Video Tutorial Below


1. Setting Up Pabbly Chatflow for Your WhatsApp Chatbot

To build a WhatsApp chatbot for product catalogs using Pabbly Chatflow, you first need to access the Pabbly Chatflow dashboard. This powerful no-code platform allows businesses to automate customer interactions seamlessly. Once you log in, you will see various options available for creating your chatbot.

Click on the ‘Flows’ option on the left sidebar. This section will allow you to create a new flow for your WhatsApp chatbot. After clicking on ‘Add Flow,’ you will be directed to the flow builder where you can start designing your chatbot’s responses and triggers.


2. Creating Triggers for Your WhatsApp Chatbot

Triggers are essential for activating your WhatsApp chatbot. In Pabbly Chatflow, you can set specific keywords that will initiate the chatbot’s response. Begin by entering common keywords like ‘hi,’ ‘hello,’ and ‘help’ in the trigger section.

  • Input keywords such as ‘hi,’ ‘hello,’ and ‘help’ to activate the chatbot.
  • Use the ‘Rex’ feature to identify variations of user messages.
  • Enable Rex to cover more phrases without adding every possible keyword.

After entering the keywords, click on the ‘Save’ button to ensure your settings are stored. This will allow your chatbot to respond to a broader range of user inquiries effectively.


3. Designing Responses for Product Catalogs and Pricing

Once you have set the triggers, the next step is to design the responses your WhatsApp chatbot will send. In Pabbly Chatflow, you can create various response types such as text messages, media messages, or list options. For instance, you can send a greeting message when a user initiates a conversation.

To set up a greeting, drag and drop the ‘Text’ action into the flow. Type a welcoming message like ‘Hello! Welcome to our Fashion Store. Browse our latest collection and shop effortlessly!’ You can also include buttons for different product categories.

  • Add buttons for categories like ‘Dresses,’ ‘Shoes,’ and ‘Accessories.’
  • Configure each button to lead to specific product catalogs.
  • Utilize media messages to showcase images or videos of products.

After designing the responses, ensure you save your flow to keep all changes intact. This setup will enhance customer engagement by providing immediate information about your products.


4. Testing Your WhatsApp Chatbot Integration

Testing is a crucial step to ensure your WhatsApp chatbot works as intended. In Pabbly Chatflow, you can simulate user interactions by sending messages through WhatsApp. This allows you to verify that the chatbot responds appropriately to various queries.

Open your WhatsApp and send a test message using one of the keywords you set earlier. Check if the chatbot responds with the correct greeting and provides options for product categories. If the response is not as expected, revisit the flow builder and make necessary adjustments.

Once you are satisfied with the chatbot’s performance, ensure all flows are saved and activated. This will allow your chatbot to operate seamlessly and respond to customer inquiries 24/7.


5. Finalizing and Activating Your Chatbot

After thorough testing, the final step is to activate your WhatsApp chatbot in Pabbly Chatflow. Click on the ‘Save’ button to store all your configurations. Make sure the flow is turned on to enable it for live interactions.

Once activated, your chatbot will automatically respond to customer messages based on the triggers and responses you have set. This automation will save you time and enhance customer satisfaction by providing instant replies.

Incorporating a WhatsApp chatbot into your business strategy can significantly improve engagement and efficiency, allowing you to focus on growth while maintaining excellent customer service.


Conclusion

Building a WhatsApp chatbot for product catalogs using Pabbly Chatflow is a straightforward process that enhances customer interaction. By following the steps outlined above, you can automate responses and improve your business efficiency. Start today to streamline your customer support!

Ensure you check out Pabbly Connect to create business automation workflows and reduce manual tasks. Pabbly Connect currently offer integration with 2,000+ applications.

Automate Webinar Invitations with AI Agent Using Pabbly Connect for Maximum Engagement

Learn how to automate webinar invitations using Pabbly Connect, Google Sheets, and AI for maximum engagement. Step-by-step tutorial included. Discover how to seamlessly connect your essential tools through accessible instructions that make powerful automation available to professionals at every skill level.

Watch Step By Step Video Tutorial Below


1. Accessing Pabbly Connect for Automation

To start automating webinar invitations, first access Pabbly Connect by navigating to the URL Pabbly.com/connect/inr. Here, you will find options to sign in or sign up for free.

If you are a new user, click on the ‘Sign Up for Free’ button to create your account. Upon signing up, you will receive 100 free tasks monthly to explore the features of Pabbly Connect. Existing users can click on ‘Sign In’ to access their dashboard.


2. Creating a New Workflow in Pabbly Connect

Once signed into Pabbly Connect, navigate to the dashboard and click on ‘Create Workflow’ to initiate the process of automating webinar invitations.

A dialog box will appear prompting you to name your workflow. Enter a relevant name such as ‘Automate Webinar Invitations with AI Agent’. Select a folder for organization, preferably one related to AI automations.

  • Click on ‘Create’ to save your workflow.
  • You will see two main sections: Trigger and Action.
  • The Trigger section will initiate the automation when a new lead is added.

Now that you have created your workflow, it’s essential to set up the trigger and action steps to automate the email invitations effectively.


3. Setting Up Google Sheets as the Trigger

The first step in your automation is to set Google Sheets as the trigger application in Pabbly Connect. Select ‘Google Sheets’ and choose the trigger event as ‘New or Updated Spreadsheet Row’.

This setup ensures that every time a new row is added to your Google Sheets, it will trigger the workflow. After selecting the trigger event, you will receive a webhook URL that acts as a bridge to transfer data from Google Sheets to Pabbly Connect.

  • Copy the webhook URL provided by Pabbly Connect.
  • Open your Google Sheets, go to Extensions, and select Add-ons.
  • Install the Pabbly Connect Webhook add-on for integration.

After installation, refresh your spreadsheet and proceed with the initial setup by pasting the webhook URL in the designated area.


4. Integrating OpenAI for Personalized Email Content

With the Google Sheets trigger set up, the next step is to integrate OpenAI as the action application within Pabbly Connect. Choose OpenAI and select the action event to generate content.

To establish the connection, you will need an API key from your OpenAI account. Click on the hyperlink to create a new secret key, which you will then paste into Pabbly Connect to connect both applications.

Select the OpenAI model you wish to use, such as GPT-4. Provide a detailed prompt that specifies the email structure and content requirements. Make sure the output format is JSON for easy mapping.

This integration allows you to generate personalized emails based on the lead’s details, ensuring maximum engagement for your webinars.


5. Sending Emails Through Gmail Using Pabbly Connect

The final step is to send the generated email content using Gmail. In your Pabbly Connect workflow, add Gmail as the action application and select the action event ‘Send Email’.

Map the recipient’s email address, subject, and email body using the dynamic content generated from OpenAI. This ensures that each email is personalized based on the lead’s information.

Click ‘Save and Send Test Request’ to verify that the email is sent successfully. Check the recipient’s inbox to confirm receipt of the email.

With this setup, every time a new lead is added to your Google Sheets, Pabbly Connect ensures that a personalized email invitation is sent automatically, maximizing engagement for your webinars.


Conclusion

In conclusion, automating webinar invitations using Pabbly Connect enhances engagement by personalizing communication with leads. By integrating Google Sheets, OpenAI, and Gmail, you can streamline your invitation process efficiently.

Ensure you check out Pabbly Connect to create business automation workflows and reduce manual tasks. Pabbly Connect currently offer integration with 2,000+ applications.

How to Generate Facebook Page Posts Using AI Agent with Pabbly Connect

Learn how to automate Facebook page posts using Pabbly Connect, Google Sheets, and AI agents for seamless social media management. Implement the precise methodologies leading organizations use to automate repetitive tasks, illustrated with practical examples designed for immediate application.

Watch Step By Step Video Tutorial Below


1. Accessing Pabbly Connect for Automation

To automate the generation of Facebook page posts, you need to access Pabbly Connect. Start by navigating to the Pabbly Connect website by entering ‘Pabbly.com/connect/inr’ in your browser.

Once there, you will see options to sign in or sign up. If you are a new user, click on the ‘Sign up for free’ button to create an account. After signing up, you will receive 100 free tasks every month to explore the software.


2. Creating a Workflow in Pabbly Connect

After signing in, you’ll reach the dashboard of Pabbly Connect. Here, you can create a new workflow by clicking on the ‘Create Workflow’ button. Name your workflow ‘Generate Facebook Page Post Using AI Agent’ and select the appropriate folder for social media automation.

  • Click on ‘Create’ to save your workflow.
  • You will see two windows: Trigger and Action.
  • Set up the trigger to capture new rows added in Google Sheets.

This setup is crucial as it defines how Pabbly Connect will react to new data entries in your spreadsheet.


3. Setting Up the Trigger with Google Sheets

In this step, you will define Google Sheets as your trigger application within Pabbly Connect. Select the trigger event as ‘New or Updated Spreadsheet Row’ which will start the automation when a new row is added.

To connect Google Sheets with Pabbly Connect, copy the webhook URL provided and set it up in your Google Sheets add-on. Install the Pabbly Connect Webhooks add-on from the Google Workspace Marketplace if you haven’t already.

  • Open your Google Sheets and go to Extensions > Pabbly Connect Webhooks > Initial Setup.
  • Paste the webhook URL and select the trigger column (e.g., column B).
  • Click ‘Send Test’ to ensure the connection is successful.

Once you have successfully set up the trigger, Pabbly Connect will capture the data from your Google Sheets whenever a new row is added.


4. Generating Captions and Images with AI Agent

Now that your trigger is set, it’s time to generate the content using an AI agent like OpenAI. Select OpenAI as your action application in Pabbly Connect and choose the action event as ‘ChatGPT’. This will allow you to create engaging captions based on the titles in your Google Sheets.

Provide the necessary API key from your OpenAI account to establish the connection. Once connected, set up the prompt for generating the caption. An example prompt could be: ‘Generate a compelling Facebook post caption for the title: [Title]. The caption should be engaging and encourage interaction.’

Map the post title from the Google Sheets response to make it dynamic. Select the model you want to use, such as GPT-4. Click ‘Save and Send Test Request’ to generate the caption.

This step demonstrates how Pabbly Connect facilitates the integration of AI to enhance your social media content.


5. Posting to Facebook with Pabbly Connect

After generating the caption, you will need to post it along with the generated image to your Facebook page using Pabbly Connect. Select Facebook Pages as your action application and choose ‘Create Page Photo Post’ as the action event.

Connect to your Facebook account and select the page where you want to post. Map the image URL and the caption generated in the previous step. Click ‘Save and Send Test Request’ to finalize the post.

Once the post is created, you can verify it by refreshing your Facebook page. You should see your new post with the caption and image, confirming that Pabbly Connect has successfully automated your Facebook posting process.


Conclusion

In this tutorial, we demonstrated how to automate Facebook page posts using Pabbly Connect, Google Sheets, and an AI agent. By following these steps, you can streamline your social media management and maintain consistent engagement with your audience effortlessly.

Ensure you check out Pabbly Connect to create business automation workflows and reduce manual tasks. Pabbly Connect currently offer integration with 2,000+ applications.

How to Use AI Agents to Automatically Generate Support Tickets with ChatGPT and Pabbly Connect

Learn how to use Pabbly Connect to automatically generate support tickets from emails using AI agents and ChatGPT. Follow our step-by-step tutorial. Implement the precise methodologies leading organizations use to automate repetitive tasks, illustrated with practical examples designed for immediate application.

Watch Step By Step Video Tutorial Below


1. Setting Up Pabbly Connect for Email Parsing

To start using Pabbly Connect for automatically generating support tickets, first, visit the Pabbly Connect website. Sign in to your existing account or create a new one for free to access 100 tasks monthly. Once logged in, navigate to the dashboard where you can select Pabbly Connect by clicking the ‘Access Now’ button.

After accessing Pabbly Connect, click on the ‘Create Workflow’ button located in the top right corner. A dialog box will appear asking for a workflow name and folder selection. Name your workflow ‘AI Agents to Automatically Generate Support Tickets’ and choose the folder where you want to save it. Click ‘Create’ to finalize this workflow setup.


2. Integrating Gmail with Pabbly Connect

In this step, we will set up Gmail as a trigger in Pabbly Connect. The trigger will activate whenever a new email is received. Select ‘Email Parser by Pabbly’ as your trigger application and choose the event ‘New Email Received’. You will be provided with an email address to connect your Gmail account.

  • Copy the provided email address.
  • Go to your Gmail account settings.
  • Add the copied email address as a forwarding address.

After adding the forwarding address, verify it through the confirmation link sent to your Gmail. Once verified, return to Pabbly Connect and click on the ‘Recapture’ button to capture the email response. This ensures that the connection between Gmail and Pabbly Connect is successfully established.


3. Filtering Emails with Pabbly Connect

To ensure that only relevant emails trigger ticket creation, we will add a filtering step in Pabbly Connect. Select ‘Filter by Pabbly’ as the action application and set the action event to ‘Filter Values’. Here, you can define conditions based on the email subject.

  • Set conditions to check if the subject contains specific keywords like ‘issue’, ‘bug’, or ‘feedback’.
  • Use the ‘Contains’ filter type for these keywords.

After setting the filter conditions, click ‘Save and Test Request’. If the condition is met, you will see a success message indicating that the workflow will execute whenever an email with the specified keywords is received.


4. Creating Support Tickets in Zoho Desk

Next, we will set up the action to create a support ticket in Zoho Desk using Pabbly Connect. Select ‘Zoho Desk’ as the action application and choose the event ‘Create New Ticket’. Connect your Zoho Desk account by entering the domain and authorizing the connection.

Fill in the necessary details for the ticket such as the subject, contact email, and description generated from the previous steps. The subject can be set as ‘New Ticket from the Client’ and the description will be dynamically mapped from the email content processed by the AI agent. After filling in all required fields, click on ‘Save and Send Test Request’ to create the ticket.


Conclusion

In this tutorial, we demonstrated how to use Pabbly Connect to automate the process of generating support tickets from emails. By integrating Gmail, AI agents, and Zoho Desk, you can streamline your customer support effectively. This integration enhances response time and improves customer satisfaction significantly.

Ensure you check out Pabbly Connect to create business automation workflows and reduce manual tasks. Pabbly Connect currently offer integration with 2,000+ applications.

How to Use AI Agent to Auto-Generate Sales Follow-Ups with Pabbly Connect

Learn how to automate sales follow-ups using Pabbly Connect and AI agents. Follow this step-by-step guide to streamline your customer communication. Eliminate manual repetitive tasks from your workflow. Discover proven automation methods with intuitive steps designed for efficiency-minded professionals.

Watch Step By Step Video Tutorial Below


1. Access Pabbly Connect to Start Automation

To automate sales follow-ups, first access Pabbly Connect by visiting its official website. Once there, sign in to your account. If you’re a new user, you can sign up for free and get 100 tasks every month.

After logging in, you will see the dashboard displaying various Pabbly applications. Click on the ‘Access Now’ button under Pabbly Connect to enter the automation dashboard. This is where you will create workflows to manage your integrations effectively.


2. Create a Workflow in Pabbly Connect

In the Pabbly Connect dashboard, click on the ‘Create Workflow’ button located in the top right corner. A dialog box will appear, prompting you to name your workflow.

For this tutorial, name your workflow something descriptive, such as ‘AI Agent to Auto-Generate Sales Follow-Ups with Pabbly.’ Select a folder to save this workflow. Once everything is set, click the ‘Create’ button. Your workflow will now be ready for setup.


3. Set Up Trigger Using Google Forms

The first step in your workflow is to set up a trigger. For this, choose Google Forms as the trigger application. This will capture customer feedback submissions. Select the event as ‘New Response Received’ to ensure that every new form submission triggers the workflow.

After selecting the trigger, Pabbly Connect will provide you with a unique webhook URL. Copy this URL to connect Google Forms to Pabbly Connect. Open your Google Form, go to the Responses section, and link it to a new Google Sheets document to capture the responses.

  • Navigate to the Responses tab in Google Forms.
  • Click on ‘Link to Sheets’ to create a new spreadsheet.
  • Copy the webhook URL from Pabbly Connect.

After setting up the Google Sheets link, make sure to configure the Google Sheets add-on for Pabbly Connect to send data to the webhook URL you copied. This setup ensures that every new response will be forwarded to Pabbly Connect.


4. Use AI Agent to Generate Follow-Up Emails

Now that the trigger is set up, the next step is to generate follow-up emails using an AI agent. For this, select OpenAI as your action application and choose the event as ‘Chat GPT’. This will allow you to create personalized emails based on customer feedback. using Pabbly Connect

When prompted, connect to OpenAI by adding a new connection. You will need an API key from OpenAI, which you can generate on their website. Once connected, specify the AI model you want to use, such as GPT-3 or GPT-4, based on your needs.

  • Enter a detailed prompt for the AI to generate the email.
  • Map customer details from the previous step to personalize the email.
  • Test the AI response to ensure it meets your requirements.

Once the email content is generated, you can review it and ensure it aligns with your communication style before sending it out. This step is crucial for maintaining customer engagement.


5. Send the Generated Email Using Gmail

After generating the email, it’s time to send it to the customer. For this step, select Gmail as your action application and choose the event ‘Send Email V1.’ Connect your Gmail account to Pabbly Connect if you haven’t done so already.

In the email setup, map the recipient’s email address from the Google Forms submission. Fill in the sender’s name and email subject. The email content type can be set to plain text or HTML, depending on your preference. Finally, use the content generated by the AI agent as the body of the email.

After configuring all the necessary fields, click on the ‘Save and Send Test Request’ button. This action will send the email to the customer, completing the workflow. Check your Gmail to confirm that the email has been sent successfully.


Conclusion

By following these steps, you can effectively use Pabbly Connect to automate sales follow-ups through AI agents. This integration not only saves time but also enhances customer engagement by ensuring timely responses to feedback.

Ensure you check out Pabbly Connect to create business automation workflows and reduce manual tasks. Pabbly Connect currently offer integration with 2,000+ applications.

Utilizing Pabbly Connect with Google Forms, OpenAI, and Gmail allows for a seamless workflow that can significantly improve your sales processes. Start automating your follow-ups today!

How to Use AI Agents to Extract and Organize License & Certification Info in Google Sheets with Pabbly Connect

Learn how to automate the extraction and organization of license and certification information in Google Sheets using Pabbly Connect and AI agents. Navigate the automation landscape confidently with clear, structured guidance suitable for professionals regardless of prior technical experience.

Watch Step By Step Video Tutorial Below


1. Accessing Pabbly Connect for Automation

To start automating the extraction and organization of license and certification info in Google Sheets, you need to access Pabbly Connect. This platform allows seamless integration between various applications, including Google Drive and Google Sheets.

Begin by visiting the Pabbly Connect website. If you are a new user, click on the ‘Sign Up for Free’ option to get started with 100 free tasks each month. Existing users should click on ‘Sign In’ to access their dashboard.


2. Creating Your Workflow in Pabbly Connect

Once logged into Pabbly Connect, the next step is to create a new workflow. Click on the ‘Create Workflow’ button, and a pop-up will appear asking for a workflow name. Name your workflow something descriptive, like ‘Extract and Organize License Info in Google Sheets’.

  • Click on ‘Create’ to open the workflow editor.
  • In the workflow editor, you will find options to set triggers and actions.

In this section, you will define how the workflow should behave. The trigger will be when a new file is added to a specific folder in Google Drive, and the action will involve extracting data using an AI agent.


3. Setting Up the Google Drive Trigger

To set up the trigger, select Google Drive as the trigger application in Pabbly Connect. Choose the event as ‘New File in Specific Folder’. This will allow the workflow to activate whenever a new certificate is uploaded to your designated folder.

Next, click on ‘Connect’, and if you haven’t connected your Google Drive account yet, select ‘Add New Connection’. You will be prompted to sign in with your Google account and grant the necessary permissions.

  • Select the folder where the certificates are stored.
  • Click on ‘Save and Send Test Request’ to ensure the connection is successful.

Once the test is successful, Pabbly Connect will capture the latest response from Google Drive, allowing you to proceed with the next steps in your workflow.


4. Extracting Data Using AI Agents

After setting up the trigger, the next step is to extract the necessary information from the uploaded certificates using AI agents. In Pabbly Connect, select OpenAI as the action application. Choose the action event as ‘Extract Content from PDF or Image’.

Click on ‘Connect’, and if you haven’t set up your OpenAI account yet, you will need to add a new connection using your OpenAI API key. Follow the prompts to generate a new API key if necessary.

Map the URL of the uploaded certificate from the previous step. Provide a prompt for the AI agent, such as ‘Extract details from the given license or certification document’.

This setup allows the AI to analyze the uploaded documents and extract relevant information, which is essential for the next step of adding this data into Google Sheets.


5. Adding Extracted Data to Google Sheets

The final step is to add the extracted details into Google Sheets. In Pabbly Connect, select Google Sheets as the action application and choose the action event ‘Add New Row’.

Connect your Google Sheets account by selecting ‘Add New Connection’ and signing in with your Google credentials. Once connected, select the specific spreadsheet and worksheet where you want the data to be added.

Map the extracted fields such as ‘Certificate Issued To’, ‘Course Name’, ‘Issued By’, and ‘Issue Date’. Click on ‘Save and Send Test Request’ to verify that the data is correctly added to your Google Sheets.

After successful verification, your workflow is now complete! Every time a new certificate is uploaded, Pabbly Connect will automatically extract the details and update your Google Sheets, streamlining your documentation process.


Conclusion

In this tutorial, we explored how to use Pabbly Connect to automate the extraction and organization of license and certification information in Google Sheets. By integrating Google Drive, AI agents, and Google Sheets, you can save time and reduce manual data entry.

Ensure you check out Pabbly Connect to create business automation workflows and reduce manual tasks. Pabbly Connect currently offer integration with 2,000+ applications.

This automation not only enhances productivity but also ensures that your documentation is always up to date. Start using Pabbly Connect today to simplify your workflow!

Generate Custom Video Scripts from Client Requests Using AI Agents with Pabbly Connect

Learn how to automate the generation of custom video scripts from client requests using Pabbly Connect and AI agents in this detailed tutorial. Follow this definitive guide to creating powerful automated workflows with straightforward, efficiency-focused solutions that save valuable time.

Watch Step By Step Video Tutorial Below


1. Accessing Pabbly Connect for Video Script Automation

To generate custom video scripts from client requests using AI agents, you first need to access Pabbly Connect. This powerful automation platform allows you to integrate various applications seamlessly.

Begin by visiting the Pabbly Connect website. If you are a new user, click on the ‘Sign Up for Free’ option to create an account. Existing users can sign in directly. Once logged in, navigate to the dashboard where you can create a new workflow for your automation.


2. Creating a Workflow in Pabbly Connect

Within Pabbly Connect, you will need to create a new workflow to automate the video script generation process. Click on the ‘Create Workflow’ button and name your workflow, such as ‘Generate Custom Video Scripts from Client Requests Using AI Agents’. Select the appropriate folder for organization. using Pabbly Connect

  • Click on ‘Create’ to initiate the workflow.
  • This will open the workflow window where you can set up triggers and actions.

In this window, you will define a trigger for your workflow. The trigger will initiate the process when a new video script request is received from your client. This setup is crucial for automating the script generation effectively.


3. Setting Up the Trigger with JotForm

For the trigger application, select JotForm in Pabbly Connect. Choose the event as ‘New Response’. This allows the workflow to activate whenever a new form submission is made. using Pabbly Connect

Upon selecting the trigger, Pabbly Connect will provide a webhook URL. Copy this URL and navigate to your JotForm account. Open the form you wish to connect and go to the settings tab. Here, you will integrate the webhook by searching for ‘Webhooks’ and pasting the copied URL.

  • Click on ‘Complete Integration’ to finalize the setup.
  • This establishes a connection between JotForm and your Pabbly Connect workflow.

After completing the integration, perform a test submission on JotForm to capture the response in Pabbly Connect. This step is essential to ensure that your workflow is functioning correctly and ready to process client requests.


4. Generating Video Scripts Using OpenAI

Next, you will set up an action to generate video scripts using OpenAI as your AI agent. Select OpenAI from the action application options and choose the event as ‘ChatGPT’. This integration allows you to utilize AI to create personalized scripts based on client input. using Pabbly Connect

To connect OpenAI, you will need to provide an API key. Follow the instructions to generate a new API key from the OpenAI dashboard and paste it into Pabbly Connect. After connecting, enter the prompt that will guide the AI in generating the script.

Map the details received from the JotForm response into the prompt for dynamic content generation. Click on ‘Save and Send Test Request’ to generate the script.

Once the request is processed, you will receive a positive response with the generated video script. This script will be tailored to the specifications provided by the client in their request.


5. Saving the Generated Scripts to Google Docs

After generating the video script, the next step is to save it to Google Docs. In Pabbly Connect, add another action step and select Google Docs as your application. Choose the action event as ‘Create Blank Document’. This will allow you to create a new document for the generated script. using Pabbly Connect

Connect your Google account to Pabbly Connect, allowing the automation to access your Google Docs. Once connected, you will need to specify the document name. Use the brand name from the previous steps and append ‘Script’ to it for clarity.

After creating the blank document, add another action to append the generated script content to this document. Map the message content from the OpenAI response into the document.

This process ensures that each video script is stored properly in your Google Drive, making it easy to access and manage client requests efficiently.


Conclusion

In this tutorial, we explored how to automate the generation of custom video scripts from client requests using Pabbly Connect. By integrating JotForm, OpenAI, and Google Docs, you can streamline your video content creation process, saving time and ensuring quality.

Ensure you check out Pabbly Connect to create business automation workflows and reduce manual tasks. Pabbly Connect currently offer integration with 2,000+ applications.

With Pabbly Connect, you can easily set up workflows that enhance your productivity and improve client satisfaction. Embrace automation and transform your scriptwriting process today!