How to Add a Task in TickTick on a Recurring Schedule Using Pabbly Connect

Learn how to automate task creation in TickTick on a recurring schedule using Pabbly Connect. Follow this step-by-step guide for seamless integration. Explore systematic approaches to creating efficient automation solutions that convert technical concepts into practical, implementable instructions.

Watch Step By Step Video Tutorial Below


1. Setting Up Pabbly Connect for Task Automation

To automate task creation in TickTick, you need to start by accessing Pabbly Connect. This powerful integration tool allows you to connect various applications seamlessly. Begin by signing up for a free account on the Pabbly Connect website, where you can access free automation tasks every month.

Once you have signed up, log in to your Pabbly Connect account and navigate to the dashboard. Here, you will find the ‘Create Workflow’ button. Clicking this will prompt you to name your workflow, after which you can click ‘Create’ to proceed to the workflow setup page.


2. Configuring the Trigger in Pabbly Connect

The next step involves configuring the trigger for your workflow in Pabbly Connect. In this case, you want to create a recurring task in TickTick. Select the ‘Schedule by Pabbly’ feature to set up the trigger for your workflow. This allows you to run the automation at regular intervals.

  • Choose the ‘Every Day’ option for daily task creation.
  • Select a specific time for the task to be created, for example, 12 PM.

After setting the time, click ‘Save’ to confirm your trigger settings. This ensures your workflow is scheduled to run daily at the specified time, automating task creation in TickTick.


3. Integrating Google Sheets to Fetch Task Details

Now that you have configured the trigger, the next step is to fetch the task details from Google Sheets using Pabbly Connect. To do this, add a new action step and select Google Sheets. Choose the action event as ‘Get Rows’ and click the connect button.

You will need to sign in to your Google account and grant Pabbly Connect access to your Google Sheets. Once connected, select the spreadsheet containing your task details. For instance, if you have a sheet named ‘Job Applicants,’ select this sheet and specify the range of data you want to retrieve.


4. Creating Tasks in TickTick Using Retrieved Data

With the task details fetched from Google Sheets, the next step is to create the tasks in TickTick using Pabbly Connect. Add another action step and select TickTick as the application. Choose the action event as ‘Create a Task’. You will need to connect your TickTick account and authorize access.

  • Input the Project ID from TickTick, which you can find in the browser URL when viewing your project.
  • Map the task title, incorporating the candidate’s name fetched from Google Sheets.

After entering the necessary details, click ‘Save and Send Test Request’ to verify that the task has been created successfully in TickTick. You should see the new task appear in your TickTick inbox.


5. Finalizing the Automation in Pabbly Connect

After successfully creating tasks in TickTick, the final step is to finalize your automation using Pabbly Connect. Ensure that all steps are correctly configured and connected. You can test the entire workflow to confirm that tasks are being added automatically as scheduled.

Once you are satisfied with the setup, you can save your workflow. This automation will now run daily without the need for manual intervention, ensuring that tasks in TickTick are created automatically based on the data from Google Sheets.


Conclusion

In this tutorial, you learned how to automate task creation in TickTick on a recurring schedule using Pabbly Connect. By following these steps, you can save time and ensure that important tasks are never forgotten. Start using Pabbly Connect today to streamline your task management process!

Ensure you check out Pabbly Connect to create business automation workflows and reduce manual tasks. Pabbly Connect currently offer integration with 2,000+ applications.

How to Update ClickUp Tasks for Acuity Scheduling Appointment Using Pabbly Connect

Learn how to automate ClickUp task updates for Acuity Scheduling appointments using Pabbly Connect in this detailed step-by-step tutorial. This comprehensive guide reveals exactly how to connect your applications and automate repetitive tasks — accessible for professionals of all technical backgrounds.

Watch Step By Step Video Tutorial Below


1. Setting Up Pabbly Connect for Automation

To begin automating ClickUp task updates for Acuity Scheduling appointments, access Pabbly Connect. This powerful tool allows you to integrate multiple applications seamlessly. Start by signing into your Pabbly Connect account, where you will see a dashboard displaying various applications available for integration.

Click on the ‘Create Workflow’ button to initiate a new automation. Name your workflow appropriately, such as ‘Update ClickUp Task for Acuity Scheduling Appointment’. This will help you identify the workflow later. After naming, click on the ‘Create’ button to proceed.


2. Integrating Typeform with ClickUp Using Pabbly Connect

In this section, we will set up the first part of the workflow where a Typeform response triggers the creation of a task in ClickUp. Choose Typeform as your trigger application and select the event as ‘New Entry’. This means every time a new form is submitted, it will initiate the workflow. using Pabbly Connect

  • Connect your Typeform account by clicking on the connect button and allowing access to Pabbly Connect.
  • Select the specific form you want to use for this automation.
  • Once connected, you can send a test request to ensure everything is working correctly.

After receiving the response from Typeform, you will be able to create a task in ClickUp based on the submitted form data. Ensure the data format matches what ClickUp requires, especially for date fields, which can be adjusted using Pabbly Connect’s built-in date formatter.


3. Creating Tasks in ClickUp from Typeform Responses

Next, we will configure the action step to create a task in ClickUp. Select ClickUp as your action application and choose the event ‘Create Task’. This action will allow you to take the data from the Typeform response and generate a task in ClickUp. using Pabbly Connect

To connect ClickUp, you will need to provide your API token. You can find this in your ClickUp account settings under API. Once you have pasted the token into Pabbly Connect, you will be able to access your ClickUp workspace.

  • Select the workspace and folder where you want to create the task.
  • Map the task name and description using the data received from the Typeform response.
  • Set the due date and priority for the task based on the information submitted.

Once you have configured all the necessary fields, click on ‘Save and Send Test Request’ to create the task in ClickUp. You should receive a confirmation response indicating that the task was successfully created.


4. Sending Confirmation Emails via Gmail

After successfully creating a task in ClickUp, the next step is to send a confirmation email to the user who submitted the Typeform. For this, choose Gmail as your action application and select ‘Send Email’ as the event. using Pabbly Connect

Connect your Gmail account to Pabbly Connect, and once connected, fill out the email details. Use the email address collected from the Typeform response as the recipient. In the subject line, you can include something like ‘Appointment Confirmation’ to inform the recipient about the email’s purpose.

Compose the email body, including a link to the Acuity Scheduling appointment. Map the task ID from ClickUp into the email for reference. Click ‘Save and Send Test Request’ to send the email.

Once the email is sent successfully, the workflow for the first part of the automation is complete. The user will now receive a confirmation email with all necessary details.


5. Updating ClickUp Tasks with Acuity Scheduling Appointments

In the final part of this automation, we will set up a new workflow that updates the ClickUp task when an appointment is scheduled in Acuity Scheduling. Start by creating a new workflow in Pabbly Connect and selecting Acuity Scheduling as the trigger application with the event ‘New Appointment’. using Pabbly Connect

Connect your Acuity Scheduling account to Pabbly Connect. Make sure to have the necessary credentials ready for a smooth connection. After connecting, you can test the trigger to ensure it captures the new appointment details.

Choose ClickUp as the action application and select ‘Find Task’ to retrieve task details. Map the task ID from the Acuity appointment to find the corresponding task in ClickUp. Set up the final action to ‘Update Task’ in ClickUp, changing the task status to ‘Booked’.

Once the task is updated successfully, you will receive a confirmation response. This completes the integration process, allowing ClickUp tasks to be updated automatically based on Acuity Scheduling appointments.


Conclusion

In this tutorial, we explored how to use Pabbly Connect to automate the updating of ClickUp tasks based on Acuity Scheduling appointments. By integrating Typeform, ClickUp, and Gmail, you can streamline your workflow and ensure efficient task management and communication.

Ensure you check out Pabbly Connect to create business automation workflows and reduce manual tasks. Pabbly Connect currently offer integration with 2,000+ applications.

How to Send Facebook Group Posts to Slack Channel Automatically Using Pabbly Connect

Learn how to automate sending Facebook Group posts to a Slack channel using Pabbly Connect. Follow our step-by-step tutorial for seamless integration. Discover hidden automation capabilities within your existing tools. This guide shows you how to connect your essential applications and permanently eliminate redundant manual processes.

Watch Step By Step Video Tutorial Below


1. Set Up Pabbly Connect for Facebook Slack Integration

To begin the automation process of sending Facebook group posts to a Slack channel, you first need to access Pabbly Connect. This powerful integration tool allows you to connect various applications seamlessly.

Start by signing up for a free account on the Pabbly Connect website. Once you have signed in, navigate to the dashboard and click on the ‘Create Workflow’ button. Here, you can name your workflow, such as ‘Facebook Group to Slack Automation’. After naming your workflow, click on the ‘Create’ button to proceed.


2. Configure Facebook Group as the Trigger in Pabbly Connect

In this step, you will set up the trigger for your automation. The trigger will be a new post in your Facebook group. Select Facebook Groups as the application from the trigger options in Pabbly Connect.

Next, choose the ‘New Post’ event as the trigger. Before connecting, ensure that you read the instructions provided by Pabbly Connect. You will need to add the Pabbly Connect app to your Facebook group. To do this, go to your Facebook group settings, navigate to advanced settings, and add the Pabbly Connect app.

  • Access your Facebook group settings.
  • Scroll down to find the ‘Advanced Settings’ option.
  • Click on ‘Apps’ and add the Pabbly Connect app.

Once added, return to Pabbly Connect and click on the ‘Connect’ button. Choose ‘Add New Connection’, log in to your Facebook account, and select the group you want to automate. Set the limit for new posts to check every 10 minutes and click ‘Save and Send Test Request’. This will fetch the latest post data from your Facebook group.


3. Set Up Slack Channel as the Action in Pabbly Connect

After successfully configuring the trigger, the next step is to set up the action that will send the Facebook post link to your Slack channel. In Pabbly Connect, search for Slack as the action application.

Choose ‘Send Channel Message’ as the action event. Click on the ‘Connect’ button, then select ‘Add New Connection’. You will be prompted to log in to your Slack account and authorize Pabbly Connect to access your Slack workspace. Choose the appropriate token type (User or Bot) based on your needs.

  • Select the token type that suits your permissions.
  • Allow Pabbly Connect to access your Slack workspace.
  • Choose the Slack channel where messages will be sent.

Once connected, draft a message for your Slack channel. You can map the link from the Facebook post fetched in the previous step. After setting up the message, click on ‘Save and Send Test Request’ to verify the connection.


4. Test Your Facebook to Slack Automation

Now that you have set up both the trigger and action in Pabbly Connect, it’s time to test your automation. Click on ‘Save and Send Test Request’ in the Slack action setup. This will send a message to the designated Slack channel with the link to the Facebook post.

Check your Slack channel to confirm that the message has been received. The message should include the link to the new Facebook post along with any additional text you configured. This testing phase ensures that your automation is functioning correctly before you rely on it fully.


5. Finalize Your Automation Setup

Once you have confirmed that the message is sent successfully to your Slack channel, your automation setup is complete! With Pabbly Connect, this integration will now run automatically in the background. You only need to set it up once, and it will continue to work whenever new posts are made in your Facebook group.

Feel free to customize your message and settings in Pabbly Connect as needed. This automation will help you keep track of important communications without having to manually check your Facebook group constantly. Remember to monitor the automation occasionally to ensure everything is functioning smoothly.


Conclusion

In this tutorial, we demonstrated how to automate sending Facebook group posts to a Slack channel using Pabbly Connect. This integration streamlines communication and ensures you stay updated with important posts effortlessly. Start using this automation today for a more efficient workflow!

Ensure you check out Pabbly Connect to create business automation workflows and reduce manual tasks. Pabbly Connect currently offer integration with 2,000+ applications.

How to Use Pabbly Connect for Writing WordPress Articles from YouTube Videos

Learn how to use Pabbly Connect to automatically generate WordPress articles from YouTube video titles using ChatGPT. Follow this detailed tutorial for seamless integration. Build sophisticated automated workflows in less time than you think. This guide translates complex integrations into straightforward steps for immediate implementation.

Watch Step By Step Video Tutorial Below


1. Setting Up Pabbly Connect for Integration

To begin utilizing Pabbly Connect for automating the generation of WordPress articles from YouTube video titles, first access the Pabbly Connect dashboard. Sign up for a free account if you haven’t already, using the link provided in the video description.

Once logged in, click on the ‘Create Workflow’ button. Here, you can name your workflow appropriately. After naming, hit the ‘Create’ button to proceed to the workflow setup page, where you will establish the necessary triggers and actions.


2. Configuring YouTube as the Trigger Application

In the workflow, begin by selecting YouTube as the trigger application. Choose the event labeled ‘New Video in Channel with Video URL’ to initiate the process whenever a new video is uploaded. Then, click on the ‘Connect’ button to establish a connection. using Pabbly Connect

  • Select ‘Add New Connection’ and connect with your YouTube account.
  • Choose your Google account associated with the YouTube channel.
  • Allow necessary permissions to connect.

After establishing the connection, select your channel name and click on ‘Save and Send Test Request’. This action fetches the details of your most recent video, including the title which will be used in the next steps.


3. Integrating ChatGPT for Article Generation

Next, you will connect Pabbly Connect with ChatGPT to generate an article based on the YouTube video title. Select ChatGPT as the action application and choose the action event ‘Ask ChatGPT’. Click on ‘Connect’ and add a new connection.

  • Enter your ChatGPT API key, which can be obtained from the OpenAI Keys page.
  • Input a prompt such as ‘Write an article for this YouTube video title’ followed by the title from the previous step.
  • Click ‘Save and Send Test Request’ to generate the article.

The response will include the generated article, which can now be used in the next step to create a draft post in WordPress.


4. Creating a Draft Post in WordPress

Now that you have the article generated, it’s time to save it as a draft in WordPress using Pabbly Connect. Select WordPress as the action application and choose the action event ‘Create a Post’. Click on ‘Connect’ and add a new connection to your WordPress account.

Provide your WordPress username, password, and the base URL of your WordPress site. Map the post title to the YouTube video title and the post content to the generated article from ChatGPT. Set the status to ‘Draft’ to review before publishing.

After filling in all necessary fields, click on ‘Save and Send Test Request’. A new draft post will be created in your WordPress account, ready for your review.


5. Finalizing the Automation Workflow

To complete your workflow setup in Pabbly Connect, ensure that all mappings are correct and the automation is functioning as intended. You can also map the YouTube video URL into the post content to include a link to the video.

Once everything is set up, click on ‘Save’ to finalize your workflow. This automation will now run automatically, generating articles in WordPress whenever you upload a new video to your YouTube channel.

With this setup, you can enhance your website’s engagement and promote your YouTube channel effortlessly!


Conclusion

This tutorial has demonstrated how to use Pabbly Connect to automate the article generation process for your WordPress site from YouTube video titles. By integrating YouTube, ChatGPT, and WordPress, you can streamline content creation and improve audience engagement.

Ensure you check out Pabbly Connect to create business automation workflows and reduce manual tasks. Pabbly Connect currently offer integration with 2,000+ applications.

Top 5 WooCommerce WhatsApp Integrations Using Pabbly Connect

Discover how to integrate WooCommerce with WhatsApp using Pabbly Connect. Learn step-by-step to automate notifications and improve your eCommerce experience. Learn to create powerful connections between your critical applications without requiring specialized programming knowledge or extensive technical background.

Watch Step By Step Video Tutorial Below


1. Integrating WooCommerce with WhatsApp Using Pabbly Connect

To start integrating WooCommerce with WhatsApp, you need to use Pabbly Connect. This powerful automation tool allows you to connect different applications seamlessly. First, log into your Pabbly Connect account and navigate to the dashboard.

Once on the dashboard, click on the ‘Create Workflow’ button. Here, you will set up your trigger application as WooCommerce. Choose the event that will initiate the integration, such as ‘New Order’ created in WooCommerce. This is essential for sending WhatsApp notifications automatically.


2. Setting Up the Trigger in Pabbly Connect

After selecting WooCommerce as your trigger application, you need to configure the trigger settings. In the settings, you will need to connect your WooCommerce account with Pabbly Connect. This will involve entering your WooCommerce API credentials to authorize the connection.

  • Input your WooCommerce store URL.
  • Generate API keys from WooCommerce settings.
  • Paste the API keys into the Pabbly Connect integration fields.

Once the connection is established, you can test the trigger to ensure that Pabbly Connect is receiving data from WooCommerce correctly. This step is crucial as it confirms that your integration is set up properly before proceeding to the action step.


3. Configuring WhatsApp as the Action Application

With the trigger successfully set, the next step is to configure WhatsApp as your action application in Pabbly Connect. Choose WhatsApp from the list of available applications. You will then need to select the action event, such as ‘Send Message’. This action will send notifications to customers via WhatsApp when a new order is placed.

You will need to set up the message template that will be sent to users. In this template, you can include details such as order number, product name, and customer name. This personalization increases engagement and improves customer satisfaction.

  • Select the recipient’s phone number field.
  • Customize the message content with dynamic fields from WooCommerce.
  • Test the action to ensure messages are sent correctly.

After testing, save your workflow. Now, every time a new order is created in WooCommerce, a WhatsApp message will be sent automatically to the customer, ensuring they are informed about their purchase.


4. Additional Integrations with Pabbly Connect

Pabbly Connect allows for further integrations beyond just WooCommerce and WhatsApp. For example, you can also set up notifications for new product reviews or stock alerts. To do this, repeat the previous steps, selecting the appropriate trigger and action applications.

For each integration, ensure you customize the message templates according to the specific event. For instance, when a product goes out of stock, you can notify the admin via WhatsApp, enabling quick responses to inventory changes.

Use WooCommerce triggers like ‘New Review’ or ‘Product Out of Stock’. Set WhatsApp actions to notify admins or customers accordingly. Test each integration to ensure proper functionality.

By utilizing Pabbly Connect, you can create a comprehensive notification system that keeps both customers and admins informed about crucial updates.


5. Finalizing Your Workflows in Pabbly Connect

Once all your workflows are set up in Pabbly Connect, it’s important to monitor their performance. Check the task history to see if notifications are being sent as expected. This will help you identify any issues that may arise during the automation process.

Additionally, consider setting up additional actions, such as sending emails via Gmail or logging data into Google Sheets for further analysis. This can enhance your eCommerce operations by providing insights into customer interactions and sales performance.

Remember to continuously refine your workflows based on feedback and performance metrics. The flexibility of Pabbly Connect allows you to adjust and improve your integrations as needed.


Conclusion

In this tutorial, we explored how to integrate WooCommerce with WhatsApp using Pabbly Connect. By following the steps outlined, you can automate notifications, improve customer engagement, and streamline your eCommerce operations effectively.

Ensure you check out Pabbly Connect to create business automation workflows and reduce manual tasks. Pabbly Connect currently offer integration with 2,000+ applications.

Utilizing Pabbly Connect for these integrations not only saves time but also enhances the overall shopping experience for your customers. Start automating today!

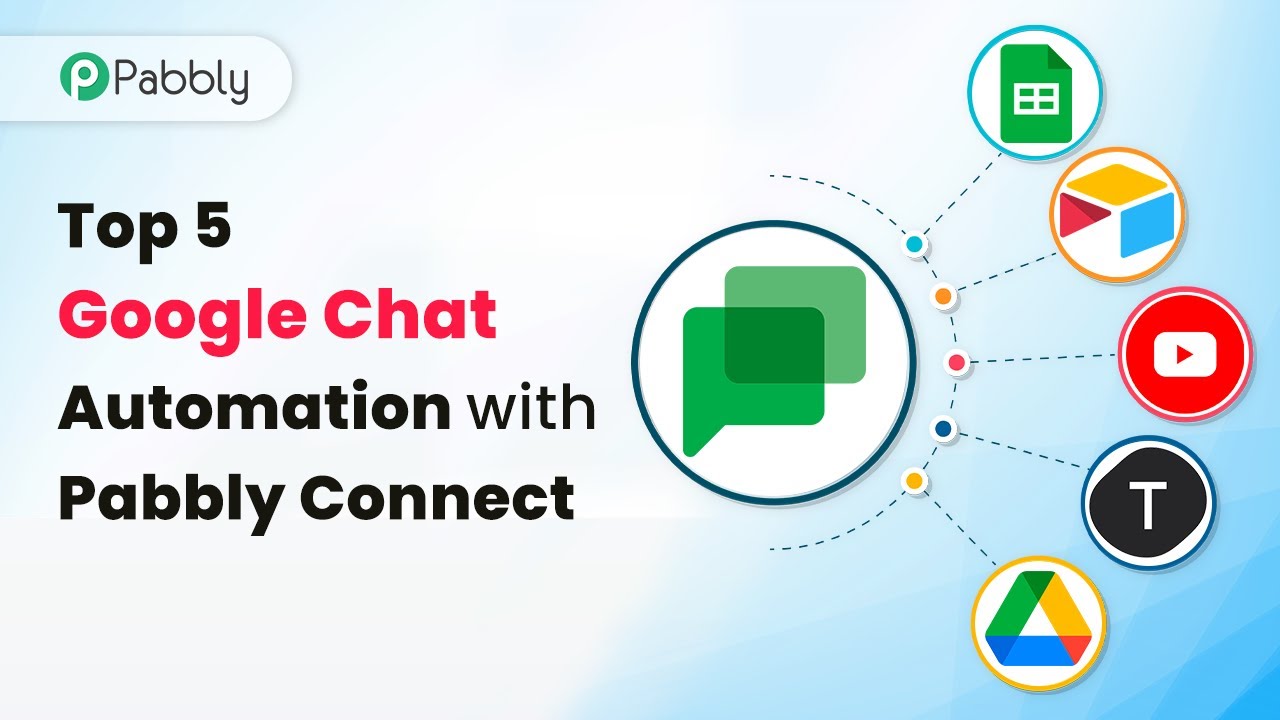
Top 5 Google Chat Automation with Pabbly Connect: A Comprehensive Guide

Learn how to automate Google Chat with Pabbly Connect. Discover top integrations with Google Sheets, YouTube, Airtable, and more! Discover how to seamlessly connect your essential tools through accessible instructions that make powerful automation available to professionals at every skill level.

Watch Step By Step Video Tutorial Below


1. Post New Message to Google Chat from Google Sheets

In this section, we will explore how to post a new message to Google Chat using Pabbly Connect. The integration begins with Google Sheets as the trigger application. Whenever new data is added to your Google Sheets, a corresponding message will be sent to Google Chat.

To set this up, follow these steps:

  • Open Pabbly Connect and select Google Sheets as the trigger application.
  • Choose the event ‘New Row’ to trigger the automation.
  • Connect your Google Sheets account to Pabbly Connect.
  • Select the specific sheet you want to monitor for new entries.

Once you have configured the trigger, the next step is to set up the action. Choose Google Chat as the action application and set the event to ‘Send Message’. This will ensure that every new row added to your Google Sheets is automatically posted as a message in Google Chat.


2. Send New Google Chat Message for New Records in Airtable

This section demonstrates how to send a new Google Chat message for new records added to Airtable using Pabbly Connect. Similar to Google Sheets, Airtable can also be integrated to automate notifications.

To implement this integration, follow these steps:

  • Select Airtable as the trigger application in Pabbly Connect.
  • Choose the event ‘New Record’ to trigger the automation.
  • Connect your Airtable account to Pabbly Connect.
  • Select the specific base and table you want to monitor for new records.

After configuring the trigger, set Google Chat as the action application. Choose ‘Send Message’ to notify your team whenever a new record is added to Airtable.


3. Send Google Chat Message for New YouTube Comments

In this section, we will explore how to send a Google Chat message for every new comment received on your YouTube videos using Pabbly Connect. This automation ensures that your team stays updated on audience interactions.

To set this up, follow these steps:

Select YouTube as the trigger application in Pabbly Connect. Choose the event ‘New Comment’ to trigger the automation. Connect your YouTube account to Pabbly Connect. Select the specific channel to monitor for new comments.

After setting up the trigger, configure Google Chat as the action application and select ‘Send Message’ to notify the team about new comments on your YouTube videos.


4. Send Typeform Responses to Google Chat as Messages

This section focuses on how to send responses from Typeform directly to Google Chat using Pabbly Connect. This integration helps keep your team informed about new form submissions.

To implement this integration, follow these steps:

Select Typeform as the trigger application in Pabbly Connect. Choose the event ‘New Response’ to trigger the automation. Connect your Typeform account to Pabbly Connect. Select the specific form you want to monitor for new responses.

Once the trigger is set, configure Google Chat as the action application and select ‘Send Message’ to notify your team of new responses received from Typeform.


5. Get Notifications on Google Chat When a File is Uploaded on Google Drive

This section explains how to get notifications in Google Chat whenever a file is uploaded to Google Drive using Pabbly Connect. This integration keeps your team updated on important file uploads.

To set this up, follow these steps:

Select Google Drive as the trigger application in Pabbly Connect. Choose the event ‘New File Uploaded’ to trigger the automation. Connect your Google Drive account to Pabbly Connect. Specify the folder to monitor for new file uploads.

After configuring the trigger, set Google Chat as the action application and choose ‘Send Message’ to notify your team whenever a new file is uploaded to Google Drive.


Conclusion

In conclusion, Pabbly Connect offers powerful automation capabilities for integrating Google Chat with various applications. By following the steps outlined in this tutorial, you can streamline your communication and enhance team collaboration. Automate your Google Chat notifications today!

Ensure you check out Pabbly Connect to create business automation workflows and reduce manual tasks. Pabbly Connect currently offer integration with 2,000+ applications.

How to Use Pabbly Connect with ChatGPT as Your Research Partner

Learn how to integrate ChatGPT with various applications using Pabbly Connect to enhance your research capabilities. Follow this definitive guide to creating powerful automated workflows with straightforward, efficiency-focused solutions that save valuable time.

Watch Step By Step Video Tutorial Below


1. Integrating ChatGPT with Google Sheets Using Pabbly Connect

To begin using Pabbly Connect for integrating ChatGPT with Google Sheets, first, access your Pabbly Connect dashboard. This powerful platform allows you to automate workflows between various applications seamlessly.

Once you’re in the dashboard, create a new workflow by selecting Google Sheets as your trigger app. This will enable you to set up a connection that triggers actions in ChatGPT whenever you add new data to your Google Sheets.


2. Setting Up Your Google Sheets Trigger in Pabbly Connect

In this step, you will configure your Google Sheets trigger within Pabbly Connect. Start by selecting the specific Google Sheets account you want to connect. After that, choose the trigger event, which will typically be ‘New Spreadsheet Row’. This event will notify ChatGPT whenever a new entry is added.

  • Select your Google account and allow necessary permissions.
  • Choose the spreadsheet and worksheet where your data will be entered.
  • Test the trigger to ensure it’s working correctly.

Once your trigger is set up, you can proceed to connect it with ChatGPT. This integration allows you to automate content generation based on the data entered in Google Sheets, enhancing your research process.


3. Connecting ChatGPT to Google Sheets via Pabbly Connect

Next, you will set up ChatGPT as the action app in Pabbly Connect. Choose ChatGPT from the list of applications and select the action event, such as ‘Generate Content’. This action will use the data from your Google Sheets to create relevant content.

Specify the parameters required for ChatGPT to generate the content. You will map the fields from your Google Sheets to the corresponding fields in ChatGPT. This ensures that the correct data is utilized for content generation.

  • Define the content structure you want ChatGPT to follow.
  • Choose the output format for the generated content.
  • Test the action to validate that ChatGPT generates the expected content.

Upon successful testing, you can finalize the integration. This will allow ChatGPT to automatically generate content whenever new data is added to your Google Sheets.


4. Using Pabbly Connect with Facebook and YouTube for Research

Another powerful feature of Pabbly Connect is its ability to integrate with social media platforms like Facebook and YouTube. This integration can enhance your research capabilities by pulling relevant data from these platforms.

To set this up, create a new workflow in Pabbly Connect, selecting Facebook or YouTube as the trigger app. For Facebook, you might choose ‘New Post in Group’ as the trigger, while for YouTube, ‘New Video’ could be your trigger event.

Authorize Pabbly Connect to access your Facebook or YouTube account. Configure the trigger settings to specify the group or channel. Test the trigger to ensure data is being pulled correctly.

Once the triggers are set, you can connect them to ChatGPT to generate insights or summaries based on the latest posts or videos, further enriching your research experience.


5. Collaborating with Slack and Discord Using Pabbly Connect

Collaboration is key in research, and Pabbly Connect facilitates this by integrating messaging platforms like Slack and Discord. This allows teams to stay updated with research developments in real-time.

To integrate these platforms, create a new workflow in Pabbly Connect and select Slack or Discord as your trigger app. For Slack, you might choose ‘New Message Posted’, while for Discord, ‘New Message in Channel’ could be your trigger event.

Authorize Pabbly Connect to access your Slack or Discord account. Set the specific channels you want to monitor for messages. Test the trigger to confirm it captures messages successfully.

After setting up the triggers, connect them to ChatGPT to generate responses or summaries based on the discussions happening in your channels, ensuring everyone is aligned and informed.


Conclusion

In conclusion, using Pabbly Connect to integrate ChatGPT with various applications like Google Sheets, Facebook, YouTube, Slack, and Discord can significantly enhance your research capabilities. By automating workflows, you can streamline content generation and collaboration, making your research process more efficient and productive.

Ensure you check out Pabbly Connect to create business automation workflows and reduce manual tasks. Pabbly Connect currently offer integration with 2,000+ applications.

How to Update Cell Values for Each WooCommerce Product Using Pabbly Connect

Learn how to automatically update cell values for WooCommerce products in Google Sheets using Pabbly Connect. Step-by-step tutorial included. Follow this definitive guide to creating powerful automated workflows with straightforward, efficiency-focused solutions that save valuable time.

Watch Step By Step Video Tutorial Below


1. Setting Up Pabbly Connect for WooCommerce and Google Sheets Integration

To update the cell value for each WooCommerce product, you start by logging into your Pabbly Connect account. This integration allows you to automate the process of updating Google Sheets whenever a new order is created in WooCommerce.

After signing in, click on the ‘Create Workflow’ button. Name your workflow something descriptive, such as ‘Update Cell Value for Each WooCommerce Product.’ This will set the foundation for your automation, allowing you to connect WooCommerce and Google Sheets seamlessly.


2. Setting the Trigger Action in WooCommerce

The next step involves setting up the trigger in Pabbly Connect. Select WooCommerce as your trigger application and choose the event ‘New Order Created.’ This means that every time a new order is placed, it will trigger the workflow.

Make sure your WooCommerce store is open and ready. You will need to set up a webhook in WooCommerce to connect it with Pabbly Connect. To do this, navigate to WooCommerce settings, go to the ‘Advanced’ tab, and find the ‘Webhooks’ option. Click on ‘Add Webhook’ and fill in the required information:

  • Name: Product Update
  • Status: Active
  • Topic: Order Created
  • Delivery URL: Paste the webhook URL from Pabbly Connect here

Once you’ve saved the webhook, Pabbly Connect will start waiting for a response from WooCommerce, allowing you to capture the necessary order details.


3. Creating an Order in WooCommerce

With the webhook set, you can now create a test order in WooCommerce. Navigate to your product page, add a product to the cart, and proceed to checkout. After placing the order, Pabbly Connect will capture the response from WooCommerce.

Once the order is placed, go back to Pabbly Connect, and you will see the response containing various details, including the product ID and order information. This data will be crucial for updating the corresponding cell in Google Sheets.


4. Updating Google Sheets with New Order Information

Next, you will set up Google Sheets as the action application in Pabbly Connect. Choose the event ‘Lookup Spreadsheet Rows’ to find the relevant product in your Google Sheet. Connect your Google account and select the spreadsheet containing your WooCommerce product details.

For the lookup, specify the column that contains the product IDs, which is typically column B. Map the product ID from the WooCommerce trigger response into the lookup value field. This allows Pabbly Connect to find the correct row in your spreadsheet to update.

  • Select your spreadsheet: WooCommerce
  • Column for lookup: B (Product ID)
  • Include headers: Yes

After configuring these settings, click on ‘Save and Send Test Request’ to ensure that Pabbly Connect retrieves the correct data from Google Sheets.


5. Finalizing the Update of Cell Values

After retrieving the current sales data from Google Sheets, you need to perform a mathematical operation to update the sales figure. Use the ‘Number Formatter’ feature in Pabbly Connect to add the new sale amount to the existing sales figure.

Once you’ve calculated the new total, add another action step to update the cell value in Google Sheets. Select ‘Update Cell Value’ as the event, and map the new total sales value along with the corresponding row index from the previous step.

Select your spreadsheet: WooCommerce Column to update: C Row index: Use the index from the lookup step

After saving and testing this action, you will see the cell value updated in your Google Sheet, reflecting the new sales totals each time an order is placed.


Conclusion

In this tutorial, we explored how to use Pabbly Connect to automatically update the cell value for each WooCommerce product in Google Sheets whenever a new order is created. This integration streamlines the process, ensuring your product sales data is always up to date.

Ensure you check out Pabbly Connect to create business automation workflows and reduce manual tasks. Pabbly Connect currently offer integration with 2,000+ applications.

With the steps provided, you can set up this automation easily, enhancing your workflow and saving time. Start using Pabbly Connect today to make your WooCommerce and Google Sheets integration seamless.

How to Generate Tweets Using ChatGPT with Pabbly Connect: A Step-by-Step Guide

Learn how to generate tweets using ChatGPT and Pabbly Connect. This detailed tutorial covers integration with Google Sheets, Twitter, and more. Implement the precise methodologies leading organizations use to automate repetitive tasks, illustrated with practical examples designed for immediate application.

Watch Step By Step Video Tutorial Below


1. Setting Up Pabbly Connect for Tweet Generation

To generate tweets using ChatGPT, the first step is to set up Pabbly Connect. Start by signing in to your Pabbly Connect account and accessing the dashboard. Here, you will find a blue button labeled ‘Create Workflow’ on the right side of the screen.

Click on this button and name your workflow, such as ‘Generate Tweets Using ChatGPT.’ After naming it, click on ‘Create’ to initiate a blank workflow. This is where you’ll be integrating Google Sheets, ChatGPT, and Twitter through Pabbly Connect.


2. Configuring Google Sheets as the Trigger Application

In this step, you will configure Google Sheets as the trigger application in Pabbly Connect. Select Google Sheets from the list of applications and set the event to ‘New or Updated Spreadsheet Row.’ Make sure your Google Sheet is prepared with the necessary columns: Tweet Title and Link.

  • Prepare your Google Sheet with the required columns.
  • Select the trigger event as ‘New or Updated Spreadsheet Row.’

Pabbly Connect will provide a webhook URL that you need to copy. This URL will allow Google Sheets to communicate with Pabbly Connect whenever a new row is added. Install the Pabbly Connect Webhooks add-on in Google Sheets to complete this integration.


3. Generating Tweet Content Using ChatGPT

After setting up the trigger, the next action is to use ChatGPT to generate content for the tweet. Choose ChatGPT as the action application in Pabbly Connect and select the event as ‘Ask ChatGPT.’ You will need to connect your OpenAI account by entering your API key.

In the prompt section, write a command such as ‘Write a short and informative tweet on ‘ and insert the title from the Google Sheet. After configuring the prompt, click on ‘Save and Send Test Request’ to generate the content. This step is crucial as it allows Pabbly Connect to fetch the tweet content generated by ChatGPT.


4. Posting the Generated Tweet to Twitter

Now that you have the content generated by ChatGPT, the next step is to post this content to Twitter. Select Twitter as the action application in Pabbly Connect and set the action event to ‘Create Tweet.’ You will need to connect your Twitter account by entering your Client ID and Client Secret.

  • Connect your Twitter account using Client ID and Client Secret.
  • Map the tweet content and link from the previous steps.

Once everything is set up, click on ‘Save and Send Test Request’ to post the tweet. This final action confirms that Pabbly Connect successfully integrates ChatGPT-generated content into your Twitter account.


5. Handling Duplicate Tweets with Pabbly Connect Router

The last step involves ensuring that your workflow handles duplicate tweets effectively. Use the Router feature in Pabbly Connect to create two paths: one for successful tweets and another for duplicate content. Set conditions based on the Twitter response to determine the appropriate action.

For example, if the response indicates a duplicate, you can configure Pabbly Connect to send an email notification using Gmail. This adds an essential layer of monitoring to your workflow, ensuring you are informed about any issues with tweet posting.


Conclusion

By following these steps, you can easily generate tweets using ChatGPT through Pabbly Connect. This integration allows you to automate your tweeting process efficiently, ensuring that your content is shared on Twitter seamlessly. With Pabbly Connect, you can enhance your social media presence and streamline your workflow.

Ensure you check out Pabbly Connect to create business automation workflows and reduce manual tasks. Pabbly Connect currently offer integration with 2,000+ applications.

Integrate Zenler with Google Sheets Automatically Using Pabbly Connect

Learn how to integrate Zenler with Google Sheets automatically using Pabbly Connect in this step-by-step tutorial. Streamline your student enrollment process now! Learn to create powerful connections between your critical applications without requiring specialized programming knowledge or extensive technical background.

Watch Step By Step Video Tutorial Below


1. Setting Up Pabbly Connect for Zenler and Google Sheets Integration

To begin integrating Zenler with Google Sheets automatically, you need to access Pabbly Connect. This platform allows seamless automation between various applications, including Zenler and Google Sheets. First, create a free account by clicking on the ‘Sign Up Free’ button on the Pabbly Connect website.

Once logged in, navigate to the dashboard and click on the blue button labeled ‘Create Workflow’. You will need to provide a name for your workflow, such as ‘Add Zenler Students to Google Sheets’. After naming your workflow, click on ‘Create’ to proceed.


2. Selecting Zenler and Google Sheets in Pabbly Connect

In this step, you will select the applications involved in your automation. For this integration, choose Zenler as the trigger application and Google Sheets as the action application. This means that whenever a new student enrolls in Zenler, their details will automatically be added to Google Sheets. using Pabbly Connect

  • Choose Zenler as the trigger application.
  • Select the trigger event for new student enrollment.
  • Set Google Sheets as the action application.

After selecting the applications, you will see a prompt to choose the specific trigger event. Opt for the event that captures new enrollments in Zenler courses. This setup is crucial as it defines when the automation will be triggered.


3. Configuring Webhook in Zenler

The next step involves setting up a webhook in Zenler. After selecting the trigger event, Pabbly Connect will provide a webhook URL. Copy this URL, as it will be used in Zenler to send student data. using Pabbly Connect

Now, navigate back to your Zenler account and open the specific course for which you want to collect student data. Go to the ‘Automation’ section and click on ‘Edit Automation Rule’. Here, you will create a new action by selecting ‘Send a Webhook’. Paste the copied webhook URL into the designated field and save the changes.


4. Testing the Integration with a Dummy Enrollment

After configuring the webhook, it is important to test the integration to ensure everything is working correctly. Return to Pabbly Connect and click on the ‘Recapture Webhook Response’ button. This action will wait for a new enrollment to trigger the webhook. using Pabbly Connect

To test, sign up as a new user in Zenler and enroll in the selected course. Once the enrollment is completed, Pabbly Connect should receive the student data. You can verify this by checking the response received in Pabbly Connect, which should display the student’s details, including name, email, and course information.


5. Finalizing Google Sheets Integration with Pabbly Connect

Now that the webhook is successfully capturing student data, the final step is to set up Google Sheets to receive this information. In Pabbly Connect, select Google Sheets as the action application and choose the ‘Add a New Row’ action event. using Pabbly Connect

Connect your Google Sheets account, and select the specific spreadsheet where you want the student data to be stored. Map the data fields from Zenler to the corresponding columns in Google Sheets, ensuring that all relevant information, such as name, email, and enrollment date, is accurately captured.

Finally, click on ‘Save and Send Test Request’. If everything is set up correctly, you should see the student details appear in your Google Sheets. This confirms that the integration is working flawlessly, and from now on, every new enrollment will automatically be recorded in your spreadsheet.


Conclusion

By following this tutorial, you have successfully integrated Zenler with Google Sheets using Pabbly Connect. This automation will save you time and effort, as student details will now be recorded automatically whenever a new enrollment occurs. Enjoy a more streamlined workflow!

Ensure you check out Pabbly Connect to create business automation workflows and reduce manual tasks. Pabbly Connect currently offer integration with 2,000+ applications.