Top 5 Google Docs Automations Inside Pabbly Connect

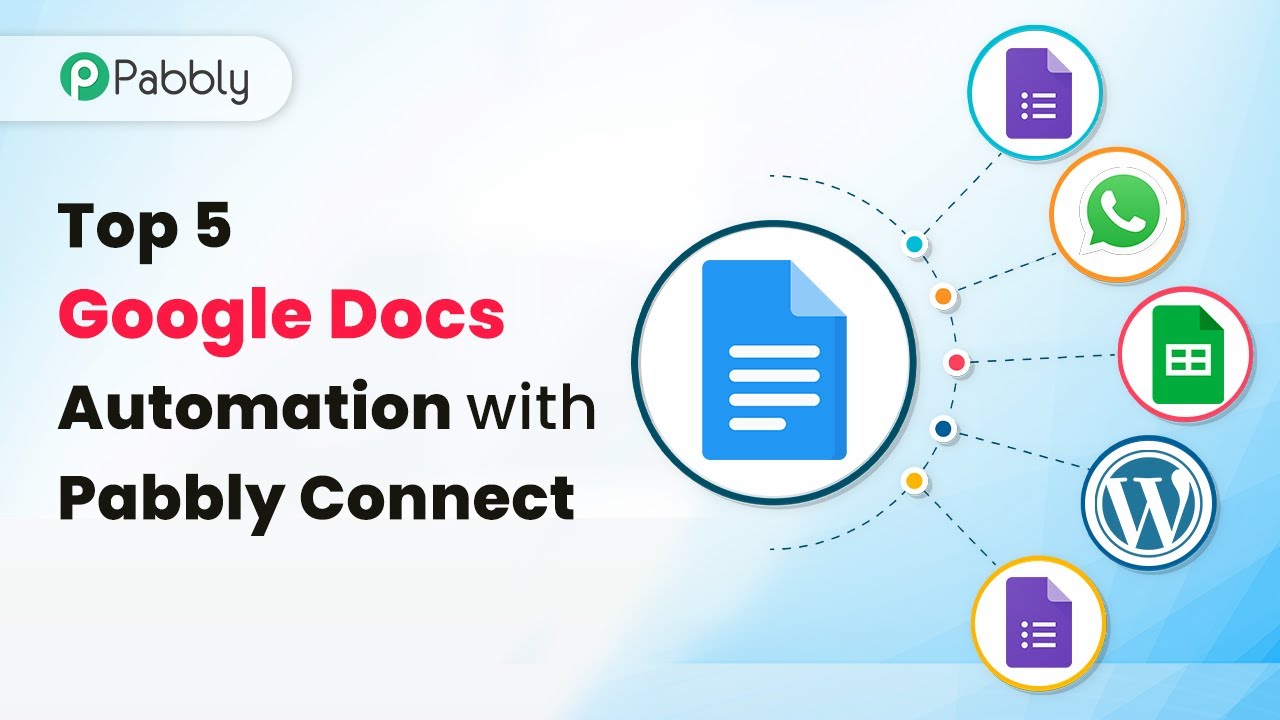
Explore the top 5 Google Docs automations using Pabbly Connect to streamline your workflow and enhance productivity. Transform complex automation concepts into accessible, actionable steps that eliminate unnecessary manual work while maximizing existing application capabilities.

Watch Step By Step Video Tutorial Below


1. Automating Certificate Creation and Sending via WhatsApp with Pabbly Connect

The first automation using Pabbly Connect is for creating and sending certificates automatically through WhatsApp. By integrating Google Forms, Google Docs, and WhatsApp’s API, this automation streamlines the certificate distribution process.

When users fill out the Google Form, Pabbly Connect captures the data and triggers the certificate creation in Google Docs. The generated certificate is then sent to the user’s WhatsApp account without any manual intervention. This not only saves time but also enhances productivity.


2. Automating Invoice Creation with Google Forms and Google Docs via Pabbly Connect

The second automation focuses on automating the invoice creation process using Pabbly Connect. By integrating Google Forms with Google Docs, businesses can efficiently generate invoices based on the information collected from customers.

As customers fill out the Google Form, Pabbly Connect automatically creates an invoice in Google Docs. This automation eliminates the need for manual invoice generation, allowing businesses to save significant time and effort. Here’s how it works:

  • Create a Google Form for invoice details.
  • Set up Pabbly Connect to capture form responses.
  • Generate an invoice template in Google Docs.
  • Link the form responses to the invoice template using Pabbly Connect.

By using this automation, businesses can streamline their invoicing process significantly.


3. Mail Merging from Google Sheets to Google Docs with Pabbly Connect

The third automation showcases the mail merge feature, allowing users to merge data from Google Sheets into Google Docs. This process is facilitated by Pabbly Connect, which automates the entire workflow.

Users can set up a Google Sheet with the necessary data and create a Google Docs template. Pabbly Connect then merges the data from the sheet into the document, making it easy to produce personalized documents in bulk. This is particularly useful for sending personalized letters or documents to multiple recipients.


4. Generating Salary Slips in Bulk with Pabbly Connect

This automation focuses on generating salary slips automatically for employees using Pabbly Connect. By integrating Google Sheets with Google Docs, companies can manage payroll efficiently.

As employee data is updated in Google Sheets, Pabbly Connect automatically generates salary slips in Google Docs. This bulk generation saves significant time, especially for companies with many employees. Here’s a brief overview of the process:

  • Maintain employee data in Google Sheets.
  • Create a salary slip template in Google Docs.
  • Use Pabbly Connect to link the sheet data to the template.
  • Automatically generate and distribute salary slips.

This automation greatly enhances efficiency in payroll management.


5. Integrating Google Docs with WordPress Using Pabbly Connect

The final automation integrates Google Docs with WordPress, allowing users to publish content directly to their WordPress site. Pabbly Connect facilitates this integration seamlessly.

Users can write their content in Google Docs, and once the document is ready, Pabbly Connect can automatically publish it on WordPress. This integration saves time by eliminating the need to switch between applications. The steps involved include:

Create a Google Docs document with your content. Set up Pabbly Connect to connect Google Docs with WordPress. Automatically publish the document on your WordPress site.

This automation streamlines the content publishing process significantly.


Conclusion

In this tutorial, we explored the top 5 Google Docs automations using Pabbly Connect. Each automation enhances productivity and streamlines workflows significantly. By leveraging Pabbly Connect, users can efficiently manage tasks across Google Docs, Google Sheets, WhatsApp, and WordPress, ultimately saving time and effort.

Ensure you check out Pabbly Connect to create business automation workflows and reduce manual tasks. Pabbly Connect currently offer integration with 2,000+ applications.

How to Create Google Contacts for New Outlook Contacts Using Pabbly Connect

Learn how to automate the creation of Google Contacts from new Microsoft Outlook contacts using Pabbly Connect. Step-by-step guide included. Develop expertise in application integration and learn how to design streamlined automation workflows using proven, simplified approaches.

Watch Step By Step Video Tutorial Below


1. Setting Up Pabbly Connect for Integration

To automate the creation of Google Contacts from new Microsoft Outlook contacts, start by accessing Pabbly Connect. This platform allows seamless integration between various applications, including Google Contacts and Microsoft Outlook.

First, visit the Pabbly Connect landing page and sign up for a free account. Once signed in, you will reach the dashboard where you can create a new workflow. Click on the ‘Create Workflow’ button, assign a suitable name to your workflow, and click on the ‘Create’ button to proceed.


2. Configuring the Trigger with Microsoft Outlook

In this step, you will configure the trigger to start the automation process. Select Microsoft 365 as the application under the trigger section in Pabbly Connect. This is essential as Outlook is part of the Microsoft 365 package.

Choose the trigger event as ‘New Contact’ and click on the ‘Connect’ button. Here, select ‘Add New Connection’ and click on ‘Connect with 365’. You will be prompted to sign in to your Microsoft account. After signing in, grant the necessary permissions, and your connection will be established successfully.


3. Adding New Contacts in Microsoft Outlook

Now that the trigger is set up, it’s time to add a new contact in Microsoft Outlook. Click on the ‘New Contact’ button within your Outlook application. Fill in the details such as name, email address, and phone number, then click on the ‘Save’ button.

After saving the new contact, return to Pabbly Connect and click on the ‘Save and Send Test Request’ button. This action will capture the data of the newly created contact, allowing you to see the response containing all relevant information.

  • Ensure you have filled in all necessary fields for the contact.
  • Click on ‘Save’ to confirm the new contact.
  • Check for a successful response in Pabbly Connect.

Once you have the response, you can proceed to the next step of sending this information to Google Contacts.


4. Creating Google Contacts from Outlook Data

With the contact data captured, the next step is to send this information to Google Contacts. In Pabbly Connect, search for ‘Google Contacts’ and select it as the action application. Choose the action event as ‘Create Contact’ and click on the ‘Connect’ button.

Just like before, select ‘Add New Connection’ and sign in with your Google account. After granting the necessary permissions, you will be able to map the fields from your Outlook contact to Google Contacts.

  • Map the email address, name, and phone number from the Outlook data.
  • Ensure all relevant fields are filled to create a complete contact.
  • Click on ‘Save and Send Test Request’ to finalize the process.

After clicking the test request, check your Google Contacts to confirm that the new contact has been added successfully.


5. Finalizing the Automation Process

After successfully creating a Google Contact from the newly added Outlook contact, your automation setup is complete. The integration through Pabbly Connect ensures that every time you add a new contact in Microsoft Outlook, it will automatically reflect in Google Contacts.

You only need to set this up once; thereafter, the automation will run in the background, saving you time and manual effort. You can also clone this workflow from the provided link in the description to start using it instantly.


Conclusion

In this tutorial, we explored how to automate the creation of Google Contacts from new Microsoft Outlook contacts using Pabbly Connect. This integration ensures your contact lists remain synchronized effortlessly, enhancing your productivity.

Ensure you check out Pabbly Connect to create business automation workflows and reduce manual tasks. Pabbly Connect currently offer integration with 2,000+ applications.

How to Setup Razorpay Automation for Multiple Products Inside Pabbly Connect

Learn how to set up Razorpay automation for multiple products using Pabbly Connect. Follow this detailed tutorial for seamless integration. Implement the precise methodologies leading organizations use to automate repetitive tasks, illustrated with practical examples designed for immediate application.

Watch Step By Step Video Tutorial Below


1. Accessing Pabbly Connect for Razorpay Automation

To set up Razorpay automation for multiple products inside Pabbly Connect, start by accessing the Pabbly Connect dashboard. You can create a free account in just a few minutes by following the sign-up link provided in the description.

Once logged in, navigate to the dashboard and click on ‘Create Workflow’. Name your workflow, for instance, ‘Razorpay to Google Drive’. This will initiate the setup process for automating payment responses from Razorpay through Pabbly Connect.


2. Connecting Razorpay with Pabbly Connect

The next step involves connecting your Razorpay account to Pabbly Connect. In the trigger window, search for Razorpay and select it as your application. Choose the trigger event as ‘Payment Captured’ to initiate the automation process.

  • Select Razorpay as the app.
  • Choose ‘Payment Captured’ as the trigger event.
  • Copy the provided webhook URL.

After copying the webhook URL, go to your Razorpay account and navigate to ‘Accounts and Settings’. Click on ‘Webhooks’ and add a new webhook using the copied URL, ensuring that the active event is set to ‘payment.captured’. This step is crucial for enabling Pabbly Connect to receive payment notifications from Razorpay.


3. Setting Up Payment Routes in Pabbly Connect

After successfully connecting Razorpay, you need to create routes within Pabbly Connect to handle different product payments. This is done using the Router feature. Click on ‘Add Router’ to create multiple routes based on the payment amount received.

For example, set up three routes for the different courses you offer, each with a unique payment amount:

  • Java course: 79900 (Rupees)
  • Python course: 99900 (Rupees)
  • PHP course: 49900 (Rupees)

Each route will be configured to check the payment amount and direct the workflow to share the corresponding course file from Google Drive using Pabbly Connect.


4. Sharing Course Files from Google Drive

Once the routes are established, the next step is to set the action for each route to share the appropriate course file. In the action step, select Google Drive and choose the action event as ‘Share a File’.

Connect your Google Drive account to Pabbly Connect by signing in and granting the necessary permissions. After connecting, select the specific course file you wish to share based on the payment received:

For the Java course, select ‘Java Course PDF’. For the Python course, select ‘Python Basics PDF’. For the PHP course, select ‘PHP Codes PDF’.

Map the email address of the customer from the Razorpay payment data to ensure that the course file is sent to the correct recipient. This integration allows for seamless file sharing directly through Pabbly Connect.


5. Testing Your Automation Workflow

With the workflow set up, it’s essential to test the automation to ensure everything functions as intended. You can do this by making test payments for each course using the Razorpay payment page.

After completing a test payment, check the email of the customer to verify that the correct course file was shared. For instance, if a payment of 99900 was received for the Python course, the corresponding file should be sent automatically:

Make a payment for the Java course. Make a payment for the Python course. Make a payment for the PHP course.

By running these tests, you can confirm that Pabbly Connect is effectively capturing payment details and sharing the appropriate files, ensuring a smooth customer experience.


Conclusion

Setting up Razorpay automation for multiple products using Pabbly Connect streamlines the payment and file-sharing process. This integration allows you to efficiently manage customer transactions and deliver course materials seamlessly.

Ensure you check out Pabbly Connect to create business automation workflows and reduce manual tasks. Pabbly Connect currently offer integration with 2,000+ applications.

How to Create Zendesk Tickets from New Gravity Forms Submissions Using Pabbly Connect

Learn how to automate Zendesk ticket creation from Gravity Forms submissions using Pabbly Connect. Follow our step-by-step tutorial for seamless integration. Implement the precise methodologies leading organizations use to automate repetitive tasks, illustrated with practical examples designed for immediate application.

Watch Step By Step Video Tutorial Below


1. Accessing Pabbly Connect for Zendesk and Gravity Forms Integration

To create Zendesk tickets from new Gravity Forms submissions, you first need to access Pabbly Connect. Start by signing up for a free account on the Pabbly Connect dashboard. Once you are logged in, click on ‘Create Workflow’ to initiate your automation process.

Give your workflow a name, such as ‘Gravity Forms to Zendesk’. This will help you identify the purpose of the workflow later. After naming your workflow, click on the ‘Create’ button to proceed to the next step.


2. Setting Up the Trigger with Gravity Forms in Pabbly Connect

In this section, you will set up the trigger for your workflow. Start by selecting ‘Gravity Forms’ as the app in the trigger window of Pabbly Connect. Choose the trigger event as ‘New Response’. This indicates that the workflow will be activated whenever a new form submission is received.

  • Select ‘New Response’ as the trigger event.
  • Copy the webhook URL provided by Pabbly Connect.
  • Go to your Gravity Forms account and install the Webhooks add-on.

After installing the Webhooks add-on, navigate to the settings of your form. Here, you will paste the copied webhook URL, select the request method as ‘POST’, and the request format as ‘JSON’. This setup allows Pabbly Connect to receive data from Gravity Forms whenever a new submission occurs.


3. Testing the Gravity Forms Connection with Pabbly Connect

Once the webhook is configured in Gravity Forms, it’s time to test the connection. Go back to Pabbly Connect and make a test submission in your Gravity Forms. Fill in dummy data like a name, email, and issue details, then submit the form.

Check back in Pabbly Connect to see if the response has been received. If successful, you will see the submission data reflected in the Pabbly Connect interface, indicating that the trigger is working correctly.


4. Creating a Zendesk Ticket from Gravity Forms Submission

Now that the trigger is set up and tested, it’s time to create a Zendesk ticket using the data received from Gravity Forms. In the action window of Pabbly Connect, search for ‘Zendesk’ and select it as the app.

  • Choose the action event as ‘Create Ticket’.
  • Connect your Zendesk account by entering your username, password, and subdomain.
  • Map the required fields from the Gravity Forms submission to the Zendesk ticket fields.

Make sure to fill in the subject, requester name, email, and description fields using the mapped data from Gravity Forms. After mapping all necessary fields, click on ‘Save and Send Test Request’ to create the ticket.


5. Verifying the Creation of Zendesk Ticket

After sending the test request, check your Zendesk account to verify that the ticket has been created successfully. You should see the ticket with the details matching the submission from Gravity Forms. This confirms that Pabbly Connect has successfully automated the process of creating a Zendesk ticket based on Gravity Forms submissions.

To further test the automation, you can make additional submissions in Gravity Forms and check if new tickets are created in Zendesk with the corresponding details. This real-time integration showcases how Pabbly Connect streamlines your workflow.


Conclusion

In this tutorial, we demonstrated how to automate the creation of Zendesk tickets from new Gravity Forms submissions using Pabbly Connect. By following these steps, you can efficiently manage customer inquiries and streamline your support process.

Ensure you check out Pabbly Connect to create business automation workflows and reduce manual tasks. Pabbly Connect currently offer integration with 2,000+ applications.

How to Create Airtable Records for New Google Ads Campaigns Using Pabbly Connect

Learn how to automate the creation of Airtable records for new Google Ads campaigns using Pabbly Connect in this step-by-step tutorial. Implement the precise methodologies leading organizations use to automate repetitive tasks, illustrated with practical examples designed for immediate application.

Watch Step By Step Video Tutorial Below


1. Accessing Pabbly Connect for Google Ads and Airtable Integration

To start automating your Google Ads campaigns with Airtable, the first step is to access Pabbly Connect. By signing up for a free account, you can set up integrations quickly. Simply visit the Pabbly Connect website and create your account in just a couple of minutes.

Once you are logged into your Pabbly Connect dashboard, click on the ‘Create Workflow’ button. Name your workflow, for example, ‘Google Ads to Airtable’, and then click ‘Create’. This action will open the workflow interface where you can set up your trigger and action steps.


2. Setting Up Google Ads Trigger in Pabbly Connect

In this section, you will configure the trigger to capture new Google Ads campaigns. In the trigger window, search for and select ‘Google Ads’ as your application. Then, choose ‘New Campaign’ as the trigger event.

  • Select ‘Connect’ and then ‘Add New Connection’.
  • Click on ‘Connect with Google Ads’ and enter your Google Ads Customer ID.
  • Remove hyphens from the Customer ID before clicking ‘Save’.

After saving, select your Google account and allow permissions. This will establish a connection between Google Ads and Pabbly Connect, enabling it to track new campaigns. Once connected, you can test the trigger by clicking ‘Save and Send Test Request’. This action retrieves details of the latest campaign to confirm the setup is working correctly.


3. Adding Airtable Action to Record Campaign Details

With the Google Ads trigger set up, the next step is to add the action for Airtable. In the action window of your workflow, search for ‘Airtable’ and select it. Choose ‘Create Record’ as the action event and click ‘Connect’. using Pabbly Connect

  • Enter your Airtable API token, which you can generate from your Airtable account settings.
  • Select the Base ID and Table ID where you want the campaign details to be recorded.
  • Map the fields from the Google Ads trigger to the corresponding Airtable fields.

For example, map the campaign name, campaign ID, status, start date, and optimization status. Ensure that the data is accurately reflected in Airtable. After mapping, click ‘Save and Send Test Request’ to verify that a new record is created in Airtable with the campaign details.


4. Verifying the New Record in Airtable

After successfully sending the test request, it’s time to verify that the new campaign record appears in your Airtable base. Navigate to your Airtable account and refresh the page to see the latest entries.

You should see the new row corresponding to the latest Google Ads campaign, complete with all the mapped details like campaign name, ID, status, start date, and optimization status. This confirms that Pabbly Connect is effectively automating the integration between Google Ads and Airtable.

This automation ensures that every time a new campaign is created in Google Ads, its details will be automatically recorded in Airtable without manual input, streamlining your workflow significantly.


5. Conclusion

In this tutorial, we demonstrated how to use Pabbly Connect to automate the creation of Airtable records for new Google Ads campaigns. By following the steps outlined, you can efficiently manage your campaigns and maintain an up-to-date database in Airtable.

Ensure you check out Pabbly Connect to create business automation workflows and reduce manual tasks. Pabbly Connect currently offer integration with 2,000+ applications.

Utilizing Pabbly Connect for this integration not only saves time but also enhances accuracy by reducing manual data entry. Start automating your workflows today with Pabbly Connect to optimize your campaign management!

How to Get Task Summary from Pabbly Connect via Email

Learn how to automate task summaries via email using Pabbly Connect. This detailed tutorial walks you through the integration with Facebook, YouTube, and Gmail. Build sophisticated automated workflows in less time than you think. This guide translates complex integrations into straightforward steps for immediate implementation.

Watch Step By Step Video Tutorial Below


1. Accessing Pabbly Connect for Task Summary Automation

To start automating task summaries via email, you need to access Pabbly Connect. Begin by logging into your Pabbly Connect account to set up the integration.

Once logged in, navigate to the dashboard where you can view your workflows. Here, you can also monitor task usage based on workflows. This is essential for tracking how many tasks are being consumed in your Pabbly Connect account.


2. Setting Up the Workflow in Pabbly Connect

Next, you’ll set up a new workflow in Pabbly Connect. Click on the ‘Create Workflow’ button and give your workflow a name, such as ‘Task Usage Summary’. This name will help you identify the automation later.

  • Click on ‘Create’.
  • Select the trigger event as ‘Schedule’.
  • Set it to run daily at your preferred time, e.g., 9 AM.

After setting the schedule, you will need to configure the action step to fetch the task usage summary from your Pabbly Connect account. This step is crucial for receiving the summary via email.


3. Fetching Task Usage Summary with Pabbly Connect Manager

In this step, you will use the Pabbly Connect Manager to fetch the task usage summary. In the action window, search for and select ‘Pabbly Connect Manager’ as your app. using Pabbly Connect

Choose the action event as ‘Tasks Usage Summary’ and connect your Pabbly account using the API token found in your account settings. This connection allows Pabbly Connect to access your task data securely.

  • Select the specific workflow you want to track.
  • Map the date range for which you want the summary.
  • Click ‘Save and Send Test Request’ to verify the setup.

Once the test request is successful, you will receive the task usage details for the selected workflow.


4. Sending the Task Summary via Gmail

To send the task summary via email, you will need to add another action step in your Pabbly Connect workflow. Select ‘Gmail’ as the app and choose the action event ‘Send Email’.

Connect your Gmail account to Pabbly Connect by following the prompts. Enter the recipient’s email address where you want to receive the task summary. You can also customize the sender’s name, subject line, and email body.

Map the data fields from the task usage summary into the email body. Include details like total tasks executed, paid tasks, and free tasks consumed. Click ‘Save and Send Test Request’ to ensure the email is sent successfully.

After sending the test email, check your inbox to confirm the task summary has been received correctly.


5. Conclusion: Automating Task Summaries with Pabbly Connect

In conclusion, using Pabbly Connect to automate task summaries via email is a straightforward process. By following the steps outlined above, you can easily set up a workflow that sends daily summaries of task usage to your email.

Ensure you check out Pabbly Connect to create business automation workflows and reduce manual tasks. Pabbly Connect currently offer integration with 2,000+ applications.

Check out Pabbly Connect – Automate your business workflows effortlessly! Sign Up Free – Start your journey with ease! 10,000+ Video Tutorials – Learn step by step! Join Pabbly Facebook Group – Connect with 21,000+ like minded people!

This automation not only saves time but also helps you keep track of your task consumption effectively. With Pabbly Connect, you can integrate various applications to streamline your workflows and enhance productivity.


How to Share Daily Weather Forecast to Google Chat Automatically Using Pabbly Connect

Learn to automate sharing daily weather forecasts to Google Chat using Pabbly Connect. Step-by-step guide with specific instructions and UI details. Follow this definitive guide to creating powerful automated workflows with straightforward, efficiency-focused solutions that save valuable time.

Watch Step By Step Video Tutorial Below


1. Setting Up Pabbly Connect for Weather Forecast Automation

To begin sharing daily weather forecasts automatically, you first need to access Pabbly Connect. Visit the Pabbly Connect landing page and sign up for a free account. After signing in, select the Pabbly Connect product to reach the dashboard.

Once on the dashboard, click on the ‘Create Workflow’ button. You will be prompted to provide a suitable name for your workflow. After naming it, click on the ‘Create’ button, and the workflow page will load, ready for you to set up your automation.


2. Configuring the Trigger with Pabbly Connect

The next step involves setting up the trigger for your workflow. In this case, you want the workflow to run daily at a specific time to send the weather forecast to Google Chat. To achieve this, select the ‘Scheduler’ feature in Pabbly Connect.

  • Choose the ‘Every Day’ option to schedule the workflow.
  • Select the desired time, for instance, 8 AM.

Once you have configured the time, click on ‘Save’. This sets the schedule for when the weather forecast will be fetched and sent to Google Chat.


3. Fetching Weather Data Using Pabbly Connect

Now that the trigger is set, the next step is to fetch the daily weather data. For this, you will utilize the Weather API through Pabbly Connect. Select the ‘API by Pabbly’ feature and choose the action event as ‘Get’. You will need to provide the endpoint URL from the Weather API.

To get this URL, you must access the Weather API tool and navigate to the API Explorer tab. Here you will need to enter your API key and specify the parameters like your city name and the number of days for the forecast. After entering the required details, click on ‘Show Response’ to generate the API call URL, which you will then paste into the endpoint URL field in Pabbly Connect.


4. Sending Weather Data to Google Chat Using Pabbly Connect

With the weather data fetched, the next task is to send this information to Google Chat. In your workflow, click on the plus icon to add a new step and search for Google Chat. Select the action event as ‘Create a Message’. using Pabbly Connect

  • Click on the connect button to link your Google Chat account.
  • Provide the chat webhook URL that you can find in your Google Chat space settings.

Once connected, you can compose your message, including the weather details. Map the temperature, sky condition, wind speed, humidity, and other relevant data from the previous step. After mapping the necessary fields, click on ‘Save and Send Test Request’ to verify that your message is sent successfully to Google Chat.


5. Finalizing the Automation in Pabbly Connect

After successfully testing the connection, your automation is now set up. The workflow will automatically fetch and send the daily weather forecast to your designated Google Chat space at the specified time. You only need to set this up once, and it will run daily without any further input. using Pabbly Connect

To conclude, you can clone the workflow link provided in the description to use it in your own Pabbly Connect account. This automation saves time and ensures you stay updated on the weather conditions without manual checks.

Conclusion

This guide summarizes the key points and helps you understand the essential features and benefits of using this tool.

Ensure you check out Pabbly Connect to create business automation workflows and reduce manual tasks. Pabbly Connect currently offer integration with 2,000+ applications.


In summary, using Pabbly Connect to automate the sharing of daily weather forecasts to Google Chat streamlines your workflow and keeps you informed effortlessly. By following these steps, you can easily implement this useful integration.

How to Add New Microsoft Outlook Emails to Google Sheets Using Pabbly Connect

Learn how to automate adding new Microsoft Outlook emails to Google Sheets using Pabbly Connect in this step-by-step tutorial. Transform complex automation concepts into accessible, actionable steps that eliminate unnecessary manual work while maximizing existing application capabilities.

Watch Step By Step Video Tutorial Below


1. Overview of Pabbly Connect for Email Integration

Pabbly Connect is a powerful automation tool that enables seamless integration between Microsoft Outlook and Google Sheets. By utilizing Pabbly Connect, users can automate the process of transferring new emails from Microsoft Outlook directly into Google Sheets, making email management more efficient.

This tutorial will guide you through the exact steps to set up this integration using Pabbly Connect. The process eliminates the need for manual data entry, allowing you to focus on more important tasks.


2. Creating a Workflow in Pabbly Connect

To begin, access the Pabbly Connect dashboard after logging in. Click on the ‘Create Workflow’ button to start a new automation process. You will need to name your workflow, for example, ‘Ms Outlook to Google Sheets,’ and then click the ‘Create’ button.

Once your workflow is created, you will see two main modules: Trigger and Action. The Trigger module will initiate the workflow, while the Action module will define what happens when the trigger occurs. Select Microsoft Outlook as your trigger application and choose the event ‘New Email’.


3. Connecting Microsoft Outlook to Pabbly Connect

In the Trigger module, after selecting Microsoft Outlook, click on the ‘Connect’ button. You will be prompted to add a new connection. Select ‘Connect with Microsoft 365’ and log in with your Microsoft account. Grant the necessary permissions to Pabbly Connect to access your Outlook emails.

Once connected, you can use the ‘Save and Send Test Request’ button to fetch the most recent email data from your inbox. This step is crucial as it ensures that Pabbly Connect can retrieve email information such as the subject and sender’s address.


4. Setting Up Google Sheets in Pabbly Connect

Next, you need to set up Google Sheets as the action application. In the Action module, select Google Sheets and choose the event ‘Add New Row’. Click on the ‘Connect’ button and sign in with your Google account to allow Pabbly Connect access to your Google Sheets.

After connecting, select the spreadsheet where you want the email data to be stored. Map the relevant fields such as the sender’s name, email address, subject, and message body from the previous step. This mapping is essential for ensuring that the correct data is transferred to the appropriate columns in your Google Sheets.

  • Map the sender’s name to the corresponding column.
  • Map the sender’s email address to the email column.
  • Map the subject line to the subject column.
  • Map the email body to the message column.

After mapping the fields, click on ‘Save and Send Test Request’ to verify that the data is correctly sent to your Google Sheets. If successful, you will see the new email data reflected in your spreadsheet.


5. Completing the Automation Process

Once the integration is set up, you only need to configure it once. With Pabbly Connect, your workflow will run automatically every time you receive a new email in Microsoft Outlook. This means you don’t have to manually check or update your Google Sheets.

To finalize, you can test the workflow by sending a new email to your Outlook account and confirming that it appears in your Google Sheets. This automation saves time and helps keep your email data organized efficiently.


Conclusion

In this tutorial, we explored how to use Pabbly Connect to automate the process of adding new Microsoft Outlook emails to Google Sheets. By following the steps outlined, you can streamline your email management and enhance productivity without manual effort. Start using Pabbly Connect today to simplify your workflows!

Ensure you check out Pabbly Connect to create business automation workflows and reduce manual tasks. Pabbly Connect currently offer integration with 2,000+ applications.

How to Send Discord Messages When New Google Docs are Created Using Pabbly Connect

Learn how to send Discord messages when new Google Docs are created using Pabbly Connect. Follow this detailed tutorial for seamless integration. Explore systematic approaches to creating efficient automation solutions that convert technical concepts into practical, implementable instructions.

Watch Step By Step Video Tutorial Below


1. Accessing Pabbly Connect for Google Docs and Discord Integration

To start the integration process, you need to access Pabbly Connect. This platform allows you to automate workflows between Google Docs and Discord seamlessly. Begin by signing in to your Pabbly Connect account.

Once logged in, you’ll be directed to the dashboard where you can create a new workflow. Click on the big blue button labeled ‘Create Workflow’ to initiate the automation process.


2. Setting Up the Trigger with Google Docs in Pabbly Connect

The first step in this automation is to set up the trigger application, which will be Google Docs. In Pabbly Connect, select Google Docs as your trigger application and choose the event as ‘New Document in Folder’. This is essential for detecting when a new document is created. using Pabbly Connect

  • Select ‘Google Docs’ as the trigger application.
  • Choose ‘New Document in Folder’ as the trigger event.
  • Connect your Google account to allow access.
  • Select the folder where new documents will be created.

After connecting your Google account, click on ‘Save and Send Test Request’. Ensure that you have already created a new document in the designated folder to test this trigger.


3. Creating a New Document in Google Docs

To proceed, you need to create a new document in Google Docs, which will serve as the trigger for the integration. Click on ‘New Document’, give it a name like ‘General Ideas’, and add some content. using Pabbly Connect

Once your document is created and saved, return to Pabbly Connect and click on ‘Save and Send Test Request’. This action will fetch the details of the newly created document, including the document link, which will be used in the next step.


4. Setting Up the Action to Send Messages on Discord

With the trigger set up, the next step involves configuring the action application, which is Discord. In Pabbly Connect, select Discord and choose ‘Send Channel Message’ as the action event. This will allow you to send a message to a specific Discord channel whenever a new document is created. using Pabbly Connect

  • Select ‘Discord’ as the action application.
  • Choose ‘Send Channel Message’ as the action event.
  • Connect your Discord account using a webhook URL.
  • Specify the channel where you want to send the message.

After configuring the Discord action, draft your message. For example, you can write, ‘A new Google file has been uploaded. Please check and fill in your ideas,’ followed by the document link. Click ‘Save and Send Test Request’ to send the message to your Discord channel.


5. Finalizing the Integration and Testing

After setting up both the trigger and action, it’s crucial to test the entire integration process. Ensure that the message appears in your selected Discord channel as expected. If everything is configured correctly, you should see the message indicating that a new Google file has been uploaded.

In case of any issues, double-check your configurations in Pabbly Connect and ensure that the webhook URL in Discord is set up correctly. This integration not only helps in sending messages but also enhances collaboration among team members.


Conclusion

In this tutorial, we explored how to use Pabbly Connect to send Discord messages whenever a new Google Doc is created. This integration streamlines communication and keeps your team informed effortlessly.

Ensure you check out Pabbly Connect to create business automation workflows and reduce manual tasks. Pabbly Connect currently offer integration with 2,000+ applications.

How to Send SMS for New Outlook Calendar Events Using Pabbly Connect

Learn to integrate Outlook and Twilio using Pabbly Connect to send SMS notifications for new Outlook Calendar events. Follow this step-by-step guide for seamless automation.

Watch Step By Step Video Tutorial Below


1. Setting Up Pabbly Connect for Outlook Calendar Events

To send SMS notifications for new Outlook Calendar events, start by accessing Pabbly Connect. This powerful automation platform allows you to seamlessly integrate various applications, including Outlook and Twilio.

Begin by signing into your Pabbly Connect account. Once logged in, click on the ‘Create Workflow’ button. Name your workflow, for example, ‘Send SMS for New Outlook Calendar Events,’ and click on ‘Create’ to proceed.


2. Configuring the Trigger for New Calendar Events

In this step, you will set up the trigger for your workflow. The trigger application will be Microsoft 365, and the event will be a new calendar event. Choose Microsoft 365 as your trigger app within Pabbly Connect.

  • Select ‘New Calendar Event’ as the event type.
  • Click on ‘Connect’ and then ‘Add New Connection’ to link your Microsoft Office 365 account.
  • Authorize access to Pabbly Connect by scrolling down and clicking ‘Yes’.

Once authorized, you can select the calendar you want to work with. After selecting your calendar, create a test event in your Outlook Calendar to ensure that Pabbly Connect can fetch the details. Save your settings before proceeding to the next step.


3. Fetching Contact Details Using Google Contacts

After successfully setting up the trigger, the next step involves fetching the contact details of the attendees from Google Contacts. This is crucial for sending SMS notifications through Twilio.

In Pabbly Connect, add a new action step and select Google Contacts as the application. Choose the ‘Search Contact’ action event. You will need to connect your Google account to Pabbly Connect to access your contacts.

  • Enter the email address of the attendee to search for their contact number.
  • Map the email address from the previous step to find the corresponding contact.
  • Click on ‘Save and Send Test Request’ to verify that the contact details are fetched successfully.

Once you have the contact number, you can proceed to format the event date and time for your SMS notification.


4. Formatting Date and Sending SMS via Twilio

Now that you have the contact number, the next step is to format the event date and time for clarity in your SMS notification. Use the ‘Format Date’ action in Pabbly Connect to achieve this.

Map the start date from the previous step and choose a simple format for the date and time. Once formatted, proceed to set up Twilio for sending the SMS notification.

Add Twilio as the action application in Pabbly Connect. Connect your Twilio account by entering your Account SID and Auth Token. Map the sender’s number (your Twilio number) and the recipient’s number (contact number from Google Contacts).

Finally, frame the body of your SMS message and click on ‘Save and Send Test Request’ to send the SMS. Verify that the SMS is received to confirm that the integration is working perfectly.


5. Conclusion

In this tutorial, we explored how to use Pabbly Connect to send SMS notifications for new Outlook Calendar events. By integrating Microsoft 365 and Twilio, you can automate reminders efficiently.

Ensure you check out Pabbly Connect to create business automation workflows and reduce manual tasks. Pabbly Connect currently offer integration with 2,000+ applications.

Check out Pabbly Connect – Automate your business workflows effortlessly! Sign Up Free – Start your journey with ease! 10,000+ Video Tutorials – Learn step by step! Join Pabbly Facebook Group – Connect with 21,000+ like minded people!

This step-by-step guide demonstrated the entire process, ensuring that you can replicate it easily. With Pabbly Connect, you can streamline your workflows and enhance productivity by automating notifications seamlessly.