Integrate Slack Channel Messages to Notion with Pabbly Connect: A Step-by-Step Guide

Learn how to automate Slack channel messages to Notion using Pabbly Connect. This detailed tutorial provides step-by-step instructions for seamless integration. Follow this definitive guide to creating powerful automated workflows with straightforward, efficiency-focused solutions that save valuable time.

Watch Step By Step Video Tutorial Below


1. Setting Up Pabbly Connect for Slack and Notion Integration

To automate Slack channel messages to Notion, start by accessing Pabbly Connect. This platform allows you to create workflows that connect multiple applications seamlessly. After logging into your Pabbly Connect account, you can create a new workflow by clicking on the ‘Create Workflow’ button.

Provide a name for your workflow, such as ‘Get Slack Channel Messages to Notion’. Once named, click on the ‘Create’ button to proceed. You will see two boxes representing the Trigger and Action, which are essential components of your automation.


2. Selecting Trigger Applications: Slack

In this step, you will set Slack as the trigger application in Pabbly Connect. Choose the trigger event as ‘New Message’ to capture messages posted in a specific Slack channel. Click on ‘Connect’ to link your Slack account with Pabbly Connect.

  • Choose ‘Add New Connection’ and select ‘Connect with Slack’.
  • Select the token type as ‘User’ for sending channel messages.
  • Authorize the connection by clicking ‘Allow’.

After connecting, you will see a list of available Slack channels. Select the channel you want to monitor for new messages, such as the ‘Family Team’ channel. Once selected, Pabbly Connect will capture the latest message from that channel automatically.


3. Capturing Slack Messages in Pabbly Connect

Now that Slack is set up as your trigger, it’s time to capture the messages. After posting a new message in your selected Slack channel, return to Pabbly Connect and click on the ‘Get Data’ button. This will fetch the most recent message details, including the content, channel name, and timestamp.

For example, if you posted ‘Team, we were testing some new kind of videos on our channel from last month,’ this message will be visible in Pabbly Connect. Every 10 minutes, Pabbly Connect checks for new data, ensuring that your Notion database stays updated with the latest Slack messages.


4. Setting Up Notion as the Action Application

With the Slack messages captured, the next step is to set Notion as the action application in Pabbly Connect. Choose the action event as ‘Create Database Item’ to save the Slack messages in Notion. Click on ‘Connect with Notion’ to link your Notion account.

  • Authorize Pabbly Connect to access your Notion pages.
  • Select the database where you want to store the messages.
  • Map the fields from Slack to the Notion database, including message content, channel name, and timestamp.

By mapping these fields, you ensure that every new message from Slack is automatically added to your Notion database, providing a comprehensive record of all updates and activities.


5. Testing and Saving Your Workflow

After setting up both applications, it’s crucial to test your workflow in Pabbly Connect. Click on the ‘Save and Send Test Request’ button to verify that the messages are correctly added to your Notion database. If successful, you will see the message details reflected in Notion.

Once tested, save your workflow to ensure it runs automatically. From now on, every time a message is posted in your selected Slack channel, it will be captured and stored in Notion without any further manual input. This automation allows you to focus on more important tasks while Pabbly Connect handles the message tracking for you.


Conclusion

Integrating Slack channel messages to Notion using Pabbly Connect streamlines your workflow and ensures all important updates are recorded automatically. By following this detailed tutorial, you can set up an efficient automation process that enhances productivity and keeps your team informed.

Ensure you check out Pabbly Connect to create business automation workflows and reduce manual tasks. Pabbly Connect currently offer integration with 2,000+ applications.

How to Create Trello Cards for New Mailchimp Subscribers Using Pabbly Connect

Learn how to automate the creation of Trello cards for new Mailchimp subscribers using Pabbly Connect. Follow our step-by-step guide for seamless integration. Implement the precise methodologies leading organizations use to automate repetitive tasks, illustrated with practical examples designed for immediate application.

Watch Step By Step Video Tutorial Below


1. Setting Up Pabbly Connect for Mailchimp and Trello Integration

To create Trello cards for new Mailchimp subscribers, start by accessing Pabbly Connect. This powerful automation tool will enable the integration between Mailchimp and Trello seamlessly. First, sign up for a free account on Pabbly Connect and log into your dashboard.

Once on the dashboard, click on ‘Create Workflow’. Name your workflow, for instance, ‘Mailchimp to Trello’ and click on ‘Create’. This sets the stage for the automation where Mailchimp acts as the trigger and Trello as the action.


2. Connecting Mailchimp to Pabbly Connect

In this section, we will connect Mailchimp to Pabbly Connect. In the trigger window, select Mailchimp as the app. Next, choose the trigger event as ‘New Subscriber’. This event will notify Pabbly Connect whenever a new subscriber is added to your Mailchimp account.

  • Search for Mailchimp in the app selection.
  • Select the trigger event as New Subscriber.
  • Copy the webhook URL provided by Pabbly Connect.

After copying the webhook URL, go to your Mailchimp account dashboard. Navigate to the ‘Audience’ section, select ‘Manage Audience’, and then click on ‘Settings’. From there, find the ‘Webhooks’ option to add the copied URL. This step is crucial as it allows Mailchimp to send subscriber data to Pabbly Connect.


3. Adding the Webhook in Mailchimp

Now that you have the webhook URL, it’s time to add it to Mailchimp. In the Webhooks section, click on ‘Create New Webhook’. Paste the webhook URL in the callback URL field and select the events you want to track, specifically ‘Subscribe’. using Pabbly Connect

  • Enable updates for subscriber actions such as adding a new subscriber.
  • Click on ‘Save’ to finalize the webhook setup.

Once saved, Pabbly Connect will start receiving data from Mailchimp every time a new subscriber is added. Click on the ‘Recapture Webhook Response’ button in Pabbly Connect to test this connection.


4. Creating a Trello Card from Mailchimp Subscriber Data

With Mailchimp connected, the next step is to set up Trello in Pabbly Connect. In the action window, search for Trello and select it as your action app. Choose the action event ‘Create Card’.

After selecting the action event, you need to connect your Trello account to Pabbly Connect. You will be prompted to enter your Trello username, API key, and API token. Follow the instructions provided in Pabbly Connect to retrieve these details from your Trello account.

Log into Trello and navigate to the API section to get your API key. Generate a token to authorize Pabbly Connect. Enter all required fields in Pabbly Connect.

Once connected, select the board where you want to create a new card. Map the subscriber’s name and other details from Mailchimp to the card fields in Trello. This ensures that every new subscriber creates a Trello card with relevant information.


5. Testing the Integration

Now it’s time to test the integration. Go back to Mailchimp, create a new subscriber using the signup form, and submit it. Pabbly Connect will capture this new subscriber’s information and create a Trello card automatically.

Check your Trello board to verify that the new card has been created successfully. The card should include the subscriber’s name and any other mapped details from Mailchimp. This confirms that the automation is functioning as intended.

By using Pabbly Connect, you can efficiently manage your leads and tasks, ensuring that every new Mailchimp subscriber is tracked in Trello without manual input.


Conclusion

In this tutorial, we explored how to use Pabbly Connect to create Trello cards for new Mailchimp subscribers automatically. This integration streamlines your workflow, allowing you to focus on nurturing your leads effectively. Start automating your processes today with Pabbly Connect!

Ensure you check out Pabbly Connect to create business automation workflows and reduce manual tasks. Pabbly Connect currently offer integration with 2,000+ applications.

Create OneNote Notes from New Google Drive Files with Pabbly Connect

Learn how to automate creating OneNote notes from new files added to Google Drive using Pabbly Connect. Step-by-step tutorial with detailed instructions. Learn to create powerful connections between your critical applications without requiring specialized programming knowledge or extensive technical background.

Watch Step By Step Video Tutorial Below


1. Setting Up Pabbly Connect for Google Drive and OneNote Integration

To create OneNote notes from new files added to Google Drive, you first need to access Pabbly Connect. This platform enables seamless integration between various applications. Start by signing in to your Pabbly Connect account.

Once logged in, navigate to the dashboard. Here, you will see previous workflows and the option to create a new one. Click on the blue button labeled ‘Create Workflow’ to begin the setup process for your automation.


2. Creating the Workflow in Pabbly Connect

After clicking ‘Create Workflow’, you will be prompted to name your workflow. For this integration, name it ‘Create OneNote Notes from New Files Added to Google Drive’. This name helps in easily identifying the purpose of the workflow later.

With the workflow created, you will now set up the trigger event. The trigger is the event that starts the automation. In this case, choose Google Drive as the application and select the event as ‘New File in Specific Folder’. This tells Pabbly Connect to monitor a specific folder in Google Drive for any new files added.


3. Connecting Google Drive to Pabbly Connect

Next, you need to connect your Google Drive account. Click on ‘Add New Connection’, and you will be prompted to sign in with your Google account. Make sure to allow access for Pabbly Connect to monitor your Google Drive. using Pabbly Connect

Once connected, select the specific folder where new files will be uploaded. This folder is crucial as it defines where Pabbly Connect will look for new files. After selecting the folder, click on ‘Save and Send Test Request’ to ensure the connection is working correctly. This step will retrieve data from the newly uploaded file, confirming that the integration is set up properly.


4. Creating Notes in OneNote Using Pabbly Connect

After successfully connecting Google Drive, the next step is to set up the action application. Choose OneNote as the action application and select the event ‘Create HTML Note in Section’. This action will create a new note in OneNote every time a new file is detected in your specified Google Drive folder. using Pabbly Connect

Now, connect your OneNote account by clicking on ‘Add New Connection’. Grant Pabbly Connect the necessary permissions to access your OneNote. Once connected, you will need to specify the notebook and section where the note should be created. Fill in the required fields such as the title and content for the note using the data retrieved from Google Drive.


5. Finalizing the Automation and Testing

To finalize your automation, you will need to set the title of the note based on the name of the uploaded file and include relevant content. Use the formatting options provided by Pabbly Connect to structure the content correctly. using Pabbly Connect

After completing the setup, click on ‘Save and Send Test Request’ once more to verify that the note is created successfully in OneNote. Check your OneNote application to see if the note appears with the correct title and content. This confirms that your integration is working as intended, automating the process of creating notes from new files added to Google Drive.


Conclusion

By utilizing Pabbly Connect, you can efficiently automate the creation of OneNote notes from new files added to Google Drive. This integration streamlines your workflow and ensures that all new submissions are documented promptly and accurately.

Ensure you check out Pabbly Connect to create business automation workflows and reduce manual tasks. Pabbly Connect currently offer integration with 2,000+ applications.

Integrate Google Drive with Google Tasks Using Pabbly Connect

Learn how to automate task creation in Google Tasks for new files in Google Drive using Pabbly Connect. Follow this detailed tutorial for seamless integration.

Watch Step By Step Video Tutorial Below


1. Setting Up Pabbly Connect for Google Drive and Google Tasks

To begin integrating Google Drive with Google Tasks, first, access Pabbly Connect. This platform allows you to automate the process of creating tasks in Google Tasks whenever a new file is uploaded to Google Drive. Start by signing into your Pabbly Connect account.

After logging in, navigate to the dashboard. Click on the ‘Create Workflow’ button to initiate a new workflow. Name your workflow appropriately, for example, ‘Add Google Task for New Files in Google Drive’, and click on ‘Create’ to proceed.


2. Configuring the Trigger in Pabbly Connect

In this step, you will set the trigger for your workflow. Select Google Drive as your trigger application. The specific trigger event you need to choose is ‘New File’. This event will initiate the workflow whenever a new file is uploaded to Google Drive. using Pabbly Connect

  • Select Google Drive as the trigger application.
  • Choose ‘New File’ as the trigger event.
  • Click on ‘Connect’ to establish a connection with your Google account.

After clicking ‘Connect’, you will need to authorize Pabbly Connect to access your Google Drive. Follow the prompts to select your Google account and grant the necessary permissions.


3. Uploading a File to Test the Integration

With the trigger configured, it’s time to test the integration. Go to your Google Drive and upload a new file, such as a PDF document. After uploading, return to Pabbly Connect and click on ‘Save and Send Test Request’. This action will verify that the new file trigger works correctly. using Pabbly Connect

Once the test request is sent, you should see the details of the uploaded file reflected in Pabbly Connect. This includes the file name and the date it was created, which is crucial for setting the due date for the task in Google Tasks.


4. Creating a Task in Google Tasks via Pabbly Connect

After confirming that the trigger works, the next step is to set up the action in Pabbly Connect. Select Google Tasks as your action application and choose the ‘Create Task’ action event. This will allow you to create a task in Google Tasks based on the uploaded file. using Pabbly Connect

  • Select Google Tasks as the action application.
  • Choose ‘Create Task’ as the action event.
  • Connect to your Google account again to authorize access.

In the task creation setup, fill in the task title, description, and due date. Ensure that you map the due date correctly based on the file creation date plus any additional days you want to set. Click ‘Save and Send Test Request’ to create the task and confirm everything is working as intended.


5. Verifying the Task Creation in Google Tasks

To finalize the process, check your Google Tasks to see if the task has been created successfully. You should find the task with the title and description you set, along with the due date reflecting the additional days you specified.

This integration allows for seamless task management, ensuring that every new file uploaded to Google Drive automatically generates a corresponding task in Google Tasks. With the help of Pabbly Connect, this process is not only efficient but also saves time.


Conclusion

In this tutorial, we explored how to automate task creation in Google Tasks for new files uploaded in Google Drive using Pabbly Connect. This integration enhances productivity by ensuring tasks are created automatically, streamlining your workflow effectively.

Ensure you check out Pabbly Connect to create business automation workflows and reduce manual tasks. Pabbly Connect currently offer integration with 2,000+ applications.

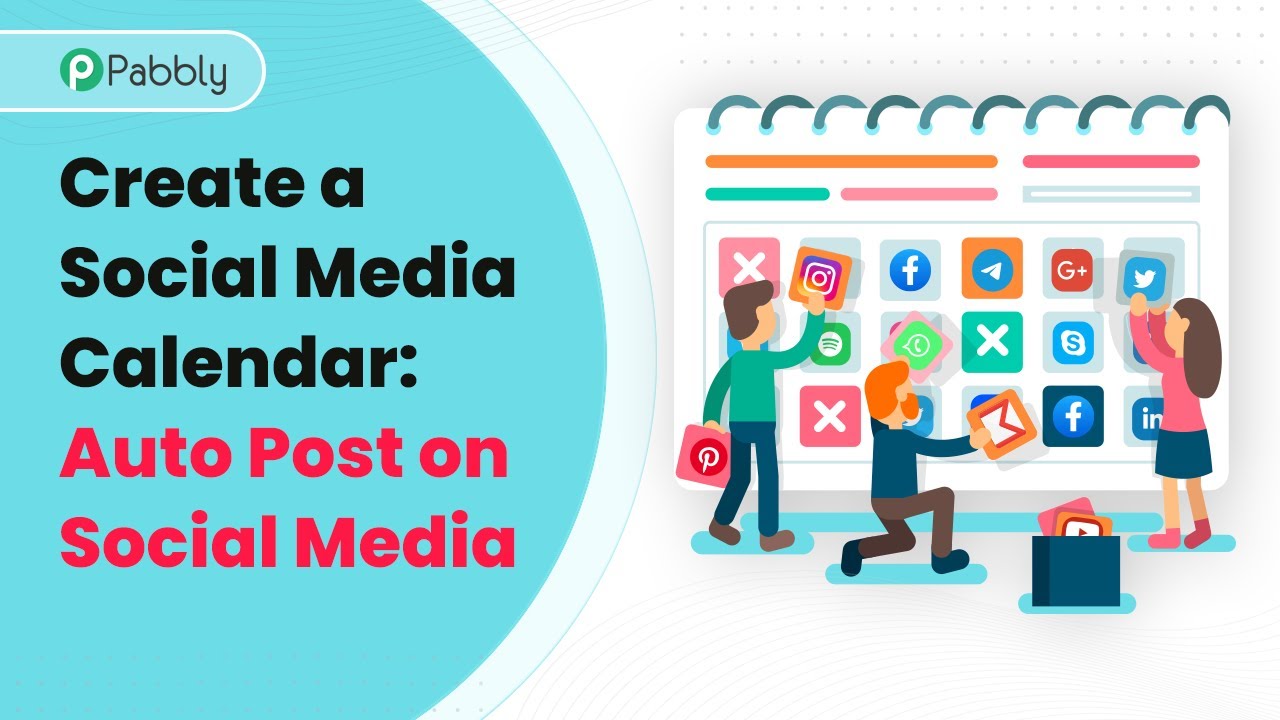
How to Auto Post on Social Media using Google Sheets and Pabbly Connect

Learn how to automate your social media posting using Google Sheets and Pabbly Connect. This step-by-step tutorial covers integration with Facebook, Instagram, and more. Navigate the automation landscape confidently with clear, structured guidance suitable for professionals regardless of prior technical experience.

Watch Step By Step Video Tutorial Below


1. Accessing Pabbly Connect for Social Media Automation

To start automating your social media posts, first access Pabbly Connect by visiting the Pabbly website. This platform will serve as the central hub for integrating Google Sheets with various social media platforms.

Once on the website, you can either sign in if you are an existing user or sign up to create a new account. Signing up is quick and provides you with 100 free tasks to explore the features. After logging in, navigate to the Pabbly Connect dashboard to begin creating your workflow.


2. Creating a Workflow in Pabbly Connect

In the Pabbly Connect dashboard, click on the ‘Create Workflow’ button. Name your workflow appropriately, such as ‘Google Sheets Social Media Calendar Automation’. This name will help you identify the workflow later.

After naming your workflow, you will see options for setting up triggers and actions. For this integration, you will set a trigger to schedule the workflow to run daily. Use the scheduling feature in Pabbly Connect to specify the desired time for your workflow to check for new posts.

  • Click on ‘Schedule’ to set the frequency of the workflow.
  • Choose to run the workflow every day at a specific time.
  • Save your settings to confirm the schedule.

After setting up the trigger, you will proceed to configure the action steps that will fetch data from your Google Sheets and post it on your social media platforms.


3. Fetching Data from Google Sheets

The next step involves configuring Pabbly Connect to fetch data from your Google Sheets. You will need to connect your Google Sheets account to Pabbly Connect and specify which spreadsheet to pull data from.

Choose the action event as ‘Look Up Spreadsheet Rows’ and connect to your Google Sheets account. Once connected, select the spreadsheet that contains your social media calendar and specify the column that holds the dates for the posts.

  • Select the spreadsheet named ‘Social Media Calendar’.
  • Set the lookup column to the date column in your sheet.
  • Ensure to include headers in your response for clarity.

After fetching the data, you will configure Pabbly Connect to delay the workflow until the correct posting time.


4. Delaying and Filtering Posts

Once the data is fetched, you will need to add a delay step in Pabbly Connect. This delay will ensure that the workflow waits until the specified date and time to post the content. Use the ‘Delay Until’ feature and map the date and time from the fetched data.

After setting the delay, add a filter to check if the date exists in the Google Sheets data. This filter ensures that the workflow only continues if there is content to post on that date.

Set the filter to check if the date exists. If the date does not exist, the workflow will stop.

With the delay and filter set up, your workflow is now ready to post on social media platforms.


5. Posting to Social Media Platforms

The final step involves using Pabbly Connect to post the content to your desired social media platforms such as Instagram, Facebook, and Pinterest. For each platform, select the appropriate action event, such as ‘Publish Photo’ for Instagram.

Connect your social media accounts to Pabbly Connect and map the necessary fields, including the photo URL and caption from your Google Sheets data. After configuring each social media platform, test the workflow to ensure that posts are successfully made.

Connect to Instagram, Facebook, and Pinterest one by one. Map the photo URL and caption for each post. Test each connection to ensure successful posting.

Once everything is configured, your automation will allow for seamless posting to multiple platforms based on your Google Sheets calendar.


Conclusion

In this tutorial, we explored how to use Pabbly Connect to automate social media posting using a Google Sheets social media calendar. By following these steps, you can efficiently manage your social media content and ensure timely posts across various platforms.

Ensure you check out Pabbly Connect to create business automation workflows and reduce manual tasks. Pabbly Connect currently offer integration with 2,000+ applications.

Utilizing Pabbly Connect not only simplifies the posting process but also saves valuable time, allowing you to focus on creating engaging content for your audience.

How to Create HubSpot Tasks from New Zendesk Tickets Using Pabbly Connect

Learn how to automate the creation of HubSpot tasks from new Zendesk tickets using Pabbly Connect. Streamline your customer support workflow effortlessly. Revolutionize your productivity approach with just a few strategic clicks. Uncover professional methods for connecting applications and creating workflows that reclaim hours of your week.

Watch Step By Step Video Tutorial Below


1. Accessing Pabbly Connect for Integration

To create HubSpot tasks from new Zendesk tickets, you need to access Pabbly Connect. Start by visiting the Pabbly Connect landing page and signing up for a free account. This platform allows you to automate tasks without any coding experience.

Once signed in, navigate to the Pabbly Connect dashboard. Click on the ‘Create Workflow’ button, and give your workflow a name, such as ‘Create HubSpot Tasks from New Zendesk Tickets’. This will set the stage for integrating your applications seamlessly.


2. Setting Up the Trigger Event in Pabbly Connect

In this step, you will set up the trigger event using Pabbly Connect. Select Zendesk as your trigger application and choose the trigger event as ‘New Ticket’. This action will initiate the workflow whenever a new ticket is created in Zendesk.

  • Choose Zendesk as the trigger application.
  • Select the trigger event ‘New Ticket’.
  • Copy the provided webhook URL for the next step.

After selecting the trigger event, follow the instructions to create a connection with Zendesk. This involves pasting the webhook URL into the Zendesk settings to capture ticket data. Once the connection is established, you can test it to ensure that the data is flowing correctly.


3. Creating a Webhook in Zendesk

Now, you need to create a webhook in Zendesk using Pabbly Connect. In your Zendesk account, navigate to the ‘Apps and Integrations’ section and find the Webhooks option. Click on ‘Create Webhook’ and input the necessary details.

  • Select ‘Trigger or Automation’ to set up the webhook.
  • Paste the copied webhook URL into the endpoint URL field.
  • Set the request method to ‘POST’ and the format to ‘JSON’.

After setting up the webhook, test the connection to ensure it captures the ticket data correctly. This step is crucial for the workflow to function seamlessly between Zendesk and HubSpot through Pabbly Connect.


4. Configuring HubSpot Action in Pabbly Connect

With the trigger set, it’s time to configure the action in HubSpot using Pabbly Connect. In the action step, select HubSpot and choose the action event ‘Create a Task Engagement’. This will allow you to create tasks in HubSpot based on the new tickets received from Zendesk.

Connect your HubSpot account by selecting ‘Add New Connection’. Once connected, you will need to map the ticket data to the task fields in HubSpot. For example, use the ticket title as the task subject and the ticket description as the task body.


5. Finalizing and Testing the Integration

Once you have mapped the fields, click on the ‘Save and Send Test Request’ button in Pabbly Connect. This action will send a test task to HubSpot based on the ticket data captured from Zendesk. Refresh your HubSpot tasks section to see if the new task appears.

If everything is set up correctly, you should see a new task created in HubSpot with the relevant details from the Zendesk ticket. This confirms that your integration is working flawlessly. After this initial setup, the automation will run continuously, creating tasks for every new ticket generated in Zendesk.


Conclusion

By following these steps, you can effectively automate the creation of HubSpot tasks from new Zendesk tickets using Pabbly Connect. This integration streamlines your customer support process, ensuring that no ticket goes unnoticed and improving your team’s productivity.

Ensure you check out Pabbly Connect to create business automation workflows and reduce manual tasks. Pabbly Connect currently offer integration with 2,000+ applications.

How to Use Webhooks in Pabbly Connect: A Comprehensive Guide

Learn how to effectively use webhooks in Pabbly Connect to integrate applications like Facebook, YouTube, and Box for seamless automation. Revolutionize your productivity approach with just a few strategic clicks. Uncover professional methods for connecting applications and creating workflows that reclaim hours of your week.

Watch Step By Step Video Tutorial Below


1. Understanding Webhooks in Pabbly Connect

Webhooks are essential for real-time communication between applications. In Pabbly Connect, webhooks allow seamless integration, enabling different services to share data instantly. This functionality acts like notifications triggered by specific events.

By utilizing webhooks within Pabbly Connect, users can automate workflows efficiently. This tutorial will guide you through the steps to set up webhooks effectively, ensuring you can connect various applications like Facebook, YouTube, and Box.


2. Creating a Workflow in Pabbly Connect

To start using webhooks in Pabbly Connect, first, create a workflow. Click on the ‘Create Workflow’ button from the dashboard. You will be prompted to name your workflow before proceeding.

  • Click on the ‘Create Workflow’ button.
  • Enter a suitable name for your workflow.
  • Click on the ‘Create’ button to proceed.

Once created, you will see the workflow page loading. Here, you need to select a trigger application, which will initiate the workflow. In this case, choose the ‘Webhook’ option as your trigger to start the integration process.


3. Configuring the Webhook URL in Pabbly Connect

After selecting the ‘Webhook’ trigger in Pabbly Connect, a unique webhook URL will be generated. This URL is crucial for receiving data from the source application. Copy this URL as you will need it to set up the integration.

For example, if you want to connect a Jotform application, navigate to your Jotform dashboard. Select the form you want to integrate and go to the ‘Form Settings’. From there, locate the ‘Integrations’ option and search for ‘Webhooks’. Paste the copied webhook URL into the designated field and complete the integration.


4. Testing the Integration with Pabbly Connect

Once the webhook URL is set up, it’s essential to test the integration. Fill out the Jotform with demo data and submit the form. This action will send the data to Pabbly Connect, where you can verify if it has been captured successfully.

  • Open your Jotform and enter the demo details.
  • Click on the submit button to send the data.
  • Check the response section in Pabbly Connect to see the captured data.

After submission, you should see the data reflected in the workflow response. This confirms that your integration is functioning as intended.


5. Troubleshooting Webhook Issues in Pabbly Connect

If you encounter any issues with the webhook URL in Pabbly Connect, you can troubleshoot by recapturing the response. Copy the webhook URL and click on ‘Recapture’ in your workflow. This will allow you to check if the integration is working correctly.

To test the webhook, paste the URL into a new browser tab, add a question mark at the end, and create key-value pairs to send data. For instance, you can send your name and age as follows: ‘?name=YourName&age=YourAge’. Press enter, and you should see a success message indicating that the response was accepted.


Conclusion

In conclusion, using webhooks in Pabbly Connect simplifies the integration of applications like Facebook, YouTube, and Box. By following this tutorial, you can set up and troubleshoot webhooks effectively to enhance your automation workflows.

Ensure you check out Pabbly Connect to create business automation workflows and reduce manual tasks. Pabbly Connect currently offer integration with 2,000+ applications.

How to Enable Two-Step Verification inside Pabbly Connect

Learn how to enable two-step verification in Pabbly Connect for enhanced security. Follow our detailed tutorial for step-by-step instructions using Google Authenticator. This comprehensive guide reveals exactly how to connect your applications and automate repetitive tasks — accessible for professionals of all technical backgrounds.

Watch Step By Step Video Tutorial Below


1. Accessing Pabbly Connect for Two-Step Verification

To enhance security, you can enable two-step verification in Pabbly Connect. Start by logging into your Pabbly account and navigating to the account section. This is essential for securing your Pabbly Connect access.

Once in the account section, go to the ‘Password and Security’ settings. Here, you’ll find the option for two-step verification. Click on the enable button to begin the setup process.


2. Enabling Two-Step Verification in Pabbly Connect

After clicking the enable button in Pabbly Connect, you will be prompted to enter your account email and password. This step is crucial for confirming your identity before proceeding with the verification setup.

  • Enter your Pabbly account email.
  • Input your Pabbly account password.
  • Click on the confirm button to proceed.

Once confirmed, you will see the setup screen for two-step verification. This is where you will set up how you will receive your verification codes, which is essential for securing your account.


3. Using Google Authenticator with Pabbly Connect

To receive verification codes, you will need an authentication app. In this tutorial, we will use Google Authenticator. Ensure you have this app installed on your mobile device to proceed with Pabbly Connect.

Open the Google Authenticator app and prepare to scan the QR code displayed in your Pabbly Connect account. This QR code is essential for linking your Google Authenticator to your Pabbly account.

  • Scan the QR code displayed in Pabbly Connect.
  • Receive the verification code from Google Authenticator.
  • Enter the verification code back in Pabbly Connect.

After entering the code, click on the confirm button. This finalizes the two-step verification setup, enhancing your account security in Pabbly Connect.


4. Logging In with Two-Step Verification in Pabbly Connect

Now that two-step verification is enabled, every time you log in to your Pabbly Connect account, you will be required to enter a verification code. This process significantly increases your account’s security.

When you attempt to log in, you will see a prompt requesting the verification code. This code will be sent to your Google Authenticator app, ensuring that only you can access your account.

Click on the login button to initiate the process. Enter the verification code from Google Authenticator. Click on verify code to complete the login.

This two-factor authentication process provides an additional layer of protection for your Pabbly Connect account, making it much harder for unauthorized users to gain access.


5. Disabling or Changing Your Authenticator in Pabbly Connect

If you need to disable two-step verification or change your authenticator app, you can easily do so within Pabbly Connect. This flexibility allows you to manage your account security effectively.

To disable two-step verification, simply navigate back to the password and security settings in your Pabbly account. Here, you will find the option to disable it. If you want to change the authenticator app, you can click on the ‘change’ button and follow the prompts to set up a new device.

Click on the disable button if you want to turn off two-step verification. Select the change option to switch to a new authenticator app. Confirm your choice to complete the process.

By managing your two-step verification settings in Pabbly Connect, you can ensure your account remains secure and adaptable to your needs.


Conclusion

Enabling two-step verification in Pabbly Connect enhances your account security significantly. By following the steps outlined above, you can ensure that your Pabbly account is protected with an additional layer of verification using Google Authenticator.

Ensure you check out Pabbly Connect to create business automation workflows and reduce manual tasks. Pabbly Connect currently offer integration with 2,000+ applications.

How to Send Thank You Emails to LinkedIn Leads Using Pabbly Connect

Learn how to automate sending thank you emails to LinkedIn leads using Pabbly Connect and Gmail integration step by step. Explore efficient methods for automating routine tasks with clear, concise instructions suited for both newcomers and experienced professionals.

Watch Step By Step Video Tutorial Below


1. Accessing Pabbly Connect for Integration

To automate sending thank you emails to LinkedIn leads, start by accessing Pabbly Connect. This integration platform allows you to connect various applications seamlessly, including LinkedIn and Gmail.

If you don’t have an account, you can create a free one in just two minutes by clicking the ‘Sign Up Free’ button. Once logged in, you will be directed to the Pabbly Connect dashboard, where you can begin setting up your automation.


2. Creating a Workflow in Pabbly Connect

Once in the dashboard of Pabbly Connect, click on the blue button labeled ‘Create Workflow’. You will be prompted to name your workflow. For this integration, you can name it ‘Send Thank You Email to LinkedIn Leads’ and then click on ‘Create’.

Next, you will see two boxes: Trigger and Action. The Trigger is what initiates the workflow, and the Action is what happens as a result. For this case, select ‘LinkedIn Lead Generation Form’ as the Trigger application and ‘Gmail’ as the Action application.


3. Setting Up the Trigger for LinkedIn Leads

In the Trigger section, choose ‘New Lead Generation Form Response’ from the options. Then click on ‘Connect’ and select ‘Add New Connection’. You will need to provide access to your LinkedIn account for Pabbly Connect to work properly.

After connecting, select the specific lead generation form you want to use, such as ‘Sample Lead Generation Form’. This form will be used to capture leads when they submit their information. Make sure to test this connection by submitting a dummy response to ensure everything is working correctly.

  • Select ‘New Lead Generation Form Response’ as the Trigger event.
  • Connect your LinkedIn account to Pabbly Connect.
  • Choose the specific lead generation form to capture responses.

After confirming the connection, you will see that the details from the form are captured successfully, confirming that Pabbly Connect is working correctly with LinkedIn.


4. Setting Up the Action to Send Emails via Gmail

Next, you will set up the Action to send an email via Gmail. In the Action section, select ‘Send Email’ as the Action event. Click on ‘Connect’ and provide access to your Gmail account through Pabbly Connect.

Once connected, you will need to fill in the necessary fields for the email. Map the recipient email address from the LinkedIn lead response to ensure the thank you email is sent to the correct person. You can also customize the email subject and content, including the lead’s name for personalization.

  • Choose ‘Send Email’ as the Action event.
  • Map the recipient’s email address from LinkedIn lead details.
  • Customize the email subject and content as needed.

After filling in all the required fields, click ‘Save and Send Test Request’ to verify that the email is sent successfully. You can check your Gmail account to confirm receipt of the thank you email.


5. Finalizing Your Pabbly Connect Integration

After testing the email functionality, your workflow is now complete. Every time someone submits the LinkedIn lead generation form, Pabbly Connect will automatically send a thank you email via Gmail without any manual effort.

This automation not only saves time but also ensures that every lead receives prompt acknowledgment. You can now relax knowing that Pabbly Connect is handling this task in the background, allowing you to focus on other aspects of your business.

For any issues or additional queries, you can visit the Pabbly Connect forum for support. Additionally, consider joining the Pabbly community on Facebook for the latest updates and unique automation ideas.


Conclusion

In summary, using Pabbly Connect to integrate LinkedIn leads with Gmail allows for seamless automation of thank you emails. This process enhances your lead engagement and saves valuable time, ensuring every lead is acknowledged promptly.

Ensure you check out Pabbly Connect to create business automation workflows and reduce manual tasks. Pabbly Connect currently offer integration with 2,000+ applications.

How to Create Trello Cards from New HubSpot Form Submissions Using Pabbly Connect

Learn how to automate the creation of Trello cards from new HubSpot form submissions using Pabbly Connect. Step-by-step tutorial for seamless integration. Revolutionize your productivity approach with just a few strategic clicks. Uncover professional methods for connecting applications and creating workflows that reclaim hours of your week.

Watch Step By Step Video Tutorial Below


1. Overview of Pabbly Connect for HubSpot and Trello Integration

Pabbly Connect serves as a powerful integration platform that automates the process of creating Trello cards from new HubSpot form submissions. This integration eliminates the need for manual data entry, allowing users to enhance productivity and efficiency. By utilizing Pabbly Connect, you can seamlessly connect HubSpot with Trello, ensuring that every new form submission is converted into a Trello card automatically.

To begin, sign up for a free Pabbly Connect account. Once registered, access the Pabbly Connect dashboard, where you can create workflows that automate your tasks. This guide will walk you through the exact steps to set up the integration between HubSpot and Trello using Pabbly Connect.


2. Creating a Workflow in Pabbly Connect

Start by logging into your Pabbly Connect account. On the dashboard, click on the ‘Create Workflow’ button. Name your workflow something descriptive, like ‘Create Trello Cards from HubSpot Form Submission’. After naming your workflow, click the ‘Create’ button to proceed to the workflow setup page.

  • Click on the ‘Trigger’ module to set the initial action.
  • Select HubSpot as the application and choose ‘New Form Submission’ as the trigger event.
  • Copy the generated webhook URL to connect with HubSpot.

With these steps completed, you are now prepared to set up the HubSpot side of the integration. This involves configuring HubSpot to send form submission data to the webhook URL provided by Pabbly Connect.


3. Setting Up HubSpot for Form Submission

Log into your HubSpot account and navigate to the Automation section. Click on ‘Workflows’ and then select ‘Create Workflow’. Choose the option to create a workflow from scratch and select ‘Blank Workflow’. After that, click on ‘Next’ to proceed.

In the workflow editor, click on ‘Set Up Triggers’. Choose the trigger type as ‘Form Submission’. From the dropdown, select the specific form you want to use, such as ‘Complaint Form I’. After selecting the form, click on ‘Apply Filter’ and then save the trigger.

Next, you need to add an action by clicking on the plus icon. Choose ‘Send a Webhook’ as your action and paste the webhook URL from Pabbly Connect. Make sure to save your workflow and turn it on, which will allow HubSpot to send data to Pabbly Connect whenever a form is submitted.


4. Testing the Connection Between HubSpot and Pabbly Connect

Now that your HubSpot workflow is set up, it’s time to test the connection. Perform a test submission on the form you configured. Fill out the form with sample data and submit it. This step is crucial as it will allow Pabbly Connect to capture the data sent from HubSpot.

After submitting the form, return to your Pabbly Connect workflow and check if the data has been received. You should see the form submission details, including fields like name, email, and issue description. This confirms that the connection between HubSpot and Pabbly Connect is working correctly.


5. Creating a Trello Card with Pabbly Connect

With the connection established, the final step is to create a Trello card using the captured data. In your Pabbly Connect workflow, add a new action and select Trello as the application. Choose the action event ‘Create Card’. You will need to connect your Trello account by entering your Trello username, API key, and token.

After connecting Trello, select the board and list where you want the card to be created. Map the fields from the HubSpot form submission to the Trello card fields. For instance, use the name from the form as the card title and the issue description as the card’s description. Finally, click ‘Save and Send Test Request’ to create the card.

Upon successful creation, you should see the new Trello card appear in your selected board. This demonstrates how Pabbly Connect effectively automates the process of transferring data from HubSpot to Trello, streamlining your workflow.


Conclusion

In this tutorial, we explored how to utilize Pabbly Connect to automatically create Trello cards from new HubSpot form submissions. This integration not only saves time but also enhances workflow efficiency. By following the steps outlined, you can set up this automation and improve your productivity seamlessly.

Ensure you check out Pabbly Connect to create business automation workflows and reduce manual tasks. Pabbly Connect currently offer integration with 2,000+ applications.