Automate Author Notifications on Slack with Pabbly Connect

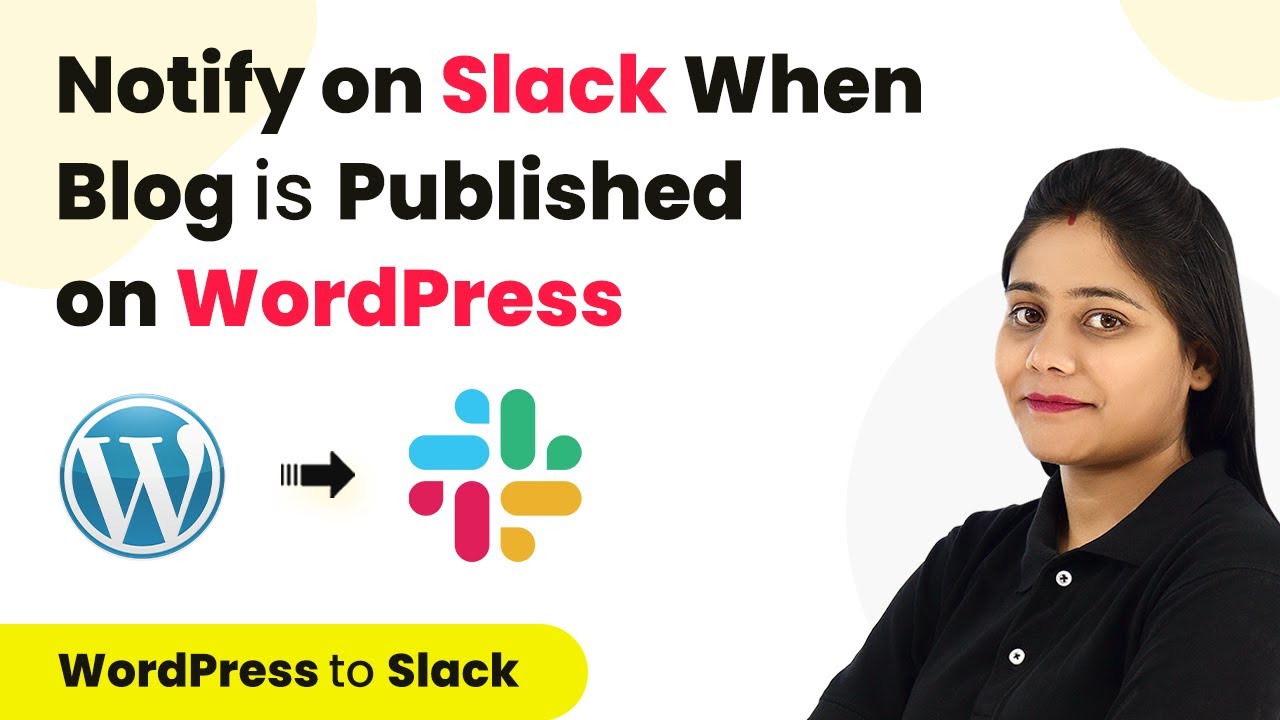
Learn how to automate notifications to authors on Slack when their blog is published on WordPress using Pabbly Connect. Step-by-step tutorial included. Develop expertise in application integration and learn how to design streamlined automation workflows using proven, simplified approaches.

Watch Step By Step Video Tutorial Below


1. Setting Up Pabbly Connect for Author Notifications

To automate author notifications on Slack when their blog is published on WordPress, first, access Pabbly Connect. Create a free account if you haven’t already. Once logged in, click on the blue ‘Create Workflow’ button to start.

Provide a name for your workflow, such as ‘Notify Authors on Slack When Their Blog is Published on WordPress’. After naming your workflow, click on the ‘Create’ button to proceed to the next step.


2. Selecting Trigger Event in Pabbly Connect

In Pabbly Connect, you will now see two sections: Trigger and Action. Here, you need to select the trigger event. For this integration, choose ‘WordPress’ as your application and then select the trigger event ‘New Post Published’.

After selecting the trigger, Pabbly Connect will provide a webhook URL. Copy this URL as you will need it to connect with your WordPress site. This URL allows Pabbly Connect to receive data whenever a new blog post is published.


3. Connecting WordPress to Pabbly Connect

Next, go to your WordPress dashboard and navigate to the plugin section. You need to install the ‘WP Webhooks’ plugin if you haven’t done so already. Once installed, go to the settings of the plugin and click on ‘Send Data’.

In the settings, select the option ‘Post Created’, click on ‘Add Webhook URL’, and paste the webhook URL you copied from Pabbly Connect. Name this connection, for example, ‘Slack Notification’. Click on ‘Add’ to save.


4. Testing the Integration with Pabbly Connect

Now that you have connected WordPress with Pabbly Connect, it’s time to test the integration. Create a new blog post in WordPress and change its status from draft to published. This action will trigger the automation you set up.

Go back to Pabbly Connect and check for a response in the webhook section. You should see the details of the newly published post, confirming that Pabbly Connect has successfully captured the data from WordPress.


5. Sending Notifications to Authors on Slack

With the data received in Pabbly Connect, the next step is to send a notification to the author via Slack. Add a new action step in your workflow and select ‘Slack’ as the application.

Connect your Slack account by providing the necessary permissions. Choose the Slack channel where you want to send notifications. Compose your message, including the author’s username and the blog title, using the mapped data from the previous steps.


Conclusion

By following this tutorial, you can automate notifications to authors on Slack when their blog is published on WordPress using Pabbly Connect. This integration streamlines communication and keeps authors informed in real-time, enhancing the overall workflow.

Ensure you check out Pabbly Connect to create business automation workflows and reduce manual tasks. Pabbly Connect currently offer integration with 2,000+ applications.

Integrate Slack with WordPress Using Pabbly Connect for New Comment Alerts

Learn how to set up alerts on Slack for new comments posted on your WordPress blog using Pabbly Connect. Follow this step-by-step tutorial for seamless integration.

Watch Step By Step Video Tutorial Below


1. Setting Up Pabbly Connect for WordPress and Slack Integration

To get alerts on Slack when a new comment is posted on your WordPress blog, you’ll first need to set up Pabbly Connect. This integration platform allows you to connect various applications seamlessly. Begin by logging into your Pabbly Connect account or creating a new one if you haven’t already.

Once you’re logged in, navigate to the dashboard and click on the ‘Create Workflow’ button. Here, you will name your workflow, such as ‘Get Comment Alerts of WordPress Logs on Slack,’ and then click on the ‘Create’ button to proceed. This action will set the stage for the integration process.


2. Selecting Trigger and Action in Pabbly Connect

In the Pabbly Connect interface, you will notice two boxes labeled ‘Trigger’ and ‘Action.’ The trigger represents the event that starts the workflow, while the action is what happens as a result. For this integration, select ‘WordPress’ as the trigger application and choose ‘New Comment’ as the event.

  • Choose WordPress as the trigger application.
  • Select the event ‘New Comment’ from the dropdown.

After selecting the trigger, Pabbly Connect will generate a webhook URL. Copy this URL, as you will need it to connect with your WordPress site. Follow the provided instructions to proceed with the setup.


3. Connecting WordPress to Pabbly Connect

Now, head over to your WordPress site. From the dashboard, navigate to the ‘Plugins’ section and search for the WP Webhooks plugin. If it’s not already installed, you will need to install it first. Once installed, click on the plugin settings and enable the ‘Send Data on New Comment’ option.

  • Go to the WP Webhooks settings.
  • Select the ‘Send Data’ option for new comments.
  • Paste the copied webhook URL from Pabbly Connect.

After setting up the webhook, save the settings. This connection allows Pabbly Connect to receive data whenever a new comment is posted on your blog, enabling the automation to work effectively.


4. Setting Up Slack Integration in Pabbly Connect

With WordPress connected to Pabbly Connect, the next step is to set up the Slack integration. In your Pabbly Connect workflow, select Slack as the action application. Click on ‘Connect with Slack’ and choose the user token type to allow Pabbly Connect to send messages to your Slack channel.

Authorize the connection by clicking on the ‘Allow’ button when prompted. After successful authorization, you will see a list of your Slack channels. Choose the appropriate channel where you want the comment alerts to be sent, such as ‘New Team.’


5. Finalizing the Setup and Testing the Integration

In your Pabbly Connect workflow, you will now need to draft the message that will be sent to Slack whenever a new comment is received. Customize the message to include details such as the blog title, blog link, and the comment itself. You can map these fields directly from the previous step’s data.

Draft a message like ‘Hello, a new comment has been posted on your blog!’ Include the blog title and link, as well as the comment content.

Finally, click on the ‘Save and Send Test Request’ button to test the integration. Check your selected Slack channel for the message to confirm that the setup is working correctly. Once verified, your automation is complete, and you will receive alerts on Slack for every new comment posted on your WordPress blog.


Conclusion

Using Pabbly Connect, you can easily set up alerts on Slack for new comments on your WordPress blog. This integration ensures that your team stays informed in real-time, enhancing communication and responsiveness. Start automating your workflows today with Pabbly Connect!

Ensure you check out Pabbly Connect to create business automation workflows and reduce manual tasks. Pabbly Connect currently offer integration with 2,000+ applications.

How to Add Products in BigCommerce from Google Sheets Using Pabbly Connect

Learn how to automate adding products to BigCommerce from Google Sheets using Pabbly Connect with this detailed step-by-step tutorial. Master proven automation processes with practical implementation examples and strategic recommendations you can apply immediately in your workflow.

Watch Step By Step Video Tutorial Below


1. Setting Up Pabbly Connect for Automation

To begin the process of adding products in BigCommerce from Google Sheets, you first need to access Pabbly Connect. This platform allows you to automate workflows seamlessly. Start by signing up for a free account on Pabbly Connect, which will only take a couple of minutes.

Once you are logged in, navigate to the dashboard and click on the option to create a new workflow. Name your workflow appropriately, for example, ‘Google Sheets to BigCommerce’. This will help you identify the workflow later. After naming it, click on the ‘Create’ button to proceed.


2. Configuring the Trigger in Pabbly Connect

In this step, you will set up a trigger in Pabbly Connect to automate the fetching of product details from Google Sheets. Select the ‘Schedule’ module, which allows the workflow to run at specified intervals. You can choose to run this workflow daily, weekly, or at any custom interval that suits your needs.

  • Choose the frequency (e.g., every day).
  • Set the specific time for the workflow to run, such as 10 AM.

After configuring the schedule, click on the ‘Save’ button. This will ensure that your automation is set to run at the desired times. The next step is to connect to Google Sheets to fetch the necessary product data.


3. Fetching Data from Google Sheets Using Pabbly Connect

Now that you have set up the trigger, it’s time to fetch product details from Google Sheets. In the action step of your workflow, select ‘Google Sheets’ and then choose the action event ‘Lookup Spreadsheet Row’. This will allow Pabbly Connect to find rows in your Google Sheet based on specific criteria. using Pabbly Connect

  • Connect your Google Sheets account by signing in through Pabbly Connect.
  • Select the spreadsheet that contains your product details.
  • Specify the sheet and lookup column (e.g., column H for product status).

Set the lookup value to ‘ready’ to filter products that are ready to be added to BigCommerce. Ensure you include headers in the response to easily identify the data fields. After configuring these settings, click on ‘Save and Send Test Request’ to verify that Pabbly Connect retrieves the correct data.


4. Adding Products to BigCommerce via Pabbly Connect

With the product details fetched from Google Sheets, the next step is to add these products to your BigCommerce store. In the action step, select ‘BigCommerce’ and choose the action event ‘Create Product’. This will allow you to create new products based on the information retrieved from Google Sheets. using Pabbly Connect

Connect your BigCommerce account by entering the required credentials such as Client ID, Access Token, and Store Hash Key. These details can be found in your BigCommerce account settings under API accounts. After connecting, map the product details received from Google Sheets to the corresponding fields in BigCommerce, such as product name, SKU, and price.

Once you have mapped all necessary product information, click on ‘Save and Send Test Request’. Pabbly Connect will attempt to add the product to your BigCommerce account. If successful, you will receive a positive response confirming that the product has been created.


5. Updating Product Status in Google Sheets

The final step in this automation process is to update the status of products in Google Sheets after they have been successfully added to BigCommerce. This prevents the same products from being added multiple times. To do this, add another action step in Pabbly Connect and select ‘Google Sheets’ again, then choose the action event ‘Update Cell’. using Pabbly Connect

In this step, you will need to specify the range of the cell that needs updating. Since the row number will change based on the product being processed, use the row index from the iterator response to dynamically set the correct row. Update the status to ‘published’ to indicate that the product has been added to BigCommerce.

After configuring this step, click on ‘Save and Send Test Request’ to confirm that the status has been updated in your Google Sheet. This completes the automation workflow, allowing you to efficiently manage product listings in BigCommerce using data from Google Sheets.


Conclusion

By leveraging Pabbly Connect, you can automate the process of adding products to BigCommerce from Google Sheets effectively. This integration not only saves time but also ensures that your product listings are always up-to-date. With scheduled automation, you can focus on growing your e-commerce business while Pabbly Connect handles the repetitive tasks.

Ensure you check out Pabbly Connect to create business automation workflows and reduce manual tasks. Pabbly Connect currently offer integration with 2,000+ applications.

Streamline HR Candidate Approvals: Google Sheets and Slack Integration Using Pabbly Connect

Learn how to automate candidate approvals in HR using Google Sheets and Slack integration with Pabbly Connect. Step-by-step guide to streamline your workflow. Explore systematic approaches to creating efficient automation solutions that convert technical concepts into practical, implementable instructions.

Watch Step By Step Video Tutorial Below


1. Setting Up Pabbly Connect for Google Sheets and Slack Integration

To begin automating candidate approvals, you first need to access Pabbly Connect. This tool allows you to integrate various applications, including Google Sheets and Slack, seamlessly. After signing up, log into your Pabbly Connect account and navigate to the dashboard.

Click on the ‘Create Workflow’ button to start setting up your automation. You will be prompted to name your workflow. Choose a descriptive name that reflects its purpose, such as ‘HR Candidate Approval Workflow’. This will help you easily identify it later.


2. Choosing Google Sheets as the Trigger Event

In the workflow setup, the next step is to select Google Sheets as the trigger application. This is where your HR team will input candidate data. Search for Google Sheets in the application list and select it.

  • Select the trigger event as ‘New or Updated Spreadsheet Row’.
  • Follow the instructions provided to connect your Google Sheets account with Pabbly Connect.
  • Once connected, capture the response from the spreadsheet to ensure data is being received correctly.

This step is crucial as it allows Pabbly Connect to monitor any new entries or updates in your Google Sheets, which will trigger the subsequent actions in your workflow.


3. Sending Notifications to Slack

After setting up the trigger, the next action is to send a notification to your HR team on Slack. Choose Slack as the action application and select the ‘Send Channel Message’ event. Connect your Slack account to Pabbly Connect by selecting the appropriate token type.

  • Select the channel where you want the message to be sent.
  • Compose your message, including details like the candidate’s name and a note to update the approval column within 8 hours.
  • Test the connection by sending a test message to ensure everything is working properly.

This integration ensures that your HR team is promptly notified about new candidates, enhancing communication and workflow efficiency.


4. Delaying Approval Check for 8 Hours

To allow time for the HR team to update the approval status, you will need to add a delay in your workflow. Use the delay feature in Pabbly Connect to pause the workflow for 8 hours after sending the initial Slack message.

Set the delay unit to hours and input the value as 8. This step is essential to ensure that the workflow does not proceed until the HR team has had sufficient time to review and approve the candidate data.


5. Finalizing Approval Notification

After the delay, the next step is to check the approval status in Google Sheets. Connect to Google Sheets again and select the ‘Get Rows’ action event to fetch the updated data.

Map the relevant fields, particularly the approval column, to ensure you receive the correct updates. If the approval status is updated, set up a condition in Pabbly Connect to send a direct message on Slack to notify the HR team about the approval status.

With this final integration, you will receive timely updates on candidate approvals, ensuring that your HR department operates smoothly and efficiently.


Conclusion

In conclusion, using Pabbly Connect to integrate Google Sheets with Slack automates the candidate approval process, saving time and enhancing collaboration within your HR team. This step-by-step guide enables you to streamline your workflow effectively.

Ensure you check out Pabbly Connect to create business automation workflows and reduce manual tasks. Pabbly Connect currently offer integration with 2,000+ applications.

How to Create Facebook Page Posts from Google Forms Using Pabbly Connect

Learn how to automate Facebook page posts from Google Forms using Pabbly Connect. Follow this detailed tutorial for seamless integration. Learn to create powerful connections between your critical applications without requiring specialized programming knowledge or extensive technical background.

Watch Step By Step Video Tutorial Below


1. Accessing Pabbly Connect for Facebook Integration

To create Facebook page posts from Google Forms, you first need to access Pabbly Connect. This platform acts as the central automation tool that links Google Forms and Facebook Pages seamlessly.

Begin by navigating to Pabbly.com/connect. If you’re an existing user, click on the ‘Sign In’ button. New users can sign up quickly. Once logged in, click on ‘Access Now’ for Pabbly Connect to reach the dashboard.


2. Creating a Workflow in Pabbly Connect

In Pabbly Connect, the next step involves creating a workflow. Click on the ‘Create Workflow’ button on the dashboard. You will be prompted to name your workflow, which could be something like ‘Facebook Post from Google Forms’.

After naming the workflow, you will see options for setting up triggers and actions. The trigger application will be Google Forms, and the trigger event is ‘New Response Received’. This event initiates the workflow whenever a new form submission occurs.

  • Click on Google Forms as the trigger application.
  • Select ‘New Response Received’ as the trigger event.
  • Copy the trigger URL provided.

Now you can proceed to set up your Google Form to send responses to Pabbly Connect.


3. Setting Up Google Forms to Work with Pabbly Connect

Next, you need to set up your Google Form. Create a form that includes fields like event name, details, city, country, start date, end date, and event link. Ensure that the form is linked to a Google Sheet to store responses.

In your Google Form, go to the responses tab and click on the three dots. Choose ‘Select Destination for Responses’ and create a new spreadsheet. Once the spreadsheet is created, format it for clarity. Ensure that the last column is marked as the trigger column for Pabbly Connect.

  • Toggle the ‘Required’ button for necessary fields.
  • Fill the form with sample data for testing.
  • Submit the form to ensure data is captured in the linked sheet.

Once this is done, you can return to Pabbly Connect to continue with the integration.


4. Connecting Google Sheets with Pabbly Connect

Now that your Google Form is set up, integrate it with Pabbly Connect by using Google Sheets. Go to the Google Sheets where your form responses are stored, and click on ‘Extensions’, then ‘Add-ons’, and find ‘Pabbly Connect Webhooks’. If it’s not installed, do so from the Google Workspace Marketplace.

Once installed, refresh the page and go back to ‘Extensions’. You will see ‘Pabbly Connect Webhooks’. Click on ‘Initial Setup’ and paste the webhook URL you copied earlier from Pabbly Connect. Set the trigger column to the final data column (usually the last column of your sheet).

Ensure the webhook URL is correctly pasted. Set the trigger column to the appropriate column (e.g., H). Click on ‘Submit’ to save the configuration.

After saving, send a test request to ensure everything is working correctly with Pabbly Connect.


5. Creating a Facebook Page Post through Pabbly Connect

With your Google Form and Sheets set up, you can now create a Facebook page post automatically. In Pabbly Connect, set the action application to Facebook Pages and select the action event as ‘Create Page Post’. Connect your Facebook account when prompted.

Fill in the required fields for the Facebook post. You can map the data from your Google Form responses to these fields. For example, the page message can be set to ‘New Event Alert’, and you can map the event details, start date, and link URL from the previous steps.

Select the Facebook page where you want to post. Map the event name, details, and link URL from the Google Form response. Click on ‘Save and Send Test Request’ to verify the post creation.

Refresh your Facebook page to see the new post with the details from your Google Form submission, confirming that Pabbly Connect has successfully integrated the two platforms.


Conclusion

This tutorial demonstrated how to use Pabbly Connect to automate Facebook page posts from Google Forms submissions. By following these steps, you can effectively streamline your event announcements and enhance your social media engagement.

Ensure you check out Pabbly Connect to create business automation workflows and reduce manual tasks. Pabbly Connect currently offer integration with 2,000+ applications.

How to Send One Time Token for WooCommerce Purchase Using Pabbly Connect

Learn how to automate sending a one-time token for WooCommerce purchases using Pabbly Connect. This step-by-step guide covers integration with Google Sheets and Gmail. Master proven automation processes with practical implementation examples and strategic recommendations you can apply immediately in your workflow.

Watch Step By Step Video Tutorial Below


1. Accessing Pabbly Connect for WooCommerce Integration

To begin sending a one-time token for WooCommerce purchases, the first step is to access Pabbly Connect. Go to the Pabbly Connect website and sign in with your existing account or create a new one if you are a new user.

Once logged in, navigate to the applications page where you will find various Pabbly products. Click on the ‘Access Now’ button for Pabbly Connect to reach the dashboard where you can create your workflow.


2. Creating a Workflow in Pabbly Connect

After accessing Pabbly Connect, click on the ‘Create Workflow’ button. In the dialog box that appears, name your workflow something like ‘Send One Time Token for WooCommerce Purchase’ and click on ‘Create’.

  • Name your workflow appropriately.
  • Select the trigger application as WooCommerce.
  • Set the trigger event to ‘New Order Created’.

Once the workflow is created, you will receive a webhook URL that acts as a bridge between WooCommerce and Pabbly Connect. Copy this URL for later use in your WooCommerce settings.


3. Setting Up the WooCommerce Webhook

In this step, you will configure the webhook in WooCommerce using the URL obtained from Pabbly Connect. Log into your WordPress dashboard, navigate to WooCommerce settings, and click on the ‘Advanced’ tab. From there, select the ‘Webhooks’ option.

Click on ‘Add Webhook’ and fill in the details: name it ‘New Order’, set the status to ‘Active’, and choose the ‘Order Created’ topic. Paste the copied webhook URL into the appropriate field and save the webhook.


4. Testing the Webhook Response in Pabbly Connect

With your webhook set up, return to Pabbly Connect and click on ‘Recapture Webhook Response’. This will prompt you to perform a test submission. Go to your WooCommerce store and make a test purchase to trigger the webhook.

After completing the order, check Pabbly Connect for the webhook response. You should see details of the order including customer information and items purchased. This confirms that the integration is working correctly.


5. Sending Coupon Code via Gmail

Now that you have successfully captured the order details, the next step is to send a coupon code using Gmail. In Pabbly Connect, add a new action step and select Gmail as the application. Choose the action event ‘Send Email’.

  • Connect your Gmail account to Pabbly Connect.
  • Map the recipient’s email from the previous step.
  • Compose the email content including the coupon code.

After configuring the email, click on ‘Save and Send Test Request’ to send the email. Verify that the email has been received by the customer with the coupon code included.


Conclusion: Updating Coupon Status in Google Sheets

Finally, to complete the process, you need to update the coupon status in Google Sheets. Add another action step in Pabbly Connect and select Google Sheets. Choose the action event ‘Update Cell Value’.

Ensure you check out Pabbly Connect to create business automation workflows and reduce manual tasks. Pabbly Connect currently offer integration with 2,000+ applications.

Check out Pabbly Connect – Automate your business workflows effortlessly! Sign Up Free – Start your journey with ease! 10,000+ Video Tutorials – Learn step by step! Join Pabbly Facebook Group – Connect with 21,000+ like minded people!

Connect your Google Sheets account, specify the spreadsheet and sheet name, and input the range for the coupon status. Set the status to ‘Taken’ to indicate that the coupon has been used. Click on ‘Save and Send Test Request’ to finalize the integration.

With these steps, you have successfully automated sending a one-time token for WooCommerce purchases using Pabbly Connect. This integration ensures that every time a purchase is made, a unique coupon code is sent to the customer and the status is updated in your Google Sheets.

Integrating Salesforce Leads with Eventbrite Registration Using Pabbly Connect

Learn how to seamlessly create Salesforce leads for Eventbrite registrations using Pabbly Connect. Step-by-step tutorial for effective integration. Implement the precise methodologies leading organizations use to automate repetitive tasks, illustrated with practical examples designed for immediate application.

Watch Step By Step Video Tutorial Below


1. Accessing Pabbly Connect for Integration

To create Salesforce leads for Eventbrite registrations, you first need to access Pabbly Connect. Sign in to your Pabbly account and navigate to the dashboard where all applications are listed. Click on the ‘Access Now’ button to reach the Pabbly Connect interface.

Once in Pabbly Connect, locate the large blue button labeled ‘Create Workflow’. Click this button and name your workflow something descriptive, such as ‘Create Salesforce Leads for New Eventbrite Registrations’. After naming your workflow, click on the ‘Create’ button to initialize it.


2. Setting Up the Trigger with Eventbrite

In this step, you will set up the trigger in Pabbly Connect to monitor new registrations in Eventbrite. Select Eventbrite as your trigger application and choose the trigger event as ‘New Order’. This event occurs when a new order is placed for tickets to an event.

  • Select Eventbrite from the application list.
  • Choose ‘New Order’ as the trigger event.
  • Connect your Eventbrite account by clicking on ‘Add New Connection’.
  • Authorize Pabbly Connect to access your Eventbrite account.

After connecting, you will see a prompt to save and send a test request. This step is crucial as it allows Pabbly Connect to start listening for new orders. Once you complete a sample registration in Eventbrite, the details will be sent to Pabbly Connect, confirming the connection is successful.


3. Extracting Order ID Using Text Formatter

Once you receive the response from Eventbrite, the next step is to extract the Order ID from the API URL provided. For this, you will utilize the Pabbly Connect Text Formatter feature. Choose ‘Text Formatter’ as the next action application and select the event as ‘Split Text’.

  • Map the API URL from the previous step.
  • Use the slash (/) as the separator.
  • Select the second to last segment to retrieve the Order ID.

After setting this up, click on ‘Save and Send Test Request’. You will receive the extracted Order ID, which is essential for fetching attendee details in the next step of the integration.


4. Fetching Attendee Details from Eventbrite

With the Order ID extracted, the next action in Pabbly Connect involves fetching the attendee details from Eventbrite. Add another action step and select Eventbrite again, this time choosing ‘Get Attendee by Order ID’ as the action event.

Connect using the existing Eventbrite connection you set up earlier. Input the Order ID obtained from the Text Formatter step. After saving and sending the test request, you will receive attendee details such as the attendee’s name, email, and reservation type.

This information is crucial as it will be used to create a lead in Salesforce. Ensure all required fields are correctly mapped to retrieve the necessary data for the lead creation.


5. Creating a Lead in Salesforce

The final step in this integration process is to create a lead in Salesforce using the attendee details fetched from Eventbrite. In Pabbly Connect, select Salesforce as the last action application and choose ‘Create Lead’ as the action event.

Connect to your Salesforce account and authorize Pabbly Connect to access it. Once connected, map the attendee details to the corresponding lead fields in Salesforce, such as first name, last name, and email address. Click on ‘Save and Send Test Request’ to create the lead.

After the process is complete, you can verify in your Salesforce account whether the lead has been successfully created. Refresh your Salesforce dashboard to see the new lead with the details you provided during the Eventbrite registration.


Conclusion

This tutorial has guided you through the process of creating Salesforce leads for Eventbrite registrations using Pabbly Connect. By following the steps outlined, you can automate lead generation efficiently, ensuring that every new registration is captured as a lead in Salesforce. This integration not only saves time but also enhances your lead management process.

Ensure you check out Pabbly Connect to create business automation workflows and reduce manual tasks. Pabbly Connect currently offer integration with 2,000+ applications.

Integrating Mailchimp and Slack with Pabbly Connect: A Step-by-Step Guide

Learn how to integrate Mailchimp and Slack using Pabbly Connect. This tutorial provides detailed steps for adding Mailchimp subscribers from new Slack users. Discover hidden automation capabilities within your existing tools. This guide shows you how to connect your essential applications and permanently eliminate redundant manual processes.

Watch Step By Step Video Tutorial Below


1. Accessing Pabbly Connect for Slack and Mailchimp Integration

To begin the integration process, access Pabbly Connect by signing into your account. This platform will serve as the central hub for connecting Slack and Mailchimp. Once logged in, navigate to the dashboard where all available applications are listed.

Click on the big blue button labeled ‘Create Workflow’ to start. You will need to name your workflow; for this tutorial, we will name it ‘Add Mailchimp Subscribers for New Users in Slack’. After naming, click on ‘Create’ to set up a blank workflow.


2. Setting Up the Trigger in Slack Using Pabbly Connect

The next step is to set up the trigger application, which in this case is Slack. In Pabbly Connect, select Slack as your trigger application and choose the event ‘New User’. This event will trigger whenever a new user is added to your Slack workspace.

  • Select ‘New User’ as the trigger event.
  • Click on ‘Connect’ to establish a connection with Slack.
  • Choose the token type as ‘User’ for proper access.

After entering the token type, click on ‘Save’. A dialog box will appear asking for permission to connect Slack. Click on ‘Allow’ to grant access to Pabbly Connect. Once this is done, you can test the connection by clicking on ‘Save and Send Test Request’ to confirm the setup.


3. Adding a Filter for Email Confirmation in Pabbly Connect

After successfully setting up the trigger, it’s important to ensure that the new user has confirmed their email. This is done by adding a filter in Pabbly Connect. The filter will check if the ‘Email Confirmed’ status is equal to one.

  • Select ‘Add Filter’ from the workflow options.
  • Set the condition to ‘Email Confirmed’ equals ‘1’.
  • This ensures that only confirmed users will be processed further.

Once the filter is set, the workflow will only proceed to the next step if the email confirmation condition is satisfied. This is crucial for maintaining the integrity of your Mailchimp subscriber list.


4. Adding Mailchimp Subscriber as Action in Pabbly Connect

Now that the trigger and filter are set, it’s time to add the action application, which is Mailchimp. In Pabbly Connect, select Mailchimp as your action application and choose the event ‘Add New Member with Custom Fields’.

To connect Mailchimp, you will need to provide your Mailchimp API key and data center. The data center can be found in the URL of your Mailchimp account. For instance, if your URL is ‘https://us6.mailchimp.com’, then the data center is ‘us6’. Enter this information in the connection settings.

Copy your API key from the Mailchimp account settings under ‘Extras’. Paste the API key into Pabbly Connect and save the connection. Map the fields from Slack to Mailchimp, including email address, first name, and last name.

Finally, click on ‘Save and Send Test Request’ to create the subscriber in Mailchimp. This action will ensure that every new user added to Slack is also subscribed to your Mailchimp list.


5. Verifying the Integration in Mailchimp

After setting up the workflow, it’s essential to verify that the integration works correctly. Go to your Mailchimp account and navigate to the ‘Audience’ section. Here, you can check if the new subscriber has been added successfully.

Upon confirming the integration, you should see the new subscriber’s email, first name, and last name listed in Mailchimp. This confirms that Pabbly Connect has successfully integrated Slack and Mailchimp, automating the process of adding new subscribers.

Always ensure to monitor the workflow in Pabbly Connect for any errors or issues. This will help maintain a seamless integration process moving forward.


Conclusion

In this tutorial, we explored how to use Pabbly Connect to integrate Slack and Mailchimp, allowing for automatic addition of new Slack users as Mailchimp subscribers. This process enhances your marketing efforts by ensuring your subscriber list is always updated.

Ensure you check out Pabbly Connect to create business automation workflows and reduce manual tasks. Pabbly Connect currently offer integration with 2,000+ applications.

How to Inform the Author When Posts Get Published on WordPress Using Pabbly Connect

Learn how to automate notifications to authors when their posts are published on WordPress using Pabbly Connect. Step-by-step guide for seamless integration. Learn to create powerful connections between your critical applications without requiring specialized programming knowledge or extensive technical background.

Watch Step By Step Video Tutorial Below


1. Setting Up Pabbly Connect for WordPress and Gmail Integration

To inform the author automatically when a post gets published on WordPress, we will utilize Pabbly Connect. First, access the Pabbly Connect dashboard by signing up for an account. After logging in, click on the ‘Create Workflow’ button to initiate your automation.

Provide a suitable name for your workflow, such as ‘Notify Author on Post Publish’. Click on the ‘Create’ button to proceed. This action will bring you to the workflow page where you can set up the trigger and action for your automation.


2. Configuring the Trigger in WordPress Using Pabbly Connect

In this step, we will configure the trigger for our automation using Pabbly Connect. The trigger event will be set to ‘New Post Published’ in WordPress. To do this, click on the trigger application field and search for ‘WordPress’.

  • Select the trigger event as ‘New Post Published’.
  • Copy the webhook URL provided by Pabbly Connect.
  • Follow the instructions to connect your WordPress site.

Once you have copied the webhook URL, log in to your WordPress admin panel. Install the ‘WP Webhooks’ plugin to facilitate the connection. After installation, navigate to the settings of WP Webhooks and set up the webhook URL to trigger notifications when a post is published.


3. Testing the Connection Between WordPress and Pabbly Connect

After setting up the trigger in WordPress using Pabbly Connect, it is essential to test the connection. Create a test post in your WordPress account and save it as a draft. This will help ensure that the workflow captures the data correctly.

Next, switch to your admin account and publish the test post. After publishing, return to Pabbly Connect to verify that the data from the published post is captured successfully. You should see the details of the post, including its title and status.

  • Ensure the post status is updated to ‘Published’ in the workflow response.
  • Check for the author ID in the captured data.

This step confirms that your WordPress site is successfully integrated with Pabbly Connect, and the trigger is functioning as expected.


4. Sending Email Notifications to Authors Using Gmail

Now that the trigger is set up, we will configure the action to send an email notification to the author using Pabbly Connect. Click on the plus icon to add a new action step and select ‘Gmail’ as the application.

Choose the action event as ‘Send Email’ and connect your Gmail account. You will need to authorize Pabbly Connect to access your Gmail account for sending notifications. Once connected, map the recipient’s email address to the author’s email captured in the previous step.

Set the sender name to ‘WordPress Admin’. Craft a subject line like ‘Your Post is Published’. Compose the email body to congratulate the author and include a link to the published post.

After configuring the email settings, click on ‘Save and Send Test Request’ to verify that the email is sent correctly to the author. This completes the setup for notifying authors when their posts are published.


5. Finalizing the Automation Workflow in Pabbly Connect

With the email notification step configured, you are now ready to finalize your automation workflow using Pabbly Connect. Ensure that all steps are correctly set up and that the data mapping is accurate. This will allow the automation to function seamlessly.

Once you have tested the workflow and confirmed that it works as intended, you can activate it. This automation will now trigger automatically every time a post is published on your WordPress site, notifying the respective author instantly.

Remember, this setup only needs to be done once. Afterward, Pabbly Connect will handle the notifications automatically, ensuring that authors are always informed when their work goes live.


Conclusion

In conclusion, using Pabbly Connect to automate notifications for authors when their posts are published on WordPress is a straightforward process. By following the steps outlined above, you can ensure that your team stays informed and engaged with their published content. This integration not only saves time but also enhances communication within your writing team.

Ensure you check out Pabbly Connect to create business automation workflows and reduce manual tasks. Pabbly Connect currently offer integration with 2,000+ applications.

How to Send Emails Based on Specific Date & Time from Google Sheets Using Pabbly Connect

Learn how to automate sending emails from Google Sheets to Gmail based on specific dates and times using Pabbly Connect. Step-by-step tutorial included. Navigate the automation landscape confidently with clear, structured guidance suitable for professionals regardless of prior technical experience.

Watch Step By Step Video Tutorial Below


1. Setting Up Pabbly Connect for Email Automation

To send emails based on specific dates and times from Google Sheets, you need to set up Pabbly Connect. Begin by logging into your Pabbly Connect account. If you’re new, create a free account in just two minutes.

Once logged in, navigate to the dashboard and click on the blue button labeled ‘Create Workflow’. Name your workflow, for example, ‘Automatically Schedule and Send Emails from Google Sheets to Gmail’. Click on ‘Create’ to proceed.


2. Choosing Trigger and Action Applications in Pabbly Connect

In this step, you will select the trigger and action applications in Pabbly Connect. For our use case, the trigger will be set to Google Sheets, and the action will be Gmail. Here, the trigger means when an event occurs, and the action is what happens as a result.

  • Select ‘New or Updated Spreadsheet Row’ as the trigger event in Pabbly Connect.
  • Copy the generated webhook URL provided by Pabbly Connect.
  • Proceed to Google Sheets to set up the integration.

By selecting these applications and setting up the webhook URL, you are establishing a connection that allows Pabbly Connect to automate your email sending process based on data entered in Google Sheets.


3. Configuring Google Sheets for Pabbly Connect Integration

Now, open your Google Sheets and navigate to the Extensions menu. Click on ‘Add-ons’ and select ‘Get Add-ons’. Search for the ‘Pabbly Connect Webhooks’ add-on and install it if you haven’t already. using Pabbly Connect

After installation, click on ‘Extensions’ again, then select ‘Pabbly Connect Webhooks’ and choose ‘Initial Setup’. Here, paste the webhook URL you copied earlier. Specify the trigger column, which should be the last data entry column in your sheet (for example, column E).


4. Delaying Email Sending Using Pabbly Connect

To ensure emails are sent at the specific date and time, you will use the delay feature in Pabbly Connect. After setting up the Google Sheets trigger, add a delay step by selecting ‘Delay Until a Specific Date & Time’.

  • Map the date and time from your Google Sheets data to the delay step.
  • Ensure the date and time are in the correct UTC format as required by Pabbly Connect.
  • Test the delay step to confirm it captures the correct date and time.

Once configured, this delay ensures that emails will only be sent once the specified date and time are reached, utilizing the capabilities of Pabbly Connect.


5. Sending Emails through Gmail via Pabbly Connect

The final step is to configure the Gmail action in Pabbly Connect. Select Gmail as your action application and connect your Gmail account. Choose the option to send an email.

Map the recipient email address, subject line, and body content from your Google Sheets data. You can include personalized elements such as the sender’s name by mapping those fields as well.

After setting everything up, test the action to ensure emails are being sent correctly based on the data from Google Sheets. Once confirmed, enable the ‘Send on Event’ option to automate the process fully.


Conclusion

In this tutorial, we demonstrated how to send emails from Google Sheets to Gmail automatically based on specific dates and times using Pabbly Connect. By following these steps, you can streamline your email communication process and ensure timely outreach without manual effort.

Ensure you check out Pabbly Connect to create business automation workflows and reduce manual tasks. Pabbly Connect currently offer integration with 2,000+ applications.