How to Automate Salon Appointments and WhatsApp Notifications with Pabbly Connect

Learn how to automate salon appointments and send WhatsApp notifications using Pabbly Connect in this detailed step-by-step tutorial. Navigate the automation landscape confidently with clear, structured guidance suitable for professionals regardless of prior technical experience.

Watch Step By Step Video Tutorial Below


1. Accessing Pabbly Connect for Salon Appointments

Pabbly Connect is the ideal platform to automate your salon appointment notifications. To get started, visit Pabbly Connect and sign in to your account. If you are new, you can create an account for free in just a few minutes.

Once logged in, navigate to the dashboard where you can create a new workflow. This will allow you to link Acuity Scheduling with WhatsApp through Pabbly Connect without any coding skills needed.


2. Creating a Workflow in Pabbly Connect

To create a workflow, click on the ‘Create Workflow’ button in Pabbly Connect. Name your workflow something descriptive like ‘Acuity Scheduling to WhatsApp’. This name will help you identify the workflow later.

Next, you will need to set up the trigger. Select Acuity Scheduling as the app and choose the trigger event as ‘New Appointment’. This means every time a client books an appointment, this workflow will activate.

  • Log in to your Pabbly Connect account.
  • Create a new workflow named ‘Acuity Scheduling to WhatsApp’.
  • Select Acuity Scheduling as the app and ‘New Appointment’ as the trigger.

After selecting the trigger, connect your Acuity Scheduling account by clicking on ‘Connect’ and following the prompts. This will allow Pabbly Connect to capture appointment details automatically.


3. Collecting Appointment Data from Acuity Scheduling

Once your Acuity Scheduling account is connected, you will need to test the trigger to ensure it captures data correctly. Go to your Acuity Scheduling appointment page and book an appointment to see if the data flows into Pabbly Connect.

When the appointment is booked, the details such as client name, phone number, and appointment time should appear in Pabbly Connect. This confirms that the integration is working properly.

  • Book an appointment through your Acuity Scheduling page.
  • Check if the appointment details are captured in Pabbly Connect.
  • Ensure all necessary data fields are populated correctly.

This step is crucial as it ensures that every time a client books an appointment, their details will be sent to WhatsApp automatically through Pabbly Connect.


4. Sending WhatsApp Messages Using Pabbly Connect

Now that you have collected the appointment data, the next step is to send this information to WhatsApp. For this, select ‘WhatsApp by 360 Dialog’ as the action app in Pabbly Connect. Choose the action event as ‘Send Template Message’.

To connect your WhatsApp account, you will need an API key from 360 Dialog. Once you have the API key, enter it into Pabbly Connect to establish the connection. This allows you to send messages directly to your clients via WhatsApp.

Select WhatsApp by 360 Dialog as the action app. Choose ‘Send Template Message’ as the action event. Input your 360 Dialog API key in Pabbly Connect.

After connecting, you can map the data fields from Acuity Scheduling to the WhatsApp message template. This mapping will ensure that the correct appointment details are sent to the client automatically.


5. Testing the Integration with Pabbly Connect

After setting up the WhatsApp action, it’s essential to test the entire workflow. Click on ‘Save and Send Test Request’ in Pabbly Connect to send a test message to the client’s WhatsApp number. Check your WhatsApp to confirm that the message has been received.

If the test is successful, your automation is complete! Each time a new appointment is booked, a confirmation message will be sent automatically via WhatsApp, enhancing your salon’s customer service.

Click ‘Save and Send Test Request’ in Pabbly Connect. Check WhatsApp for the test message confirmation. Ensure the message contains all mapped appointment details.

This testing phase is crucial to ensure that your salon’s appointment notifications are running smoothly and efficiently through Pabbly Connect.


Conclusion

In conclusion, using Pabbly Connect to automate salon appointments and send WhatsApp messages is a straightforward process that enhances customer communication. By following these steps, you can ensure timely appointment confirmations and improve your overall client experience.

Ensure you check out Pabbly Connect to create business automation workflows and reduce manual tasks. Pabbly Connect currently offer integration with 2,000+ applications.

Share Brochure of Your Coaching Institute on WhatsApp Using Pabbly Connect

Learn how to share your coaching institute’s brochure on WhatsApp automatically when a student fills the enquiry form using Pabbly Connect in this detailed tutorial.

Watch Step By Step Video Tutorial Below


1. Access Pabbly Connect for Integration

To share the brochure of your coaching institute on WhatsApp, you need to access Pabbly Connect. Start by visiting the Pabbly website and signing in to your account. If you don’t have an account, you can create one for free in just a few minutes.

Once logged in, navigate to the Pabbly Connect dashboard. Click on the ‘Create Workflow’ button located at the top right corner. You will be prompted to name your workflow, so enter a descriptive name like ‘Elementor to WhatsApp’ and click ‘Create’. This sets the stage for integrating your enquiry form with WhatsApp through Pabbly Connect.


2. Connect Elementor Form with Pabbly Connect

The next step is to connect your Elementor form to Pabbly Connect. In your WordPress dashboard, navigate to the page where your form is located. Click on ‘Edit with Elementor’ to open the form editor.

  • Select the form you want to integrate.
  • Go to the ‘Actions After Submit’ section.
  • Add a new action and select ‘Webhook’.

After selecting ‘Webhook’, paste the webhook URL provided by Pabbly Connect into the designated field. This URL allows Pabbly Connect to capture form submissions automatically, enabling seamless data transfer to WhatsApp.


3. Capture Data from Elementor Form in Pabbly Connect

Once your Elementor form is connected, it’s time to capture the data submitted by students. After setting up the webhook, submit a test entry in your form to ensure data is being captured correctly in Pabbly Connect.

When a student fills out the enquiry form, their details (like name, email, and message) will be automatically sent to Pabbly Connect. You can view this data in your workflow dashboard, confirming that the integration is functioning as intended.


4. Send WhatsApp Message Using Pabbly Connect

The final step involves sending the captured data to WhatsApp using Pabbly Connect. For this, you will utilize the 360 Dialog API to send the message. In your workflow, choose ‘360 Dialog’ as the action app and select ‘Send Template Message’ as the action event.

  • Connect your 360 Dialog account by providing your API key and domain name.
  • Select the template you created for sending the coaching brochure.
  • Map the data fields such as recipient’s mobile number and message body.

Once everything is mapped correctly, click ‘Save and Send Test Request’ to send a test message. If successful, the student will receive a WhatsApp message containing the brochure link immediately after submitting the enquiry form.


5. Conclusion: Automate Your Coaching Institute’s Communication

By following these steps, you can effectively automate the process of sharing your coaching institute’s brochure on WhatsApp using Pabbly Connect. This integration not only saves time but also enhances communication with prospective students.

Ensure you check out Pabbly Connect to create business automation workflows and reduce manual tasks. Pabbly Connect currently offer integration with 2,000+ applications.

Check out Pabbly Connect – Automate your business workflows effortlessly! Sign Up Free – Start your journey with ease! 10,000+ Video Tutorials – Learn step by step! Join Pabbly Facebook Group – Connect with 21,000+ like minded people!
Utilizing Pabbly Connect for this integration means you can focus more on your coaching classes while the automation handles the communication with students who fill out your enquiry form. Start using Pabbly Connect today to streamline your processes!


Automate WhatsApp Messages with Pabbly Connect: Share Your Electronic Products Sale Brochure

Learn how to automate sending your electronic products sale brochure via WhatsApp using Pabbly Connect when customers fill your website form. Step-by-step tutorial included. Explore efficient methods for automating routine tasks with clear, concise instructions suited for both newcomers and experienced professionals.

Watch Step By Step Video Tutorial Below


1. Setting Up Pabbly Connect for Automation

To automate sending your electronic products sale brochure via WhatsApp, you need to set up Pabbly Connect. This integration tool allows you to connect various applications seamlessly. Start by signing into your Pabbly Connect account and navigating to the dashboard.

Once in the dashboard, click on the ‘Create Workflow’ button. Here, you can name your workflow, for instance, ‘WhatsApp Brochure Automation’. After naming your workflow, you will select the application that will trigger the automation, which in this case is your website form.


2. Connecting Your Website Form to Pabbly Connect

Next, you need to connect your website form to Pabbly Connect. This is crucial as it captures the data submitted by customers. Choose the form application you are using, such as Elementor or any other form builder.

  • Select your form application in Pabbly Connect.
  • Authenticate your account by providing the necessary API keys.
  • Choose the specific form that will trigger the automation.

After setting up the form connection, test the trigger by submitting a sample form. This allows Pabbly Connect to fetch the data successfully, ensuring that everything is working correctly.


3. Integrating WhatsApp with Pabbly Connect

Now that your website form is connected, the next step is to integrate WhatsApp using Pabbly Connect. This integration will allow you to send the electronic products sale brochure automatically. Search for WhatsApp in the action step of Pabbly Connect.

Select the action event as ‘Send Message’. You will need to authenticate your WhatsApp account with Pabbly Connect by providing the necessary credentials. Once authenticated, you can customize the message that will be sent to customers.

  • Input the message body, including the details of the electronic products sale brochure.
  • Add dynamic fields to personalize the message, such as the customer’s name.
  • Select the recipient’s phone number from the form data.

After configuring the WhatsApp message, you can test the action to ensure that the message is sent correctly to a sample recipient.


4. Finalizing Your Pabbly Connect Workflow

With the WhatsApp integration set up, it’s time to finalize your workflow in Pabbly Connect. Review all the steps to ensure everything is configured correctly. You can add additional actions if necessary, such as logging the data or sending notifications.

Once you are satisfied with the setup, turn on your workflow. This ensures that anytime a customer fills out the website form, the electronic products sale brochure will be sent via WhatsApp automatically. Monitor the workflow to see if any adjustments are needed.


5. Testing Your Automation with Pabbly Connect

Testing is a crucial step in ensuring your automation works as intended. Submit your website form with test data and check if the WhatsApp message is sent. This will confirm that Pabbly Connect is functioning correctly and that customers receive the sale brochure.

If the message is not sent, revisit each step in Pabbly Connect to troubleshoot the integration. Ensure that all credentials are correct and that the workflow is active. Testing multiple scenarios will help you refine the process.

Once confirmed, your automation is ready to go live. Now you can efficiently share your electronic products sale brochure via WhatsApp with customers who fill out your website form.


Conclusion

By following this tutorial, you can successfully automate sending your electronic products sale brochure via WhatsApp using Pabbly Connect. This integration streamlines communication and enhances customer engagement, making your sales process more efficient.

Ensure you check out Pabbly Connect to create business automation workflows and reduce manual tasks. Pabbly Connect currently offer integration with 2,000+ applications.

Automate YouTube Channel Stats to WhatsApp with Pabbly Connect

Learn how to automate sending YouTube channel stats to your WhatsApp using Pabbly Connect. Follow this step-by-step tutorial for seamless integration. Build sophisticated automated workflows in less time than you think. This guide translates complex integrations into straightforward steps for immediate implementation.

Watch Step By Step Video Tutorial Below


1. Setting Up Pabbly Connect for YouTube and WhatsApp Integration

To automate sending YouTube channel stats to your WhatsApp, we will use Pabbly Connect as the integration platform. First, access your Pabbly Connect account and create a new workflow. This will enable you to connect YouTube and WhatsApp seamlessly.

Once in Pabbly Connect, click on ‘Create New Workflow’. You will be prompted to name your workflow. Choose a descriptive name, such as ‘YouTube Stats to WhatsApp’. This will help you identify the workflow later. After naming, click on ‘Create’.


2. Connecting YouTube to Pabbly Connect

Now, it’s time to connect your YouTube channel to Pabbly Connect. In the workflow, select YouTube as the trigger application. Choose the trigger event, which should be ‘New Video Uploaded’. This will allow Pabbly Connect to fetch data whenever a new video is uploaded to your channel.

  • Select your YouTube account and authorize Pabbly Connect to access your YouTube data.
  • After authorization, set up the trigger by selecting the specific channel you want to monitor.
  • Test the trigger to ensure Pabbly Connect can successfully retrieve data from your YouTube channel.

After successfully setting up the YouTube connection, you will receive a test response. This confirms that Pabbly Connect has connected to your YouTube channel and can fetch the necessary stats.


3. Integrating WhatsApp with Pabbly Connect

Next, we will integrate WhatsApp into our workflow using Pabbly Connect. Select WhatsApp Web as the action application. Choose the action event ‘Send Message’ to configure how you want to send the stats to your WhatsApp.

  • Connect your WhatsApp account by following the authorization prompts.
  • In the message setup, customize the content to include the YouTube channel stats such as views and subscriber count.
  • You can also set the recipient’s WhatsApp number to ensure the stats are sent to the right contact.

After completing the setup, send a test message to verify that the integration is working correctly. This step ensures that you will receive the YouTube channel stats on WhatsApp as intended.


4. Scheduling Daily Updates with Pabbly Connect

To receive daily updates of your YouTube channel stats on WhatsApp, you will need to set up a schedule in Pabbly Connect. Use the ‘Schedule’ feature to specify when you want to receive the stats. For instance, you can choose to receive updates every day at 7 PM.

In the schedule setup, specify the time in UTC format. This will ensure that you receive your updates at the correct local time. Once configured, save the schedule settings and ensure they are active.

Additionally, you can customize the message further if you want to include specific data points from your YouTube channel, such as the number of new subscribers or total views. This customization will make your updates more informative and tailored to your needs.


5. Finalizing Your Pabbly Connect Workflow

After configuring all the necessary connections, it’s time to finalize your workflow in Pabbly Connect. Review all settings to ensure that your YouTube channel is correctly linked to WhatsApp and that the schedule is set up properly.

Once everything is verified, turn on your workflow. This will activate the integration, allowing you to receive YouTube channel stats on WhatsApp daily. You can monitor the workflow’s performance through Pabbly Connect’s dashboard.

If you encounter any issues, Pabbly Connect provides troubleshooting options and support to help you resolve them efficiently. With this setup, you will stay updated on your YouTube channel’s performance effortlessly.


Conclusion

In conclusion, using Pabbly Connect to automate YouTube channel stats to WhatsApp is a straightforward process. By following these steps, you can ensure that you receive timely updates on your channel’s performance every day, enhancing your engagement and awareness.

Ensure you check out Pabbly Connect to create business automation workflows and reduce manual tasks. Pabbly Connect currently offer integration with 2,000+ applications.

How to Automatically Reply to Comments on YouTube Videos Using Pabbly Connect

Learn how to automatically reply to comments on YouTube videos using Pabbly Connect. This tutorial provides step-by-step instructions for seamless integration. Discover hidden automation capabilities within your existing tools. This guide shows you how to connect your essential applications and permanently eliminate redundant manual processes.

Watch Step By Step Video Tutorial Below


1. Introduction to Pabbly Connect for YouTube Auto Replies

Pabbly Connect is the automation tool that allows you to automatically reply to comments on YouTube videos. By integrating YouTube with other platforms like Facebook and Twitter, you can streamline your response process. This tutorial will guide you through setting up automatic replies using Pabbly Connect.

To start, you will need a Pabbly Connect account and access to your YouTube channel. Once you have these, you can easily set up the integration to ensure all comments receive timely replies. The process is straightforward and requires no coding knowledge.


2. Setting Up Pabbly Connect for YouTube Integration

To set up Pabbly Connect for replying to YouTube comments, first log into your Pabbly Connect account. Click on the ‘Create Workflow’ button to start a new workflow. This is where you will define the trigger and action for your automation. The trigger will be a new comment on your YouTube video. using Pabbly Connect

  • Select YouTube as your trigger application.
  • Choose the ‘New Comment’ trigger event.
  • Connect your YouTube account by following the prompts.

Once you have set up the trigger, you can test it to ensure everything is working correctly. This step is crucial as it confirms that Pabbly Connect can fetch comments from your YouTube videos.


3. Configuring Automatic Replies in Pabbly Connect

After setting up the trigger, the next step is to configure the action for your workflow. This action will specify how Pabbly Connect replies to the comments received. In this case, you will set it to reply to the comments automatically. using Pabbly Connect

Choose the action application as YouTube and select the ‘Reply to Comment’ action event. Here’s how to set it up:

  • Select the YouTube account you want to use for replying.
  • Map the comment ID from the trigger step to the reply action.
  • Type your reply message in the designated field.

This configuration allows Pabbly Connect to automatically respond to comments with your specified message. Test this action to ensure that the replies are sent correctly to the comments.


4. Testing and Activating Your YouTube Auto Reply Workflow

Once you have configured both the trigger and action, it’s time to test your workflow. Click on the ‘Test’ button within Pabbly Connect to simulate a new comment on your YouTube video. This will help you verify if the automatic reply feature is functioning as intended. using Pabbly Connect

If the test is successful, you will see the reply sent to the comment in your YouTube account. Finally, activate your workflow by toggling the switch to ‘On’. This will ensure that your Pabbly Connect integration is live and responding to new comments automatically.


5. Conclusion and Final Thoughts on Pabbly Connect

Using Pabbly Connect to automate replies to YouTube comments is an efficient way to engage with your audience. By following the steps outlined in this tutorial, you can set up a seamless integration between YouTube and other platforms. This not only saves time but also enhances interaction with your viewers.

Ensure you check out Pabbly Connect to create business automation workflows and reduce manual tasks. Pabbly Connect currently offer integration with 2,000+ applications.

Check out Pabbly Connect – Automate your business workflows effortlessly! Sign Up Free – Start your journey with ease! 10,000+ Video Tutorials – Learn step by step! Join Pabbly Facebook Group – Connect with 21,000+ like minded people!
In summary, Pabbly Connect allows you to effortlessly manage your YouTube comments by automating replies. Start using Pabbly Connect today to improve your YouTube channel engagement and management.


Automate Hotel Bookings with Pabbly Connect: A Step-by-Step Guide

Learn how to automate hotel bookings and notify your staff using Pabbly Connect. This detailed guide covers integration with JotForm, Airtable, and Pushover. Discover how to seamlessly connect your essential tools through accessible instructions that make powerful automation available to professionals at every skill level.

Watch Step By Step Video Tutorial Below


1. Setting Up Pabbly Connect for Hotel Management Automation

To start automating hotel bookings, you need to access Pabbly Connect. This platform allows seamless integration between various applications like JotForm, Airtable, and Pushover. Begin by visiting the Pabbly Connect website and signing up for an account.

Once signed in, navigate to the dashboard. Here, you will create a new workflow specifically for filtering hotel bookings. Click on the ‘Create Workflow’ button and name it appropriately, such as ‘Filter Hotel Bookings from JotForm and Notify via Pushover’.


2. Integrating JotForm with Pabbly Connect

In this section, you will connect JotForm to Pabbly Connect. First, select JotForm as your trigger application. Choose the trigger event as ‘New Response’. This action will generate a webhook URL.

  • Copy the webhook URL generated by Pabbly Connect.
  • Go to your JotForm dashboard and select the booking form you created.
  • In the form settings, navigate to ‘Integrations’ and select ‘Webhooks’.
  • Paste the copied URL into the webhook field and complete the integration.

After completing these steps, Pabbly Connect will be ready to capture responses from your JotForm automatically. This integration ensures that each new booking is processed without manual intervention.


3. Collecting Data from JotForm in Pabbly Connect

With JotForm integrated, the next step is to collect the data in Pabbly Connect. After receiving a new booking, you will retrieve the data directly from JotForm. To do this, fill out the booking form with a test entry.

Once the form is submitted, return to Pabbly Connect to see if the data has been captured successfully. This confirmation indicates that the integration is functioning correctly.

  • Check the data captured in Pabbly Connect.
  • Ensure all required fields are populated accurately.
  • This data will be used for further processing in the next steps.

After confirming the data collection, you can proceed to the next integration step with Airtable.


4. Searching for Blacklisted Guests in Airtable

The next crucial step involves searching for blacklisted guests in Airtable using Pabbly Connect. First, connect Airtable as your action application. Choose the action event as ‘Search Record’. This will allow you to look for the guest’s email in your Airtable database.

To establish this connection, you will need your Airtable API key. Obtain this from the Airtable account section and paste it into Pabbly Connect. Select the relevant base and table that contains your blacklist records.

Map the email field from the JotForm response. Set up the search criteria to match the email against the blacklist. Test the connection to ensure it retrieves the correct records.

Once the search is complete, you can confirm whether the guest is blacklisted, allowing you to take appropriate actions in the next step.


5. Sending Notifications via Pushover

The final step in this automation process is to send notifications to your staff using Pushover through Pabbly Connect. After confirming that a booking belongs to a blacklisted guest, set up Pushover as your action application and select the ‘Push Notification’ action event.

To connect Pushover, you will need to provide an API token and user key. Create a new application in Pushover to generate the API token and ensure you have the correct user key for notifications.

Compose the notification message, including details of the blacklisted guest. Set the priority of the notification to ensure it stands out. Test the notification to ensure it is received correctly by your staff.

With this, your hotel management automation is complete, allowing for real-time notifications whenever a blacklisted guest attempts to book a room.


Conclusion

By following these steps, you can efficiently automate hotel bookings using Pabbly Connect, integrating JotForm, Airtable, and Pushover. This setup helps manage guest bookings effectively and ensures your staff is promptly notified about blacklisted guests.

Ensure you check out Pabbly Connect to create business automation workflows and reduce manual tasks. Pabbly Connect currently offer integration with 2,000+ applications.

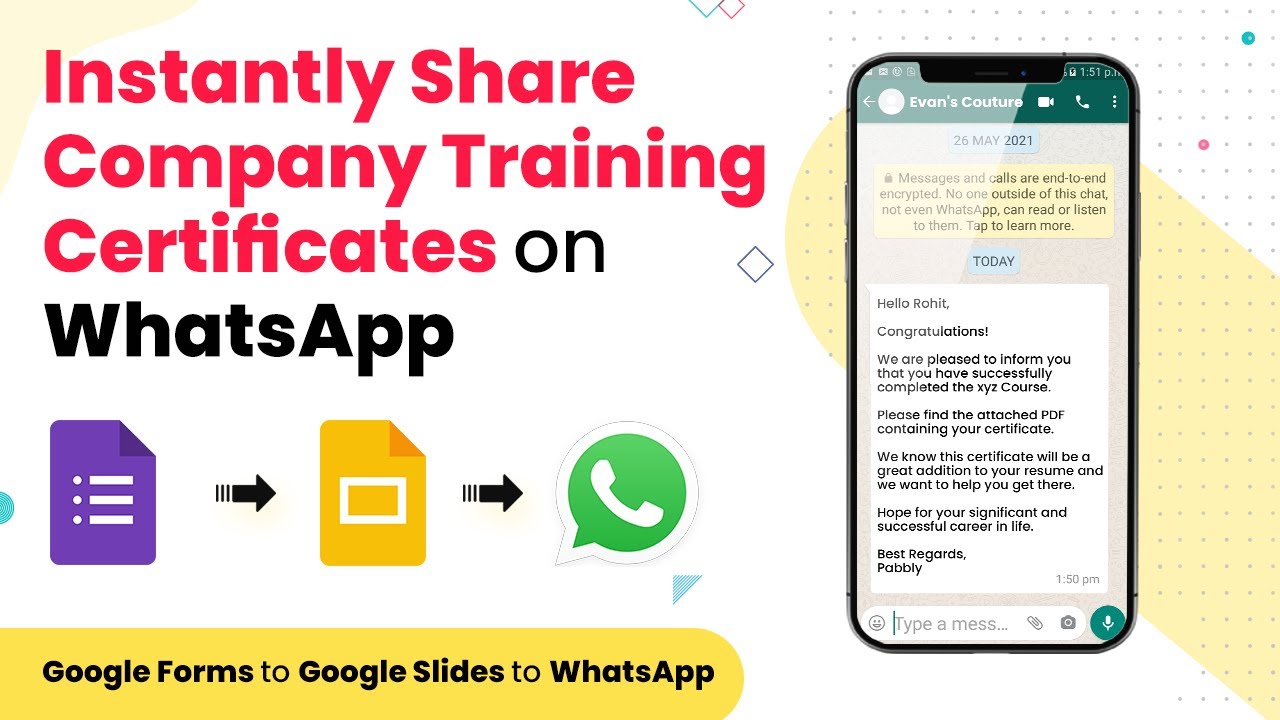
Automate Certificate Creation and Distribution for Company Training Programs Using Pabbly Connect

Learn how to automatically create and send certificates for your company training program using Pabbly Connect, Google Forms, and WhatsApp. Build sophisticated automated workflows in less time than you think. This guide translates complex integrations into straightforward steps for immediate implementation.

Watch Step By Step Video Tutorial Below


1. Setting Up Pabbly Connect for Certificate Automation

To automate the creation and distribution of certificates for your company training program, you first need to set up Pabbly Connect. Start by visiting the Pabbly Connect website and signing up for a free account.

Once you are logged in, you will see a dashboard. Here, you can create a new workflow by clicking on the ‘Create New Workflow’ button. Name your workflow something relevant, such as ‘Send Certificates to Trainees on WhatsApp’. This will help you keep track of your automation process.


2. Integrating Google Forms with Pabbly Connect

The first step in the automation process is to connect Google Forms to Pabbly Connect. This integration allows you to collect data from trainees who fill out the form. Click on the first application field and search for ‘Google Forms’.

  • Select the trigger event for new form submissions.
  • Copy the generated webhook URL from Pabbly Connect.
  • Go to your Google Form, click on ‘Responses’, and create a Google Sheet to capture the data.

After setting up the Google Sheet, return to Pabbly Connect and test the connection by submitting a test response in your Google Form. This will ensure that the data is captured correctly in Pabbly Connect.


3. Creating Certificates with Google Slides

Next, we will integrate Google Slides with Pabbly Connect to create certificates for the trainees. Click on the plus icon to add another application and search for ‘Google Slides’.

Select the action event as ‘Create Presentation from Template’. Connect your Google account and choose the template you created for the certificates. Ensure that the template includes placeholders for the trainee’s name and the date.

  • Map the trainee’s name and formatted date into the respective fields.
  • Set the location in Google Drive where the certificate will be saved.

After mapping these fields, test the Google Slides connection to ensure that a certificate is generated successfully whenever a form is submitted.


4. Saving Certificates in Google Drive

To store the generated certificates, integrate Google Drive with Pabbly Connect. This allows you to save each certificate in a designated folder. Add Google Drive as the next application in your workflow.

Select the action event ‘Share a File with Anyone’ and connect your Google Drive account. You will need to map the presentation ID from the previous step to share the generated certificate.

Ensure that the file ID is correctly mapped to allow sharing. Test the integration to confirm that the certificate is saved and accessible.

Once this integration is successful, you will have a certificate saved in Google Drive for each trainee who submits the form.


5. Sending Certificates via WhatsApp using 360 Dialog

The final step is to send the certificates to the trainees via WhatsApp. For this, you will use the 360 Dialog integration with Pabbly Connect. Click to add another application and search for ‘360 Dialog’.

Select the action event ‘Send Template Message’. You will need to enter your API key and domain from your 360 Dialog account to connect.

Map the recipient’s mobile number, ensuring that it includes the country code. Include the PDF link for the certificate in the message body.

After mapping all required fields, test the WhatsApp integration to confirm that the message is sent successfully to the trainee’s number with the certificate attached.


Conclusion

By following these steps using Pabbly Connect, you can automate the process of creating and sending certificates for your company training program efficiently. This integration not only saves time but also ensures that each trainee receives their certificate promptly via WhatsApp.

Ensure you check out Pabbly Connect to create business automation workflows and reduce manual tasks. Pabbly Connect currently offer integration with 2,000+ applications.

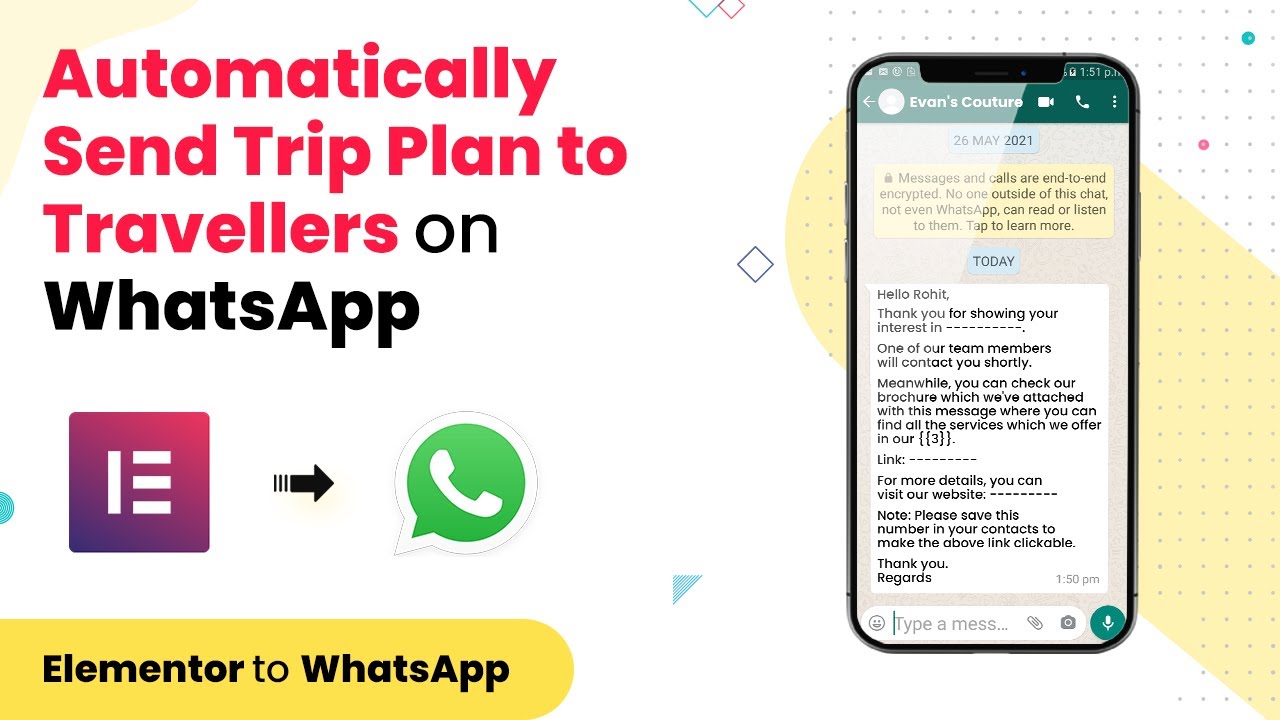
Automatically Send Trip Plans to Travellers with Pabbly Connect

Learn how to automatically send trip plans and itineraries to travellers using Pabbly Connect and Pabbly Connect in this detailed tutorial. Learn to create powerful connections between your critical applications without requiring specialized programming knowledge or extensive technical background.

Watch Step By Step Video Tutorial Below


1. Access Pabbly Connect for Integration

To start sending trip plans automatically, access Pabbly Connect by visiting its website. Create a free account if you haven’t done so already. This integration will connect your inquiry form submissions to WhatsApp messages seamlessly.

Once logged in, navigate to the dashboard. Here, you will create a new workflow specifically for the trip plan automation. Click on the ‘Create Workflow’ button and give your workflow a relevant name, like ‘Trip Plan from Elementor Forms to WhatsApp.’ This will help you identify the workflow later.


2. Set Up Webhook URL in Pabbly Connect

The next step involves setting up the webhook URL in Pabbly Connect. In your newly created workflow, choose Elementor as the application for the trigger event. Select ‘New Form Submission’ as the trigger event. This will generate a webhook URL.

  • Click on ‘Copy URL’ to copy the generated webhook URL.
  • Next, go to your WordPress site and edit the Elementor form.
  • In the form settings, find the ‘Actions After Submit’ section and add ‘Webhook’ as an action.

Paste the copied webhook URL into the designated field and save your changes. This setup allows Pabbly Connect to receive data from your form submissions automatically.


3. Capture Form Data in Pabbly Connect

After setting up the webhook, it’s time to test the integration by filling out the Elementor form. Once you submit the form, Pabbly Connect will capture the data sent from the form.

Go back to your Pabbly Connect dashboard and check for the captured data. You should see the details you filled in the form, confirming that the integration is working correctly. This data will be used to send the trip plan to the traveller.


4. Send Trip Plan via WhatsApp Using Pabbly Connect

The final step involves sending the captured data as a WhatsApp message using the 360 Dialog app integrated with Pabbly Connect. In your workflow, add a new action by selecting 360 Dialog as the application.

  • Choose ‘Send Template Messages’ as the action event.
  • Connect your 360 Dialog account by providing the required API key and domain name.
  • Select the message template you want to use for sending the trip plan.

Map the recipient’s mobile number and other dynamic fields from the form submission data. Once everything is set, click on ‘Save and Send Test Request’ to send a test message. If successful, the traveller will receive the trip plan on their WhatsApp.


5. Recap and Benefits of Using Pabbly Connect

In summary, using Pabbly Connect to automate trip plan deliveries enhances efficiency. This integration eliminates the need for manual work, allowing you to focus on other aspects of your travel business. By connecting Elementor forms with WhatsApp, you can respond to inquiries promptly and professionally.

Additionally, Pabbly Connect offers a free account that allows you to run up to 100 tasks each month, making it an excellent choice for small to medium-sized businesses. Overall, this automation saves time and improves customer satisfaction.


Conclusion

This tutorial detailed how to use Pabbly Connect and Pabbly Form Builder to automatically send trip plans to travellers upon inquiry. By following the outlined steps, you can streamline your communication and enhance your travel service efficiency.

Ensure you check out Pabbly Connect to create business automation workflows and reduce manual tasks. Pabbly Connect currently offer integration with 2,000+ applications.

Automate Sharing Real Estate Brochures on WhatsApp with Pabbly Connect

Learn how to automate sharing your real estate brochure PDF on WhatsApp using Pabbly Connect and Pabbly Connect. Follow these steps for seamless integration.

Watch Step By Step Video Tutorial Below


1. Setup Pabbly Connect for Integration

To begin the process of sharing your real estate brochure PDF on WhatsApp, you first need to set up Pabbly Connect. This integration platform allows you to automate workflows without any coding skills. Start by visiting the Pabbly website and signing up for an account if you haven’t already.

Once logged in, navigate to the Pabbly Connect dashboard. Here’s how you can set up your workflow:

  • Click on the ‘Create Workflow’ button.
  • Name your workflow, e.g., ‘Real Estate Brochure to WhatsApp’.
  • Click ‘Create’ to initialize your workflow.

Your workflow is now ready to be configured, connecting the Elementor form to WhatsApp through Pabbly Connect.


2. Connect Elementor Form to Pabbly Connect

The next step involves connecting your Elementor form to Pabbly Connect. This is crucial as it will allow you to capture the data submitted by customers when they fill out the form. To do this, you will need to set up a webhook URL in Pabbly Connect.

Follow these steps to connect your form:

  • In Pabbly Connect, select ‘Elementor’ as the app.
  • Choose ‘New Form Submission’ as the trigger event.
  • Copy the generated webhook URL.

Now, head back to your Elementor form settings. Under ‘Actions After Submit’, select ‘Webhook’ and paste the copied URL into the designated field. Save your changes to complete the connection.


3. Capture Data from Elementor Forms in Pabbly Connect

After successfully connecting your Elementor form to Pabbly Connect, the next step is to capture the data when a customer submits their inquiry. This is essential for sending the brochure via WhatsApp.

To test the connection, fill out your Elementor form as a customer would. For example, enter the name and contact details of a potential buyer and submit the form. Once submitted, return to the Pabbly Connect dashboard to verify that the data has been captured. You should see the details displayed in the workflow.

Here’s what to expect:

Name of the customer. Contact number for WhatsApp messaging. Any other relevant inquiry details.

With this data captured, you are now ready to send the brochure automatically through WhatsApp using Pabbly Connect.


4. Send the Brochure via WhatsApp Using Pabbly Connect

The final step is to send the brochure PDF to the customer via WhatsApp using Pabbly Connect and the 360dialog WhatsApp API. This step will ensure that the customer receives the brochure automatically after filling out the inquiry form.

To set this up, select ‘360dialog’ as the action app in Pabbly Connect. Choose ‘Send Template Message’ as the action event and connect your 360dialog account by entering your API key and domain name.

After connecting, select the template you created for sending messages. Ensure that you map the customer’s phone number correctly and fill in the message body with relevant details, including the brochure link. Here’s a summary of what to do:

Map customer details such as name and inquiry. Insert the link to the brochure PDF in the message. Test the setup to ensure the message is sent successfully.

Once you save and test the request, the message will be sent to the customer’s WhatsApp, completing the automation process through Pabbly Connect.


Conclusion

In this tutorial, we explored how to automate the process of sharing your real estate brochure PDF on WhatsApp using Pabbly Connect and Elementor forms. By following the steps outlined, you can streamline your customer inquiries and enhance your communication efficiency. Automating this process not only saves time but also improves customer satisfaction by providing immediate responses.

Ensure you check out Pabbly Connect to create business automation workflows and reduce manual tasks. Pabbly Connect currently offer integration with 2,000+ applications.

Send License Key via Email on Successful Payment Using Pabbly Connect

Learn how to send license keys via email on successful payment using Pabbly Connect. This step-by-step tutorial covers integration with Google, Gmail, and Razorpay. Navigate the automation landscape confidently with clear, structured guidance suitable for professionals regardless of prior technical experience.

Watch Step By Step Video Tutorial Below


1. Accessing Pabbly Connect for Integration

To send a license key via email on successful payment, start by accessing Pabbly Connect. This platform allows you to automate workflows efficiently by connecting various applications seamlessly.

Once you log into your Pabbly Connect account, navigate to the dashboard. Here, you can create a new workflow that will help automate the process of sending license keys after a payment is successfully processed.


2. Setting Up Razorpay Integration in Pabbly Connect

Begin by selecting Razorpay as your trigger application in Pabbly Connect. This is crucial for capturing payment events. Choose the ‘Payment Successful’ trigger event to initiate the workflow.

  • Log in to your Razorpay account and navigate to the API section.
  • Generate the API key and secret, which will be used in Pabbly Connect.
  • Copy the API key and secret into the respective fields in Pabbly Connect.

After entering the required details, save the settings and proceed to test the connection. This ensures that Pabbly Connect can successfully receive payment data from Razorpay.


3. Configuring Email Notifications via Gmail

In this step, you will set up Gmail as the action application in Pabbly Connect. This allows you to send an email containing the license key once a payment is confirmed.

  • Select Gmail as the action app and choose ‘Send Email’ as the action event.
  • Authorize Pabbly Connect to access your Gmail account.
  • Fill in the recipient’s email, subject, and body of the email, including the license key.

Ensure that the email content is clear and contains all necessary information for the customer. After configuring the email settings, save and test the action to confirm that the email is sent successfully via Gmail.


4. Integrating Google Sheets for License Key Management

To manage license keys effectively, integrate Google Sheets within Pabbly Connect. This will allow you to store and retrieve license keys associated with each customer.

Choose Google Sheets as an additional action app. Select the ‘Add Row’ action event to log each transaction and corresponding license key.

Connect your Google account to Pabbly Connect. Select the spreadsheet where you want to store the data. Map the fields such as customer name, email, and license key to the respective columns in your Google Sheet.

By integrating Google Sheets, you can keep track of all transactions and license keys, ensuring efficient management of your software licenses.


5. Finalizing the Workflow in Pabbly Connect

After setting up all the integrations, finalize your workflow in Pabbly Connect. Review all steps to ensure that each application is correctly configured and connected.

Once you are satisfied with the setup, activate the workflow. This will allow Pabbly Connect to automatically send license keys via email upon successful payments processed through Razorpay.

Test the entire workflow by processing a sample payment. Check your Gmail for the license key email. Verify that the license key is correctly logged in Google Sheets.

With everything tested and working, your integration is now complete, allowing you to send license keys automatically after successful payments, enhancing customer satisfaction.


Conclusion

In this tutorial, we explored how to send license keys via email on successful payment using Pabbly Connect. By integrating Razorpay, Gmail, and Google Sheets, you can automate the entire process, ensuring a seamless experience for your customers.

Ensure you check out Pabbly Connect to create business automation workflows and reduce manual tasks. Pabbly Connect currently offer integration with 2,000+ applications.