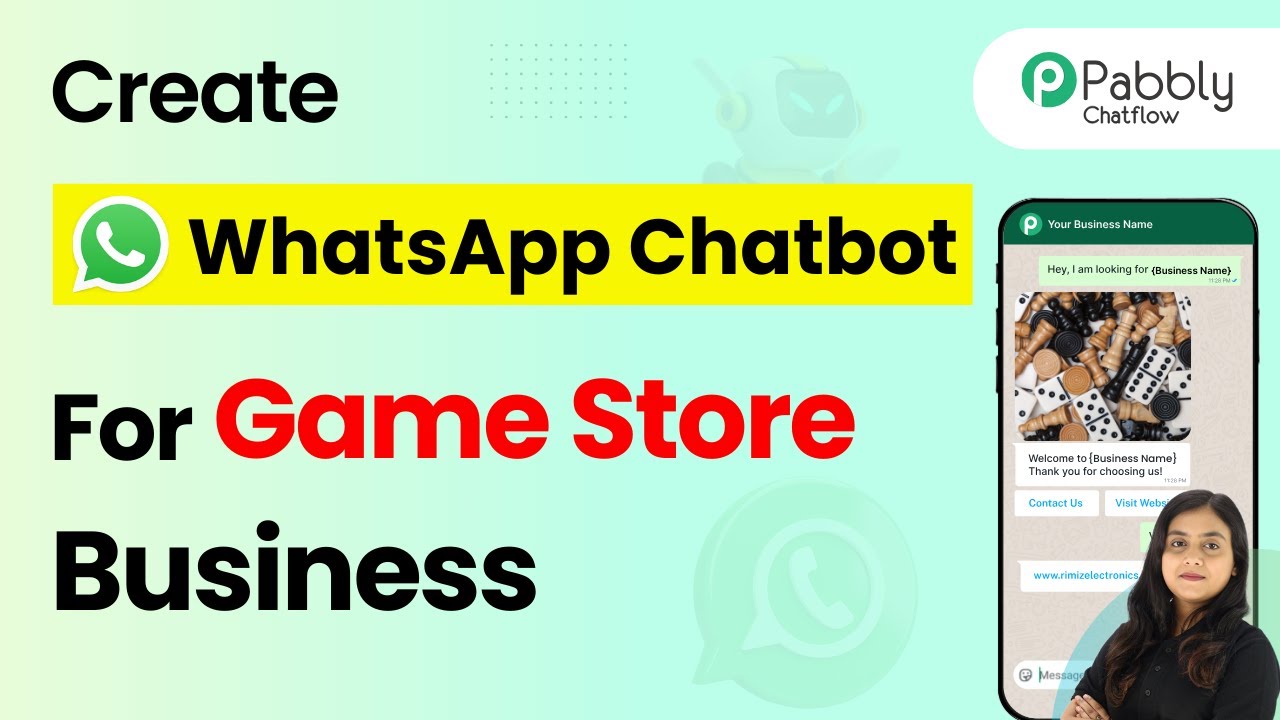
How to Send Jotform Leads to Ecwid Automatically Using Pabbly Connect

Learn how to send Jotform leads to Ecwid automatically using Pabbly Connect. Follow this step-by-step tutorial for seamless integration. Develop expertise in application integration and learn how to design streamlined automation workflows using proven, simplified approaches.

Watch Step By Step Video Tutorial Below


1. Access Pabbly Connect for Jotform and Ecwid Integration

To send Jotform leads to Ecwid automatically, the first step is to access Pabbly Connect. Navigate to the Pabbly Connect website by entering ‘Pabbly.com/connect’ in your browser’s address bar. If you already have an account, sign in; otherwise, sign up for free to start your automation journey.

Once signed in, you will be directed to the Pabbly Connect dashboard where you can create new workflows. Click on the ‘Create Workflow’ button to begin setting up the integration between Jotform and Ecwid.


2. Creating a Jotform to Ecwid Workflow

After accessing Pabbly Connect, you need to create a workflow specifically for Jotform to Ecwid integration. Name your workflow, such as ‘Jotform to Ecwid’, and click on the ‘Create’ button. This will initiate the process of linking both applications.

In the workflow settings, you will encounter two sections: Trigger and Action. The Trigger will be set to Jotform, specifically the ‘New Response’ trigger, which activates whenever a new form submission is received. Select this option to proceed.

  • Choose Jotform as the trigger application.
  • Select ‘New Response’ as the trigger event.
  • Copy the provided webhook URL for further configuration.

Once you have set the trigger, you will be able to connect Jotform with Pabbly Connect using the copied webhook URL.


3. Configuring the Jotform Webhook

To finalize the integration, you must configure the webhook in your Jotform account. Open your Jotform form and navigate to the ‘Settings’ tab, then select ‘Integrations’. Here, look for the Webhooks option, where you will paste the previously copied webhook URL from Pabbly Connect.

After pasting the webhook URL, click on ‘Complete Integration’ to establish the connection between Jotform and Pabbly Connect. This step ensures that every new submission on your Jotform form will trigger an action in your Ecwid account.


4. Setting Up the Ecwid Connection

With the Jotform webhook configured, the next step is to set up the action in Ecwid. In your Pabbly Connect workflow, select Ecwid as the action application and choose ‘Create Customer’ as the action event. This will allow you to automatically create a new customer in Ecwid based on the submitted Jotform data.

Connect your Ecwid account by clicking on ‘Connect’ and authorizing Pabbly Connect to access your Ecwid account. Once connected, you will be prompted to map the fields from Jotform to the respective fields in Ecwid, ensuring that all customer data is accurately transferred.

  • Map the email address from Jotform to the billing email in Ecwid.
  • Input the customer’s name and address details from the Jotform submission.
  • Ensure all required fields in Ecwid are filled using the mapped data.

After mapping the fields, click on ‘Save and Send Test Request’ to verify that the integration works correctly. This action will create a new customer in your Ecwid account using the data from your Jotform submission.


5. Testing the Integration

To confirm that the integration between Jotform and Ecwid is functioning, fill out your Jotform and submit it. Once you submit the form, return to Pabbly Connect to check if the customer has been created in your Ecwid account. This step is crucial to ensure that the automation is working as intended.

After testing, you can view the newly created customer in your Ecwid account under the ‘Customers’ section. This seamless integration allows you to manage your leads effectively and utilize the information for marketing purposes.

By using Pabbly Connect, you automate the process of adding new customers from Jotform to Ecwid, saving you time and effort while enhancing your e-commerce capabilities.


Conclusion

In this tutorial, we explored how to send Jotform leads to Ecwid automatically using Pabbly Connect. By following these steps, you can streamline your lead management process and enhance customer engagement. Automation saves time and improves efficiency, making it a valuable tool for your business.

Ensure you check out Pabbly Connect to create business automation workflows and reduce manual tasks. Pabbly Connect currently offer integration with 2,000+ applications.

Integrate Calendly Invitees with Your CRM and Email Marketing Using Pabbly Connect

Learn how to seamlessly integrate Calendly invitees with your CRM and email marketing apps using Pabbly Connect for efficient workflow automation. Follow this definitive guide to creating powerful automated workflows with straightforward, efficiency-focused solutions that save valuable time.

Watch Step By Step Video Tutorial Below


1. Accessing Pabbly Connect for Integration

To start integrating Calendly invitees with your CRM and email marketing apps, access Pabbly Connect. First, navigate to the Pabbly Connect website and log into your account. If you don’t have an account, sign up for free to explore its features.

Once logged in, you will find a user-friendly interface that allows you to create automated workflows. Click on the ‘Create Workflow’ button to begin your integration process. This is where you will set up the connection between Calendly and your desired applications.


2. Creating a Workflow in Pabbly Connect

After accessing Pabbly Connect, the next step is to create a new workflow. To do this, click on the ‘Create Workflow’ button. You will be prompted to name your workflow, such as ‘Calendly to CRM Integration’. This helps in identifying your workflow later.

  • Enter a descriptive name for your workflow.
  • Select the trigger application, which in this case is Calendly.
  • Choose the event that will trigger the workflow, like ‘New Invitee Created’.

Once you have configured these settings, click on ‘Save and Continue’ to proceed. This step sets the foundation for how Pabbly Connect will interact with Calendly and your chosen CRM.


3. Connecting Calendly to Pabbly Connect

Next, you will connect your Calendly account to Pabbly Connect. You need to generate an API key from your Calendly account. Go to the Integrations section in Calendly and copy your API key.

In Pabbly Connect, paste the API key into the required field to establish the connection. This allows Pabbly Connect to access your Calendly data. After entering the API key, click on ‘Save and Continue’ to finalize the connection.


4. Adding Invitees to CRM and Email Marketing Apps

With the connection established, the next step is to add invitees to your CRM and email marketing applications. In this step, you will map the fields from Calendly to your CRM. For example, you can map the invitee’s name, email, and appointment details. using Pabbly Connect

  • Select the CRM application you want to integrate with.
  • Map the fields such as First Name, Last Name, and Email from Calendly.
  • Repeat the mapping process for your email marketing app.

After mapping the fields, click on ‘Save and Continue’. This ensures that every new invitee from Calendly is automatically added to both your CRM and email marketing lists, streamlining your workflow.


5. Finalizing the Integration

The last step in this integration process involves testing the workflow you created in Pabbly Connect. Once the setup is complete, it’s crucial to test the connection to ensure everything works smoothly. Trigger a test invitee from Calendly to see if the data flows correctly into your CRM and email marketing tools.

If the test is successful, you can confidently activate your workflow. This automation will now run in the background, automatically adding new Calendly invitees to your CRM and email marketing apps without any manual effort.


Conclusion

Integrating Calendly invitees with your CRM and email marketing apps using Pabbly Connect simplifies your workflow significantly. This automation ensures that your invitees are added seamlessly, allowing you to focus on engaging with your audience more effectively.

Ensure you check out Pabbly Connect to create business automation workflows and reduce manual tasks. Pabbly Connect currently offer integration with 2,000+ applications.

Automate Google Hangouts Messages from Google Sheets Using Pabbly Connect

Learn how to automate sending Google Hangouts messages from Google Sheets using Pabbly Connect. Step-by-step tutorial with precise instructions. Master proven automation processes with practical implementation examples and strategic recommendations you can apply immediately in your workflow.

Watch Step By Step Video Tutorial Below


1. Setting Up Pabbly Connect for Google Hangouts Automation

To automate sending messages from Google Sheets to Google Hangouts, start by logging into your Pabbly Connect account. If you don’t have an account yet, you can create one for free and get 100 automation tasks every month. Once logged in, navigate to the dashboard to create a new workflow.

Click on the ‘Create Workflow’ button, name your workflow (e.g., ‘Google Sheets to Google Hangouts Automation’), and click ‘Create’. This action sets the stage for integrating Google Sheets and Google Hangouts through Pabbly Connect.


2. Setting Up the Trigger in Google Sheets

In this step, you will set up the trigger that initiates the automation when data is entered into Google Sheets. In the workflow, select Google Sheets as the trigger application and choose the trigger event as ‘New or Updated Spreadsheet Row’. This event will notify Pabbly Connect whenever a new row is added or updated in your spreadsheet.

  • Choose Google Sheets as the trigger application.
  • Select ‘New or Updated Spreadsheet Row’ as the trigger event.
  • Copy the provided webhook URL for further use.

After setting up the trigger, you will need to connect this webhook URL to your Google Sheets. This connection allows Pabbly Connect to receive data from your spreadsheet automatically.


3. Configuring Google Sheets for Webhook URL

To link Google Sheets with Pabbly Connect, open your spreadsheet and go to Extensions > Add-ons > Get Add-ons. Search for the ‘Pabbly Connect Webhooks’ add-on and install it. After installation, refresh your spreadsheet to see the new options.

Once refreshed, navigate to Extensions > Pabbly Connect Webhooks > Initial Setup. Paste the copied webhook URL into the designated field and specify the trigger column (e.g., column D where the last data entry occurs). This setup ensures that when data is entered in this column, it triggers the workflow.


4. Setting Up Google Hangouts Action in Pabbly Connect

Now, it’s time to configure Google Hangouts as the action application in your workflow. In the action step, select Google Hangouts and choose ‘Create Message’ as the action event. This step allows Pabbly Connect to send messages to your specified Google Hangouts space.

To proceed, you will need the chat webhook URL from Google Hangouts. Go to your Google Hangouts space, click on the arrow next to the space name, and select ‘Manage Webhooks’. Create a new webhook, give it a name (e.g., ‘From Google Sheets’), and copy the generated URL back into Pabbly Connect.

  • Select Google Hangouts as the action application.
  • Choose ‘Create Message’ as the action event.
  • Paste the Hangouts webhook URL into the appropriate field.

In the message field, write a standard message template and map the data from Google Sheets to customize the message. This mapping will ensure that each message sent to Google Hangouts contains the relevant property details.


5. Testing the Integration

After configuring both Google Sheets and Google Hangouts, it’s crucial to test the integration. Click on the ‘Save and Send Test Request’ button in Pabbly Connect. This action will send a test message to your Google Hangouts space, verifying that everything is working correctly.

Check your Google Hangouts space to see if the message appears. If the test is successful, you will see a message indicating the property details. This confirms that your workflow is functioning as intended, allowing for seamless communication between Google Sheets and Google Hangouts.

Once the test is successful, you can finalize your workflow. From now on, every time a new row is added to your Google Sheets, a message will automatically be sent to Google Hangouts, enhancing your team’s productivity.


Conclusion

In this tutorial, you learned how to automate sending Google Hangouts messages from Google Sheets using Pabbly Connect. By following these steps, you can streamline your communication process and improve team efficiency. This integration allows for real-time updates and notifications, ensuring that your team stays informed about new property listings.

Ensure you check out Pabbly Connect to create business automation workflows and reduce manual tasks. Pabbly Connect currently offer integration with 2,000+ applications.

Automate Task Notifications: Send Asana Task Details to Google Hangouts Using Pabbly Connect

Learn how to automate sending Asana task details to Google Hangouts using Pabbly Connect. Follow this step-by-step tutorial for seamless integration. Discover hidden automation capabilities within your existing tools. This guide shows you how to connect your essential applications and permanently eliminate redundant manual processes.

Watch Step By Step Video Tutorial Below


1. Setting Up Pabbly Connect for Asana and Google Hangouts Integration

To automate sending Asana task details to Google Hangouts, you first need to access Pabbly Connect. Start by logging into your Pabbly Connect account, which allows you to create workflows between different applications easily.

Once logged in, navigate to the dashboard and click on the ‘Create Workflow’ button. Name your workflow appropriately, such as ‘Asana to Google Hangouts Automation,’ and click on the ‘Create’ button to initiate the setup process.


2. Setting Up Asana as the Trigger Application

In this step, you’ll configure Asana as the trigger application in Pabbly Connect. Select Asana from the list of applications and choose the trigger event as ‘New Task in Project.’ This event will initiate the workflow whenever a new task is created in Asana.

  • Select ‘Add New Connection’ when prompted.
  • Connect with Asana by logging in and authorizing the connection.
  • Choose the specific project from which you want to capture task details.

After selecting the project, click on ‘Save and Send Test Request’ to capture the details of a newly created task. This step is crucial for ensuring that your automation is set up correctly.


3. Creating a New Task in Asana for Testing

Now that you have set up the trigger, you need to create a new task in Asana to test the integration. Go to your Asana dashboard, click on the ‘+’ icon to add a new task, and fill in the necessary details like task name, description, and priority.

Once the task is created, return to Pabbly Connect to verify if the task details have been captured successfully. You should see all relevant information, including the task name, description, and status, displayed in the response section.


4. Configuring Google Hangouts as the Action Application

Next, you will set up Google Hangouts as the action application in your Pabbly Connect workflow. Select Google Hangouts and choose the action event as ‘Create Message.’ This step allows you to send task notifications to your team on Google Hangouts.

  • Obtain the chat webhook URL from your Google Hangouts space.
  • Paste the webhook URL in the designated field in Pabbly Connect.
  • Compose a message that includes task details, using the mapped fields from Asana.

After composing your message, click on ‘Save and Send Test Request’ to send a test message to your Google Hangouts space, confirming that the integration works as intended.


5. Finalizing the Integration and Testing

Once you have set up both Asana and Google Hangouts in your Pabbly Connect workflow, it’s time to finalize the integration. Review all the mappings in your action step to ensure that the task details from Asana are correctly linked to your Google Hangouts message.

Click on ‘Save and Send Test Request’ one last time to see the automated message delivered in your Google Hangouts space. If everything is set up correctly, you should receive a message containing the task details, confirming the successful automation.


Conclusion

By following this tutorial, you have successfully set up an automation that sends Asana task details to Google Hangouts using Pabbly Connect. This integration not only saves time but also enhances team communication by delivering task notifications automatically. With Pabbly Connect, you can streamline your workflow and improve productivity effortlessly.

Ensure you check out Pabbly Connect to create business automation workflows and reduce manual tasks. Pabbly Connect currently offer integration with 2,000+ applications.

Automatically Send RSS Feed to Discord Using Pabbly Connect

Learn how to automatically send RSS feeds to Discord using Pabbly Connect. Follow this step-by-step tutorial for seamless integration. Explore systematic approaches to creating efficient automation solutions that convert technical concepts into practical, implementable instructions.

Watch Step By Step Video Tutorial Below


1. Setting Up Pabbly Connect for RSS Feed to Discord Integration

To send RSS feeds to Discord automatically, the first step is to set up Pabbly Connect. Log in to your account on Pabbly Connect to access the dashboard. If you don’t have an account yet, you can create one easily and receive 100 free automation tasks every month.

Once logged in, click on the ‘Create Workflow’ button. Name your workflow something descriptive, such as ‘Send RSS Feeds to Discord Automatically’. This naming helps you identify the workflow later. After naming, click on the ‘Create’ button to proceed.


2. Configuring the Trigger in Pabbly Connect

In this step, you will configure the trigger for your workflow in Pabbly Connect. The trigger will be the event that starts your automation process. Select the RSS feature provided by Pabbly in the ‘Choose App’ field.

  • Choose ‘New Item in Feed’ as the trigger event.
  • Paste the RSS feed URL from your chosen website (e.g., NDTV sports RSS feed).
  • Click ‘Save and Send Test Request’ to fetch the latest feed details.

After completing these steps, Pabbly Connect will fetch the most recent RSS feed item. This setup ensures that any new posts published on the website will trigger the automation.


3. Setting Up Discord Action in Pabbly Connect

Next, you need to set up the action that will send the RSS feed to your Discord channel using Pabbly Connect. In the action step, search for Discord and select it. Choose the action event as ‘Send Channel Message with HTML’. This allows formatted messages to be sent to your Discord channel.

To connect Discord, you will need a webhook URL. Follow these steps to create a webhook:

  • Go to your Discord server and click on the channel settings.
  • Select ‘Integrations’, then ‘Webhooks’.
  • Create a new webhook, give it a name, and copy the webhook URL.

Paste this webhook URL into Pabbly Connect where prompted. You can also customize the message that will accompany the RSS feed link when it is sent to Discord.


4. Finalizing the Integration and Testing

To finalize your integration using Pabbly Connect, you need to configure the message that will be sent to your Discord channel. You can personalize the message to your audience, such as ‘Hi Family, we have just published a new RSS feed for you!’.

After setting up the message, link the RSS feed URL from the previous step into the message. This way, your audience can click directly on the feed link to view the content.

Finally, click ‘Save and Send Test Request’ to test the integration. If set up correctly, you should see the message appear in your Discord channel, confirming that the automation works as intended.


5. Benefits of Using Pabbly Connect for RSS Feed Automation

Using Pabbly Connect to automate sending RSS feeds to Discord has numerous benefits. It saves time and effort by eliminating manual posting of updates. This automation allows you to keep your community informed in real-time.

Moreover, Pabbly Connect checks for new RSS posts every eight hours, ensuring that your Discord channel is always up-to-date with the latest information. This consistent engagement can significantly enhance user interaction within your Discord community.


Conclusion

In this tutorial, we explored how to send RSS feeds to Discord automatically using Pabbly Connect. By following the steps outlined, you can streamline your communication and keep your audience engaged effortlessly. Automate your workflow today and enjoy the benefits of real-time updates!

Ensure you check out Pabbly Connect to create business automation workflows and reduce manual tasks. Pabbly Connect currently offer integration with 2,000+ applications.

Integrate Cognito Forms with Mattermost Using Pabbly Connect for Lead Alerts

Learn how to use Pabbly Connect to automate lead alerts from Cognito Forms to Mattermost. Step-by-step tutorial for seamless integration. Build sophisticated automated workflows in less time than you think. This guide translates complex integrations into straightforward steps for immediate implementation.

Watch Step By Step Video Tutorial Below


1. Accessing Pabbly Connect for Integration

To start integrating Cognito Forms with Mattermost, access Pabbly Connect. First, visit the Pabbly website and navigate to the Pabbly Connect product page. If you are a new user, click on ‘Sign Up for Free’ to create an account. This process only takes a few minutes and provides you with 100 free tasks each month.

Once you have an account, log in to Pabbly Connect. On the dashboard, you will see a plus sign that allows you to create a new workflow. Click on it and give your workflow a name, such as ‘Cognito Forms to Mattermost Integration.’ This is the first step in automating lead alerts.


2. Setting Up the Trigger with Cognito Forms

In Pabbly Connect, the integration process begins with setting up a trigger. Click on the trigger window and select Cognito Forms as the application. Choose the trigger event as ‘New Entry’. This step is crucial because it ensures that every time a form is filled out, Pabbly Connect will capture the data.

  • Select ‘New Entry’ as the trigger event.
  • Copy the provided webhook URL from Pabbly Connect.
  • Go to your Cognito Forms account and access the specific form you want to integrate.

After copying the webhook URL, navigate to the submission settings in your Cognito form. Enable the option to post data to a website and paste the webhook URL in the provided field. Save these settings to establish the connection between Cognito Forms and Pabbly Connect.


3. Testing the Connection in Pabbly Connect

Next, you need to test the connection to ensure that the data flows correctly from Cognito Forms to Pabbly Connect. Fill out the form as a test submission. For example, enter the name ‘Adam Smith’, email ‘[email protected]’, and a mobile number, then submit the form. This action will trigger the webhook and send the data to Pabbly Connect.

Return to Pabbly Connect to see if the response has been captured. You should see the details from your test submission listed in the Pabbly Connect interface. This confirmation indicates that the integration is successfully capturing data from Cognito Forms.


4. Creating the Action in Mattermost

Now that you have set up the trigger, the next step in Pabbly Connect is to create the action that sends the lead alerts to Mattermost. Choose Mattermost as the application for the action step and select ‘Create a Post’ as the action event. Click on ‘Connect’ to establish a connection with your Mattermost account.

  • Generate a personal access token in Mattermost by going to your profile and selecting ‘Security’.
  • Copy the token and paste it into Pabbly Connect.
  • Enter the Mattermost URL without the trailing backslash.

After connecting, select the team and channel where you want the alerts to be posted. You can customize the message to include details from the form submission, like the customer’s name, email, and mobile number, which will be mapped from the data captured in Pabbly Connect.


5. Finalizing the Integration and Testing

With the action set up, save your workflow in Pabbly Connect. To ensure everything is working correctly, conduct another test submission through your Cognito form. After submitting, check your Mattermost channel to see if the lead alert appears as intended.

If successful, you will see a message like ‘New lead received: Customer details are Name: Adam Smith, Email: [email protected], Mobile: [your number].’ This confirms that the integration is functioning as expected. Now, every time a customer fills out the form, the details will automatically be sent to your Mattermost channel.


Conclusion

In this tutorial, we demonstrated how to automate lead alerts from Cognito Forms to Mattermost using Pabbly Connect. By following the steps outlined, you can easily set up this integration and streamline your communication process. Enjoy the benefits of automated lead management!

Ensure you check out Pabbly Connect to create business automation workflows and reduce manual tasks. Pabbly Connect currently offer integration with 2,000+ applications.

Automate Sending Ramzan Offers to Customers on WhatsApp Using Pabbly Connect

Learn how to send Ramzan offers to your customers on WhatsApp using Pabbly Connect. This detailed tutorial covers integration steps with Facebook, YouTube, Gmail, and more.

Watch Step By Step Video Tutorial Below


1. Accessing Pabbly Connect for Integration

To send Ramzan offers to your customers on WhatsApp, you will start by accessing Pabbly Connect. Open your browser and navigate to Pabbly.com. From the homepage, click on ‘Products’ and select Pabbly Connect.

If you are a first-time user, click on ‘Sign Up for Free’ to create an account. After signing up, you will receive 100 free tasks every month. Existing users can simply click on ‘Sign In’. After logging in, go to the ‘All Apps’ section, find Pabbly Connect, and click on ‘Access Now’ to enter the dashboard.


2. Creating a Workflow in Pabbly Connect

In the Pabbly Connect dashboard, you will create a workflow to send offers automatically. Click on the plus sign to create a new workflow and name it ‘Send Offers to Facebook Leads on WhatsApp’. This name helps you identify the workflow later.

Once the workflow is created, you will see a trigger window and an action window. In the trigger window, select ‘Facebook Lead Ads’ as the application and choose ‘New Lead (Instant)’ as the trigger event. Click on ‘Connect’ to set up the connection.

  • Choose ‘Add New Connection’ and authenticate your Facebook account.
  • Select your Facebook page and the lead generation form.
  • Click on ‘Save and Send Test Request’ to ensure the connection works.

This setup allows Pabbly Connect to capture leads from your Facebook ads automatically, preparing for the next step of sending offers via WhatsApp.


3. Sending Offers to Customers via WhatsApp

With the leads captured, the next step is to send them the Ramzan offers on WhatsApp using Pabbly Connect. In the action step, choose ‘360 Dialog’ and select ‘Send Template Message’ as the action event. Click on ‘Connect’ to establish the connection.

To connect, you will need your 360 Dialog API key. Log into your 360 Dialog account, navigate to the WhatsApp account page, and click on ‘Generate API Key’. Copy this key and return to Pabbly Connect to paste it in the required field.

  • Enter the domain provided during the API key generation.
  • Select the template you created for sending offers.
  • Map the recipient’s WhatsApp number and customize the message with customer details.

By following these steps, Pabbly Connect ensures that your promotional messages reach your customers promptly, enhancing your marketing efforts during Ramzan.


4. Testing the Integration Workflow

To ensure everything is working smoothly, it’s time to test the integration you set up in Pabbly Connect. Fill out the Facebook lead form with test customer information, such as name, email, and WhatsApp number. Submit the form to trigger the workflow.

After submission, return to Pabbly Connect to check for the response. If the connection is successful, you should see the customer details captured from the form submission. This confirms that the workflow is functioning correctly.

Check your WhatsApp for the message sent to the test customer. Ensure that the message contains the correct customer details and offer. If successful, save the workflow in Pabbly Connect.

This testing phase is crucial to verify that your customers receive the offers seamlessly, thanks to Pabbly Connect automating the process.


5. Conclusion: Automate Your Ramzan Offers with Pabbly Connect

In conclusion, using Pabbly Connect to send Ramzan offers to your customers on WhatsApp is an effective way to streamline your marketing efforts. By integrating Facebook Lead Ads with WhatsApp, you ensure that your promotional messages reach your audience automatically.

Ensure you check out Pabbly Connect to create business automation workflows and reduce manual tasks. Pabbly Connect currently offer integration with 2,000+ applications.

With the simple steps outlined in this tutorial, you can set up and test your workflow in Pabbly Connect efficiently. This automation not only saves time but also enhances customer engagement during the festive season. Start using Pabbly Connect today to elevate your marketing strategies!

Automate Google Chat Messages for HubSpot CRM Activities with Pabbly Connect

Learn how to automatically send Google Chat messages for new activities in HubSpot CRM using Pabbly Connect in this detailed tutorial. Explore systematic approaches to creating efficient automation solutions that convert technical concepts into practical, implementable instructions.

Watch Step By Step Video Tutorial Below


1. Accessing Pabbly Connect for Integration

To automate the process of sending Google Chat messages for new activities in HubSpot CRM, you need to access Pabbly Connect. This powerful platform allows seamless integration between various applications without any coding skills required.

Start by navigating to the Pabbly website. You can do this by entering ‘Pabbly.com’ in your browser. Once on the site, go to the products section and select Pabbly Connect. If you are a first-time user, click on ‘Sign Up for Free’ to create your account. Existing users can simply log in.


2. Creating a Workflow in Pabbly Connect

Once logged in to Pabbly Connect, you will be directed to the dashboard. To initiate the integration process, click on the plus sign to create a new workflow. Name your workflow, for instance, ‘HubSpot to Google Chat Integration,’ and click on ‘Create’.

  • Click on the trigger window to set up the trigger application.
  • Select ‘HubSpot CRM’ as the application.
  • Choose ‘New Ticket’ as the trigger event.

Now, click on ‘Connect’ and then ‘Add New Connection’. You will be prompted to enter your HubSpot API key. Follow the instructions provided to generate this key from your HubSpot account settings.


3. Setting Up Integration with HubSpot

With Pabbly Connect, you can easily connect your HubSpot account. After entering your API key, click ‘Save’. This action connects your HubSpot CRM account to Pabbly Connect.

Next, create a new ticket in your HubSpot CRM to test the integration. Click on ‘Create Ticket’, fill in the necessary details such as ticket name, description, and status, and then save the ticket. This step is crucial as it allows Pabbly Connect to capture the latest response for the integration.

  • Input a ticket name like ‘Mattermost Trigger Issue’.
  • Select the appropriate pipeline and status.
  • Provide a detailed description of the issue.

After creating the ticket, return to Pabbly Connect and click on ‘Save and Send Test Request’. This will capture the ticket details and confirm that the integration is functioning correctly.


4. Sending Messages to Google Chat

Now that you have set up the HubSpot integration, the next step is to configure the Google Chat message functionality. In Pabbly Connect, select ‘Google Chat’ as the action application.

Choose ‘Create Message’ as the action event and click ‘Connect’. You will need to provide the Google Chat webhook URL. To do this, go to your Google Chat account, create a new space, and manage the webhooks to obtain the URL.

Create a new webhook and name it, for example, ‘HubSpot Tickets’. Copy the generated webhook URL. Paste this URL into the Pabbly Connect action setup.

Next, craft the message you want to send. Include details like ticket ID, subject, and description, mapping these fields from the HubSpot response captured earlier.


5. Testing and Finalizing the Integration

After setting up the message, click on ‘Save and Send Test Request’ in Pabbly Connect. This action sends a test message to your Google Chat space, confirming the integration is working.

To ensure everything is functioning correctly, check your Google Chat for the new message. You should see details like the ticket ID, subject, and description displayed in the chat.

Verify that the message contains accurate ticket details. Ensure that subsequent tickets also trigger messages in Google Chat.

Once confirmed, save your workflow in Pabbly Connect. Your integration is now complete, and every time a new ticket is created in HubSpot, a message will automatically be sent to your Google Chat.


Conclusion

In this tutorial, we explored how to use Pabbly Connect to automate sending Google Chat messages for new activities in HubSpot CRM. By following the steps outlined, you can ensure efficient communication within your team whenever a new ticket is raised.

Ensure you check out Pabbly Connect to create business automation workflows and reduce manual tasks. Pabbly Connect currently offer integration with 2,000+ applications.

Automate Trello Cards to Google Hangouts with Pabbly Connect

Learn how to automate sending Trello card details to Google Hangouts using Pabbly Connect. Follow this step-by-step guide for seamless integration. Follow this definitive guide to creating powerful automated workflows with straightforward, efficiency-focused solutions that save valuable time.

Watch Step By Step Video Tutorial Below


1. Setting Up Pabbly Connect for Integration

To automate sending Trello card details to Google Hangouts, you need to start by setting up Pabbly Connect. First, access the Pabbly Connect dashboard by signing in or creating a new account if you are a first-time user. This platform is essential for managing your integrations efficiently.

Once logged in, you will see an option to create a new workflow. Click on the ‘Create Workflow’ button, and give your workflow a meaningful name, such as ‘Trello to Google Hangouts’. This name will help you identify the workflow later.


2. Configuring Trello Integration in Pabbly Connect

After setting up your workflow, the next step is to configure Trello as your trigger application in Pabbly Connect. Select Trello from the list of applications, and choose the trigger event, which is typically ‘New Card’. This event will initiate the workflow whenever a new card is created in Trello.

  • Select the Trello account you want to connect.
  • Choose the board and list where the new card will be created.
  • Test the trigger to ensure it works correctly.

Once you have set up the trigger, you will need to map the fields from Trello to ensure that the correct details are sent to Google Hangouts. This mapping is crucial for the automation to work seamlessly.


3. Setting Up Google Hangouts in Pabbly Connect

Next, you will configure Google Hangouts as the action application in Pabbly Connect. Select Google Hangouts from the list and choose the action event, such as ‘Send Message’. This action will allow you to send messages directly to your Google Hangouts whenever a new Trello card is created.

Log in to your Google account when prompted, and authorize Pabbly Connect to access your Google Hangouts. After authorization, you can customize the message that will be sent. You can include details from the Trello card, such as the card title and description.


4. Mapping Fields Between Trello and Google Hangouts

Once both applications are configured, it’s time to map the fields between Trello and Google Hangouts in Pabbly Connect. This step is essential to ensure that the correct information is sent. For example, you can map the Trello card title to the message title in Google Hangouts and the card description to the message body.

  • Map the ‘Card Title’ field from Trello to the ‘Message Title’ field in Google Hangouts.
  • Map the ‘Card Description’ field to the ‘Message Body’.

After mapping the fields, it’s crucial to test the integration to ensure everything works as expected. Send a test message to Google Hangouts and verify that the details from the Trello card appear correctly.


5. Finalizing and Activating Your Workflow

After successfully testing the integration, the final step is to activate your workflow in Pabbly Connect. This step ensures that the automation will run every time a new card is created in Trello. Simply toggle the switch to turn on your workflow.

Once activated, you can monitor your workflow from the Pabbly Connect dashboard. You will receive notifications for any errors or successful message deliveries, allowing you to manage your automation efficiently.


Conclusion

In this tutorial, we covered how to automate sending Trello card details to Google Hangouts using Pabbly Connect. This integration simplifies communication and ensures that your team stays updated with the latest card details. By following these steps, you can enhance your workflow and improve collaboration.

Ensure you check out Pabbly Connect to create business automation workflows and reduce manual tasks. Pabbly Connect currently offer integration with 2,000+ applications.

Social Media to Discord Automation: Connect YouTube, Twitter, and Facebook with Pabbly Connect

Learn how to automate your social media posts from YouTube, Twitter, and Facebook to Discord using Pabbly Connect. Step-by-step tutorial included. Master proven automation processes with practical implementation examples and strategic recommendations you can apply immediately in your workflow.

Watch Step By Step Video Tutorial Below


1. Setting Up Pabbly Connect for Social Media to Discord Automation

To start the automation process, you need to access Pabbly Connect. Go to the Pabbly website and navigate to the Connect section.

Once there, you can either sign in or sign up for a new account. Signing up is quick and offers you 100 free tasks monthly. After logging in, you will be directed to the dashboard where you can create workflows.


2. Connecting Facebook to Discord Using Pabbly Connect

In this section, we will connect Facebook to Discord through Pabbly Connect. First, create a new workflow and name it ‘Facebook to Discord’. This helps in organizing your automations.

Next, set Facebook as the trigger application and select the ‘New Post’ event. Authenticate your Facebook account to allow Pabbly Connect to access your pages. Choose the page from which you want to pull posts.

  • Select the Facebook page you want to connect.
  • Set the number of posts to fetch (e.g., 1, 5, 10).
  • Click on ‘Save and Send Test Request’ to validate the connection.

Once the connection is established, you can see the latest post details. This data will be sent to Discord in the next steps.


3. Sending Facebook Posts to Discord Channels

With Facebook connected, the next step is to send posts to Discord. In Pabbly Connect, choose Discord as the action application and select ‘Send Channel Message’ as the action event.

To set this up, you will need a webhook URL from Discord. Create a new webhook in your Discord server settings, and copy the URL. Paste this URL back into Pabbly Connect to link the two platforms.

  • Go to Discord server settings and select ‘Integrations’.
  • Create a new webhook for the Facebook channel.
  • Map the message fields to include the post content and link.

After setting this up, click on ‘Save and Send Test Request’ to ensure that the Facebook posts appear correctly in your Discord channel.


4. Automating YouTube Videos to Discord with Pabbly Connect

Next, we will automate the process of sending new YouTube videos to Discord using Pabbly Connect. Start by creating another workflow titled ‘YouTube to Discord’.

Select YouTube as the trigger application and choose the ‘New Video in Channel’ event. Authenticate your YouTube account, allowing Pabbly Connect to access your channel information.

Upload a new video to your YouTube channel. Click on ‘Save and Send Test Request’ to fetch the latest video. Choose the video details to send to Discord.

This will ensure that every time you upload a new video, it gets automatically posted in your designated Discord channel.


5. Connecting Twitter to Discord via Pabbly Connect

Finally, we will connect Twitter to Discord using Pabbly Connect. Create a new workflow named ‘Twitter to Discord’.

Set Twitter as the trigger application and select the ‘New Tweet’ event. Authenticate your Twitter account to permit Pabbly Connect to access your tweets.

Create a new tweet on your Twitter account. Click on ‘Save and Send Test Request’ to validate the connection. Ensure the tweet appears correctly in your Discord channel.

With this setup, any new tweets will be automatically sent to your Discord server, keeping your followers updated.


Conclusion

Using Pabbly Connect, you can seamlessly automate the process of connecting social media platforms like YouTube, Twitter, and Facebook to Discord. This integration helps in keeping your community engaged by delivering content directly to them.

Ensure you check out Pabbly Connect to create business automation workflows and reduce manual tasks. Pabbly Connect currently offer integration with 2,000+ applications.