Integrating Facebook Ad Leads to Google Sheets in Real Time with Pabbly Connect

Learn how to integrate Facebook Ad leads directly into Google Sheets in real time using Pabbly Connect. Step-by-step guide included. Discover how to seamlessly connect your essential tools through accessible instructions that make powerful automation available to professionals at every skill level.

Watch Step By Step Video Tutorial Below


1. Setting Up Pabbly Connect for Facebook Ad Leads

To integrate Facebook Ad leads into Google Sheets, start by accessing Pabbly Connect. This platform allows you to create automated workflows that connect different applications seamlessly. Begin by logging into your Pabbly Connect account and creating a new workflow named ‘Facebook Lead Ads to Google Sheets’.

Next, select Facebook Lead Ads as your trigger application. The trigger event you need is ‘New Lead in Any Form’, which ensures that every new lead captured by Facebook is processed in real time. Click on the endpoint and connect your Facebook account by clicking the ‘Connect with Facebook Lead Ads’ button. Once connected, save and send a test request to set up your webhook automatically.


2. Testing Facebook Lead Ads with Pabbly Connect

After setting up the connection, it’s essential to test the integration. Use the Facebook Lead Ads testing tool to submit a test lead. This step ensures that Pabbly Connect captures the lead data correctly. Once you submit the test lead, Pabbly Connect will receive this data in real time.

  • Select the correct Facebook page and lead form.
  • Delete any previously submitted leads to avoid conflicts.
  • Submit a new test lead using the testing tool.

Once the test lead is submitted, check Pabbly Connect to see if the lead data appears correctly. You should see the name and email captured from the test lead. This confirms that your setup is functioning as intended.


3. Filtering Leads in Pabbly Connect

To ensure that only relevant leads are processed, you can set up a filter in Pabbly Connect. This filter will check that the lead comes from the correct Facebook lead form. This is crucial if you have multiple forms and want to capture leads from a specific one.

To add a filter, select the action step in your workflow and configure it to check if the form name matches your desired Facebook lead form. For example, set the condition to check if the form name is equal to ‘Facebook Leads Form’. This ensures that only leads from this specific form will proceed to the next steps in your workflow.


4. Sending Captured Leads to Google Sheets

Once you have filtered the leads, the next step is to send the captured lead data to Google Sheets using Pabbly Connect. Create a new Google Sheet named ‘Facebook Lead Ads’ where you will store the leads. Connect your Google account to Pabbly Connect to enable data transfer.

In the action step, select ‘Add New Row’ to map the lead data. You will need to map the fields for the name and email collected from the Facebook lead. Make sure to select the last value from the lead data, as Facebook often sends data in a convoluted format. This ensures that you receive accurate information in your Google Sheet.


5. Verifying the Integration of Leads into Google Sheets

After setting up the action to send leads to Google Sheets, it’s important to verify that the integration works as expected. Use the testing tool to submit another test lead and check your Google Sheet for the new entry. This will confirm that Pabbly Connect is successfully capturing and transferring lead data.

If you encounter any issues, review the filter settings to ensure they match the form from which you are capturing leads. Additionally, check the mappings in the Google Sheets action step to ensure correct data placement. If everything is set up correctly, you should see the new lead entry appear in your Google Sheet instantly.


Conclusion

In this tutorial, we explored how to use Pabbly Connect to integrate Facebook Ad leads into Google Sheets in real time. By following the steps outlined, you can automate your lead management process efficiently.

Ensure you check out Pabbly Connect to create business automation workflows and reduce manual tasks. Pabbly Connect currently offer integration with 2,000+ applications.

Integrate InstaMojo with ActiveCampaign Using Pabbly Connect

Learn how to seamlessly integrate InstaMojo with ActiveCampaign using Pabbly Connect for efficient email marketing and data management. Develop expertise in application integration and learn how to design streamlined automation workflows using proven, simplified approaches.

Watch Step By Step Video Tutorial Below


1. Setting Up Pabbly Connect for Integration

To start integrating InstaMojo with ActiveCampaign using Pabbly Connect, first, access your Pabbly Connect dashboard. This platform allows you to automate workflows between various applications seamlessly.

Once you are in the dashboard, click on ‘Create New Workflow’. This action initiates the process of setting up your integration. You will be prompted to name your workflow for easy identification.


2. Selecting InstaMojo as Your Trigger Application

In this step, you will select InstaMojo as your trigger application within Pabbly Connect. This is essential for capturing data when a purchase is made on InstaMojo.

  • Choose ‘InstaMojo’ from the list of applications.
  • Select the trigger event, which is typically a new sale or payment.
  • Connect your InstaMojo account by providing the necessary API key or credentials.

After setting up the trigger, ensure that you test the connection to confirm that data is being captured correctly. This is crucial for the subsequent steps in the integration process.


3. Configuring ActiveCampaign as Your Action Application

Next, you will configure ActiveCampaign as your action application in Pabbly Connect. This allows you to send the captured data from InstaMojo directly to ActiveCampaign for email marketing.

Select ‘ActiveCampaign’ from the list of applications and choose the action event, such as ‘Add Contact’. You will need to connect your ActiveCampaign account by entering your API URL and key.

  • Map the fields from InstaMojo to ActiveCampaign, ensuring that customer details like name and email are correctly aligned.
  • Test the action to verify that data is being sent to ActiveCampaign successfully.

Once the setup is complete, your integration will facilitate seamless data transfer between InstaMojo and ActiveCampaign, enhancing your marketing efforts.


4. Finalizing Your Integration in Pabbly Connect

After configuring both applications, it’s time to finalize your integration in Pabbly Connect. Review all the mapped fields and settings to ensure accuracy.

Once you are satisfied, turn on the workflow to enable the real-time data transfer between InstaMojo and ActiveCampaign. This will ensure that every new sale on InstaMojo automatically adds a contact to your ActiveCampaign list.

Monitor the workflow for any errors or issues that may arise. Make adjustments as necessary to improve the integration process.

With the integration finalized, you can now focus on your email marketing campaigns, knowing that your data flow is automated and reliable.


5. Testing and Optimizing Your Integration

To ensure that your integration between InstaMojo and ActiveCampaign using Pabbly Connect is functioning correctly, it’s crucial to conduct thorough testing. Start by making a test purchase on InstaMojo.

Check your ActiveCampaign account to confirm that the test contact is added successfully. If everything works as expected, your integration is set up correctly. If not, revisit the mapping and settings in Pabbly Connect to troubleshoot any issues.

Regularly monitor the integration to optimize the process over time. You may want to adjust the fields or add additional actions as your marketing needs evolve.


Conclusion

By integrating InstaMojo with ActiveCampaign using Pabbly Connect, you streamline your email marketing efforts and enhance data management. This automation allows for real-time updates and improved customer engagement, making your marketing strategies more effective.

Ensure you check out Pabbly Connect to create business automation workflows and reduce manual tasks. Pabbly Connect currently offer integration with 2,000+ applications.

Understanding the Difference Between Polling and Webhooks for Integration with Pabbly Connect

Learn how to integrate Facebook and YouTube using Pabbly Connect, understanding the differences between polling and webhooks for real-time data transfer. Build sophisticated automated workflows in less time than you think. This guide translates complex integrations into straightforward steps for immediate implementation.

Watch Step By Step Video Tutorial Below


1. Introduction to Pabbly Connect for Integration

Pabbly Connect is a powerful automation tool that enables seamless integration between various applications like Facebook and YouTube. Understanding the difference between polling and webhooks is crucial for effective data transfer. In this section, we will explore how to access and utilize Pabbly Connect for these integrations.

To get started, you need to log into your Pabbly Connect account. Once you’re in, you can create a new workflow by selecting the applications you want to integrate. This is where the magic happens, as Pabbly Connect allows you to automate tasks that require real-time data updates.


2. Understanding Polling and Its Limitations with Pabbly Connect

Polling is a method where the integration software periodically checks for updates from an external application. In the context of Pabbly Connect, this means sending requests to Facebook or YouTube at regular intervals to see if there are any new data updates. While this method can work, it has significant drawbacks. using Pabbly Connect

  • Polling consumes server resources as it continuously checks for updates.
  • Data is not received in real-time, leading to potential delays.
  • It can result in unnecessary API calls, increasing costs.

In summary, while polling can be useful, it is not the most efficient way to handle integrations. Pabbly Connect offers better solutions through webhooks, which we will discuss in the next section.


3. The Advantages of Webhooks in Pabbly Connect

Webhooks are a more efficient alternative to polling. Instead of continuously checking for updates, webhooks allow applications to send data to Pabbly Connect in real-time whenever an event occurs. This eliminates the need for constant requests, making it a resource-friendly option.

When using Pabbly Connect, setting up webhooks is straightforward. Here’s how to do it:

  • Choose the Webhook option in Pabbly Connect.
  • Copy the unique URL provided by Pabbly Connect.
  • Configure Facebook or YouTube to send data to this URL when specific events occur.

By implementing webhooks, you can ensure that your integration is efficient and responsive. Pabbly Connect makes it easy to manage these connections, ensuring that you receive data as soon as it is available.


4. Setting Up Facebook Integration with Pabbly Connect

To integrate Facebook with Pabbly Connect, begin by creating a new workflow. Select Facebook as your trigger application and choose the specific event that will initiate the workflow. This could be a new post, comment, or any other relevant action. using Pabbly Connect

After selecting the event, you will need to authenticate your Facebook account. Pabbly Connect will guide you through the necessary steps to ensure that your account is linked correctly. Once authenticated, you can test the trigger to ensure that data is being received properly.


5. Integrating YouTube with Pabbly Connect

Integrating YouTube follows a similar process to Facebook. Start by creating a new workflow in Pabbly Connect and selecting YouTube as your application. Choose the event that will trigger the workflow, such as a new video upload. using Pabbly Connect

Just like with Facebook, you’ll need to authenticate your YouTube account. Pabbly Connect will provide prompts to help you link your account. Once the connection is established, you can test the workflow to ensure that updates from YouTube are being captured correctly.


Conclusion

In conclusion, using Pabbly Connect for integrating Facebook and YouTube provides a streamlined approach to data management. By understanding the differences between polling and webhooks, users can make informed decisions about their integration strategies. Pabbly Connect not only simplifies these processes but also optimizes them for better performance and resource management.

Ensure you check out Pabbly Connect to create business automation workflows and reduce manual tasks. Pabbly Connect currently offer integration with 2,000+ applications.

How to Setup Custom Fields in Pabbly Email Marketing with Pabbly Connect

Learn how to set up custom fields in Pabbly Connect using Pabbly Connect to enhance your email campaigns. Follow our step-by-step guide for seamless integration.

Watch Step By Step Video Tutorial Below


1. Introduction to Custom Fields in Pabbly Email Marketing

In this section, we will explore how to use Pabbly Connect to set up custom fields in Pabbly Email Marketing. Custom fields allow you to store additional subscriber information, enhancing personalization in your email campaigns.

For example, you can store details like a subscriber’s name, gender, city, and subscription date. Using Pabbly Connect, you can easily manage these custom fields to optimize your email marketing efforts.


2. Creating Custom Fields Using Pabbly Connect

To create custom fields in Pabbly Email Marketing, start by accessing your Pabbly Connect dashboard. From there, navigate to the custom fields option. Click on the button labeled ‘Add Custom Field’ to begin the process. using Pabbly Connect

  • Select the type of custom field you want to create (e.g., phone number, country).
  • Enter the name of the custom field, such as ‘Country’.
  • Click ‘Save’ to add the custom field to your email list.

Once you have created your custom fields, you can incorporate them into your email templates using tags. For instance, you can use the tag {{country}} to personalize your emails based on the subscriber’s country information.


3. Importing Subscribers with Custom Fields

After setting up your custom fields, the next step is importing subscribers into Pabbly Email Marketing. You can add subscribers manually or by uploading a CSV file containing their details.

For manual entry, click on ‘Add Subscribers’ and fill in the required fields. You will need to map the fields correctly. Ensure you include the custom fields you created earlier, like phone numbers. This is where Pabbly Connect plays a crucial role in ensuring the data is accurately imported.

  • Enter the subscriber’s name, email, and any custom field data (e.g., phone number).
  • Click on ‘Import Subscribers’ to start the process.
  • Map the fields correctly to ensure all data is imported successfully.

By following these steps, you can confirm that your subscriber data, including custom fields, is accurately represented in Pabbly Email Marketing.


4. Utilizing Custom Fields in Email Campaigns

Once your subscribers are imported with custom fields, you can utilize this data to personalize your email campaigns. For instance, you can include a subscriber’s phone number in the subject line or body of your email.

To do this, simply use the custom field tag in your email content, like {{phone}}. This tag will dynamically replace with the subscriber’s phone number when the email is sent. Pabbly Connect ensures that this integration runs smoothly, allowing for seamless personalization.

Here’s how to include a custom field in your email:

Type your email subject or body. Insert the custom field tag (e.g., {{phone}}) where you want the data to appear. Save your email template.

This allows for a more personalized approach in your email marketing strategy, enhancing engagement with your audience.


5. Conclusion: Enhancing Email Marketing with Pabbly Connect

In summary, utilizing custom fields in Pabbly Email Marketing through Pabbly Connect allows you to enhance your email campaigns significantly. By following the steps outlined in this tutorial, you can effectively create and manage custom fields, import subscribers, and personalize your email content.

Ensure you check out Pabbly Connect to create business automation workflows and reduce manual tasks. Pabbly Connect currently offer integration with 2,000+ applications.

Using Pabbly Connect as the central integration platform not only streamlines the process but also ensures that your email marketing efforts are more effective and engaging. Start using custom fields today to improve your email marketing strategy!

Automate Instamojo Order Confirmation with Pabbly Connect and WhatsApp

Learn how to automate Instamojo order confirmations via WhatsApp using Pabbly Connect and the Official WhatsApp Cloud API in this step-by-step tutorial. Explore systematic approaches to creating efficient automation solutions that convert technical concepts into practical, implementable instructions.

Watch Step By Step Video Tutorial Below


In this section, we will set up an Instamojo payment link using Pabbly Connect. First, log into your Instamojo account and click on ‘Create New’ to add a payment link.

Choose the ‘Smart Link’ option and enter the purpose of the payment, such as ‘Digital Report’. Set the price (e.g., 10 rupees for testing purposes) and click on ‘Next’. Customize the link by selecting ‘Smart Actions’ and then click on ‘Add Webhook’. This webhook will enable Pabbly Connect to receive notifications after payment completion.


2. Configuring Pabbly Connect for Instamojo

Now, we will configure Pabbly Connect to handle the webhook from Instamojo. Open your browser and navigate to Pabbly.com. Sign in to your account and select Pabbly Connect from the dashboard.

Click on ‘Create Workflow’ and name it something like ‘Instamojo Order Completion to WhatsApp’. Set the trigger application as Instamojo and the trigger event as ‘New Sales’. Copy the provided webhook URL and paste it into the webhook configuration in Instamojo.

  • Log into Pabbly Connect
  • Create a new workflow
  • Set trigger as Instamojo and event as New Sales
  • Paste the webhook URL from Pabbly Connect into Instamojo

Once the webhook is set up, perform a test payment to ensure that Pabbly Connect captures the payment details correctly. You should see the payment information reflected in Pabbly Connect.


3. Fetching Payment Details in Pabbly Connect

After capturing the payment details, the next step involves fetching specific customer information through Pabbly Connect. Add another action step in your workflow by selecting Instamojo and choosing ‘Get Payment Details’ as the action event.

Connect this action to your previous webhook step. You will need to enter your Instamojo API key and auth token to authenticate this request. Once authenticated, map the payment ID from the previous step to retrieve the necessary customer information.

  • Select ‘Get Payment Details’ action in Pabbly Connect
  • Authenticate using API key and auth token
  • Map the payment ID to fetch customer details

Once you have the customer details, you can proceed to send a WhatsApp message using the Official WhatsApp Cloud API.


4. Sending WhatsApp Message Using Pabbly Connect

The next step is to send the order confirmation message via WhatsApp using the Official WhatsApp Cloud API through Pabbly Connect. First, ensure you have a WhatsApp Cloud API account set up. Go to developers.facebook.com and click on ‘My Apps’. Select your app and navigate to the WhatsApp section.

In Pabbly Connect, add a new action step and select WhatsApp Cloud API as the application. Choose ‘Send Template Message’ as the action event. Connect your account by entering the temporary access token, phone number ID, and WhatsApp business account ID. After saving, select the message template you created earlier for order confirmation.

Ensure to fill in the recipient’s mobile number (without the country code) and map the necessary variables for the message body and header. This will personalize the message for each customer based on their order details.


5. Conclusion

In this tutorial, we have successfully demonstrated how to send Instamojo order confirmations via WhatsApp automatically using Pabbly Connect and the Official WhatsApp Cloud API. By following these steps, you can streamline your order confirmation process and enhance customer communication.

Ensure you check out Pabbly Connect to create business automation workflows and reduce manual tasks. Pabbly Connect currently offer integration with 2,000+ applications.

For any questions or further assistance, feel free to reach out to the Pabbly support team. Automating your order confirmations can significantly improve your business efficiency and customer satisfaction.

How to Verify Emails and Remove Bad Emails Using Pabbly Connect

Learn how to effectively verify and clean your email list using Pabbly Connect and Pabbly Connect. Follow our detailed tutorial for step-by-step instructions. Implement the precise methodologies leading organizations use to automate repetitive tasks, illustrated with practical examples designed for immediate application.

Watch Step By Step Video Tutorial Below


1. Introduction to Email Verification with Pabbly Connect

Email verification is crucial for maintaining a clean and effective email list. In this tutorial, we will explore how to use Pabbly Connect alongside Pabbly Email Verification to remove bad emails, duplicates, and invalid addresses. This process helps prevent bounces and ensures your emails reach the intended recipients.

Using Pabbly Connect, you can seamlessly integrate various applications to automate your email verification process. With the right steps, you can upload your email list, verify it, and receive a cleaned list that retains any custom data you may have included.


2. Preparing Your Email List in Google Sheets

Before starting the verification process, you need to prepare your email list in Google Sheets. This step involves creating a spreadsheet that includes the names, email addresses, and any custom fields you wish to retain. Here’s how to set it up:

  • Create a new Google Sheet and label it appropriately.
  • Input the relevant data, including names, email addresses, and custom fields like city or country.
  • Ensure to include some bad emails for testing, such as duplicates or invalid addresses.

Once your Google Sheet is ready, you will be able to upload this data into Pabbly Connect for verification. This preparation is essential for ensuring the accuracy of the cleaning process.


3. Uploading Your Email List to Pabbly Connect

To start the verification process, you’ll need to upload your prepared email list to Pabbly Connect. Here’s how to do it:

First, sign in to your Pabbly Connect account. Navigate to the Pabbly Email Verification section and click on the access button. Once on the dashboard, look for the option to upload your CSV file. Drag and drop your file into the designated area.

  • Select the CSV file you exported from Google Sheets.
  • Confirm the upload and ensure it shows the correct number of emails processed.
  • Click on the start verification button to initiate the cleaning process.

After initiating the process, Pabbly Connect will begin verifying the emails in your list, removing duplicates and invalid addresses in real-time.


4. Monitoring the Email Verification Process

Once you have started the verification, you can monitor the progress directly from the Pabbly Connect dashboard. The system will display the number of emails processed and their verification status. You can expect to see results such as:

During this phase, Pabbly Connect will categorize the emails as safe to send, invalid, or unknown. You will receive notifications via email once the verification is complete, detailing the results of the cleaning process.

Total emails processed. Number of safe to send emails. Count of invalid emails.

The verification process may take some time, but the accuracy achieved by Pabbly Connect is worth the wait. After completion, you can download the cleaned list for further use.


5. Downloading and Using the Cleaned Email List

After the verification process is complete, you can download your cleaned email list directly from Pabbly Connect. This list will contain the verified emails along with their statuses, ensuring you have an effective list to work with.

To download, simply navigate to the results section, select the appropriate option, and save the CSV file. You can then import this cleaned list back into your Google Sheets for easy access and further analysis.

Using Pabbly Email Verification through Pabbly Connect allows you to maintain a high-quality email list, reducing the chances of bounces and ensuring your emails reach your audience effectively. This process not only saves time but also enhances your email marketing efforts.


Conclusion

In this tutorial, we demonstrated how to use Pabbly Connect and Pabbly Email Verification to effectively clean your email list. By following these steps, you can ensure your email campaigns are successful and reach the right audience without the risk of bad emails.

Ensure you check out Pabbly Connect to create business automation workflows and reduce manual tasks. Pabbly Connect currently offer integration with 2,000+ applications.

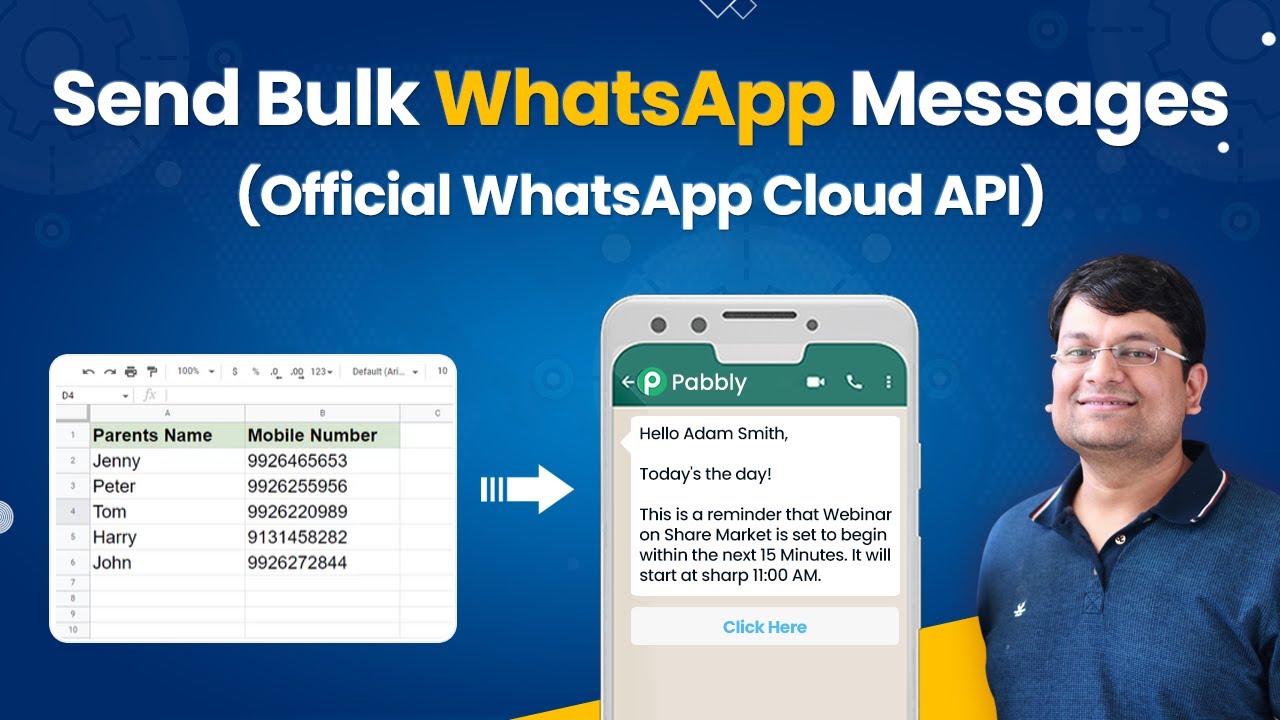
How to Send WhatsApp Messages from Google Sheets in Bulk Using Pabbly Connect

Learn how to send WhatsApp messages in bulk from Google Sheets using Pabbly Connect and the Official WhatsApp Cloud API. Step-by-step tutorial included. This comprehensive guide reveals exactly how to connect your applications and automate repetitive tasks — accessible for professionals of all technical backgrounds.

Watch Step By Step Video Tutorial Below


1. Setting Up the WhatsApp Cloud API with Pabbly Connect

To start sending WhatsApp messages from Google Sheets using Pabbly Connect, you first need to set up your WhatsApp Cloud API. This setup is crucial as it allows you to send messages through the WhatsApp platform. Ensure that you have a verified phone number in your WhatsApp account before proceeding.

Once your WhatsApp Cloud API is set up, you can create a message template that will be used for sending messages. Follow these steps to set up your message template:

  • Log in to your WhatsApp Cloud API account.
  • Navigate to the message templates section and click on ‘Create Message Template’.
  • Fill in the template details, including the message body and any variables you want to include.

After creating your message template, ensure it is approved by WhatsApp. This approval process may take a few minutes, so be patient. Once approved, you can start using Pabbly Connect to automate sending messages.


2. Creating a Workflow in Pabbly Connect

Next, you will create a workflow in Pabbly Connect to automate the message sending process. Start by logging into your Pabbly Connect account and creating a new workflow.

Follow these steps to set up your workflow:

  • Click on ‘Create Workflow’ and name it something like ‘Google Sheets to WhatsApp’.
  • Select ‘Google Sheets’ as the trigger app and choose the trigger event as ‘New Spreadsheet Row’.
  • Copy the webhook URL generated by Pabbly Connect for use in your Google Sheet.

This webhook URL will allow Pabbly Connect to receive data from Google Sheets whenever a new row is added, enabling the automation of WhatsApp message sending.


3. Setting Up Google Sheets for Integration

To integrate Google Sheets with Pabbly Connect, you need to install the Pabbly Connect Webhooks add-on. This add-on will facilitate sending data from Google Sheets to Pabbly Connect.

Here’s how to set up Google Sheets:

Open your Google Sheet and go to Extensions > Add-ons > Get Add-ons. Search for ‘Pabbly Connect Webhooks’ and install it. After installation, refresh your Google Sheet and navigate to Extensions > Pabbly Connect Webhooks > Initial Setup.

In the Initial Setup, paste the webhook URL you copied earlier and specify the trigger column where the data will be sent from. This setup links your Google Sheets data to Pabbly Connect, enabling the automation of WhatsApp messages.


4. Sending WhatsApp Messages Using Pabbly Connect

Once your Google Sheets and Pabbly Connect are set up, you can proceed to send WhatsApp messages. In your Pabbly Connect workflow, add an action step to send a message via WhatsApp Cloud API.

Follow these steps to configure the WhatsApp message sending:

Select ‘WhatsApp Cloud API’ as the action app and ‘Send Template Message’ as the action event. Connect your WhatsApp Cloud API account by entering the required credentials: token, phone number ID, and business account ID. Map the recipient’s mobile number from the Google Sheets data, ensuring to include the country code.

After configuring these settings, test the action to ensure that the WhatsApp message is sent successfully. This step is crucial to confirm that everything is working as intended before you send bulk messages.


5. Sending Bulk Messages from Google Sheets

Now that you have successfully set up the integration, you can send messages in bulk from Google Sheets using Pabbly Connect. This is done by clicking the ‘Send All Data’ button in the Pabbly Connect Webhooks menu within Google Sheets.

Here’s how to execute bulk messaging:

Go to Extensions > Pabbly Connect Webhooks and click on ‘Send All Data’. This action will trigger Pabbly Connect to send messages to each number listed in your Google Sheet. Monitor the execution history in Pabbly Connect to check the status of each message sent.

This feature allows you to efficiently communicate with multiple recipients without manually sending each message, saving time and effort while ensuring consistent communication.


Conclusion

In this tutorial, we’ve demonstrated how to send WhatsApp messages in bulk from Google Sheets using Pabbly Connect and the Official WhatsApp Cloud API. By following these steps, you can automate your messaging process and reach out to multiple recipients effectively.

Ensure you check out Pabbly Connect to create business automation workflows and reduce manual tasks. Pabbly Connect currently offer integration with 2,000+ applications.

Utilizing Pabbly Connect not only streamlines the integration process but also enhances your ability to manage communications efficiently. Start automating your WhatsApp messaging today!

Automatically Reply to a New Google Review Using Pabbly Connect

Learn how to automatically reply to new Google reviews using Pabbly Connect. Follow this step-by-step guide to set up your workflow without any coding. Develop expertise in application integration and learn how to design streamlined automation workflows using proven, simplified approaches.

Watch Step By Step Video Tutorial Below


1. Setting Up Pabbly Connect for Google Reviews

To begin the automation process, you need to access Pabbly Connect. This platform allows you to create workflows that connect different applications seamlessly. Start by logging into your Pabbly Connect account.

Once logged in, click on the ‘Create New Workflow’ button. Name your workflow something descriptive, like ‘Automatic Reply Sending on Google Reviews’, and save it. This sets the stage for automating responses to new Google reviews.


2. Triggering New Google Reviews in Pabbly Connect

In this step, you will configure Pabbly Connect to check for new reviews on your Google My Business account. Select ‘Google My Business’ as your trigger app and choose ‘New Review’ as the trigger event. using Pabbly Connect

  • Select your Google My Business account credentials.
  • Choose the specific business location for which you want to track reviews.
  • Save the settings and send a test request to fetch the latest review.

This test will verify that Pabbly Connect can successfully pull the latest review details, including the reviewer’s name and rating. Ensure all details are mapped correctly for the next steps.


3. Configuring Automatic Replies to Reviews

Now that you have set up the trigger for new reviews, it’s time to configure Pabbly Connect to automatically reply. Again, select ‘Google My Business’ as your action app, and choose ‘Create a Reply’ as the action event. using Pabbly Connect

Connect to the same Google My Business account you used earlier. In the reply configuration, map the reviewer’s display name to personalize your response. For example, you can write, ‘Thank you for your review, {reviewer_name}!’, where {reviewer_name} is dynamically replaced with the actual name.

  • Ensure that the reply message is friendly and appreciative.
  • Test the reply functionality to confirm that it posts correctly on your Google My Business page.

Once satisfied, save your settings. This automation will now trigger every time a new review is posted, ensuring timely responses.


4. Monitoring and Activating the Workflow

After setting up the reply automation, you need to monitor the workflow status. Pabbly Connect will check for new reviews every 10-15 minutes, ensuring that no review goes unanswered. using Pabbly Connect

To activate the workflow, simply toggle the status to active. This means that every time a new review is posted on your Google My Business page, Pabbly Connect will automatically fetch the details and send a personalized reply.

Make sure to periodically check the workflow to ensure it’s functioning as expected. You can adjust the reply message as needed to keep it fresh and engaging for customers.


5. Conclusion: Streamlining Your Google Review Responses

In conclusion, using Pabbly Connect allows you to automate replies to new Google reviews effortlessly. This not only saves time but also enhances customer engagement by ensuring timely responses.

Ensure you check out Pabbly Connect to create business automation workflows and reduce manual tasks. Pabbly Connect currently offer integration with 2,000+ applications.

By following the steps outlined in this tutorial, you can set up your workflow in minutes, ensuring that your business stays responsive to customer feedback. Automate your Google review replies today with Pabbly Connect!

Automatically Add Users to Facebook Custom Audience with Pabbly Connect

Learn how to automatically add users to Facebook Custom Audience using Pabbly Connect and Pabbly Connect in this detailed tutorial. Follow this definitive guide to creating powerful automated workflows with straightforward, efficiency-focused solutions that save valuable time.

Watch Step By Step Video Tutorial Below


1. Introduction to Pabbly Connect and Its Importance

Pabbly Connect is a powerful automation tool that enables seamless integration between various applications. In this tutorial, we will explore how to use Pabbly Connect to automatically add users to Facebook Custom Audiences based on their pre-sales inquiries collected through Pabbly Form Builder.

This integration is crucial for businesses looking to target specific audiences for their advertising campaigns. By utilizing Pabbly Connect, you can streamline the process of gathering customer data and effectively use it for marketing purposes.


2. Setting Up Your Pabbly Form Builder

To begin, you need to create a pre-sales form using Pabbly Form Builder. This form will collect essential information from potential customers, such as their names and email addresses. Once your form is ready, you can integrate it with Pabbly Connect.

Follow these steps to set up your form:

  • Log in to your Pabbly Form Builder account.
  • Create a new form and add fields for name and email.
  • Save and publish your form.

Now that your form is set up, the next step is to connect it with Pabbly Connect to capture the responses automatically.


3. Creating a New Workflow in Pabbly Connect

To create a new workflow in Pabbly Connect, log into your Pabbly Connect account and follow these steps:

Click on the ‘Create New Workflow’ button and name your workflow, for example, ‘Pre-Sales Query to Facebook Custom Audience’. After saving your workflow, select Pabbly Form Builder as your trigger application.

Next, you will need to set up the webhook response to capture the data from your form submissions. Click on the ‘Capture Webhook Response’ option, which will provide you with a unique webhook URL. Copy this URL and paste it into the integration settings of your form in Pabbly Form Builder. This allows Pabbly Connect to receive data whenever a new form submission occurs.


4. Adding Users to Facebook Custom Audience

Once your form submissions are being captured in Pabbly Connect, the next step is to add this data to your Facebook Custom Audience. In your workflow, select Facebook Custom Audiences as the action application.

Choose the ‘Add a User to Custom Audience’ action. You will need to connect your Facebook account by clicking the connect button and authorizing the application. After connecting, select your business account and ad account.

Now, you need to hash the user’s first name, last name, and email address before sending them to Facebook. Add the Data Transformer application in between your webhook response and Facebook Custom Audiences step. Use the SHA-256 method to hash each value. This ensures that you comply with Facebook’s data privacy requirements.


5. Testing and Finalizing Your Integration

After setting up the hashing process, it’s time to test your integration. Go back to your workflow in Pabbly Connect and click on ‘Save and Send Test Request’ to check if the user is successfully added to your Facebook Custom Audience.

If the test is successful, you will see the audience ID confirming that the user has been added. This means that every time someone fills out your pre-sales form, they will automatically be added to your Facebook Custom Audience, allowing you to run targeted ads.

By following these steps, you can leverage Pabbly Connect and Pabbly Form Builder to enhance your marketing strategies and effectively reach out to potential customers.


Conclusion

In this tutorial, we demonstrated how to use Pabbly Connect and Pabbly Form Builder to automatically add users to Facebook Custom Audience based on their pre-sales inquiries. This integration not only saves time but also enhances your ability to target specific audiences effectively. Start using Pabbly Connect today to streamline your marketing efforts!

Ensure you check out Pabbly Connect to create business automation workflows and reduce manual tasks. Pabbly Connect currently offer integration with 2,000+ applications.

Mastering the Text Formatter with Pabbly Connect: A Step-by-Step Guide

Learn how to use the Text Formatter – Basic Formatting Module inside Pabbly Connect to enhance your text processing. Follow our detailed tutorial! Eliminate manual repetitive tasks from your workflow. Discover proven automation methods with intuitive steps designed for efficiency-minded professionals.

Watch Step By Step Video Tutorial Below


1. Introduction to the Text Formatter in Pabbly Connect

The Pabbly Connect platform offers a powerful Text Formatter that allows users to manipulate and transform text strings effectively. This module supports various transformations such as capitalizing text, converting to lowercase, and extracting essential information like email addresses and URLs.

To access the Text Formatter, first log into your Pabbly Connect account. Navigate to the dashboard and select the ‘Text Formatter’ module from the available options. This module is designed to enhance your text processing capabilities seamlessly.


2. Performing Text Transformations with Pabbly Connect

Using the Text Formatter in Pabbly Connect, you can perform several text transformations. These include capitalizing text, converting it to lowercase, and extracting specific elements from strings. For instance, if you have a string like ‘hello this is a message,’ you can capitalize each word easily.

  • Select the transformation type (e.g., capitalize).
  • Input your text string in the designated field.
  • Click on ‘Save and Send Test Request’ to see the results.

Upon executing these steps, you will notice that the first letter of each word in your string is capitalized, showcasing how Pabbly Connect efficiently handles text transformations.


3. Extracting Information from Text Using Pabbly Connect

Another essential feature of the Text Formatter in Pabbly Connect is its ability to extract specific information from text strings. For example, if your text includes an email address or a URL, you can easily extract these elements using the appropriate options.

To extract an email address, follow these steps:

  • Choose the ‘Extract Email Address’ transformation.
  • Enter your text string.
  • Click on ‘Save and Send Test Request’ to extract the email address.

After completing these actions, Pabbly Connect will display the extracted email address, demonstrating its capability to process text efficiently.


4. Counting Words and Length of Text in Pabbly Connect

In addition to extracting information, Pabbly Connect allows users to count the number of words and the length of a text string. This feature can be particularly useful for content creators and marketers.

To count words and length, execute the following steps:

Select the ‘Word Count’ transformation. Enter the text string you wish to analyze. Click on ‘Save and Send Test Request’ to get the word count.

After performing these actions, Pabbly Connect will provide you with the total word count, showcasing its effectiveness in text analysis.


5. Conclusion: Leveraging Pabbly Connect for Text Formatting

In conclusion, the Text Formatter – Basic Formatting Module inside Pabbly Connect is an invaluable tool for anyone looking to manipulate text efficiently. From capitalizing text to extracting email addresses and counting words, this module simplifies various text processing tasks.

Ensure you check out Pabbly Connect to create business automation workflows and reduce manual tasks. Pabbly Connect currently offer integration with 2,000+ applications.

Check out Pabbly Connect – Automate your business workflows effortlessly! Sign Up Free – Start your journey with ease! 10,000+ Video Tutorials – Learn step by step! Join Pabbly Facebook Group – Connect with 21,000+ like minded people!

By following the steps outlined in this tutorial, you can harness the full potential of the Text Formatter within Pabbly Connect. This integration not only enhances your productivity but also streamlines your workflow effectively.