Generate QR Code & Send Reminder Emails for Live Events Automatically Using Pabbly Connect

Learn how to automate QR code generation and reminder emails for live events using Pabbly Connect and Pabbly Connect in this detailed tutorial. Navigate the automation landscape confidently with clear, structured guidance suitable for professionals regardless of prior technical experience.

Watch Step By Step Video Tutorial Below


1. Setting Up Pabbly Connect for QR Code Generation

To automate the process of generating QR codes for live events, you will use Pabbly Connect. Start by creating an account on the Pabbly Connect website. Once registered, log in to access the dashboard.

From the dashboard, click on the ‘Create Workflow’ button. Name your workflow something descriptive, such as ‘Send QR Codes and Reminder Emails for Events’. This workflow will manage the automation between Pabbly Form Builder and other applications.


2. Integrating Pabbly Form Builder with Pabbly Connect

In this step, you will integrate Pabbly Form Builder with Pabbly Connect to capture event registrations. Select the trigger event as ‘New Form Submission’. This means that every time someone submits a form, it will trigger the workflow.

  • Choose Pabbly Form Builder as the trigger application.
  • Select ‘New Form Submission’ as the trigger event.
  • Copy the webhook URL provided by Pabbly Connect.

Next, go to your Pabbly Form Builder dashboard, select your event registration form, and navigate to the integrations section. Here, you will paste the webhook URL into the webhook settings. This connection allows Pabbly Connect to receive data whenever someone registers for your event.


3. Generating QR Code with Pabbly Connect

Once you have set up the form integration, it’s time to generate a QR code using Pabbly Connect. Add an action step in your workflow and select the QR.io application. Choose the action event ‘Generate QR Code’ to create a unique QR code for each registrant.

To connect to QR.io, you will need to enter your API key, which you can find in your QR.io account settings. After connecting, map the necessary fields from the form submission data, such as the registrant’s name and email address, to personalize the QR code.

  • Select the data fields to include in the QR code.
  • Set a unique title for the QR code using the registrant’s name and ticket ID.
  • Choose the folder in QR.io where the QR codes will be stored.

After configuring these settings, click on ‘Save and Send Test Request’ to generate the QR code. You can view the generated QR code link in the response.


4. Sending Emails with QR Code Attachments

Now that the QR code is generated, the next step is to send it via email using Pabbly Connect and Gmail. Add another action step and select Gmail as the application. Choose ‘Send Email with Attachment’ as the action event.

Connect your Gmail account by clicking on the connect button. Once connected, map the recipient’s email address from the Pabbly Form Builder data to ensure the QR code is sent to the correct person. Customize the email subject and body to include a message about the event and attach the generated QR code.

Map the recipient’s email from the form submission data. Set the email subject to something relevant, like ‘Your Concert QR Code’. Attach the QR code file to the email.

Click on ‘Save and Send Test Request’ to send a test email. Check the recipient’s inbox to confirm that the email with the QR code has been received successfully.


5. Setting Up Reminder Emails

To enhance the user experience, you can automate reminder emails using Pabbly Connect. After the QR code email step, add a delay module to pause the workflow until the day before the event. Set the delay to the specific date and time when you want to send the reminder.

After the delay, add another Gmail action step to send the reminder email. Map the recipient’s email address again and customize the reminder message to remind them about the event and include the QR code attachment once more for convenience.

Click on ‘Save and Send Test Request’ to ensure that the reminder email is sent correctly. You can check the email inbox to verify that the reminder has been delivered successfully.


Conclusion

This tutorial has shown you how to automate the process of generating QR codes and sending reminder emails for live events using Pabbly Connect and Pabbly Form Builder. By following these steps, you can streamline your event management and enhance the attendee experience seamlessly.

Ensure you check out Pabbly Connect to create business automation workflows and reduce manual tasks. Pabbly Connect currently offer integration with 2,000+ applications.

Sync Google Contacts to Grist Using Pabbly Connect

Learn how to sync Google Contacts to Grist using Pabbly Connect. This detailed guide covers all steps and features for seamless integration. Develop expertise in application integration and learn how to design streamlined automation workflows using proven, simplified approaches.

Watch Step By Step Video Tutorial Below


1. Introduction to Pabbly Connect for Google Contacts and Grist Integration

To sync Google Contacts with Grist, you will utilize Pabbly Connect as the central integration platform. This powerful tool automates the process of creating or updating records in Grist whenever new Google Contacts are saved.

First, ensure you have a Pabbly Connect account. Once logged in, you can start setting up the integration between Google Contacts and Grist seamlessly using Pabbly Connect’s user-friendly interface.


2. Setting Up the Trigger in Pabbly Connect

Begin by creating a new workflow in Pabbly Connect. This will serve as the starting point for your integration. Choose Google Contacts as your trigger application.

  • Navigate to the ‘Create Workflow’ section in Pabbly Connect.
  • Select Google Contacts as the trigger application.
  • Choose ‘New Contact’ as the trigger event.

After setting the trigger, connect your Google account by following the prompts. This allows Pabbly Connect to access your Google Contacts and monitor for any new entries.


3. Configuring the Action to Update Grist Records

Next, you will configure the action in Pabbly Connect to update or create records in Grist. Select Grist as the action application.

  • Choose the action event as ‘Create or Update Record’.
  • Connect your Grist account to Pabbly Connect.
  • Map the fields from Google Contacts to the corresponding fields in Grist.

This mapping ensures that whenever a new contact is added in Google, the details are correctly reflected in Grist, keeping your records up to date.


4. Testing the Integration in Pabbly Connect

After configuring both the trigger and action, it’s essential to test the integration in Pabbly Connect. This step verifies that your setup works correctly.

Click on the ‘Test’ button in Pabbly Connect to send a test contact from Google Contacts to Grist. Check Grist to confirm that the record has been created or updated as expected. This ensures that your integration is functioning smoothly.


5. Finalizing and Activating Your Pabbly Connect Workflow

Once you have tested the integration successfully, you can finalize your workflow in Pabbly Connect. Make sure to turn on the workflow to start the automatic syncing process.

With the workflow activated, every new Google Contact will be automatically synced to Grist, allowing you to manage your contacts efficiently without manual intervention.


Conclusion

By utilizing Pabbly Connect, you can effortlessly sync Google Contacts to Grist, ensuring that your records are always up to date. This integration streamlines your workflow, saving you time and reducing errors.

Ensure you check out Pabbly Connect to create business automation workflows and reduce manual tasks. Pabbly Connect currently offer integration with 2,000+ applications.

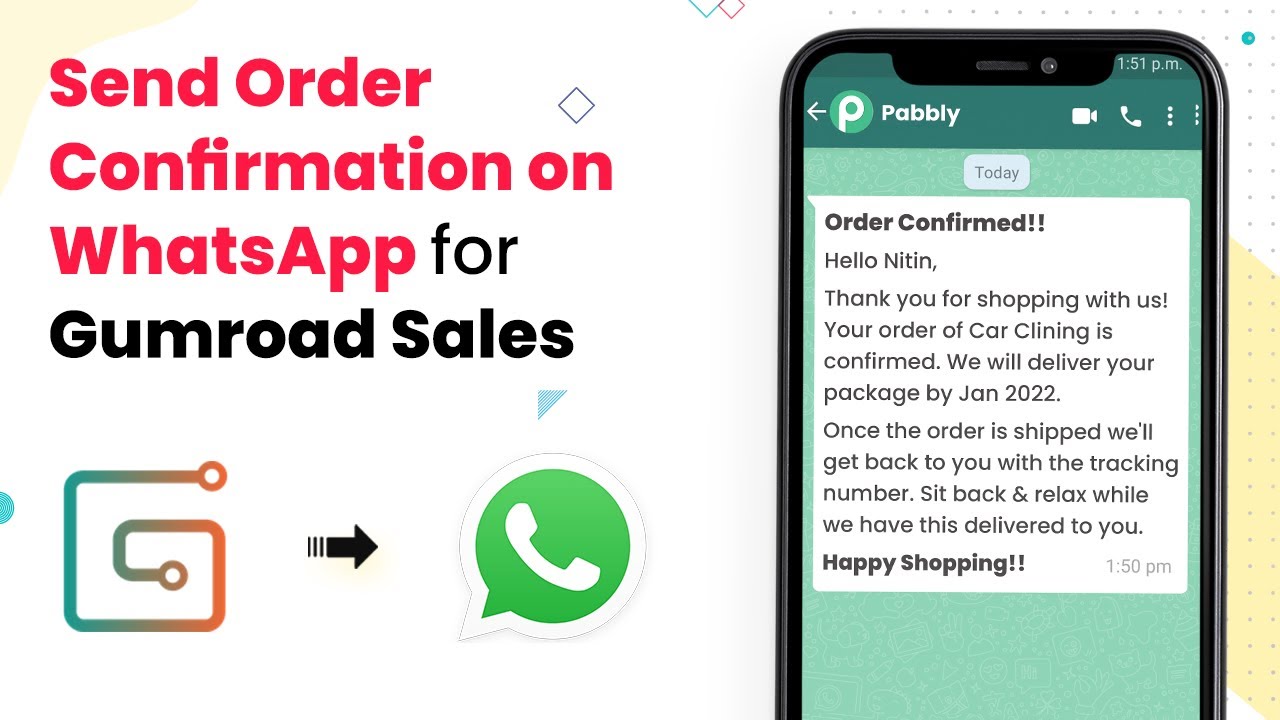
Send Order Confirmation Message to Customer on WhatsApp Using Pabbly Connect

Learn how to send order confirmation messages to customers on WhatsApp using Pabbly Connect. Follow this detailed tutorial for seamless integration. Explore efficient methods for automating routine tasks with clear, concise instructions suited for both newcomers and experienced professionals.

Watch Step By Step Video Tutorial Below


1. Setting Up Pabbly Connect for WhatsApp Integration

To send order confirmation messages on WhatsApp, the first step is to set up Pabbly Connect. This powerful automation tool enables seamless integration between your sales platform and WhatsApp. Start by logging into your Pabbly Connect account, or create a new account if you haven’t already.

Once logged in, navigate to the dashboard where you can create a new workflow. Click on the ‘Create Workflow’ button and give your workflow a name that reflects its purpose, such as ‘Order Confirmation via WhatsApp’. This initial setup is crucial as it lays the foundation for the automation process.


2. Configuring Gumroad Triggers in Pabbly Connect

The next step involves configuring the trigger for your workflow in Pabbly Connect. Select Gumroad as the application that will initiate the workflow. This means that every time a sale happens on Gumroad, it will trigger the workflow to send a confirmation message via WhatsApp.

  • Choose ‘New Sale’ as the trigger event from the options provided.
  • Connect your Gumroad account by providing the necessary API keys.
  • Test the trigger to ensure it captures the sale data correctly.

After successfully testing the trigger, you can move on to the next step of setting up the action that will send the WhatsApp message. This configuration ensures that every sale generates a confirmation message automatically.


3. Setting Up WhatsApp Action in Pabbly Connect

Now that your trigger is ready, it’s time to configure the action to send a WhatsApp message. In the Pabbly Connect dashboard, select WhatsApp as the application to perform the action. This action will take the data from your Gumroad sales and send it as a message to the customer.

Choose the action event, which should be ‘Send Message’. You will need to connect your WhatsApp account to Pabbly Connect. This involves providing the necessary authentication details and selecting the template for the message.

  • Fill in the required fields such as customer name, order details, and WhatsApp number.
  • Customize your message template to include a thank you note and order confirmation details.
  • Test the action to ensure the message is sent correctly.

Once the action is set up and tested, you are ready to finalize the workflow. This step is vital as it ensures that every customer receives their order confirmation promptly.


4. Finalizing the Workflow in Pabbly Connect

With both the trigger and action configured, it’s time to finalize your workflow in Pabbly Connect. Review all the settings to ensure everything is correctly set up. This includes checking the trigger for Gumroad and the action for WhatsApp messaging.

Once you are satisfied with your setup, click on the ‘Save’ button to activate the workflow. This will ensure that the integration is live, and every new sale on Gumroad will automatically send a confirmation message via WhatsApp.

Additionally, you can monitor the workflow’s performance through the Pabbly Connect dashboard. This allows you to see if any messages fail to send and troubleshoot any issues that may arise.


5. Testing the Integration of Pabbly Connect

The final step involves testing the entire integration to ensure everything works smoothly. Make a test purchase on Gumroad to initiate the trigger you set up in Pabbly Connect. This is a crucial step to confirm that the order confirmation message is sent to the customer’s WhatsApp.

Check the WhatsApp account linked to the customer for the confirmation message. The message should include all the relevant details about their order, confirming the purchase. This testing phase is essential to ensure that the integration functions as intended.

If the message is successfully received, congratulations! Your integration is complete. If not, revisit the workflow settings in Pabbly Connect to troubleshoot any issues. By following these steps, you can enhance customer communication and streamline your sales process.


Conclusion

In this tutorial, we explored how to send order confirmation messages to customers on WhatsApp using Pabbly Connect. By integrating Gumroad and WhatsApp, you can automate customer notifications and improve the shopping experience.

Ensure you check out Pabbly Connect to create business automation workflows and reduce manual tasks. Pabbly Connect currently offer integration with 2,000+ applications.

How to Publish Posts from WordPress to Blogger Using Pabbly Connect

Learn how to automate publishing posts from WordPress to Blogger using Pabbly Connect. Step-by-step guide for seamless integration. Navigate the automation landscape confidently with clear, structured guidance suitable for professionals regardless of prior technical experience.

Watch Step By Step Video Tutorial Below


1. Setting Up Pabbly Connect for WordPress to Blogger Integration

To publish your posts from WordPress to Blogger, the first step is to set up Pabbly Connect. Access your Pabbly Connect account and create a new workflow. This workflow will automate the process of transferring your content from WordPress to Blogger.

Once you are in the Pabbly Connect dashboard, click on the ‘Create New Workflow’ button. Give your workflow a name that reflects its function, such as ‘WordPress to Blogger Integration’. This will help you keep your automations organized.


2. Connecting WordPress to Pabbly Connect

After creating the workflow, the next step involves connecting your WordPress account to Pabbly Connect. Select WordPress as your trigger application. This allows Pabbly Connect to listen for new posts published on your WordPress site.

  • Choose the ‘New Post’ trigger event.
  • Authenticate your WordPress account by entering your website URL and login credentials.
  • Test the connection to ensure that Pabbly Connect can access your WordPress site.

After successful authentication, you can set up the specific parameters for the posts you want to publish. This includes selecting post types and categories that will trigger the automation.


3. Integrating Blogger with Pabbly Connect

The next step is to connect your Blogger account to Pabbly Connect. Choose Blogger as your action application. This will allow you to publish content directly to your Blogger account once it is triggered from WordPress.

Authenticate your Blogger account by selecting it from the list of applications and logging in with your Google credentials. Make sure you grant the necessary permissions for Pabbly Connect to manage your Blogger posts.


4. Mapping Fields Between WordPress and Blogger

Now, it’s time to map the fields from your WordPress posts to Blogger. This is a crucial step in the integration process facilitated by Pabbly Connect. You need to ensure that the content from your WordPress posts is accurately reflected in your Blogger posts.

  • Map the post title from WordPress to the title field in Blogger.
  • Link the post content from WordPress to the content field in Blogger.
  • Specify any labels or tags you want to apply to the Blogger post.

Once the fields are mapped, you can perform a test to ensure that a new post in WordPress is successfully published on Blogger. This step validates that your integration is working correctly.


5. Finalizing Your WordPress to Blogger Integration

After mapping the fields and testing the integration, it’s time to finalize your workflow in Pabbly Connect. Review all settings to ensure everything is configured correctly. Once confirmed, turn on your workflow to begin automatic posting.

Now, every time you publish a new post on WordPress, it will automatically appear on your Blogger account. This seamless integration saves you time and ensures your content reaches a wider audience without manual effort.


Conclusion

Using Pabbly Connect, you can efficiently automate the process of publishing posts from WordPress to Blogger. This integration allows for seamless content sharing and enhances your online presence.

Ensure you check out Pabbly Connect to create business automation workflows and reduce manual tasks. Pabbly Connect currently offer integration with 2,000+ applications.

Integrate Google Drive with Keap Contacts Using Pabbly Connect

Learn how to create Google Drive folders automatically for new Keap contacts using Pabbly Connect. Step-by-step guide for seamless integration. Eliminate manual repetitive tasks from your workflow. Discover proven automation methods with intuitive steps designed for efficiency-minded professionals.

Watch Step By Step Video Tutorial Below


1. Setting Up Pabbly Connect for Google Drive and Keap Integration

To create Google Drive folders for new Keap contacts, the first step is to access Pabbly Connect. This platform enables seamless integration between various applications, including Google Drive and Keap. Sign up for a free account on Pabbly Connect to get started.

Once logged in, navigate to the ‘Connect’ section. Here, you can set up a new workflow by selecting Keap as your trigger application. This will initiate the process for creating folders in Google Drive whenever a new contact is added in Keap.


2. Configuring the Keap Trigger in Pabbly Connect

After setting up your account, the next step is to configure the Keap trigger in Pabbly Connect. Choose the trigger event as ‘New Contact’ to ensure that every time a new contact is created in Keap, it triggers the workflow.

  • Select ‘Connect with Keap’ to authorize Pabbly Connect to access your Keap account.
  • Once authorized, you can test the trigger to ensure it captures new contacts correctly.

Testing the trigger is crucial as it confirms that Pabbly Connect can retrieve the required contact information. After successful testing, you can proceed to the next step of creating a Google Drive folder.


3. Creating a Google Drive Folder for New Contacts

Now that the trigger is set up, the next step is to create a Google Drive folder using the information from the new Keap contact. In Pabbly Connect, select Google Drive as the action application.

Choose the action event as ‘Create Folder’. You will need to map the fields from the Keap contact details to the folder name in Google Drive. For instance, you can set the folder name to be the contact’s first and last name.

  • In the folder name field, select the contact’s first name from the Keap trigger.
  • Then add the last name to create a full name folder.

This step ensures that a new folder is created in Google Drive every time a new contact is added in Keap, effectively organizing your contacts.


4. Testing and Finalizing the Integration

To ensure everything is working correctly, it’s important to test the entire integration setup in Pabbly Connect. After setting up the Google Drive action, you can run a test to verify that a folder is created for a sample new contact.

Check your Google Drive to confirm that the folder appears as expected. If the folder is created successfully, your integration is working properly. If there are any issues, you can revisit the setup to troubleshoot the configuration.

Once confirmed, you can save the workflow in Pabbly Connect to make it live. This means that every time a new contact is added in Keap, a corresponding folder will be created in Google Drive automatically.


5. Conclusion: Automate Your Workflow with Pabbly Connect

By following these steps, you can easily automate the process of creating Google Drive folders for new Keap contacts using Pabbly Connect. This integration saves time and ensures that all your contacts are organized efficiently.

Ensure you check out Pabbly Connect to create business automation workflows and reduce manual tasks. Pabbly Connect currently offer integration with 2,000+ applications.

Using Pabbly Connect not only streamlines your workflow but also enhances productivity by automating repetitive tasks. Start using this integration today to simplify your contact management process.


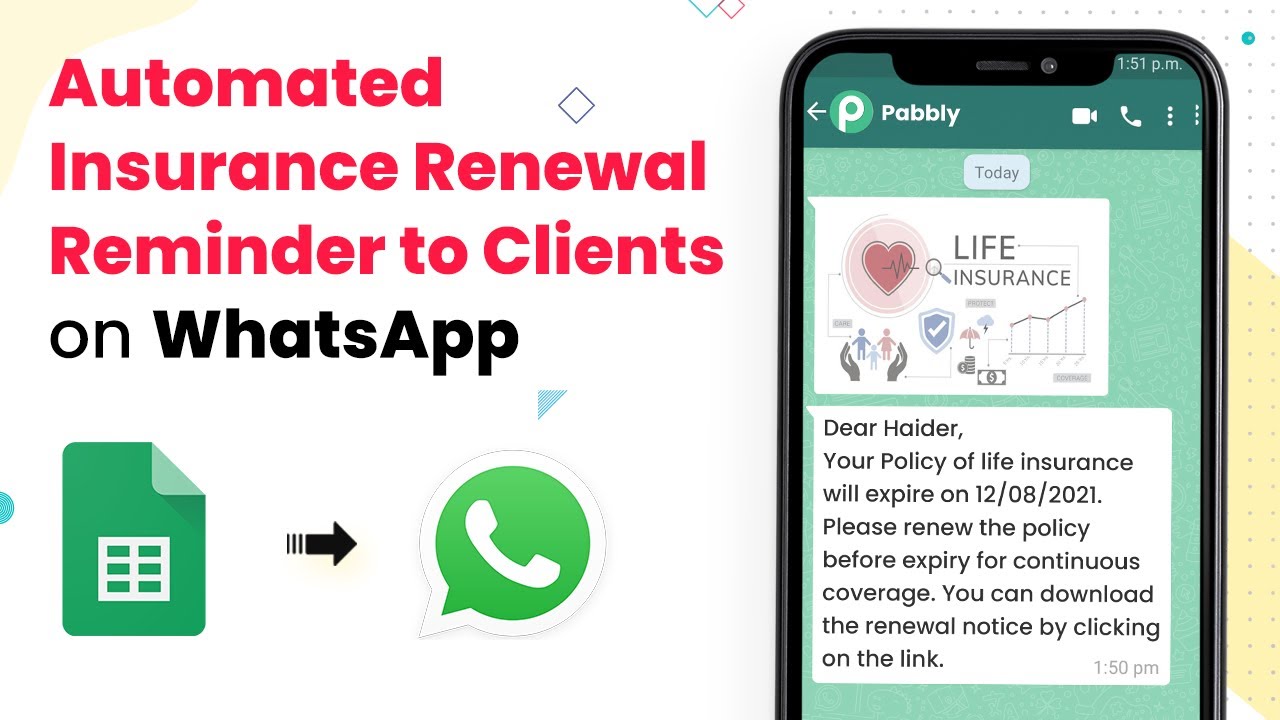
Automate Insurance Renewal Reminders via WhatsApp with Pabbly Connect

Learn how to automate insurance renewal reminders to clients on WhatsApp using Pabbly Connect for seamless integration with Google Sheets. Discover how to seamlessly connect your essential tools through accessible instructions that make powerful automation available to professionals at every skill level.

Watch Step By Step Video Tutorial Below


1. Accessing Pabbly Connect for Automation

To automate sending insurance renewal reminders via WhatsApp, you first need to access Pabbly Connect. Start by visiting the Pabbly Connect website and signing up for a free account. This platform allows you to integrate various applications seamlessly, making the automation process efficient.

Once signed in, navigate to the dashboard where you can create a new workflow. This is where you will set up the automation to send reminders based on data from Google Sheets. With Pabbly Connect, you can easily connect to Google Sheets and WhatsApp.


2. Setting Up Google Sheets for Client Data

The next step involves setting up your Google Sheets to collect client data. You will need to create a spreadsheet that includes essential details such as client names, WhatsApp numbers, policy names, and expiration dates. This data will be crucial for sending accurate reminders.

  • Client Name
  • WhatsApp Number
  • Policy Name
  • Expiration Date

After setting up your sheet, ensure that the data is accurate and up-to-date. This will enable Pabbly Connect to pull the correct information for sending reminders. You can now proceed to the next step of creating your automation workflow.


3. Creating the Workflow in Pabbly Connect

With your Google Sheets ready, the next step is to create a new workflow in Pabbly Connect. Start by selecting Google Sheets as your trigger application. You will then choose the specific trigger event, which will be when a new row is added or updated in your spreadsheet.

Next, you will need to connect your Google Sheets account to Pabbly Connect. This requires authorizing Pabbly to access your Google account. Once connected, select the spreadsheet you created earlier and specify the worksheet containing your client data.


4. Sending Messages via WhatsApp

After setting up the trigger, it’s time to configure the action to send WhatsApp messages. Select WhatsApp as the action application in Pabbly Connect. You will need to set up your WhatsApp account by generating an API key through the WhatsApp Business API.

  • Enter the WhatsApp number of the client.
  • Compose the reminder message, including policy details and expiration dates.
  • Test the message to ensure it is sent correctly.

Once the message configuration is complete, save your workflow. This allows Pabbly Connect to send automated reminders to your clients on WhatsApp based on the data from Google Sheets.


5. Testing and Activating Your Workflow

Before fully implementing your automation, it’s essential to test the workflow. Trigger the workflow by adding a new row in your Google Sheets to see if the WhatsApp message is sent correctly. This step ensures that all integrations are functioning as expected.

If the test is successful, you can activate your workflow in Pabbly Connect. This means that reminders will now be sent automatically whenever a new entry is added or an existing entry is updated in your Google Sheets. This automation saves time and ensures that your clients receive timely reminders.


Conclusion

In this tutorial, you learned how to automate sending insurance renewal reminders to clients on WhatsApp using Pabbly Connect. By integrating Google Sheets and WhatsApp, you can streamline your communication process and ensure your clients are always informed about their policy expirations.

Ensure you check out Pabbly Connect to create business automation workflows and reduce manual tasks. Pabbly Connect currently offer integration with 2,000+ applications.

Track Customer Feedback in Airtable from Google My Business Reviews Automatically with Pabbly Connect

Learn how to automatically track Google My Business reviews in Airtable using Pabbly Connect. Follow this detailed step-by-step tutorial for seamless integration. Explore systematic approaches to creating efficient automation solutions that convert technical concepts into practical, implementable instructions.

Watch Step By Step Video Tutorial Below


1. Setting Up Pabbly Connect for Google My Business Reviews

To start tracking customer feedback from Google My Business reviews automatically, you first need to set up your account on Pabbly Connect. Go to the Pabbly Connect website and sign up for a free trial account. This platform will serve as the central hub for integrating Google My Business with Airtable.

After signing up, log in to your Pabbly Connect dashboard. Here, you will create a new workflow that will connect your Google My Business account to Airtable. Follow these steps to create your workflow:

  • Visit the Pabbly Connect dashboard and click on the ‘Create Workflow’ button.
  • Name your workflow (e.g., ‘Get Google My Business Reviews on Airtable’).
  • Click ‘Create’ to start building your integration.

With your workflow created, you are now ready to set the trigger for new reviews from Google My Business.


2. Setting the Trigger for New Reviews in Google My Business

The next step involves configuring the trigger in your Pabbly Connect workflow. This trigger will activate whenever a new review is submitted on your Google My Business page. Click on the trigger window and select Google My Business as your app.

Now, choose the event as ‘New Review’. Connect your Google My Business account by clicking on the ‘Connect’ button. You will need to authorize Pabbly Connect to access your Google My Business account. After connecting, select the specific business location for which you want to track reviews.

  • Click on ‘Add New Connection’ and authorize access to your Google My Business account.
  • Select the business location from which you want to capture reviews.
  • Test the connection by clicking ‘Save and Send Test Request’ to fetch the latest review.

This setup ensures that every time a customer submits a review, it will be captured in your Pabbly Connect workflow.


3. Formatting the Review Date for Airtable

After setting the trigger, the next step is to format the review date before sending it to Airtable. Pabbly Connect allows you to use the Date Time Formatter feature to adjust the date format as needed. Click on the action step and select ‘Date Time Formatter’ from the list of applications. using Pabbly Connect

In the action event, select ‘Format Date with Time Zone’. Map the date you captured from the Google My Business review. Specify the format you want to convert to and the time zone. This will ensure that the date is correctly formatted for your Airtable records.

Select the date field from the Google My Business review data. Choose the format you want to convert to, such as ‘YYYY-MM-DD’. Set the time zone to your preference, like ‘Asia/Kolkata’.

Once formatted, the date will be ready to be sent to Airtable along with the review details.


4. Sending Review Data to Airtable

Now that you have the review data and formatted date, it’s time to send this information to Airtable. In your Pabbly Connect workflow, add a new action step and select Airtable as the application. Choose ‘Create Record’ as the action event to insert the review into your Airtable base. using Pabbly Connect

Connect your Airtable account by providing the API key, which you can find in your Airtable account settings. After connecting, select the base and table where you want the review data to be stored. Map the fields for name, review comment, star rating, and the formatted date.

Provide your Airtable API key for authentication. Select the correct base and table from your Airtable account. Map the relevant fields with the captured data from Google My Business.

After mapping, click on ‘Save and Send Test Request’ to verify that the data is correctly sent to Airtable.


5. Recap and Finalizing Your Pabbly Connect Workflow

With the integration steps completed, let’s recap what has been accomplished using Pabbly Connect. You have successfully set up a workflow that captures new reviews from Google My Business and sends them to Airtable automatically. This eliminates the need for manual tracking of reviews.

To finalize your workflow, make sure to save all your changes in Pabbly Connect. You can also clone this workflow for other business locations or different applications as needed. This automation not only saves time but also ensures that you have all customer feedback organized in one place.

By following these steps, you can now effectively track customer feedback from Google My Business in Airtable, enhancing your business operations and customer engagement.


Conclusion

In this tutorial, we explored how to use Pabbly Connect to automatically track Google My Business reviews in Airtable. By setting up triggers and actions, you can streamline your feedback management process effortlessly. Start utilizing this integration today to enhance your customer service efficiency.

Ensure you check out Pabbly Connect to create business automation workflows and reduce manual tasks. Pabbly Connect currently offer integration with 2,000+ applications.

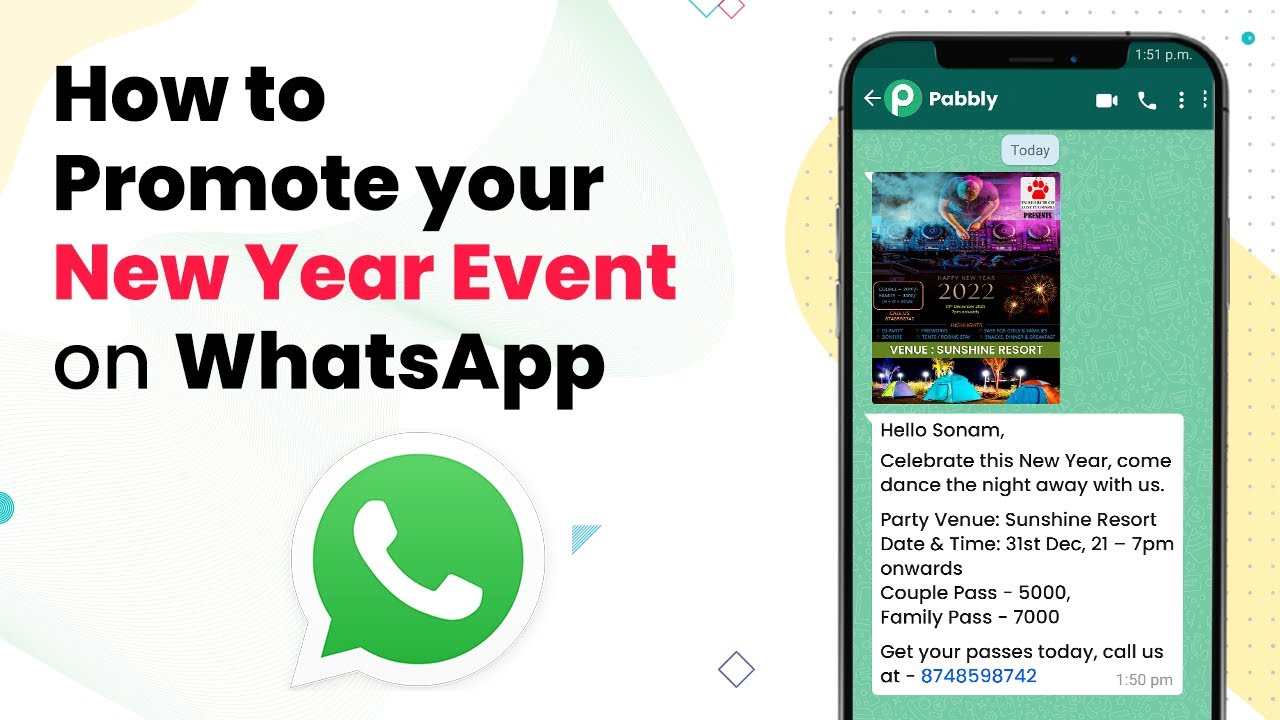
Integrate Facebook Lead Ads with WhatsApp Using Pabbly Connect for New Year Events

Learn how to seamlessly integrate Facebook Lead Ads with WhatsApp using Pabbly Connect to promote your New Year event. Step-by-step tutorial included. Implement the precise methodologies leading organizations use to automate repetitive tasks, illustrated with practical examples designed for immediate application.

Watch Step By Step Video Tutorial Below


1. Access Pabbly Connect for Integration

To begin integrating Facebook Lead Ads with WhatsApp, first access Pabbly Connect. This platform allows for seamless automation of tasks across applications. To set up your integration, visit the Pabbly website and create a free account.

Once registered, log into your Pabbly Connect dashboard. From here, you can create a new workflow that connects Facebook Lead Ads and WhatsApp. This integration will enable you to automatically send event invitations to your leads via WhatsApp.


2. Creating a New Workflow in Pabbly Connect

After accessing your Pabbly Connect dashboard, click on the ‘Create Workflow’ button. Name your workflow something relevant, such as ‘New Year Party Details to Facebook Leads on WhatsApp’. This will help you easily identify the automation later.

In this workflow, you will set up a trigger and an action. The trigger will be a new lead collected from Facebook Lead Ads, while the action will be sending a message through WhatsApp. Follow these steps to set up your workflow:

  • Click on the ‘Create Workflow’ button.
  • Name your workflow appropriately.
  • Set the trigger to Facebook Lead Ads.

After naming your workflow, you will see options for setting the trigger and action. Ensure you select Facebook Lead Ads as the trigger application to start this integration.


3. Setting Up Facebook Lead Ads as Trigger

To configure Facebook Lead Ads within your Pabbly Connect workflow, select Facebook Lead Ads as the trigger app. Then choose the trigger event as ‘New Lead’. This action will allow Pabbly Connect to capture data whenever a new lead fills out your form.

Next, connect your Facebook account by clicking on the ‘Connect’ button. Once connected, select the Facebook page where your lead ad is running and the specific lead generation form. This ensures that Pabbly Connect captures leads accurately:

  • Choose the Facebook page linked to your event.
  • Select the lead generation form you created for the New Year event.
  • Save the settings and test the connection.

Once the connection is established, Pabbly Connect will be ready to capture new leads generated from your Facebook ads.


4. Sending WhatsApp Messages via Pabbly Connect

After setting up the trigger for Facebook Lead Ads, the next step is to configure the action to send a WhatsApp message. For this, select ‘360 Dialog’ as the action app, which is essential for sending messages through WhatsApp using the official API.

Choose the action event as ‘Send Template Message’. You will need to connect your 360 Dialog account by providing the API key and domain. This connection allows Pabbly Connect to send messages to WhatsApp. Follow the steps below to complete this setup:

Input your 360 Dialog API key and domain. Select the message template you created for the New Year invitation. Map the lead’s WhatsApp number to ensure messages are sent correctly.

After mapping the required fields, save your settings. Your workflow is now ready to send automated WhatsApp messages to new leads as they come in from Facebook.


5. Testing the Integration

To ensure everything is functioning correctly, it’s crucial to test your Pabbly Connect integration. Fill out your Facebook Lead Ads form to generate a new lead and check if the WhatsApp message is sent successfully.

Upon submitting the form, you should receive a WhatsApp message containing the details of your New Year event. This message will include personalized elements like the lead’s name and the event details, demonstrating how Pabbly Connect automates the process effectively.

Here’s how to test your integration:

Submit a test lead through your Facebook Lead Ads form. Check your WhatsApp for the automated message. Verify the message content matches your template.

If everything works as expected, your integration is complete, and you can start promoting your New Year event effectively using Pabbly Connect.


Conclusion

Integrating Facebook Lead Ads with WhatsApp using Pabbly Connect allows you to automate invitations for your New Year event efficiently. By following the steps outlined in this tutorial, you can ensure that your leads receive timely updates and invitations directly on WhatsApp, enhancing customer engagement.

Ensure you check out Pabbly Connect to create business automation workflows and reduce manual tasks. Pabbly Connect currently offer integration with 2,000+ applications.

How to Create Record in Grist when Response is Received in Google Forms Using Pabbly Connect

Learn how to integrate Google Forms with Grist using Pabbly Connect to automatically create records from form responses. Navigate the automation landscape confidently with clear, structured guidance suitable for professionals regardless of prior technical experience.

Watch Step By Step Video Tutorial Below


1. Setting Up Pabbly Connect for Google Forms Integration

To create a record in Grist when a response is received in Google Forms, start by accessing Pabbly Connect. This automation platform allows you to connect various applications seamlessly, making it perfect for this integration.

Begin by logging into your Pabbly Connect account. From the dashboard, click on the ‘Create Workflow’ button to initiate the integration process. You will be prompted to name your workflow, which can be something like ‘Google Forms to Grist Integration’.


2. Configuring Google Forms in Pabbly Connect

Next, you need to set up Google Forms as your trigger application in Pabbly Connect. Choose Google Forms from the list of available applications and select the trigger event as ‘New Response Received’. This action will initiate the workflow whenever someone submits the form.

  • Select your Google account to connect with Pabbly Connect.
  • Choose the specific Google Form you want to track for responses.
  • Test the trigger to ensure it fetches the latest response correctly.

After setting up the trigger, you will see a prompt to test it. Make sure to submit a test response in your Google Form to verify that Pabbly Connect captures the data successfully. This step is crucial for ensuring your integration works as intended.


3. Creating a Record in Grist

Now that you have configured Google Forms, it’s time to set Grist as your action application in Pabbly Connect. Select Grist from the list of applications and choose the action event ‘Create Record’. This will allow you to create a new record in your Grist database whenever a new form response is submitted.

  • Connect your Grist account to Pabbly Connect.
  • Map the fields from Google Forms to the corresponding fields in Grist.
  • Test the action to confirm that a record is created successfully in Grist.

After testing, you should see the new record in your Grist account reflecting the data submitted through Google Forms. This automated process saves you time and ensures data accuracy.


4. Finalizing the Integration in Pabbly Connect

With both Google Forms and Grist configured in Pabbly Connect, you can finalize the integration. Ensure all settings are correct, and give your workflow a final review. This includes checking the trigger and action mappings to confirm they are aligned with your requirements.

Once satisfied, turn on your workflow in Pabbly Connect. This will activate the integration, allowing it to run automatically whenever a new response is received in your Google Form. You can monitor the workflow activity directly from your Pabbly Connect dashboard.


Conclusion

In this tutorial, we explored how to create a record in Grist when a response is received in Google Forms using Pabbly Connect. By following these steps, you can automate data entry and improve efficiency in your workflows.

Ensure you check out Pabbly Connect to create business automation workflows and reduce manual tasks. Pabbly Connect currently offer integration with 2,000+ applications.

Utilizing Pabbly Connect for integrating Google Forms and Grist enhances your data management capabilities, ensuring that all responses are captured and recorded accurately.

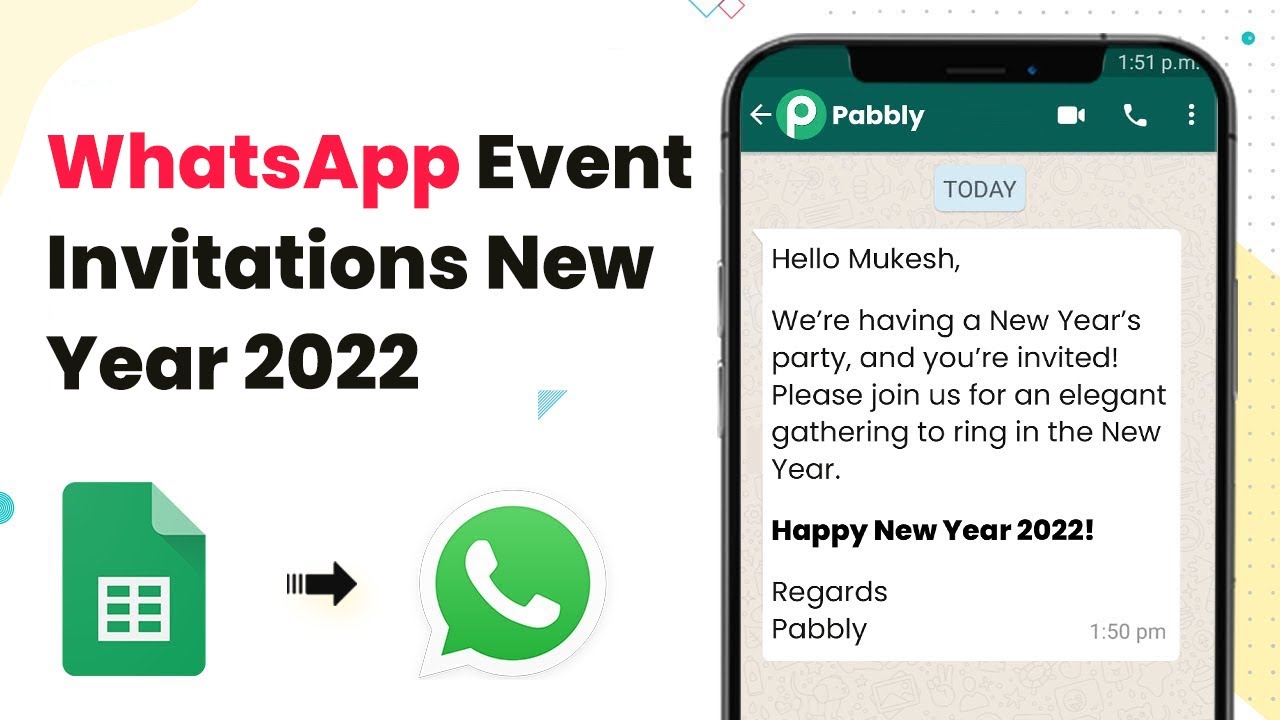
Automate Sending New Year Invitations on WhatsApp Using Pabbly Connect

Learn how to automate sending New Year 2022 invitations on WhatsApp using Pabbly Connect, Google Sheets, and 360 Dialog for seamless integration. This comprehensive guide reveals exactly how to connect your applications and automate repetitive tasks — accessible for professionals of all technical backgrounds.

Watch Step By Step Video Tutorial Below


1. Accessing Pabbly Connect for Automation

To send New Year invitations automatically via WhatsApp, you first need to access Pabbly Connect. Open your web browser and navigate to Pabbly Connect. If you are a new user, click on the green ‘Sign Up for Free’ button to create your account.

Once you have logged into Pabbly Connect, you will be directed to your dashboard. Here, you can start creating a new workflow that will facilitate the integration between Google Sheets and WhatsApp. This integration is essential for sending bulk invitations, making the process seamless and efficient.


2. Creating a New Workflow in Pabbly Connect

To set up the automation, click on the blue button in the top right corner of the dashboard to create a new workflow. Name your workflow something descriptive, like ‘Google Sheets to WhatsApp’. This will help you remember the purpose of the workflow later.

After naming your workflow, click on the ‘Create’ button. Now, you will need to define the trigger and action for your automation. The trigger will be the event that collects guest data from Google Sheets, while the action will be to send the WhatsApp invitations. This step is crucial as it sets the foundation for your automation.

  • Define the trigger as ‘Scheduler’ to determine when the workflow should run.
  • Set the action to ‘Send WhatsApp Message’ to complete the integration.

With these steps, you have successfully created your workflow in Pabbly Connect, which will now manage the sending of invitations automatically.


3. Integrating Google Sheets with Pabbly Connect

The next step is to integrate Google Sheets into your workflow via Pabbly Connect. Click on the trigger application and select ‘Google Sheets’. You will then need to choose the action event ‘Get Rows’ to retrieve guest details.

After selecting the action event, click on ‘Connect’ and authorize Pabbly Connect to access your Google Sheets. Choose the specific spreadsheet that contains your guest list. Make sure to define the range of cells that contain the guest details, for example, from A2 to C8, which includes names and phone numbers.

  • Select the spreadsheet named ‘Client List’ from your Google account.
  • Set the range to A2:C, ensuring it covers all potential guest entries.

By completing this integration, Pabbly Connect will now be able to pull data from your Google Sheets automatically.


4. Sending Invitations via WhatsApp with Pabbly Connect

After integrating Google Sheets, the next step is to send invitations through WhatsApp. Add another step in your workflow and select ‘360 Dialog’ as the action application. Choose the action event ‘Send Template Message’ to configure the WhatsApp message.

To connect with 360 Dialog, you will need to enter your API key and domain. This step is essential as WhatsApp does not allow direct messaging without using an API. Once you have entered your details, select the template for your New Year invitation.

Map the mobile number field to ensure the message is sent to the correct recipient. Include the header image link and customize the body of the message with the guest’s name.

By completing these steps, Pabbly Connect will automate the sending of invitations via WhatsApp, ensuring each guest receives a personalized message.


5. Conclusion: Automate Your New Year Invitations with Pabbly Connect

In this tutorial, we explored how to automate sending New Year 2022 invitations on WhatsApp using Pabbly Connect. By integrating Google Sheets with WhatsApp through 360 Dialog, you can efficiently manage your guest list and send personalized invitations.

Ensure you check out Pabbly Connect to create business automation workflows and reduce manual tasks. Pabbly Connect currently offer integration with 2,000+ applications.

This automation not only saves time but ensures that every guest receives their invitation seamlessly. With Pabbly Connect, you can simplify your event planning and make your New Year celebrations memorable.