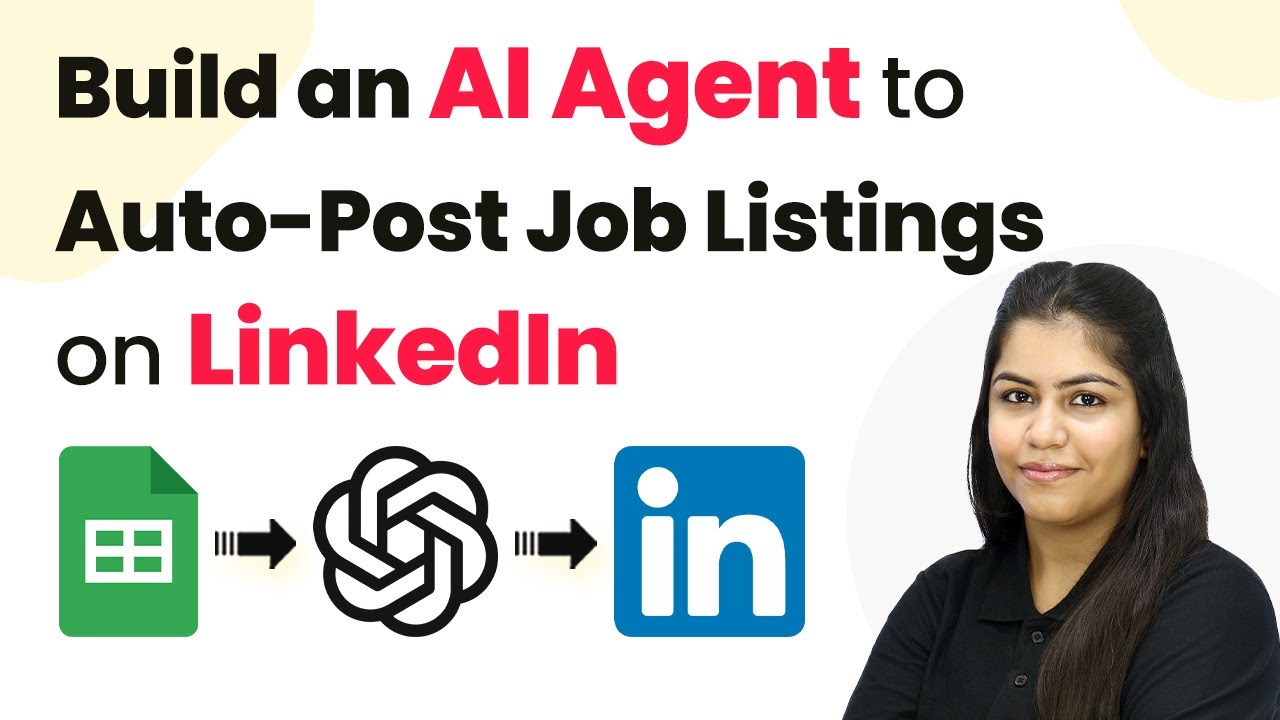
Automatically Post RSS Feed to Tumblr Using Pabbly Connect

Learn how to automatically post RSS feeds to Tumblr using Pabbly Connect. Follow our step-by-step guide to streamline your content sharing process. Explore efficient methods for automating routine tasks with clear, concise instructions suited for both newcomers and experienced professionals.

Watch Step By Step Video Tutorial Below


1. Setting Up Pabbly Connect for RSS to Tumblr Integration

To start the process of posting RSS feeds to Tumblr automatically, you first need to access Pabbly Connect. Visit the Pabbly Connect website and log in to your account. If you don’t have an account, you can create one for free using the link provided in the description.

Once logged in, navigate to the dashboard. Here, you will create a new workflow by clicking the ‘Create Workflow’ button. Name your workflow appropriately, for example, ‘RSS Feeds to Tumblr Automation’, and click ‘Create’ to proceed.


2. Creating the Trigger for RSS Feed Updates

The next step involves setting up the trigger in Pabbly Connect. Since our goal is to post new RSS feeds, select the ‘RSS by Pabbly’ feature as the trigger app. For the trigger event, choose ‘New Item in Feed’. This will allow Pabbly Connect to monitor updates from the specified RSS feed.

  • Select ‘RSS by Pabbly’ as the trigger app.
  • Choose ‘New Item in Feed’ as the trigger event.
  • Enter the RSS feed URL from the website you want to monitor.

After entering the feed URL, click ‘Save’ and then ‘Send Test Request’. This will fetch the most recent item from the RSS feed, confirming that your trigger is set up correctly.


3. Configuring Tumblr Action in Pabbly Connect

With the trigger set, the next step is to configure the action that will occur when a new RSS feed is detected. Search for ‘Tumblr’ in Pabbly Connect and select it as the action app. For the action event, choose ‘Create a Link Post’. This tells Pabbly Connect to create a new post on Tumblr whenever a new item is detected in the RSS feed.

Click ‘Connect’ to establish a connection with your Tumblr account. If you are not already logged in, you will be prompted to do so. After logging in, grant the necessary permissions to allow Pabbly Connect to post on your behalf.

  • Choose your Tumblr blog where the post will be made.
  • Map the fields from the RSS feed to the Tumblr post fields.
  • Decide if the post should be published immediately or saved as a draft.

After setting up the action, click ‘Save and Send Test Request’ to verify that everything is working properly. You should see a new post on your Tumblr blog reflecting the latest RSS feed item.


4. Completing the Automation Setup

After successfully testing the action, your automation using Pabbly Connect is complete. This means that every time a new item is added to your specified RSS feed, it will automatically create a post on your Tumblr account without any manual intervention. This automation runs every eight hours to check for updates.

Once the setup is complete, you can sit back and let Pabbly Connect handle the posting for you. It’s a simple yet powerful way to increase traffic to your website by sharing RSS feeds through your Tumblr account.


5. Conclusion: Automate Your RSS Feed Posting with Pabbly Connect

In conclusion, using Pabbly Connect to automate the posting of your RSS feed to Tumblr is an efficient way to enhance your online presence. By following the steps outlined above, you can set up this integration quickly and easily.

Ensure you check out Pabbly Connect to create business automation workflows and reduce manual tasks. Pabbly Connect currently offer integration with 2,000+ applications.

With this automation, you can ensure that your Tumblr followers are always updated with your latest content, driving more traffic to your website. Start using Pabbly Connect today to streamline your content sharing process!

Automatically Repost Blogger Posts to Webflow Using Pabbly Connect

Learn how to automatically repost Blogger posts to Webflow using Pabbly Connect with this detailed, step-by-step tutorial. Build sophisticated automated workflows in less time than you think. This guide translates complex integrations into straightforward steps for immediate implementation.

Watch Step By Step Video Tutorial Below


1. Accessing Pabbly Connect for Blogger to Webflow Integration

To automatically repost Blogger posts to Webflow, start by accessing Pabbly Connect. Log into your Pabbly Connect account and navigate to the dashboard. If you don’t have an account yet, you can create one easily and enjoy 100 free automation tasks each month.

Once logged in, click on the Create Workflow button. You will be prompted to name your workflow. For this integration, you can name it something like ‘Blogger to Webflow Automation’. After naming it, click on the Create button to proceed.


2. Setting Up the Trigger in Pabbly Connect

In this step, you will set up the trigger that starts the automation. Choose Pabbly Connect as your platform and select Google Blogger as the trigger application. In the trigger event dropdown, select New Post Added. This will notify Pabbly Connect whenever a new blog post is published on your Blogger account.

  • Select Google Blogger from the app options.
  • Choose New Post Added as the trigger event.
  • Click on Connect to authenticate your Blogger account.

After connecting, select the specific blog from which you want to fetch posts. Ensure you set the status to Live to only capture published posts. Click on Save and Send Test Request to test the connection and fetch the most recent blog post.


3. Transforming Data Using Pabbly Connect

Once you have retrieved the blog post data from Blogger, the next step is to clean it up for Webflow. Use the Data Transformer feature in Pabbly Connect to strip HTML tags from the blog content. This is essential to ensure the content displays correctly on your Webflow site.

  • Select Data Transformer from the action step options.
  • Choose Strip HTML Tags as the action event.
  • Map the content from the previous step to remove HTML.

After setting this up, click on Save and Send Test Request. You will receive the cleaned content without any HTML, making it ready for your Webflow post.


4. Creating a New Post in Webflow

With the cleaned content ready, you can now create a new post in Webflow. In this step, select Pabbly Connect again and choose Webflow as the action application. Select Create Live Item as the action event. This will allow you to publish the new blog post automatically.

Connect your Webflow account by entering the API token. Select the site and the specific collection where the post should go. Map the title, content, and image URL from the previous steps.

After mapping all necessary fields, click on Save and Send Test Request. This will create a new blog post in your Webflow site with the data fetched from Blogger.


5. Finalizing the Automation Process

After setting up the automation, you can finalize everything by testing it thoroughly. Ensure that whenever a new post is published on Blogger, it automatically appears on your Webflow site without any manual intervention. This is the power of Pabbly Connect, which streamlines the process and saves time.

Make sure to check your Webflow site to confirm that the new blog post appears correctly. You can revisit the settings in Pabbly Connect to adjust any parameters if needed. Remember, this automation only needs to be set up once, and it will work seamlessly from then on.


Conclusion

In conclusion, using Pabbly Connect allows you to automatically repost Blogger posts to your Webflow site efficiently. By setting up triggers and actions, you can save time and ensure your content is consistently updated across platforms. This integration is a powerful way to enhance your blogging workflow.

Ensure you check out Pabbly Connect to create business automation workflows and reduce manual tasks. Pabbly Connect currently offer integration with 2,000+ applications.

Automatically Share Tumblr Posts to Discord with Pabbly Connect

Learn how to automate sharing Tumblr posts to Discord using Pabbly Connect. Follow our step-by-step guide for seamless integration. Implement the precise methodologies leading organizations use to automate repetitive tasks, illustrated with practical examples designed for immediate application.

Watch Step By Step Video Tutorial Below


1. Accessing Pabbly Connect for Automation

To start sharing your Tumblr posts to Discord automatically, you first need to access Pabbly Connect. Head to the address bar and type in Pabbly.com/connect. This platform provides a seamless way to connect various applications and automate workflows.

Once on the Pabbly Connect page, you can either sign in if you already have an account or sign up for a new one. Signing up is free and offers 100 free tasks every month to help you practice your automation workflows.


2. Creating Your Workflow in Pabbly Connect

After logging in, you will see a dashboard with your existing automations. Click on the ‘Create Workflow’ button to start a new automation. Name your workflow something descriptive, like ‘Tumblr to Discord’ to easily identify it later.

  • Click on ‘Create’ after naming your workflow.
  • You will see two windows: Trigger and Action.
  • Select ‘New Post’ from the Tumblr trigger options.

By choosing the trigger, you set up the event that initiates the workflow. In this case, it is a new post on your Tumblr blog. This is where Pabbly Connect starts to work its magic, linking your Tumblr account with Discord.


3. Connecting Tumblr to Pabbly Connect

Now that you have set your trigger, you need to connect your Tumblr account. Click on ‘Add New Connection’ and authorize Pabbly Connect to access your Tumblr data. This step is crucial as it ensures that your posts will be fetched automatically.

Once connected, you will select the type of post you want to share. For this automation, choose the ‘Text’ post type. After that, click on ‘Save and Send Test Request’ to fetch the latest post from your Tumblr blog.


4. Setting Up Discord to Receive Posts

Next, you will set up Discord as the action application. Choose Discord from the action options and select ‘Send Channel Message’. This allows Pabbly Connect to send a message to your specified Discord channel whenever a new Tumblr post is created.

  • Obtain the Webhook URL from your Discord server settings.
  • Create a new webhook and copy the URL.
  • Paste the Webhook URL into Pabbly Connect.

After pasting the URL, create your message format. You can use mapping to include the title and link of the new Tumblr post in your Discord message. This ensures that your followers will see the latest posts directly in the channel.


5. Testing Your Automation with Pabbly Connect

Now that everything is set up, it’s time to test your automation. Click on ‘Save and Send Test Request’ in the Discord action step. This will send a test message to your Discord channel, confirming that the integration works properly.

Once you have tested the automation, create a new post on Tumblr to see it in action. Wait a few moments, and you should see the message appear in your Discord channel. This demonstrates how Pabbly Connect efficiently links Tumblr and Discord for seamless post sharing.


Conclusion

In this tutorial, we demonstrated how to use Pabbly Connect to automatically share Tumblr posts to Discord. By following these steps, you can streamline your content sharing process and keep your audience updated effortlessly. Automation not only saves time but also enhances audience engagement.

Ensure you check out Pabbly Connect to create business automation workflows and reduce manual tasks. Pabbly Connect currently offer integration with 2,000+ applications.

Automate Sharing Tumblr Posts to Twitter with Pabbly Connect

Learn how to use Pabbly Connect to automatically share Tumblr posts to Twitter. Follow this step-by-step tutorial for seamless integration. Develop expertise in application integration and learn how to design streamlined automation workflows using proven, simplified approaches.

Watch Step By Step Video Tutorial Below


1. Access Pabbly Connect for Automation

To start sharing Tumblr posts to Twitter automatically, you need to access Pabbly Connect. Begin by visiting the Pabbly website and navigating to the Pabbly Connect section.

On the Pabbly Connect page, you can either sign in if you have an account or sign up for free. Signing up gives you 100 free tasks each month, allowing you to explore the automation features. Once logged in, click on ‘Access Now’ for Pabbly Connect to start creating your automation workflow.


2. Create a New Workflow in Pabbly Connect

Next, you will create a new workflow in Pabbly Connect. Click on ‘Create Workflow’ and give your workflow a name, such as ‘Tumblr to Twitter’. This name helps identify the integration you are setting up.

In Pabbly Connect, you will see two main sections: ‘Trigger’ and ‘Action’. The trigger is where the automation starts, and the action is what happens as a result. For this integration, select Tumblr as the trigger application and choose ‘New Post in My Blog’ as the trigger event.


3. Connect Tumblr to Pabbly Connect

After selecting Tumblr, click on ‘Connect’ to link your Tumblr account with Pabbly Connect. You will need to authorize the connection, allowing Pabbly Connect to access your Tumblr data securely.

Once connected, you can specify the type of content you want to share. Options include text, video, audio, and more. For this example, choose ‘Text’. After setting this up, you can create a new post on Tumblr with relevant content and tags.

  • Create a new text post on Tumblr.
  • Include a title and content for your post.
  • Add relevant tags to categorize your post.

Once your post is created, click on ‘Save and Send Test Request’ in Pabbly Connect to test the connection and ensure it captures the latest blog post information.


4. Connect Twitter to Pabbly Connect

Now that Tumblr is connected, it’s time to set up Twitter in Pabbly Connect. In the action section, select Twitter as the application and choose ‘Create Tweet’ as the action event. This action will allow you to post tweets automatically whenever you publish a new Tumblr post.

Click on ‘Connect’ to link your Twitter account to Pabbly Connect. Authorize the connection to ensure that Pabbly Connect can post tweets on your behalf. After connecting, you can customize the tweet message by mapping the title and summary of your Tumblr post.

  • Set up the tweet message format, including the title and link.
  • Map the relevant fields from the Tumblr post.
  • Test the tweet creation by clicking ‘Save and Send Test Request’.

Once you have configured your tweet message, click on ‘Save and Send Test Request’ to see if a new tweet is created successfully on your Twitter account.


5. Finalize the Integration

With both Tumblr and Twitter connected through Pabbly Connect, your integration is nearly complete. When you publish a new post on Tumblr, it will automatically trigger a tweet on Twitter, allowing your followers to see your latest updates.

To finalize, ensure that all fields are correctly mapped and that you have tested the workflow successfully. This automation will save you time and help you reach a wider audience across both platforms.

Remember, you can always return to Pabbly Connect to modify your workflows or add additional features as needed. This integration enables seamless sharing of content between Tumblr and Twitter, enhancing your online presence.


Conclusion

Using Pabbly Connect to automate the sharing of Tumblr posts to Twitter is a straightforward process that enhances your online visibility. By following the steps outlined above, you can easily set up this integration and keep your audience informed about your latest content.

Ensure you check out Pabbly Connect to create business automation workflows and reduce manual tasks. Pabbly Connect currently offer integration with 2,000+ applications.

Notify Sales Team on New Orders in Ecwid Store Using Pabbly Connect and Google Chat

Learn how to notify your sales team about new orders in your Ecwid store using Pabbly Connect and Google Chat. Follow this detailed tutorial for step-by-step instructions.

Watch Step By Step Video Tutorial Below


1. Accessing Pabbly Connect for Integration

To notify your sales team on new orders from your Ecwid account, you will first need to access Pabbly Connect. Start by navigating to the Pabbly website and selecting the Connect option. If you already have an account, simply log in; if not, sign up for free to get started.

Once logged in, you will be directed to the dashboard where you can create a new workflow. Click on the ‘Create Workflow’ button, and give your workflow a meaningful name, such as ‘Ecwid to Google Chat’. This setup allows you to automate notifications seamlessly.


2. Setting Up the Trigger for New Orders in Ecwid

The next step is to set up the trigger in Pabbly Connect for new orders in your Ecwid store. In the trigger window, select Ecwid as your application and choose the event called ‘New Order’. Click on the ‘Connect’ button to establish a connection with your Ecwid account.

  • Select Ecwid as the application.
  • Choose the ‘New Order’ event.
  • Authenticate your Ecwid account.

After connecting, test the connection by clicking on ‘Save and Send Test Request’. This will fetch the latest order details from your Ecwid account, confirming that the trigger is set up correctly.


3. Configuring Google Chat Action in Pabbly Connect

Now that the trigger is set, you need to configure the action to send notifications to Google Chat. In the action window of Pabbly Connect, select Google Chat and choose the ‘Create Message’ event. Click on ‘Connect’ to establish a connection with your Google Chat account.

For this step, you will need to set up a Webhook URL in Google Chat. Navigate to the ‘Manage Webhooks’ section in your Google Chat settings, and create a new webhook. Copy this URL and paste it back into Pabbly Connect.


4. Mapping Data for Notifications

With the action configured, it’s time to map the data you want to send in the notification message. In Pabbly Connect, create a message that includes customer details, product information, and the order amount. Use the mapping feature to pull data directly from the trigger step.

  • Customer Name: Map from the Ecwid order data.
  • Customer Email: Map from the Ecwid order data.
  • Product Name: Map from the Ecwid order data.
  • Order Amount: Map from the Ecwid order data.

Once you have mapped all necessary fields, click on ‘Save and Send Test Request’ to send a test message to Google Chat. Verify that the message appears as expected in your Google Chat.


5. Testing the Integration

The final step involves testing the entire integration to ensure everything works smoothly. Make a new test order in your Ecwid store and check your Google Chat for the notification. This will confirm that Pabbly Connect is successfully sending order details to your sales team.

After placing the order, it may take a few moments for the notification to appear in Google Chat. If you do not see it immediately, wait a couple of minutes as the data may take some time to process.


Conclusion

By following these steps, you can effectively notify your sales team about new orders in your Ecwid store using Pabbly Connect and Google Chat. This integration streamlines communication and ensures your team is always updated on sales activities.

Ensure you check out Pabbly Connect to create business automation workflows and reduce manual tasks. Pabbly Connect currently offer integration with 2,000+ applications.

Automate ThriveCart Sales Notifications on Google Chat Using Pabbly Connect

Learn how to automate ThriveCart sales notifications on Google Chat using Pabbly Connect. Follow this step-by-step tutorial for seamless integration. Discover how to seamlessly connect your essential tools through accessible instructions that make powerful automation available to professionals at every skill level.

Watch Step By Step Video Tutorial Below


1. Accessing Pabbly Connect for ThriveCart Integration

To automate ThriveCart sales notifications on Google Chat, you will first need to access Pabbly Connect. Start by navigating to the Pabbly website and selecting the Connect option. If you don’t have an account, signing up is free and provides you with 100 free tasks each month.

Once logged in, you will see options to create a new workflow. Click on ‘Create Workflow’ and name your workflow, such as ‘ThriveCart to Google Chat Integration’. This will set the stage for connecting your ThriveCart account to Google Chat automatically.


2. Setting Up the Trigger for ThriveCart Purchases

In your newly created workflow on Pabbly Connect, you will need to set up a trigger. The trigger event will be a product purchase from ThriveCart. Select ThriveCart as the application and choose the ‘Product Purchase’ event.

  • Choose ‘ThriveCart’ from the application menu.
  • Select ‘Product Purchase’ as the trigger event.
  • Connect your ThriveCart account by entering the API key.

After connecting, you will need to select the product you wish to monitor for purchases. This step ensures that every sale made on ThriveCart triggers a notification on your Google Chat.


3. Configuring Google Chat to Receive Notifications

Next, you will configure Google Chat to receive notifications from Pabbly Connect. In the action step of your workflow, select Google Chat and then choose the ‘Create Message’ option. You will need to set up a webhook URL for Google Chat.

  • Navigate to Google Chat and select ‘Manage Webhooks’.
  • Add a new webhook and name it something like ‘ThriveCart Notifications’.
  • Copy the generated webhook URL back into Pabbly Connect.

By doing this, every time a product is purchased on ThriveCart, a message will be sent to your Google Chat with the purchase details.


4. Testing the Integration Workflow

With your workflow configured, it’s time to test the integration. Make a test purchase on ThriveCart for the selected product to see if the notification appears in Google Chat. This step is crucial to ensure that everything is functioning correctly.

Once the purchase is completed, return to Pabbly Connect to check if the response from ThriveCart has been received. You should see the customer details, including their name, email, and the product purchased.


5. Finalizing and Utilizing Your Automation

After successful testing, finalize your workflow by saving it in Pabbly Connect. You can customize the message format that will be sent to Google Chat, including customer name, product name, email, and amount.

This automation will now run in the background, sending notifications to your Google Chat team every time a sale is made on ThriveCart, enhancing your team’s responsiveness and efficiency.


Conclusion

In this tutorial, we demonstrated how to automate ThriveCart sales notifications on Google Chat using Pabbly Connect. By following these steps, you can streamline your sales process and keep your team informed in real-time.

Ensure you check out Pabbly Connect to create business automation workflows and reduce manual tasks. Pabbly Connect currently offer integration with 2,000+ applications.

Sync Data from MySQL to Mailchimp Using Pabbly Connect

Learn how to sync data from MySQL to Mailchimp automatically using Pabbly Connect. Follow this step-by-step tutorial for seamless integration. Implement the precise methodologies leading organizations use to automate repetitive tasks, illustrated with practical examples designed for immediate application.

Watch Step By Step Video Tutorial Below


1. Introduction to Pabbly Connect for Syncing Data

In this tutorial, we will explore how to use Pabbly Connect to sync data from MySQL to Mailchimp automatically. This integration allows you to add customer details from your MySQL database directly into your Mailchimp subscriber list.

Pabbly Connect is a powerful automation tool that requires no coding skills, making it accessible for everyone. By using Pabbly Connect, you can ensure seamless data flow between MySQL and Mailchimp, enhancing your email marketing efforts.


2. Accessing Pabbly Connect

To start the integration process, you need to access Pabbly Connect. Open your web browser and type in ‘Pabbly.com’. From the homepage, navigate to the products section and click on Pabbly Connect.

If you are a new user, click on ‘Sign Up for Free’ to create your account. Existing users can simply log in. Once logged in, you will be directed to the dashboard where you can create a new workflow.


3. Creating a Workflow in Pabbly Connect

In the Pabbly Connect dashboard, click on the ‘+’ icon to create a new workflow. Name your workflow something descriptive, like ‘MySQL to Mailchimp Integration’, and click ‘Create’. This step sets up the foundation for your automation. using Pabbly Connect

Next, you will see a trigger and action window. Click on the trigger window, select MySQL as the application, and choose the trigger event as ‘New Row in a Table’. Click on ‘Connect’ and then ‘Add New Connection’. Enter your MySQL database username, password, and host details to establish the connection.

  • Enter your MySQL username and password.
  • Paste the MySQL host URL.
  • Specify the database name and port (usually 3306).

After entering the required details, save the connection. Now, select the table containing customer data and specify the unique column ID to ensure accurate data retrieval.


4. Syncing Data to Mailchimp

Once your MySQL connection is established, it’s time to sync the data to Mailchimp using Pabbly Connect. Click on the action step and select Mailchimp as the application. Choose the action event as ‘Add New Member with Custom Fields’.

To connect Mailchimp, click ‘Connect’ and then ‘Add New Connection’. Enter your Mailchimp API key, which you can find in your Mailchimp account under the profile settings. Also, specify your data center, which is part of your Mailchimp URL.

  • Navigate to Mailchimp profile, then to Extras, and select API keys.
  • Copy your API key and paste it in Pabbly Connect.
  • Enter your Mailchimp data center (e.g., us6).

After setting up the connection, select your audience list and map the subscriber’s email and name from the MySQL data. Finally, click ‘Save and Send Test Request’ to verify the integration.


5. Verifying Integration Success

After executing the test request, check your Mailchimp account to ensure the new subscriber has been added successfully. Navigate to the ‘All Contacts’ section and look for the email address you just synced from MySQL.

This confirmation indicates that your integration is working correctly. From now on, any new entries in your MySQL database will automatically sync to your Mailchimp account, thanks to Pabbly Connect.

To finalize, save your workflow in Pabbly Connect. This setup ensures that your email marketing efforts are automated and efficient, allowing you to focus on other aspects of your business.


Conclusion

In conclusion, using Pabbly Connect to sync data from MySQL to Mailchimp automates your email marketing process effectively. By following the steps outlined in this tutorial, you can ensure that new customer details are added seamlessly to your Mailchimp subscriber list.

Ensure you check out Pabbly Connect to create business automation workflows and reduce manual tasks. Pabbly Connect currently offer integration with 2,000+ applications.

Integrate Facebook Lead Ads with Google Hangouts Using Pabbly Connect

Learn how to automatically send Facebook lead details to Google Hangouts using Pabbly Connect. Follow our detailed tutorial for seamless integration. Discover hidden automation capabilities within your existing tools. This guide shows you how to connect your essential applications and permanently eliminate redundant manual processes.

Watch Step By Step Video Tutorial Below


1. Accessing Pabbly Connect for Integration

To begin integrating Facebook Lead Ads with Google Hangouts, you need to access Pabbly Connect. Start by visiting the Pabbly website and navigating to the Pabbly Connect section.

If you are a first-time user, click on the ‘Sign up for free’ option to create your account. After signing up, you can log in to your account and access the dashboard where you can create workflows for automation.


2. Creating a Workflow in Pabbly Connect

Once you are logged into Pabbly Connect, click on the plus sign to create a new workflow. Give your workflow a relevant name, such as ‘Facebook Lead Ads to Google Hangouts Integration’. This helps keep your integrations organized.

  • Click on ‘Create Workflow’
  • Select ‘Facebook Lead Ads’ as the trigger application
  • Choose ‘New Lead’ as the trigger event

After selecting the trigger event, proceed by connecting your Facebook account to Pabbly Connect. Ensure you are logged into your Facebook account to authorize the connection.


3. Setting Up Facebook Lead Ads in Pabbly Connect

In this step, you will configure the Facebook Lead Ads within Pabbly Connect. Start by selecting the specific Facebook page that contains your lead ads. Choose the lead generation form you want to use for the integration.

Once you have selected the page and form, click on ‘Save and Send Test Request’ to capture the lead details. You will need to fill out the lead form to test the connection. After submitting the test form, return to Pabbly Connect to see if the data has been captured successfully.


4. Integrating Google Hangouts with Pabbly Connect

After successfully capturing the lead details, it’s time to set up Google Hangouts in Pabbly Connect. Select Google Hangouts as the action application and choose the action event as ‘Create Message’. This will allow you to send messages to your Google Hangouts account automatically.

For this step, you need to provide the chat webhook URL from your Google Hangouts account. Create a new webhook for the specific room where you want to send the lead messages. Copy the webhook URL and paste it into Pabbly Connect.

  • Enter a message template, such as ‘New Lead Received’
  • Map the customer details from the Facebook lead form

Once you have completed these steps, click on ‘Save and Send Test Request’ to ensure that the messages are sent to Google Hangouts successfully.


5. Testing the Integration between Facebook Lead Ads and Google Hangouts

To verify that your integration works, fill out the Facebook Lead Ads form again with new lead details. After submitting the form, check your Google Hangouts to see if the message has been delivered.

If everything is set up correctly, you should see a message in your Google Hangouts indicating that a new lead has been received, along with the customer’s details. This confirms that Pabbly Connect is successfully automating the process between Facebook Lead Ads and Google Hangouts.

Remember to save your workflow in Pabbly Connect to ensure that this automation runs smoothly for future leads.


Conclusion

In conclusion, using Pabbly Connect makes it easy to automate the process of sending Facebook lead details to Google Hangouts. By following these steps, you can streamline your lead management and ensure timely communication with your team.

Ensure you check out Pabbly Connect to create business automation workflows and reduce manual tasks. Pabbly Connect currently offer integration with 2,000+ applications.

Automate Student Registration in LearnDash Courses Using Pabbly Connect

Learn how to automate student registration in LearnDash courses using Pabbly Connect and WordPress effortlessly. Step-by-step tutorial included. Discover hidden automation capabilities within your existing tools. This guide shows you how to connect your essential applications and permanently eliminate redundant manual processes.

Watch Step By Step Video Tutorial Below


1. Accessing Pabbly Connect for Course Enrollment Automation

To automate student registration in LearnDash courses, you first need to access Pabbly Connect. Start by visiting the Pabbly website and navigating to the Pabbly Connect section. If you’re a new user, click on ‘Sign Up for Free’ to create your account, which takes just a couple of minutes.

Once you have an account, log in to your Pabbly Connect dashboard. Here, you can create a workflow that will facilitate the integration between WordPress and LearnDash. The first step is to click on the ‘+’ icon to create a new workflow, naming it ‘Course Enrollment Automation’.


2. Setting Up Triggers in Pabbly Connect

After naming your workflow, you will set up a trigger in Pabbly Connect. Click on the trigger window and select WordPress as the application. Choose the trigger event as ‘User Registered’. This means that whenever a new user registers on your WordPress site, it will trigger the workflow to enroll them in a LearnDash course.

  • Select WordPress from the application list.
  • Choose the trigger event ‘User Registered’.
  • Copy the webhook URL provided by Pabbly Connect.

Next, you need to configure the WP Webhooks plugin in your WordPress dashboard. Install the plugin if you haven’t already, then navigate to Settings > WP Webhooks. From there, select ‘Send Data’ and add your copied webhook URL. This establishes the connection between your WordPress site and Pabbly Connect.


3. Testing the Integration with Pabbly Connect

To ensure that the integration works, you need to test it by creating a new user in WordPress. Navigate to the Users section, click on ‘Add New’, and fill in the necessary details like username, email, and role. For example, create a user named ‘Adam Smith’ with a specified email address.

Once the user is created, Pabbly Connect will capture the details of the new user. You will see the user data reflected in your Pabbly Connect dashboard, confirming that the trigger is functioning correctly.

  • Create a new user in WordPress.
  • Verify that the user details appear in Pabbly Connect.
  • Ensure that the trigger is activated.

With the user details captured, you can now proceed to enroll the user in a specific LearnDash course.


4. Enrolling Users in LearnDash via Pabbly Connect

Next, you will set up the action step in Pabbly Connect to enroll the new user into a LearnDash course. Click on the action step and select LearnDash as the application. Choose ‘Enroll into Course’ as the action event. You will need to connect your LearnDash account by entering your login details.

Once connected, select the specific course you wish to enroll the user in, such as ‘Advanced Node.js’. Map the user ID from the previous step to ensure the correct user is enrolled. After mapping, click on ‘Save and Send Test Request’ to complete the enrollment process.

Select LearnDash as the application. Choose ‘Enroll into Course’ as the action event. Map the user ID correctly.

Check your LearnDash account to confirm that the user has been successfully enrolled in the specified course.


5. Finalizing the Course Enrollment Automation

After successfully enrolling the new user, it’s important to finalize your workflow in Pabbly Connect. Save the workflow to ensure that all settings and configurations are stored. This integration means that every time a new user registers on your WordPress site, they will automatically be enrolled in the selected LearnDash course.

To further test the automation, you can add another new user in WordPress and verify that they are enrolled in the course as well. This confirms that the integration is working as intended and streamlines your course enrollment process.

In summary, using Pabbly Connect to automate student registration in LearnDash courses not only saves time but also ensures a seamless experience for both administrators and students.


Conclusion

In this tutorial, we explored how to automate course enrollment using Pabbly Connect with WordPress and LearnDash. By following these steps, you can easily manage student registrations and ensure they are enrolled in the correct courses automatically. This integration enhances efficiency and simplifies the process for everyone involved.

Ensure you check out Pabbly Connect to create business automation workflows and reduce manual tasks. Pabbly Connect currently offer integration with 2,000+ applications.

Create Product in Ecwid Using Airtable Database with Pabbly Connect

Learn how to automate product creation in Ecwid using Airtable with Pabbly Connect. Step-by-step guide to streamline your e-commerce workflow. Explore systematic approaches to creating efficient automation solutions that convert technical concepts into practical, implementable instructions.

Watch Step By Step Video Tutorial Below


1. Setting Up Pabbly Connect for Automation

To create products in your Ecwid store using Airtable, the first step is to set up your automation through Pabbly Connect. Start by logging into your Pabbly Connect account and navigating to the dashboard. If you don’t have an account yet, you can easily create one using the link provided in the description, which offers 100 free automation tasks every month.

Once on the dashboard, click on the ‘Create Workflow’ button. You will be prompted to name your workflow. For this integration, you might name it ‘Create Products in Ecwid from Airtable’. After naming, click the ‘Create’ button to proceed. This opens a new page where you will set up your trigger and action.


2. Setting Up the Trigger with Airtable

The next step involves configuring the trigger for your workflow, which will be initiated by new entries in Airtable. In Pabbly Connect, select Airtable as your trigger application and choose the ‘New Record’ event. This event will activate whenever a new product entry is added to your Airtable database.

  • Search for Airtable and select it as the trigger application.
  • Choose ‘New Record’ as the trigger event.
  • Click on ‘Connect’ and add a new connection using your Airtable API key.

After connecting, you will need to specify the base name and table name from your Airtable account. Ensure the trigger field is set to the ‘Created Time’ type to capture when the record was added. Click ‘Save and Send Test Request’ to verify the connection, and you should see the most recently added product details fetched into Pabbly Connect.


3. Configuring the Action to Create Product in Ecwid

Now that your trigger is set up, the next step is to configure the action to create a product in Ecwid. In Pabbly Connect, search for Ecwid and select it as the action application. Choose the ‘Create Product’ action event to proceed.

  • Click on ‘Connect’ and authenticate your Ecwid account.
  • Map the product details from Airtable to the corresponding fields in Ecwid.
  • Ensure to fill in necessary fields like product name, SKU, price, and description.

After mapping the details, click ‘Save and Send Test Request’. If everything is configured correctly, a new product will be created in your Ecwid store, reflecting the details from your Airtable record. You can verify this by checking your Ecwid product list.


4. Finalizing the Integration Workflow

With the trigger and action set, your integration is almost complete. In this step, you can review your workflow in Pabbly Connect to ensure everything is functioning as expected. Each time you add a new row in your Airtable database, the corresponding product will be automatically created in your Ecwid store.

This automation eliminates the need for manual data entry, saving you time and reducing errors. You can further customize your workflow by adding additional actions or filters as needed, enhancing the automation capabilities of Pabbly Connect.


5. Testing and Monitoring Your Automation

After setting up your automation, it’s crucial to test it thoroughly. Add a new product record in Airtable and check if it appears in your Ecwid store. In Pabbly Connect, you can monitor the execution of your workflow through the dashboard, ensuring that everything runs smoothly.

If you encounter any issues, Pabbly Connect provides detailed logs and error messages to help troubleshoot. Once confirmed working, you can rely on this integration to automate your e-commerce operations effectively.


Conclusion

In conclusion, using Pabbly Connect to automate product creation from Airtable to Ecwid streamlines your workflow, saving time and minimizing errors. With easy setup and no coding required, anyone can enhance their e-commerce operations effectively.

Ensure you check out Pabbly Connect to create business automation workflows and reduce manual tasks. Pabbly Connect currently offer integration with 2,000+ applications.