How to Send Notifications of Unpublished Jobs to Team on Slack Using Pabbly Connect

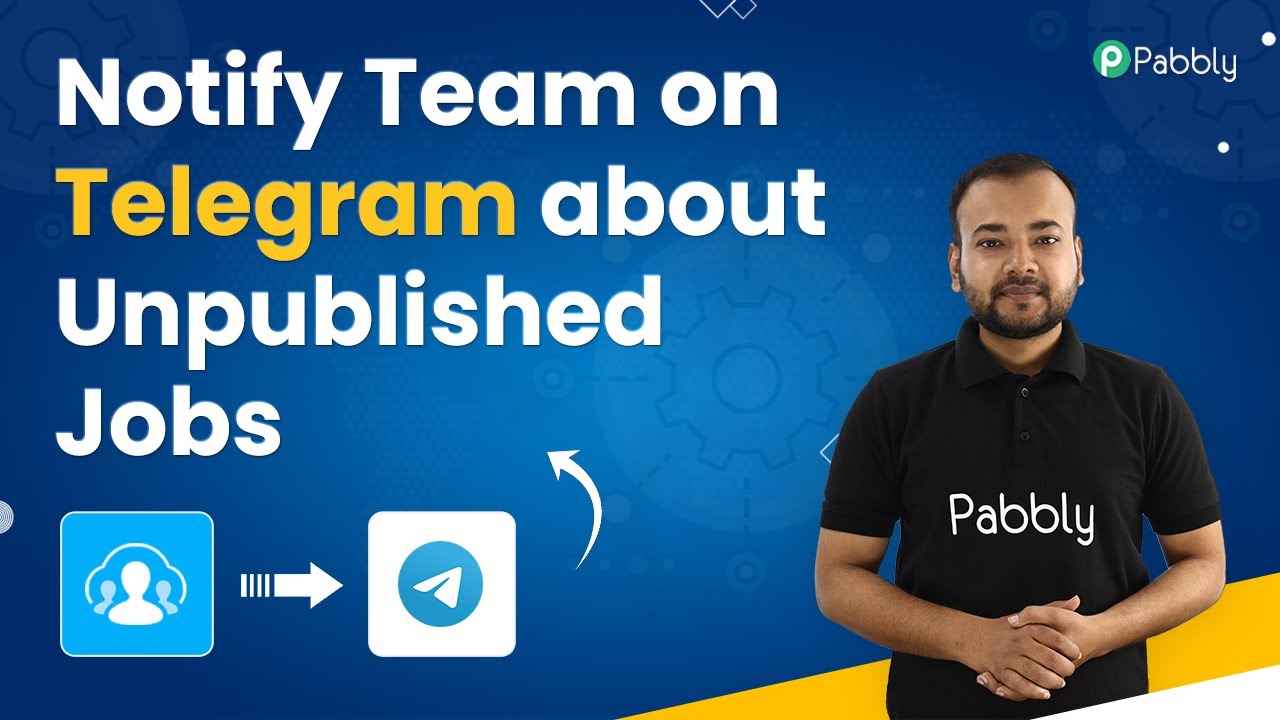
Learn how to integrate Recruitee with Slack using Pabbly Connect to automate notifications for unpublished jobs. Step-by-step tutorial included. Implement the precise methodologies leading organizations use to automate repetitive tasks, illustrated with practical examples designed for immediate application.

Watch Step By Step Video Tutorial Below


1. Setting Up Pabbly Connect for Recruitee and Slack Integration

To begin the integration process, you must first log into your Pabbly Connect account. This platform is essential as it helps automate the workflow between Recruitee and Slack. If you don’t have an account, you can create one for free, which allows you to access 100 free automation tasks each month.

Once you are logged in, navigate to the dashboard of Pabbly Connect. Here, you will create a new workflow by clicking on the ‘Create Workflow’ button. Name your workflow something descriptive, such as ‘Unpublishing a Job on Recruitee – Send Message on Slack Automatically.’ After naming your workflow, click on the ‘Create’ button to proceed.


2. Configuring the Trigger in Pabbly Connect

The next step in your automation setup is to configure the trigger. In this case, the trigger will be the action of unpublishing a job in Recruitee. From the trigger application dropdown, select ‘Recruitee’ and then choose the trigger event labeled ‘Job is Unpublished.’ This setup will initiate the workflow whenever a job is unpublished. using Pabbly Connect

  • Select Recruitee as the trigger application.
  • Choose the trigger event ‘Job is Unpublished’.
  • Copy the webhook URL generated by Pabbly Connect.

After selecting the trigger, you will receive a webhook URL. This URL is crucial as it will be used to fetch data from Recruitee. Next, navigate to your Recruitee dashboard, click on the settings icon, and find the ‘Webhooks’ option under the ‘Plugins’ section. Here, you will add a new webhook by pasting the copied URL into the designated field. Ensure that you check the box for ‘Job Unpublished’ and then click on ‘Verify and Create’ to finalize the webhook setup.


3. Testing the Trigger in Pabbly Connect

With the trigger configured, it’s time to test if the setup is working correctly. Go back to Pabbly Connect and click on the ‘Recapture Webhook Response’ button. This action will prepare Pabbly Connect to receive data from Recruitee when a job is unpublished. To initiate the test, you need to unpublish a job in Recruitee.

Navigate to the job section in Recruitee and select a job to unpublish. Click on the option to close the job for new candidates. After confirming the action, return to Pabbly Connect to check if the data from the unpublished job has been received. You should see details such as the job title and department in the response section.


4. Configuring the Action in Pabbly Connect

Now that the trigger is working, the next step is to set up the action, which will send a notification to your Slack channel. In the action application dropdown, select ‘Slack’ and choose the action event ‘Send Channel Message.’ This configuration allows you to send a message to your team whenever a job is unpublished.

  • Select Slack as the action application.
  • Choose the action event ‘Send Channel Message’.
  • Connect your Slack account to Pabbly Connect.

After selecting the action, you will need to connect your Slack account. Choose whether the message will be sent by a bot or a user. Enter the required token type and allow permissions for Pabbly Connect to access your Slack workspace. Select the channel where you want the message to be sent, typically the general channel where your team communicates.


5. Mapping Data and Sending Notifications

The final step is to map the data received from Recruitee into the message that will be sent to Slack. In the message field, create a notification template such as: ‘Hey team, a job opening for [Job Title] is closed on Recruitee. The department is [Department Name]. Happy hiring!’ Use the mapping feature to insert the job title and department data from the trigger step. using Pabbly Connect

Once you have configured the message, click on ‘Save and Send Test Request’ to test if the message is successfully sent to your Slack channel. Check your Slack channel to confirm that the message appears as intended, indicating that your integration is working correctly. This automation will now run seamlessly, notifying your team whenever a job is unpublished in Recruitee.


Conclusion

In this tutorial, we successfully demonstrated how to use Pabbly Connect to automate notifications for unpublished jobs from Recruitee to your Slack team. By following these steps, you can streamline your recruitment communication and save valuable time.

Ensure you check out Pabbly Connect to create business automation workflows and reduce manual tasks. Pabbly Connect currently offer integration with 2,000+ applications.

Streamline Job Notifications to Telegram with Pabbly Connect and Recruitee Integration

Learn how to automate job notifications to your team on Telegram using Pabbly Connect and Recruitee. Follow our detailed tutorial for seamless integration. Build sophisticated automated workflows in less time than you think. This guide translates complex integrations into straightforward steps for immediate implementation.

Watch Step By Step Video Tutorial Below


1. Setting Up Pabbly Connect for Job Notifications

To begin sending notifications about unpublished jobs to your team on Telegram, first, you need to set up Pabbly Connect. Start by logging into your Pabbly Connect account. If you don’t have an account, you can create one quickly by checking the link in the description.

Once logged in, you will be directed to the Pabbly Connect dashboard. From here, click on the ‘Create Workflow’ button. Name your workflow something descriptive, like ‘Unpublishing a Job in Recruitee – Notify Team on Telegram’ and click on ‘Create’. This sets the foundation for your automation.


2. Configuring the Trigger in Pabbly Connect

The next step is to configure the trigger that will initiate the automation. In the trigger section of Pabbly Connect, select ‘Recruitee’ as your application. The trigger event should be set to ‘Job Unpublished’. This means the workflow will activate when a job is unpublished in Recruitee.

  • Choose ‘Recruitee’ as the trigger application.
  • Set the trigger event to ‘Job Unpublished’.
  • Copy the webhook URL provided by Pabbly Connect.

After setting the trigger, you will receive a webhook URL. This URL is essential for connecting Recruitee with Pabbly Connect. Copy this URL and proceed to the Recruitee application to set it up.


3. Setting Up Webhook in Recruitee

Now, navigate to your Recruitee dashboard. Go to the ‘Settings’ section, then find ‘Apps & Plugins’ and select the ‘Webhooks’ tab. Click on ‘Add New Webhook’ to create a new webhook connection.

  • Paste the copied webhook URL from Pabbly Connect into the ‘Post URL’ field.
  • Name the webhook appropriately, such as ‘Notify Team’.
  • Select the ‘Job Unpublished’ checkbox and click ‘Verify and Create’.

After setting up the webhook, return to Pabbly Connect and click on ‘Recapture Webhook Response’ to test the connection. This ensures that the data will flow correctly when a job is unpublished.


4. Connecting Telegram in Pabbly Connect

Next, you’ll need to set up the action in Pabbly Connect to send notifications via Telegram. In the action step, select ‘Telegram Bot’ as your application and choose the action event ‘Send a Text Message’. Click on ‘Connect’ to establish the connection.

To connect your Telegram bot, you need a bot token. You can create a Telegram bot using the BotFather in Telegram. Search for ‘BotFather’, send the message ‘/newbot’, and follow the prompts to create your bot. Once created, you will receive a token, which you need to paste into Pabbly Connect.


5. Configuring the Notification Message

Once your Telegram bot is connected, you need to configure the message that will be sent to your team. Specify the chat ID of your Telegram group where the message will be sent. You can find this by opening your Telegram group in a web browser and copying the numerical ID from the URL.

Input the chat ID into the chat ID field in Pabbly Connect. Craft your message, including dynamic data from the unpublished job. Click ‘Save and Send Test Request’ to verify the integration.

After clicking the test request, your team should receive a notification in Telegram indicating that a job has been unpublished. This confirms that your automation is functioning correctly, leveraging the capabilities of Pabbly Connect.


Conclusion

By following this tutorial, you have successfully set up an automation using Pabbly Connect to send notifications about unpublished jobs to your team on Telegram. This integration streamlines communication and enhances your hiring process, ensuring that your team stays informed in real time.

Ensure you check out Pabbly Connect to create business automation workflows and reduce manual tasks. Pabbly Connect currently offer integration with 2,000+ applications.

How to Automatically Add Google Forms Leads as Subscribers in Convertkit Using Pabbly Connect

Learn how to integrate Google Forms with Convertkit using Pabbly Connect to automatically add new subscribers. Follow this detailed step-by-step tutorial. Explore efficient methods for automating routine tasks with clear, concise instructions suited for both newcomers and experienced professionals.

Watch Step By Step Video Tutorial Below


1. Accessing Pabbly Connect for Google Forms Integration

To begin adding Google Forms leads as subscribers in Convertkit, you need to access Pabbly Connect. Start by navigating to the Pabbly Connect website by typing ‘Pabbly.com/connect’ into your browser’s address bar.

If you already have an account, simply sign in. If not, you can sign up for free, which includes 100 free tasks monthly to help you practice your workflows. Once logged in, select the option to create a new workflow.


2. Setting Up the Google Forms Trigger in Pabbly Connect

In this step, you will set Google Forms as the trigger in your Pabbly Connect workflow. After creating your workflow, name it something like ‘Google Forms to Convertkit’ and click on create.

  • Select Google Forms as your trigger application.
  • Choose ‘New Response in Spreadsheet’ as the trigger event.
  • Copy the webhook URL provided by Pabbly Connect.

Next, go to your Google Forms, navigate to the responses tab, and create a new Google Sheets spreadsheet to collect the responses. This spreadsheet will serve as the link between Google Forms and Pabbly Connect.


3. Linking Google Sheets with Pabbly Connect

Now that you have your Google Sheets set up, you need to link it to Pabbly Connect. In your Google Sheets, go to Extensions, select Pabbly Connect Webhooks, and then click on Initial Setup.

  • Paste the copied webhook URL into the designated field.
  • Set the trigger column to the last data column (e.g., ‘E’).
  • Click on Submit to complete the setup.

After this, you can test the connection by submitting a response in your Google Form. This will send the data to your Google Sheets and trigger Pabbly Connect to capture the response.


4. Configuring Convertkit Action in Pabbly Connect

With the Google Forms trigger set up, the next step is to configure Convertkit as the action in your Pabbly Connect workflow. Select Convertkit as the action application and choose ‘Add Subscriber to Form’ as the action event.

To connect to your Convertkit account, you will need your API key and API secret. Log into your Convertkit account, navigate to Account Settings, and find your API key under the Advanced settings. Paste the API key and secret into Pabbly Connect to establish the connection.


5. Testing and Finalizing the Integration

After setting up the action, you will need to map the fields from your Google Forms responses to the corresponding fields in Convertkit. This includes mapping the first name, last name, and email address.

Once you have completed mapping, click on ‘Save & Send Test Request’ to check if the integration works correctly. If successful, you will see a confirmation that a new subscriber has been added to your Convertkit account.

Finally, refresh your Convertkit subscribers list to see the new addition. This entire process automates the addition of Google Forms leads as subscribers in Convertkit using Pabbly Connect.


Conclusion

In this tutorial, we explored how to use Pabbly Connect to automatically add Google Forms leads as subscribers in Convertkit. By following these steps, you can streamline your lead management process effectively.

Ensure you check out Pabbly Connect to create business automation workflows and reduce manual tasks. Pabbly Connect currently offer integration with 2,000+ applications.

Integrate Google Forms with Teamleader CRM Using Pabbly Connect

Learn how to seamlessly integrate Google Forms responses with Teamleader CRM using Pabbly Connect. Step-by-step tutorial to automate your lead generation process. Explore efficient methods for automating routine tasks with clear, concise instructions suited for both newcomers and experienced professionals.

Watch Step By Step Video Tutorial Below


1. Access Pabbly Connect for Integration

To start integrating Google Forms with Teamleader CRM, you need to access Pabbly Connect. Begin by typing Pabbly.com/connect in your browser’s address bar. This will take you to the Pabbly Connect interface, where you can log in or sign up for a free account.

Once logged in, you’ll see an option to create a new workflow. Click on it and give your workflow a name, such as ‘Google Forms to Teamleader’. This naming convention helps keep your integrations organized and easily identifiable.


2. Setting Up Google Forms in Pabbly Connect

In this step, you will configure Google Forms to trigger the automation in Pabbly Connect. Select the trigger event by choosing ‘New Response Received’ from the Google Forms options. This action will initiate the workflow every time a new response is submitted.

  • Choose your Google Forms account to connect.
  • Follow the instructions to set up the webhook URL provided by Pabbly Connect.
  • Link the Google Sheet that captures your Google Forms responses.

Once the Google Sheet is linked, go to the ‘Responses’ section of your Google Form and create a new Google Sheet. This sheet will automatically populate with responses from your form, enabling Pabbly Connect to access the data.


3. Connecting Google Sheets to Pabbly Connect

After setting up Google Forms, the next step is to connect Google Sheets to Pabbly Connect. In your Google Sheet, navigate to the ‘Extensions’ menu, then select ‘Pabbly Connect Webhooks’. If you don’t see this option, you may need to install the Pabbly Connect Webhooks add-on.

Once installed, go back to the ‘Extensions’ menu and click on ‘Initial Setup’. Paste the webhook URL from Pabbly Connect into the designated field and set the trigger column to the last data column of your sheet. This column will be responsible for sending the data to Pabbly Connect.


4. Configuring Teamleader CRM to Receive Data

Now that your Google Forms responses are connected to Pabbly Connect, it’s time to set up Teamleader CRM. In Pabbly Connect, select Teamleader as the action app and choose the ‘Create Contact with Primary Address’ action. This will create a new contact in your CRM every time a form response is submitted. using Pabbly Connect

Click on ‘Connect’ and authorize Pabbly Connect to access your Teamleader account. Once connected, you can map the fields from the Google Sheet to the corresponding fields in Teamleader CRM, such as first name, last name, email, and address. Ensure that you enter the country in capital letters as required by Teamleader.


5. Testing and Activating the Integration

After mapping the fields, it’s crucial to test the integration. Click on ‘Save and Send Test Request’ in Pabbly Connect. This will send a test contact to Teamleader CRM. Check your CRM to ensure the contact is created successfully.

If you encounter any issues, double-check that the data is correctly mapped and that the country field is in the proper format. Once everything is confirmed, your integration is complete. From now on, every new Google Forms response will automatically create a lead in Teamleader CRM through Pabbly Connect.


Conclusion

This tutorial detailed how to integrate Google Forms with Teamleader CRM using Pabbly Connect. By automating this process, you can efficiently manage leads and enhance your business operations. Follow these steps to streamline your lead generation process seamlessly.

Ensure you check out Pabbly Connect to create business automation workflows and reduce manual tasks. Pabbly Connect currently offer integration with 2,000+ applications.

Integrate WooCommerce Product Updates into Grist Using Pabbly Connect

Learn how to automate WooCommerce product updates in Grist using Pabbly Connect with this detailed step-by-step tutorial. Follow this definitive guide to creating powerful automated workflows with straightforward, efficiency-focused solutions that save valuable time.

Watch Step By Step Video Tutorial Below


1. Accessing Pabbly Connect for WooCommerce and Grist Integration

To begin integrating WooCommerce product updates into Grist, you first need to access Pabbly Connect. Type in the URL Pabbly.com/connect in your browser’s address bar. This will lead you to the Pabbly Connect dashboard where you can either sign in or create a new account.

If you don’t already have an account, signing up is free and provides you with 100 free tasks every month. Once logged in, you can create a new workflow by clicking on the ‘Create Workflow’ button, naming it ‘WooCommerce to Grist’ to reflect the integration.


2. Setting Up the Trigger in Pabbly Connect

With your workflow created, the next step is to set up the trigger. In Pabbly Connect, select WooCommerce as the trigger application and choose the event as ‘Product Updated’. This means that any time a product is updated in WooCommerce, it will trigger the workflow. using Pabbly Connect

  • Select WooCommerce from the application list.
  • Choose ‘Product Updated’ as the event.
  • Copy the webhook URL provided by Pabbly Connect.

This webhook URL needs to be configured in your WooCommerce settings. Navigate to WooCommerce > Settings > Advanced > Webhooks and click on ‘Add Webhook’. Fill in the name, set the status to active, and select ‘Product Updated’ as the topic. Paste the copied webhook URL into the delivery URL field and save the webhook.


3. Capturing the Webhook Response

After saving the webhook in WooCommerce, return to Pabbly Connect and click on ‘Recapture Webhook Response’. This action will allow Pabbly Connect to wait for a response from WooCommerce whenever a product is updated.

To test this, go back to WooCommerce, navigate to Products, and select a product to edit. Change any product detail, such as the price, and click on ‘Update’. After updating, Pabbly Connect should capture the webhook response, showing the updated product details.

  • Edit the product in WooCommerce.
  • Change the product details and save.
  • Check Pabbly Connect for the captured response.

This response will include the product ID and updated information, which is essential for the next step in the integration.


4. Updating the Grist Record via Pabbly Connect

Now that you have the updated product details in Pabbly Connect, it’s time to update the corresponding record in Grist. Select Grist as the action application and choose the event ‘Update Record’. You will need to connect your Grist account by entering your API key. using Pabbly Connect

Once connected, specify the workspace and document where your product records are stored. Select the table that contains the product IDs and use the mapping feature to link the product ID from the WooCommerce update to the corresponding record in Grist. This ensures that the right product is updated.

Select Grist as the action application. Choose ‘Update Record’ as the event. Map the product ID to the correct Grist record.

After mapping the necessary fields, click on ‘Save and Send Test Request’ to finalize the update. You should see the updated product information reflected in your Grist account.


5. Conclusion: Automate WooCommerce Updates with Pabbly Connect

By following these steps, you have successfully integrated WooCommerce product updates into Grist using Pabbly Connect. This automation saves time and reduces manual errors by ensuring that your product information is always up-to-date across platforms.

Ensure you check out Pabbly Connect to create business automation workflows and reduce manual tasks. Pabbly Connect currently offer integration with 2,000+ applications.

With Pabbly Connect, you can streamline your workflow and enhance productivity, making it easier to manage your WooCommerce products and their corresponding records in Grist. This integration is a powerful tool for any business looking to automate their processes effectively.


Integrate Recruitee with Google Sheets Using Pabbly Connect

Learn how to integrate Recruitee with Google Sheets using Pabbly Connect to automate job applicant tracking. Step-by-step guide included. Build sophisticated automated workflows in less time than you think. This guide translates complex integrations into straightforward steps for immediate implementation.

Watch Step By Step Video Tutorial Below


1. Getting Started with Pabbly Connect for Job Applicant Tracking

To begin tracking job applicant details effectively, you will need to use Pabbly Connect. This platform allows you to automate the integration between Recruitee and Google Sheets, ensuring that every job application is recorded without manual input.

First, visit the Pabbly website by typing Pabbly.com in your browser. Navigate to the products section and select Pabbly Connect. If you are a new user, click on the ‘Sign up for free’ button to create your account. Existing users can log in directly to access their dashboard.


2. Creating a Workflow in Pabbly Connect

After logging into Pabbly Connect, you will need to create a new workflow. Click on the plus sign to create a new workflow and name it ‘Keep Track of Job Applicant Details in Google Sheets’. This name can be customized according to your preference.

In the workflow setup, you will see a trigger and action window. The trigger is an event that will start the workflow, and the action is what happens as a result. For our case, we want to set the trigger to Recruitee when a candidate is created. Follow these steps:

  • Select Recruitee as the application.
  • Choose ‘Candidate is created’ as the trigger event.
  • Copy the webhook URL provided by Pabbly Connect.

Next, head to your Recruitee account, navigate to settings, and select ‘Apps and Plugins’. Click on the ‘Webhooks’ option to create a new webhook. Paste the copied URL and select the event for when a candidate is created, then verify and create the webhook.


3. Capturing Applicant Details from Recruitee

With the webhook set up, it’s time to test the integration. You need to submit a job application through your Recruitee portal. For example, you can use the name ‘Adam Smith’ and provide the necessary details such as email and phone number.

Once the application is submitted, Pabbly Connect will capture the applicant’s details automatically. You can verify this by checking the response in the Pabbly Connect dashboard, where you will see all relevant information such as name, email, and phone number.

  • Check the response for the captured details.
  • Ensure all information is accurate and complete.

After confirming that the details are captured correctly, you can proceed to the next step of adding this information to Google Sheets.


4. Adding Job Applicant Details to Google Sheets

Now that you have captured the applicant’s details, the next step is to add this information to Google Sheets using Pabbly Connect. In the action step of your workflow, select Google Sheets as the application and choose the action event ‘Add New Row’.

Connect your Google account by selecting the appropriate account where your Google Sheets are located. Once connected, you will see a list of your spreadsheets. Choose the spreadsheet you created for job applications.

Select the spreadsheet named ‘Recruiting Job Applications’. Map the fields from Recruitee to the corresponding columns in Google Sheets. Ensure to include name, email, phone number, department, and title.

After mapping the fields, click on ‘Save and Send Test Request’ to ensure that the details are added to your Google Sheets correctly. You can check your Google Sheets to confirm that the new row was created successfully with all the applicant’s details.


5. Verifying Integration Success

To ensure that the integration is functioning correctly, you should perform a test by submitting another job application. This time, use a different applicant, for example, ‘Shikha Arya’ with her respective details.

Once the application is submitted, check your Google Sheets again. You should see the new applicant’s details added automatically. This confirms that Pabbly Connect is successfully integrating Recruitee with Google Sheets.

To summarize the integration process:

Created a webhook in Recruitee to capture candidate details. Used Pabbly Connect to map these details to Google Sheets. Verified that new applications appear in Google Sheets automatically.

This integration allows for seamless tracking of job applicants, saving time and reducing manual errors.


Conclusion

In this tutorial, we explored how to use Pabbly Connect to integrate Recruitee with Google Sheets, enabling you to keep track of job applicant details effortlessly. By following the steps outlined, you can automate the process and ensure that every application is recorded accurately.

Ensure you check out Pabbly Connect to create business automation workflows and reduce manual tasks. Pabbly Connect currently offer integration with 2,000+ applications.

Utilizing Pabbly Connect not only simplifies your workflow but also enhances your recruitment process, making it more efficient and reliable.

Integrating CloudWaitress and Loyverse with Pabbly Connect: A Step-by-Step Tutorial

Learn how to automate the creation of customers in Loyverse whenever a new order is placed in CloudWaitress using Pabbly Connect. Follow this detailed tutorial!

Watch Step By Step Video Tutorial Below


1. Accessing Pabbly Connect for Integration

To begin the integration process using Pabbly Connect, open your web browser and navigate to the Pabbly website. This platform is essential for connecting CloudWaitress and Loyverse seamlessly.

Once on the Pabbly homepage, click on ‘Products’ and select ‘Pabbly Connect’. If you are a new user, you can sign up for free, which grants you 100 tasks every month. Existing users should click ‘Sign In’ to access their accounts.


2. Creating a Workflow in Pabbly Connect

After signing in, you will be directed to the dashboard of Pabbly Connect. To create a workflow, click on the plus sign and then select ‘Create Workflow’. Name your workflow something like ‘CloudWaitress to Loyverse Integration’ and click ‘Create’.

In the workflow setup, you will see a trigger window and an action window. The trigger signifies when an event occurs, while the action determines the response. In this case, the trigger is set to ‘New Order Placed’ in CloudWaitress.

  • Select CloudWaitress as the application.
  • Choose the trigger event ‘New Order Placed’.
  • Copy the provided webhook URL.

Now, you need to set up this webhook in your CloudWaitress account to ensure that the integration works properly.


3. Setting Up CloudWaitress for Webhooks

Log into your CloudWaitress account and navigate to the ‘Settings’ section of your restaurant. Here, locate the ‘Webhooks’ option and click on it to create a new webhook.

Click the red button to create a webhook and ensure it is activated. Paste the webhook URL from Pabbly Connect into the designated field. Make sure to activate the event for ‘Order Created’ while deactivating all other events.

  • Activate the webhook.
  • Ensure ‘Order Created’ is the only active event.
  • Click ‘Save’ to finalize your webhook setup.

Once saved, return to Pabbly Connect to test the webhook. This will ensure that it captures the order details when a new order is placed.


4. Testing the Integration

To test the integration, you need to place a new order in CloudWaitress. Navigate to your store and select an item to order. Fill in the required customer details, such as name, email, and address.

Once the order is placed, switch back to Pabbly Connect to confirm that the webhook has received the response. You should see all the order details captured, including customer information.

Check for the restaurant name, customer name, email, and phone number. Verify that the details match what was entered during the order.

If everything appears correctly, you can proceed to create a customer record in Loyverse using the captured details from the order.


5. Creating a Customer in Loyverse

Now that you have successfully captured the order details, it’s time to create a customer in Loyverse using Pabbly Connect. In the action step of your workflow, select Loyverse as the application and choose ‘Create Customer’ as the action event.

Connect your Loyverse account to Pabbly Connect by entering your login credentials and granting permissions. Once connected, you will need to map the customer details from the CloudWaitress order to the appropriate fields in Loyverse.

Map the full name, email, and phone number from CloudWaitress. Ensure the address and other details are also mapped correctly.

After mapping, click on ‘Save and Send Test Request’. This will add the new customer to your Loyverse account. Check your Loyverse customer section to confirm that the new customer has been created successfully.


Conclusion

In this tutorial, we demonstrated how to integrate CloudWaitress with Loyverse using Pabbly Connect. By following these steps, you can automate customer creation whenever a new order is placed in CloudWaitress, enhancing efficiency in your restaurant operations.

Ensure you check out Pabbly Connect to create business automation workflows and reduce manual tasks. Pabbly Connect currently offer integration with 2,000+ applications.

Utilizing Pabbly Connect allows you to streamline your workflows and manage customer data effectively. This integration not only saves time but also ensures accuracy in customer management across platforms.

Automate Adding Facebook Leads to TeamLeader CRM with Pabbly Connect

Learn how to seamlessly integrate Facebook Leads into TeamLeader CRM using Pabbly Connect. Follow our step-by-step tutorial for automation. Discover hidden automation capabilities within your existing tools. This guide shows you how to connect your essential applications and permanently eliminate redundant manual processes.

Watch Step By Step Video Tutorial Below


1. Accessing Pabbly Connect for Integration

To begin integrating Facebook leads into TeamLeader CRM, you must first access Pabbly Connect. Start by typing ‘Pabbly.com’ in your browser and navigate to the products section.

Click on Pabbly Connect to reach the landing page. If you are a new user, select the ‘Sign up for free’ option to create an account in just a few minutes. Existing users can simply click on ‘Sign in’ to access their accounts.


2. Creating a Workflow in Pabbly Connect

After logging into Pabbly Connect, the next step is to create a new workflow. Click on the plus sign to create a workflow and name it ‘Add Facebook Leads to TeamLeader CRM’.

  • Click on ‘Create’ to initiate the workflow.
  • You will see a trigger window and an action window.

In Pabbly Connect, triggers are events that start the workflow, while actions are the tasks performed as a result. Here, select ‘Facebook Lead Ads’ as the trigger application.


3. Setting Up Facebook Lead Ads as Trigger

Within the trigger window, choose ‘New Lead’ from the Facebook Lead Ads options. Click on ‘Connect’ to set up the connection, followed by ‘Add New Connection’ and authorize Pabbly Connect to access your Facebook account.

Once authorized, select your Facebook page (e.g., ‘Book Review’) and choose the lead ad form you want to use (e.g., ‘Contact Form’). Before saving, fill out the form as a test to capture the latest response.


4. Creating a Contact in TeamLeader CRM

Next, you will set up the action to create a contact in TeamLeader CRM. In the action window, select ‘TeamLeader’ as the application, and choose ‘Create a Contact’ as the action event.

  • Connect to TeamLeader by clicking on ‘Add New Connection’.
  • Map the fields from Facebook lead ads to TeamLeader, including first name, last name, and email address.

After mapping the required fields, click on ‘Save and Send Test Request’. This action will create a new contact in your TeamLeader CRM, confirming successful integration via Pabbly Connect.


5. Verifying the Integration

To ensure everything is working correctly, fill out another form on Facebook Lead Ads with different details. After submitting, check your TeamLeader CRM account to see if the new contact appears.

Refresh the contacts section in TeamLeader CRM to verify the new entry. This confirms that Pabbly Connect is successfully automating the addition of Facebook leads to your CRM.


Conclusion

In this tutorial, we demonstrated how to automate adding Facebook leads to TeamLeader CRM using Pabbly Connect. This integration simplifies lead management, helping businesses streamline their customer engagement process.

Ensure you check out Pabbly Connect to create business automation workflows and reduce manual tasks. Pabbly Connect currently offer integration with 2,000+ applications.

Automatically Add Revue Subscribers to Google Sheets Using Pabbly Connect

Learn how to automatically add Revue subscribers to Google Sheets using Pabbly Connect. Follow this step-by-step guide for seamless integration. Navigate the automation landscape confidently with clear, structured guidance suitable for professionals regardless of prior technical experience.

Watch Step By Step Video Tutorial Below


1. Accessing Pabbly Connect for Integration

To start the process of adding Revue subscribers to Google Sheets automatically, you first need to access Pabbly Connect. Open your web browser and type in the URL Pabbly.com/connect. This will lead you to the Pabbly Connect dashboard.

If you already have an account, simply sign in. If not, signing up is free and takes just a couple of minutes. Upon signing up, you also receive 100 free tasks every month to explore the functionalities of Pabbly Connect.


2. Creating a New Workflow in Pabbly Connect

Once you’re logged into Pabbly Connect, you’ll see your dashboard where you can create a new workflow. Click on ‘Create New Workflow’ and name it, for example, ‘Revue to Google Sheets’. This name helps you easily identify the workflow later.

In the workflow setup, you’ll notice two sections: Trigger and Action. The Trigger section is where you define the event that starts the workflow. In this case, select Revue as your first application and choose ‘New Subscriber’ as the trigger event. This means that every time a new subscriber is added to Revue, it will trigger the action in Google Sheets.


3. Connecting Revue to Pabbly Connect

To connect your Revue account, click on ‘Add New Connection’. You will be prompted to enter your API token. To find this token, log into your Revue account, navigate to Account Settings, and then to Integrations where you will find your API key. using Pabbly Connect

  • Log into Revue and go to Account Settings.
  • Navigate to Integrations to find your API key.
  • Copy the API key and return to Pabbly Connect.

Paste the API key into the designated field in Pabbly Connect, ensuring to add the required prefix before saving the connection. After saving, click on ‘Save and Send Test Request’ to ensure the connection works. You should see a response confirming the successful connection.


4. Adding Subscribers to Google Sheets Automatically

After successfully connecting to Revue, the next step is to set up the action in Google Sheets. Select Google Sheets as the action application and choose ‘Add New Row’ as the action event. This action will automatically add a new row in your Google Sheets whenever a new subscriber is added to Revue. using Pabbly Connect

Click on ‘Add New Connection’ to connect your Google Sheets account. You will be prompted to sign in with your Google account where your Google Sheets are stored. Once connected, select the specific spreadsheet you want to use, such as ‘Revue Subscribers’.

  • Select the spreadsheet where you want the subscriber data to be stored.
  • Choose the specific sheet within the spreadsheet (e.g., ‘Subscribers’).
  • Map the fields from Revue to the columns in Google Sheets (First Name, Last Name, Email).

Once you have mapped the necessary fields, click on ‘Save and Send Test Request’. A new row should appear in your Google Sheets with the subscriber details, confirming that the automation is functioning correctly.


5. Testing the Integration for New Subscribers

To ensure everything is working smoothly, add a new subscriber in your Revue account. Fill in the required fields such as email, first name, and last name, then click on ‘Add Subscriber’. After adding the subscriber, go back to Pabbly Connect and click ‘Save and Send Test Request’ again. using Pabbly Connect

Keep in mind that due to the polling trigger used in this integration, there may be a short delay before the new subscriber appears in your Google Sheets. This is normal, and it usually takes a few minutes for the data to sync. After a brief wait, refresh your Google Sheets, and you should see the new entry for the subscriber you just added.


Conclusion

Using Pabbly Connect, you can automate the process of adding Revue subscribers to Google Sheets easily. This integration not only saves time but also ensures that you have an up-to-date record of your subscribers without manual intervention. Start using this automation today for efficient subscriber management!

Ensure you check out Pabbly Connect to create business automation workflows and reduce manual tasks. Pabbly Connect currently offer integration with 2,000+ applications.

How to Get Notified on Telegram for GoHighLevel Campaigns Using Pabbly Connect

Learn how to integrate GoHighLevel with Telegram for instant notifications using Pabbly Connect. Step-by-step tutorial with detailed instructions. Discover hidden automation capabilities within your existing tools. This guide shows you how to connect your essential applications and permanently eliminate redundant manual processes.

Watch Step By Step Video Tutorial Below


1. Accessing Pabbly Connect for Integration

To start the integration process, visit Pabbly Connect by typing in ‘Pabbly.com/connect’ in your browser. This will take you to the Pabbly Connect dashboard, where you can log in or create a new account.

Creating an account is free and takes only a couple of minutes. Once logged in, you will see options to create new workflows, which is essential for setting up the integration with GoHighLevel and Telegram.


2. Creating a New Workflow in Pabbly Connect

After logging into Pabbly Connect, click on the ‘Create New Workflow’ button. You will be prompted to name your workflow; for this tutorial, name it ‘Go High Level to Telegram’.

  • Choose a relevant name for your workflow.
  • Click on ‘Create’ to proceed.

Once created, you will be presented with two options: Trigger and Action. The Trigger is the event that starts the workflow, and the Action is what happens as a result of that trigger. For this integration, you will set GoHighLevel as the Trigger.


3. Setting Up the Trigger for GoHighLevel

In the Trigger section of your workflow, select Pabbly Connect and choose ‘GoHighLevel’ as the application. Then, select ‘Customer Replied’ as the trigger event.

Next, you will see a webhook URL provided by Pabbly Connect. This URL will be used to connect your GoHighLevel account to the Pabbly Connect workflow. Follow these steps:

  • Log into your GoHighLevel account.
  • Navigate to the ‘Triggers’ section and click ‘Add Trigger’.
  • Paste the webhook URL from Pabbly Connect into the appropriate field.

Once done, activate the trigger and save your settings. This setup will ensure that whenever a customer replies, the information is sent to your Pabbly Connect workflow.


4. Configuring the Action to Send Notifications to Telegram

Now that you have set up the trigger, the next step is to configure the action to send notifications to Telegram. In the Action section, select Pabbly Connect and then choose ‘Telegram’ as the application.

For the action event, select ‘Send Text Message’. You will need to connect your Telegram bot to Pabbly Connect. To do this, you will require the bot token, which you can obtain via the BotFather on Telegram. Follow these steps:

Start a chat with BotFather on Telegram. Create a new bot and copy the token provided. Paste the token into Pabbly Connect to establish the connection.

After connecting, you will also need to provide the chat ID of the Telegram group where notifications will be sent. Make sure your bot is an admin in this group for it to send messages successfully.


5. Testing the Integration for Successful Notifications

With the setup complete, it’s time to test the integration. Send a test email to the GoHighLevel account and reply to that email. This action should trigger the workflow you created in Pabbly Connect.

Check your Telegram group to see if the notification appears. The message should contain details about the customer’s issue, allowing your team to respond promptly.

By using Pabbly Connect, you can automate notifications effectively, enhancing your team’s responsiveness and customer service capabilities. This integration streamlines communication and ensures that your team is always updated with customer inquiries.


Conclusion

Integrating GoHighLevel with Telegram using Pabbly Connect allows you to receive instant notifications for customer replies. This automation enhances team collaboration and improves customer service efficiency.

Ensure you check out Pabbly Connect to create business automation workflows and reduce manual tasks. Pabbly Connect currently offer integration with 2,000+ applications.