How to Create Images on Google Forms Submission using AI Agent with Pabbly Connect

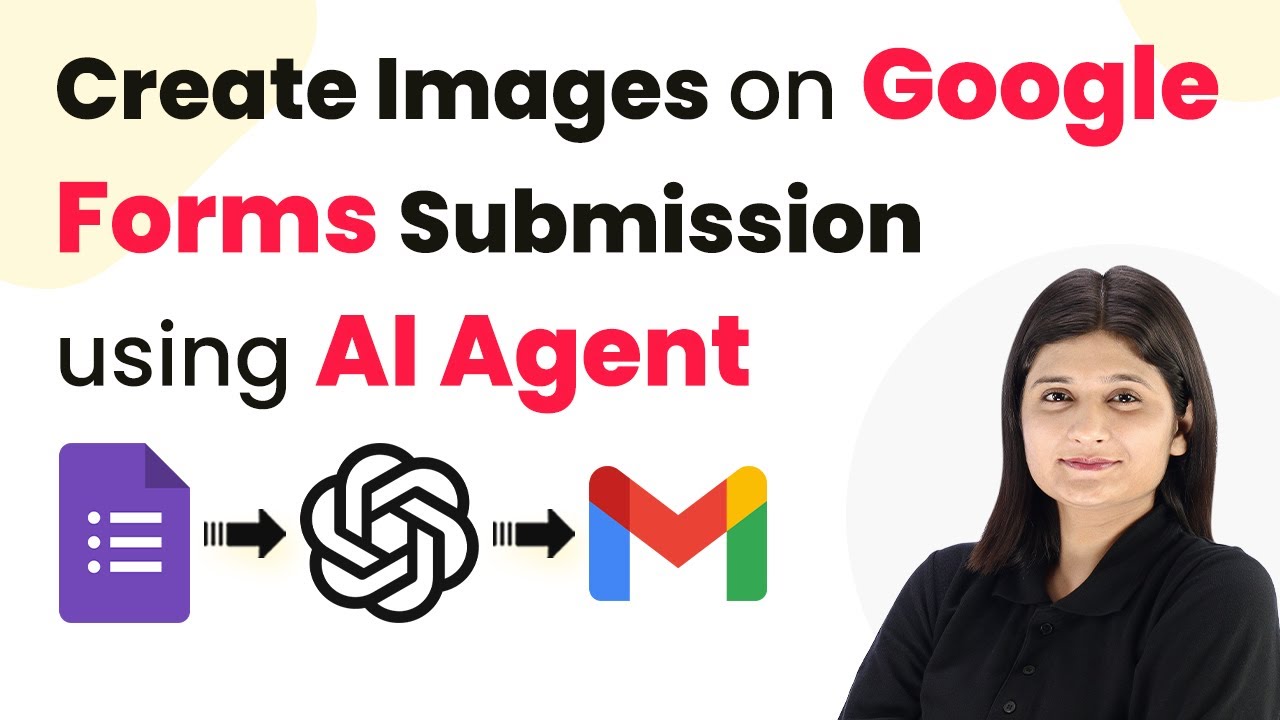
Learn how to automate image creation from Google Forms submissions using Pabbly Connect, integrating Google Drive, Gmail, and AI agents seamlessly. Revolutionize your productivity approach with just a few strategic clicks. Uncover professional methods for connecting applications and creating workflows that reclaim hours of your week.

Watch Step By Step Video Tutorial Below


1. Accessing Pabbly Connect for Integration

To create images on Google Forms submission using Pabbly Connect, you first need to access the platform. Visit Pabbly Connect by navigating to Pabbly’s official website and logging into your account. If you are a new user, you can sign up for free and get started with 100 tasks monthly.

Once logged in, you will be taken to the dashboard where you can create and manage your workflows. Click on the Pabbly Connect option from the applications menu to begin setting up your automation process.


2. Creating a New Workflow in Pabbly Connect

In this section, you will create a new workflow to automate image generation upon Google Forms submission. Start by clicking on the Create Workflow button. You will need to name your workflow appropriately, such as ‘Create Images on Google Forms Submission’.

  • Select a folder for your workflow to be saved in.
  • Click on the Create button to finalize your workflow setup.

After creating the workflow, you will see two boxes appear: one for the trigger and another for the action. The trigger will be set to Google Forms submission, while the action will involve generating an image using an AI agent.


3. Setting Up Google Forms Trigger in Pabbly Connect

Now it’s time to set up the Google Forms trigger. Click on the trigger box and select Google Forms as your application. Choose the event as New Response Received. This will allow Pabbly Connect to capture any new submissions made through your Google Form.

Next, you will need to connect your Google account. Follow the prompts to authorize Pabbly Connect to access your Google Forms. Once connected, select the form you want to use for this integration.


4. Connecting AI Agent and Gmail for Image Generation

In this step, you will connect an AI agent, such as OpenAI, to generate images based on the responses received from Google Forms. Click on the action box and select OpenAI as the application. For the event, choose Generate Image.

Map the fields from the Google Forms submission to the corresponding fields in OpenAI. Ensure that you provide the necessary details like the prompt for image generation, which will be based on the user’s inputs. After setting this up, connect Gmail to send the generated image to the user.

  • Select Gmail as the application for the action step.
  • Choose Send Email as the action event.

Map the recipient’s email address from the Google Forms submission and include the image link generated by the AI agent in the email body.


5. Testing and Verifying the Automation

After setting up your workflow, it’s crucial to test the automation to ensure everything works as expected. Submit a test response through your Google Form. Check your email to verify that you receive the generated image as intended.

If everything is set up correctly, you should see a confirmation email with the generated image based on the details you provided in the form. This process highlights how effectively Pabbly Connect integrates Google Forms, AI agents, and Gmail to automate tasks seamlessly.


Conclusion

By using Pabbly Connect, you can easily automate the image creation process from Google Forms submissions, integrating various applications like Google Drive, Gmail, and AI agents. This setup not only saves time but enhances productivity by streamlining workflows efficiently.

Ensure you check out Pabbly Connect to create business automation workflows and reduce manual tasks. Pabbly Connect currently offer integration with 2,000+ applications.

Automate Press Releases with Pabbly Connect: A Step-by-Step Guide

Learn how to automate press releases using Pabbly Connect with Google Sheets and Twitter. Follow this detailed tutorial for seamless integration. Explore systematic approaches to creating efficient automation solutions that convert technical concepts into practical, implementable instructions.

Watch Step By Step Video Tutorial Below


1. Accessing Pabbly Connect for Automation

To begin automating press releases, you must first access Pabbly Connect. Open your browser and navigate to the Pabbly Connect website. You will see options to sign in or sign up for free. If you are new, click on ‘Sign up for free’ to create an account. Existing users should simply sign in to access their dashboards.

Once signed in, you will see all available Pabbly applications. For this tutorial, select Pabbly Connect to create your automation workflow. Click on ‘Access Now’ to enter your Pabbly Connect dashboard, where you can start building your automation.


2. Creating a Workflow in Pabbly Connect

After accessing Pabbly Connect, the next step is to create a new workflow. Click on the blue button labeled ‘Create Workflow’. You will be prompted to name your workflow and select a folder to save it in. Name your workflow something relevant, like ‘Automate Press Releases with AI Agent’.

  • Click ‘Create’ to open the workflow window.
  • Select Google Sheets as your trigger application.
  • Choose the trigger event as ‘New or Updated Spreadsheet Row’.

After selecting your trigger event, Pabbly Connect will provide you with a webhook URL. This URL is essential for connecting your Google Sheets to the Pabbly Connect workflow. Copy the URL as you will need it in the next steps.


3. Setting Up Google Sheets for Integration

Now it’s time to set up your Google Sheets to work with Pabbly Connect. Open the Google Sheets document where you want to enter your press release details. Navigate to ‘Extensions’, then ‘Add-ons’, and select ‘Get add-ons’. Search for ‘Pabbly Connect Webhooks’ and install it.

After installation, refresh the spreadsheet to ensure the new options appear. Go back to ‘Extensions’, select ‘Pabbly Connect Webhooks’, and then click on ‘Initial Setup’. Here, paste the webhook URL you copied from Pabbly Connect and set the trigger column, which will be the final column in your sheet where data will be entered.


4. Using AI Agent to Generate Press Releases

Once your Google Sheets is set up, the next step involves integrating the AI agent, which in this case is OpenAI. In your Pabbly Connect workflow, add a new action step and select OpenAI as the application. Choose the action event as ‘Chat GPT’ and connect your OpenAI account by pasting the API key from the OpenAI API key page.

Now, you will need to enter a prompt for the AI agent. This prompt should instruct the AI to generate a concise and professional tweet based on the data provided in Google Sheets. Use mapping to pull in dynamic data from the previous step, ensuring that each new entry in your spreadsheet triggers a new tweet generation.


5. Posting the Generated Tweet on Twitter

The final step in this automation process is to post the generated tweet on Twitter. In your Pabbly Connect workflow, add another action step and select Twitter (now X) as the application. Choose ‘Create Tweet’ as the action event and connect your Twitter account using the client ID and secret from your Twitter Developer portal.

  • Map the message content from the OpenAI response to the tweet message field.
  • Leave the tweet ID and direct message deep link fields blank.
  • Click ‘Save and Send Test Request’ to post the tweet.

After completing these steps, your automation is fully set up. Each time you add a new press release in Google Sheets, Pabbly Connect will trigger the AI agent to generate a tweet and post it on your Twitter account automatically.


Conclusion

In this tutorial, we explored how to automate press releases using Pabbly Connect with Google Sheets and Twitter. By following these steps, you can streamline your press release process and save valuable time. Embrace automation and enhance your PR efforts effortlessly!

Ensure you check out Pabbly Connect to create business automation workflows and reduce manual tasks. Pabbly Connect currently offer integration with 2,000+ applications.

How to Use Pabbly Connect to Extract Packing List Data for Inventory Management

Learn how to use Pabbly Connect to automate the extraction of packing list data for efficient inventory management. Follow this step-by-step tutorial. Master proven automation processes with practical implementation examples and strategic recommendations you can apply immediately in your workflow.

Watch Step By Step Video Tutorial Below


1. Accessing Pabbly Connect for Automation

To begin using Pabbly Connect for extracting packing list data, the first step is to access the platform. Open your web browser and navigate to the Pabbly Connect landing page at www.Pabbly.com/connect. Here, you will find options to sign in or sign up for free, which allows you to explore the application with 100 free tasks each month.

For existing users, simply click on the sign in button. After signing in, you will be directed to the dashboard where you can access various tools and applications offered by Pabbly. To start the automation process, click on access now under Pabbly Connect, and then select create workflow to initiate your first automation setup.


2. Creating Your Workflow in Pabbly Connect

When creating a new workflow in Pabbly Connect, you will be prompted to name your workflow and select a folder to save it in. Name your workflow something descriptive, such as ‘Extract Packing List Data for Inventory Management’. Choose an appropriate folder, like automations, from the left side of the dashboard.

  • Click on create to open the workflow window.
  • This window will allow you to set triggers and actions for your automation.
  • Remember, triggers are events that start the workflow, while actions are responses to those triggers.

Now that you have set up your workflow, you can begin integrating your applications. Select Google Drive as your trigger application since your packing list files will be stored there.


3. Setting Up Google Drive as the Trigger in Pabbly Connect

To set Google Drive as your trigger in Pabbly Connect, search for Google Drive in the trigger application selection. Once selected, choose the trigger event new file in a specific folder. This action will monitor the designated folder for any new packing list files uploaded.

Click on connect and follow the prompts to authenticate your Google account. Make sure to allow all necessary permissions for Pabbly Connect to access your Google Drive files. After connecting, select the specific folder where your packing lists are stored, ensuring it is shared with anyone with the link and has editor access.

  • Upload a sample packing list file to test the trigger.
  • Click on save and send test request to capture the latest response.

Once the trigger is set up, Pabbly Connect will check for new files every 10 minutes, ensuring your workflow is efficient and up-to-date.


4. Integrating the AI Agent with Pabbly Connect

Next, you will set up the AI agent, OpenAI, as the action application in Pabbly Connect. Search for OpenAI and select it, then choose the action event extract content from PDF/image. Click on connect and enter your OpenAI API key, which you can obtain from the OpenAI API key page.

After entering the token, select the OpenAI model, such as GPT-4 mini. For the PDF URL, map the URL from the previous Google Drive trigger response to ensure that the AI agent extracts the correct data from the uploaded packing list.

Input a prompt to guide the AI on what data to extract, like order number and item details. Generate a structured output JSON to define how the extracted data should be formatted.

Once you have set up the AI agent, click save and send test request to see the extracted details from the packing list. This step completes the integration with the AI agent through Pabbly Connect.


5. Adding Extracted Data to Google Sheets via Pabbly Connect

The final step is to send the extracted data to Google Sheets. In your Pabbly Connect workflow, add another action step and select Google Sheets as the action application. Choose the action event add new row and connect your Google Sheets account.

After connecting, select the spreadsheet and sheet where you want to save the extracted data. Map the fields such as order number, date, items, and shipment number from the AI agent’s response to the corresponding columns in your Google Sheets.

Click on save and send test request to add the details to your Google Sheets. Verify that the details appear correctly in your spreadsheet without any manual effort.

This integration allows you to automate the entire process of extracting packing list data and adding it to Google Sheets, significantly reducing manual data entry errors.


Conclusion

Using Pabbly Connect to automate the extraction of packing list data streamlines your inventory management process. By integrating Google Drive, OpenAI, and Google Sheets, you can effortlessly manage your data with accuracy and efficiency. Implement this automation to save time and improve your workflow.

Ensure you check out Pabbly Connect to create business automation workflows and reduce manual tasks. Pabbly Connect currently offer integration with 2,000+ applications.

Streamlining Content Editing with Pabbly Connect and AI Integration

Learn how to use Pabbly Connect for automating content editing with AI for text improvements. Step-by-step guide to integrate Google Sheets and OpenAI. Eliminate manual repetitive tasks from your workflow. Discover proven automation methods with intuitive steps designed for efficiency-minded professionals.

Watch Step By Step Video Tutorial Below


1. Accessing Pabbly Connect for Integration

To start streamlining content editing for text improvements, access Pabbly Connect by navigating to pabby.com/connect. This platform is essential for integrating various applications like Google Sheets and OpenAI.

Once on the Pabbly Connect homepage, you will see options to sign in or sign up. If you are new, click on ‘Sign Up Free’ to create an account and receive 300 tasks to explore the software. Existing users can simply sign in to access their dashboard.


2. Creating a Workflow in Pabbly Connect

After signing in, navigate to the Pabbly Connect dashboard. Here, you will create a new workflow to automate the content editing process. Click the ‘Create Workflow’ button in the top right corner. using Pabbly Connect

  • Enter a name for your workflow, such as ‘Use AI Agent to Streamlining Content Editing for Text Improvements’.
  • Select a folder to save the workflow, such as ‘Automations’.
  • Click the ‘Create’ button to finalize your workflow setup.

Now, you have successfully created a workflow. The next step involves setting up a trigger for Google Sheets.


3. Setting Up Google Sheets as a Trigger

In your workflow, select Google Sheets as the trigger application. This integration allows Pabbly Connect to capture new or updated rows in your spreadsheet automatically. using Pabbly Connect

Choose the trigger event as ‘New or Updated Spreadsheet Row’. This ensures that whenever you add new content in Google Sheets, Pabbly Connect will trigger the automation.

  • Copy the webhook URL provided by Pabbly Connect.
  • Open your Google Sheets and install the Pabbly Connect Webhooks add-on from the Extensions menu.
  • Paste the copied webhook URL into the add-on’s initial setup.

After submitting the setup, you can test the connection to ensure data is sent correctly from Google Sheets to Pabbly Connect.


4. Connecting OpenAI for Text Improvements

Once the Google Sheets trigger is set up, the next step is to connect OpenAI through Pabbly Connect. This allows you to utilize AI for text improvements based on the content drafted in your spreadsheet.

Select OpenAI as the action application in your workflow. Choose the action event as ‘ChatGPT’ to enable AI-driven editing of your draft content.

Create a new connection by entering your OpenAI API key. Select the AI model you wish to use, such as GPT-4. Map the draft content from Google Sheets to the prompt field for AI processing.

After configuring these settings, save the request, and Pabbly Connect will handle sending your draft content to OpenAI for editing.


5. Updating Google Sheets with Edited Content

After receiving the edited content from OpenAI, the final step is to update your Google Sheets with the improved text. Again, you will use Pabbly Connect to facilitate this process.

Select Google Sheets as the action application once more, and this time choose the action event as ‘Update a Cell Value’. This allows you to specify where the edited content should be inserted in your spreadsheet.

Connect to Google Sheets using the same or a new connection. Specify the spreadsheet and sheet name where the edited content should be placed. Map the edited text from OpenAI to the appropriate cell in Google Sheets.

Once you save this action, your automation is complete. Now, whenever you add new content to Google Sheets, it will automatically be edited by OpenAI and updated in the designated column.


Conclusion

In this tutorial, we explored how to use Pabbly Connect to streamline content editing through AI for text improvements. By integrating Google Sheets and OpenAI, you can automate the editing process, ensuring your content is polished and engaging with minimal effort.

Ensure you check out Pabbly Connect to create business automation workflows and reduce manual tasks. Pabbly Connect currently offer integration with 2,000+ applications.

Utilizing Pabbly Connect for such integrations not only saves time but also enhances the quality of your content, making it a valuable tool for any content creator.

Automatically Extract E-Commerce Order Details from PDFs Using Pabbly Connect

Learn how to automatically extract e-commerce order details from PDFs using Pabbly Connect and streamline your order processing with AI. Navigate the automation landscape confidently with clear, structured guidance suitable for professionals regardless of prior technical experience.

Watch Step By Step Video Tutorial Below


1. Accessing Pabbly Connect for PDF Order Extraction

To automatically extract e-commerce order details from PDFs, you need to access Pabbly Connect. Start by searching for ‘Pabbly.com/connect’ in your browser. This will take you to the Pabbly Connect homepage, where you can either sign in or sign up for free.

Once logged in, navigate to the dashboard of Pabbly Connect. Here, you will create a workflow that connects Google Drive, OpenAI, and Google Sheets. This integration allows you to automate the extraction of PDF order details seamlessly.


2. Creating a Workflow in Pabbly Connect

After accessing your Pabbly Connect dashboard, you need to create a new workflow. Click on the ‘Create Workflow’ button located at the top right corner. Name your workflow as ‘Automatically Extract E-Commerce Order Details from PDFs Using an AI Agent’ and select the appropriate folder for organization.

  • Click on the ‘Create’ button to initiate your workflow.
  • Select Google Drive as the trigger application.
  • Choose ‘New File in a Specific Folder’ as the trigger event.

This setup ensures that whenever a new PDF invoice is uploaded to your specified Google Drive folder, Pabbly Connect will trigger the workflow to extract order details automatically.


3. Connecting Google Drive to Pabbly Connect

To connect Google Drive with Pabbly Connect, click on ‘Connect’ and then ‘Add New Connection’. Sign in with your Google account and grant access to Pabbly Connect. After successful authorization, select the specific folder where your e-commerce order invoices are stored.

Ensure that the folder settings allow for sharing. Set the general access to ‘Anyone with the link’ to facilitate document access for the AI agent. This step is crucial for the AI to extract data from the PDFs.


4. Using OpenAI to Extract PDF Data

Next, you will set up the action step to utilize OpenAI for extracting data from the uploaded PDF. In your Pabbly Connect workflow, select OpenAI as the action application and choose ‘Extract Content from PDF or Image’ as the action event.

Connect to OpenAI by adding your API token. This token can be generated from your OpenAI account. After connecting, you will need to enter the PDF URL, which can be mapped from the previous Google Drive step. Specify the extraction prompt to include fields like customer name, email, and invoice ID.

  • Map the PDF URL from the trigger step.
  • Define the structured output schema in JSON format for organized data extraction.

With these settings, Pabbly Connect will facilitate the extraction of order details from your PDFs, ensuring accurate data retrieval.


5. Adding Extracted Data to Google Sheets

Once the data is extracted, the final step is to add this information to Google Sheets. In your Pabbly Connect workflow, select Google Sheets as your action application and choose ‘Add a New Row’ as the action event.

Connect to Google Sheets using your Google account and select the spreadsheet where you want to store the order details. Map the extracted data fields such as invoice number, customer name, and total amount from the OpenAI extraction step to the corresponding columns in your Google Sheet.

Map the invoice number, customer name, and other details accurately. Click ‘Save and Send Request’ to finalize the entry.

This integration allows Pabbly Connect to automatically populate your Google Sheets with the latest order details, enhancing your workflow efficiency.


Conclusion

Using Pabbly Connect, you can efficiently automate the extraction of e-commerce order details from PDFs. This process not only saves time but also minimizes manual errors, ensuring smooth order processing in your business.

Ensure you check out Pabbly Connect to create business automation workflows and reduce manual tasks. Pabbly Connect currently offer integration with 2,000+ applications.

Automate Content Distribution to Multiple Platforms Using Pabbly Connect

Learn how to automate content distribution to multiple platforms using Pabbly Connect. This step-by-step tutorial covers integration with Google Sheets, Facebook, WordPress, and more. Follow this definitive guide to creating powerful automated workflows with straightforward, efficiency-focused solutions that save valuable time.

Watch Step By Step Video Tutorial Below


1. Accessing Pabbly Connect for Automation

To automate content distribution using Pabbly Connect, first, access the platform by visiting www.Pabbly.com/connect. This site will direct you to the Pabbly Connect landing page, where you can sign in or create a new account.

After signing in, you will see the Pabbly Connect dashboard. Here, you can create workflows that automate your tasks. Click on the ‘Create Workflow’ button in the top right corner to begin setting up your automation process.


2. Creating a Workflow in Pabbly Connect

In this section, we will create a workflow to automate content distribution. After clicking on ‘Create Workflow’, a dialog box will appear asking for the workflow name and folder selection. Name your workflow something like ‘AI Agent for Content Distribution’.

  • Enter a descriptive name for your workflow.
  • Select a folder to save your workflow.
  • Click the ‘Create’ button to finalize.

This step establishes the foundation for your workflow, allowing you to integrate various applications effectively using Pabbly Connect.


3. Setting Up the Trigger with Google Sheets

The next step involves setting up the trigger application. For this integration, select Google Sheets as your trigger application. Choose the trigger event as ‘New or Updated Spreadsheet Row’. This allows the workflow to activate whenever a new row is added to your Google Sheet.

Copy the provided webhook URL from Pabbly Connect and set up the Google Sheets add-on to connect to this URL. Follow these steps:

  • Go to the Extensions menu in Google Sheets.
  • Select Add-ons and then Get Add-ons.
  • Search for Pabbly Connect Webhooks and install it.
  • After installation, refresh your Google Sheet.

Once set up, every time a new row is added with content details, Pabbly Connect will trigger the workflow, capturing the data for further processing.


4. Generating Content Using AI Agent

After setting up the trigger, the next action is to generate content using an AI agent. For this, select OpenAI as the action application and choose ‘Chat GPT’ as the action event. This integration allows Pabbly Connect to send the content details to OpenAI, which will generate the required content based on the information from Google Sheets.

In the setup, you will need to provide a prompt that specifies what type of content you want generated. Here’s how to do it:

Select the AI model (e.g., GPT-4). Map the content topic, keywords, hashtags, and tone style from the previous step. Click ‘Save and Send Test Request’ to generate the content.

This process allows you to automate the creation of high-quality content tailored to your specifications, thanks to the capabilities of Pabbly Connect.


5. Distributing Content Across Multiple Platforms

With the content generated, the final step is to distribute it across various platforms like Facebook and WordPress. In this section, you will add action steps for each platform. Start with Facebook by selecting it as the action application and choosing ‘Create Page Photo Post’ as the action event.

Map the generated content and image URL from the previous steps into the Facebook post setup. Once you have configured the details, click ‘Save and Send Test Request’. Repeat this process for WordPress:

Select WordPress as the action application. Choose ‘Create Post’ as the action event. Map the content title and body from the previous steps.

After completing these configurations, Pabbly Connect will automatically post the content to both Facebook and WordPress, streamlining your content distribution process.


Conclusion

In this tutorial, we explored how to automate content distribution to multiple platforms using Pabbly Connect. By integrating Google Sheets, OpenAI, Facebook, and WordPress, you can streamline your content creation and posting process effectively. This setup not only saves time but also enhances your online presence with minimal effort.

Ensure you check out Pabbly Connect to create business automation workflows and reduce manual tasks. Pabbly Connect currently offer integration with 2,000+ applications.

How to Extract Data from Purchase Order PDFs Using Pabbly Connect to Google Sheets

Learn how to extract data from Purchase Order PDFs using Pabbly Connect and automate the process to Google Sheets. Step-by-step tutorial included. Learn to create powerful connections between your critical applications without requiring specialized programming knowledge or extensive technical background.

Watch Step By Step Video Tutorial Below


1. Setting Up Pabbly Connect for Extracting Data from PDFs

To begin the process of extracting data from Purchase Order PDFs, you need to access Pabbly Connect. This integration platform allows you to connect various applications seamlessly. Start by visiting the Pabbly Connect website and signing up for a free account or logging in if you already have one.

Once logged in, navigate to the dashboard and click on the ‘Create Workflow’ button. Name your workflow, for instance, ‘AI Agent for Purchase Order Data Extraction’. After naming, select the appropriate folder in your Pabbly account to store this workflow and click ‘Create’. This setup is essential for automating the extraction process.


2. Trigger Setup in Google Drive with Pabbly Connect

In this section, you will set up the trigger that detects new Purchase Order PDFs uploaded to Google Drive. Within your workflow in Pabbly Connect, click on the trigger window and search for ‘Google Drive’. Select it and choose the trigger event as ‘New File in Specific Folder’.

  • Connect your Google Drive account by clicking on ‘Sign in with Google’.
  • Select the folder where you will upload your Purchase Order PDFs.
  • Change the sharing settings of the folder to allow access for the automation.

After setting the folder, click on the ‘Save and Send Test Request’ button. This action will fetch the details of the most recent file uploaded in that folder, which is crucial for the next steps.


3. Extracting Data Using OpenAI with Pabbly Connect

Once the trigger is set, the next step involves sending the captured PDF to OpenAI for data extraction. In the action window of Pabbly Connect, search for ‘OpenAI’ and select it. Choose the action event as ‘Extract Content from PDF/Image’.

To connect your OpenAI account, enter your API key, which you can obtain from your OpenAI dashboard. After connecting, you will need to map the file URL from the previous step into the OpenAI action. Set the prompt to instruct OpenAI to extract details from the PDF in a structured format.

  • Select the model you wish to use for extraction, such as GPT-4 mini.
  • Ensure the output is structured correctly, preferably in JSON format.
  • Click ‘Save and Send Test Request’ to receive the extracted data.

This step is pivotal as it transforms the unstructured data from the PDFs into a format that can be utilized in Google Sheets.


4. Adding Extracted Data to Google Sheets via Pabbly Connect

After successfully extracting data from the Purchase Order PDFs, the next step is to add this data into Google Sheets. In your Pabbly Connect workflow, click on the ‘Add Action Step’ button and search for ‘Google Sheets’. Choose the action event as ‘Add New Row’.

Connect your Google Sheets account by signing in. Once connected, select the spreadsheet where you want to store the extracted data. Map each field from the OpenAI response to the corresponding columns in your Google Sheets. This ensures that every piece of extracted information is accurately placed in the right location.

Finally, click ‘Save and Send Test Request’ to confirm that the data is being sent to your Google Sheets. Check your spreadsheet to verify that the new row has been added correctly with the extracted details from the Purchase Order PDF.


Conclusion

In this tutorial, we explored how to utilize Pabbly Connect to automate the extraction of data from Purchase Order PDFs and seamlessly add it to Google Sheets. By following the outlined steps, you can streamline your data management processes, enhancing efficiency in your workflow.

Ensure you check out Pabbly Connect to create business automation workflows and reduce manual tasks. Pabbly Connect currently offer integration with 2,000+ applications.

Extract Customer Feedback and Survey Data from PDF Forms to Google Sheets Using Pabbly Connect

Learn how to automate the extraction of customer feedback from PDF forms to Google Sheets using Pabbly Connect. Step-by-step guide with detailed instructions. Explore systematic approaches to creating efficient automation solutions that convert technical concepts into practical, implementable instructions.

Watch Step By Step Video Tutorial Below


1. Accessing Pabbly Connect for Automation

To start automating the extraction of customer feedback using Pabbly Connect, you need to visit the Pabbly Connect website. Simply type ‘Pabbly.com/connect’ in your browser. This will take you to the homepage where you can either sign in or sign up for a free account.

As a new user, click on the ‘Sign Up for Free’ button to create an account. Existing users can log in directly. Upon signing up, you will receive 100 free tasks each month to explore the platform’s capabilities. Once logged in, navigate to the Pabbly Connect dashboard to begin creating your workflow.


2. Creating a Workflow in Pabbly Connect

In the Pabbly Connect dashboard, you will find an option to create a new workflow. Click on the ‘Create Workflow’ button and name your workflow, for example, ‘Extract Customer Feedback and Survey Data from PDF Forms to Google Sheets using AI Agent.’ This name helps you identify the workflow later.

After naming your workflow, you can select a folder to save it. This organization helps manage multiple workflows efficiently. Once you have set everything up, click on ‘Create’ to proceed. You will now see a blank workflow screen with two important sections: Trigger and Action.

  • Select Google Drive as the Trigger Application.
  • Choose ‘New File in Specific Folder’ as the Trigger Event.
  • Connect your Google Drive account to Pabbly Connect.

This setup ensures that every time a new feedback form is uploaded to Google Drive, it will trigger the automation process.


3. Extracting Data Using AI Agent

After setting up the trigger with Google Drive, the next step is to extract data from the uploaded PDF forms using an AI agent. In this case, you will select OpenAI as your action application in Pabbly Connect. This integration allows you to use AI to read and extract handwritten data from the PDF forms.

Once OpenAI is selected, you need to choose the action event, which is to extract content from the PDF or image. Make sure you are logged into your OpenAI account for a seamless connection. You will need to provide an API token to establish this connection.

  • Select the model you want to use for extraction, such as GPT-4.
  • Map the PDF or image URL from the previous step to ensure the correct file is processed.
  • Enter a prompt to instruct OpenAI on what data to extract.

By mapping the URL dynamically, you ensure that every new file uploaded will be processed without manually changing the URL each time.


4. Saving Extracted Data to Google Sheets

Once the data is extracted using OpenAI, the next step is to save this information into Google Sheets. In your Pabbly Connect workflow, add another action step and select Google Sheets as the application. The action event here will be ‘Add New Row’. This allows the extracted data to be added systematically into your Google Sheets.

Connect your Google Sheets account to Pabbly Connect and select the spreadsheet where you want to store the feedback. Map the fields from the OpenAI response to the corresponding columns in your Google Sheets. Ensure that you include fields like date of visit, name of guest, room number, and overall experience.

Map the date of visit from the OpenAI response. Add the name of the guest and room number accordingly. Include overall experience and any additional comments from the feedback.

After mapping all the necessary fields, click ‘Save and Send Test Request’ to ensure that the data is added correctly to your Google Sheets.


5. Conclusion: Automate Your Customer Feedback Process with Pabbly Connect

In conclusion, by using Pabbly Connect, you can automate the entire process of extracting customer feedback from PDF forms and saving it to Google Sheets. This integration not only saves time but also ensures accuracy in data entry, allowing you to focus on improving customer experience.

Ensure you check out Pabbly Connect to create business automation workflows and reduce manual tasks. Pabbly Connect currently offer integration with 2,000+ applications.

Check out Pabbly Connect – Automate your business workflows effortlessly! Sign Up Free – Start your journey with ease! 10,000+ Video Tutorials – Learn step by step! Join Pabbly Facebook Group – Connect with 21,000+ like minded people!

By following the steps outlined in this tutorial, you can easily set up a workflow that captures valuable feedback and systematically organizes it in Google Sheets. Start using Pabbly Connect today to enhance your business operations and streamline your feedback collection process.

How to Transcribe Audio Files from OneDrive using Pabbly Connect and AI Agent

Learn how to transcribe audio files from OneDrive using Pabbly Connect and AI Agent. Follow our step-by-step tutorial for seamless integration. Build sophisticated automated workflows in less time than you think. This guide translates complex integrations into straightforward steps for immediate implementation.

Watch Step By Step Video Tutorial Below


1. Accessing Pabbly Connect for Audio Transcription

To transcribe audio files from OneDrive using Pabbly Connect, start by accessing the platform. Go to your browser and search for Pabbly Connect at pabby.com/connect. Here, you can sign up for a free account or log in if you already have one. using Pabbly Connect

After signing in, navigate to the Pabbly Connect dashboard. Click on the ‘Create Workflow’ button to begin setting up your audio transcription workflow. Name your workflow, for example, ‘AI Agent for Audio Transcription,’ and select the appropriate folder in your Pabbly Connect account.


2. Setting Up the Trigger with OneDrive

In this step, you will connect your OneDrive account to Pabbly Connect to capture new audio files. In the trigger window, search for ‘Microsoft OneDrive’ and select it. Choose the trigger event as ‘New File’ and click on ‘Connect’ to add a new connection. using Pabbly Connect

  • Click on ‘Connect with Microsoft OneDrive’ and accept the permissions.
  • Enter the folder path where your audio files will be uploaded.
  • Select the event type as ‘New File Created’.

After entering the folder path, click on ‘Save and Send Test Request’ to capture the details of the most recent file uploaded. This is the first step in building your AI agent using Pabbly Connect.


3. Transcribing Audio Files Using OpenAI

Next, you will send the captured audio file to OpenAI for transcription. In the action step, search for ‘OpenAI’ and select it. Choose the action event as ‘Generate Transcript’ and click on ‘Connect’ to add a new connection. using Pabbly Connect

You will need to enter your OpenAI API key, which can be obtained from your OpenAI account dashboard. After pasting the API key in Pabbly Connect, click on ‘Save’ to connect your OpenAI account.

  • Map the audio file URL from the OneDrive trigger response to the OpenAI action.
  • Select the transcription model you wish to use, such as Whisper.
  • Click on ‘Save and Send Test Request’ to receive the transcription response.

This step allows Pabbly Connect to facilitate the transcription of your audio file using OpenAI’s capabilities.


4. Updating Google Sheets with Transcription Details

In the final step, you will update a Google Sheet with the transcription details. Search for ‘Google Sheets’ in the action step and select it. Choose the action event as ‘Add New Row’ and click on ‘Connect’ to establish a connection with your Google Sheets account. using Pabbly Connect

Once connected, select the spreadsheet where you want to save the transcription details, such as ‘Audio File Transcriptions.’ Map the fields for file name, transcription, and file link accordingly.

Select the appropriate sheet (e.g., Sheet1) from your spreadsheet. Map the file name from OneDrive and the transcription from OpenAI. Click ‘Save and Send Test Request’ to ensure the data is added to your sheet.

With Pabbly Connect, you can seamlessly integrate Google Sheets to store and manage your transcription data effectively.


5. Conclusion: Automate Your Audio Transcription Process

In this tutorial, we demonstrated how to transcribe audio files from OneDrive using Pabbly Connect and AI Agent. By following these steps, you can automate the transcription process and efficiently manage your audio files.

Ensure you check out Pabbly Connect to create business automation workflows and reduce manual tasks. Pabbly Connect currently offer integration with 2,000+ applications.

Check out Pabbly Connect – Automate your business workflows effortlessly! Sign Up Free – Start your journey with ease! 10,000+ Video Tutorials – Learn step by step! Join Pabbly Facebook Group – Connect with 21,000+ like minded people!

Pabbly Connect serves as the central integration platform, allowing you to connect various applications like OneDrive, OpenAI, and Google Sheets. This automation not only saves time but also enhances productivity in managing audio transcriptions.


Effortless Salary Slip Data Extraction with Pabbly Connect

Learn how to automate salary slip data extraction using Pabbly Connect, Google Drive, and Open AI for efficient payroll automation. Revolutionize your productivity approach with just a few strategic clicks. Uncover professional methods for connecting applications and creating workflows that reclaim hours of your week.

Watch Step By Step Video Tutorial Below


1. Accessing Pabbly Connect for Salary Slip Automation

To start automating salary slip data extraction, you need to access Pabbly Connect. Open your browser and visit Pabbly.com/connect. Here, you will find options to sign in or sign up for free.

If you are a new user, click on the ‘Sign up for free’ button to create an account. Existing users can simply click on ‘Sign in’. Once logged in, navigate to the Pabbly Connect dashboard to begin creating your workflow for salary slip data extraction.


2. Creating a Workflow in Pabbly Connect

After accessing Pabbly Connect, click on the ‘Create Workflow’ button. Name your workflow, for instance, ‘AI Agent for Salary Slip Data Extraction’ and choose a folder to save it in.

  • Select the folder where you want to save the workflow.
  • Name your workflow appropriately.
  • Click on the ‘Create’ button to proceed.

This action opens the workflow window where you can set triggers and actions. The trigger is the event that starts the workflow, while actions are the tasks executed in response.


3. Setting Up Google Drive as the Trigger

In the workflow window, select Google Drive as your trigger application. Choose the event ‘New File in a Specific Folder’ to ensure that the workflow triggers when a new salary slip is uploaded.

Click on the ‘Connect’ button to link your Google Drive account with Pabbly Connect. If prompted, sign in with your Google account and grant necessary permissions. Make sure the folder you select for salary slips is shared with editor access.


4. Using AI Agent for Data Extraction

Now, select Open AI as your action application in Pabbly Connect. Choose the action event ‘Extract Content from PDF/Image’. Connect your Open AI account by providing the API key, which you can generate from the Open AI API key page.

Map the PDF URL of the uploaded salary slip from the Google Drive trigger response. This mapping allows the AI agent to dynamically fetch the correct URL each time a new slip is uploaded.

  • Select the model, typically GPT-4 Mini, for better results.
  • Set the prompt to instruct the AI on what details to extract.
  • Enter the structured output JSON to define the output format.

Once configured, click on ‘Save and Send Test Request’ to ensure the AI agent successfully extracts the details from the salary slip.


5. Adding Extracted Data to Google Sheets

After extracting the data using the AI agent, the next step is to add this information into Google Sheets. Select Google Sheets as your action application and choose the ‘Add a New Row’ action event.

Connect your Google Sheets account in Pabbly Connect, then select the spreadsheet and sheet where you want to store the extracted data. Map all relevant fields from the AI agent’s response to the corresponding columns in your Google Sheets.

Map employee name, employee code, designation, and other relevant fields. Click on ‘Save and Send Test Request’ to finalize the integration. Check Google Sheets to confirm that data is added correctly.

This completes the workflow, allowing for seamless data extraction and storage without manual intervention.


Conclusion

This tutorial demonstrated how to automate salary slip data extraction using Pabbly Connect. By integrating Google Drive, Open AI, and Google Sheets, you can streamline payroll processes effectively.

Ensure you check out Pabbly Connect to create business automation workflows and reduce manual tasks. Pabbly Connect currently offer integration with 2,000+ applications.