How to Generate AI-Based Job Descriptions for New Openings Using Pabbly Connect

Learn how to generate AI-based job descriptions for new openings using Pabbly Connect, Google Docs, and Google Sheets in this detailed tutorial. Navigate the automation landscape confidently with clear, structured guidance suitable for professionals regardless of prior technical experience.

Watch Step By Step Video Tutorial Below


1. Accessing Pabbly Connect for Job Descriptions

To generate AI-based job descriptions, the first step is to access Pabbly Connect. This platform allows seamless integration of various applications, including Google Sheets and Google Docs. Start by visiting the Pabbly Connect website and signing up for a free account.

Once logged in, you will be directed to the Pabbly Connect dashboard. Here, you can create a new workflow to automate the process of generating job descriptions. The integration will streamline your HR tasks by automating the job description generation process based on inputs from Google Sheets.


2. Creating a Workflow in Pabbly Connect

In this section, you will create a workflow that connects Google Sheets with Google Docs through Pabbly Connect. Click on the ‘Create Workflow’ button in the top right corner of the dashboard. Name your workflow something descriptive, like ‘Generate AI-Based Job Descriptions’.

  • Select a folder to save your workflow.
  • Choose ‘Google Sheets’ as your trigger application.
  • Set the trigger event to ‘New or Updated Spreadsheet Row’.

After setting up the trigger, you will need to connect your Google Sheets account to Pabbly Connect. This connection allows Pabbly to capture data whenever a new job detail is added to your sheet.


3. Configuring Google Sheets with Pabbly Connect

Now that your workflow is set up, it’s time to configure Google Sheets. Open your Google Sheets document where you will input job details. Ensure that the sheet contains columns for job title, responsibilities, required skills, and location.

In Pabbly Connect, you will need to select your Google Sheets account and specify the spreadsheet and worksheet containing the job details. This setup enables Pabbly Connect to monitor the sheet for any new entries that trigger the workflow.

  • Map the relevant columns in your Google Sheets to the data fields in Pabbly.
  • Test the connection to ensure data is being captured correctly.

Once you have confirmed the setup, you can proceed to the next step of connecting Google Docs for generating the job descriptions automatically.


4. Integrating Google Docs for Job Description Generation

The next step in your workflow is to integrate Google Docs. This will allow Pabbly Connect to create a new document for each job description generated. Select ‘Google Docs’ as your action application and choose the event ‘Create Document’.

You will need to connect your Google Docs account to Pabbly Connect. After successful authentication, you can configure the document settings, including naming the document based on the job title from your Google Sheets.

Set up the document title to include the job title for easy identification. Map the job description fields to the content of the document.

This integration ensures that every time a new job detail is added to Google Sheets, a corresponding document is created in Google Docs with the relevant job description.


5. Finalizing the Workflow and Testing

With your Google Sheets and Google Docs integrated via Pabbly Connect, it’s time to finalize your workflow. You can add additional actions, such as converting the document to a PDF and saving it to Google Drive. This step will enhance the automation process by ensuring all job descriptions are stored in a specific folder.

Test your workflow by adding a new job detail in Google Sheets. Pabbly Connect will trigger the automation, generating a job description and creating a document in Google Docs. You can check Google Drive to confirm that the PDF version of the job description has been uploaded successfully.

Once everything is confirmed to be working correctly, your automation is complete. You can now generate AI-based job descriptions efficiently using Pabbly Connect.


Conclusion

This tutorial demonstrated how to use Pabbly Connect to automate the generation of AI-based job descriptions. By integrating Google Sheets and Google Docs, you can streamline your HR processes and save valuable time.

Ensure you check out Pabbly Connect to create business automation workflows and reduce manual tasks. Pabbly Connect currently offer integration with 2,000+ applications.

Automate Employee Onboarding Emails with Pabbly Connect and AI Agent

Learn how to automate employee onboarding emails using Pabbly Connect, Google Sheets, and AI Agent step by step without coding. Explore efficient methods for automating routine tasks with clear, concise instructions suited for both newcomers and experienced professionals.

Watch Step By Step Video Tutorial Below


1. Accessing Pabbly Connect for Automation

To automate employee onboarding emails, first, you need to access Pabbly Connect. Open your browser and type Pabbly.com/connect. This will take you to the homepage of Pabbly Connect where you can either sign in as an existing user or sign up for free if you are new.

Upon signing up, you will receive 100 free tasks every month, allowing you to explore the platform’s features. Once logged in, click on the ‘Access’ button to enter the dashboard of Pabbly Connect. Here, you can create workflows to automate various tasks, including employee onboarding emails.


2. Creating a Workflow in Pabbly Connect

Now that you are in the Pabbly Connect dashboard, click on the ‘Create Workflow’ option. You will be prompted to name your workflow. Enter a name like ‘Automate Employee Onboarding Emails Using AI Agent’ and select a folder for organization.

  • Select an appropriate folder for your workflow.
  • Click on the ‘Create’ button to set up the workflow.

Your new workflow will be blank. In this setup, you will define a trigger and action. The trigger will be the event that starts the workflow, while the action will be the task performed as a response. This is where Pabbly Connect shines, allowing you to automate tasks without any coding.


3. Setting Up the Trigger with Google Sheets

For this automation, the trigger application will be Google Sheets. Select Google Sheets as your trigger application and choose the trigger event as ‘New Row Added’. This means that every time a new row is added to your sheet, the workflow will activate.

To link Google Sheets with Pabbly Connect, you will receive a webhook URL. Copy this URL and go to your Google Sheets. From the menu, select ‘Extensions’ and then ‘Add-ons’. Install the Pabbly Connect Webhooks add-on if you haven’t done so already.

  • Paste the webhook URL in the add-on settings.
  • Select the trigger column where the new data will be added.

After completing this setup, every new row added in your Google Sheets will automatically trigger the workflow in Pabbly Connect.


4. Configuring the AI Agent to Generate Emails

Next, you will set up the action step using OpenAI as your AI agent. In Pabbly Connect, select OpenAI as the action application and choose the action event as ‘Generate Content’. This will allow you to create personalized onboarding emails based on the data received from Google Sheets.

Before connecting, ensure you are logged into your OpenAI account. Click on ‘Add New Connection’ and input your OpenAI API key. Once connected, you can define the model to use for generating content, such as GPT-4.

Set up the prompt for the AI to generate an email. Map the details from Google Sheets to the prompt, ensuring dynamic content is used for each email.

This setup ensures that every time a new employee is onboarded, a personalized email will be generated automatically, showcasing the power of Pabbly Connect in streamlining the onboarding process.


5. Sending Emails via Gmail

Finally, you will set up Gmail to send the generated emails. In Pabbly Connect, add an action step and select Gmail as the application. Choose the action event as ‘Send Email’. Connect your Gmail account if you haven’t already done so.

In the action setup, map the recipient’s email address, subject, and body content that you received from the OpenAI step. Ensure that the email content is dynamic by mapping the fields correctly.

Set the sender name as your company name. Click on ‘Save and Send Test Request’ to send a test email.

This final step will ensure that every new onboarding email is sent automatically via Gmail, showcasing the seamless integration capabilities of Pabbly Connect with various applications.


Conclusion

In this tutorial, we explored how to automate employee onboarding emails using Pabbly Connect, Google Sheets, and an AI agent. By following these steps, you can streamline the onboarding process, saving time and ensuring personalized communication for new employees.

Ensure you check out Pabbly Connect to create business automation workflows and reduce manual tasks. Pabbly Connect currently offer integration with 2,000+ applications.

Automate Sentiment Analysis for Google Business Profile Reviews using Pabbly Connect

Learn how to automate sentiment analysis for Google Business Profile reviews using Pabbly Connect and OpenAI. Step-by-step tutorial included. Master proven automation processes with practical implementation examples and strategic recommendations you can apply immediately in your workflow.

Watch Step By Step Video Tutorial Below


1. Accessing Pabbly Connect for Automation

To automate sentiment analysis for Google Business Profile reviews, start by accessing Pabbly Connect. Open your web browser and navigate to Pabbly’s official site, where you can either sign in or create a new account.

If you are new to Pabbly Connect, click on the ‘Sign Up Free’ button to set up your account in just a few minutes. For existing users, simply click on ‘Sign In’ to access your dashboard.


2. Creating a New Workflow in Pabbly Connect

Once you are signed into Pabbly Connect, click on the ‘Create Workflow’ button to start building your AI agent for sentiment analysis. Name your workflow, for instance, ‘AI Agent for Sentiment Analysis of Reviews,’ and select the appropriate folder within your Pabbly account.

After creating the workflow, you will see two windows: a trigger window and an action window. The trigger window is where you will set up the event that starts the automation, while the action window will define what happens next.


3. Connecting Google Business Profile to Pabbly Connect

In the trigger window, search for ‘Google Business Profile’ to connect your account. Select the event as ‘New Review’ and click on ‘Connect’. You will be prompted to sign in with your Google account to establish the connection with Pabbly Connect.

After signing in, choose the specific Google Business Profile account you want to monitor for new reviews. Click on ‘Save and Send Test Request’ to capture the details of the most recent review. This step ensures that your AI agent is ready to process incoming reviews effectively.


4. Performing Sentiment Analysis Using OpenAI

After capturing the review, navigate to the action window and search for ‘OpenAI’. Select the action event as ‘Chat GPT Structured Output’. To connect your OpenAI account, you will need to enter your API key. You can obtain this by logging into your OpenAI account and navigating to the API keys section. using Pabbly Connect

Once connected, configure the settings by selecting the AI model (e.g., GPT-4 Mini) and entering a prompt for sentiment analysis. This prompt should instruct OpenAI to analyze the sentiment of the review and generate a polite response. Ensure that the response format is set to JSON schema to receive structured data from OpenAI.

  • Select ‘Chat GPT Structured Output’ as the action event.
  • Enter your OpenAI API key to connect.
  • Configure the prompt for sentiment analysis and response generation.

After setting up the prompt, click on ‘Save and Send Test Request’ to confirm that OpenAI returns the sentiment analysis and generated reply correctly.


5. Adding Review Details to Google Sheets

To keep track of the reviews and their sentiment analysis, the next step involves adding this data to a Google Sheet. In the action window, search for ‘Google Sheets’ and select the action event as ‘Add New Row’. Connect your Google Sheets account by signing in and selecting the appropriate spreadsheet. using Pabbly Connect

Map the fields from the previous steps to the corresponding columns in your Google Sheets. This includes the reviewer’s name, comment, star rating, sentiment analysis result, and the reply generated by OpenAI. After mapping all the necessary fields, click on ‘Save and Send Test Request’ to ensure the data is correctly added to your spreadsheet.


Conclusion

In this tutorial, we explored how to automate sentiment analysis for Google Business Profile reviews using Pabbly Connect and OpenAI. By following these steps, you can efficiently capture reviews, analyze sentiments, and manage responses seamlessly. Automate your review process today with Pabbly Connect for enhanced customer engagement!

Ensure you check out Pabbly Connect to create business automation workflows and reduce manual tasks. Pabbly Connect currently offer integration with 2,000+ applications.

How to Generate AI Images in Airtable Using Pabbly Connect

Learn how to generate AI images in Airtable using Pabbly Connect. Follow this detailed tutorial for seamless integration with AI Agent and OpenAI. This comprehensive guide reveals exactly how to connect your applications and automate repetitive tasks — accessible for professionals of all technical backgrounds.

Watch Step By Step Video Tutorial Below


1. Accessing Pabbly Connect for Integration

To begin generating AI images in Airtable, we first need to access Pabbly Connect. This platform allows us to integrate various applications seamlessly, starting with Facebook and Airtable.

Open your browser and navigate to the Pabbly Connect website. Here you will see options to either sign in or sign up for a free account. If you are new to Pabbly, click on the ‘Sign up free’ button to create your account.


2. Creating a Workflow in Pabbly Connect

Once you are signed into Pabbly Connect, you will be directed to the dashboard. From here, click on the ‘Create Workflow’ button to set up your integration. Name your workflow, for example, ‘AI Agent for Image Generation’.

After naming your workflow, select the folder where you want to store it, and click on ‘Create’. This action will open the new workflow, which consists of a trigger and action window.

  • Click on ‘Create Workflow’ button.
  • Name your workflow (e.g., ‘AI Agent for Image Generation’).
  • Select the folder for your workflow.

In this section, you will set up the trigger to connect Airtable with Pabbly Connect.


3. Setting Up the Trigger with Airtable

To connect your Airtable account with Pabbly Connect, select Airtable as the app in the trigger step. Choose ‘New Record’ as the trigger event. Then, click on ‘Connect’ and select ‘Add New Connection’.

Follow the prompts to connect your Airtable account by granting access to the base you want to use. Make sure to select the correct base and table that contains the image descriptions and details you want to generate.

  • Select Airtable as the app in the trigger step.
  • Choose ‘New Record’ as the trigger event.
  • Grant access to the appropriate Airtable base.

After successfully connecting, Pabbly Connect will capture the necessary details from the new record in Airtable.


4. Sending Data to OpenAI for Image Generation

Now that our trigger is set up, we will use Pabbly Connect to send the captured data to OpenAI. In the action step, select OpenAI and choose the action event as ‘Generate Image’.

Connect your OpenAI account by entering the API key, which you can find in your OpenAI dashboard. After connecting, configure the prompt, image size, quality, and style using the mapped data from Airtable.

Select OpenAI as the app in the action step. Choose ‘Generate Image’ as the action event. Enter the API key to connect OpenAI.

After configuring these settings, click ‘Save and Send Test Request’ to generate the image and retrieve the URL.


5. Updating Airtable with the Generated Image

With the image generated, the final step is to update the Airtable record with the image URL. In the action step, select Airtable again and choose ‘Update Record’ as the action event.

Use the mapping feature to specify which record to update and add the image URL retrieved from OpenAI into the attachments field of the corresponding record.

Select Airtable as the app for the final action. Choose ‘Update Record’ as the action event. Map the image URL to the attachments field.

Once you click ‘Save and Send Test Request’, your Airtable record will be updated with the generated image, confirming that the integration via Pabbly Connect is working flawlessly.


Conclusion

In this tutorial, we learned how to generate AI images in Airtable using Pabbly Connect and an AI Agent. By following the steps outlined, you can automate the process of image generation and easily manage your records in Airtable.

Ensure you check out Pabbly Connect to create business automation workflows and reduce manual tasks. Pabbly Connect currently offer integration with 2,000+ applications.

This integration not only enhances productivity but also showcases the powerful capabilities of Pabbly Connect in connecting multiple applications seamlessly.

Auto-Generate Google Sheets Reports Using Pabbly Connect and AI Agent

Learn how to auto-generate Google Sheets reports using Pabbly Connect and AI Agent with this step-by-step tutorial. Streamline your reporting process effortlessly! Navigate the automation landscape confidently with clear, structured guidance suitable for professionals regardless of prior technical experience.

Watch Step By Step Video Tutorial Below


1. Accessing Pabbly Connect for Automation

To begin automating your Google Sheets reports, you need to access Pabbly Connect. Start by typing Pabbly.com/connect in your browser. This will take you to the Pabbly Connect homepage where you can either sign in or sign up for free.

If you are a new user, click on the ‘Sign Up for Free’ button to create an account. Existing users can simply log in. After signing up, you will receive 100 free tasks each month to explore the features of Pabbly Connect.


2. Creating a Workflow in Pabbly Connect

After logging into Pabbly Connect, navigate to the dashboard. Click on the ‘Create Workflow’ button to start a new automation. You will be prompted to name your workflow; enter ‘Auto-generate Google Sheets Reports using AI Agent’ and select a relevant folder.

Once your workflow is named, you will see two main sections: Trigger and Action. The Trigger is what starts the workflow, and the Action is what happens in response. In this case, the trigger will be a new row added to Google Sheets, and the action will involve generating a report using AI Agent.

  • Click on ‘Create’ to confirm your workflow setup.
  • Select Google Sheets as your trigger application.
  • Choose ‘New or Updated Spreadsheet Row’ as the trigger event.

With this setup, every time a new salesperson is added to Google Sheets, the automation will be triggered, facilitating the report generation process through Pabbly Connect.


3. Setting Up Google Sheets Integration

To connect Google Sheets with Pabbly Connect, you will need a webhook URL. After selecting Google Sheets as the trigger, copy the webhook URL provided by Pabbly Connect.

Next, go to your Google Sheets, click on ‘Extensions’, and select ‘Add-ons’. Search for ‘Pabbly Connect Webhooks’ in the Google Workspace Marketplace and install it. Once installed, refresh your Google Sheets to see the new options.

  • Click on ‘Initial Setup’ under Pabbly Connect Webhooks.
  • Paste the webhook URL you copied earlier.
  • Define a trigger column (e.g., column G) that will send data to Pabbly Connect.

After setting this up, click on the ‘Send Test’ button to ensure the connection is working properly. This step confirms that your Google Sheets is now integrated with Pabbly Connect.


4. Integrating AI Agent for Report Generation

With Google Sheets now connected to Pabbly Connect, the next step is to integrate your AI Agent, such as OpenAI. Select OpenAI as your action application in Pabbly Connect and choose the ‘Generate Content’ action event.

To establish the connection, you will need to log into your OpenAI account. If you already have a connection, select it; otherwise, create a new connection by clicking on ‘Add New Connection’ and entering your OpenAI API key.

Select the model (e.g., GPT-4) to generate the report. Provide a detailed prompt for the AI to follow, specifying the sales data format. Map the fields from Google Sheets to the prompt to automate data entry.

Once the AI has generated the content, you can then proceed to the next steps to save the report in Google Docs using Pabbly Connect.


5. Saving Reports to Google Docs and Google Drive

The final step involves saving the generated report to Google Docs and uploading it to Google Drive. In Pabbly Connect, select Google Docs as the action application and choose ‘Create Document’ as the action event.

After connecting Google Docs, provide a dynamic name for the document, such as ‘Weekly Sales Report for [Salesperson Name]’. This ensures that each report is uniquely named based on the salesperson.

Use the mapped data from the AI response to append the report content. Create a new folder in Google Drive to save the reports. Upload the report as a PDF file to the designated Google Drive folder.

This process ensures that every report is automatically generated and stored, streamlining your reporting workflow with the help of Pabbly Connect.


Conclusion

By following these steps, you can effectively automate the generation of Google Sheets reports using Pabbly Connect and AI Agent. This integration simplifies the reporting process, saving you time and effort while enhancing productivity.

Ensure you check out Pabbly Connect to create business automation workflows and reduce manual tasks. Pabbly Connect currently offer integration with 2,000+ applications.

Automate Data Analysis from Sales Reports with Pabbly Connect

Learn how to automate data analysis from sales reports using Pabbly Connect with Google Sheets and OpenAI. Step-by-step tutorial included. Discover hidden automation capabilities within your existing tools. This guide shows you how to connect your essential applications and permanently eliminate redundant manual processes.

Watch Step By Step Video Tutorial Below


1. Access Pabbly Connect for Automation

To automate data analysis from sales reports, start by accessing Pabbly Connect. Visit the official website and either sign in or create a free account. New users can sign up for free and get 100 tasks each month to explore the features of Pabbly Connect.

Once you are logged into your account, click on the ‘Access Now’ button to navigate to the Pabbly Connect dashboard. Here, you can create a new workflow to begin your automation process.


2. Create a New Workflow in Pabbly Connect

In this section, you will create a workflow in Pabbly Connect to automate data analysis. Click on the ‘Create Workflow’ button located at the top right corner of the dashboard. A dialog box will appear prompting you to name your workflow.

For this workflow, name it ‘AI Agent to Automate Data Analysis from Sales Reports’ and select an appropriate folder to save it. After naming the workflow, click on the ‘Create’ button. You will see two windows: one for the trigger and one for the action.

  • Click on ‘Create Workflow’ to start.
  • Name your workflow appropriately.
  • Select a folder for organization.

Now that your workflow is created, you need to set up the trigger for when new data is added to your Google Sheets.


3. Set Up Trigger in Pabbly Connect

The next step involves setting up the trigger in Pabbly Connect. Select ‘Google Sheets’ as your trigger application. Choose the trigger event as ‘New or Updated Spreadsheet Row’. This allows Pabbly Connect to capture data when new sales data is entered.

After selecting the trigger application and event, Pabbly Connect will provide you with a webhook URL. Copy this URL and go to your Google Sheets document. Navigate to Extensions > Add-ons > Get Add-ons and search for ‘Pabbly Connect Webhooks’ to install it.

  • Select ‘Google Sheets’ as the trigger application.
  • Choose ‘New or Updated Spreadsheet Row’ as the event.
  • Copy the webhook URL provided by Pabbly Connect.

After installation, refresh your Google Sheets and go back to Extensions > Pabbly Connect Webhooks > Initial Setup. Paste the webhook URL and set the trigger column (e.g., Column F) where the total revenue data will be entered. Click on the ‘Submit’ button to complete the setup.


4. Set Up Action in Pabbly Connect

With the trigger set, the next step is to define the action in Pabbly Connect. For the action application, select ‘OpenAI’ and the action event as ‘Chat GPT’. This will allow Pabbly Connect to send the sales data to OpenAI for analysis.

Click on the ‘Connect’ button and then ‘Add New Connection’. You will need to provide an API key from your OpenAI account. Generate a new secret key by navigating to the API keys section in your OpenAI account and copy the token into Pabbly Connect.

Select ‘OpenAI’ as the action application. Use ‘Chat GPT’ as the action event. Generate and copy the API key from OpenAI.

After connecting OpenAI, set the AI model to use (e.g., GPT-4) and create a prompt that outlines what analysis you want. This prompt should specify the fields you want analyzed and any insights you need. Map the relevant fields from the previous step to the prompt.


5. Update Google Sheets with Analysis

After receiving the analysis from OpenAI, it’s time to update your Google Sheets with the results. Add another action step in Pabbly Connect and select ‘Google Sheets’ again, but this time choose ‘Update Row’ as the action event.

Connect to your Google Sheets account and select the spreadsheet and sheet where you want to update the data. Map the data from the analysis to the corresponding fields in your Google Sheets. Click on the ‘Save and Send Test Request’ button to confirm the update.

Select ‘Google Sheets’ and ‘Update Row’ for the action. Choose the correct spreadsheet and sheet. Map the analysis data to the respective fields.

Once the data is updated, you can check your Google Sheets to see the new analysis automatically added. This process ensures that your sales reports are always up-to-date with the latest insights generated by your AI agent powered by Pabbly Connect.


Conclusion

In this tutorial, we explored how to automate data analysis from sales reports using Pabbly Connect, Google Sheets, and OpenAI. By following these steps, you can efficiently analyze sales data and keep your reports updated with minimal manual effort. Leverage the capabilities of Pabbly Connect to enhance your data management processes.

Ensure you check out Pabbly Connect to create business automation workflows and reduce manual tasks. Pabbly Connect currently offer integration with 2,000+ applications.

How to Use Pabbly Connect to Effortlessly Extract Census Data for Market Research

Learn how to use Pabbly Connect to automate the extraction of census data from Google Drive to Google Sheets using AI agents for market research.

Watch Step By Step Video Tutorial Below


1. Accessing Pabbly Connect for Automation

To start using Pabbly Connect, visit the Pabbly website and navigate to the Pabbly Connect section. This powerful integration platform allows you to connect various applications effortlessly. using Pabbly Connect

After signing in to your Pabbly account, you can create a new workflow. This process involves naming your workflow and selecting a folder for organization. Pabbly Connect facilitates the integration between Google Drive, AI agents, and Google Sheets, making it ideal for extracting census data.


2. Creating a Workflow in Pabbly Connect

In Pabbly Connect, you can create a new workflow specifically designed to extract census data. Start by clicking on the ‘Create Workflow’ button. You will need to provide a name for your workflow and select the appropriate folder. using Pabbly Connect

  • Name your workflow as ‘Extract Census Data for Market Research’.
  • Select the folder where you want to save this workflow.

Once you have created the workflow, you will see two boxes appear: one for the trigger and another for the action. This setup is crucial for automating the extraction process using Pabbly Connect.


3. Setting Up the Trigger with Google Drive

The first step in your workflow is to set up a trigger using Google Drive. This trigger will activate whenever a new file is uploaded to a specified folder in Google Drive. Select Google Drive as your trigger application. using Pabbly Connect

Choose the event as ‘New File in Folder’ and connect your Google Drive account to Pabbly Connect. Make sure to grant the necessary permissions for seamless integration. After connecting, select the specific folder where you will upload your census data PDF files.

  • Select the folder named ‘Market Research’ in your Google Drive.
  • Ensure that the general access for the file is set to allow extraction.

With the trigger configured, Pabbly Connect will now monitor the selected folder for any new uploads, setting the stage for the next steps in your automation.


4. Extracting Data Using AI Agent

After setting up the trigger, the next step involves using an AI agent to extract data from the uploaded PDF file. Select OpenAI as your action application in Pabbly Connect. using Pabbly Connect

For the action event, choose ‘Extract Content from PDF’. Connect your OpenAI account and input the necessary details, including the web content link generated from the previous step. This is where Pabbly Connect truly shines by enabling seamless communication between Google Drive and OpenAI.

Paste the web content link from the Google Drive response. Provide a prompt for the AI agent to specify what data to extract.

Once the AI agent processes the PDF, it will return the extracted data, ready for the final step of your workflow.


5. Adding Extracted Data to Google Sheets

The final step in the workflow is to add the extracted data into Google Sheets. Select Google Sheets as your action application again and choose the event ‘Add New Row’. using Pabbly Connect

Connect your Google Sheets account and select the specific spreadsheet where you want to store the extracted census data. Pabbly Connect allows you to map the extracted fields to the corresponding columns in your Google Sheets, ensuring organized data entry.

Select the spreadsheet named ‘Market Research’. Map each extracted field to the appropriate column in your spreadsheet.

After completing the mapping, save your workflow. Now, every time you upload a new PDF file to Google Drive, Pabbly Connect will automatically extract the census data and populate your Google Sheets, streamlining your market research process.


Conclusion

In conclusion, using Pabbly Connect to automate the extraction of census data from Google Drive to Google Sheets is a game-changer for market research. By leveraging the integration capabilities of Pabbly Connect, you can effortlessly streamline your data extraction process.

Ensure you check out Pabbly Connect to create business automation workflows and reduce manual tasks. Pabbly Connect currently offer integration with 2,000+ applications.

How to Create Personalized Coaching Plans Using Pabbly Connect and AI Agent

Learn how to automate personalized coaching plans using Pabbly Connect, Google Sheets, and AI Agent effectively. Step-by-step tutorial included. Implement the precise methodologies leading organizations use to automate repetitive tasks, illustrated with practical examples designed for immediate application.

Watch Step By Step Video Tutorial Below


1. Accessing Pabbly Connect for Personalized Coaching Plans

To begin creating personalized coaching plans, first access Pabbly Connect. Open your browser and type in ‘Pabbly.com/connect’. This will direct you to the landing page where you have options to sign in or sign up for free.

If you are a new user, you can sign up for free to explore the features of Pabbly Connect. Existing users can simply sign in to access their dashboard and begin the workflow creation process.


2. Creating a New Workflow in Pabbly Connect

Once logged into Pabbly Connect, click on the ‘Create Workflow’ button. You will be prompted to name your workflow and select a folder to save it in. For example, you might name it ‘How to Create Personalized Coaching Plans Using AI Agent’.

After naming your workflow, click on ‘Create’. You will be taken to the workflow window where you need to set up a trigger and actions. The trigger will initiate the workflow whenever specific data is added to Google Sheets.

  • Select Google Sheets as the trigger application.
  • Choose ‘New or Updated Spreadsheet Row’ as the trigger event.
  • Copy the provided webhook URL for future steps.

This setup allows Pabbly Connect to monitor your Google Sheets for new entries, automating the workflow effectively.


3. Linking Google Sheets with Pabbly Connect

To link Google Sheets with Pabbly Connect, you need to install the Pabbly Connect Webhooks add-on. Open your Google Sheets, navigate to Extensions, then Add-ons, and select ‘Get Add-ons’. Search for ‘Pabbly Connect Webhooks’ and install it.

After installation, refresh your Google Sheets. Then, go to Extensions, select Pabbly Connect Webhooks, and click on ‘Initial Setup’. Here, paste the webhook URL you copied earlier and set the trigger column as E, which will send data when new entries are made.

  • Paste the webhook URL in the setup.
  • Set the trigger column to E for final data entry.
  • Click submit to complete the setup.

With this, you have successfully connected Google Sheets to Pabbly Connect, enabling it to react to new entries automatically.


4. Generating Personalized Coaching Plans Using AI Agent

After setting up Google Sheets, the next step is to generate personalized coaching plans using an AI agent through Pabbly Connect. Select OpenAI as the action application and choose ‘ChatGPT’ as the action event.

You will need to connect your OpenAI account by adding an API key. Visit the OpenAI API key page, create a new secret key, and copy it into Pabbly Connect. Select the AI model (e.g., GPT-4) and enter your prompt to generate the coaching plan based on the client data from Google Sheets.

Map the client details from the trigger response. Click on ‘Save and Send Test Request’ to generate the plan. Review the generated content for accuracy.

This step allows you to automate the creation of personalized coaching plans, significantly reducing manual effort.


5. Documenting Coaching Plans in Google Docs

The final step is to document the generated coaching plans in Google Docs using Pabbly Connect. Select Google Docs as the action application and choose ‘Create a Blank Document’ as the action event.

Connect your Google Docs account, specify the document name (e.g., client name and plan), and save. Then, add another action step to append the generated content into the newly created document.

Select ‘Append a Paragraph to a Document’ as the action event. Map the document ID from the previous step. Insert the AI-generated content into the document.

This integration ensures that all personalized coaching plans are documented seamlessly, allowing easy access for review and sharing.


Conclusion

In this tutorial, we explored how to create personalized coaching plans using Pabbly Connect and an AI agent. By integrating Google Sheets, OpenAI, and Google Docs, you can automate the entire process, saving time and effort while enhancing the quality of your coaching services.

Ensure you check out Pabbly Connect to create business automation workflows and reduce manual tasks. Pabbly Connect currently offer integration with 2,000+ applications.

This workflow not only streamlines your operations but also allows for consistent and personalized client engagement. Start leveraging Pabbly Connect today to transform your coaching business!

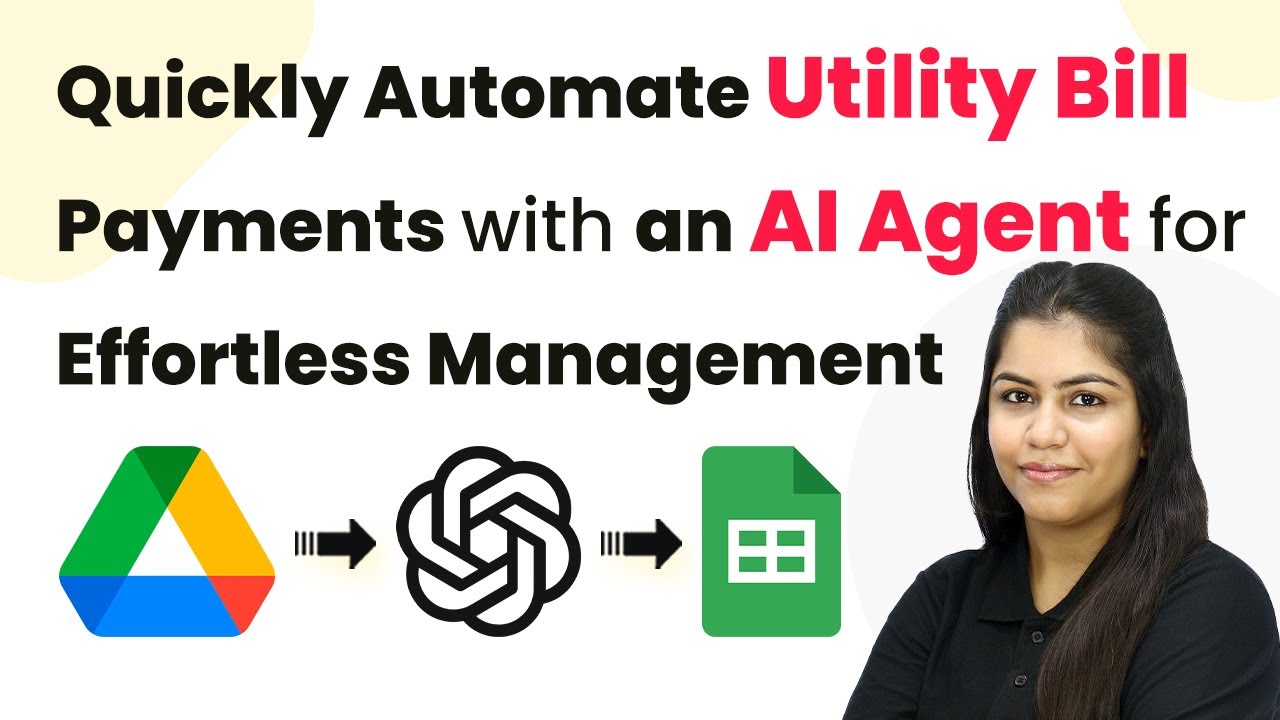
Automate Utility Bill Payments Effortlessly with Pabbly Connect

Learn how to automate utility bill payments using Pabbly Connect with an AI agent for seamless management. Follow this step-by-step guide! Navigate the automation landscape confidently with clear, structured guidance suitable for professionals regardless of prior technical experience.

Watch Step By Step Video Tutorial Below


1. Accessing Pabbly Connect for Automation

To automate utility bill payments, the first step is to access Pabbly Connect. Open your web browser and navigate to Pabbly.com/connect. This platform is essential for integrating various applications seamlessly.

Once on the Pabbly Connect landing page, you will see options to sign in or sign up. If you are a new user, click on ‘Sign up for free’ to create an account. Existing users should click on ‘Sign in’ to access their dashboard. This is where you will manage your automation workflows.


2. Creating Your Workflow in Pabbly Connect

After signing in, the next step involves creating a new workflow in Pabbly Connect. Click on the ‘Create Workflow’ button. You will then be prompted to name your workflow and select a folder to save it in. Name it something descriptive, like ‘Automating Utility Bill Payments with AI Agent’.

Once the workflow is created, you will enter the workflow window where triggers and actions are set. Triggers define when the workflow starts, while actions determine what happens next. For this automation, we will set Google Drive as the trigger application.

  • Click on ‘Select Trigger Application’ and search for Google Drive.
  • Choose ‘New File in Specific Folder’ as the trigger event.
  • Connect your Google Drive account to Pabbly Connect.

After setting up the trigger, ensure that you select the correct folder in Google Drive where your utility bills will be uploaded. This step is crucial for the automation to function correctly.


3. Extracting Bill Details Using AI Agent

Once the trigger is set, the next step is to extract the bill details using the AI agent integrated within Pabbly Connect. Select the action application as OpenAI. This AI will read the bill details from the uploaded PDF.

For the action event, choose ‘Extract Content from PDF/Image’. You will need to connect your OpenAI account to Pabbly Connect. Follow the prompts to enter your OpenAI API key. This key is necessary for the AI to function properly in extracting data.

  • Map the PDF URL from the previous step into the AI agent.
  • Enter a prompt like ‘Extract details from the given PDF’.
  • Generate a structured output JSON to define the data format.

After configuring the AI agent, run a test to ensure that it can successfully extract the required details from the PDF bill. This will confirm that your automation is working as intended.


4. Adding Extracted Data to Google Sheets

With the bill details extracted, the next step is to add this data to Google Sheets using Pabbly Connect. Select Google Sheets as your action application and choose ‘Add a New Row’ as the action event.

Connect your Google Sheets account by signing in and granting the necessary permissions. Once connected, select the spreadsheet and the specific sheet where you want to store the extracted bill details. This ensures that all your data is organized.

Map the extracted details like customer name, email, due date, and amount into the respective columns of your Google Sheet. Click ‘Save and Send Test Request’ to confirm the data is added successfully.

After saving the data, check your Google Sheet to verify that the information has been added correctly. This step finalizes the automation process, allowing for seamless tracking of utility bills.


5. Conclusion: Effortless Utility Bill Management with Pabbly Connect

In conclusion, automating utility bill payments using Pabbly Connect streamlines the process significantly. By integrating Google Drive, OpenAI, and Google Sheets, you can easily manage your bills without manual entry.

Ensure you check out Pabbly Connect to create business automation workflows and reduce manual tasks. Pabbly Connect currently offer integration with 2,000+ applications.

This automation not only saves time but also helps prevent missed payments by keeping all your bill details organized in one place. Start using Pabbly Connect today to enhance your utility bill management!


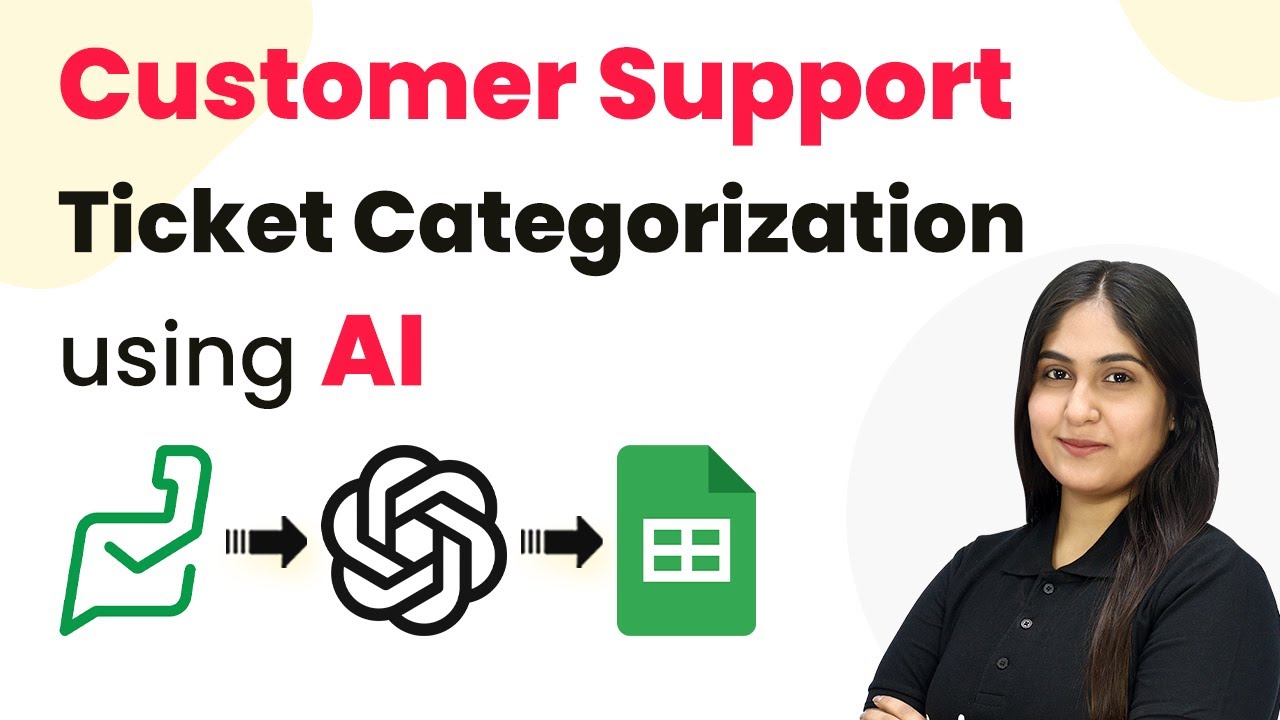
Automate Customer Support Ticket Categorization Using Pabbly Connect

Learn to automate customer support ticket categorization using Pabbly Connect with this step-by-step tutorial integrating Zoho Desk and Google Sheets. Eliminate manual repetitive tasks from your workflow. Discover proven automation methods with intuitive steps designed for efficiency-minded professionals.

Watch Step By Step Video Tutorial Below


1. Accessing Pabbly Connect for Automation

To automate customer support ticket categorization, the first step is accessing Pabbly Connect. Open your browser and go to pabby.com/connect. You will see options to sign in or sign up for a free account.

If you are a new user, click on ‘Sign Up Free’ to create an account and receive 300 tasks every month. Existing users should select ‘Sign In’. After logging in, you will be directed to the Pabbly Apps window where you can find Pabbly Connect.


2. Creating a Workflow in Pabbly Connect

Once logged into Pabbly Connect, click on the ‘Create Workflow’ button located at the top right corner. This will open a dialog box where you can name your workflow.

For this automation, name your workflow ‘Automate Customer Support Ticket Categorization Using AI’. Select an existing folder or create a new one to save your workflow. After naming, click on the ‘Create’ button to proceed.

  • Click on ‘Create Workflow’.
  • Provide a name for your workflow.
  • Select a folder to save the workflow.

Once the workflow is created, you’ll see the two main principles of automation: Trigger and Action. The trigger is the event that starts the workflow, while the action is what happens as a result of that trigger.


3. Setting Up Zoho Desk as the Trigger

To set up the trigger, select Zoho Desk as the trigger application in Pabbly Connect. Choose the trigger event as ‘New Ticket Created’. This allows the workflow to capture new support tickets as they come in.

Next, click on ‘Connect’ to establish a connection between your Zoho Desk account and Pabbly Connect. If you haven’t connected before, select ‘Add New Connection’. Input your Zoho Desk domain, which you can find in your Zoho Desk URL, and click ‘Save’.

  • Select Zoho Desk as the trigger application.
  • Choose the trigger event: New Ticket Created.
  • Connect your Zoho Desk account by entering the domain.

After setting this up, you will need to create a test ticket in Zoho Desk to see if the connection works properly. Once the ticket is created, Pabbly Connect will capture the details, confirming that the trigger is functioning as expected.


4. Integrating OpenAI for Ticket Categorization

After successfully capturing the ticket details, the next step is to integrate OpenAI into your workflow using Pabbly Connect. Select OpenAI as the action application and choose the action event as ‘Categorize Ticket’. This allows OpenAI to analyze the ticket content and categorize it accordingly.

To establish a connection, click on ‘Connect’ and select ‘Add New Connection’. You will need to input your OpenAI API key, which you can generate from your OpenAI account. Copy this key and paste it into Pabbly Connect to connect the two applications.

Select OpenAI as the action application. Choose the action event: Categorize Ticket. Enter your OpenAI API key to connect.

Once connected, you will set up a prompt for OpenAI, instructing it on how to categorize the tickets. Use the ticket message from the previous step as input for the AI model to process and categorize.


5. Finalizing Integration with Google Sheets

The final step in this automation is to log the categorized ticket details into Google Sheets using Pabbly Connect. Choose Google Sheets as the action application and select the action event ‘Add New Row’. This will create a new entry in your specified Google Sheet each time a ticket is categorized.

Connect your Google Sheets account by clicking ‘Connect’ and selecting ‘Add New Connection’. Sign in with your Google account and grant access to Pabbly Connect. Select the spreadsheet and sheet where you want to log the ticket details.

Choose Google Sheets as the action application. Select the action event: Add New Row. Map the ticket details to the appropriate columns in Google Sheets.

After mapping the necessary fields such as customer name, subject, and category, click ‘Save and Send Test Request’. This will verify if the integration is successful by adding a new row to your Google Sheets with the ticket details.


Conclusion

In this tutorial, we demonstrated how to automate customer support ticket categorization using Pabbly Connect. By integrating Zoho Desk, OpenAI, and Google Sheets, you can streamline your customer support process, saving time and enhancing efficiency.

Ensure you check out Pabbly Connect to create business automation workflows and reduce manual tasks. Pabbly Connect currently offer integration with 2,000+ applications.

With the steps outlined, you can replicate this automation to improve your support ticket handling. Utilizing Pabbly Connect ensures that all applications work seamlessly together, enhancing your operational workflow.