Automatically Send Discount Coupon Code to Customer on Shopify Order Cancellation using Pabbly Connect

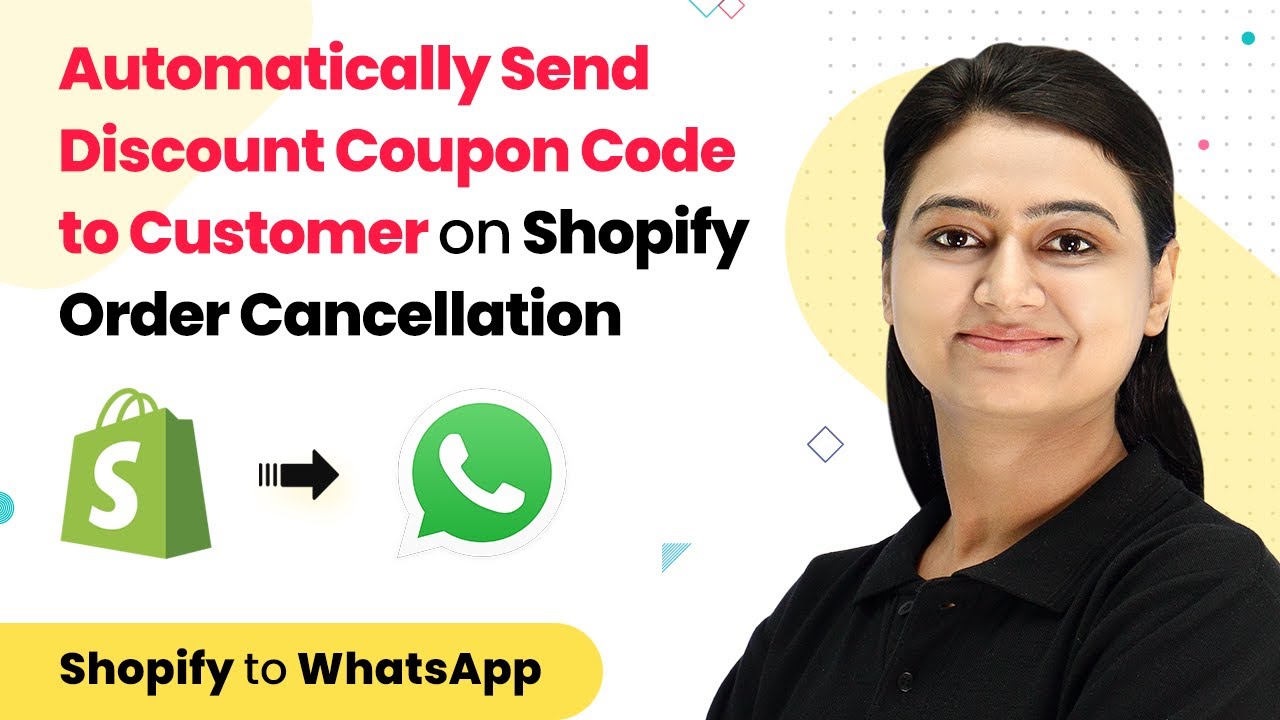
Learn how to automatically send discount coupon codes to customers on Shopify order cancellation using Pabbly Connect. Follow our step-by-step tutorial for seamless integration. Implement the precise methodologies leading organizations use to automate repetitive tasks, illustrated with practical examples designed for immediate application.

Watch Step By Step Video Tutorial Below


1. Setting Up Pabbly Connect for Shopify Integration

To automatically send discount coupon codes to customers when they cancel an order on Shopify, you need to set up Pabbly Connect. Begin by visiting the Pabbly website and signing in to your account. Once logged in, navigate to Pabbly Connect on the dashboard.

Click on the Create Workflow button at the top right corner. Name your workflow something descriptive, such as ‘Shopify to WhatsApp’. This naming helps you identify the workflow later. After naming, you will see two windows for setting up the trigger and action.


2. Creating the Trigger in Pabbly Connect

In the trigger application window, select Shopify. For the trigger event, choose Order Cancelled. This selection ensures that every time an order is cancelled, it triggers the automation process. Upon selection, a webhook URL will be generated.

  • Copy the generated webhook URL.
  • Proceed to your Shopify store settings.
  • Navigate to Settings > Notifications and scroll down to create a webhook.

Paste the copied webhook URL in the appropriate field for the order cancellation event. Save the settings to ensure the webhook is active. This step connects Pabbly Connect with your Shopify store, allowing it to listen for order cancellations.


3. Testing the Integration with a Dummy Order

After setting up the webhook, it’s crucial to test the integration. Place a dummy order in your Shopify store and then cancel it. This process will help verify if Pabbly Connect is receiving the cancellation data correctly.

To do this, go to the Orders section in Shopify, find your dummy order, and click on it. Select More Actions and then Cancel Order. Make sure to uncheck any refund boxes if you only want to cancel the order.

Once the order is cancelled, return to Pabbly Connect. You should see that it has received the response from Shopify, confirming the cancellation along with customer details. This successful connection is essential for the next steps of sending a discount code.


4. Creating the Discount Code with Pabbly Connect

Next, you will need to create a unique discount code for the cancelled order. In Pabbly Connect, add a new action step by selecting Shopify again and choose Create Discount Code. This action allows you to generate a discount code that will be sent to the customer.

  • Connect to your existing Shopify account.
  • Select the discount rules you previously set up in Shopify.
  • Map the discount code to include the cancellation date for uniqueness.

After mapping the necessary fields, save your settings. This discount code will be used in the WhatsApp message sent to the customer, ensuring they receive a personalized offer.


5. Sending the Discount Code via WhatsApp

Finally, set up the last action step in Pabbly Connect to send the discount code via WhatsApp. Choose WhatsApp Cloud API as the action application and select Send Template Message as the action event.

To configure this, you will need to enter your WhatsApp credentials, including the temporary access token and phone number ID. These can be found on the WhatsApp developer page. After entering the credentials, select the message template you created for order cancellations.

Ensure to map the customer’s name and the generated discount code into the message template. Once everything is set up, test the action to confirm that the message is sent successfully. This step finalizes the integration process using Pabbly Connect, providing a seamless customer experience.


Conclusion

By following these steps, you can effectively automate the process of sending discount coupon codes to customers upon order cancellation in Shopify using Pabbly Connect. This integration not only saves time but also enhances customer retention by encouraging future purchases.

Ensure you check out Pabbly Connect to create business automation workflows and reduce manual tasks. Pabbly Connect currently offer integration with 2,000+ applications.

Send Discord Channel Messages from Google Sheets with Custom Data Using Pabbly Connect

Learn how to send Discord channel messages from Google Sheets with custom data using Pabbly Connect in this step-by-step tutorial. Learn to create powerful connections between your critical applications without requiring specialized programming knowledge or extensive technical background.

Watch Step By Step Video Tutorial Below


1. Accessing Pabbly Connect for Integration

To send Discord channel messages from Google Sheets with custom data, you first need to access Pabbly Connect. Start by visiting the Pabbly website and signing in to your account. If you don’t have an account, you can easily create one for free.

Once logged in, navigate to the Pabbly Connect dashboard. Here, you will find the option to create a new workflow. Click on the ‘Create Workflow’ button, and give it a name such as ‘Google Sheets to Discord’. This sets the stage for the integration process.


2. Setting Up the Trigger with Google Sheets

In this step, you will set up the trigger for your workflow in Pabbly Connect. Select Google Sheets as your trigger application. For the trigger event, choose ‘New or Updated Spreadsheet Row’. This ensures that every time a row in Google Sheets is updated, a message will be sent to Discord.

  • Select Google Sheets as the trigger application.
  • Choose the trigger event: New or Updated Spreadsheet Row.
  • Copy the generated webhook URL for further use.

After copying the webhook URL, open your Google Sheets document. Go to the Extensions menu, select Pabbly Connect Webhooks, and click on Initial Setup. Paste the copied URL and set the trigger column, which should always be the last column of your sheet.


3. Sending Custom Data from Google Sheets

Next, you will configure the custom data that you want to send to Discord using Pabbly Connect. In Google Sheets, go back to Extensions, select Pabbly Connect Webhooks, and scroll down to the option for sending custom data. Here, you need to define the range of data you want to send.

  • Set the start range to A2 (the first data row).
  • Set the end range to D2 to include the desired columns.
  • Submit the setup to capture the specified data.

Once you have submitted the range, return to Pabbly Connect to check if the data has been received correctly. You should see that only the specified custom data fields, such as name, contact number, email, and message, are captured.


4. Configuring the Action to Send Messages to Discord

Now that you have the trigger set up, it’s time to configure the action in Pabbly Connect to send messages to Discord. Select Discord as the action application and choose the ‘Send Channel Message’ action event. This is where you will set up the webhook URL to connect to your Discord channel.

To get the webhook URL, go to your Discord server settings, navigate to Integrations, and create a new webhook. Copy the webhook URL and paste it back into Pabbly Connect. Map the message content from Google Sheets to the message field in Discord, customizing it as needed.


5. Testing the Integration for Success

The final step is to test the integration to ensure everything is working correctly. In Pabbly Connect, after setting up the action, click on ‘Save and Send Test Request’. This will send a test message to your Discord channel based on the data from Google Sheets.

Check your Discord channel to confirm that the message has been received. You should see a message indicating that the response has been recorded, confirming the successful integration of Google Sheets and Discord through Pabbly Connect.


Conclusion

This tutorial demonstrated how to send Discord channel messages from Google Sheets with custom data using Pabbly Connect. By following these steps, you can automate the process of sending messages, ensuring that only the necessary information is shared effortlessly.

Ensure you check out Pabbly Connect to create business automation workflows and reduce manual tasks. Pabbly Connect currently offer integration with 2,000+ applications.

Sync Salesforce Contacts to Google Contacts Using Pabbly Connect

Learn how to seamlessly sync Salesforce contacts to Google Contacts using Pabbly Connect in this step-by-step tutorial. Eliminate manual repetitive tasks from your workflow. Discover proven automation methods with intuitive steps designed for efficiency-minded professionals.

Watch Step By Step Video Tutorial Below


1. Accessing Pabbly Connect for Integration

To begin syncing Salesforce contacts to Google Contacts, first access Pabbly Connect. Open your browser and type in ‘Pabbly.com/connect’. This is the platform that will facilitate the integration between Salesforce and Google Contacts.

Once on the Pabbly Connect page, you can create a free account or log in if you already have one. With Pabbly Connect, you get 100 free tasks to test the automation process, making it easy to set up and evaluate the integration.


2. Creating a Workflow in Pabbly Connect

After logging into Pabbly Connect, click on the blue button to create a new workflow. Name your workflow something descriptive, like ‘Salesforce to Google Contacts Automation’, and click on create. This workflow will define the automation process between the two applications.

In the workflow setup, you will see two boxes labeled ‘Trigger’ and ‘Action’. The trigger is what starts the automation, and the action is what happens as a result. For this integration, select Salesforce as your trigger application and set the trigger event to ‘New Contact Created’.

  • Select Salesforce as the trigger application.
  • Choose ‘New Contact Created’ as the trigger event.

After configuring the trigger, click on connect and add a new connection to Salesforce. Authorize Pabbly Connect to access your Salesforce account, ensuring a secure connection for the automation.


3. Capturing Contact Data from Salesforce

Once the Salesforce connection is established, click on ‘Save and Send Test Request’ to verify the integration. This step fetches the most recent contact data created in Salesforce to ensure everything is working correctly. You will see the details of the new contact displayed in Pabbly Connect. using Pabbly Connect

For this example, create a dummy contact in Salesforce to test the integration. Go to Salesforce, click on ‘New Contact’, and fill in the necessary details. Save the contact and return to Pabbly Connect to check if the data has been captured successfully.

  • Create a dummy contact in Salesforce with details like name and email.
  • Verify that the contact data appears in Pabbly Connect.

If the contact details are visible in Pabbly Connect, it confirms that the Salesforce connection is functioning correctly. Now, you can proceed to the next step of adding this data to Google Contacts.


4. Adding Salesforce Contacts to Google Contacts

Next, you will configure the action step in Pabbly Connect to add the captured Salesforce contact to Google Contacts. Select Google Contacts as the action application and choose ‘Create Contact’ as the action event. using Pabbly Connect

Click on connect and authorize Pabbly Connect to access your Google Contacts account. Once connected, you will need to map the fields from the Salesforce data to the Google Contacts fields, ensuring that all necessary information is transferred accurately.

Map the first name and last name from Salesforce to Google Contacts. Ensure email and phone number fields are also filled correctly.

After mapping the fields, click on ‘Save and Send Test Request’ to test the action. Check your Google Contacts to verify that the new contact has been added successfully.


5. Completing the Automation Setup

After successfully adding the contact to Google Contacts, your automation is now complete. Pabbly Connect will automatically sync any new contacts created in Salesforce to Google Contacts without any further action required on your part. using Pabbly Connect

This seamless integration allows you to access your contacts easily from your phone or any device without having to log into Salesforce. Pabbly Connect ensures that your customer interactions are streamlined and efficient, enhancing your communication capabilities.

Once set up, you can rely on Pabbly Connect to handle the synchronization process, allowing you to focus on more important tasks while keeping your contact list up-to-date.


Conclusion

In this tutorial, we demonstrated how to sync Salesforce contacts to Google Contacts using Pabbly Connect. This integration simplifies contact management and enhances communication efficiency. Now, you can easily manage your customer interactions with minimal effort.

Ensure you check out Pabbly Connect to create business automation workflows and reduce manual tasks. Pabbly Connect currently offer integration with 2,000+ applications.

How to Integrate FreshBooks Customers with Salesforce Using Pabbly Connect

Learn how to integrate FreshBooks customers with Salesforce using Pabbly Connect. Follow our detailed step-by-step tutorial for seamless automation. Discover hidden automation capabilities within your existing tools. This guide shows you how to connect your essential applications and permanently eliminate redundant manual processes.

Watch Step By Step Video Tutorial Below


1. Understanding FreshBooks and Salesforce Integration with Pabbly Connect

To begin with, Pabbly Connect is an integration platform that connects FreshBooks, an accounting software, with Salesforce, a CRM application. The purpose of this integration is to automate the addition of new FreshBooks customers into Salesforce, ensuring that customer details are consistently updated across platforms.

This automation allows businesses to maintain effective communication with their customers by ensuring that whenever a new customer is added in FreshBooks, their details are automatically reflected in Salesforce. This eliminates manual data entry and enhances productivity.


2. Setting Up Pabbly Connect for Integration

To set up the integration, visit the Pabbly Connect website. If you are a new user, you can create an account by clicking on the ‘Sign Up for Free’ option. Existing users can simply click on ‘Sign In’ to access their accounts. Once logged in, navigate to the dashboard. using Pabbly Connect

  • Click on the plus sign to create a new workflow.
  • Name your workflow, for example, ‘FreshBooks to Salesforce Integration’.
  • Click on ‘Create’ to proceed.

After creating the workflow, you will see a trigger and action window. Pabbly Connect operates on a trigger-action mechanism, where the trigger is the event that starts the automation and the action is what happens as a result.


3. Configuring the Trigger Event in Pabbly Connect

In this step, you will configure the trigger event by selecting FreshBooks as the application. Choose the trigger event as ‘New Client’ to ensure that every time a new customer is added, it triggers the workflow. using Pabbly Connect

Next, click on ‘Connect’, then select ‘Add New Connection’ and authorize Pabbly Connect to access your FreshBooks account. Make sure you are logged into your FreshBooks account to facilitate this process. Once connected, you will see your account name automatically populated.

  • Click on ‘Save and Send Test Request’ to capture the response.
  • Create a test client in FreshBooks to verify the connection.

After creating the test client, return to Pabbly Connect and click on ‘Recapture Webhook Response’ to fetch the client details. This step is crucial to ensure all relevant information is captured for the next action.


4. Adding the Action Step to Create a Contact in Salesforce

Once the trigger is set up and the client details are captured, it’s time to add an action step. Choose Salesforce as the application and select ‘Create Contact’ as the action event. This will enable Pabbly Connect to automatically create a new contact in Salesforce whenever a new client is added in FreshBooks. using Pabbly Connect

Click on ‘Connect’ and authorize Pabbly Connect to access your Salesforce account. Similar to the previous step, you need to ensure that you allow Pabbly Connect the necessary permissions to create contacts in your Salesforce account.

Map the client details such as first name, last name, email, and phone number from FreshBooks to Salesforce. Select the lead source and any other relevant fields.

After mapping all necessary details, click on ‘Save and Send Test Request’ to finalize the action. This will create a new contact in Salesforce based on the information received from FreshBooks.


5. Verifying the Integration Works Seamlessly

To verify that the integration is working correctly, create another test client in your FreshBooks account. Enter the client details and save the new client. This action should automatically trigger the workflow in Pabbly Connect.

After saving the new client, check your Salesforce account to see if the new contact has been created. If the contact appears with all the correct details, it confirms that the integration is functioning as intended.

Ensure that all details are correctly mapped and displayed in Salesforce. Repeat the process to ensure reliability and consistency of the integration.

By following these steps, you can successfully automate the process of adding FreshBooks customers to Salesforce using Pabbly Connect. This integration not only saves time but also improves data accuracy across platforms.


Conclusion

In summary, using Pabbly Connect to integrate FreshBooks with Salesforce allows businesses to automate customer data management seamlessly. This integration enhances efficiency and ensures that customer information is always up-to-date across both platforms. By following the steps outlined in this tutorial, users can set up their workflows easily and enjoy the benefits of automation.

Ensure you check out Pabbly Connect to create business automation workflows and reduce manual tasks. Pabbly Connect currently offer integration with 2,000+ applications.

Automate Zoho Books Invoices from Shopify Orders Using Pabbly Connect

Learn how to create Zoho Books invoices from new Shopify orders automatically using Pabbly Connect. Step-by-step tutorial for seamless integration. Explore efficient methods for automating routine tasks with clear, concise instructions suited for both newcomers and experienced professionals.

Watch Step By Step Video Tutorial Below


1. Accessing Pabbly Connect for Integration

To create Zoho Books invoices from new Shopify orders, first access Pabbly Connect. This platform facilitates seamless integration between your Shopify store and Zoho Books without any coding knowledge.

Begin by navigating to Pabbly’s website. Once there, click on ‘Products’ and select ‘Pabbly Connect’. If you are a new user, click on ‘Sign up for free’ to create an account. For existing users, simply click ‘Sign in’ and access your dashboard.


2. Creating a Workflow in Pabbly Connect

After logging into Pabbly Connect, you will need to create a workflow. Click on the plus sign to create a new workflow and name it ‘Shopify to Zoho Books Integration’. This name helps identify the workflow easily.

In this workflow, you will set up a trigger and an action. The trigger will be a new order in Shopify, and the action will be creating an invoice in Zoho Books. This setup allows automatic invoice generation whenever a new order is placed.

  • Click on the plus sign to create a new workflow.
  • Name the workflow as ‘Shopify to Zoho Books Integration’.
  • Set the trigger as ‘New Order’ from Shopify.

Now that the workflow is set up, you can proceed to configure the trigger to listen for new orders from Shopify.


3. Setting the Trigger for New Shopify Orders

To set the trigger in Pabbly Connect, select the application as Shopify and the trigger event as ‘New Order’. This configuration allows Pabbly Connect to monitor your Shopify store for any new orders.

Once you select the trigger, Pabbly Connect will provide a webhook URL. Copy this URL and head over to your Shopify account. In Shopify, go to ‘Settings’ and then ‘Notifications’. Scroll down to find the ‘Webhooks’ section and click on ‘Create Webhook’.

  • Select ‘Order Creation’ as the event.
  • Paste the webhook URL copied from Pabbly Connect.
  • Choose ‘JSON’ as the format and save the webhook.

This webhook setup will ensure that every time a new order is placed, Shopify will send the order details to Pabbly Connect.


4. Capturing Order Details in Pabbly Connect

After setting up the webhook, it’s time to capture the order details in Pabbly Connect. Create a test order in your Shopify store to generate a sample webhook response. This response will contain all the necessary details of the order.

Once the order is placed, return to Pabbly Connect, where you will see the webhook response. This response includes customer details like name, email, and order items, which are crucial for creating the invoice in Zoho Books.

Confirm that the response includes customer name, email, and order details. Use these details to create a new invoice in Zoho Books.

With the order details captured, you can now proceed to check if the customer exists in Zoho Books.


5. Creating Invoices in Zoho Books

To create an invoice using Pabbly Connect, add an action step and select Zoho Books as the application. Choose the action event as ‘Create Invoice’. Connect your Zoho Books account by providing the necessary credentials.

Map the customer details retrieved from the webhook response into the invoice fields. This includes customer name, email, and order item details. After mapping all required fields, click on ‘Save and Send Test Request’ to create the invoice.

Once the invoice is created, you will receive a confirmation response from Zoho Books, indicating that the invoice has been successfully generated. You can check your Zoho Books account to verify that the invoice appears as expected.


Conclusion

By following these steps, you can automate the process of creating Zoho Books invoices from new Shopify orders using Pabbly Connect. This integration saves time and reduces manual errors, allowing you to focus on growing your business.

Ensure you check out Pabbly Connect to create business automation workflows and reduce manual tasks. Pabbly Connect currently offer integration with 2,000+ applications.

Utilizing Pabbly Connect for this integration not only simplifies your workflow but also enhances your overall efficiency in managing orders and invoices.

Automate WhatsApp Welcome Messages with Pabbly Connect and LeadSquared

Learn how to automate sending welcome messages on WhatsApp when a new lead is added in LeadSquared using Pabbly Connect. Step-by-step guide included. Navigate the automation landscape confidently with clear, structured guidance suitable for professionals regardless of prior technical experience.

Watch Step By Step Video Tutorial Below


1. Setting Up Pabbly Connect for LeadSquared Integration

To begin automating welcome messages on WhatsApp, access Pabbly Connect by visiting the official website. Create an account or log in if you already have one. Once logged in, you will be directed to the dashboard where you can create a new workflow.

Click on the ‘Create Workflow’ button and name it something descriptive like ‘LeadSquared to WhatsApp’. This will help you identify the workflow later. The workflow interface consists of two main sections: the trigger window and the action window, which are essential for setting up your automation.


2. Trigger Setup with LeadSquared in Pabbly Connect

In the trigger window, search for ‘LeadSquared’ as the app to connect. Select the trigger event as ‘New Lead’. This means that every time a new lead is added in LeadSquared, it will trigger the workflow in Pabbly Connect.

Once the trigger is set, a webhook URL will be generated. Copy this URL as it will be used to connect LeadSquared with Pabbly Connect. Now, navigate to your LeadSquared account, go to the settings, and select the API and Webhooks option. Create a new webhook and paste the copied URL into the appropriate field while ensuring the content type is set to application/json.


3. Generating a Test Lead in LeadSquared

After setting up the webhook, it’s time to generate a test lead in LeadSquared. Go to the leads section and click on ‘Quick Add Lead’. Fill in the details such as name, email address, and phone number. This step is crucial as it will allow Pabbly Connect to capture the lead data.

Once the lead is created, return to Pabbly Connect and click on ‘Recapture Webhook Response’. This will fetch the details of the newly added lead. You should see the lead’s information displayed in the response section of Pabbly Connect, confirming that the integration is working correctly.


4. Sending Messages via WhatsApp Cloud API

Next, we will set up the action to send a welcome message through WhatsApp Cloud API. In the action window of Pabbly Connect, search for ‘WhatsApp Cloud API’ and select the action event as ‘Send Template Message’. Connect your WhatsApp Cloud API account by entering the required details such as token ID, phone number ID, and WhatsApp Business Account ID.

After connecting, select the message template you want to use for the welcome message. Ensure that you have created and approved the template in your WhatsApp Cloud API account. This template will contain dynamic fields like the lead’s name, which will personalize the message sent to each new lead.

  • Select the appropriate template from the dropdown.
  • Map the recipient’s mobile number without the plus sign.
  • Fill in dynamic fields such as the lead’s name and organization name.

After mapping all the necessary fields, click on ‘Save and Send Test Request’ to send the message. Verify that the message is received on WhatsApp to confirm the setup is successful.


5. Testing the Automation in Real Time

To ensure that the automation is functioning correctly, add another test lead in your LeadSquared account. Repeat the previous steps to create a new lead and check if the welcome message is sent via WhatsApp. This real-time testing will confirm that Pabbly Connect is effectively linking LeadSquared with WhatsApp Cloud API.

After adding the new lead, check the WhatsApp account associated with the lead’s phone number. You should receive the automated welcome message as configured in your template. This process demonstrates how Pabbly Connect streamlines the communication between your CRM and WhatsApp.


Conclusion

In this tutorial, we’ve explored how to automate sending welcome messages on WhatsApp when a new lead is added in LeadSquared using Pabbly Connect. By following these steps, you can enhance your lead nurturing process and ensure timely communication with new leads.

Ensure you check out Pabbly Connect to create business automation workflows and reduce manual tasks. Pabbly Connect currently offer integration with 2,000+ applications.

Automate Google Forms Submissions to DocuSign with Pabbly Connect

Learn how to automate the process of sending documents from DocuSign upon receiving new Google Forms submissions using Pabbly Connect. Step-by-step tutorial included. Discover hidden automation capabilities within your existing tools. This guide shows you how to connect your essential applications and permanently eliminate redundant manual processes.

Watch Step By Step Video Tutorial Below


1. Accessing Pabbly Connect for Integration

To automate sending documents from DocuSign upon receiving new Google Forms submissions, start by accessing Pabbly Connect. Visit the Pabbly Connect dashboard by searching for ‘Pabbly.com/connect’ in your browser. If you don’t have an account, click on ‘Sign Up Free’ to create one, or log in if you already have an account.

Once logged in, click on ‘Create Workflow’ and name your workflow, for example, ‘Google Forms to DocuSign’. This sets up the automation process that will allow Pabbly Connect to manage the integration between Google Forms and DocuSign.


2. Setting Up Google Forms Trigger in Pabbly Connect

After naming your workflow, the next step is to set the trigger in Pabbly Connect. In the trigger window, select ‘Google Forms’ as the app and choose the event ‘New Response Received’. This action will notify Pabbly Connect whenever a new submission is made in your Google Form.

  • Select Google Forms as the application.
  • Choose ‘New Response Received’ as the event.
  • Copy the webhook URL provided by Pabbly Connect.

Next, go to your Google Form, navigate to the ‘Responses’ tab, and click on the spreadsheet icon to create a new Google Sheet for the responses. This spreadsheet will store the form submission data, which Pabbly Connect will use to send documents via DocuSign.


3. Linking Google Sheets to Pabbly Connect

To connect your Google Sheets with Pabbly Connect, install the Pabbly Connect Webhooks add-on from the Google Workspace Marketplace. Once installed, refresh your Google Sheet and go to ‘Extensions’, select ‘Pabbly Connect Webhooks’, and click on ‘Initial Setup’. Here, you will need to paste the webhook URL you copied earlier.

  • Select the sheet that contains the form responses.
  • Paste the webhook URL in the designated field.
  • Set the trigger column to the last data entry column in your sheet.

After completing these steps, click on ‘Submit’ and then select ‘Send on Event’ from the same Pabbly Connect Webhooks menu. This will allow Pabbly Connect to send data to the webhook every time a new row is added, effectively linking Google Forms submissions to DocuSign automation.


4. Sending Documents from DocuSign Using Pabbly Connect

With the Google Forms and Google Sheets integration set up, the next step is to configure DocuSign within Pabbly Connect. In the action window, select ‘DocuSign’ as the app and choose ‘Create Signature Request with Template’ as the action event. This action will send a document to the user who submitted the form.

Click on ‘Connect’, then select ‘Add New Connection’. Log in to your DocuSign account, allowing Pabbly Connect to access your documents. Once connected, select your document template from the dropdown menu, fill in the email subject and recipient details, and map the user’s name and email from the Google Forms submission data.


5. Testing the Integration and Final Steps

To ensure everything is working correctly, submit a test entry in your Google Form. This will trigger the entire workflow set up in Pabbly Connect. Check the responses in Pabbly Connect to confirm that it received the correct data from the form submission.

Finally, verify that the document was sent to the recipient’s email address as intended. If successful, you will see the document in their inbox, ready for signature. This entire process showcases how Pabbly Connect automates sending documents from DocuSign based on Google Forms submissions, streamlining your workflow efficiently.


Conclusion

In this tutorial, we explored how to automate sending documents from DocuSign upon receiving new submissions from Google Forms using Pabbly Connect. This integration simplifies the process, saving time and effort while ensuring documents are sent promptly for signatures.

Ensure you check out Pabbly Connect to create business automation workflows and reduce manual tasks. Pabbly Connect currently offer integration with 2,000+ applications.

How to Enroll Users in Specific Courses via Razorpay with Pabbly Connect

Learn how to automate user enrollment in specific courses selected on Razorpay Payment Page using Pabbly Connect. Follow our step-by-step tutorial for seamless integration. Eliminate manual repetitive tasks from your workflow. Discover proven automation methods with intuitive steps designed for efficiency-minded professionals.

Watch Step By Step Video Tutorial Below


1. Accessing Pabbly Connect for Integration

To start integrating Razorpay with course enrollment using Pabbly Connect, first visit the Pabbly Connect dashboard. You can access it by searching for ‘Pabbly.com/connect’ in your browser. If you don’t have an account, sign up for free in just two minutes.

Once logged in, click on ‘Create Workflow’ to begin. Name your workflow, for instance, ‘Razorpay to Graphy’. This sets up the environment where you will automate the enrollment process based on the payment received through Razorpay.


2. Setting Up the Trigger with Razorpay

In this section, you will set up a trigger to capture payment details from Razorpay using Pabbly Connect. In the trigger window, choose Razorpay as your app, and select ‘Payment Captured’ as the trigger event. This allows Pabbly Connect to react whenever a payment is successfully made.

  • Select Razorpay from the app list.
  • Choose ‘Payment Captured’ as the trigger event.
  • Copy the webhook URL provided by Pabbly Connect.

Next, go to your Razorpay account settings and navigate to the webhook section. Here, paste the copied webhook URL and set the active event to ‘payment.captured’. This connects Razorpay with Pabbly Connect, allowing it to send payment data automatically.


3. Capturing Payment Details in Pabbly Connect

After setting up the webhook, Pabbly Connect will wait for a payment response from Razorpay. To test this, make a sample payment through your Razorpay payment page. Ensure you enter all required details, including the course name.

Upon successful payment, Pabbly Connect will capture the payment details, including customer information and the course selected. You will see this data reflected in the trigger window, confirming that the integration is working correctly.

  • Verify that the payment amount and details are accurate.
  • Check for customer details such as name, email, and selected course.
  • Ensure the payment status reflects as successful.

This step is crucial as it ensures that Pabbly Connect is receiving the right information from Razorpay, which will be used for the next action in your workflow.


4. Adding the Customer to Graphy

Now that you have captured the payment details, the next step is to add the customer as a learner in your Graphy account using Pabbly Connect. In the action window, select Graphy as your app and choose ‘Create Learner’ as the action event.

You will need to connect your Graphy account by entering the API key and subdomain. This information can be found in your Graphy account under integrations. Once connected, map the customer details captured from Razorpay to the respective fields in Graphy, such as email and full name.


5. Enrolling the User in the Selected Course

After successfully adding the customer to Graphy, you will now enroll them in the specific course they selected during payment. Use Pabbly Connect to create a router in your workflow, allowing you to handle multiple course enrollments based on the user’s selection.

Set up conditions for each course (e.g., PHP for Beginners and React.js). For each route, map the course name to the respective action in Graphy, ensuring the user is enrolled in the correct course based on their payment selection.

Finally, test the automation by making another payment with a different course selection. Verify that the user is enrolled in the correct course in Graphy, confirming that the entire workflow is functioning as intended.


Conclusion

Using Pabbly Connect, you can automate the process of enrolling users in specific courses based on their selections on the Razorpay payment page. This integration streamlines the workflow, saving time and reducing manual errors.

Ensure you check out Pabbly Connect to create business automation workflows and reduce manual tasks. Pabbly Connect currently offer integration with 2,000+ applications.

By following the steps outlined in this tutorial, you can efficiently manage course enrollments and enhance the user experience for your learners.

Integrate Mailchimp with Discord Using Pabbly Connect: A Step-by-Step Guide

Learn how to integrate Mailchimp with Discord using Pabbly Connect to send new subscriber details automatically. Follow our detailed tutorial for seamless automation. Master proven automation processes with practical implementation examples and strategic recommendations you can apply immediately in your workflow.

Watch Step By Step Video Tutorial Below


1. Accessing Pabbly Connect for Integration

To start the integration process, you first need to access Pabbly Connect. Simply open your web browser and navigate to the Pabbly Connect dashboard by visiting Pabbly.com/connect. If you do not have an account, click on ‘Sign Up Free’ to create one in just a few minutes. For existing users, click ‘Sign In’ to access your account.

Once you are logged into your Pabbly Connect account, you will see the dashboard. From here, you can create a new workflow by clicking on the ‘Create Workflow’ button. You can name your workflow something like ‘Mailchimp to Discord’ to easily identify it later. This setup will allow you to automate the process of sending new Mailchimp subscriber details to your Discord channel.


2. Setting Up Mailchimp Trigger in Pabbly Connect

In your newly created workflow, you will see two windows: the trigger window and the action window. The first step is to set up the trigger for new subscribers in Mailchimp. In the trigger window, search for ‘Mailchimp’ and select it. Then, choose the trigger event as ‘New Subscriber’. This means that every time a new subscriber is added to your Mailchimp account, Pabbly Connect will trigger an action. using Pabbly Connect

  • Search for Mailchimp in the trigger app.
  • Select the trigger event as New Subscriber.
  • Copy the webhook URL provided by Pabbly Connect.

After copying the webhook URL, go to your Mailchimp account. Navigate to the audience dashboard and select ‘Manage Audience’ followed by ‘Settings’. In the settings page, scroll down to find the ‘Webhooks’ option and click on it. Here, you can create a new webhook by pasting the copied URL and selecting the type of updates you want to receive. Make sure to select ‘Subscribers’ and uncheck all other options to ensure that only new subscriber updates are sent to Pabbly Connect.


3. Capturing New Subscriber Data in Pabbly Connect

Once you have set up the webhook in Mailchimp, it’s time to test the connection. Go back to your Pabbly Connect workflow and click on the ‘Recapture Webhook Response’ button. This will allow Pabbly Connect to listen for new subscriber data from Mailchimp. To test this, you need to add a new subscriber in your Mailchimp account.

  • Add a new contact in Mailchimp as a subscriber.
  • Enter the subscriber’s name, email, and other details.
  • Click ‘Subscribe’ to save the new subscriber.

After adding the subscriber, return to your Pabbly Connect workflow. You should see that Pabbly Connect has received the subscriber’s details, including their name, email address, and any other information you entered. This confirms that the connection between Mailchimp and Pabbly Connect is working correctly.


4. Sending New Subscriber Details to Discord

The next step is to send the captured subscriber details to your Discord channel. In the action window of your Pabbly Connect workflow, search for ‘Discord’ and select it. For the action event, choose ‘Send Channel Message’. You will need to connect your Discord account by providing a webhook URL that you will create in Discord.

Open your Discord server and navigate to the channel settings. Create a new webhook and copy the webhook URL. Paste the Discord webhook URL in Pabbly Connect.

After setting the webhook, you can customize the message that will be sent to your Discord channel. For example, you can set the message to say, ‘Hello team, we have added a new subscriber in our Mailchimp account’ followed by the subscriber’s details. Map the fields from the Mailchimp response to include the name, email, and phone number of the subscriber in the message.


5. Testing the Automation Workflow

To ensure everything is set up correctly, you will want to test the entire workflow. After mapping the necessary fields and customizing your message in the Discord action, click on ‘Save and Send Test Request’ in Pabbly Connect. If everything is configured properly, you should receive a response indicating that the message was sent successfully. using Pabbly Connect

Now, head over to your Discord channel to check if the message appears. You should see the message you configured, displaying the new subscriber’s details. This confirms that your automation is functioning as intended, allowing you to receive notifications of new subscribers directly in your Discord channel.

With this setup, every time a new subscriber is added to your Mailchimp account, their details will automatically be sent to your Discord channel, streamlining your communication process and keeping your team informed.


Conclusion

In this tutorial, we demonstrated how to use Pabbly Connect to seamlessly integrate Mailchimp with Discord. By following these steps, you can automate the process of sending new subscriber details to your Discord channel, improving team communication and efficiency. Leverage the power of Pabbly Connect for your automation needs and enhance your workflow today!

Ensure you check out Pabbly Connect to create business automation workflows and reduce manual tasks. Pabbly Connect currently offer integration with 2,000+ applications.

Integrate Shopify with Google Sheets Using Pabbly Connect

Learn how to automatically add product details from Shopify to Google Sheets using Pabbly Connect. Follow this step-by-step tutorial for seamless integration. Revolutionize your productivity approach with just a few strategic clicks. Uncover professional methods for connecting applications and creating workflows that reclaim hours of your week.

Watch Step By Step Video Tutorial Below


1. Access Pabbly Connect for Shopify and Google Sheets Integration

To start integrating Shopify with Google Sheets, you need to access Pabbly Connect. First, visit the Pabbly website and sign in to your account. If you don’t have an account, you can sign up for free. Once signed in, navigate to the Pabbly Connect dashboard.

Here, you will find the option to create a new workflow. Click on the ‘Create Workflow’ button, and name your workflow. For this tutorial, let’s name it ‘Shopify to Google Sheets’. This naming helps in identifying the workflow later.


2. Setting Up the Trigger Event in Pabbly Connect

The next step involves setting up the trigger event in Pabbly Connect. Choose Shopify as the trigger application. For the trigger event, select ‘Product Updated’. This option ensures that every time a product is updated in Shopify, the details will be captured.

  • Select Shopify as the trigger application.
  • Choose ‘Product Updated’ as the trigger event.
  • Copy the generated webhook URL provided by Pabbly Connect.

After copying the webhook URL, you need to set it in your Shopify account. This URL will connect Shopify to Pabbly Connect, allowing it to receive updates whenever a product is modified.


3. Configuring the Webhook in Shopify

Now, navigate to your Shopify dashboard to configure the webhook. Click on ‘Settings’ at the bottom left corner, then select ‘Notifications’. Scroll down to find the ‘Create Webhook’ section. Here, choose the event as ‘Product Update’ and paste the webhook URL you copied from Pabbly Connect.

Make sure to leave the format as JSON and select the latest API version. Once done, click on ‘Save’. You should see a confirmation message indicating that the webhook has been saved successfully.


4. Testing the Integration Between Shopify and Google Sheets

To ensure that the integration works correctly, you need to test it. Go back to your Shopify dashboard and update a product. For instance, you can create or modify a product, such as adding an air conditioner with a specific price.

After saving the product, return to Pabbly Connect to check if it captures the response. You should see the details of the product, including the title and price, successfully retrieved from Shopify.

  • Confirm that the product details are captured in Pabbly Connect.
  • If successful, proceed to set up the action event.

This step verifies that Pabbly Connect is receiving updates from Shopify, which is crucial for the next steps.


5. Adding Product Details to Google Sheets

In this final step, you will set up the action event to add the product details to Google Sheets. Select Google Sheets as the action application in Pabbly Connect. Choose the action event as ‘Add New Row’. This ensures that each time a product is updated, a new row will be added to your specified Google Sheets document.

Next, connect your Google Sheets account and grant the necessary permissions. After connecting, select the spreadsheet where you want the product details to be added. Map the fields such as the product title and price to the respective columns in your Google Sheets.

Finally, save the configuration and send a test request. Check your Google Sheets to confirm that the product details have been successfully added as a new row, indicating that the integration is complete.


Conclusion

In this tutorial, we demonstrated how to integrate Shopify with Google Sheets using Pabbly Connect. By following these steps, you can automate the process of updating product details in Google Sheets whenever a product is modified in Shopify. This integration streamlines your workflow and saves time, allowing you to focus on other aspects of your business.

Ensure you check out Pabbly Connect to create business automation workflows and reduce manual tasks. Pabbly Connect currently offer integration with 2,000+ applications.