Create Google Calendar Events Automatically from MS Excel Using Pabbly Connect

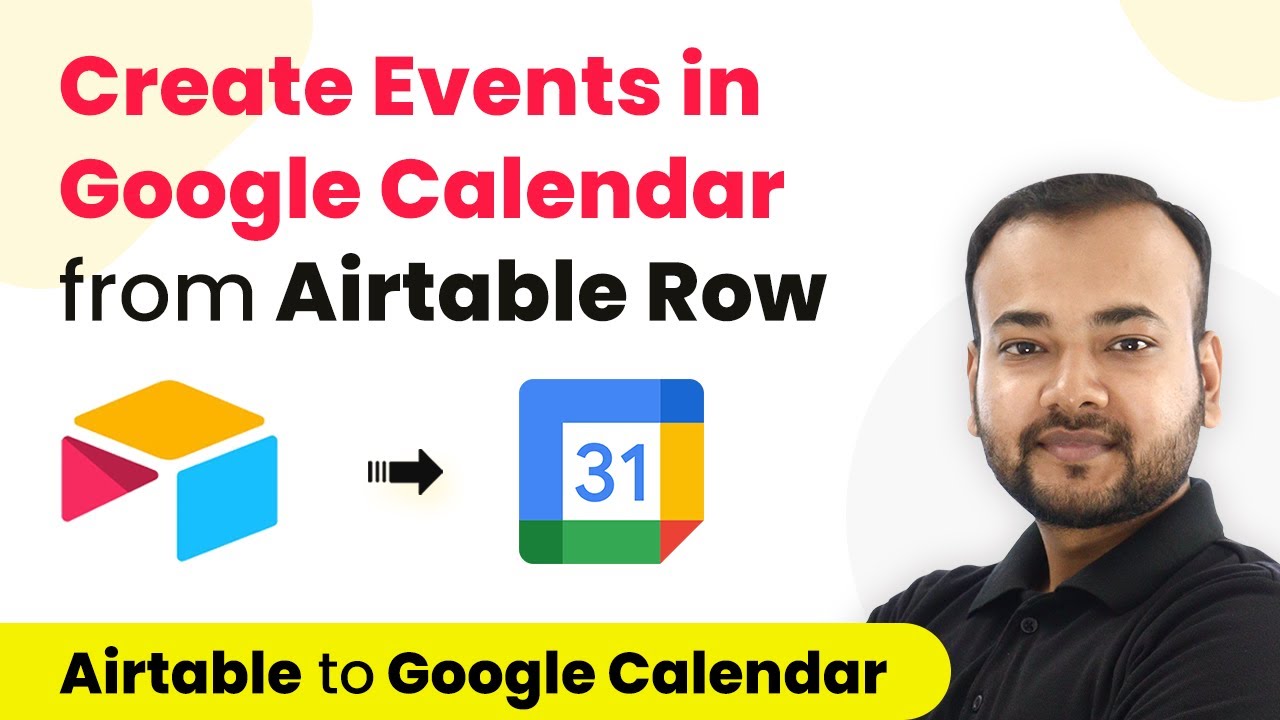
Learn how to use Pabbly Connect to automatically create Google Calendar events whenever a new row is added in MS Excel. Step-by-step tutorial included. Master proven automation processes with practical implementation examples and strategic recommendations you can apply immediately in your workflow.

Watch Step By Step Video Tutorial Below


1. Setting Up Pabbly Connect for Automation

To create events in Google Calendar whenever a new row is added in MS Excel, you will first need to set up Pabbly Connect. Start by visiting the Pabbly Connect website and signing up for a free account. This allows you to access the automation tools necessary for this integration.

Once you have signed up, log in to your Pabbly Connect dashboard. Click on the ‘Create Workflow’ button to begin. You can name your workflow something like ‘Google Calendar Events from MS Excel’. This naming will help you identify the workflow later on.


2. Connecting MS Excel as the Trigger Application

In this step, you will connect Microsoft Excel as the trigger application in Pabbly Connect. Click on the trigger module and search for ‘Microsoft Excel’. Select it and choose the trigger event as ‘New Row in Worksheet’. This means that whenever a new row is added in your specified Excel sheet, the workflow will be triggered.

  • Select ‘Microsoft Excel’ as the trigger application.
  • Choose ‘New Row in Worksheet’ as the trigger event.
  • Click ‘Connect’ and authorize Pabbly Connect to access your Excel account.

After connecting, choose the specific workbook where you will be adding new rows. This setup ensures that any new data entered in the selected Excel sheet will automatically initiate the workflow in Pabbly Connect.


3. Setting Up Google Calendar as the Action Application

Next, you will set Google Calendar as the action application in your Pabbly Connect workflow. Search for ‘Google Calendar’ in the action step and select it. Choose the action event ‘Create Event’. This action will create a new event in Google Calendar based on the data from the new row added in Excel.

Click on the ‘Connect’ button to link your Google Calendar account. You will need to authorize Pabbly Connect to access your Google Calendar. After successful authorization, specify the calendar where you want the events to be created.


4. Mapping Data from Excel to Google Calendar

In this step, you will map the data from your Excel sheet to the fields required for creating an event in Google Calendar using Pabbly Connect. You will need to map fields such as event title, description, start time, and end time. Make sure the data format matches what Google Calendar requires.

  • Map the event title from the Excel row.
  • Map the event description and any guest emails.
  • Specify the start and end times, ensuring they are in the correct format.

Once the data is mapped, click ‘Save and Send Test Request’. This will test the integration and create a new event in Google Calendar based on the data from the Excel sheet. Make sure to check if the event appears correctly in your Google Calendar.


5. Finalizing Your Automation Workflow

After successfully mapping the data and testing the workflow, your automation is nearly complete. The last step is to ensure that everything is working as intended. You can add new rows in your Excel sheet and verify that events are created automatically in Google Calendar.

Once everything is set up, you won’t need to interact with the workflow again. Just continue adding events in your Excel sheet, and Pabbly Connect will handle the rest, creating calendar events automatically.


Conclusion

In this tutorial, you learned how to use Pabbly Connect to create Google Calendar events automatically whenever a new row is added in MS Excel. This integration streamlines your workflow and saves time by automating event creation. Start using Pabbly Connect today to enhance your productivity!

Ensure you check out Pabbly Connect to create business automation workflows and reduce manual tasks. Pabbly Connect currently offer integration with 2,000+ applications.

Automate Your Event Ticketing System with Pabbly Connect

Learn how to automate your event ticketing system using Pabbly Connect with Microsoft Excel, Google Docs, Gmail, and more. Follow our step-by-step tutorial! Explore systematic approaches to creating efficient automation solutions that convert technical concepts into practical, implementable instructions.

Watch Step By Step Video Tutorial Below


1. Setting Up Pabbly Connect for Event Ticketing

To automate your event ticketing system, the first step is to access Pabbly Connect. This platform allows you to seamlessly integrate various applications to streamline your workflow.

Start by creating a free account on the Pabbly Connect landing page. After signing up, log in to your dashboard, where you can create a new workflow for your event ticketing system. Click on the ‘Create Workflow’ button, name it ‘Event Ticketing System’, and click ‘Create’ to proceed.


2. Integrating Microsoft Excel with Pabbly Connect

In this step, you will set Microsoft Excel as the trigger application in Pabbly Connect. This means that when a new entry is added to your Excel sheet, it will trigger the workflow.

  • Select ‘Microsoft Excel’ as your trigger application.
  • Choose the trigger event ‘New Row in Worksheet’.
  • Connect your Microsoft Excel account by clicking ‘Connect’.

Once connected, specify the workbook and worksheet names. This setup allows Pabbly Connect to check for new entries every eight hours, triggering the automation to create tickets when new data is added.


3. Creating Tickets with Google Docs through Pabbly Connect

After setting up Microsoft Excel, the next step is to create tickets using Google Docs. This process is initiated by the data captured from your Excel sheet via Pabbly Connect.

To create tickets, you need to have a template ready in Google Docs. Use the ‘Create Document from Template’ action in Pabbly Connect and connect your Google Docs account. Map the necessary fields such as customer name, email, row number, and seat number to the corresponding placeholders in your template.

  • Select your ticket template in Google Docs.
  • Map the customer details from the Excel trigger to the template fields.
  • Save and send the test request to generate the ticket.

Once the ticket is created, it will be saved in your specified Google Drive folder, ready for distribution.


4. Generating QR Codes for Tickets Using Pabbly Connect

To enhance your tickets, you can generate QR codes using the QR.io application integrated with Pabbly Connect. This QR code can be embedded in the ticket for easy access.

In your workflow, add a new action step to generate a QR code. Connect your QR.io account and provide the necessary API key. Specify the data to be encoded in the QR code, such as the event URL, and click ‘Save and Send Test Request’ to generate the QR code.

Map the QR code image URL to your ticket document. Insert the QR code into the ticket document using Google Docs integration. Ensure the QR code is positioned correctly in the ticket layout.

This integration allows each ticket to have a unique QR code, enhancing the ticketing experience and ensuring easy access for attendees.


5. Sharing Tickets via Gmail with Pabbly Connect

The final step in automating your event ticketing system is to share the generated tickets via email using Gmail, facilitated by Pabbly Connect.

To do this, add Gmail as an action step in your workflow. Connect your Gmail account and specify the recipient’s email address, which can be mapped from the Excel trigger. Customize the email content, including the subject and body, and attach the generated ticket file.

Map the customer’s email address from the Excel data. Attach the ticket PDF link to the email. Send the email and verify the ticket delivery.

With this setup, tickets are automatically sent to customers as soon as they are generated, simplifying the ticketing process.


Conclusion

In conclusion, automating your event ticketing system using Pabbly Connect streamlines the process of ticket creation and distribution. By integrating Microsoft Excel, Google Docs, and Gmail, you can efficiently manage ticketing without manual intervention. This automation enhances customer experience and ensures timely delivery of tickets.

Ensure you check out Pabbly Connect to create business automation workflows and reduce manual tasks. Pabbly Connect currently offer integration with 2,000+ applications.

Integrate Jotform Submissions to Excel Spreadsheet Using Pabbly Connect

Learn how to seamlessly integrate Jotform submissions into your Excel spreadsheet using Pabbly Connect with this step-by-step tutorial. Navigate the automation landscape confidently with clear, structured guidance suitable for professionals regardless of prior technical experience.

Watch Step By Step Video Tutorial Below


1. Accessing Pabbly Connect for Jotform to Excel Integration

To integrate Jotform submissions with your Excel spreadsheet, first access Pabbly Connect. Visit the Pabbly website and navigate to the Pabbly Connect product page. If you are a new user, click on the ‘Sign up for free’ button to create your account. Existing users can simply sign in to their accounts.

Once logged in, you will be directed to the Pabbly Connect dashboard. Here, click on the plus sign to create a new workflow. Name your workflow something descriptive, like ‘Jotform to MS Excel Integration’. After naming your workflow, click on the ‘Create’ button to proceed.


2. Setting Up Jotform as the Trigger in Pabbly Connect

In this step, you will set up Jotform as the trigger application in Pabbly Connect. Select Jotform from the list of applications and choose the trigger event as ‘New Response’. This event will activate whenever a new form submission is made.

  • Choose ‘New Response’ as the trigger event.
  • Copy the webhook URL provided by Pabbly Connect.
  • Navigate to your Jotform account and edit the form you want to connect.

In the Jotform settings, find the Integrations option and search for ‘Webhooks’. Paste the copied webhook URL and complete the integration. This setup allows Jotform to send submission data directly to Pabbly Connect whenever a form is filled out.


3. Testing the Jotform Integration with Pabbly Connect

After setting up the Jotform trigger, it’s essential to test the integration to ensure data is flowing correctly. Fill out the Jotform you integrated with sample data to generate a submission. Once submitted, return to Pabbly Connect to see if the response is captured.

Check the response section in Pabbly Connect. You should see the details of the form submission, including fields like first name, last name, email address, and phone number. This confirms that Jotform is successfully sending data to Pabbly Connect.


4. Connecting Excel to Pabbly Connect for Data Entry

Next, you will connect Microsoft Excel as the action application in Pabbly Connect. Select Microsoft Excel from the application list and choose the action event as ‘Add Row to Worksheet’. This action will add a new row in your specified Excel spreadsheet whenever a new Jotform submission is received.

  • Click on ‘Connect’ and then ‘Add New Connection’.
  • Authorize Pabbly Connect to access your Microsoft Excel account.
  • Select the workbook and worksheet where you want the data to be stored.

After authorizing and selecting the correct workbook, map the fields from the Jotform response to the corresponding columns in your Excel worksheet. This mapping ensures that the data is accurately entered into the right fields.


5. Finalizing the Integration and Testing

With both Jotform and Excel connected through Pabbly Connect, it’s time to finalize the integration. Click on ‘Save and Send Test Request’ to check if the data is being added to your Excel spreadsheet correctly. Refresh your Excel worksheet to see the new row populated with the test submission data.

Once confirmed, save your workflow in Pabbly Connect. This automation is now set up, meaning every new Jotform submission will automatically populate your Excel spreadsheet without any manual effort. You can repeat this test with additional submissions to ensure everything functions as intended.


Conclusion

Integrating Jotform submissions with your Excel spreadsheet using Pabbly Connect streamlines data management significantly. This automation allows you to capture form responses directly into your spreadsheet, enhancing efficiency and reducing manual entry errors. Follow the steps outlined in this tutorial for seamless integration.

Ensure you check out Pabbly Connect to create business automation workflows and reduce manual tasks. Pabbly Connect currently offer integration with 2,000+ applications.

Automate Emails to Disqualified Candidates Using Pabbly Connect

Learn how to send automated emails to disqualified candidates using Pabbly Connect. Follow this step-by-step tutorial to set up MySQL to Gmail integration effortlessly. Navigate the automation landscape confidently with clear, structured guidance suitable for professionals regardless of prior technical experience.

Watch Step By Step Video Tutorial Below


1. Accessing Pabbly Connect for Automation

To automate emails to disqualified candidates, the first step is to access Pabbly Connect. Start by typing Pabbly.com in your browser. Here, you can navigate to the products section and select Pabbly Connect.

If you are a new user, click on the ‘Sign Up for Free’ button to create an account within minutes. Existing users can simply sign in. Once logged in, click on the ‘+ Create Workflow’ button to initiate your automation process.


2. Creating a Workflow in Pabbly Connect

After accessing your dashboard in Pabbly Connect, the next step is to create a workflow. Name your workflow, for instance, ‘Send Automated Emails to Disqualified Candidates,’ and click on the ‘Create’ button to proceed.

  • Select MySQL as the trigger application.
  • Choose ‘New Row in Table’ as the trigger event.
  • Connect your MySQL database by entering the required credentials.

Once you have set up the trigger, Pabbly Connect will monitor your MySQL database for new entries, specifically focusing on candidates marked as disqualified.


3. Integrating MySQL with Gmail via Pabbly Connect

Following the creation of your workflow, the next step is to integrate MySQL with Gmail through Pabbly Connect. This integration allows automatic email notifications to disqualified candidates.

After establishing your MySQL connection, select the relevant table that contains candidate data. Ensure you set a unique identifier for the candidates, such as ‘Candidate ID’, to accurately track entries.

  • Fill in the database username, password, host, and port.
  • Choose the table where candidate details are stored.
  • Select the unique column to track updates.

Once configured, Pabbly Connect will pull data from MySQL, allowing you to send emails based on the candidate’s status.


4. Sending Automated Emails to Disqualified Candidates

To send emails to disqualified candidates, navigate to the action step in Pabbly Connect and select Gmail as the application. Choose ‘Send Email’ as the action event.

Connect your Gmail account by clicking on ‘Add New Connection’ and follow the prompts to authorize access. Once connected, you will need to fill out the email details, including the recipient’s address, subject, and message body.

Map the recipient’s email address from the MySQL data. Draft a personalized email content thanking the candidate for their application. Test the email sending process to ensure functionality.

After sending a test email, check the recipient’s inbox to confirm that the email was received successfully. This ensures that your integration is working as intended.


5. Filtering Candidates for Email Notifications

To ensure that only disqualified candidates receive emails, set up a filter in Pabbly Connect. This filter will check the candidate’s status and only proceed if it matches ‘disqualified’.

In the action step, choose the filter application and set the condition to check if the status equals ‘disqualified’. This ensures that your workflow runs only for the intended candidates.

After applying the filter, you can test the workflow to confirm that it captures the correct candidates. If the filter criteria are met, Pabbly Connect will allow the email sending process to continue.


Conclusion

In this tutorial, we explored how to automate emails to disqualified candidates using Pabbly Connect. By integrating MySQL with Gmail, you can efficiently manage your candidate communications. This process not only saves time but also ensures that your disqualified candidates receive timely notifications.

Ensure you check out Pabbly Connect to create business automation workflows and reduce manual tasks. Pabbly Connect currently offer integration with 2,000+ applications.

How to Automatically Save Your Tweets to an Excel Spreadsheet Using Pabbly Connect

Learn how to save your tweets automatically to an Excel spreadsheet using Pabbly Connect. Follow our step-by-step guide for seamless Twitter and Excel integration. Eliminate manual repetitive tasks from your workflow. Discover proven automation methods with intuitive steps designed for efficiency-minded professionals.

Watch Step By Step Video Tutorial Below


1. Accessing Pabbly Connect for Twitter and Excel Integration

To save your tweets automatically to an Excel spreadsheet, you need to access Pabbly Connect. Start by typing Pabbly.com in your browser. Once on the Pabbly website, navigate to the Products section and select Pabbly Connect.

If you are a new user, click on the ‘Sign Up for Free’ button to create an account. Existing users can simply click ‘Sign In’. After logging in, you will see the Pabbly Connect dashboard, where you can create a new workflow for integrating Twitter with Excel.


2. Creating Your Workflow in Pabbly Connect

In the Pabbly Connect dashboard, click on the plus sign to create a new workflow. Name your workflow, for example, ‘Save Tweets to Excel Spreadsheet’, and click on the ‘Create’ button. This will set up the environment for your Twitter and Excel integration. using Pabbly Connect

  • Click on the trigger window and select Twitter as your application.
  • Choose ‘New Tweet’ as the trigger event.
  • Click on ‘Connect’ and then ‘Add New Connection’.
  • Authorize Pabbly Connect to access your Twitter account.

Once authorized, you can proceed to create a new tweet in your Twitter account to test the integration. After tweeting, return to Pabbly Connect and click on ‘Save and Send Test Request’ to capture the tweet details.


3. Formatting Tweet Data for Excel

After capturing the tweet details, you may notice that the created date and time are combined. To format this correctly for your Excel spreadsheet, you will use the Date and Time Formatter in Pabbly Connect.

  • Add an action step and select ‘Date and Time Formatter’ as the application.
  • Choose ‘Format Date’ as the action event.
  • Map the created date from the Twitter response and select the desired format (DD/MM/YY).

After setting up the format, click on ‘Save and Send Test Request’ to ensure the date is formatted correctly. This step ensures that only the date is sent to your Excel spreadsheet without the time.


4. Saving Tweets to Excel Spreadsheet

Now that the tweet data is formatted, the next step is to save this data into your Excel spreadsheet using Pabbly Connect. Add another action step and select Microsoft Excel as your application.

Choose ‘Add Row to Worksheet’ as the action event. Connect your Microsoft Excel account by clicking ‘Add New Connection’. Select the workbook and worksheet where you want to save the tweet data.

Map the formatted date and tweet details from the previous steps into the respective columns in your Excel spreadsheet. Once done, click on ‘Save and Send Test Request’ to verify that the data is saved successfully.


5. Testing the Twitter and Excel Integration

After saving the workflow, it’s time to test the integration. Create another tweet in your Twitter account to see if it automatically saves to your Excel spreadsheet via Pabbly Connect.

Refresh your Excel spreadsheet after a few minutes, as the trigger may take some time to capture the data. You should see the new tweet details added in the specified format. This confirms that your integration is working correctly.

In case the tweet does not appear immediately, remember that the trigger is polling-based, and it may take around 10 minutes to capture new data. However, once it does, you will see all your tweets automatically logged in your Excel spreadsheet.


Conclusion

By following this guide, you can seamlessly integrate Twitter with your Excel spreadsheet using Pabbly Connect. This automation allows you to save your tweets effortlessly, enhancing your productivity and organization. Start using Pabbly Connect today for efficient integrations!

Ensure you check out Pabbly Connect to create business automation workflows and reduce manual tasks. Pabbly Connect currently offer integration with 2,000+ applications.

Automate Adding New Rows to MS Excel Spreadsheet for New Files on Google Drive Using Pabbly Connect

Learn how to automate adding new rows to an MS Excel spreadsheet for new files on Google Drive using Pabbly Connect. Step-by-step tutorial included. Navigate the automation landscape confidently with clear, structured guidance suitable for professionals regardless of prior technical experience.

Watch Step By Step Video Tutorial Below


1. Setting Up Pabbly Connect for Google Drive and MS Excel Integration

To begin automating the addition of new rows in an MS Excel spreadsheet for new files on Google Drive, you need to access Pabbly Connect. Start by visiting the Pabbly website and signing up for a free account or logging into your existing account. This platform serves as the integration hub for Google Drive and MS Excel.

Once logged in, navigate to the Pabbly Connect dashboard and create a new workflow. Name your workflow, for instance, ‘Google Drive to MS Excel’. This initial setup is crucial as it will define the automation process that captures new file uploads and logs them into your spreadsheet.


2. Trigger Setup: Capturing New Files from Google Drive

In the workflow you created in Pabbly Connect, you will start by setting up the trigger. Search for and select ‘Google Drive’ as your trigger application. From the trigger event dropdown, choose ‘New File’. This selection indicates that the automation will be activated whenever a new file is uploaded to your Google Drive.

  • Select ‘Connect’ and then choose ‘Add New Connection’ to link your Google Drive account.
  • Authorize Pabbly Connect to access your Google Drive by selecting your account and granting the necessary permissions.
  • Once connected, click on ‘Save and Send Test Request’ to fetch details of the most recent file uploaded.

After performing these steps, Pabbly Connect will capture the details of the newly uploaded file, including its name, type, and creation date. This data is essential for logging into your MS Excel spreadsheet.


3. Action Setup: Adding Rows to MS Excel Spreadsheet

Next, you will set up the action in your Pabbly Connect workflow to add the new file details into your MS Excel spreadsheet. Search for ‘Microsoft Excel’ as the action application and select ‘Add Row to Worksheet’ from the action event dropdown. This action will insert a new row in your specified Excel sheet with the details captured from Google Drive. using Pabbly Connect

Connect your Microsoft Excel account to Pabbly Connect by selecting ‘Connect’ and then ‘Add New Connection’. Authorize the connection by allowing Pabbly Connect to access your Excel account. Once authorized, you will be prompted to select the workbook and worksheet where you want the new data to be added.

  • Select the workbook that contains your desired worksheet for logging new files.
  • Choose the worksheet (e.g., Sheet1) where the new row will be added.
  • Map the fields from the Google Drive trigger to the corresponding columns in your Excel sheet.

After mapping the fields such as file name, file type, created date, and file link, you can finalize the setup by clicking on ‘Save and Send Test Request’. This action will confirm that the data from Google Drive is successfully added to your Excel spreadsheet.


4. Verifying the Automation: Check Your MS Excel Spreadsheet

To ensure that the automation is functioning correctly, navigate to your MS Excel spreadsheet after completing the setup in Pabbly Connect. Refresh the sheet to see if the details of the new file uploaded to Google Drive have been logged correctly. You should see the new row containing the file name, file type, creation date, and link to the file.

This verification step is crucial as it confirms that the integration between Google Drive and MS Excel via Pabbly Connect is working as expected. If the details appear correctly, your automation is set up successfully, allowing you to maintain a log of all new files uploaded to your Google Drive.


5. Conclusion: Streamlining Your Workflow with Pabbly Connect

In conclusion, using Pabbly Connect to automate the addition of new rows to an MS Excel spreadsheet for new files on Google Drive simplifies your workflow significantly. By following the steps outlined in this tutorial, you can ensure that every new file uploaded is automatically logged, saving you time and effort.

Ensure you check out Pabbly Connect to create business automation workflows and reduce manual tasks. Pabbly Connect currently offer integration with 2,000+ applications.

Check out Pabbly Connect – Automate your business workflows effortlessly! Sign Up Free – Start your journey with ease! 10,000+ Video Tutorials – Learn step by step! Join Pabbly Facebook Group – Connect with 21,000+ like minded people!

This integration not only enhances your productivity but also ensures that you have a reliable record of all files uploaded to Google Drive. With Pabbly Connect, you can easily replicate this process for other applications as well, making it a versatile tool for automation.

Integrating Pipedrive Deals with MS Excel Using Pabbly Connect

Learn how to automate adding new Pipedrive deals to MS Excel spreadsheets using Pabbly Connect in this step-by-step tutorial. This comprehensive guide reveals exactly how to connect your applications and automate repetitive tasks — accessible for professionals of all technical backgrounds.

Watch Step By Step Video Tutorial Below


1. Accessing Pabbly Connect for Integration

To begin the integration process, you need to access Pabbly Connect. Start by navigating to your web browser and searching for ‘Pabbly.com/connect’. You will be directed to the Pabbly Connect landing page.

If you don’t have an account, you can create one by clicking on ‘Sign Up Free’. If you already have an account, simply click on ‘Sign In’ to access your dashboard.


2. Creating a Workflow in Pabbly Connect

Once you are signed into Pabbly Connect, you will arrive at the dashboard. Here, click on ‘Access Now’ under Pabbly Connect. This will take you to the main interface where you can create a new workflow.

Click on the ‘Create Workflow’ button and give your workflow a name, such as ‘Pipedrive to Microsoft Excel’. After naming your workflow, click on the ‘Create’ button to proceed. This sets the stage for your automation.


3. Setting Up the Trigger for Pipedrive Deals

In the workflow interface, you will see two sections: the trigger window and the action window. Start with the trigger window to capture new deals from Pipedrive. Search for ‘Pipedrive’ in the ‘Choose App’ section. using Pabbly Connect

Next, select ‘New Deal’ as your trigger event. Click on ‘Connect’ and choose ‘Add New Connection’. You will need to enter your API token from Pipedrive. To find this token, go to your Pipedrive account, click on your profile, and select ‘Personal Preferences’. From there, navigate to the API section to copy your token.

  • Log into Pipedrive and navigate to your profile.
  • Select ‘Personal Preferences’ and then the API section.
  • Copy the API token and paste it into Pabbly Connect.

After saving the connection, you will be prompted to enter your company domain. This is found in the URL of your Pipedrive account. Once you save and send a test request, Pabbly Connect will wait for a new deal to be created in Pipedrive.


4. Adding New Deal Data to MS Excel

Now that you have set up the trigger, it’s time to move to the action window to send the data to Microsoft Excel. In the action window, search for ‘Microsoft Excel’ in the ‘Choose App’ section. using Pabbly Connect

Select ‘Add Row to Worksheet’ as the action event. Click ‘Connect’ and then ‘Add New Connection’. Authorize Pabbly Connect to access your Microsoft Excel account. Once connected, select the workbook where you want to add the new deals.

  • Choose the workbook that will store the Pipedrive deal data.
  • Select the worksheet within that workbook.
  • Map the columns in Excel to the data received from Pipedrive.

Map the fields such as client name, deal name, email, and mobile number from the Pipedrive response to the corresponding columns in your Excel sheet. After mapping, click on ‘Save and Send Test Request’ to ensure the data is correctly added to your Excel sheet.


5. Testing the Automation in Real Time

To verify that your automation works, create a new deal in your Pipedrive account. As you input the details of the new deal, such as the client name and deal value, click ‘Save’. This action should trigger the automation you set up in Pabbly Connect.

After saving the deal, refresh your Microsoft Excel sheet to see if the new deal details have been added. You should see the same client name, deal name, email, mobile number, and deal value in your Excel sheet, confirming that the integration is functioning as intended.

By following these steps, you can effortlessly automate the process of adding new Pipedrive deals to your MS Excel spreadsheets using Pabbly Connect. This integration not only saves time but also minimizes the risk of manual data entry errors.


Conclusion

In this tutorial, we demonstrated how to use Pabbly Connect to automate the integration between Pipedrive and MS Excel. You can easily add new Pipedrive deals to your Excel spreadsheets, streamlining your workflow and enhancing productivity.

Ensure you check out Pabbly Connect to create business automation workflows and reduce manual tasks. Pabbly Connect currently offer integration with 2,000+ applications.

How to Sync Facebook Leads Ads to MS Excel Using Pabbly Connect

Learn how to integrate Facebook Leads Ads with MS Excel using Pabbly Connect in this step-by-step tutorial. Automate your lead management efficiently! Transform complex automation concepts into accessible, actionable steps that eliminate unnecessary manual work while maximizing existing application capabilities.

Watch Step By Step Video Tutorial Below


1. Accessing Pabbly Connect for Integration

To sync Facebook Leads Ads to MS Excel, start by accessing Pabbly Connect. Type the URL into your browser and hit enter to reach the landing page. Here, you will see options to sign in or sign up for free. If you are a new user, click on the ‘Sign Up’ button to create an account and receive 100 free tasks.

Once you have signed up or logged in, you will be redirected to the dashboard. Click on the ‘Create Workflow’ button to begin setting up your integration. Name your workflow something like ‘Facebook Lead Ads to MS Excel Integration’ and click ‘Create’. This sets the stage for connecting Facebook Leads Ads with MS Excel using Pabbly Connect.


2. Setting Up Facebook Lead Ads as Trigger in Pabbly Connect

In this step, you will set up Facebook Lead Ads as the trigger application in Pabbly Connect. Select Facebook Lead Ads from the list of applications and choose the trigger event as ‘New Lead’. Click on ‘Connect’ to initiate the connection.

  • Choose ‘Add New Connection’ to link your Facebook account.
  • Authorize Pabbly Connect to access your Facebook Lead Ads account.
  • Select the Facebook page associated with your lead generation.

After selecting your Facebook page and the lead generation form, click on ‘Save and Send Test Request’. This action will wait for a webhook response, which means you need to perform a test submission through Facebook Lead Ads to capture the data accurately.


3. Testing the Webhook Response in Pabbly Connect

To complete the setup, you need to test the webhook response. Click on the hyperlink for the Facebook Lead Ads testing tool. Select the form you previously set up, and fill in the test data such as email address, full name, and phone number. After filling in the details, submit the form.

Once the form is submitted, return to Pabbly Connect and check if the API response has been received. You should see the test data you submitted displayed in the response section. This confirms that your Facebook Lead Ads are correctly integrated with Pabbly Connect.


4. Configuring MS Excel as Action in Pabbly Connect

Now, you will set up MS Excel as the action application in Pabbly Connect. Search for Microsoft Excel and select it. Choose the action event ‘Add Row to Worksheet’ to ensure new leads are added to your Excel sheet.

  • Click ‘Connect’ to link your Microsoft Excel account with Pabbly Connect.
  • Authorize the connection by selecting your account and clicking ‘Yes’.
  • Select the appropriate workbook and worksheet where the leads will be stored.

After selecting the workbook, map the data received from Facebook Lead Ads to the corresponding columns in your Excel sheet. Once mapping is complete, click on ‘Save and Send Test Request’. This action should add a new row in your selected Excel sheet with the lead information.


5. Verifying the Integration Success

To verify that the integration was successful, refresh your Excel sheet. You should see the new lead information populated in the designated columns. This confirms that Pabbly Connect has successfully synced your Facebook Leads Ads data to MS Excel.

For further testing, you can delete the previous lead entries and submit another test form through Facebook Lead Ads. Check your Excel sheet again to ensure that new leads are continuously added. This demonstrates the real-time syncing capability of Pabbly Connect.


Conclusion

In this tutorial, we covered how to use Pabbly Connect to sync Facebook Leads Ads with MS Excel. By following these steps, you can automate the process of managing leads efficiently. This integration streamlines your workflow and enhances productivity without manual data entry.

Ensure you check out Pabbly Connect to create business automation workflows and reduce manual tasks. Pabbly Connect currently offer integration with 2,000+ applications.

How to Sync MS Excel Data to Google Sheets in Real-Time Using Pabbly Connect

Learn how to seamlessly integrate MS Excel with Google Sheets in real-time using Pabbly Connect. Follow this detailed tutorial for step-by-step instructions. Revolutionize your productivity approach with just a few strategic clicks. Uncover professional methods for connecting applications and creating workflows that reclaim hours of your week.

Watch Step By Step Video Tutorial Below


1. Accessing Pabbly Connect for Integration

To sync MS Excel data to Google Sheets in real-time, start by accessing Pabbly Connect. Open your web browser and type the URL Pabbly.com/connect to reach the landing page.

On the right-hand side, you will see options to sign in or sign up. If you’re a new user, click on ‘Sign Up for Free’ to create an account, which will take just a couple of minutes. Existing users can simply click on ‘Sign In’.


2. Creating a Workflow in Pabbly Connect

After signing in to Pabbly Connect, you will be directed to the dashboard. Click on ‘Create Workflow’ to start your integration process. Name your workflow something descriptive, like ‘MS Excel to Google Sheets Integration’.

Once named, click on ‘Create’. You will be presented with two main options: ‘Trigger’ and ‘Action’. For this integration, your trigger application will be Microsoft Excel, and the action application will be Google Sheets.


3. Setting Up the Trigger with MS Excel

To set up the trigger, select Microsoft Excel from the list of applications. For the trigger event, choose ‘New Row in Worksheet’. This will ensure that every time a new row is added in Excel, it will trigger an action in Google Sheets.

Click on ‘Connect’ to link your Microsoft Excel account with Pabbly Connect. You will need to log in and authorize access. Once connected, select the specific workbook you want to use, for example, ‘Book XLS’.

  • Choose your workbook from the dropdown.
  • Click on ‘Save and Send Test Request’ to retrieve data from Excel.

After completing these steps, you will see the data retrieved from Excel, including fields like first name, last name, email address, and contact number.


4. Setting Up the Action with Google Sheets

Next, you will set up the action application as Google Sheets. Click on Google Sheets and select the action event ‘Add New Row’. This ensures that every new entry in Excel will correspond to a new row in Google Sheets.

Again, click on ‘Connect’ to link your Google Sheets account with Pabbly Connect. Authorize the connection and select the spreadsheet you want to update, such as ‘New Lead Data’.

  • Map the fields from Excel to the corresponding fields in Google Sheets.
  • Fill in the first name, last name, email address, and mobile number.

Once you have mapped all the necessary data, click on ‘Save and Send Test Request’. If successful, the new data from Excel will now appear in your Google Sheets.


5. Testing the Integration in Real-Time

With the integration set up, it’s time to test if the data syncs in real-time. Go back to your MS Excel sheet and add a new entry. For example, you could add a name like ‘Demo Name’ along with an email and contact number.

After saving the new entry, refresh your Google Sheets to check if the new data has populated. Note that Pabbly Connect may have a polling time, which means it checks for new data at set intervals, such as every 8 hours.

Once the polling time has elapsed, you should see the new entry reflected in Google Sheets, confirming that the integration is working successfully. This process only needs to be set up once, and data will continue to sync automatically.


Conclusion

In this tutorial, we demonstrated how to use Pabbly Connect to sync MS Excel data to Google Sheets in real-time. By following these steps, you can automate your data management tasks effectively, ensuring that your spreadsheets are always up-to-date.

Ensure you check out Pabbly Connect to create business automation workflows and reduce manual tasks. Pabbly Connect currently offer integration with 2,000+ applications.

How to Add Razorpay Payment Details to MS Excel Using Pabbly Connect

Learn how to automate adding Razorpay payment details to MS Excel using Pabbly Connect. Follow this step-by-step guide for seamless integration. Implement the precise methodologies leading organizations use to automate repetitive tasks, illustrated with practical examples designed for immediate application.

Watch Step By Step Video Tutorial Below


1. Setting Up Pabbly Connect for Razorpay and MS Excel Integration

To begin automating the process of adding Razorpay payment details to MS Excel, you first need to set up Pabbly Connect. This powerful integration platform allows you to connect various applications seamlessly.

Start by visiting the Pabbly Connect website and creating a free account. Once logged in, you will access the dashboard where you can create your workflow. Follow these steps:

  • Go to the Pabbly Connect dashboard.
  • Click on the ‘Create Workflow’ button.
  • Name your workflow (e.g., Razorpay to MS Excel).

After naming your workflow, you will see two sections: Trigger and Action. This setup will allow you to specify that when a payment is captured in Razorpay, the details will be added to MS Excel using Pabbly Connect.


2. Configuring the Trigger App: Razorpay

In this step, you will configure Razorpay as the trigger app in your Pabbly Connect workflow. Select Razorpay from the list of applications and set the trigger event to ‘Payment Captured’. This ensures that every time a payment is made, the workflow is activated.

After selecting Razorpay, you will receive a webhook URL. This URL is crucial for connecting Razorpay to Pabbly Connect. Follow these instructions:

  • Log into your Razorpay account and navigate to the settings.
  • Go to the Webhooks section and click on ‘Add New Webhook’.
  • Paste the webhook URL from Pabbly Connect and set the trigger event to ‘Payment Captured’.

Once the webhook is created, you can proceed to test it by making a dummy payment through Razorpay. This will allow Pabbly Connect to capture the payment details successfully.


3. Testing the Webhook Response from Razorpay

After setting up the webhook in Razorpay, it’s time to test the integration with Pabbly Connect. You need to make a test payment to ensure that Razorpay sends the payment details back to Pabbly Connect.

Perform the following steps to test the webhook:

Open your Razorpay payment page. Make a dummy payment using the provided test card details. Check Pabbly Connect to see if the webhook response captures the payment details.

Once the payment is successful, you should see the payment details reflected in Pabbly Connect. This confirms that Razorpay is correctly communicating with Pabbly Connect.


4. Adding MS Excel as the Action App

Now that Razorpay is set up as the trigger app, the next step is to add MS Excel as the action app in your Pabbly Connect workflow. This action will automatically add the payment details to your designated Excel sheet whenever a payment is captured.

Select MS Excel from the list of applications and choose the action event ‘Add Row to Worksheet’. You will then need to connect your Microsoft account with Pabbly Connect to allow access to your Excel files. Follow these steps:

Click on ‘Connect’ and authorize Pabbly Connect to access your MS Excel account. Select the workbook where you want to add the payment details. Map the fields from the Razorpay response to the corresponding columns in your Excel sheet.

After mapping the fields, click on ‘Save and Send Test Request’. This will add a new row in your Excel sheet with the payment details captured from Razorpay through Pabbly Connect.


5. Conclusion: Automating Razorpay Payments to MS Excel with Pabbly Connect

By following this tutorial, you have successfully set up an automated workflow that adds Razorpay payment details to MS Excel using Pabbly Connect. This integration allows for efficient tracking of payments without manual entry.

Ensure you check out Pabbly Connect to create business automation workflows and reduce manual tasks. Pabbly Connect currently offer integration with 2,000+ applications.

Now, every time a payment is made through Razorpay, the details will automatically populate in your Excel sheet. This not only saves time but also minimizes the risk of errors associated with manual data entry. With Pabbly Connect, you can focus on growing your business while the automation takes care of the data management.

For any questions or further automation needs, feel free to reach out through the Pabbly Connect support forum. Enjoy the benefits of automation!