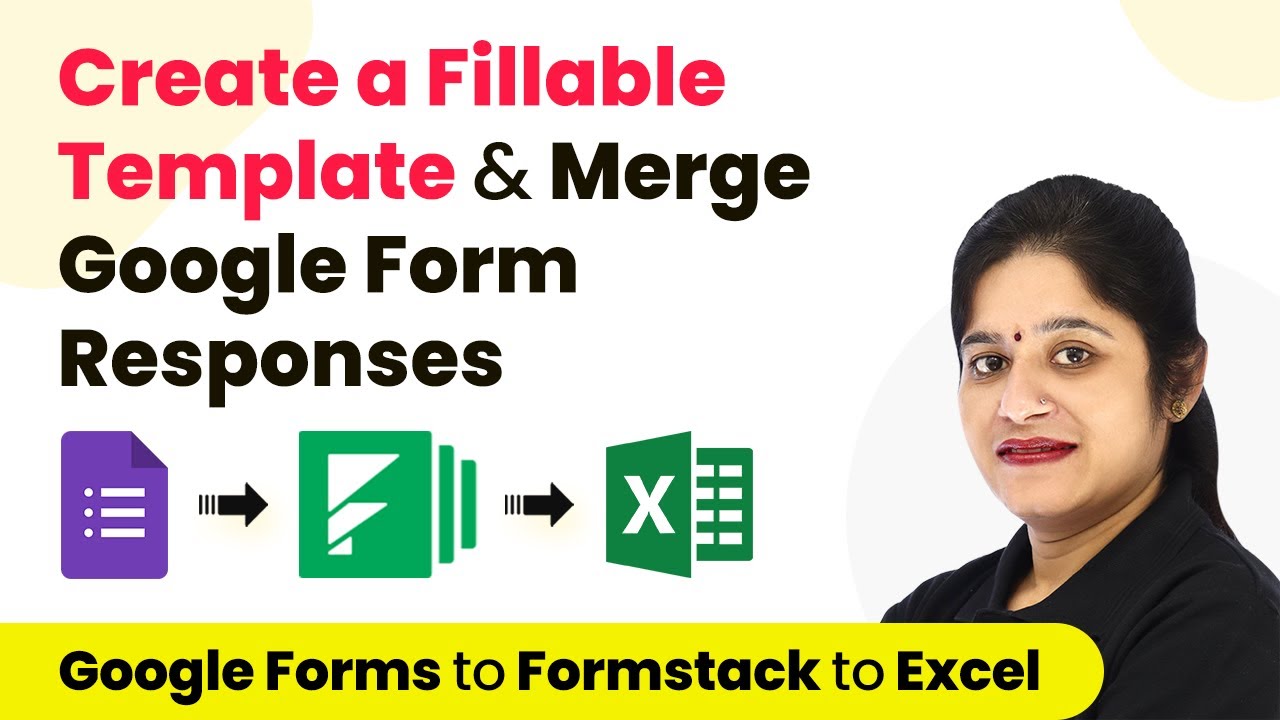
How to Create a Fillable Template and Merge Google Form Responses Using Pabbly Connect

Learn how to create a fillable template and merge Google Form responses using Pabbly Connect with this detailed step-by-step tutorial. This comprehensive guide reveals exactly how to connect your applications and automate repetitive tasks — accessible for professionals of all technical backgrounds.

Watch Step By Step Video Tutorial Below


1. Accessing Pabbly Connect for Integration

To create a fillable template and merge Google Form responses, you first need to access Pabbly Connect. Start by typing ‘Pabbly.com’ in your browser. If you are a new user, click on the ‘Sign Up for Free’ button to create your account. Existing users can simply sign in to their accounts.

Once logged in, navigate to the ‘All Apps’ section and click on Pabbly Connect. From here, you can create a new workflow by clicking on the plus sign and selecting ‘Create Workflow’. Name your workflow, for example, ‘Create a Fillable Template and Merge Google Form Responses’, and click ‘Create’ to proceed.


2. Setting Up Google Forms with Pabbly Connect

In this section, you will integrate Google Forms with Pabbly Connect. Open the trigger window in your workflow and select ‘Google Forms’ as the application. Choose ‘New Response Received’ as the trigger event. You will see a webhook URL and instructions to set up the webhook in Google Forms.

  • Make the last question in your Google Form required.
  • Fill out the form to generate a response.

After submitting the form, return to Pabbly Connect to see the new response captured. This integration will allow you to collect responses directly into your workflow, setting the stage for further automation.


3. Linking Google Sheets to Pabbly Connect

Next, you will link Google Sheets to Pabbly Connect to store the form responses. Click on the three dots in Google Forms, select ‘Select Response Destination’, and create a new spreadsheet. Name it appropriately, such as ‘Pabbly Education Academy Responses’.

After linking, navigate to the Google Sheets and ensure the responses are being recorded correctly. To integrate this with Pabbly Connect, go to the ‘Extensions’ menu, select ‘Add-ons’, and then ‘Get Add-ons’. Search for ‘Pabbly Connect Webhooks’ and install it. Refresh your Google Sheets to activate the add-on.


4. Integrating Formstack Documents with Pabbly Connect

Now that you have set up Google Forms and Sheets, it’s time to integrate Formstack Documents with Pabbly Connect. Open the action window in your workflow and select ‘Formstack Documents’. Choose ‘Merge Document’ as the action event. You will need to connect your Formstack account by entering the API key and secret key.

  • Select the document template you want to use.
  • Map the fields from the Google Form responses to the document fields.

Once everything is mapped, click ‘Save and Send Test Request’ to generate a document. This document will now contain data pulled from the Google Form submissions, allowing you to automate document creation seamlessly.


5. Adding Data to Excel with Pabbly Connect

The final step is to send the merged document URL and other details to your Excel sheet using Pabbly Connect. Add an action step and select ‘Microsoft Excel’. Choose ‘Add Row to Worksheet’ as the action event.

Connect your Microsoft Excel account and select the appropriate spreadsheet and worksheet. Map the fields from the Google Form responses and the document URL into the respective columns. Once mapped, click ‘Save and Send Test Request’. Check your Excel sheet to confirm that the new data has been added successfully.


Conclusion

In this tutorial, you learned how to create a fillable template and merge Google Form responses using Pabbly Connect. By integrating Google Forms, Google Sheets, and Formstack Documents, you can streamline your data collection and document generation processes effectively. This automation saves time and enhances productivity, demonstrating the power of Pabbly Connect in managing workflows.

Ensure you check out Pabbly Connect to create business automation workflows and reduce manual tasks. Pabbly Connect currently offer integration with 2,000+ applications.

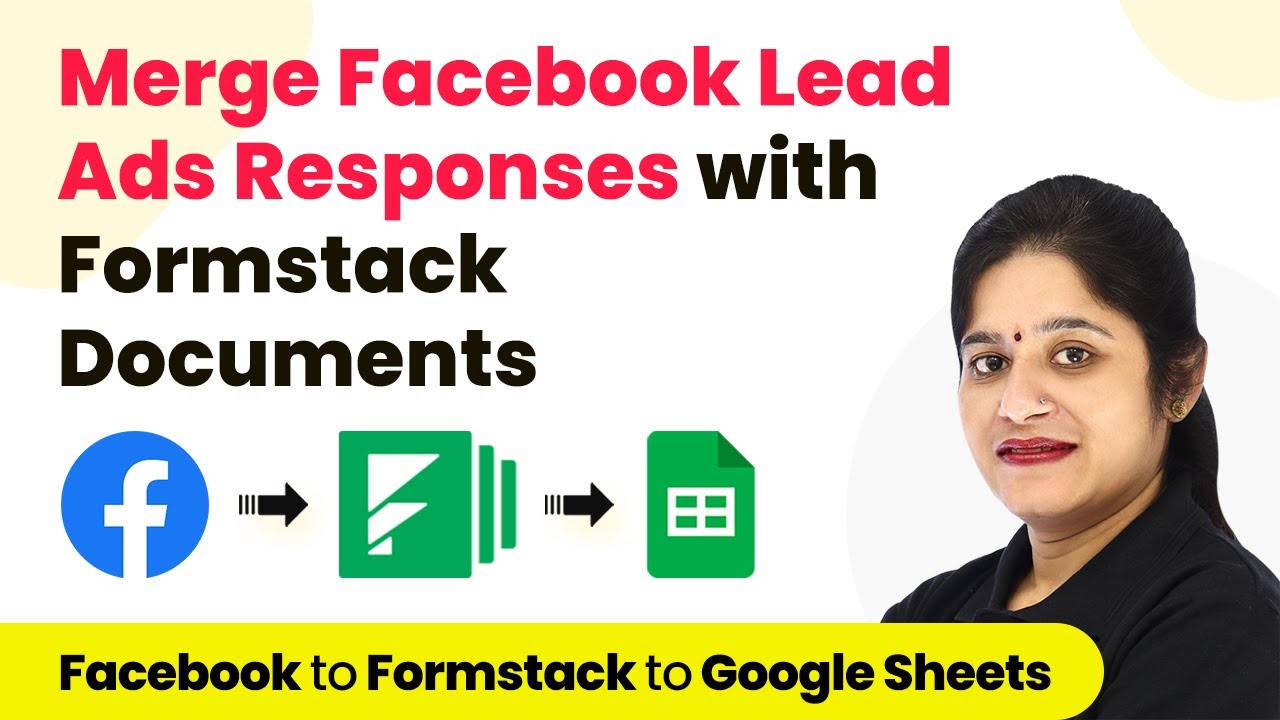
Integrate Facebook Lead Ads with Formstack Documents Using Pabbly Connect

Learn how to merge Facebook Lead Ads responses with Formstack Documents using Pabbly Connect. Step-by-step tutorial with detailed instructions and screenshots. Explore efficient methods for automating routine tasks with clear, concise instructions suited for both newcomers and experienced professionals.

Watch Step By Step Video Tutorial Below


1. Access Pabbly Connect for Integration

To begin merging Facebook Lead Ads responses with Formstack Documents, you need to access Pabbly Connect. Visit Pabbly.com and sign up for a free account or log in if you are an existing user.

Once logged in, navigate to the dashboard, find the all apps section, and click on Pabbly Connect. From here, you can create a new workflow by clicking on the plus sign. This allows you to set up the integration between Facebook Lead Ads and Formstack Documents.


2. Create a New Workflow in Pabbly Connect

After accessing Pabbly Connect, you need to create a new workflow for merging Facebook Lead Ads with Formstack Documents. Click on the ‘Create Workflow’ button and name your workflow accordingly, such as ‘Merge Facebook Lead Ads Responses with Formstack Documents’.

In this step, you will see a trigger window and an action window. The trigger will be Facebook Lead Ads, and the action will be Formstack Documents. This setup ensures that when a lead is generated from Facebook, it triggers the creation of a document in Formstack.


3. Integrate Facebook Lead Ads with Pabbly Connect

To integrate Facebook Lead Ads, select it as your trigger application in Pabbly Connect. Choose the trigger event as ‘New Lead’ and click on ‘Connect’. You will then be prompted to authorize your Facebook account.

  • Click on ‘Add New Connection’ to link your Facebook account.
  • Select the Facebook page associated with your lead ads.
  • Choose the specific lead generation form you want to use.

Once you have selected your form, click on ‘Save and Send Test Request’ to ensure that the connection works properly. You will need to submit a test lead to capture the response.


4. Set Up Formstack Documents in Pabbly Connect

Now that your Facebook Lead Ads are integrated, the next step is to set up Formstack Documents in Pabbly Connect. In the action window, choose Formstack Documents as the action application and select the action event as ‘Merge Document’.

To connect your Formstack Documents account, you will need to provide your API key and secret key. Log in to your Formstack account to find these keys. Once connected, select the document template you want to use for merging the lead details.

  • Choose the document template where the lead details will be merged.
  • Map the fields from the lead response to the corresponding fields in your document.
  • Click on ‘Save and Send Test Request’ to generate the document.

This step ensures that every time a lead is captured, a new document is generated automatically using the specified template.


5. Add Lead Details to Google Sheets

The final step is to integrate Google Sheets with Pabbly Connect to log the lead details. Click on the plus sign to add an action step and select Google Sheets as the application. Choose ‘Add New Row’ as the action event.

Connect your Google Sheets account by following the prompts. After authorization, select the spreadsheet where you want to save the lead information. You will then map the lead details such as name, email, phone number, and the document URL generated from Formstack.

Map the lead name from Facebook Lead Ads to the corresponding column in Google Sheets. Repeat the mapping for email, phone number, and the document URL. Click on ‘Save and Send Test Request’ to confirm the data is added to Google Sheets.

Once this integration is set, every new lead from Facebook will automatically populate in your Google Sheets, along with the generated document URL.


Conclusion

This tutorial demonstrated how to merge Facebook Lead Ads responses with Formstack Documents using Pabbly Connect. By following the steps outlined, you can automate the entire process of capturing leads and generating documents seamlessly.

Ensure you check out Pabbly Connect to create business automation workflows and reduce manual tasks. Pabbly Connect currently offer integration with 2,000+ applications.

With Pabbly Connect, you can enhance your workflow efficiency and ensure that your lead data is organized and accessible in real-time.

Best Ways to Automate Twitter with Pabbly Connect

Learn how to automate Twitter using Pabbly Connect. Discover effective integrations with Instagram, Blogger, RSS feeds, and more to enhance your social media strategy. Build sophisticated automated workflows in less time than you think. This guide translates complex integrations into straightforward steps for immediate implementation.

Watch Step By Step Video Tutorial Below


1. Automate Instagram to Twitter with Pabbly Connect

Using Pabbly Connect, you can easily automate the process of sharing Instagram posts to Twitter. This integration allows you to connect Instagram as the trigger application and Twitter as the action application. Whenever you post on Instagram, the same content will automatically be shared on your Twitter handle, saving you valuable time.

To set this up, follow these steps:

  • Log in to your Pabbly Connect account.
  • Select Instagram as the trigger application.
  • Choose the event that triggers the action, such as ‘New Post’.
  • Connect your Instagram account to Pabbly Connect.
  • Select Twitter as the action application.
  • Set the action event to ‘Create Tweet’.
  • Connect your Twitter account and map the fields accordingly.

After completing these steps, every time you post on Instagram, it will automatically appear on your Twitter account, streamlining your social media management.


2. Integrate Blogger with Twitter using Pabbly Connect

Another effective way to utilize Pabbly Connect is by integrating Blogger with Twitter. This setup allows your blog posts to be automatically shared on Twitter, ensuring that your followers stay updated with your latest content. When you publish a new blog post, it will be truncated to fit Twitter’s character limit and tweeted from your account.

To automate this process, follow these steps:

  • Access your Pabbly Connect dashboard.
  • Choose Blogger as your trigger application.
  • Select the trigger event, such as ‘New Post’.
  • Connect your Blogger account.
  • Set Twitter as the action application.
  • Choose ‘Create Tweet’ as the action event.
  • Connect your Twitter account and map the necessary fields.

After setting up this automation, your blog posts will be tweeted automatically, enhancing your online presence without additional effort.


3. Automate RSS Feeds to Twitter with Pabbly Connect

With Pabbly Connect, you can also automate the sharing of RSS feeds to your Twitter account. This integration is particularly useful for websites that generate content through RSS feeds, allowing you to share updates directly to Twitter without manual intervention. By connecting your RSS feed to Twitter, you can keep your followers informed about new content effortlessly.

To set up this automation, follow these steps:

Log into your Pabbly Connect account. Select RSS by Pabbly as the trigger application. Choose ‘New Item in Feed’ as the trigger event. Enter your RSS feed URL. Connect Twitter as the action application. Select ‘Create Tweet’ as the action event. Connect your Twitter account and map the feed content to the tweet.

Once this automation is active, new items in your RSS feed will be tweeted automatically, improving engagement and visibility of your content on Twitter.


4. Connect Twitter to Telegram via Pabbly Connect

Utilizing Pabbly Connect, you can also set up an automation that connects Twitter to Telegram. This integration allows you to share your Twitter posts directly to your Telegram community, ensuring that your followers on both platforms receive your updates without any extra effort. Whenever you tweet, the same message can be sent to your Telegram channel automatically.

To implement this automation, follow these steps:

Access your Pabbly Connect dashboard. Select Twitter as the trigger application. Choose ‘New Tweet’ as the trigger event. Connect your Twitter account. Set Telegram as the action application. Select ‘Send Message’ as the action event. Connect your Telegram account and configure the message details.

After completing these steps, any tweet you make will be shared automatically in your Telegram community, enhancing your reach across platforms.


5. Automate WordPress Posts to Twitter with Pabbly Connect

Finally, you can integrate WordPress with Twitter using Pabbly Connect. This integration allows you to automatically share your WordPress blog posts as tweets, ensuring that your audience is always updated with your latest articles. By automating this process, you can focus on creating content rather than spending time on social media management.

To set this up, follow these steps:

Log into your Pabbly Connect account. Select WordPress as the trigger application. Choose ‘New Post’ as the trigger event. Connect your WordPress account. Set Twitter as the action application. Select ‘Create Tweet’ as the action event. Connect your Twitter account and map the post fields accordingly.

Once this integration is complete, every new WordPress post will be tweeted automatically, keeping your followers engaged with your latest content effortlessly.


Conclusion

In conclusion, using Pabbly Connect to automate Twitter with various applications like Instagram, Blogger, RSS feeds, Telegram, and WordPress can significantly enhance your social media strategy. By automating these processes, you save time and increase your productivity while keeping your audience engaged with fresh content.

Ensure you check out Pabbly Connect to create business automation workflows and reduce manual tasks. Pabbly Connect currently offer integration with 2,000+ applications.

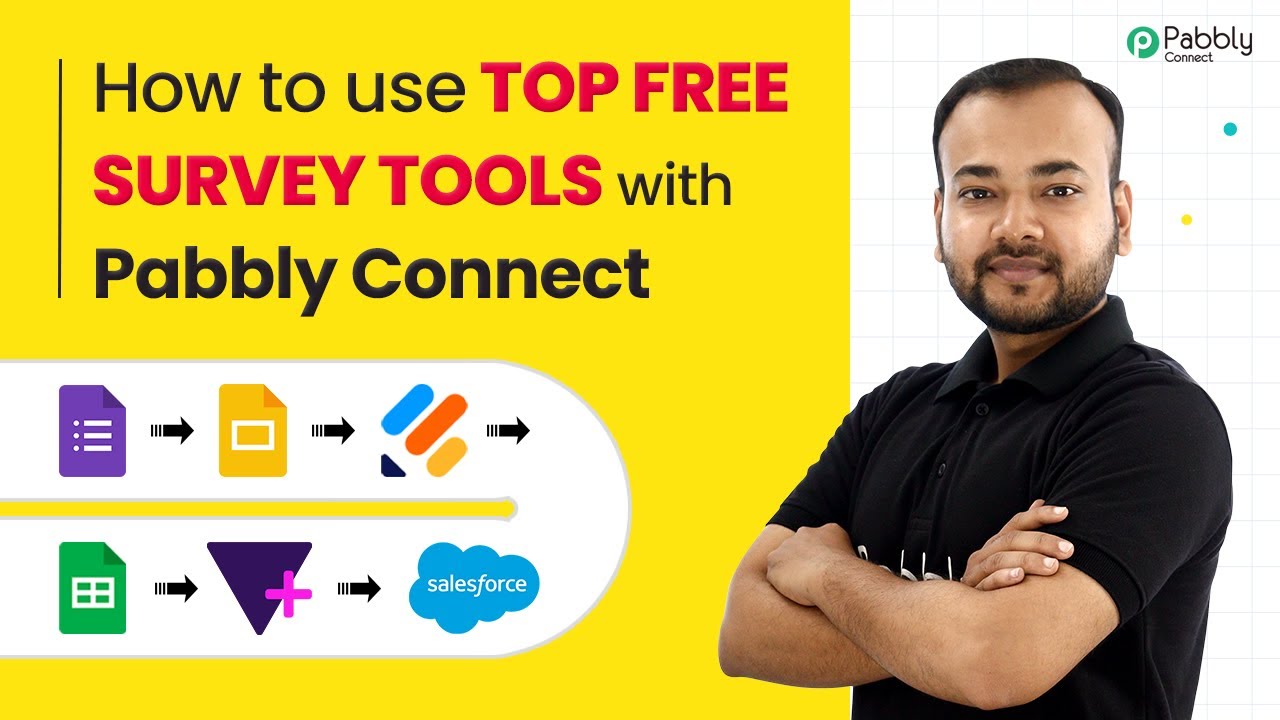
Integrate Top Free Survey Tools Using Pabbly Connect

Learn how to use Pabbly Connect to automate survey processes with top free survey tools like Google Forms, JotForm, and more. Step-by-step guide included. Develop expertise in application integration and learn how to design streamlined automation workflows using proven, simplified approaches.

Watch Step By Step Video Tutorial Below


1. Google Forms to WhatsApp Integration Using Pabbly Connect

In this section, we will explore how to automate the process of sending WhatsApp messages whenever a Google Form is submitted, using Pabbly Connect. This integration allows for immediate communication with respondents, enhancing user experience.

To set this up, start by logging into Pabbly Connect and selecting Google Forms as the trigger application. Follow these steps:

  • Choose Google Forms as the trigger app.
  • Select ‘New Form Response’ as the trigger event.
  • Connect your Google account and select the specific form.
  • Test the trigger to ensure it captures responses correctly.

Once the trigger is set, select WhatsApp as the action application. Configure the message you want to send, such as a confirmation of form submission. This automation saves time, as you do not have to manually send messages to each respondent.


2. Google Forms to Google Slides Integration via Pabbly Connect

Next, we will automate the creation of Google Slides presentations from Google Form submissions using Pabbly Connect. This integration is beneficial for visualizing survey data quickly.

Begin by setting up a new workflow in Pabbly Connect. Here’s how to do it:

  • Select Google Forms as the trigger application.
  • Choose ‘New Form Response’ as the trigger event.
  • Connect your Google account and specify the form.
  • Test the trigger to ensure it works properly.

After the trigger is set, select Google Slides as the action application. Create a new slide for each form response automatically. This eliminates the need for manual data entry and streamlines the presentation creation process.


3. JotForm to Google Sheets Integration with Pabbly Connect

In this section, we will discuss how to connect JotForm submissions to multiple Google Sheets using Pabbly Connect. This integration helps in organizing data efficiently.

To implement this integration, follow these steps in Pabbly Connect:

Choose JotForm as the trigger application. Select ‘New Submission’ as the trigger event. Connect your JotForm account. Test the trigger to ensure it captures submissions correctly.

Next, select Google Sheets as the action application. Map specific fields from the JotForm submission to designated Google Sheets. This automation allows for seamless data management without manual input.


4. JotForm to Easy Print Integration Using Pabbly Connect

We will now look at how to automate printing JotForm submissions using Pabbly Connect and Easy Print. This is particularly useful for businesses that need physical copies of survey responses.

To set this up, create a new workflow in Pabbly Connect and follow these steps:

Select JotForm as the trigger application. Choose ‘New Submission’ as the trigger event. Connect your JotForm account and test the trigger.

For the action, choose Easy Print. Configure the settings to print the submission along with the submitter’s details automatically. This integration saves time and ensures all submissions are printed without manual effort.


5. Teleform to Salesforce Integration via Pabbly Connect

Lastly, we will discuss how to add Teleform responses to Salesforce contacts using Pabbly Connect. This integration is essential for managing customer relationships effectively.

Begin by setting up a workflow in Pabbly Connect with these steps:

Select Teleform as the trigger application. Choose ‘New Submission’ as the trigger event. Connect your Teleform account and test the trigger.

After setting the trigger, select Salesforce as the action application. Map the Teleform fields to Salesforce contacts. This ensures that every submission is automatically added as a contact, streamlining your CRM processes.


Conclusion

In this tutorial, we explored how to use Pabbly Connect to automate survey processes with various applications like Google Forms, JotForm, and Salesforce. By leveraging these automations, you can enhance efficiency and save valuable time in your workflow.

Ensure you check out Pabbly Connect to create business automation workflows and reduce manual tasks. Pabbly Connect currently offer integration with 2,000+ applications.

How to Send Lead Alerts on WhatsApp to Multiple Persons Using Pabbly Connect

Learn how to use Pabbly Connect to automate lead alerts on WhatsApp to multiple persons using a round robin assignment method. Follow this step-by-step tutorial!

Watch Step By Step Video Tutorial Below


1. Introduction to Sending Lead Alerts with Pabbly Connect

In this tutorial, we will learn how to send lead alerts on WhatsApp to multiple persons using Pabbly Connect. This process involves automating lead assignments to sales representatives in a round robin manner. The objective is to ensure that each new lead captured from a Google Form is sent to a designated team member sequentially.

To achieve this integration, we will utilize various applications such as Google Forms, WhatsApp Cloud API, and Pabbly Connect. This guide will provide a step-by-step approach to set up this automation effectively.


2. Setting Up Pabbly Connect for Google Forms Integration

To start, you need to access Pabbly Connect and create a new workflow. This involves signing into your Pabbly account and clicking on the ‘Create Workflow’ button. Name your workflow appropriately, such as ‘Send Google Forms Leads to Team on WhatsApp’. This will help you identify the automation later on.

Next, you will set up the trigger event. Select Google Forms as the application and choose the trigger event as ‘New Response’. This means that every time a new lead is submitted through the Google Form, the workflow will be activated. Follow these steps to connect Google Forms with Pabbly Connect:

  • Copy the webhook URL provided by Pabbly Connect.
  • Open your Google Form and navigate to the responses section.
  • Access the linked Google Sheets and install the Pabbly Connect Webhooks add-on.
  • Paste the webhook URL into the add-on settings and configure the trigger column.

After completing these steps, test the connection by submitting a dummy lead through your Google Form. This will ensure that the data is correctly sent to Pabbly Connect for further processing.


3. Configuring WhatsApp Cloud API for Lead Notifications

Once the Google Forms integration is set up, the next step is to configure the WhatsApp Cloud API. This will allow you to send the lead notifications to your sales team via WhatsApp. In Pabbly Connect, select WhatsApp Cloud API as the action app and choose the action event as ‘Send Template Message’.

To connect your WhatsApp Cloud API account, you will need to provide the following details:

  • Token: Your permanent token generated from the WhatsApp Cloud API.
  • Phone Number ID: This is found in your WhatsApp Cloud API settings.
  • WhatsApp Business Account ID: Required to complete the connection.

After entering these details, test the connection to ensure it is working properly. This setup is crucial for sending lead alerts to your team members on WhatsApp.


4. Implementing Round Robin Lead Assignment with Pabbly Connect

Now that you have set up both Google Forms and WhatsApp Cloud API, it’s time to implement the round robin assignment logic. In Pabbly Connect, you will use the Number Formatter and Router features to create a sequential assignment system. Start by adding a Number Formatter and selecting the ‘Counter’ action event.

Configure the counter settings as follows:

Initial Value: Set to 1. Operation: Increment. Change By Value: 1. Reset After: Set to 3 (for three sales agents).

This configuration will enable the counter to cycle through the numbers 1, 2, and 3, representing each sales agent. Next, use the Router feature to create three conditions based on the counter’s output. Each condition will correspond to sending a message to a specific sales agent based on the counter value.


5. Testing and Finalizing the Automation in Pabbly Connect

After configuring the round robin assignment, it’s essential to test the entire workflow to ensure it functions as expected. Submit another dummy lead through the Google Form and observe how the lead is assigned to the sales agents. Each submission should trigger the counter and send the lead details to the appropriate agent via WhatsApp.

To finalize the automation, ensure that all connections are tested successfully. You can also clone the setup for future use or adjust settings as needed. Once everything is confirmed, you can close Pabbly Connect as the automation will run in the background, handling lead assignments seamlessly.


Conclusion

This tutorial demonstrated how to use Pabbly Connect to send lead alerts on WhatsApp to multiple persons using a round robin assignment method. By integrating Google Forms and WhatsApp Cloud API, you can automate lead distribution effectively, ensuring that your sales team can respond promptly to inquiries. Implement this automation to enhance your team’s efficiency and improve response times.

Ensure you check out Pabbly Connect to create business automation workflows and reduce manual tasks. Pabbly Connect currently offer integration with 2,000+ applications.

Automate Saving Pinterest Pins to Google Drive with Pabbly Connect

Learn how to automate saving Pinterest pins directly to Google Drive using Pabbly Connect. Follow this step-by-step tutorial for seamless integration. Transform complex automation concepts into accessible, actionable steps that eliminate unnecessary manual work while maximizing existing application capabilities.

Watch Step By Step Video Tutorial Below


1. Accessing Pabbly Connect for Pinterest Google Drive Automation

To automate saving Pinterest pins in Google Drive, the first step is to access Pabbly Connect. Go to Pabbly’s website and either sign in or create a free account to get started. Signing up gives you access to free tasks every month, which is beneficial for managing your automation needs.

Once logged in, navigate to the Pabbly Connect dashboard. Click on the ‘Create Workflow’ button to begin setting up your integration. Name your workflow something relevant, like ‘Pinterest to Google Drive’, and proceed to the next step.


2. Setting Up the Trigger Event in Pabbly Connect

In this section, you will set up the trigger event that activates the automation process. Select Pinterest as your trigger application and choose the trigger event as ‘New Pin’. This event will trigger whenever a new pin is added to your selected Pinterest board.

  • Select ‘Add New Connection’ to connect with your Pinterest account.
  • Authorize Pabbly Connect to access your Pinterest account.
  • Choose the board where you will save pins.

After successfully selecting your board, proceed to test the connection. Save a pin on Pinterest to see if Pabbly Connect captures the data accurately. This ensures that the integration is functioning as expected.


3. Configuring the Action Event to Upload to Google Drive

Now that your trigger is set, it’s time to configure the action event. Choose Google Drive as your action application. The action event will be ‘Upload a File’, which allows you to save the captured Pinterest pin directly into Google Drive.

To connect Google Drive, select ‘Add New Connection’ and authorize access to your Google account. Make sure you select the correct Google Drive account where you want to save the pins.

  • You will need to provide the URL of the image you want to upload.
  • Specify the folder ID where the pin will be saved in Google Drive.
  • Ensure the file name includes the correct extension (e.g., .jpg).

After configuring these settings, test the action to confirm that the pin is uploaded to your designated Google Drive folder. This step verifies that your Pinterest and Google Drive integration via Pabbly Connect is working seamlessly.


4. Finalizing the Integration and Testing

At this stage, you have set up both the trigger and action events in Pabbly Connect. It’s crucial to finalize the integration by sending a test request. This will confirm that when you save a pin on Pinterest, it automatically uploads to Google Drive.

To test, save another pin on your selected Pinterest board. Then, check your Google Drive to see if the pin appears in the specified folder. This step ensures that the integration is functioning correctly and that all necessary data is being captured and transferred.

Once you confirm that the pin is saved successfully, you can be assured that Pabbly Connect has effectively automated the process of saving Pinterest pins to Google Drive. This integration saves time and keeps your pins organized effortlessly.


5. Conclusion: Automate Pinterest to Google Drive with Pabbly Connect

In conclusion, using Pabbly Connect to automate saving Pinterest pins to Google Drive streamlines your workflow significantly. By following the steps outlined above, you can ensure that every new pin saved in Pinterest is automatically uploaded to your Google Drive without manual effort.

Ensure you check out Pabbly Connect to create business automation workflows and reduce manual tasks. Pabbly Connect currently offer integration with 2,000+ applications.

This automation not only saves time but also enhances your productivity by organizing your pins in a structured manner. Start using Pabbly Connect today to simplify your Pinterest management!

Integrating Google Sheets with WhatsApp Using Pabbly Connect for Real-Time Trading Tips

Learn how to automate sending real-time trading tips from Google Sheets to WhatsApp using Pabbly Connect. Step-by-step guide included! Explore efficient methods for automating routine tasks with clear, concise instructions suited for both newcomers and experienced professionals.

Watch Step By Step Video Tutorial Below


1. Setting Up Pabbly Connect for Automation

To begin sending real-time trading tips via WhatsApp, first access Pabbly Connect. Go to the Pabbly website and either sign in or create a free account. Signing up grants you free tasks monthly, which is essential for this automation.

After signing in, click on the ‘Create Workflow’ button located in the top right corner. Name your workflow something like ‘Google Sheets to WhatsApp’ to keep it organized. This sets the stage for connecting your Google Sheets with WhatsApp through Pabbly Connect.


2. Configuring Google Sheets as the Trigger

In this step, you will configure Google Sheets as the trigger application in Pabbly Connect. Select Google Sheets and then choose the event ‘New or Updated Spreadsheet Row’. This event triggers whenever you add a new trading tip to your Google Sheet.

  • Select Google Sheets as the trigger application.
  • Choose the trigger event: New or Updated Spreadsheet Row.
  • Copy the generated webhook URL for later use.

After copying the webhook URL, navigate to your Google Sheets. Click on ‘Extensions’ and select ‘Pabbly Connect Webhooks’. In the setup, paste the copied URL and specify the trigger column. This column will notify Pabbly Connect whenever a new trading tip is added.


3. Setting Up WhatsApp as the Action Application

Next, you will set up WhatsApp as the action application in Pabbly Connect. Select WhatsApp Cloud API and choose the action event ‘Send a Template Message’. This step is crucial as it will send the trading tips directly to your clients’ WhatsApp accounts.

To configure this, you will need to connect your WhatsApp account by providing the required details like your temporary access token, phone number ID, and WhatsApp business account ID. Make sure to retrieve these from your WhatsApp developer dashboard.

  • Enter your temporary access token from the WhatsApp developer dashboard.
  • Provide the phone number ID and WhatsApp business account ID.
  • Save the connection to establish it.

Once connected, select the template you want to use for sending messages. Ensure that your template is pre-approved in your WhatsApp account to avoid any issues during message delivery.


4. Finalizing the Integration Workflow

With both Google Sheets and WhatsApp configured, it’s time to finalize the integration in Pabbly Connect. Use the ‘Get Rows’ action in Google Sheets to fetch client details, which will be necessary for sending personalized messages.

Set the range for the rows you want to fetch, ensuring it includes all relevant client information. Next, use the iterator feature to loop through each client’s details. This allows Pabbly Connect to send messages one by one to each client in your list.

Select the range of rows from your Google Sheets. Use the iterator to process each client’s contact details. Map the client’s details to the WhatsApp message template.

By completing these steps, you ensure that every time a new trading tip is added to your Google Sheet, it gets sent to all clients via WhatsApp automatically.


5. Testing the Automation

The final step is to test your automation to ensure everything works seamlessly. In Pabbly Connect, send a test request to verify that the WhatsApp message is sent correctly. Check the WhatsApp account to confirm that the message appears as intended.

If the test is successful, your integration is complete! From now on, every new trading tip added to your Google Sheet will be sent directly to your clients on WhatsApp in real-time.

Remember, you can always revisit your workflow in Pabbly Connect to make adjustments or add new features as needed. This flexibility allows you to enhance your trading tips communication continuously.


Conclusion

Integrating Google Sheets with WhatsApp using Pabbly Connect allows you to automate the process of sending real-time trading tips efficiently. By following the steps outlined in this tutorial, you can ensure timely updates for your clients, enhancing your trading strategy communication.

Ensure you check out Pabbly Connect to create business automation workflows and reduce manual tasks. Pabbly Connect currently offer integration with 2,000+ applications.

Integrate Google Sheets with Worksnaps Using Pabbly Connect

Learn how to integrate Google Sheets with Worksnaps using Pabbly Connect to automate task creation seamlessly. Follow this detailed tutorial for step-by-step guidance. Learn to create powerful connections between your critical applications without requiring specialized programming knowledge or extensive technical background.

Watch Step By Step Video Tutorial Below


1. Accessing Pabbly Connect for Google Sheets and Worksnaps Integration

To integrate Google Sheets with Worksnaps, you first need to access Pabbly Connect. This platform facilitates the automation process by connecting different applications seamlessly. Begin by visiting the Pabbly website and signing in or signing up for a free account.

Once logged in, navigate to the top right corner and click on the ‘Create Workflow’ button. You will be prompted to name your workflow. For this integration, you can name it ‘Google Sheets to Worksnaps’. This sets the stage for automating task creation in Worksnaps whenever a new row is added in Google Sheets.


2. Setting Up the Trigger in Pabbly Connect

The next step involves setting up the trigger in Pabbly Connect. Select Google as your trigger application. For the trigger event, choose ‘New or Updated Spreadsheet Row’. This event will activate the workflow each time a new row is added or updated in your Google Sheets.

  • Select Google as the trigger application.
  • Choose ‘New or Updated Spreadsheet Row’ as the trigger event.
  • Copy the generated webhook URL provided by Pabbly Connect.

After copying the webhook URL, go to your Google Sheets. Click on the ‘Extensions’ button, then select ‘Pabbly Connect Webhooks’ followed by ‘Initial Setup’. Paste the copied webhook URL into the designated section and specify the trigger column, which in this case is column B. This column will monitor for new entries.


3. Testing the Integration Setup

Once the trigger is set, it’s crucial to test the integration to ensure everything is functioning correctly. In Google Sheets, after setting up the webhook, you can send a test by entering a sample task name and description in the designated columns.

After entering the test data, click on ‘Send Test’ in the setup menu. You should see a confirmation that the test data was sent successfully. Now, return to Pabbly Connect to verify if the response was received. This confirms that the connection between Google Sheets and Pabbly Connect is operational.


4. Setting Up the Action in Worksnaps

Now that the trigger is confirmed, it’s time to configure the action step in Pabbly Connect. Select Worksnaps as your action application and choose ‘Create a New Task in Project’ as the action event. This action will create a new task in Worksnaps whenever a new row is added to Google Sheets.

To connect Worksnaps, you will need to add a new connection. Enter your API token, which can be found in your Worksnaps account under Profile and Settings > Web Service API. Copy the token and paste it into the Pabbly Connect interface. Leave the password field blank as it’s not required.

  • Select Worksnaps as the action application.
  • Choose ‘Create a New Task in Project’ as the action event.
  • Input your API token from Worksnaps to establish the connection.

Once connected, you will need to select the project in which the task should be created. Map the task name and description from Google Sheets to the corresponding fields in Worksnaps. This ensures that each new row added will create a task with the specified details in your Worksnaps project.


5. Finalizing the Integration and Verifying Task Creation

After mapping the necessary fields, click on ‘Save and Send Test Request’ in Pabbly Connect. This will send the mapped data to Worksnaps, creating a new task. You will receive a response indicating that the task was successfully created.

To verify, log into your Worksnaps account and check the project you selected earlier. You should see the newly created task with the name and description you specified in Google Sheets. This confirms that the integration between Google Sheets and Worksnaps through Pabbly Connect is successful and operational.


Conclusion

Integrating Google Sheets with Worksnaps using Pabbly Connect streamlines your task management process. By following this tutorial, you can automate task creation, ensuring efficiency and accuracy in your workflow. Experience the power of automation with Pabbly Connect today!

Ensure you check out Pabbly Connect to create business automation workflows and reduce manual tasks. Pabbly Connect currently offer integration with 2,000+ applications.

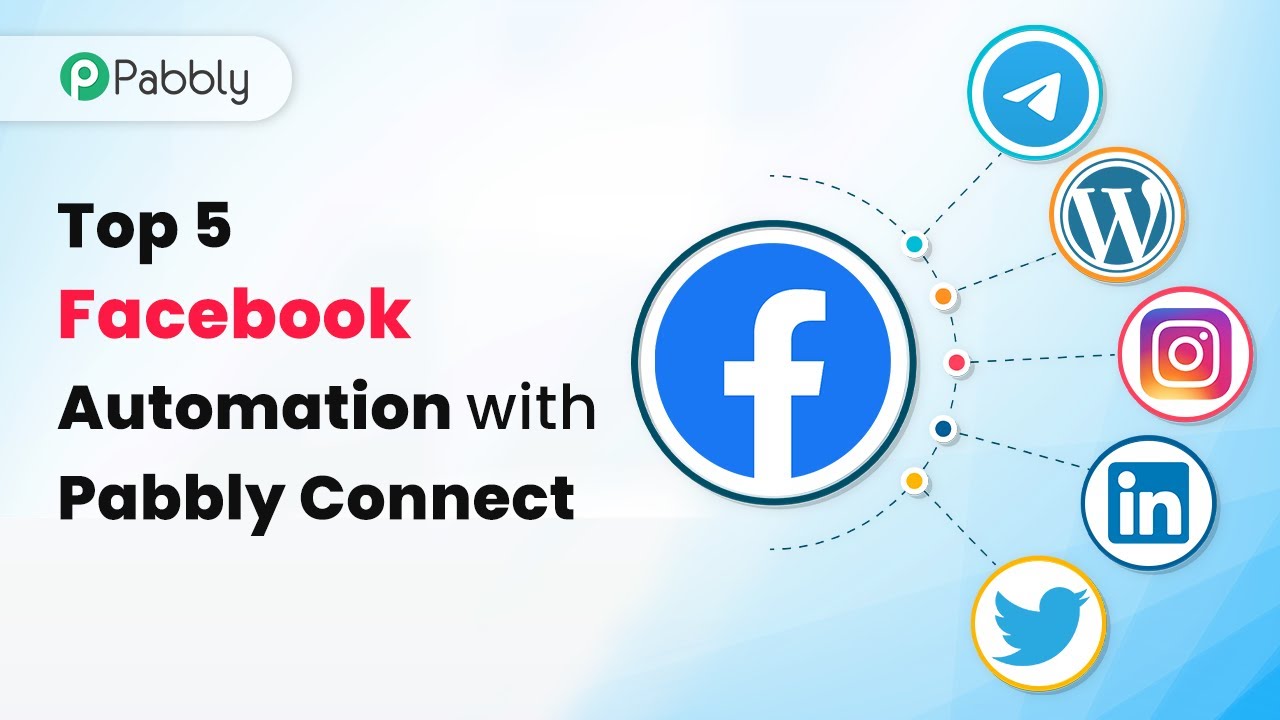
Top 5 Facebook Automation with Pabbly Connect for Effortless Marketing

Discover how to automate your Facebook marketing with Pabbly Connect. Learn the top 5 automations that save time and enhance your social media strategy. Transform complex automation concepts into accessible, actionable steps that eliminate unnecessary manual work while maximizing existing application capabilities.

Watch Step By Step Video Tutorial Below


1. Sharing Facebook Page Posts to Facebook Groups with Pabbly Connect

The first automation using Pabbly Connect enables you to share your Facebook page posts directly to your Facebook groups. This is particularly useful for business owners who manage multiple pages and groups. Instead of manually posting the same content across all groups, Pabbly Connect automates this process, saving you time and effort.

To set this up, follow these steps:

  • Log into your Pabbly Connect account.
  • Create a new workflow and select Facebook as the trigger app.
  • Choose the trigger event as ‘New Post’.
  • Connect your Facebook account and select the page you wish to monitor.
  • Set up the action to share the post in your selected Facebook groups.

Once configured, every time you post on your Facebook page, the same content will automatically be shared in your groups, enhancing your reach effortlessly.


2. Sharing Facebook Posts to Telegram with Pabbly Connect

Another fantastic automation available through Pabbly Connect is sharing your Facebook posts to a Telegram channel. This is ideal for communities that are active on Telegram and want to stay updated with your Facebook content. By automating this process, you ensure that your Telegram audience never misses a post.

To implement this automation, follow these steps:

  • In Pabbly Connect, create a new workflow.
  • Select Facebook as the trigger app and set the trigger event to ‘New Post’.
  • Connect your Facebook account and choose the page.
  • For the action app, select Telegram and choose ‘Send Message’ as the action event.
  • Connect your Telegram account and specify the channel to which the post should be sent.

Now, whenever you share a new post on Facebook, the link will automatically be sent to your Telegram channel, keeping your community engaged across platforms.


3. Sharing Facebook Posts to Discord with Pabbly Connect

Using Pabbly Connect also allows you to share your Facebook posts directly to a Discord channel. This integration is particularly beneficial for communities that use Discord for communication and want to ensure that their members are updated with the latest Facebook content.

To set up this automation, follow these steps:

Open Pabbly Connect and create a new workflow. Select Facebook as the trigger app and choose ‘New Post’ as the trigger event. Connect your Facebook account and select the relevant page. For the action, choose Discord and set the action event to ‘Send Channel Message’. Connect your Discord account and specify the channel for the messages.

After completing these steps, all new Facebook posts will automatically be sent to your Discord channel, ensuring your community is always informed of your latest updates.


4. Sharing WordPress Posts to Facebook with Pabbly Connect

Another useful automation through Pabbly Connect is the capability to share new WordPress posts directly to your Facebook page. This is especially helpful for bloggers who want to keep their Facebook audience updated with their latest content.

To automate this process, follow these steps:

Log into Pabbly Connect and create a new workflow. Select WordPress as the trigger app and choose ‘New Post’ as the trigger event. Connect your WordPress account and set the blog you want to monitor. For the action, select Facebook and choose ‘Create Page Post’ as the action event. Connect your Facebook account and select the page where you want to share the post.

With this setup, every time you publish a new blog post on WordPress, it will automatically be shared on your Facebook page, driving traffic from your social media audience to your blog content.


5. Auto Replying to Comments on Facebook with Pabbly Connect

One of the most powerful features of Pabbly Connect is the ability to automatically reply to comments on your Facebook posts. This automation can significantly save time and maintain engagement with your audience by providing timely responses without manual effort.

To configure this automation, follow these steps:

In Pabbly Connect, create a new workflow. Select Facebook as the trigger app and choose ‘New Comment’ as the trigger event. Connect your Facebook account and specify the page you want to monitor. For the action, select Facebook again and choose ‘Reply to Comment’ as the action event. Customize your reply message based on keywords or phrases in the comments.

This automation ensures that your audience receives timely responses based on their comments, enhancing engagement and maintaining a personal touch without the need for constant monitoring of your posts.


Conclusion

In conclusion, automating your Facebook marketing tasks with Pabbly Connect can significantly enhance your efficiency and engagement. By implementing these top five automations, you can streamline your workflow, keep your audience informed, and save valuable time. Start using Pabbly Connect today to make your marketing easier and faster!

Ensure you check out Pabbly Connect to create business automation workflows and reduce manual tasks. Pabbly Connect currently offer integration with 2,000+ applications.

How to Get Stock Price Drop Alerts on Email Using Pabbly Connect

Learn how to automate stock price drop alerts via email using Google Sheets and Gmail with Pabbly Connect in this detailed tutorial. Develop expertise in application integration and learn how to design streamlined automation workflows using proven, simplified approaches.

Watch Step By Step Video Tutorial Below


1. Setting Up Pabbly Connect for Stock Alerts

To get started with stock price drop alerts, you need to set up Pabbly Connect. This powerful automation tool allows you to integrate various applications seamlessly. First, visit the Pabbly Connect landing page and create a free account.

Once registered, sign in to your Pabbly Connect dashboard. Click on the ‘Create Workflow’ button to initiate your automation setup. Name your workflow, for instance, ‘Stock Prices Drop Alerts,’ and click on the Create button to proceed.


2. Trigger Setup Using Google Sheets

The next step involves setting up a trigger in Google Sheets, which will monitor stock prices. In the workflow dashboard, select Google Sheets as your trigger application. Choose the trigger event that will initiate the workflow, which is when the stock price falls below your purchase price. using Pabbly Connect

  • Select ‘New Row’ as the trigger event.
  • Connect your Google Sheets account by clicking on ‘Connect’ and following the authorization steps.
  • Choose the spreadsheet containing your stock data.

After selecting your spreadsheet, ensure you have included the Google Finance formula to fetch stock prices. This setup will allow the workflow to trigger every time there’s a change in stock price data, facilitating the email alerts.


3. Configuring Email Alerts Using Gmail

After setting up the trigger, the next step is to configure the action that sends email alerts via Gmail. In the action step of your workflow, search for and select Gmail as the action application. Choose the action event as ‘Send Email’ to set up the email alert. using Pabbly Connect

Connect your Gmail account by clicking on ‘Connect’ and following the prompts to authorize Pabbly Connect to send emails on your behalf. Fill in the recipient’s email address, subject, and body content of the email to customize your alert message.

  • Set the subject as ‘Stock Price Alert’.
  • In the email body, include dynamic fields to specify the stock name and price drop.
  • Test the email configuration to ensure alerts are sent correctly.

This setup ensures that every time there’s a significant drop in stock price, you receive an immediate email notification.


4. Finalizing Your Automation Workflow

Now that you have set up both the trigger and action, it’s time to finalize your automation. Review your Pabbly Connect workflow to ensure everything is configured correctly. You can set the frequency of checks, for instance, every 15 minutes, to monitor stock prices continuously. using Pabbly Connect

Once satisfied with the configuration, activate your workflow. This will allow Pabbly Connect to run in the background, checking your Google Sheets for stock price changes and sending alerts as needed.

Additionally, ensure that your Google Sheets is updated with the latest stock prices for accurate monitoring. This ensures that you receive timely alerts whenever your stocks drop below your purchase price.


5. Monitoring and Adjusting Your Alerts

After setting up the automation, it’s essential to monitor its performance. Regularly check your email for alerts and your Google Sheets for stock price updates. You can adjust the parameters in your Pabbly Connect workflow based on your preferences and stock performance. using Pabbly Connect

If you notice that the alerts are too frequent or not relevant, you can modify the trigger settings or the conditions for sending emails. This flexibility allows you to tailor the alerts according to your investment strategy.

Remember, with Pabbly Connect, you can automate this entire process without any coding, making it accessible for everyone. This integration not only saves time but also keeps you informed about your investments effectively.


Conclusion

In this tutorial, we explored how to set up stock price drop alerts using Pabbly Connect, Google Sheets, and Gmail. By automating this process, you can stay updated on your stock investments without manual checks. Utilize Pabbly Connect to enhance your investment strategy effortlessly.

Ensure you check out Pabbly Connect to create business automation workflows and reduce manual tasks. Pabbly Connect currently offer integration with 2,000+ applications.