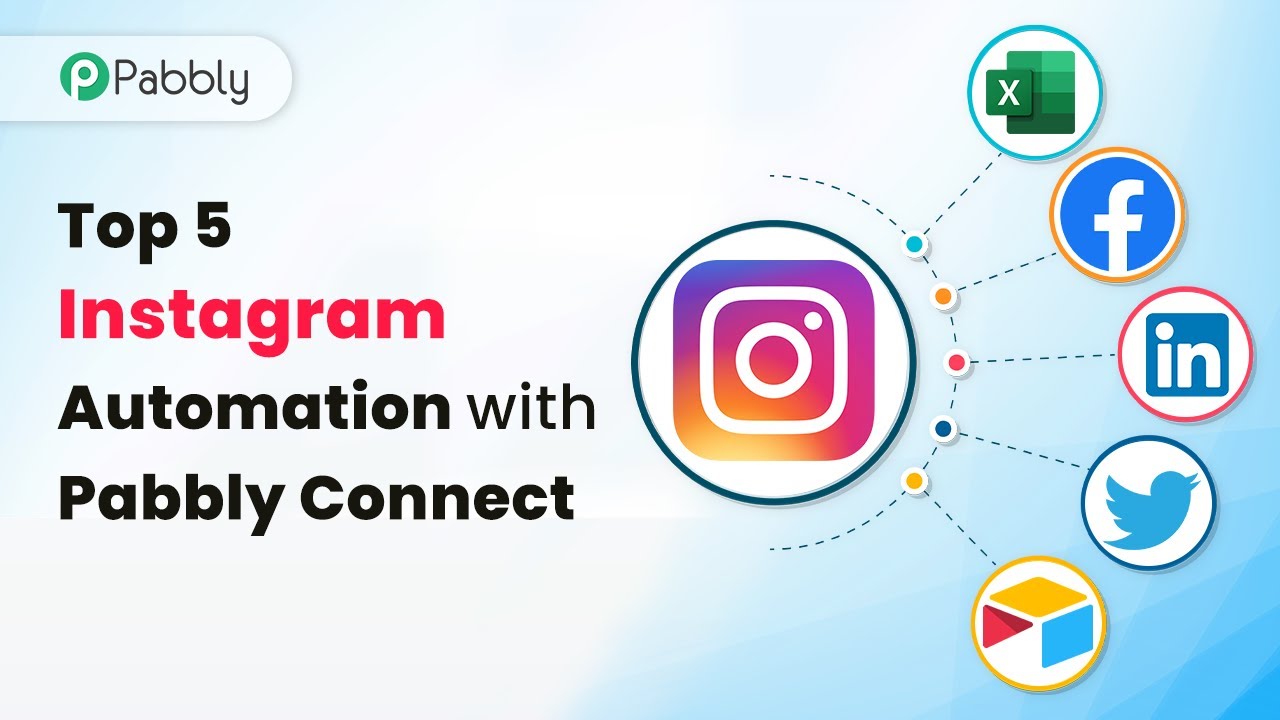
How to Send Thank You SMS to Your Customers Using Pabbly Connect: Google Forms to Twilio Integration

Learn how to automate sending thank you SMS to your customers using Pabbly Connect to integrate Google Forms and Twilio. Step-by-step guide included. Eliminate manual repetitive tasks from your workflow. Discover proven automation methods with intuitive steps designed for efficiency-minded professionals.

Watch Step By Step Video Tutorial Below


1. Accessing Pabbly Connect for SMS Automation

To send thank you SMS to your customers automatically, you need to access Pabbly Connect. This platform allows you to integrate various applications, including Google Forms and Twilio, seamlessly. Start by creating a free account on Pabbly Connect, which you can do in just a few minutes by clicking on the ‘Sign Up Free’ button.

Once logged in, you will be directed to the Pabbly Connect dashboard. Here, you can create a workflow by clicking on the blue button labeled ‘Create Workflow’. You will need to name your workflow something descriptive like ‘Automatically Send SMS to Customers’. This naming convention helps in organizing your automations effectively.


2. Setting Up Google Forms as the Trigger

In this step, you will configure Google Forms as the trigger application in Pabbly Connect. Select Google Forms from the list of applications. The trigger event you need to choose is ‘New Response Received’. This event will initiate the workflow whenever a new form submission occurs.

  • Open the associated Google Sheets for your form.
  • Copy the webhook URL provided by Pabbly Connect.
  • Install the Pabbly Connect Webhooks add-on in Google Sheets.

After copying the webhook URL, go to your Google Sheets and paste it into the initial setup of the Pabbly Connect add-on. Specify the trigger column, which is the column that will activate the webhook when data is added. This setup ensures that every new form submission triggers the SMS sending process.


3. Capturing Data from Google Forms

Now that you have configured the trigger in Pabbly Connect, you need to capture the data from Google Forms. To do this, make a test submission to your Google Form. This will populate the Google Sheets with the data from the form submission.

Once the form is submitted, return to Pabbly Connect and click on the ‘Send Test’ button. This action will allow you to verify if the data from the Google Form is being captured correctly. You should see the details from the form submission, such as the name and email address, in the Pabbly Connect dashboard.

  • Ensure that the phone number field is included in your Google Form.
  • Update the trigger column if necessary to capture the phone number.

After confirming that the data is captured correctly, you can proceed to the next step of integrating Twilio for sending SMS.


4. Integrating Twilio to Send SMS

With the data from Google Forms captured, the next step is to set up Twilio in Pabbly Connect to send SMS. Select Twilio as the action application and choose the action event ‘Send SMS’. This will allow you to send a thank you message to your customers automatically.

To configure Twilio, you will need to enter your Account SID and Auth Token from your Twilio account. These credentials can be found in your Twilio dashboard. Paste them into the respective fields in Pabbly Connect to establish the connection.

Compose your SMS message, including a personalized greeting using mapped data. Map the recipient’s phone number from the captured data to send the SMS correctly.

After configuring the SMS content and recipient details, click on ‘Save and Send Test Request’. This action will send a test SMS to verify that everything is working correctly. You should receive the SMS on your phone, confirming that the integration is successful.


5. Finalizing Your Automation with Pabbly Connect

Now that you have set up Google Forms and Twilio in Pabbly Connect, it’s time to finalize your automation. Ensure that the ‘Send on Event’ option is enabled in the Pabbly Connect add-on. This setting allows the automation to run automatically every time a new form submission is made.

After enabling this option, your automation will be complete. Every time a customer submits the Google Form, Pabbly Connect will capture the data and send a thank you SMS via Twilio instantly. This automation saves time and ensures that your customers receive immediate acknowledgment.

With this setup, you can also customize the messages or add additional SMS features as needed. Pabbly Connect allows for flexibility in integrating various applications, ensuring that your SMS automation meets your specific business needs.


Conclusion

In this tutorial, we explored how to automate sending thank you SMS to your customers using Pabbly Connect to integrate Google Forms and Twilio. By following the detailed steps outlined, you can streamline your customer communication and enhance engagement. Automate your SMS processes today with Pabbly Connect for efficient customer interactions!

Ensure you check out Pabbly Connect to create business automation workflows and reduce manual tasks. Pabbly Connect currently offer integration with 2,000+ applications.

Integrating Nolt Post Comments with Gmail and WhatsApp Using Pabbly Connect

Learn how to integrate Nolt post comments with Gmail and WhatsApp using Pabbly Connect in this detailed tutorial. Automate your notifications today! Learn to create powerful connections between your critical applications without requiring specialized programming knowledge or extensive technical background.

Watch Step By Step Video Tutorial Below


1. Accessing Pabbly Connect for Nolt Integration

To start integrating Nolt post comments with Gmail and WhatsApp, the first step is to access Pabbly Connect. Go to the Pabbly website and click on the Connect option to reach the dashboard.

Once you are on the Pabbly Connect page, log in with your existing account or sign up if you are a new user. After logging in, click on the ‘Create Workflow’ button to begin setting up your integration.


2. Creating a New Workflow in Pabbly Connect

Create a new workflow in Pabbly Connect by naming it something relevant, such as ‘Nolt Comments to Gmail and WhatsApp’. This will help you identify the workflow later.

Next, you will set up the trigger and action applications. The trigger application will be Nolt, and the action applications will be Gmail and WhatsApp. Follow these steps to configure:

  • Select Nolt as the trigger application.
  • Choose the trigger event as ‘New Comment’.
  • Connect your Nolt account by entering the required API key.

After saving the connection, you can test the trigger to ensure it’s working correctly before moving on to the action steps.


3. Setting Up Email Notifications via Gmail

In this section, you will configure Pabbly Connect to send email notifications through Gmail whenever a new comment is posted on Nolt. Select Gmail as your action application and choose the ‘Send Email’ action event.

Connect your Gmail account by allowing access when prompted. Fill in the required fields for the email, including the recipient’s email address, sender’s name, and email subject. Make sure to include the comment details in the email content by mapping the data from the Nolt trigger.

  • Recipient’s Email: [email protected]
  • Email Subject: New Comment Received on Nolt
  • Email Content: Include post title, comment, and user email.

After filling in the details, save and send a test request to confirm that the email is sent correctly. Check your inbox to verify the email notification.


4. Sending WhatsApp Notifications Using Pabbly Connect

Next, you will set up WhatsApp notifications using Pabbly Connect by integrating with Interact. Choose Interact as your action application and select ‘Send WhatsApp Template Message’ as the action event.

Connect your Interact account by entering the required secret key. Fill in the necessary fields, including the country code and phone number for the recipient, along with the template code for the message.

Template Code: New Comment Node Body Variables: Post title, comment text, and user email.

After setting this up, send a test request to ensure the WhatsApp message is sent successfully. Check your WhatsApp to confirm receipt of the message.


5. Final Testing and Confirmation of Integration

To finalize the integration, test the entire workflow by posting a new comment on your Nolt board. This will trigger both the email and WhatsApp notifications set up through Pabbly Connect.

After posting the comment, verify that both notifications are received in your Gmail and WhatsApp. This step confirms that the integration is functioning correctly and that you will receive notifications for future comments as well.

In summary, using Pabbly Connect allows seamless integration between Nolt, Gmail, and WhatsApp, automating your comment notifications efficiently.


Conclusion

In this tutorial, we explored how to use Pabbly Connect to integrate Nolt post comments with Gmail and WhatsApp. By following the detailed steps, you can automate your notification process and ensure you never miss important comments again.

Ensure you check out Pabbly Connect to create business automation workflows and reduce manual tasks. Pabbly Connect currently offer integration with 2,000+ applications.

How to Create WooCommerce Products in Bulk from Google Sheets Using Pabbly Connect

Learn how to automate the process of creating WooCommerce products in bulk from Google Sheets using Pabbly Connect. Step-by-step tutorial included. Eliminate manual repetitive tasks from your workflow. Discover proven automation methods with intuitive steps designed for efficiency-minded professionals.

Watch Step By Step Video Tutorial Below


1. Accessing Pabbly Connect for WooCommerce Integration

To create WooCommerce products in bulk from Google Sheets, you will first need to access Pabbly Connect. Start by signing up for a free account on the Pabbly Connect website. Once registered, log in to your dashboard to begin setting up your workflow.

After logging in, click on the ‘Create Workflow’ button. Name your workflow, for example, ‘Google Sheets to WooCommerce’ and click on the ‘Create’ button. This will open your workflow where you will set up the trigger and action to integrate Google Sheets with WooCommerce using Pabbly Connect.


2. Setting Up the Trigger in Pabbly Connect

In this section, you will set up the trigger to connect Google Sheets with Pabbly Connect. In the trigger window, search for ‘Google Sheets’ and select it. Choose the trigger event as ‘New or Updated Spreadsheet Row’. This means that whenever a new row is added or updated in your Google Sheet, it will trigger the workflow.

  • Select Google Sheets as your app.
  • Choose the trigger event: New or Updated Spreadsheet Row.
  • Copy the webhook URL provided by Pabbly Connect.

Next, go to your Google Sheet, click on ‘Extensions’, then ‘Add-ons’, and select ‘Get Add-ons’. Search for the ‘Pabbly Connect Webhooks’ add-on and install it. After installation, refresh your Google Sheet and navigate back to ‘Extensions’ to find the Pabbly Connect Webhooks option. Click on ‘Initial Setup’ to configure the webhook.


3. Initializing the Webhook in Google Sheets

In the initial setup dialog, select the sheet containing your product details, paste the webhook URL you copied earlier, and specify the trigger column. This column should be the last column containing data in your Google Sheet. For example, if your data extends to column G, enter ‘G’ as the trigger column.

After configuring these settings, click the ‘Send Test’ button. You should see a confirmation message indicating that test data has been sent successfully. This means that the first product’s details from your Google Sheet have been captured by Pabbly Connect.

  • Select the sheet with product details.
  • Paste the Pabbly Connect webhook URL.
  • Specify the trigger column (e.g., G).

Once the test is successful, save your settings in the Google Sheets add-on. This will finalize the connection between Google Sheets and Pabbly Connect, enabling the automation to work seamlessly.


4. Configuring the WooCommerce Action in Pabbly Connect

Now that the trigger is set up, you need to configure the action to create products in WooCommerce. In the action window of Pabbly Connect, search for ‘WooCommerce’ and select it. Choose the action event as ‘Create a Product’. Click on ‘Connect’ and add a new connection to your WooCommerce account.

To connect your WooCommerce account, enter your Consumer Key, Consumer Secret, and Website URL. You can obtain these credentials from your WooCommerce settings under the REST API section. Once connected, you will be able to map the product details from Google Sheets to the respective fields in WooCommerce.

Search for WooCommerce in the action window. Select ‘Create a Product’ as the action event. Map product details from Google Sheets to WooCommerce fields.

Map the fields such as product name, SKU, price, and description by selecting the corresponding responses from the Google Sheets trigger. This mapping is crucial as it ensures that the data entered in Google Sheets is accurately reflected in your WooCommerce store.


5. Sending Data to WooCommerce and Finalizing

After mapping all required fields, click on the ‘Save and Send Test Request’ button in Pabbly Connect. This will send the product details to your WooCommerce store. If everything is set up correctly, you will receive a positive response indicating that the product has been created.

To add multiple products, simply delete the row from your Google Sheet that was previously sent, and click on the ‘Send All Data’ button in the Pabbly Connect Webhooks add-on. This will send all product details from your Google Sheet to Pabbly Connect, which will then create all products in WooCommerce automatically.

Click ‘Save and Send Test Request’ to create the product. Delete the row from Google Sheets after testing. Use ‘Send All Data’ to add more products.

After refreshing your WooCommerce store, you should see all the products successfully added with the details provided in your Google Sheets. This automation saves time and effort, allowing you to manage your eCommerce products efficiently using Pabbly Connect.


Conclusion

Using Pabbly Connect, you can seamlessly create WooCommerce products in bulk from Google Sheets. This integration automates the process, ensuring accuracy and efficiency in managing your online store. With just a few clicks, all your product details can be transferred from Google Sheets to WooCommerce.

Ensure you check out Pabbly Connect to create business automation workflows and reduce manual tasks. Pabbly Connect currently offer integration with 2,000+ applications.

How to Automate SMS Sending with Pabbly Connect: A Step-by-Step Guide

Learn how to automate SMS sending using Pabbly Connect with our detailed tutorial. Integrate Google Sheets, Twilio, and more for seamless SMS automation. Develop expertise in application integration and learn how to design streamlined automation workflows using proven, simplified approaches.

Watch Step By Step Video Tutorial Below


1. Introduction to SMS Automation with Pabbly Connect

SMS automation is a powerful tool for businesses to enhance communication with customers. Using Pabbly Connect, you can automate the process of sending SMS notifications for various purposes, such as order confirmations, appointment reminders, and promotional offers. This tutorial will guide you through setting up SMS automation using Pabbly Connect and other applications.

With Pabbly Connect, businesses can streamline their SMS communication effectively. By integrating applications like Google Sheets and Twilio, you can ensure that SMS messages are sent automatically whenever specific events occur, thus improving customer engagement and service efficiency.


2. Accessing Pabbly Connect for SMS Automation

To get started with SMS automation, first, access Pabbly Connect. If you do not have an account, you can create a free account in just a few minutes. Once logged in, you will be directed to the Pabbly Connect dashboard, where you can manage your workflows.

To create a new automation workflow, click on the blue ‘Create Workflow’ button and give your workflow a name, such as ‘Automate SMS Sending Process with Pabbly Connect’. Once named, click on the ‘Create’ button to proceed. You will see two main sections: Trigger and Action, which define the automation flow.


3. Setting Up the Trigger in Pabbly Connect

In this step, you will set up the trigger for your SMS automation process. Select an application that will act as the trigger, such as Google Sheets. This means that whenever new data is added to Google Sheets, an SMS will be sent automatically through Pabbly Connect.

  • Choose Google Sheets as the trigger application.
  • Select the trigger event, such as ‘New or Updated Spreadsheet Row’.
  • Copy the provided webhook URL from Pabbly Connect.
  • Open Google Sheets, go to Extensions, then Add-ons, and install the Pabbly Connect Webhooks add-on.

After installing the add-on, paste the webhook URL into the add-on’s initial setup. Specify the trigger column, which is the column where the data will be filled to trigger the SMS sending. Once configured, click on the ‘Send Test’ button to ensure the connection is established correctly.


4. Configuring the SMS Action in Pabbly Connect

Now that the trigger is set up, it’s time to configure the action that sends the SMS. For this, select Twilio as your action application within Pabbly Connect. This integration allows you to send SMS messages automatically based on the data captured from Google Sheets.

  • Choose Twilio as the action application.
  • Select the action event, such as ‘Send SMS Message’.
  • Connect your Twilio account by entering the required credentials (Account SID, Auth Token).
  • Compose the SMS body using dynamic fields from the Google Sheets data.

Mapping is crucial here; it allows you to personalize the SMS by automatically inserting customer details from Google Sheets. For example, you can create a message like, ‘Hello [Customer Name], enjoy a 25% discount on our anniversary sale!’ This makes your communication more engaging and relevant.


5. Testing and Activating the Automation

After configuring both the trigger and action, it’s essential to test your automation. Click ‘Save and Send Test Request’ to check if the SMS is sent successfully via Twilio. Ensure that the recipient number is formatted correctly, including the country code.

If the test is successful, you will receive a confirmation that the SMS was sent. Once confirmed, you can activate the automation. Every time new data is added to Google Sheets, Pabbly Connect will automatically send the SMS to the specified number without any manual intervention.

For bulk SMS sending, you can enable the ‘Send All Data’ option in the Pabbly Connect settings. This allows you to send messages to all customers listed in your Google Sheets at once, streamlining your communication process significantly.


Conclusion

In this tutorial, we explored how to automate SMS sending using Pabbly Connect. By integrating Google Sheets and Twilio, businesses can enhance their communication with customers effectively. With this setup, sending personalized SMS notifications becomes effortless and efficient, ultimately improving customer engagement.

Ensure you check out Pabbly Connect to create business automation workflows and reduce manual tasks. Pabbly Connect currently offer integration with 2,000+ applications.

Top 5 Google My Business Automation: A Complete Guide with Pabbly Connect

Learn how to automate your Google My Business with Pabbly Connect using integrations with Facebook, Instagram, and more. Step-by-step guide included. This comprehensive guide reveals exactly how to connect your applications and automate repetitive tasks — accessible for professionals of all technical backgrounds.

Watch Step By Step Video Tutorial Below


1. Introduction to Pabbly Connect for Google My Business Automation

Pabbly Connect is an exceptional automation platform that allows you to integrate various applications seamlessly. In this tutorial, we will explore how to automate Google My Business using Pabbly Connect to enhance your business operations. using Pabbly Connect

With Pabbly Connect, you can connect Google My Business with platforms like Facebook, Instagram, and more, ensuring that your business remains responsive and efficient. This tutorial will guide you through the necessary steps to set up these automations effectively.


2. Setting Up Pabbly Connect to Handle Google Reviews

To begin automating Google My Business reviews, log in to your Pabbly Connect account. First, create a new workflow by clicking on the ‘Create Workflow’ button. Name your workflow something descriptive, like ‘Auto Reply to Google Reviews’. using Pabbly Connect

  • Select Google My Business as the trigger application.
  • Choose the trigger event as ‘New Review’.
  • Connect your Google My Business account to Pabbly Connect.

Once connected, every time a new review is posted, Pabbly Connect will capture the review details, allowing you to automate responses based on the review content.


3. Integrating OpenAI for Automated Review Responses

After setting up the Google My Business trigger, the next step is to integrate OpenAI to generate automatic responses. In Pabbly Connect, add a new action step and select OpenAI as the action application. using Pabbly Connect

In this step, you will configure the action to generate a response based on the review received. Set the prompt to something like ‘Generate a professional reply for a positive review’. This way, when a review is captured, OpenAI will generate a relevant response automatically.


4. Saving Responses to Google Sheets for Record Keeping

To maintain a record of all reviews and responses, integrate Google Sheets into your Pabbly Connect workflow. Add Google Sheets as another action step and select the action event as ‘Add New Row’. using Pabbly Connect

  • Map the review ID, review content, and generated response to the respective columns in Google Sheets.
  • Ensure that each new review and its corresponding response are logged for future reference.

This integration not only keeps your responses organized but also provides a valuable resource for analyzing customer feedback over time.


5. Finalizing and Testing Your Automation Workflow

After setting up all integrations, it’s crucial to test your workflow. Use the ‘Save and Send Test Request’ feature in Pabbly Connect to ensure that your automation works as intended. Check that new reviews trigger the correct responses and that entries are logged in Google Sheets. using Pabbly Connect

Once tested successfully, your automation setup is complete. You can now enjoy a streamlined process where Pabbly Connect handles your Google My Business reviews efficiently, allowing you to focus on other aspects of your business.


Conclusion

In conclusion, Pabbly Connect offers a powerful solution for automating Google My Business tasks. By integrating with various applications, you can enhance your business efficiency and responsiveness. Set up your automation today and streamline your customer interactions!

Ensure you check out Pabbly Connect to create business automation workflows and reduce manual tasks. Pabbly Connect currently offer integration with 2,000+ applications.

Automatically Transfer Google Tasks to Google Sheets with Pabbly Connect

Learn how to automatically transfer tasks from Google Tasks to Google Sheets using Pabbly Connect in this step-by-step tutorial. Transform complex automation concepts into accessible, actionable steps that eliminate unnecessary manual work while maximizing existing application capabilities.

Watch Step By Step Video Tutorial Below


1. Setting Up Pabbly Connect for Integration

To begin the integration between Google Tasks and Google Sheets, you need to access Pabbly Connect. Start by signing into your Pabbly Connect account or create a new account if you don’t have one.

Once logged in, navigate to the dashboard where you can create a new workflow. This is where you will set up the automation that transfers tasks from Google Tasks to Google Sheets automatically.


2. Connecting Google Tasks with Pabbly Connect

In this step, you will connect your Google Tasks account to Pabbly Connect. Click on the ‘Create Workflow’ button and name your workflow appropriately.

  • Select Google Tasks as your trigger application.
  • Choose the trigger event as ‘New Task’.
  • Connect your Google account by following the on-screen instructions to authorize Pabbly Connect.

After connecting, you will need to test the connection to ensure that Pabbly Connect can retrieve data from Google Tasks. This step is crucial for the automation to work effectively.


3. Adding Google Sheets to the Workflow

Next, you will set up Google Sheets as the action application in Pabbly Connect. After successfully connecting Google Tasks, click on the ‘+’ icon to add another application.

  • Select Google Sheets as the action application.
  • Choose the action event as ‘Add Row’.
  • Connect your Google Sheets account by authorizing Pabbly Connect.

Once connected, you need to specify which Google Sheets document you want to send the data to. This is done by selecting the spreadsheet and specifying the worksheet where the data will be added.


4. Mapping Data from Google Tasks to Google Sheets

In this section, you will map the data retrieved from Google Tasks to the appropriate columns in Google Sheets using Pabbly Connect. After selecting the spreadsheet, you will see fields corresponding to the columns in your sheet.

Map the fields such as task name, due date, and any other relevant information from Google Tasks to the respective columns in Google Sheets. This ensures that the data is organized correctly when added.


5. Testing the Integration

Finally, you will need to test the entire integration to confirm that tasks from Google Tasks are automatically transferred to Google Sheets. Trigger a new task in Google Tasks and check if it appears in your Google Sheets document.

If everything is set up correctly, you should see the new task populated in your specified Google Sheets. This demonstrates the power of Pabbly Connect in automating workflows between applications seamlessly.


Conclusion

By following these steps, you can easily automate the transfer of tasks from Google Tasks to Google Sheets using Pabbly Connect. This integration saves time and enhances productivity by keeping your task lists updated automatically.

Ensure you check out Pabbly Connect to create business automation workflows and reduce manual tasks. Pabbly Connect currently offer integration with 2,000+ applications.

Top 5 Twitter Automation: A Complete Guide Using Pabbly Connect

Learn how to automate Twitter tasks using Pabbly Connect in this detailed guide. Discover step-by-step integrations with Gmail, Excel, WordPress, and more! Discover how to seamlessly connect your essential tools through accessible instructions that make powerful automation available to professionals at every skill level.

Watch Step By Step Video Tutorial Below


1. How to Access Pabbly Connect for Twitter Automation

To begin with Twitter automation, access Pabbly Connect by signing up for a free account. This integration tool allows you to automate tasks between various applications seamlessly. Once signed up, log in to your account and navigate to the dashboard.

On the dashboard, click on the ‘Create Workflow’ button. You will need to name your workflow, such as ‘Twitter Automation’. After naming, click on the create button to start setting up your automation process.


2. Posting Tweets Across Multiple Twitter Accounts Using Pabbly Connect

To automate posting tweets across multiple Twitter accounts, you will set up a workflow in Pabbly Connect. First, select Twitter as your trigger application. Choose the trigger event as ‘New Tweet’ and connect your Twitter account by authorizing Pabbly Connect.

  • Select Twitter as the trigger application.
  • Choose ‘New Tweet’ as the trigger event.
  • Authorize your Twitter account.

Once connected, you can fetch details of the most recent tweet. For the action step, select Twitter again and choose the action event as ‘Create Tweet’. Connect the second Twitter account and map the tweet text from the first account to the second account.


3. Exporting Twitter Followers to Microsoft Excel with Pabbly Connect

Next, you can automate the process of exporting Twitter followers to Microsoft Excel using Pabbly Connect. Start by creating a new workflow where the trigger application is Twitter. Set the trigger event to ‘New Follower’ to monitor when a specific user gains a new follower.

Connect your Twitter account and specify the username of the target account whose followers you want to track. After establishing the connection, set the action application to Microsoft Excel and choose the action event as ‘Add Row’ to insert follower data into your Excel sheet.

  • Create a new workflow in Pabbly Connect.
  • Set Twitter as the trigger application with ‘New Follower’.
  • Connect Microsoft Excel for the action step.

Map the relevant fields like username, name, and follower details from Twitter to the corresponding columns in your Excel sheet. This way, every time a new follower is added, their information will automatically populate in your Excel file.


4. Saving Tweets to Airtable Using Pabbly Connect

Another useful automation is saving tweets to Airtable with Pabbly Connect. Begin by creating a new workflow and selecting Twitter as the trigger application with the event set to ‘New Tweet’. This setup will allow you to capture any tweet you post.

Once you have connected your Twitter account, set the action application to Airtable and choose the action event as ‘Create Record’. You will need to connect your Airtable account and specify the base and table where you want to store the tweets.

Select Twitter as the trigger application with ‘New Tweet’. Connect Airtable for the action step. Map the tweet content to the Airtable fields.

By mapping the tweet details, every new tweet will be automatically saved in your Airtable base, allowing you to keep a backup of your tweets effortlessly.


5. Sending Email Notifications for New Tweets via Pabbly Connect

Lastly, automate the process of sending email notifications for new tweets using Pabbly Connect. Create a workflow where Twitter is the trigger application, and the event is set to ‘New Tweet’. After connecting your Twitter account, set the action application to Gmail.

In the Gmail action step, you will need to specify the recipient’s email address, subject, and content of the email. Utilize mapping to insert the tweet details into the email body, ensuring that your team receives timely notifications whenever a new tweet is posted.

Create a new workflow in Pabbly Connect. Set Twitter as the trigger application with ‘New Tweet’. Connect Gmail for the action step.

After completing the setup, every time you tweet, an email notification will be sent to the specified recipient, keeping your team informed about new posts on Twitter.


Conclusion

This guide on using Pabbly Connect for Twitter automation demonstrated how to integrate various applications effectively. By automating tasks like posting tweets, exporting followers, saving tweets, and sending notifications, you can streamline your social media management. Start using Pabbly Connect today to enhance your Twitter experience!

Ensure you check out Pabbly Connect to create business automation workflows and reduce manual tasks. Pabbly Connect currently offer integration with 2,000+ applications.

Send SMS Alerts on Expiring TV Subscriptions Using Pabbly Connect

Learn how to send SMS alerts for expiring TV subscriptions from Google Sheets using Pabbly Connect. This detailed tutorial guides you through the integration process step-by-step.

Watch Step By Step Video Tutorial Below


1. Setting Up Pabbly Connect for SMS Alerts

To start sending SMS alerts for expiring TV subscriptions, the first step is to set up Pabbly Connect. This powerful integration platform allows users to connect various applications seamlessly. Begin by visiting the Pabbly Connect website and signing up for a free account.

After signing up, navigate to the dashboard and click on ‘Create Workflow’. This is where you will build your integration. Name the workflow descriptively to help identify its purpose, such as ‘Google Sheets to SMS Alerts’. After naming, click on the ‘Create’ button to proceed.


2. Scheduling the Workflow in Pabbly Connect

Once your workflow is created, the next step involves scheduling it to run daily. This is essential for sending timely SMS alerts. In the trigger window, select ‘Schedule by Pabbly’ as the app. Here, you can set the frequency of the workflow. using Pabbly Connect

  • Choose a daily schedule for sending alerts.
  • Set the time to 9:30 AM IST (UTC +5:30).
  • Convert your local time to UTC for accurate scheduling.

After configuring the schedule, click on ‘Save’ to finalize your settings. This step ensures that the workflow will check for expiring subscriptions every day at the specified time.


3. Retrieving Data from Google Sheets via Pabbly Connect

Now that the workflow is scheduled, the next step is to retrieve data from Google Sheets. In the action window, select ‘Google Sheets by Pabbly’ and choose the action event ‘Get Rows’. This action allows Pabbly Connect to pull the necessary data from your subscription list. using Pabbly Connect

Connect your Google Sheets account by clicking on ‘Connect’, and then select the spreadsheet that contains your subscription data. You will need to specify the range of cells to retrieve, typically from A2 to C15, which includes customer names, phone numbers, and subscription expiry dates.


4. Applying Conditions for Sending SMS Alerts

After retrieving the data, you need to apply conditions to determine who should receive SMS alerts. Utilize the iterator feature in Pabbly Connect to loop through each row of data. This allows you to check each subscription’s expiry date against the current date.

  • Establish current date using ‘DateTime’ action.
  • Subtract expiry date from current date to determine urgency.
  • Create filter conditions to check if the expiry is within 5 days.

If the conditions are met (expiry date is less than 5 days away), the workflow will proceed to send an SMS alert to the respective customer. This is a crucial step to ensure that only those whose subscriptions are about to expire receive notifications.


5. Sending SMS Alerts Using Twilio

The final step in this integration process is to send SMS alerts using Twilio. In the last action window of Pabbly Connect, select ‘Twilio’ as the app and choose the action event ‘Send SMS’. This will allow you to configure the SMS message that will be sent to customers.

Fill in the required fields such as the sender number (provided by Twilio), recipient number (mapped from Google Sheets), and the SMS body. The SMS body should include a personalized message indicating the expiry date and a reminder to renew the subscription.

Once everything is set up, click on ‘Save and Send Test Request’ to verify that the SMS is sent successfully. You can check the recipient’s phone to confirm delivery. This step finalizes the workflow, allowing for automated SMS alerts to be sent whenever a subscription is nearing its expiry date.


Conclusion

In this tutorial, we explored how to send SMS alerts for expiring TV subscriptions using Pabbly Connect. By integrating Google Sheets and Twilio, you can automate the reminder process efficiently. With this setup, you ensure timely notifications to your customers, enhancing their experience and prompting timely renewals.

Ensure you check out Pabbly Connect to create business automation workflows and reduce manual tasks. Pabbly Connect currently offer integration with 2,000+ applications.

Top 5 Zoom Automations with Pabbly Connect: A Complete Guide

Discover how to automate Zoom with Pabbly Connect in this step-by-step guide. Learn to integrate with Gmail, Google Sheets, Salesforce, and more! Build sophisticated automated workflows in less time than you think. This guide translates complex integrations into straightforward steps for immediate implementation.

Watch Step By Step Video Tutorial Below


1. Introduction to Pabbly Connect for Zoom Automation

In this guide, we will explore how to automate various Zoom functionalities using Pabbly Connect. By integrating Zoom with other applications, we can streamline processes like sending meeting invites, reminders, and tracking participant attendance. This tutorial will cover the top five automations you can set up using Pabbly Connect.

Before we dive into the specifics, it’s important to note that Pabbly Connect serves as the central integration platform that connects Zoom with other applications like Gmail, Google Sheets, and Salesforce. Each automation will demonstrate how Pabbly Connect facilitates seamless workflows.


2. Sending Zoom Meeting Invites via Gmail Using Pabbly Connect

The first automation involves sending Zoom meeting invites automatically through Gmail. This process begins by setting up a trigger in Pabbly Connect that captures registration details from Zoom. When a new participant registers for a meeting, the information is relayed to Gmail to send a personalized invite.

Follow these steps to set up the integration:

  • Log in to your Pabbly Connect account.
  • Create a new workflow and select ‘Zoom’ as the trigger app.
  • Choose ‘Configure Webhook’ as the trigger event.

Once the trigger is set, proceed to connect your Zoom account to Pabbly Connect by copying the webhook URL and adding it to your Zoom account’s integration settings. This will allow Pabbly Connect to capture registration data directly from Zoom.


3. Automating Meeting Reminders via WhatsApp with Pabbly Connect

The second automation focuses on sending meeting reminders through WhatsApp. This ensures that participants receive timely notifications about upcoming meetings. Utilizing Pabbly Connect, we can automate reminders to be sent one day, two hours, and 15 minutes before the scheduled meeting.

To implement this automation, follow these steps:

  • Create a new workflow in Pabbly Connect and set Zoom as the trigger app.
  • Use the ‘Participant Host Joined’ event to trigger the workflow.
  • Add a delay action to schedule reminders at specified times.

By mapping the participant’s details from Zoom into the WhatsApp message template, you can ensure that each registrant receives a personalized reminder. This integration not only saves time but also enhances participant engagement.


4. Recording Participant Join and Leave Times in Google Sheets with Pabbly Connect

Another useful automation is tracking the joining and leaving times of participants in a Zoom meeting by logging this data into Google Sheets. This can be invaluable for analyzing attendance and engagement levels.

Here’s how to set up this integration:

In Pabbly Connect, create a new workflow and select Zoom as the trigger application. Choose ‘Participant Joined’ and ‘Participant Left’ events to capture both joining and leaving data. Use Google Sheets as the action app to log the data.

By utilizing Pabbly Connect, you can automate the process of recording these times, ensuring accurate tracking without manual input. This integration allows for a streamlined approach to participant management during meetings.


5. Integrating Zoom with Salesforce Using Pabbly Connect

The final automation we will cover is integrating Zoom with Salesforce to manage leads effectively. This allows for the automatic addition of new registrants as contacts in Salesforce, enhancing your CRM capabilities.

To set up this integration, follow these steps:

In Pabbly Connect, create a new workflow and select Zoom as the trigger app. Choose ‘Meeting Registration Created’ as the trigger event. Set Salesforce as the action app and select ‘Create Contact’.

With this setup, every time a new registrant signs up for a Zoom meeting, their details will be automatically sent to Salesforce, creating a new contact entry. This integration streamlines lead management and ensures that no potential client is overlooked.


Conclusion

In this tutorial, we explored how to automate various Zoom functionalities using Pabbly Connect. From sending Gmail invites to tracking participant attendance in Google Sheets and integrating with Salesforce, Pabbly Connect serves as a powerful tool for enhancing your Zoom experience. By implementing these automations, you can save time and ensure a seamless workflow across your applications.

Ensure you check out Pabbly Connect to create business automation workflows and reduce manual tasks. Pabbly Connect currently offer integration with 2,000+ applications.

How to Share Google Slides Presentation on LinkedIn Profile from Google Sheets Using Pabbly Connect

Learn how to seamlessly share your Google Slides presentation on your LinkedIn profile directly from Google Sheets using Pabbly Connect. Follow this detailed tutorial! Build sophisticated automated workflows in less time than you think. This guide translates complex integrations into straightforward steps for immediate implementation.

Watch Step By Step Video Tutorial Below


1. Setting Up Pabbly Connect for Google Slides and LinkedIn Integration

To share your Google Slides presentation on LinkedIn directly from Google Sheets, you will first need to set up Pabbly Connect. This platform allows seamless integration between Google Sheets and LinkedIn, facilitating automated posting of your presentations.

Begin by logging into your Pabbly Connect account. If you don’t have an account, create one easily. Once logged in, navigate to the dashboard and select the option to create a new workflow. This will allow you to set up the automation process for sharing your presentation.


2. Creating a New Workflow in Pabbly Connect

In this step, you will create a new workflow specifically for sharing your Google Slides presentation on LinkedIn. Click on the ‘Create Workflow’ button and name your workflow appropriately, such as ‘Share Google Slides on LinkedIn’.

  • Select Google Sheets as the trigger application.
  • Choose the trigger event as ‘New Spreadsheet Row’.
  • Connect your Google Sheets account to Pabbly Connect.

After setting up the trigger, proceed to configure the specific Google Sheet you wish to use. Make sure your sheet is structured correctly to include all necessary details about your presentation, such as the presentation title and link.


3. Linking Google Slides to LinkedIn Using Pabbly Connect

Now that your trigger is set, the next step is to link Google Slides to LinkedIn through Pabbly Connect. Add an action step to your workflow by selecting LinkedIn as the action application.

  • Choose the action event as ‘Create Share Update’.
  • Connect your LinkedIn account to Pabbly Connect.
  • Map the fields from your Google Sheets to the LinkedIn post fields.

This mapping is crucial as it determines how the information from your Google Sheets will appear in your LinkedIn post. Ensure that the presentation link and title are correctly mapped for optimal visibility.


4. Testing the Integration with Pabbly Connect

With the workflow configured, it’s time to test the integration. In Pabbly Connect, use the ‘Test’ feature to simulate the process. This will help you verify that the data flows correctly from Google Sheets to LinkedIn.

Check the LinkedIn profile after the test to see if the presentation has been posted successfully. If everything is set up correctly, you should see a new post with your Google Slides presentation linked, showcasing your work to your network.


5. Finalizing the Workflow in Pabbly Connect

Once the test is successful, you can finalize your workflow in Pabbly Connect. Make sure to turn on the workflow so that it runs automatically whenever a new row is added to your Google Sheets.

This automation will save you time and ensure that your LinkedIn profile is always updated with your latest presentations. Monitor your LinkedIn profile to track engagement and feedback from your audience.


Conclusion

Using Pabbly Connect, sharing Google Slides presentations on your LinkedIn profile from Google Sheets is straightforward and efficient. This integration not only automates the process but also enhances your professional visibility by showcasing your presentations seamlessly.

Ensure you check out Pabbly Connect to create business automation workflows and reduce manual tasks. Pabbly Connect currently offer integration with 2,000+ applications.