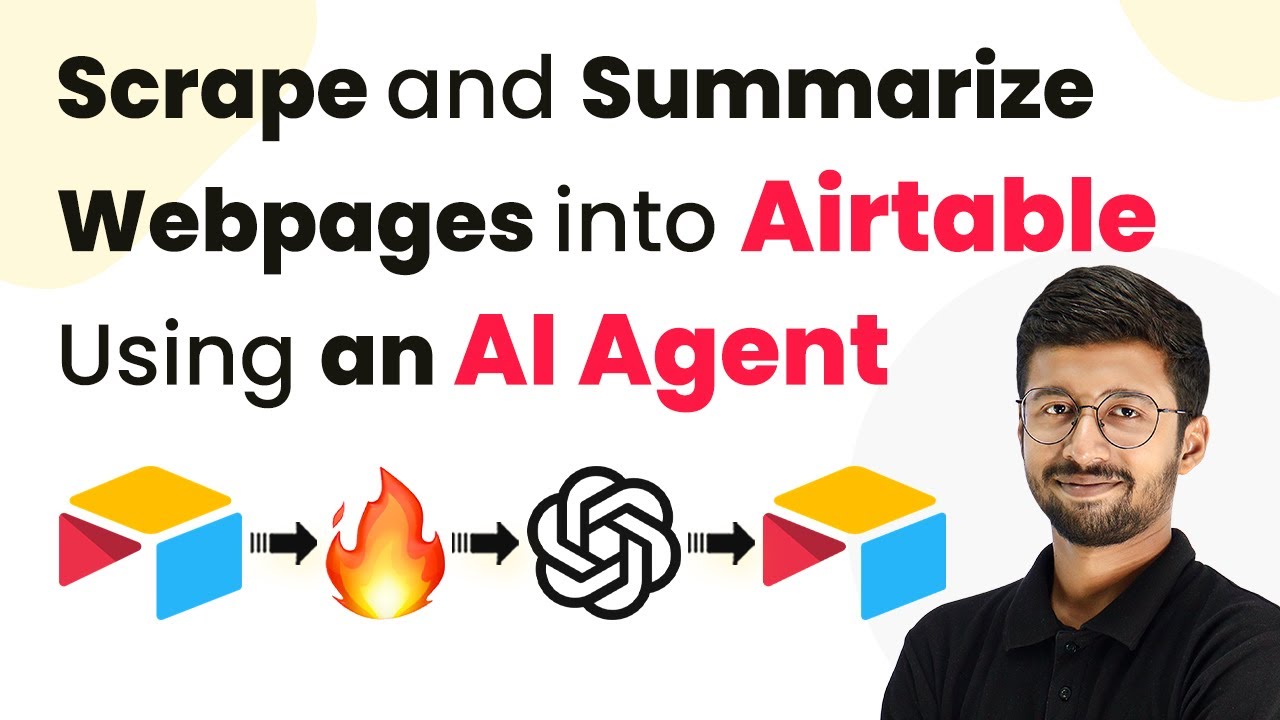
How to Scrape and Summarize Webpages into Airtable Using Pabbly Connect

Learn how to scrape and summarize webpages into Airtable using Pabbly Connect and an AI agent. Step-by-step guide for seamless integration. Discover hidden automation capabilities within your existing tools. This guide shows you how to connect your essential applications and permanently eliminate redundant manual processes.

Watch Step By Step Video Tutorial Below


1. Accessing Pabbly Connect for Web Scraping

To begin scraping and summarizing webpages into Airtable, the first step is accessing Pabbly Connect. Start by navigating to the Pabbly Connect landing page.

Here, you will find options to either sign in or sign up for a free account. If you are new to Pabbly, click on the ‘Sign Up Free’ button to create your account in a few minutes. Existing users can simply click on ‘Sign In’. After signing in, you will reach the all apps page, where you can access Pabbly Connect.


2. Creating a Workflow in Pabbly Connect

Once you are in Pabbly Connect, the next step is to create a workflow for your AI agent. Click on the ‘Create Workflow’ button and name it, for instance, ‘AI Agent for Web Scraping and Summary’. After naming your workflow, select the appropriate folder in your Pabbly account and click ‘Create’. using Pabbly Connect

  • Name your workflow appropriately.
  • Select the folder for organization.
  • Click ‘Create’ to proceed.

This will open your workflow dashboard, where you will see two windows: the trigger and action windows. The trigger window is where you will set up the event that starts your automation.


3. Setting Up the Trigger with Airtable

In this section, you will connect your Airtable database to Pabbly Connect to trigger the automation when a new record is added. In the trigger step, search for Airtable and select it.

Choose the trigger event as ‘New Record’ and click on ‘Connect’. You will then need to add a new connection to your Airtable account. Click on ‘Connect with Airtable’ and grant access to your Airtable bases. After connecting, select the base you want to work with and ensure you have created a field named ‘Created’ of type ‘Created Time’.

  • Select the appropriate base and table.
  • Ensure the ‘Created’ field is set up correctly.
  • Click ‘Save and Send Test Request’ to confirm the connection.

Upon successful connection, you will receive the details of the last record added to Airtable, which will be used in the next steps of your workflow.


4. Scraping Data Using Firecrawl

Next, you will set up the action step to scrape data from the webpage using Firecrawl. In the action step, search for Firecrawl and select it. Choose the action event as ‘Add a Script’ and click on ‘Connect’ to establish a connection with your Firecrawl account. using Pabbly Connect

To connect Firecrawl, you will need to enter your API key from your Firecrawl account. After successfully connecting, you will specify the URL of the webpage you want to scrape by mapping it from the trigger step responses.

Map the URL from the trigger step. Select the desired data format (e.g., markdown). Click ‘Save and Send Test Request’ to initiate scraping.

Once the scraping is complete, Firecrawl will return the scraped content in the specified format, ready for summarization.


5. Sending Data to OpenAI for Summarization

In this final step, you will send the scraped data to OpenAI for summarization. Add another action step in your workflow, search for OpenAI, and select it. Choose the action event as ‘Chat GPT’ and connect your OpenAI account by entering your API key. using Pabbly Connect

After connecting, you will select the AI model you wish to use for summarization and enter the prompt for OpenAI. Map the scraped content from Firecrawl into the prompt field, ensuring clarity in the summary request.

Map the content into the prompt field. Click ‘Save and Send Test Request’ to receive the summary. Ensure the summary is returned correctly in the response.

Finally, update your Airtable record with the summarized content and title using another action step in Pabbly Connect, ensuring your workflow is complete and functional.


Conclusion

By following these detailed steps, you can effectively scrape and summarize webpages into Airtable using Pabbly Connect. This automation streamlines the process, allowing you to focus on analyzing the summarized content rather than manually extracting information.

Ensure you check out Pabbly Connect to create business automation workflows and reduce manual tasks. Pabbly Connect currently offer integration with 2,000+ applications.

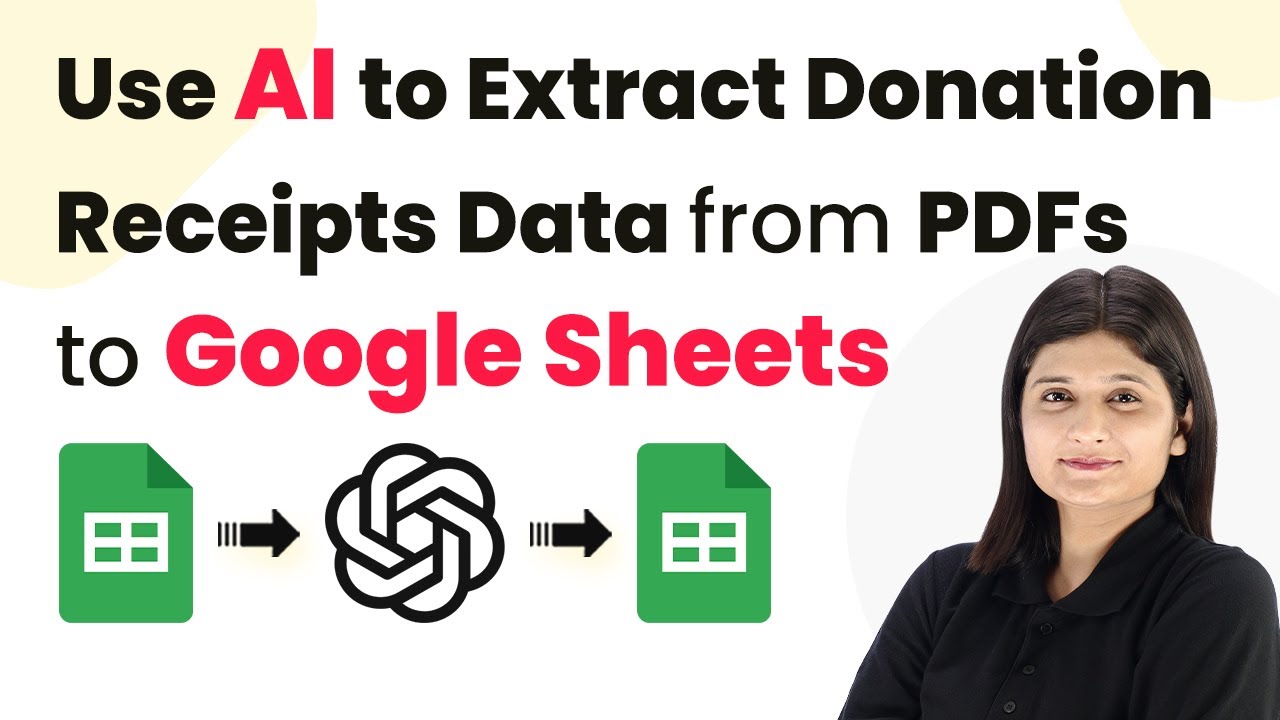
How to Use Pabbly Connect to Extract Donation Receipts Data from PDFs to Google Sheets

Learn how to use Pabbly Connect to automate the extraction of donation receipts data from PDFs to Google Sheets seamlessly. Discover how to seamlessly connect your essential tools through accessible instructions that make powerful automation available to professionals at every skill level.

Watch Step By Step Video Tutorial Below


1. Setting Up Pabbly Connect for PDF Data Extraction

To extract donation receipts data from PDFs to Google Sheets, first access Pabbly Connect. This powerful automation tool allows you to integrate various applications without any coding skills. Start by visiting Pabbly Connect and signing in to your account.

Once logged in, you will see the dashboard. From there, create a new workflow by clicking on the ‘Create Workflow’ button. Name your workflow appropriately, such as ‘Extract Donation Receipts Data from PDFs’. This sets the foundation for your automation process.


2. Setting Up the Trigger in Pabbly Connect

In this step, you will set up the trigger that initiates the workflow. Select Google Drive as your trigger application. This is crucial because the process starts when you upload a new PDF file to your Google Drive.

  • Choose the trigger event as ‘New File in Folder’.
  • Specify the folder you will use for uploading donation receipts, such as ‘Donations’.
  • Connect your Google Drive account to Pabbly Connect by following the prompts.

Once the connection is established, you can test the trigger by uploading a sample PDF file to the specified folder. This ensures that Pabbly Connect can detect new files correctly.


3. Using OpenAI to Extract Data from PDFs

After setting up the trigger, the next step is to extract data from the uploaded PDF using OpenAI. In Pabbly Connect, select OpenAI as the action application. This AI agent will process the PDF content and extract the necessary information.

Choose the action event as ‘Extract Content from PDF/Image’. You will need to enter your OpenAI API token to authenticate the connection. Make sure to copy the token from your OpenAI account and paste it into Pabbly Connect. This step is essential for enabling the AI to access your data.

  • Map the PDF URL from Google Drive to the corresponding field in OpenAI.
  • Set the model to GPT-4 Mini for optimal data extraction.
  • Define the prompt as ‘Extract the data from the PDF’.

After configuring these settings, you can test this action to ensure that Pabbly Connect successfully retrieves the information from the PDF.


4. Sending Extracted Data to Google Sheets

Once the data is extracted, the next step is to send it to Google Sheets for easy analysis. In your Pabbly Connect workflow, add another action step and select Google Sheets as the application.

Choose the action event as ‘Add New Row’. This allows you to input the extracted data into your Google Sheets document. Connect your Google Sheets account to Pabbly Connect and select the spreadsheet where you want to store the data.

Map the fields from the OpenAI response to the corresponding columns in Google Sheets. Ensure that each piece of extracted data has a designated column in your spreadsheet.

After mapping the fields, save the configuration and send a test request. This will verify that the extracted data from the PDF is correctly entered into your Google Sheets.


5. Finalizing and Testing Your Pabbly Connect Workflow

With all components set up, it’s time to finalize your Pabbly Connect workflow. Make sure to review each step to confirm that the trigger, action, and mappings are correctly configured. This will ensure a smooth automation process.

Next, upload a new PDF receipt to the designated Google Drive folder. Wait for the processing time, as Pabbly Connect will check for new files at intervals. After a few minutes, check your Google Sheets to see if the new data has been added.

If everything works as intended, you have successfully created an automated workflow using Pabbly Connect to extract donation receipts data from PDFs to Google Sheets. This automation saves you time and ensures accurate data entry.


Conclusion

In this tutorial, we explored how to use Pabbly Connect to automate the extraction of donation receipts data from PDFs to Google Sheets. This integration streamlines your workflow, allowing for efficient data management and analysis.

Ensure you check out Pabbly Connect to create business automation workflows and reduce manual tasks. Pabbly Connect currently offer integration with 2,000+ applications.

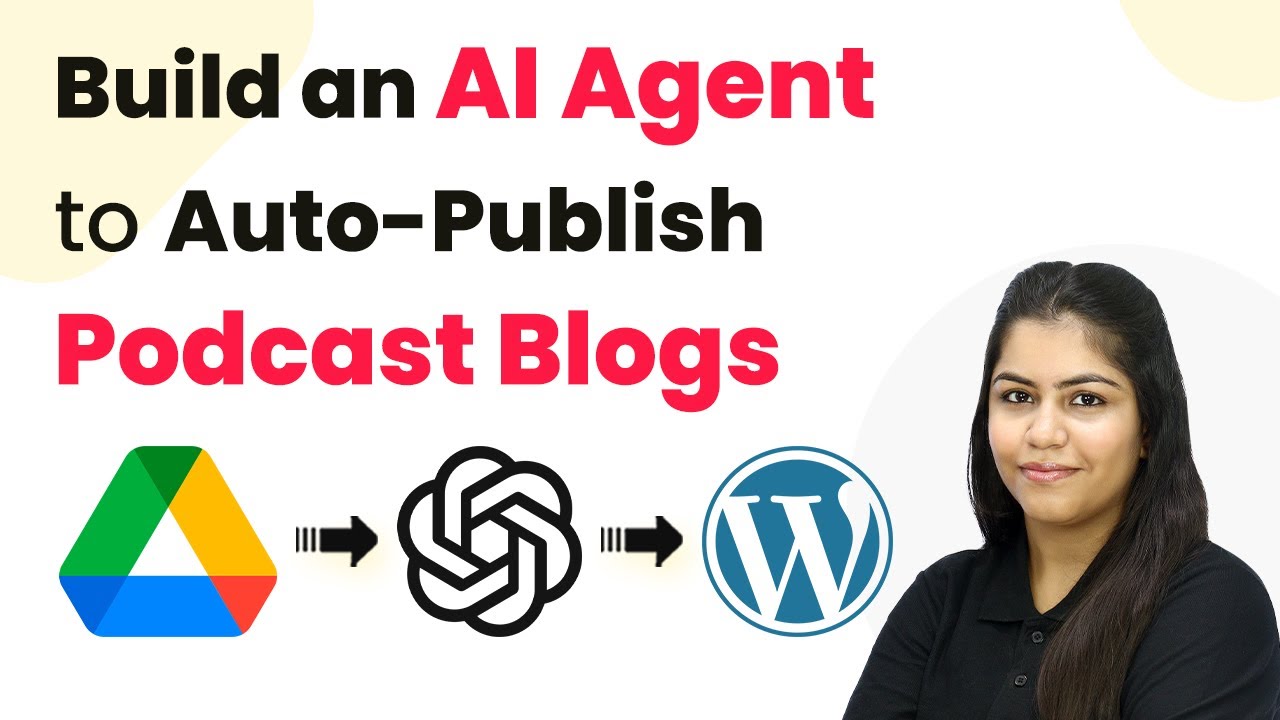
How to Build an AI Agent to Auto Publish Podcast Blogs Using Pabbly Connect

Learn how to automate podcast blog publishing with Pabbly Connect by integrating Google Drive, AI Agent, and WordPress in this detailed tutorial. Follow this definitive guide to creating powerful automated workflows with straightforward, efficiency-focused solutions that save valuable time.

Watch Step By Step Video Tutorial Below


1. Accessing Pabbly Connect for Automation

To start building an AI agent to auto publish podcast blogs, first access Pabbly Connect. Open your browser and navigate to Pabbly.com/connect. Here, you’ll find options to sign in or sign up for free.

If you’re a new user, click on ‘Sign up for free’ to explore the application with 100 tasks free every month. For existing users, click ‘Sign in’ to access your dashboard where all Pabbly applications are listed.


2. Creating a New Workflow in Pabbly Connect

After signing in to Pabbly Connect, the next step is to create a new workflow. Click on the ‘Create Workflow’ button, and name your workflow ‘How to Build an AI Agent to Auto Publish Podcast Blogs’. Choose the folder where you want to save this workflow.

Once your workflow is created, you will see the workflow window where you can set up triggers and actions. Triggers are events that start your workflow, while actions are the tasks that follow. In this case, we will set Google Drive as the trigger application.


3. Setting Up Google Drive as a Trigger

In the workflow window, select Google Drive as your trigger application and choose the trigger event ‘New File in a Specific Folder’. Click on the ‘Connect’ button to link your Google Drive account with Pabbly Connect.

You will need to sign in with your Google account and grant necessary permissions. After connecting, select the specific folder named ‘podcast’ where your audio files will be uploaded. Ensure this folder is shareable so that the AI agent can access the files.

  • Select Google Drive as the trigger application.
  • Choose the trigger event ‘New File in a Specific Folder’.
  • Connect your Google Drive account.
  • Select the ‘podcast’ folder as the target.

After saving these settings, your workflow will be ready to trigger whenever a new podcast file is added to the specified folder.


4. Transcribing Audio with AI Agent

Next, we need to transcribe the audio file using the AI agent. Select OpenAI as your action application and choose the action event ‘Generate Transcript (Whisper)’. Click on ‘Connect’ and enter your OpenAI API key to establish the connection with Pabbly Connect.

Once connected, map the audio file URL from the previous Google Drive trigger. This mapping allows the AI agent to dynamically access the audio file for transcription. After mapping, click on the ‘Save and Send Test Request’ button to generate the transcript.

  • Select OpenAI as the action application.
  • Choose ‘Generate Transcript (Whisper)’ as the action event.
  • Map the audio file URL from Google Drive.
  • Click ‘Save and Send Test Request’ to generate the transcript.

After successfully generating the transcript, you can move on to the next step to create the blog content.


5. Generating Blog Content and Publishing

To create the blog post, add another action step in your workflow and select OpenAI again. This time, choose ‘Structured AI Output (ChatGPT)’ as the action event. Connect to OpenAI using the previously established connection in Pabbly Connect.

Now, you need to map the transcript generated in the previous step as input for the AI agent. Enter a prompt like ‘Write a detailed and engaging blog post based on the transcription of the podcast episode’. Also, define the response format to include both the blog title and content. Finally, click ‘Save and Send Test Request’ to generate the blog post.

After the blog content is generated, add a final action step to publish it on WordPress. Select WordPress as the action application and choose ‘Create a Post’ as the action event. Connect to your WordPress account and map the blog title and content. Set the post status to ‘Publish’ and save the settings. This will automatically publish your blog post on WordPress.


Conclusion

In this tutorial, we explored how to use Pabbly Connect to automate the process of publishing podcast blogs. By integrating Google Drive, an AI agent, and WordPress, you can save time and streamline your content creation process. With Pabbly Connect, the entire workflow runs seamlessly in the background, allowing you to focus on your podcasting without the hassle of manual blogging.

Ensure you check out Pabbly Connect to create business automation workflows and reduce manual tasks. Pabbly Connect currently offer integration with 2,000+ applications.

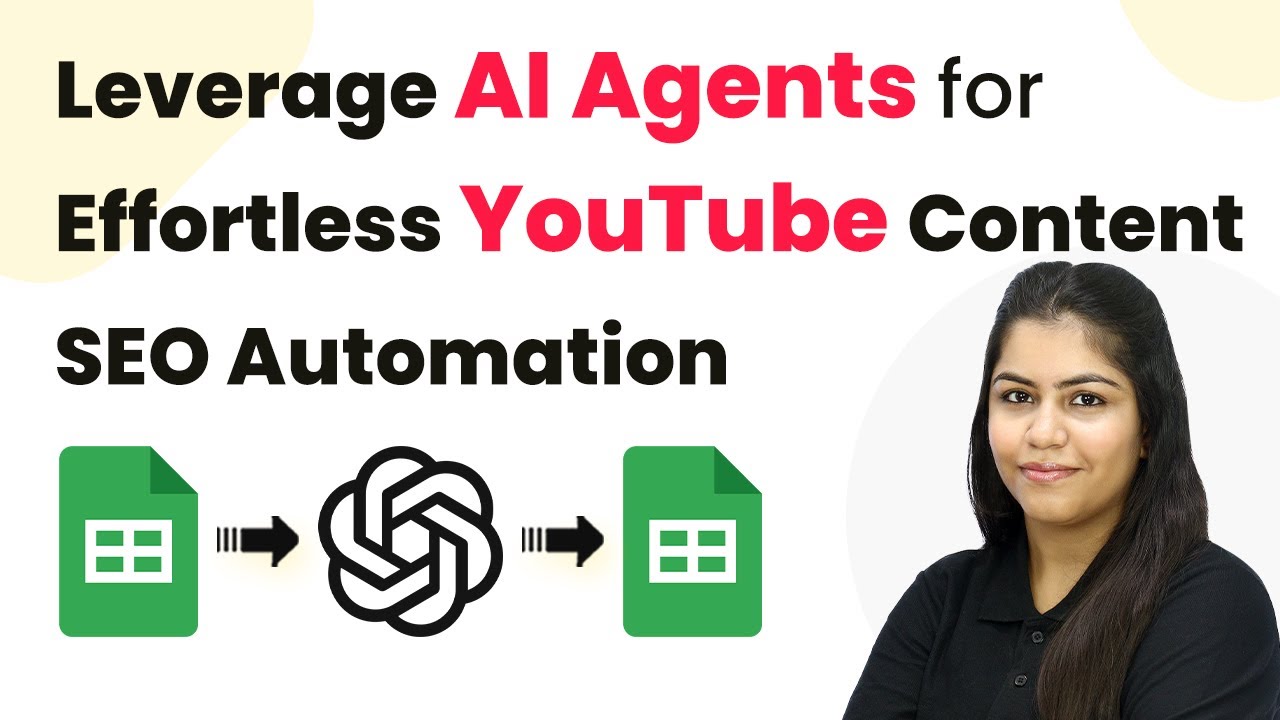
Automate Your YouTube SEO with Pabbly Connect: A Step-by-Step Guide

Learn how to leverage Pabbly Connect for effortless YouTube content SEO automation by integrating Google Sheets, AI agents, and more. Step-by-step tutorial included! Develop expertise in application integration and learn how to design streamlined automation workflows using proven, simplified approaches.

Watch Step By Step Video Tutorial Below


1. Accessing Pabbly Connect for YouTube SEO Automation

To start automating your YouTube SEO, first, you need to access Pabbly Connect. This platform allows you to integrate various applications seamlessly, making your workflow efficient.

Begin by visiting the Pabbly Connect landing page at pabyt.com/connect. Here, you will find options to sign in or sign up for free. If you are a new user, click on ‘Sign up for free’ to explore the application with 100 free tasks per month. Existing users can click on ‘Sign in’ to access their accounts.


2. Creating a Workflow in Pabbly Connect

Once logged into Pabbly Connect, navigate to your dashboard and click on the ‘Create Workflow’ button. This action will prompt you to name your workflow and choose a folder for organization.

  • Name your workflow: ‘How to Leverage AI Agents for Effortless YouTube Content SEO Automation’.
  • Select a folder where you want to save this workflow.
  • Click on ‘Create’ to open the workflow window.

This window is crucial as it allows you to set up triggers and actions, which are the core of your automation process. The trigger will initiate the workflow, while actions will define what happens next.


3. Integrating Google Sheets with Pabbly Connect

For this automation, your trigger application will be Google Sheets. Start by selecting Google Sheets as your trigger application in Pabbly Connect. Choose the trigger event as ‘New or Updated Spreadsheet Row’.

Once selected, a webhook URL will be generated. Copy this URL, as you will need it to connect Google Sheets with Pabbly Connect. Open your Google Sheets, navigate to Extensions, and select ‘Get Add-ons’. Search for the ‘Pabbly Connect Webhooks’ extension and install it.

  • After installation, refresh your Google Sheets.
  • Go to Extensions > Pabbly Connect Webhooks > Initial Setup.
  • Paste the webhook URL and set your trigger column (e.g., Column E).

Finally, click on ‘Submit’ to complete the setup. This establishes a connection between Google Sheets and Pabbly Connect, allowing data to flow seamlessly.


4. Leveraging AI Agents for SEO Content Generation

Now that your Google Sheets is integrated with Pabbly Connect, it’s time to leverage AI agents for SEO content generation. Select the AI Agent application, such as OpenAI, and choose the action event as ‘ChatGPT Structured AI Output’.

Next, connect your OpenAI account by entering your API key. If you haven’t created one yet, visit the OpenAI API key page, generate a new key, and paste it into Pabbly Connect.

Select the AI model (e.g., GPT-4 Mini). Input the prompt for content generation based on the data from Google Sheets. Map the fields from your Google Sheets to the corresponding fields in the AI response.

Click ‘Save and Send Test Request’ to generate the SEO-optimized title, description, and tags. This automation saves you time and effort, allowing you to focus on content creation.


5. Updating Google Sheets with AI-Generated Content

With the AI-generated content ready, the next step is to update your Google Sheets with the new information. Select Google Sheets again as your action application and choose ‘Update Row’ as the action event. using Pabbly Connect

Connect your Google Sheets account and specify the spreadsheet and sheet name. Then, map the row index received from the previous step to ensure the correct row is updated with the new title, description, and tags.

Map the title generated by the AI. Map the description generated by the AI. Map the tags generated by the AI.

After mapping these fields, click ‘Save and Send Test Request’. Your Google Sheets will now be updated with the latest SEO content automatically, streamlining your workflow significantly.


Conclusion

In this tutorial, you learned how to automate your YouTube SEO using Pabbly Connect by integrating Google Sheets and AI agents. This process not only saves time but also enhances your content’s visibility and search rankings. Implement these steps to streamline your YouTube content management effectively.

Ensure you check out Pabbly Connect to create business automation workflows and reduce manual tasks. Pabbly Connect currently offer integration with 2,000+ applications.

How to Automatically Schedule Blog Posts Using Pabbly Connect and AI Agent

Learn how to automatically schedule blog posts using Pabbly Connect and AI Agent. This detailed tutorial covers integration steps with Google Sheets, WordPress, and more.

Watch Step By Step Video Tutorial Below


1. Accessing Pabbly Connect for Blog Scheduling

To start automatically scheduling blog posts, you need to access Pabbly Connect. This platform allows you to integrate various applications seamlessly. Begin by visiting the Pabbly Connect landing page by entering ‘Pabbly.com/connect’ in your browser.

Once on the landing page, you’ll find options to either sign in or sign up for free. If you are a new user, click on the ‘Sign Up for Free’ button to explore the application with 100 free tasks each month. Existing users should click ‘Sign In’ to access their account.


2. Creating a Workflow in Pabbly Connect

After signing into Pabbly Connect, the next step is to create a new workflow. Click on the ‘Create Workflow’ button and give your workflow a name, such as ‘Automatically Schedule Blog Posts Using AI Agent’. Choose a folder to save it in, like ‘Automations’.

The workflow window is crucial as it consists of triggers and actions. Here’s how to set it up:

  • Select Google Sheets as your trigger application.
  • Choose the trigger event as ‘New or Updated Spreadsheet Row’.
  • Copy the provided webhook URL for further use.

Now, you have successfully set up the trigger in Pabbly Connect.


3. Setting Up Google Sheets with Pabbly Connect

To connect Google Sheets with Pabbly Connect, you need to install the Pabbly Connect Webhooks extension. Go to your Google Sheets, click on ‘Extensions’, then ‘Add-ons’, and select ‘Get Add-ons’. Search for ‘Pabbly Connect Webhooks’ and install it.

After installation, refresh your Google Sheets. Then navigate to ‘Extensions’, find ‘Pabbly Connect Webhooks’, and select ‘Initial Setup’. Here, you will:

  • Select the sheet you want to connect.
  • Paste the webhook URL copied from Pabbly Connect.
  • Set the trigger column to the final data column (for example, column C).

After completing these steps, click on ‘Submit’ to establish the connection with Pabbly Connect.


4. Integrating OpenAI with Pabbly Connect

Once you have set up Google Sheets, the next step is to integrate OpenAI as your AI agent through Pabbly Connect. In the action step of your workflow, select OpenAI and choose the action event as ‘Chat GPT Structured AI Output’.

To connect your OpenAI account, you will need an API key. Go to the OpenAI API key page, create a new secret key, and copy it. Paste this key into Pabbly Connect and click on ‘Save’. Then, select the AI model you wish to use, such as GPT-4 Mini, and fill in the roles and content as follows:

Set the role to ‘User’. Enter the prompt for generating blog content based on the topic, keywords, and audience.

This setup allows Pabbly Connect to generate the blog title and content dynamically based on your inputs from Google Sheets.


5. Creating a Post in WordPress via Pabbly Connect

The final step is to create a blog post in WordPress using the content generated by OpenAI through Pabbly Connect. Add another action step and select WordPress as the application, with the action event set to ‘Create a Post’.

Connect your WordPress account by entering the necessary credentials, including your base URL. Ensure you exclude any login details from the URL. Once connected, map the post title and content generated by the AI agent to the respective fields in the WordPress action setup. You can choose to publish the post immediately or schedule it for later.

After filling in the required fields, click on ‘Save and Send Request’. You will receive a confirmation that your post has been created successfully. You can check your WordPress dashboard to see the newly created post, confirming that Pabbly Connect has automated your blog posting process efficiently.


Conclusion

In this tutorial, we explored how to automatically schedule blog posts using Pabbly Connect and an AI agent. By integrating Google Sheets, OpenAI, and WordPress, you can streamline your blog posting process and save time. With these steps, you can maintain a consistent posting schedule effortlessly.

Ensure you check out Pabbly Connect to create business automation workflows and reduce manual tasks. Pabbly Connect currently offer integration with 2,000+ applications.

How to Use AI Agents to Auto-Generate Holiday Greetings with Pabbly Connect

Learn how to use Pabbly Connect to automate holiday greetings with AI agents, integrating Google Sheets and OpenAI seamlessly. Discover hidden automation capabilities within your existing tools. This guide shows you how to connect your essential applications and permanently eliminate redundant manual processes.

Watch Step By Step Video Tutorial Below


1. Accessing Pabbly Connect for Holiday Greetings

To start using Pabbly Connect for generating holiday greetings, access the platform by navigating to Pabbly.com in your browser. Here, you can sign in or create a new account to begin your automation journey.

Once logged in, you will find the dashboard where you can manage your applications. From this dashboard, you can create a new workflow that connects Google Sheets with OpenAI to automate the greeting generation process.


2. Creating a Workflow in Pabbly Connect

In this section, we will create a workflow in Pabbly Connect that will facilitate the integration of Google Sheets and OpenAI. Click on the ‘Create Workflow’ button located at the top right corner of your dashboard.

Enter a name for your workflow, such as ‘Generate Holiday Greetings’. This name will help you identify the workflow later. After naming it, select a folder to organize your workflows. Here are the steps to follow:

  • Click on ‘Create Workflow’.
  • Name your workflow appropriately.
  • Select a folder for organization.

After completing these steps, you will be directed to the workflow editor where you can set up triggers and actions for your automation.


3. Setting Up Google Sheets Trigger in Pabbly Connect

The next step involves setting up a trigger in Pabbly Connect using Google Sheets. This trigger will activate whenever a new holiday greeting is added to your Google Sheet. Select Google Sheets as your trigger application and choose the event as ‘New or Updated Spreadsheet Row’.

Once you have selected the trigger event, you will receive a webhook URL. This URL is crucial as it connects your Google Sheets to Pabbly Connect. Ensure you copy this URL as you will need it later to set up your Google Sheets integration. Follow these steps:

  • Select Google Sheets as the trigger application.
  • Choose ‘New or Updated Spreadsheet Row’ as the trigger event.
  • Copy the provided webhook URL.

This setup will ensure that every time you add a new greeting in Google Sheets, Pabbly Connect captures the data and triggers the next action.


4. Connecting OpenAI for Greeting Generation

Now that we have the trigger set up, we will connect OpenAI to Pabbly Connect for generating holiday greetings. Select OpenAI as your action application and choose ‘Generate Text’ as the action event. This will allow you to generate a personalized greeting based on the data from your Google Sheets.

In the setup, you will need to enter your OpenAI API key and specify the prompt for generating the greeting. The prompt should include details like the occasion and business name. Here’s how to do it:

Select OpenAI as the action application. Choose ‘Generate Text’ as the action event. Enter your OpenAI API key and the prompt for the greeting.

After successfully setting this up, you can test the action to ensure that the greeting is generated correctly based on the occasion you specified.


5. Updating Google Sheets with Generated Greetings

Finally, we will set up an action to update the Google Sheets with the generated holiday greeting. In this step, select Google Sheets again and choose the action event ‘Update Row’. This will allow you to insert the generated greeting into the appropriate column in your Google Sheet.

Specify the spreadsheet and the specific column where you want the greeting to be added. Here’s how to finalize this step:

Select Google Sheets as the action application. Choose ‘Update Row’ as the action event. Specify the spreadsheet and column for the greeting.

Once you save this setup, every time a new holiday greeting is generated, it will automatically update in your Google Sheets, completing the automation process using Pabbly Connect.


Conclusion

Using Pabbly Connect, you can seamlessly automate the process of generating and sending holiday greetings using AI agents. By integrating Google Sheets and OpenAI, you can ensure personalized messages reach your customers effortlessly.

Ensure you check out Pabbly Connect to create business automation workflows and reduce manual tasks. Pabbly Connect currently offer integration with 2,000+ applications.

This integration not only saves time but also enhances customer engagement during the holiday season. Start using Pabbly Connect today to streamline your holiday greeting process!

Automate Scholarship Application Evaluations Using Pabbly Connect and AI Agent

Learn how to automate scholarship application evaluations using Pabbly Connect and AI Agent. Step-by-step tutorial for seamless integration. Eliminate manual repetitive tasks from your workflow. Discover proven automation methods with intuitive steps designed for efficiency-minded professionals.

Watch Step By Step Video Tutorial Below


1. Accessing Pabbly Connect for Automation

To begin automating scholarship application evaluations, access Pabbly Connect by navigating to Pabbly.com/connect in your browser. This platform serves as the central hub for integrating various applications involved in the evaluation process.

Once on the Pabbly Connect landing page, you have the option to sign in or sign up for free. If you’re new, click on the ‘Sign Up for Free’ button to create your account, which allows you to explore automation features with 100 free tasks each month.


2. Creating a Workflow in Pabbly Connect

After logging into your Pabbly Connect account, the next step is to create a new workflow. Click on the ‘Create Workflow’ option and name it ‘Automate Scholarship Application Evaluations using AI Agent’. This workflow will manage the entire automation process. using Pabbly Connect

  • Choose the AI folder to save the workflow.
  • Select Google Sheets as the trigger application.
  • Set the trigger event to ‘New or Updated Spreadsheet Row’.

By selecting Google Sheets, you enable Pabbly Connect to capture data every time a new scholarship application is submitted. This data will then be processed by your AI agent for evaluation.


3. Setting Up Google Sheets with Pabbly Connect

To connect Google Sheets with Pabbly Connect, you need to install the Pabbly Connect Webhooks add-on. Navigate to ‘Extensions’ in Google Sheets, then select ‘Add-ons’ and find Pabbly Connect Webhooks in the Google Workspace Marketplace.

After installing, go back to Pabbly Connect and copy the webhook URL provided. Paste this URL into the Pabbly Connect Webhooks setup in Google Sheets. Choose a specific trigger column (e.g., Column G) that will send data to Pabbly Connect when filled.

  • Select the trigger column to send data.
  • Click on ‘Send Test Request’ to confirm the setup.

Once the test request is sent, Pabbly Connect will capture the details from Google Sheets, allowing for further actions based on this data.


4. Integrating the AI Agent with Pabbly Connect

With Google Sheets set up, the next step is to integrate your AI agent, such as OpenAI, with Pabbly Connect. In the action step, select OpenAI and choose the action event as ‘Chat GPT’ to generate eligibility summaries based on the captured data.

To establish this connection, you must log into your OpenAI account and create an API token. This token will allow Pabbly Connect to communicate with your AI agent effectively.

Generate a new API key in your OpenAI account. Map the necessary fields from Google Sheets to the prompt in OpenAI.

By mapping these fields, you ensure that every time a new application is submitted, the AI agent evaluates the information and generates a summary automatically.


5. Finalizing the Automation and Document Creation

After setting up the AI agent, the last step involves creating a document in Google Docs to store the eligibility summary. In Pabbly Connect, select Google Docs as your action application and choose the ‘Create Document’ action event. using Pabbly Connect

Map the necessary fields to generate a dynamic document name and content based on the evaluation results. Following this, use the ‘Append Paragraph’ action to add the summary generated by the AI agent into the document.

Map the document ID and summary text accordingly. Ensure the document is saved in the correct Google Drive folder.

Finally, upload the document as a PDF to Google Drive for easy sharing with team members. This completes the automation process, allowing seamless evaluations of scholarship applications using Pabbly Connect.


Conclusion

Automating scholarship application evaluations using Pabbly Connect and an AI agent streamlines the entire process, saving time and resources. By following these steps, you can efficiently manage applications and generate summaries for review.

Ensure you check out Pabbly Connect to create business automation workflows and reduce manual tasks. Pabbly Connect currently offer integration with 2,000+ applications.

Automatically Generate LinkedIn Job Postings Using Pabbly Connect

Learn how to automatically generate LinkedIn job postings using Pabbly Connect, integrating Google Sheets and OpenAI effortlessly. Transform complex automation concepts into accessible, actionable steps that eliminate unnecessary manual work while maximizing existing application capabilities.

Watch Step By Step Video Tutorial Below


1. Accessing Pabbly Connect for Job Postings

To automatically generate LinkedIn job postings, first access Pabbly Connect. This platform serves as the essential integration tool connecting Google Sheets and LinkedIn seamlessly.

Begin by navigating to Pabbly Connect in your web browser. If you are a new user, click on ‘Sign Up Free’ to create an account, which allows you to explore a limited number of tasks monthly. Existing users should choose ‘Sign In’ to access their dashboard.


2. Creating a Workflow in Pabbly Connect

After logging into Pabbly Connect, the next step is to create a new workflow. This workflow will automate the job posting process from Google Sheets to LinkedIn.

  • Click on the ‘Create Workflow’ button located at the top right corner.
  • Name your workflow, for example, ‘Automatically Generate LinkedIn Job Postings’.
  • Select the appropriate folder for organization, such as ‘Automations’.

Once your workflow is created, you can set up the trigger event to initiate the automation process.


3. Setting Up the Trigger with Google Sheets

The first step in your workflow is to set up a trigger using Google Sheets. This trigger will activate whenever new job details are entered into your Google Sheet.

Select Google Sheets as the trigger application and choose the ‘New or Updated Spreadsheet Row’ event. This selection ensures that every time a new job entry is made, Pabbly Connect captures it automatically.

Next, you will need to connect your Google Sheets account by following the prompts to authorize Pabbly Connect to access your sheets. Once connected, select the specific sheet that contains your job postings.


4. Integrating OpenAI for Job Description Generation

After setting up the trigger, the next action step involves integrating OpenAI to generate job descriptions based on the details from Google Sheets. This is where Pabbly Connect shines as it facilitates this advanced functionality.

  • Choose OpenAI as the action application.
  • Select the ‘Create Content’ event, specifically using the GPT model.
  • Map the fields from Google Sheets to the content parameters in OpenAI.

Once the mapping is complete, Pabbly Connect will utilize OpenAI to generate a job posting based on the input data from your Google Sheet.


5. Posting the Job to LinkedIn

The final step in this automation process is to post the generated job description to your LinkedIn account. This is achieved by adding another action step in Pabbly Connect.

Select LinkedIn as the action application and choose the ‘Share a Simple Text’ event. Here, map the generated job description from OpenAI to the content field in LinkedIn.

After configuring the visibility settings, such as making the post Pabbly, click on ‘Save and Send Test Request’ to verify that your job posting has been successfully shared on LinkedIn.


Conclusion

In summary, using Pabbly Connect allows you to efficiently automate the process of generating and posting LinkedIn job postings directly from Google Sheets. This integration not only saves time but also ensures consistency in your job postings.

Ensure you check out Pabbly Connect to create business automation workflows and reduce manual tasks. Pabbly Connect currently offer integration with 2,000+ applications.

How to Build an AI Agent to Auto-Generate YouTube Shorts Descriptions Using Pabbly Connect

Learn how to use Pabbly Connect to automate the generation of YouTube Shorts descriptions with Google Sheets and OpenAI. Follow this detailed tutorial for step-by-step guidance.

Watch Step By Step Video Tutorial Below


1. Accessing Pabbly Connect for Automation

To start automating the generation of YouTube Shorts descriptions, you need to access Pabbly Connect. Begin by searching for Pabbly.com and selecting the Pabbly Connect option. If you are a new user, click on ‘Sign Up Free’ to create an account, which allows you to explore the software with 100 free tasks every month.

Once you are signed in, you will see the dashboard. From here, you can create a new workflow by clicking on the ‘Create Workflow’ button located at the top right corner. This is where you will set up the integration between Google Sheets and OpenAI to generate YouTube Shorts descriptions.


2. Creating a Workflow in Pabbly Connect

In this section, you will create a workflow that connects Google Sheets with OpenAI using Pabbly Connect. Start by naming your workflow, for example, ‘AI Agent to Auto-Generate YouTube Shorts Descriptions’. Select a folder to save your workflow in, or create a new folder if necessary.

  • Name your workflow appropriately.
  • Choose or create a folder in Pabbly Connect.
  • Click on ‘Create’ to finalize your workflow setup.

After you have set up your workflow, it’s time to define the trigger. Select Google Sheets as your trigger application and choose the trigger event as ‘New or Updated Spreadsheet Row’. This ensures that whenever a new YouTube title is added to your Google Sheet, it will automatically trigger the workflow.


3. Configuring Google Sheets Trigger in Pabbly Connect

To configure the Google Sheets trigger, you need to connect your Google Sheets account with Pabbly Connect. Copy the webhook URL provided by Pabbly and paste it into your Google Sheets as an add-on. This will allow Pabbly Connect to capture the data from your sheet.

Next, go to your Google Sheets account, click on ‘Extensions’, then select ‘Add-ons’, and finally ‘Get Add-ons’. Search for the Pabbly Connect Webhook add-on and install it. Once installed, refresh your Google Sheets to see the new option. Set up the add-on to send data to the webhook URL whenever a new row is added.


4. Integrating OpenAI with Pabbly Connect

With the Google Sheets trigger configured, the next step is to integrate OpenAI. In this section, you will select OpenAI as your action application in Pabbly Connect. Choose the action event as ‘Create Completion’ to generate the YouTube Shorts description based on the title and channel niche provided in the Google Sheet.

When configuring OpenAI, you will need to enter your API key, which can be found in your OpenAI account settings. After entering the API key, select the appropriate model, such as GPT-4, and set the prompt that will instruct OpenAI on how to generate the description. For example, you might use the video title and niche as parameters for the prompt.


5. Updating Google Sheets with Generated Descriptions

The final step in this automation process involves updating your Google Sheets with the generated descriptions from OpenAI using Pabbly Connect. Select Google Sheets again as the action application and choose the action event as ‘Update Row’. This will allow you to update the specific cell in your Google Sheet with the description generated by OpenAI.

  • Select the correct spreadsheet and sheet name.
  • Map the relevant data from the OpenAI response to the appropriate cell in your Google Sheet.
  • Save and test the workflow to ensure everything is functioning correctly.

After testing, you will see that the generated YouTube Shorts descriptions are automatically updated in your Google Sheet, streamlining the content creation process and saving you time.


Conclusion

In conclusion, using Pabbly Connect to automate the generation of YouTube Shorts descriptions is a powerful way to enhance your content creation process. By integrating Google Sheets with OpenAI, you can save time and ensure that each video has a unique, engaging description. This automation not only boosts visibility but also helps grow your channel faster.

Ensure you check out Pabbly Connect to create business automation workflows and reduce manual tasks. Pabbly Connect currently offer integration with 2,000+ applications.

Generate Lesson Plans for Teachers Using Pabbly Connect and AI

Learn how to generate lesson plans for teachers using Pabbly Connect with Google Sheets, Google Docs, and an AI agent. Follow this detailed tutorial for step-by-step guidance.

Watch Step By Step Video Tutorial Below


1. Accessing Pabbly Connect for Lesson Plan Generation

To begin generating lesson plans for teachers, access Pabbly Connect by visiting the official website. As a manager in an edtech company, using Pabbly Connect streamlines the process of creating structured lesson plans.

Once on the Pabbly Connect website, you can either sign in if you are an existing user or sign up for a free account. Signing up provides access to 100 free tasks each month, which is beneficial for managing multiple lesson plans.


2. Creating a Workflow in Pabbly Connect

After signing into Pabbly Connect, navigate to the dashboard and click on the ‘Create Workflow’ button located in the top right corner. This initiates the workflow setup process for generating lesson plans.

In the dialog box that appears, name your workflow, such as ‘AI Agent to Generate Lesson Plans for Teachers’. Select a folder to save this workflow, ensuring it is organized within your Pabbly Connect account.

  • Name your workflow appropriately.
  • Select an existing folder or create a new one.
  • Click on the ‘Create’ button to finalize the workflow.

After creating the workflow, you will see two main windows: the trigger window and the action window. This setup is essential for establishing the automation process.


3. Setting Up the Trigger in Pabbly Connect

The next step involves setting up the trigger for your workflow. Select Google Sheets as your trigger application, as this is where the lesson plan details will be recorded. Choose the trigger event as ‘New or Updated Spreadsheet Row’ to capture any new entries.

Upon selecting the trigger application, Pabbly Connect provides a webhook URL. Copy this URL to connect your Google Sheets to Pabbly Connect. This connection enables automatic updates whenever new data is entered in the spreadsheet.

  • Copy the provided webhook URL.
  • Open your Google Sheets and go to Extensions > Add-ons > Get Add-ons.
  • Search for and install Pabbly Connect Webhooks.

After installation, refresh your Google Sheets and set up the initial configuration by pasting the webhook URL and selecting the trigger column. This column will determine when the data is sent to Pabbly Connect.


4. Generating AI Content with Pabbly Connect

With the trigger set up, the next phase is to configure the action step using OpenAI as the action application. By selecting OpenAI, you can generate structured lesson plans based on the data captured from Google Sheets.

You’ll need to connect OpenAI to Pabbly Connect by adding a new connection. This process requires an API token, which you can generate from your OpenAI account. After entering the token, select the AI model you wish to use, such as GPT-4 Mini.

Generate a new API token in your OpenAI account. Paste the token into Pabbly Connect. Set the prompt for generating lesson plans.

Ensure your prompt is specific, detailing the required output fields like lesson title, objectives, and homework. This structured approach helps the AI agent generate relevant content accurately.


5. Updating Google Sheets with Generated Content

Once the AI content is generated, you will want to update your Google Sheets with this information. For this, select Google Sheets again as your action application and choose the ‘Update Row’ action event. using Pabbly Connect

Connect to your Google Sheets account and select the spreadsheet and specific sheet you want to update. Map the generated data from the AI response to the corresponding fields in your Google Sheets. This ensures that the lesson plan details are systematically recorded.

Select the spreadsheet and specific sheet for updates. Map the generated lesson title, objectives, and homework to the appropriate columns. Click ‘Save and Send Test Request’ to finalize the update.

After saving, check your Google Sheets to confirm that the AI-generated content has been successfully added, completing the workflow.


Conclusion

This tutorial demonstrated how to generate lesson plans for teachers using Pabbly Connect and an AI agent. By following these steps, educators can automate the process of creating structured lesson plans efficiently.

Ensure you check out Pabbly Connect to create business automation workflows and reduce manual tasks. Pabbly Connect currently offer integration with 2,000+ applications.

Utilizing Pabbly Connect allows for seamless integration between Google Sheets and OpenAI, making lesson planning easier and more organized.