Automate Gmail Zip File Conversion and Upload to Dropbox Using Pabbly Connect

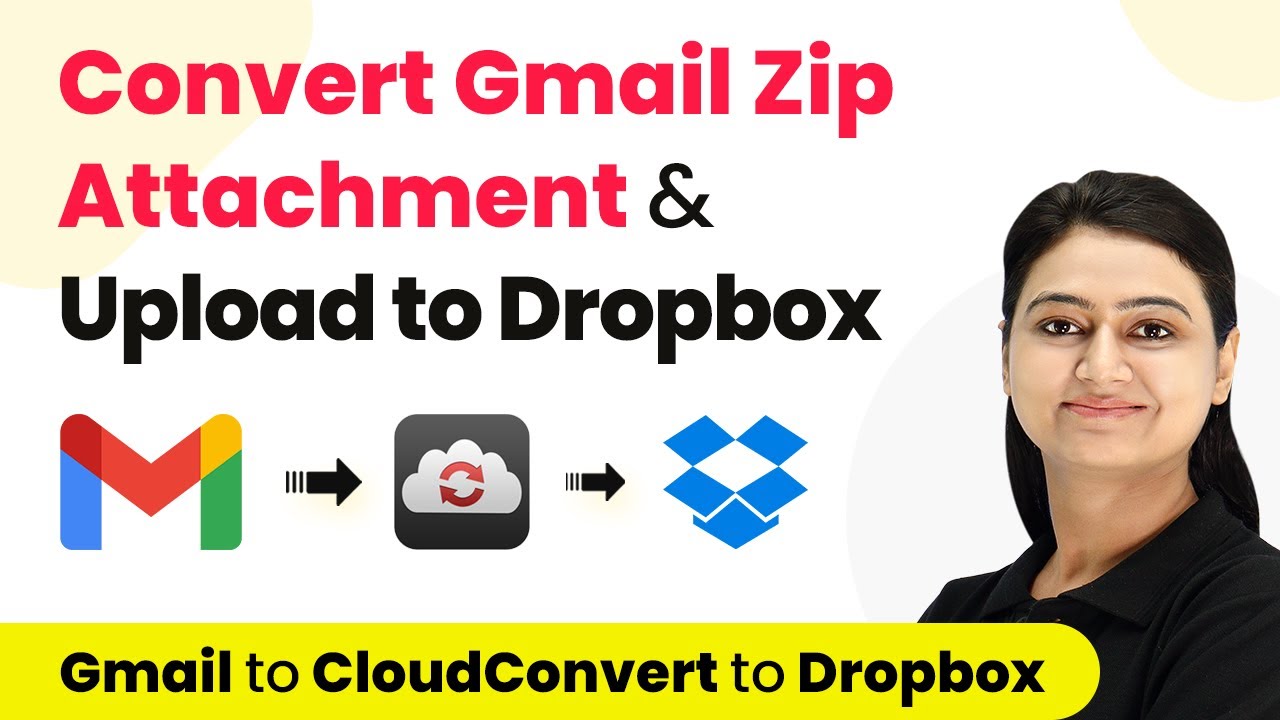
Learn how to automate the conversion of zip files from Gmail and upload them to Dropbox using Pabbly Connect in this detailed tutorial. Transform complex automation concepts into accessible, actionable steps that eliminate unnecessary manual work while maximizing existing application capabilities.

Watch Step By Step Video Tutorial Below


1. Access Pabbly Connect for Gmail to Dropbox Integration

To start automating the process of converting zip files from Gmail and uploading them to Dropbox, you need to access Pabbly Connect. Begin by visiting the Pabbly website and either sign in or create a free account, which provides free tasks every month.

Once logged in, click on the ‘Create Workflow’ button at the top right. Name your workflow ‘Gmail to Dropbox’. This step establishes the foundation for your automation process using Pabbly Connect, enabling seamless integration between Gmail and Dropbox.


2. Set Up Email Parser in Pabbly Connect

Now, configure the trigger for your workflow by selecting the ‘Email Parser’ application in Pabbly Connect. This tool helps extract details from incoming emails, including attachments.

  • Copy the generated email address from Pabbly Connect.
  • In Gmail, go to Settings, then Forwarding and POP/IMAP, and add the copied address as a forwarding address.
  • Verify the forwarding address using the confirmation code sent to the Pabbly email address.

By setting up the Email Parser, you ensure that every email with a zip attachment is forwarded to Pabbly Connect, where it can be processed further.


3. Filter Emails for Zip Attachments

Next, you need to set up a filter in Pabbly Connect to ensure that only emails containing zip attachments are processed. Select the ‘Filter’ option to create this condition.

  • Set the filter to check if the attachment link contains ‘.zip’.
  • Save and send a test request to verify that the filter is functioning correctly.

This filtering step is crucial, as it ensures that Pabbly Connect only processes relevant emails, thereby streamlining your workflow and avoiding unnecessary actions.


4. Convert Zip Files Using CloudConvert

After filtering, the next step is to convert the zip file using CloudConvert integrated through Pabbly Connect. Select CloudConvert as the action application and choose the ‘Convert a File’ event.

Connect your CloudConvert account and map the attachment URL from the email parser to the file URL field. Specify the input format as ‘zip’ and choose your desired output format, such as ‘RAR’.

Once configured, click on ‘Save and send test request’ to perform the conversion. This step highlights how Pabbly Connect facilitates the interaction between Gmail, the conversion service, and Dropbox.


5. Upload Converted Files to Dropbox

Finally, set up the last action in your workflow to upload the converted file to Dropbox. Select Dropbox as the action application and choose ‘Upload File’ as the action event.

Connect your Dropbox account and map the file URL from the CloudConvert step. Provide a file name and specify the folder path where you want to save the file in Dropbox.

Click on ‘Save and send test request’ to complete the upload process. This final step showcases how Pabbly Connect enables the seamless transfer of files from Gmail to Dropbox, ensuring that your converted files are stored safely.


Conclusion

In this tutorial, we explored how to automate the conversion of zip attachments from Gmail and upload them to Dropbox using Pabbly Connect. By following these steps, you can streamline your workflow and ensure that your files are efficiently processed and stored.

Ensure you check out Pabbly Connect to create business automation workflows and reduce manual tasks. Pabbly Connect currently offer integration with 2,000+ applications.

How to Post Parsed PDF Data from Docparser to Slack Channel Using Pabbly Connect

Learn how to automate posting parsed PDF data from Docparser to Slack Channel using Pabbly Connect with this step-by-step tutorial. Implement the precise methodologies leading organizations use to automate repetitive tasks, illustrated with practical examples designed for immediate application.

Watch Step By Step Video Tutorial Below


1. Access Pabbly Connect to Set Up Your Automation

To start posting parsed PDF data from Docparser to your Slack channel, first, you need to access Pabbly Connect. Open your browser and navigate to the Pabbly Connect website. Sign up for a free account or log in if you already have one.

Once logged in, you will arrive at the Pabbly Connect dashboard. Here, click on the ‘Create Workflow’ button to initiate your automation setup. You can name your workflow, for example, ‘Docparser to Slack’, and click on the ‘Create’ button to proceed.


2. Set Up Trigger in Pabbly Connect Using Docparser

In this step, you will configure the trigger for your workflow which will be Docparser. In the trigger window, select Pabbly Connect as your app and choose Docparser from the dropdown menu. Then, set the trigger event to ‘Parsed Documents’.

After selecting the trigger event, Pabbly Connect will generate a webhook URL. Copy this URL as it will be used to connect Docparser with Pabbly Connect. The next step is to set up this connection in your Docparser account.


3. Connect Docparser to Pabbly Connect

Now, navigate to your Docparser account and locate the document parser you want to use. Click on ‘Integrations’ and then select ‘Simple Webhook’. Here, paste the webhook URL you copied from Pabbly Connect.

Next, give your connection a name, set the payload format to JSON, and click on ‘Save and Test’. This action will connect Docparser with Pabbly Connect, allowing you to send parsed data whenever a document is uploaded.

  • Go to the Integrations section in Docparser.
  • Select Simple Webhook and paste the Pabbly Connect webhook URL.
  • Save the integration and test it.

After saving, you will need to upload a PDF document to Docparser to ensure that the integration is functioning correctly.


4. Upload Document to Docparser and Test Integration

Upload the PDF document that contains the data you want to parse. For example, you can upload an invoice PDF. Once the document is uploaded, click on ‘I am done uploading’. Docparser will begin parsing the document, which may take a few moments.

After parsing, check Pabbly Connect to see if the parsed data has been received. The data will include customer details, invoice amounts, and any other fields you set up in your parsing rules. This step confirms that the connection between Docparser and Pabbly Connect is successfully established.


5. Send Parsed Data to Slack Channel Using Pabbly Connect

In the action window of Pabbly Connect, select Slack as the app to send the parsed data. Choose the action event as ‘Send Channel Message’. Click on ‘Connect’ and authorize Pabbly Connect to access your Slack account. using Pabbly Connect

Once connected, select the channel where you want to post the message. Map the parsed data fields from Docparser to the message format you want to send. For example, include the customer name, email, and invoice details in your message. After setting up the message, click on ‘Save and Send Test Request’ to send a test message to your Slack channel.

  • Select Slack as the action app in Pabbly Connect.
  • Map the parsed fields to the message format.
  • Send a test message to confirm successful integration.

Check your Slack channel to see if the message was successfully posted, confirming that your automation is now fully functional.


Conclusion

In this tutorial, we demonstrated how to use Pabbly Connect to automate the process of posting parsed PDF data from Docparser to a Slack channel. By following these steps, you can ensure that important information from PDF documents is shared efficiently with your team. This automation can save time and improve communication within your organization.

Ensure you check out Pabbly Connect to create business automation workflows and reduce manual tasks. Pabbly Connect currently offer integration with 2,000+ applications.

How to Add Vadoo.tv Leads to Google Sheets Using Pabbly Connect

Learn how to automate adding Vadoo.tv leads to Google Sheets using Pabbly Connect with this step-by-step tutorial. Implement the precise methodologies leading organizations use to automate repetitive tasks, illustrated with practical examples designed for immediate application.

Watch Step By Step Video Tutorial Below


1. Accessing Pabbly Connect for Integration

To start integrating Vadoo.tv leads into Google Sheets, you must first access Pabbly Connect. Open your browser and search for Pabbly Connect. Click on ‘Sign Up Free’ to create a new account or ‘Sign In’ if you already have one.

Once logged in, navigate to the dashboard. Click on ‘Access Now’ under Pabbly Connect. This will open the workspace where you can create your automation workflow.


2. Creating a Workflow in Pabbly Connect

In your Pabbly Connect dashboard, click on ‘Create Workflow’. Name your workflow something relevant, like ‘Vadoo.tv to Google Sheets’. This name will help you identify the workflow later. using Pabbly Connect

After naming the workflow, you will see two windows: the trigger and action windows. The trigger is where you will set up the event that starts the automation, while the action window will define what happens next.


3. Setting Up the Trigger for Vadoo.tv Leads

In the trigger window, search for Vadoo.tv and select it. Then, choose the trigger event ‘Lead Captured’ from the dropdown menu. This event will activate whenever a new lead is generated through Vadoo.tv. using Pabbly Connect

Pabbly Connect will provide you with a webhook URL. Copy this URL as you will need it to connect Vadoo.tv with Pabbly Connect. Now, head to your Vadoo.tv account and navigate to the dashboard.

  • Open your project in Vadoo.tv.
  • Go to the settings and then to the Integrations page.
  • Click on ‘Add Web URL’ and select ‘Lead Capture’ from the dropdown.
  • Paste the copied webhook URL from Pabbly Connect and save changes.

After saving, your Vadoo.tv account is now connected to Pabbly Connect, enabling lead capture.


4. Configuring Google Sheets in Pabbly Connect

Now that the trigger is set, scroll down to the action window in Pabbly Connect. Here, search for Google Sheets and select it. Choose the action event ‘Add New Row’ to insert new lead data into your Google Sheets. using Pabbly Connect

Click on ‘Connect’ and select ‘Add New Connection’. You will need to connect your Google Sheets account to Pabbly Connect. Click on the ‘Connect with Google Sheets’ button and choose your Google account.

  • Select the spreadsheet where you want to add the lead data.
  • Choose the specific sheet within that spreadsheet.
  • Map the fields from the Vadoo.tv lead data to the corresponding columns in Google Sheets.

After mapping the fields, click on ‘Save and Send Test Request’ to ensure that everything works correctly.


5. Testing the Automation Setup

With the workflow set up, it’s time to test the automation. Go back to your Vadoo.tv project and generate a new lead by filling out the lead capture form. Once submitted, the lead data should be captured in Pabbly Connect. using Pabbly Connect

Check Pabbly Connect to see if the lead details are visible in the response. If everything is set up correctly, the details will also appear in your specified Google Sheet as a new row. This confirms that your automation is working perfectly.

Now, every time a new lead is captured in Vadoo.tv, their details will automatically populate in Google Sheets, streamlining your lead management process.


Conclusion

In this tutorial, we demonstrated how to seamlessly integrate Vadoo.tv leads into Google Sheets using Pabbly Connect. This automation simplifies lead management and ensures your data is always up-to-date and organized.

Ensure you check out Pabbly Connect to create business automation workflows and reduce manual tasks. Pabbly Connect currently offer integration with 2,000+ applications.

How to Create Tasks in TMetric from Google Sheets Using Pabbly Connect

Learn how to automate task creation in TMetric from Google Sheets using Pabbly Connect with this step-by-step tutorial. Learn to create powerful connections between your critical applications without requiring specialized programming knowledge or extensive technical background.

Watch Step By Step Video Tutorial Below


1. Setting Up Pabbly Connect for Google Sheets Integration

To create tasks in TMetric from Google Sheets, you first need to access Pabbly Connect. Start by navigating to your browser and searching for ‘Pabbly.com/connect’. You can sign up for a free account or log in if you already have one. This platform will facilitate the automation process.

Once logged in, you will be directed to the Pabbly Connect dashboard. Here, click on the ‘Create Workflow’ button. Name your workflow something like ‘Google Sheets to TMetric’ and click on ‘Create’ to proceed. This sets the stage for your automation process.


2. Configuring the Trigger in Pabbly Connect

The next step involves configuring the trigger in Pabbly Connect. In the trigger window, select ‘Google Sheets’ as the app. For the trigger event, choose ‘New or Updated Spreadsheet Row’. This will allow Pabbly Connect to monitor your Google Sheets for any new task entries.

  • Select ‘Google Sheets’ from the app options.
  • Choose the trigger event as ‘New or Updated Spreadsheet Row’.
  • Copy the webhook URL provided by Pabbly Connect.

After copying the webhook URL, go to your Google Sheets. Click on ‘Extensions’, then ‘Add-ons’, and select ‘Get Add-ons’. Search for ‘Pabbly Connect Webhooks’ and install it. Refresh your Google Sheet to ensure the add-on is active.


3. Setting Up Google Sheets to Send Data to Pabbly Connect

With the Pabbly Connect Webhooks add-on installed, you need to set it up to send data to Pabbly Connect. Hover over the add-on in the Extensions menu and click on ‘Initial Setup’. Here, you will configure the selected sheet, webhook URL, and trigger column.

  • Select the correct sheet from your Google Sheets.
  • Paste the copied webhook URL into the designated field.
  • Choose the trigger column, which is the last data entry column in your sheet.

After submitting these details, click on ‘Send on Event’ in the add-on menu. This tells Google Sheets to send data to Pabbly Connect whenever a new row is added. Now your Google Sheets is successfully connected to Pabbly Connect.


4. Connecting TMetric to Pabbly Connect

Now that Google Sheets is set up, it’s time to connect TMetric with Pabbly Connect. In the action window of your workflow, search for ‘TMetric’ and select it. For the action event, choose ‘Create Task’. Click on ‘Connect’ and then select ‘Add New Connection’.

To establish this connection, you need the API token from your TMetric account. Go to your TMetric profile, click on ‘Get New API Token’, and copy the token. Paste this token back into Pabbly Connect and click ‘Save’ to connect your TMetric account.


5. Mapping Task Details and Testing the Automation

Once TMetric is connected, you will need to map the task details from Google Sheets into the TMetric task creation fields. In the task name field, select the response from Google Sheets that corresponds to the task name. Repeat this mapping for the description, due date, and estimated time fields.

After mapping all required fields, click on ‘Save and Send Test Request’. You should see a positive response indicating that the task was created in TMetric. To verify, check your TMetric account for the newly created task with the details you entered in Google Sheets.

This completes the automation setup. Now, every time you add a new row with task details in Google Sheets, a corresponding task will automatically be created in TMetric through Pabbly Connect.


Conclusion

This tutorial demonstrated how to use Pabbly Connect to automate task creation in TMetric from Google Sheets. By following these steps, you can streamline your workflow and enhance productivity.

Ensure you check out Pabbly Connect to create business automation workflows and reduce manual tasks. Pabbly Connect currently offer integration with 2,000+ applications.

Automatically Reply to YouTube Video Comments Using Pabbly Connect and OpenAI

Learn how to automatically reply to YouTube comments using Pabbly Connect and OpenAI. This detailed guide walks you through the integration process step-by-step. Implement the precise methodologies leading organizations use to automate repetitive tasks, illustrated with practical examples designed for immediate application.

Watch Step By Step Video Tutorial Below


1. Accessing Pabbly Connect for YouTube Comment Automation

To start automating replies to YouTube comments, first, you need to access Pabbly Connect. Head over to the Pabbly Connect website and create a free account if you don’t have one. Existing users can simply log in to their account.

Once logged in, you will reach the Pabbly Connect dashboard. Here, you can create a new workflow that will connect your YouTube account with OpenAI for automated replies. Click on the ‘Create Workflow’ button and give your workflow a name, such as ‘Auto Reply to YouTube Comments via OpenAI’.


2. Setting Up the Trigger Event in Pabbly Connect

In this section, you will set up the trigger event that initiates the automation. Choose YouTube as the application and select the trigger event as ‘New Comment on Video’. This means whenever a new comment is posted on your YouTube video, Pabbly Connect will automatically fetch it. using Pabbly Connect

  • Select your YouTube channel during the connection process.
  • Authorize Pabbly Connect to access your YouTube account.
  • Set the maximum number of comments to retrieve (e.g., 20).

Click on the ‘Continue’ button after setting these parameters. You should now test the trigger by fetching the most recent comment from your YouTube video. This will confirm that Pabbly Connect is properly connected to your YouTube account.


3. Generating an Automated Reply Using OpenAI

After successfully setting up the trigger, the next step is to generate an automated reply using OpenAI. Choose OpenAI as the action application in Pabbly Connect and select the action event as ‘Generate Content’. This will allow Pabbly Connect to create a reply based on the comment fetched from YouTube. using Pabbly Connect

To connect OpenAI, you need to enter your API token from the OpenAI dashboard. Once connected, you will set the parameters for the content generation:

  • Input a prompt for the AI, such as ‘Write a professional reply to the comment’.
  • Map the comment text from the YouTube trigger into the OpenAI prompt.
  • Set the maximum token limit for the response.

Once you have configured these settings, click on the ‘Submit’ button to generate a reply. The AI will produce a professional response that you can use to reply to the YouTube comment automatically.


4. Replying to the YouTube Comment Automatically

With the automated reply generated, the next step is to send this reply back to the YouTube comment. In Pabbly Connect, select YouTube again as the action application and choose the action event as ‘Reply to Comment’. This will allow you to post the generated reply directly to the original comment on YouTube. using Pabbly Connect

Connect your YouTube account again if needed and map the generated reply text from OpenAI into the corresponding field for the reply. You will also need to map the comment ID from the trigger step to ensure the reply is posted to the correct comment.

Click on the ‘Save and Send Request’ button to send the reply. After executing this step, you can check your YouTube video to see if the automated reply has been posted successfully. Refresh the comments section to verify the reply appears as expected.


5. Conclusion: Automate Your YouTube Comment Replies with Pabbly Connect

In this tutorial, we explored how to use Pabbly Connect to automate replies to YouTube comments using OpenAI. By following the steps outlined, you can effectively engage with your audience without the need for manual replies.

Ensure you check out Pabbly Connect to create business automation workflows and reduce manual tasks. Pabbly Connect currently offer integration with 2,000+ applications.

Check out Pabbly Connect – Automate your business workflows effortlessly! Sign Up Free – Start your journey with ease! 10,000+ Video Tutorials – Learn step by step! Join Pabbly Facebook Group – Connect with 21,000+ like minded people!

Implementing this automation not only saves time but also enhances your interaction with subscribers. With Pabbly Connect, you can streamline your YouTube channel management and focus on creating more content.

Start using Pabbly Connect today to enhance your YouTube engagement and automate your workflows efficiently!

How to Use ‘Append Value’ Action Event in Google Sheets with Pabbly Connect

Learn how to use the ‘Append Value’ action event in Google Sheets using Pabbly Connect. This tutorial covers setup, integration, and mapping steps. This comprehensive guide reveals exactly how to connect your applications and automate repetitive tasks — accessible for professionals of all technical backgrounds.

Watch Step By Step Video Tutorial Below


1. Setting Up Pabbly Connect for Google Sheets Integration

To use the ‘Append Value’ action event in Google Sheets, start by accessing Pabbly Connect. This platform allows you to integrate various applications seamlessly. First, log in to your Pabbly Connect account and create a new workflow.

Choose the trigger application, which in this case is Pabbly Form Builder. This integration enables you to collect data from a form and append it to Google Sheets. Once you set up the trigger, you can proceed to configure the action event.


2. Filling Out the Form in Pabbly Form Builder

Next, you need to fill out the form that you’ve created in Pabbly Form Builder. This form collects user data that you want to append to Google Sheets. For example, enter the following dummy data:

  • Name: Dummy User
  • Email: [email protected]
  • Phone: 1234567890
  • Travel Date: 28th September
  • Number of Travelers: 4+
  • Destination: Sikkim
  • Travel Budget: 80000

After filling out the form, submit it. You will receive a confirmation message indicating that your submission was successful. This data will now be sent to Pabbly Connect for further processing.


3. Connecting Google Sheets to Pabbly Connect

Now that you have the data from the form, the next step is to connect Google Sheets using Pabbly Connect. Select Google Sheets as the action application and choose the action event ‘Append Values’. This will allow you to add the form data to your Google Sheets.

In the connection settings, select the specific spreadsheet you want to use for appending the data. Make sure to map the correct fields from the form submission to the corresponding columns in your Google Sheet. This step ensures that all data is accurately reflected in your spreadsheet.


4. Mapping Values in Google Sheets

In this step, you will map the values received from the form submission to your Google Sheets. In Pabbly Connect, you need to enter the row values in a comma-separated format. For instance, if you have eight fields, you will input them in the following format:

  • Value 1: First Name
  • Value 2: Last Name
  • Value 3: Email
  • Value 4: Phone Number
  • Value 5: Travel Date
  • Value 6: Destination
  • Value 7: Travel Budget
  • Value 8: Number of Travelers

Ensure that you do not leave any extra commas or spaces in your mapping to avoid errors. Once you have accurately mapped all the values, you can proceed to save and send the test request.


5. Testing the Integration in Pabbly Connect

After mapping the values, click on the ‘Save and Send Test Request’ button in Pabbly Connect. This action will attempt to append the values to your Google Sheets. If everything is set up correctly, you will receive a successful response indicating that the data has been appended.

If you encounter any errors, double-check your mapping for any extra commas or incorrect formats. Once the test is successful, you can view the appended data in your Google Sheets. This confirms that the integration is working seamlessly through Pabbly Connect.


Conclusion

Using Pabbly Connect to integrate Google Sheets with Pabbly Form Builder allows for efficient data management. The ‘Append Value’ action event simplifies adding form submissions directly into your spreadsheet. Follow the outlined steps to ensure smooth integration and accurate data handling.

Ensure you check out Pabbly Connect to create business automation workflows and reduce manual tasks. Pabbly Connect currently offer integration with 2,000+ applications.

How to Create Carrier in Shipday for New Zoho Forms Entries Using Pabbly Connect

Learn how to automate the creation of a carrier in Shipday for new Zoho Forms entries using Pabbly Connect. Step-by-step tutorial included! Navigate the automation landscape confidently with clear, structured guidance suitable for professionals regardless of prior technical experience.

Watch Step By Step Video Tutorial Below


1. Accessing Pabbly Connect for Integration

To create a carrier in Shipday for new Zoho Forms entries, you first need to access Pabbly Connect. Start by visiting the Pabbly website where you can sign up for a free account or log into your existing account. Signing up gives you free tasks every month, which is beneficial for automation.

Once logged in, navigate to the top right corner where you will find the ‘Create Workflow’ button. Click on it and name your workflow, for example, ‘Zoho Forms to Shipday’. This sets the stage for your automation process, which relies on a trigger and an action.


2. Setting Up the Trigger in Pabbly Connect

In Pabbly Connect, the next step is to set up the trigger. Select ‘Zoho Forms’ as the trigger application and choose the event ‘New Forms Submitted’. This action will initiate the workflow every time a new response is received from Zoho Forms.

After selecting the trigger, Pabbly Connect generates a webhook URL. This URL is essential for linking Zoho Forms to Pabbly Connect. You will need to copy this URL and follow these steps to set it up in Zoho Forms:

  • Log in to your Zoho Forms account.
  • Open the form you want to integrate.
  • Go to the ‘Integrations’ section and select ‘Webhooks’.
  • Paste the copied webhook URL and set the content type to ‘application/json’.

Once you have configured the webhook, make sure to save the settings. This setup allows Pabbly Connect to receive data from your Zoho Forms whenever a new entry is submitted.


3. Testing the Webhook Connection

After setting up the webhook in Zoho Forms, it is essential to test the connection using Pabbly Connect. Return to Pabbly Connect, where it will indicate that it is waiting for a webhook response. To verify the setup, you need to submit a test entry in your Zoho Form.

Fill out the form with dummy data, such as first name, last name, phone number, and email. After submitting the form, check back in Pabbly Connect to see if it captures the response. If successful, you will see the details populated in Pabbly Connect, confirming that the integration is working.


4. Configuring the Action in Shipday

Now that the trigger is set up and tested, the next step involves configuring the action in Shipday using Pabbly Connect. Select ‘Shipday’ as the action application and choose the event ‘Create Carrier’. This action will create a new carrier entry in Shipday every time a new response is received from Zoho Forms.

To connect Shipday, you will need to provide your API key, which can be found in the integrations section of your Shipday account. Once the API key is entered, click on ‘Save’ to establish the connection. After connecting, you will need to map the fields from Zoho Forms to Shipday, such as name, email, and phone number.


5. Finalizing Integration and Testing

After mapping the necessary fields in Pabbly Connect, it’s time to finalize the integration. Click on ‘Save and Send Test Request’ to check if the details are correctly sent to Shipday. If everything is set up correctly, you should see a confirmation in Pabbly Connect that the carrier has been created.

To verify, log into your Shipday account and check the carriers list. You should see the new carrier entry with the details you submitted in Zoho Forms. This confirms that the integration between Zoho Forms and Shipday through Pabbly Connect has been successfully completed.


Conclusion

In this tutorial, we explored how to automate the creation of a carrier in Shipday for new Zoho Forms entries using Pabbly Connect. By following the steps outlined, you can streamline your workflow and enhance productivity, ensuring that every form submission is efficiently handled.

Ensure you check out Pabbly Connect to create business automation workflows and reduce manual tasks. Pabbly Connect currently offer integration with 2,000+ applications.

Integrate WooCommerce Orders into Shipday Dispatch Using Pabbly Connect

Learn how to automatically create Shipday orders from WooCommerce using Pabbly Connect. Follow this detailed tutorial for seamless integration. This comprehensive guide reveals exactly how to connect your applications and automate repetitive tasks — accessible for professionals of all technical backgrounds.

Watch Step By Step Video Tutorial Below


1. Accessing Pabbly Connect for Integration

To integrate WooCommerce with Shipday, first, access Pabbly Connect. This platform is essential for automating the order creation process. Begin by visiting the Pabbly website and signing in to your account. If you don’t have an account, you can sign up for free, which offers you free tasks monthly.

Once logged in, locate the ‘Create Workflow’ button in the top right corner. You will be prompted to name your workflow. Enter a name like ‘WooCommerce to Shipday’ and click process. This will set the stage for your automation.


2. Setting Up the Trigger in Pabbly Connect

The next step involves setting up the trigger in Pabbly Connect. Select WooCommerce as your trigger application and choose the event ‘New Order Created’. This action indicates that every time a new order is placed in WooCommerce, it will trigger the next steps in your workflow.

  • Select WooCommerce as the trigger application.
  • Choose the event ‘New Order Created’.
  • Copy the generated webhook URL provided by Pabbly Connect.

This webhook URL is crucial as it connects WooCommerce to Pabbly Connect. Next, you will need to set up this URL in your WooCommerce settings to complete the integration.


3. Configuring WooCommerce to Use the Webhook

Now, navigate to your WooCommerce settings to configure the webhook. Go to the left sidebar, click on ‘Settings’, then head to the ‘Advanced’ tab. In the Advanced settings, select ‘Webhooks’ and click on the ‘Add Webhook’ button.

Here, you will need to fill out the webhook details:

  • Name your webhook (e.g., ‘Shipday Test’).
  • Set the status to ‘Active’.
  • Choose the topic ‘Order Created’.
  • Paste the copied webhook URL in the Delivery URL field.

Once you have filled in these details, click on ‘Save Webhook’. This action will link WooCommerce to Pabbly Connect, enabling it to send order details whenever a new order is created.


4. Capturing Order Details in Pabbly Connect

After setting up the webhook, return to Pabbly Connect and click on ‘Recapture Webhook Response’. This will allow Pabbly to listen for any new orders made in WooCommerce. To test this, place a dummy order in your WooCommerce store.

Once the order is placed, Pabbly Connect will capture the order details such as customer name, address (including Oak Street), email, and the ordered product. Check the responses in Pabbly Connect to confirm that it has successfully captured all necessary information.


5. Creating an Order in Shipday Using Pabbly Connect

With the order details captured, it’s time to set up the action in Pabbly Connect to create an order in Shipday. Select Shipday as your action application and choose ‘Create Order’ as the action event. You will need to connect your Shipday account by entering your API key, which can be retrieved from your Shipday account under the Integrations section.

After connecting, map the captured WooCommerce details to the corresponding fields in Shipday, such as:

Order Number (using the ID captured earlier). Customer Name (first and last name). Customer Address (including Oak Street). Total Order Cost.

After mapping all necessary fields, click on ‘Save and Send Test Request’. If successful, you will see an order created in your Shipday account reflecting the details from WooCommerce. This confirms the successful integration of WooCommerce orders into the Shipday Dispatch System using Pabbly Connect.


Conclusion

In this tutorial, we explored how to integrate WooCommerce orders into the Shipday Dispatch System using Pabbly Connect. By following these detailed steps, you can automate your order management process efficiently. This integration allows for seamless order handling and enhances your workflow.

Ensure you check out Pabbly Connect to create business automation workflows and reduce manual tasks. Pabbly Connect currently offer integration with 2,000+ applications.

Automate Shipday Orders from Google Sheets Using Pabbly Connect

Learn how to automate order creation in Shipday from Google Sheets using Pabbly Connect. Follow this detailed tutorial for seamless integration. Implement the precise methodologies leading organizations use to automate repetitive tasks, illustrated with practical examples designed for immediate application.

Watch Step By Step Video Tutorial Below


1. Setting Up Pabbly Connect for Google Sheets Integration

To automate order creation in Shipday from Google Sheets, you will first need to set up Pabbly Connect. Start by visiting the Pabbly website and signing in or signing up for a free account. Once you log in, you will be directed to the Pabbly Connect dashboard.

In the dashboard, click on the ‘Create Workflow’ button located at the top right corner. Name your workflow as ‘Google Sheets to Shipday’. This creates a trigger-action workflow where the trigger will be a new row added to Google Sheets, and the action will be to create an order in Shipday.


2. Configuring Google Sheets as a Trigger in Pabbly Connect

Next, you will configure Google Sheets as the trigger application in Pabbly Connect. Select Google Sheets and choose the trigger event as ‘New or Updated Spreadsheet Row’. This allows Pabbly Connect to monitor your Google Sheets for any new entries.

  • Select Google Sheets as the trigger application.
  • Choose ‘New or Updated Spreadsheet Row’ as the trigger event.
  • Copy the generated webhook URL provided by Pabbly Connect.

Now, navigate to your Google Sheets document and go to Extensions > Pabbly Connect > Webhooks > Initial Setup. Paste the copied webhook URL into the designated field and set the trigger column to the last column (Column I). This ensures that when details are added in this column, Pabbly Connect will capture the entire row’s data.


3. Testing the Google Sheets Integration with Pabbly Connect

After setting up the webhook in Google Sheets, it’s time to test the integration with Pabbly Connect. Enter test data into the last column of your Google Sheets, then click on ‘Send Test’ in the webhook setup. This action sends the data to Pabbly Connect.

Once the test data is sent, return to Pabbly Connect to verify that the data has been captured. You should see the response indicating that the order number, customer name, and other details have been successfully received. This confirms that your Google Sheets are now connected to Pabbly Connect.


4. Setting Up Shipday as the Action Application in Pabbly Connect

With the trigger successfully set up, the next step is to configure Shipday as the action application in Pabbly Connect. Select Shipday and choose the action event as ‘Create Order’. This allows Pabbly Connect to create an order in Shipday whenever a new row is added to Google Sheets.

To connect Shipday, you will need to provide your API key. Log in to your Shipday account, navigate to Integrations, and copy your API key. Paste this key back into Pabbly Connect to establish the connection. Once connected, you can proceed to map the necessary data from Google Sheets to Shipday.


5. Mapping Data from Google Sheets to Shipday in Pabbly Connect

Now that you have set up the action application, it’s time to map the data fields from Google Sheets to Shipday using Pabbly Connect. This step is crucial for ensuring that the correct information is sent to Shipday.

  • Map the order number from Google Sheets to the corresponding field in Shipday.
  • Include customer details such as name, address, and phone number.
  • Map the total order cost and item details accordingly.

After mapping all necessary fields, click on ‘Save and Send Test Request’. If the setup is correct, you should receive a success message along with an order ID from Shipday. This indicates that the order has been created successfully based on the data from Google Sheets.


Conclusion

Using Pabbly Connect, you can efficiently automate the process of creating orders in Shipday from Google Sheets. This integration streamlines your workflow and ensures accurate order management. Follow the steps outlined in this tutorial to enhance your restaurant operations.

Ensure you check out Pabbly Connect to create business automation workflows and reduce manual tasks. Pabbly Connect currently offer integration with 2,000+ applications.

Automate Motivational Quotes for Instagram Using Pabbly Connect and Google Sheets

Learn how to automate motivational quotes for Instagram using Pabbly Connect, Google Sheets, and SwitchBoard Canvas with this detailed step-by-step tutorial. Eliminate manual repetitive tasks from your workflow. Discover proven automation methods with intuitive steps designed for efficiency-minded professionals.

Watch Step By Step Video Tutorial Below


1. Setting Up Pabbly Connect for Automation

To automate motivational quotes for Instagram, you need to set up Pabbly Connect. Start by creating a free account on the Pabbly Connect website. This platform allows you to set up automation workflows without any coding.

After signing up, log in to your Pabbly Connect dashboard. Click on the ‘Create Workflow’ button to initiate your automation process. Name your workflow, for instance, ‘Motivational Quotes for Instagram from SwitchBoard Canvas’, and click on the ‘Create’ button to proceed.


2. Connecting Google Sheets as the Trigger Application

In this step, you will connect Google Sheets using Pabbly Connect as the trigger application. Select Google Sheets as your trigger app and choose the ‘New Spreadsheet Row’ event. This event will trigger the workflow every time a new row is added to your Google Sheets.

  • Open your Google Sheets in an incognito window if you are using multiple Google accounts.
  • Click on Extensions, then Add-ons, and select ‘Get Add-ons’.
  • Search for ‘Pabbly Connect Webhooks’ and install it.

Once installed, refresh your Google Sheets. Go back to Extensions, select Pabbly Connect Webhooks, and click on ‘Initial Setup’. Here, paste the webhook URL provided by Pabbly Connect and set the trigger column to the last data entry column in your spreadsheet.


3. Configuring SwitchBoard Canvas for Image Creation

Next, you will configure SwitchBoard Canvas to create images based on the data from Google Sheets using Pabbly Connect. In the action step of your workflow, select SwitchBoard Canvas and choose the ‘Create Images’ action event. Connect it to your SwitchBoard Canvas account by entering your API key.

After connecting, select the template you want to use for your motivational quotes. For this example, use the ‘Golden Gate’ template. You need to specify the image width and height, and map the necessary fields such as the person’s name, backdrop image, and quote text from the Google Sheets data.

  • Map the name field with the corresponding data from Google Sheets.
  • Set the backdrop image using the link from your spreadsheet.
  • Map the quote text field to the appropriate data from Google Sheets.

Test the connection to ensure that the image is created successfully. You will receive a URL for the newly created image, which you can then use in your workflow.


After successfully creating the image, the next step involves updating your Google Sheets with the image link using Pabbly Connect. Add another action step to your workflow and select Google Sheets again. Choose the ‘Update Cell Value’ action event.

Connect to your Google Sheets account and specify the spreadsheet name, sheet name, and the cell range where you want to update the image link. For instance, use column D to store the image URL. Map the row index from the previous step to ensure the correct row is updated.

Once you have mapped all the necessary fields, click ‘Save and Send Test Request’. This will place the created image link in the specified cell of your Google Sheets.


5. Conclusion

In this tutorial, we demonstrated how to automate motivational quotes for Instagram using Pabbly Connect, Google Sheets, and SwitchBoard Canvas. By following these steps, you can create and manage your motivational quotes effortlessly, allowing you to focus on your content rather than the manual creation process.

Ensure you check out Pabbly Connect to create business automation workflows and reduce manual tasks. Pabbly Connect currently offer integration with 2,000+ applications.

Check out Pabbly Connect – Automate your business workflows effortlessly! Sign Up Free – Start your journey with ease! 10,000+ Video Tutorials – Learn step by step! Join Pabbly Facebook Group – Connect with 21,000+ like minded people!

With Pabbly Connect, you can streamline your workflow and ensure that every new quote added to your Google Sheets results in an automatically generated image ready for your social media platforms.