Automate Your Google Calendar Events with Pabbly Connect: Top 5 Integrations

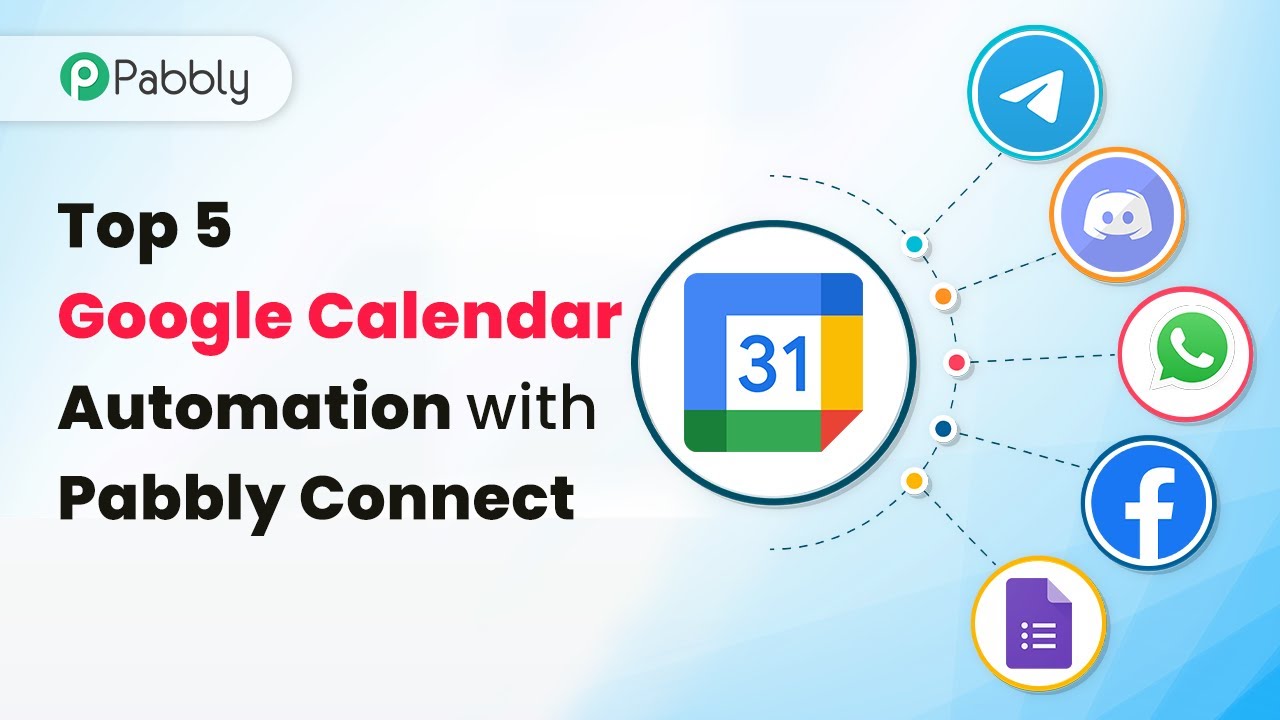
Learn how to automate Google Calendar events using Pabbly Connect. Discover top integrations with WhatsApp, Discord, Facebook, and more! Explore efficient methods for automating routine tasks with clear, concise instructions suited for both newcomers and experienced professionals.

Watch Step By Step Video Tutorial Below


1. Integrate Google Calendar with WhatsApp using Pabbly Connect

To automate Google Calendar events, you can use Pabbly Connect to send WhatsApp reminders. This integration allows you to automatically notify users of upcoming events scheduled in your Google Calendar.

First, set up a trigger in Pabbly Connect that activates every time a new event is created in Google Calendar. Next, configure the action to send a WhatsApp message to the intended recipient. This process ensures that all participants are informed about the scheduled event.


2. Create Google Calendar Events from Google Forms with Pabbly Connect

Another useful automation is connecting Google Forms with Google Calendar via Pabbly Connect. This integration enables you to create calendar events automatically when a new form submission occurs.

To set this up, initiate the process by selecting Google Forms as your trigger application. After that, choose the action to create an event in Google Calendar. This seamless integration saves time and reduces manual entry errors.

  • Select Google Forms as the trigger app.
  • Choose the specific form to monitor for submissions.
  • Set up the action to create a new event in Google Calendar.

This integration helps streamline your workflow, ensuring that every form submission results in a corresponding calendar event.


3. Send Discord Notifications for Google Calendar Events with Pabbly Connect

By using Pabbly Connect, you can also integrate Google Calendar with Discord. This integration allows you to send messages to a Discord channel whenever a new event is created in Google Calendar.

Start by setting Google Calendar as your trigger application in Pabbly Connect. Then, select Discord as the action application to send a message. This ensures that your team stays updated on important events without needing to check the calendar manually.

  • Choose Google Calendar as the trigger app.
  • Set the action to send a message to the desired Discord channel.
  • Customize the message to include event details.

This integration effectively keeps your team informed and engaged with upcoming events, enhancing collaboration.


4. Create Google Calendar Events from Telegram Messages with Pabbly Connect

With Pabbly Connect, you can also automate the creation of Google Calendar events based on messages received in Telegram. This is particularly useful for teams that communicate primarily through Telegram.

To set this up, use Telegram as the trigger application in Pabbly Connect. Define the action to create an event in Google Calendar when a new message is received. This integration helps in capturing important discussions and turning them into scheduled events.

Select Telegram as your trigger app. Define the action to create a new event in Google Calendar. Customize event details based on the message content.

This setup allows for seamless transitions from conversation to scheduling, ensuring that important tasks are not overlooked.


5. Add Facebook Events to Google Calendar with Pabbly Connect

Lastly, you can integrate Facebook with Google Calendar using Pabbly Connect to automatically add Facebook events to your Google Calendar. This ensures you never miss important social events.

Begin by selecting Facebook as your trigger application in Pabbly Connect. Set the action to create an event in Google Calendar whenever a new event is posted on Facebook. This integration keeps your calendar up-to-date with social engagements.

Choose Facebook as the trigger app. Set the action to create an event in Google Calendar. Include relevant details from the Facebook event.

This integration not only saves time but also ensures that you stay on top of all important events in your social calendar.


Conclusion

In summary, using Pabbly Connect to automate Google Calendar events can significantly enhance your productivity. By integrating with applications like WhatsApp, Discord, Facebook, and Telegram, you can streamline reminders and event creation. This not only saves time but also ensures that you never miss an important event.

Ensure you check out Pabbly Connect to create business automation workflows and reduce manual tasks. Pabbly Connect currently offer integration with 2,000+ applications.

Embrace the power of automation with Pabbly Connect and transform how you manage your schedule!

Automate LinkedIn Posts with Pabbly Connect: Top 5 LinkedIn Automations

Learn how to automate LinkedIn posts using Pabbly Connect. Discover top 5 LinkedIn automations with step-by-step instructions for seamless integration. Transform complex automation concepts into accessible, actionable steps that eliminate unnecessary manual work while maximizing existing application capabilities.

Watch Step By Step Video Tutorial Below


1. Automate LinkedIn Posts with Google Sheets Integration

To automate LinkedIn posts using Pabbly Connect, you can start by integrating LinkedIn with Google Sheets. This integration allows you to automatically add LinkedIn profiles into a Google Sheet for easy management. Begin by setting LinkedIn as your trigger application.

Next, in Pabbly Connect, choose Google Sheets as the action application. This means that whenever a new profile is checked on LinkedIn, it will automatically populate the specified Google Sheet. Follow these steps:

  • Open Pabbly Connect and create a new workflow.
  • Select LinkedIn as the trigger and configure the trigger event.
  • Set Google Sheets as the action and specify the sheet where data should be added.

By automating this process with Pabbly Connect, you save time and ensure that all relevant LinkedIn profiles are stored efficiently in Google Sheets.


2. Automate LinkedIn Posts from Twitter

Another powerful automation using Pabbly Connect is connecting Twitter to LinkedIn. This allows your tweets to be automatically shared on your LinkedIn profile, ensuring your professional network stays updated. First, set Twitter as your trigger application.

In Pabbly Connect, select LinkedIn as the action application. This configuration means that every time you post a new tweet, it will automatically appear on LinkedIn. To set this up:

  • Create a new workflow in Pabbly Connect.
  • Choose Twitter as the trigger application and specify the trigger event for new tweets.
  • Set LinkedIn as the action application to post the tweet.

This automation allows you to maintain a consistent presence across both platforms without manual effort, thanks to Pabbly Connect.


3. Automate LinkedIn Posts from Instagram

Using Pabbly Connect, you can also automate LinkedIn posts from Instagram. This integration allows your Instagram posts to be shared directly on LinkedIn, enhancing your visibility. Start by designating Instagram as the trigger application.

After that, configure Pabbly Connect to set LinkedIn as the action application. This means that whenever you publish a new Instagram post, it will automatically be shared on your LinkedIn profile. The steps to achieve this are as follows:

Log into Pabbly Connect and create a new automation. Select Instagram as the trigger and set the event for new posts. Choose LinkedIn as the action and configure it to share the post.

This integration allows you to effortlessly promote your Instagram content on LinkedIn, leveraging the capabilities of Pabbly Connect.


4. Automate LinkedIn Posts from Facebook

Integrating Facebook with LinkedIn through Pabbly Connect is another effective way to streamline your social media management. This allows any new Facebook post to automatically be shared on LinkedIn. Begin by selecting Facebook as your trigger application.

In Pabbly Connect, set LinkedIn as the action application. This setup ensures that every time you post something on Facebook, it will instantly appear on your LinkedIn profile. Follow these steps to configure this integration:

Access Pabbly Connect and create a new workflow. Choose Facebook as the trigger and set the event for new posts. Select LinkedIn as the action to share the post.

This automation keeps your LinkedIn profile updated with your Facebook activity, showcasing your content across platforms using Pabbly Connect.


5. Automate LinkedIn Posts from Blogger

Finally, you can automate LinkedIn posts from your Blogger account using Pabbly Connect. This integration allows you to share new blog posts directly on LinkedIn, increasing your reach. Start by selecting Blogger as your trigger application.

Next, configure Pabbly Connect to set LinkedIn as the action application. This means that whenever you publish a new blog post, it will automatically be shared on LinkedIn. Follow these steps:

Open Pabbly Connect and create a new automation. Select Blogger as the trigger and set it to detect new posts. Choose LinkedIn as the action application to share the blog link or content.

This way, you can keep your LinkedIn audience informed about your latest blog posts effortlessly through Pabbly Connect.


Conclusion

In conclusion, automating LinkedIn posts using Pabbly Connect enhances your social media strategy by integrating various platforms like Google Sheets, Twitter, Instagram, Facebook, and Blogger. Each integration allows for seamless sharing of content, saving you time and effort while expanding your online presence.

Ensure you check out Pabbly Connect to create business automation workflows and reduce manual tasks. Pabbly Connect currently offer integration with 2,000+ applications.

Creating Motivational Quotes with Pabbly Connect and Sending via WhatsApp

Learn how to create motivational quotes using Pabbly Connect, Switchboard Canvas, and send them via WhatsApp effortlessly. Step-by-step tutorial included. Discover how to seamlessly connect your essential tools through accessible instructions that make powerful automation available to professionals at every skill level.

Watch Step By Step Video Tutorial Below


1. Setting Up Pabbly Connect for Automation

To begin with, Pabbly Connect serves as the central platform for automating the creation of motivational quote images and sending them via WhatsApp. Start by accessing the Pabbly Connect landing page and creating your free account. After signing up, log in to reach the dashboard where you can set up your automation workflow.

On the dashboard, click the ‘Create Workflow’ button. You will be prompted to name your workflow; choose a suitable name that reflects its purpose. Once named, click the ‘Create’ button to proceed. This initiates the setup for your automation, where you will configure the trigger and action applications.


2. Configuring Google Sheets as the Trigger Application

In this step, you will integrate Google Sheets as the trigger application within Pabbly Connect. This integration is essential as it allows you to input the data for your motivational quotes. Select Google Sheets from the list of applications and choose the ‘New or Updated Spreadsheet Row’ as the trigger event. This action will provide you with a webhook URL necessary for connecting your Google Sheets.

  • Open your Google Sheets document in incognito mode if using multiple accounts.
  • Install the Pabbly Connect Webhooks add-on from the Extensions menu.
  • Paste the webhook URL in the Initial Setup of the add-on.

After setting up the webhook, ensure to refresh your Google Sheets. This step is crucial to activate the connection. Once refreshed, click on ‘Send Test’ to verify that the data is being received correctly in Pabbly Connect. This ensures that your integration is functioning as expected before proceeding to the next steps.


3. Creating Images with Switchboard Canvas

Once your Google Sheets trigger is configured, the next step involves using Pabbly Connect to create images using Switchboard Canvas. For this, you will select Switchboard Canvas as your action application within the workflow. Choose the ‘Create Images’ action event and connect it using your API key from Switchboard Canvas.

In the setup, you will need to specify the template name, image dimensions, and map the data from your Google Sheets. This data includes the motivational quote, background image, and name. After mapping these fields, click on ‘Save and Send Test Request’ to generate the image. If successful, you will receive a URL link to the newly created image.


4. Sending Images via WhatsApp Using Pabbly Connect

After creating your motivational quote images, the next step is to send these images via WhatsApp. For this, you will again use Pabbly Connect to integrate with the WhatsApp Cloud API. Select WhatsApp as the action application and choose the ‘Send Template Message’ option.

  • Connect to the WhatsApp Cloud API using your API token and phone number ID.
  • Map the WhatsApp number and the image URL created in the previous step.
  • Customize the body field with the recipient’s name to personalize the message.

Once all fields are mapped correctly, click on ‘Save and Send Test Request’ to send the message. This action will dispatch the motivational quote image to the specified WhatsApp number, completing the automation workflow.


5. Finalizing Your Automation Workflow

With the setup completed, test your entire workflow by entering data into your Google Sheets. As you input new motivational quotes, Pabbly Connect will automatically create images using Switchboard Canvas and send them via WhatsApp without any manual intervention. This seamless integration allows for efficient communication of motivational content.

Once you confirm that everything works as intended, you can save your workflow in Pabbly Connect. You can also clone this workflow for future use or share it with others who might benefit from automating their motivational quote delivery.


Conclusion

In conclusion, using Pabbly Connect to automate the creation and sending of motivational quotes via WhatsApp is a powerful way to inspire others effortlessly. By following this tutorial, you can set up your integration quickly and efficiently, ensuring that your motivational messages reach your audience automatically.

Ensure you check out Pabbly Connect to create business automation workflows and reduce manual tasks. Pabbly Connect currently offer integration with 2,000+ applications.

How to Send Airtable Responses to Focuster Using Pabbly Connect

Learn how to use Pabbly Connect to send Airtable responses to Focuster automatically. Follow our detailed step-by-step tutorial for seamless integration. Follow this definitive guide to creating powerful automated workflows with straightforward, efficiency-focused solutions that save valuable time.

Watch Step By Step Video Tutorial Below


1. Introduction to Pabbly Connect Automation

Pabbly Connect is a powerful automation tool that allows you to integrate various applications seamlessly. In this tutorial, we will demonstrate how to send Airtable responses to Focuster using Pabbly Connect. This integration will help automate task management by creating actions in Focuster whenever new data is added to Airtable.

To get started, you need to create a free account on Pabbly Connect. After signing up, log in to your dashboard to begin setting up your automation. This process does not require any coding skills and is user-friendly, making it accessible for everyone.


2. Creating a Workflow in Pabbly Connect

To initiate the workflow, click on the ‘Create Workflow’ button in your Pabbly Connect dashboard. You will be prompted to name your workflow. For this integration, you can name it ‘Airtable to Focuster Automation’. After naming it, click the ‘Create’ button to proceed. using Pabbly Connect

  • Click on ‘Create Workflow’ in the dashboard.
  • Enter a suitable name for your workflow.
  • Click the ‘Create’ button to set up your workflow.

Once the workflow page is ready, you will see two modules: the trigger and the action. The trigger is the event that starts the workflow, while the action is the response that occurs as a result of the trigger. In this case, the trigger will be adding details to Airtable.


3. Setting Up Airtable as the Trigger Application

In the trigger module, search for Airtable and select it. You will choose the event that triggers the workflow, which is ‘New Record in Base’. This setup will check for new records in your Airtable base every 10 minutes. using Pabbly Connect

Next, click on ‘Connect’ and select ‘Add New Connection’. Here, you will need to enter your Airtable API key. To find this key, go to your Airtable account settings and copy it from the API section. Paste the key into Pabbly Connect and click ‘Save’.

  • Select ‘Airtable’ as your trigger application.
  • Choose ‘New Record in Base’ as the trigger event.
  • Enter your Airtable API key to connect.

After saving the connection, you will be prompted to select the base and table you want to monitor. Choose the base named ‘Focused Actions’ and the table ‘Table 1’. Ensure that your table has a ‘Created Time’ field, which is essential for triggering the workflow.


4. Testing the Airtable Trigger

Once you have configured your Airtable connection, it’s time to test the trigger. Click on ‘Save and Send Test Request’. This action will pull the most recent entry from your Airtable base into Pabbly Connect. You should see the data displayed, including the title, notes, assignee’s name, and due date. using Pabbly Connect

This step is crucial as it confirms that your Airtable integration is working correctly. If the data appears as expected, you can proceed to set up the action with Focuster. If not, double-check your Airtable settings and the connection.


5. Setting Up Focuster as the Action Application

In the action module, search for Focuster and select it. Choose ‘Create Action’ as your action event. Click on ‘Connect’ and select ‘Add New Connection’. You will need to enter the API key from your Focuster account, which can be found in your account settings under the Integrations tab. using Pabbly Connect

Once connected, you will map the fields from the Airtable data to the corresponding fields in Focuster. This includes the title, notes, and list where you want to add the action. Click on ‘Save and Send Test Request’ to create the action in Focuster. You should see a new action created with the same details from Airtable.

This integration ensures that every time you add a new record in Airtable, an action is created in Focuster automatically, streamlining your task management process.


Conclusion

In this tutorial, we demonstrated how to use Pabbly Connect to send Airtable responses to Focuster automatically. By following the steps outlined, you can easily set up this integration to enhance your productivity and automate your task management. Now, whenever you add a new task in Airtable, it will create an action in Focuster without manual intervention.

Ensure you check out Pabbly Connect to create business automation workflows and reduce manual tasks. Pabbly Connect currently offer integration with 2,000+ applications.

How to Create an Action in Focuster When an Email is Received Using Pabbly Connect

Learn how to create an action in Focuster when an email is received using Pabbly Connect. Step-by-step tutorial for seamless integration. Build sophisticated automated workflows in less time than you think. This guide translates complex integrations into straightforward steps for immediate implementation.

Watch Step By Step Video Tutorial Below


1. Accessing Pabbly Connect for Email Integration

To start using Pabbly Connect, first, visit the Pabbly Connect landing page. Here, you can sign up for a free account that provides automation tasks each month to test your integrations.

Once signed up, log into your Pabbly Connect account. You will be directed to the dashboard where you can click on the ‘Create Workflow’ button to start setting up your automation process.


2. Setting Up Email Parser in Pabbly Connect

In this section, we will set up the email parser feature in Pabbly Connect. This feature allows you to capture specific emails that will act as triggers for your workflow.

Click on the email parser option and copy the generated email parser address. This address will be used to forward emails from your Gmail account. Follow these steps:

  • Go to your Gmail settings and find the ‘Forwarding and POP/IMAP’ tab.
  • Click on ‘Add a forwarding address’ and paste the email parser address.
  • Follow the confirmation steps to verify the forwarding address.

Once verified, you can set it to forward all incoming emails to the parser’s address, allowing Pabbly Connect to capture the necessary data.


3. Filtering Email Data for Task Assignments

After setting up the email parser, the next step is to filter the incoming emails to ensure only relevant task assignments trigger actions in Focuster. This is done within Pabbly Connect by applying a filter condition.

In the sections tab, select the filter option and configure it to check if the subject of the email contains the word ‘task’. This ensures that only emails regarding task assignments will proceed further in the workflow. Here’s how to set it up:

  • Select the subject label from the previous email parser step.
  • Set the filter type to ‘contains’ and input the word ‘task’.

After saving the filter, Pabbly Connect will only allow emails that meet this condition to proceed, setting the stage for action creation in Focuster.


4. Creating an Action in Focuster Using Pabbly Connect

With the email filter in place, we can now create an action in Focuster. This is the final step in the automation process using Pabbly Connect. Click on the plus icon to add another action step, and search for the Focuster application.

Select the action event as ‘Create Action’ and connect your Focuster account by entering the API key found in your Focuster settings. Here’s how to do it:

Navigate to your Focuster settings and click on ‘Integrations’ to find your API key. Paste the API key into Pabbly Connect and save the connection. Map the subject from the email as the action title and the email body as the note.

Once everything is set, test the connection to create an action in Focuster, confirming that the integration works seamlessly through Pabbly Connect.


5. Conclusion: Automating Task Management with Pabbly Connect

By following these steps, you can effectively automate task management in Focuster when receiving specific emails using Pabbly Connect. This setup ensures that you stay organized and responsive to task assignments without manual intervention.

Ensure you check out Pabbly Connect to create business automation workflows and reduce manual tasks. Pabbly Connect currently offer integration with 2,000+ applications.

Once configured, Pabbly Connect will handle the automation in the background, allowing you to focus on your tasks while it processes incoming emails and creates actions in Focuster automatically.

How to Generate DocsCloud Documents from Google Sheets Using Pabbly Connect

Learn how to integrate Google Sheets with DocsCloud to automatically generate documents using Pabbly Connect. Follow this detailed step-by-step tutorial. Follow this definitive guide to creating powerful automated workflows with straightforward, efficiency-focused solutions that save valuable time.

Watch Step By Step Video Tutorial Below


1. Accessing Pabbly Connect for Integration

To generate DocsCloud documents from Google Sheets, you first need to access Pabbly Connect. Start by visiting the official Pabbly website at pabby.com.

If you are a new user, click on the ‘Sign Up Free’ button to create your account. Existing users can simply sign in. Once logged in, navigate to the all apps section and select Pabbly Connect to access the dashboard.


2. Creating a Workflow in Pabbly Connect

In the Pabbly Connect dashboard, you will need to create a new workflow. Click on the plus sign and select ‘Create Workflow’. Name your workflow, such as ‘Generate DocsCloud Documents from Google Sheets’, then click on ‘Create’.

  • Choose Google Sheets as the trigger application.
  • Select the trigger event as ‘New or Updated Spreadsheet Row’.
  • Copy the webhook URL provided by Pabbly Connect.

After setting up the trigger, you will need to configure the Google Sheet to send data to this URL. Make sure to follow the instructions provided in Pabbly Connect to ensure proper integration.


3. Setting Up Google Sheets for Data Capture

Open your Google Sheets document where you will be entering data. Go to Extensions > Add-ons > Get Add-ons to install the Pabbly Connect Webhooks add-on. After installation, refresh your Google Sheet. using Pabbly Connect

Next, navigate to Extensions > Pabbly Connect Webhooks and click on ‘Initial Setup’. Here, paste the webhook URL you copied earlier and set the trigger column, which should be the column you want to monitor for updates.

  • Select the trigger column as the final data column (e.g., Column G).
  • Click on ‘Send Test’ to confirm the setup.

Once the test is successful, ensure that the ‘Send on Event’ option is checked so that future data entries will automatically trigger the webhook.


4. Integrating DocsCloud with Pabbly Connect

Now that your Google Sheets is set up, it’s time to integrate DocsCloud. In the action window of Pabbly Connect, select DocsCloud and choose the action event as ‘Generate Document’. Click on ‘Connect’.

You will need to input your Auth ID and Auth Token to establish the connection. To find these, log in to your DocsCloud account, navigate to ‘My Profile’, and copy the required credentials.

Paste the Auth ID and Auth Token into the respective fields in Pabbly Connect. Select the template you want to use for document generation.

After selecting the template, map the variables from your Google Sheets data to the corresponding fields in the DocsCloud template. This ensures that the data entered in your Google Sheets is accurately reflected in the generated document.


5. Updating Google Sheets with Document URLs

After generating the document in DocsCloud, you will want to update your Google Sheets with the document URL. In Pabbly Connect, add another action step and select Google Sheets again, this time choosing ‘Update Cell Value’ as the action event.

Connect using the existing connection you created earlier, then select the spreadsheet and specify the range where the document URL should be placed. Map the row index where the data was added and the document URL generated from DocsCloud.

Ensure to save and send a test request to verify the update. Check your Google Sheets to confirm that the document URL appears correctly.

This step finalizes the integration, ensuring that every time you add data to Google Sheets, a document is generated in DocsCloud, and its URL is automatically updated in your Google Sheets.


Conclusion

In this tutorial, we demonstrated how to use Pabbly Connect to seamlessly integrate Google Sheets with DocsCloud. By following the steps outlined, you can automate document generation based on your Google Sheets data, enhancing efficiency and accuracy.

Ensure you check out Pabbly Connect to create business automation workflows and reduce manual tasks. Pabbly Connect currently offer integration with 2,000+ applications.

With Pabbly Connect, you can easily manage this integration and ensure that your workflows run smoothly. Start automating your processes today and experience the benefits of integration!

How to Generate DocsCloud Documents for New Google Forms Responses Using Pabbly Connect

Learn how to automate document generation in DocsCloud for Google Forms responses with Pabbly Connect. Follow our step-by-step guide for seamless integration. Discover how to seamlessly connect your essential tools through accessible instructions that make powerful automation available to professionals at every skill level.

Watch Step By Step Video Tutorial Below


1. Accessing Pabbly Connect for Integration

To generate DocsCloud documents for new Google Forms responses, you first need to access Pabbly Connect. Go to the official Pabbly website and sign in or create a new account if you don’t have one. This process is straightforward and allows you to set up automation workflows quickly.

Once logged in, navigate to the Pabbly Connect dashboard. Click on the plus sign to create a new workflow. Here, you will name your workflow, such as ‘Generate DocsCloud Documents for New Google Forms Responses.’ This naming convention helps keep your integrations organized.


2. Setting Up Google Forms as the Trigger Application

In this section, you will set up Google Forms as the trigger application in Pabbly Connect. Select Google Forms from the list of applications and choose the trigger event as ‘New Response Received.’ This step is crucial as it defines when the automation will start.

  • Select Google Forms as the application.
  • Choose ‘New Response Received’ as the trigger event.
  • Copy the webhook URL provided by Pabbly Connect.

After setting the trigger, you will need to configure your Google Form to ensure it captures responses correctly. Make sure the last question in your Google Form is set as required, as this will help in capturing all necessary data for the document generation.


3. Linking Google Sheets with Pabbly Connect

Google Forms responses are automatically collected in Google Sheets. To link your Google Sheets with Pabbly Connect, go to the responses tab of your Google Form. Click on the three dots and select ‘Select Response Destination’ to create a new spreadsheet for the responses.

  • Create a new spreadsheet named ‘Dinner Confirmation Form Responses.’
  • Install the Pabbly Connect Webhooks add-on from Google Workspace Marketplace.
  • Configure the webhook URL in the add-on settings.

Once the Google Sheet is linked, ensure that the Pabbly Webhooks add-on is set up to send data to the webhook URL whenever a new form response is recorded. This setup allows Pabbly Connect to capture responses automatically without manual intervention.


4. Generating Documents in DocsCloud

Now that you have set up Google Forms and Sheets, it’s time to integrate DocsCloud with Pabbly Connect. In the action window of your workflow, select DocsCloud and choose the action event as ‘Generate Document.’ This action will create a new document based on the responses captured.

Connect your DocsCloud account by entering your O ID and Au token. Select the template you want to use for document generation. Map the variables from the Google Forms responses to the template fields.

After mapping the variables, click on ‘Save and Send Test Request’ to generate a document. You will receive a response indicating the success of the document creation along with the document URL. This confirms that your integration is functioning correctly through Pabbly Connect.


5. Testing the Integration in Real-Time

With everything set up, it’s time to test your integration. Fill out the Google Form with new participant details and submit it. This action will trigger Pabbly Connect to capture the response and generate a new document in DocsCloud automatically.

To verify, check your DocsCloud account for the newly generated document. It should reflect the information provided in the Google Form submission. This testing phase is crucial to ensure that all steps are functioning as expected.

In summary, you have successfully set up an integration between Google Forms, Google Sheets, and DocsCloud using Pabbly Connect. This automation will save you time and streamline your document generation process for future events.


Conclusion

In this tutorial, we demonstrated how to generate DocsCloud documents for new Google Forms responses using Pabbly Connect. By following these steps, you can automate your document creation process effectively. This integration not only enhances efficiency but also ensures accuracy in handling event confirmations and similar tasks.

Ensure you check out Pabbly Connect to create business automation workflows and reduce manual tasks. Pabbly Connect currently offer integration with 2,000+ applications.

How to Use Look Up Table Action for Infinity inside Pabbly Connect

Learn how to integrate Google Sheets, Infinity, and more using the Look Up Table Action in Pabbly Connect with this detailed tutorial. Master proven automation processes with practical implementation examples and strategic recommendations you can apply immediately in your workflow.

Watch Step By Step Video Tutorial Below


1. Accessing Pabbly Connect for Integration

To start using Pabbly Connect, navigate to the official website by typing ‘Pabbly.com’ in your browser. If you’re a new user, click on the ‘Sign Up for Free’ button to create your account. Existing users can simply sign in to access their dashboard.

Once logged in, locate the ‘All Apps’ section and select Pabbly Connect. Here, you will create a new workflow for integrating Google Sheets with Infinity using the Look Up Table action. Click on the plus sign to create a workflow, and name it appropriately, such as ‘Use Look Up Table Action for Infinity inside Pabbly Connect.’


2. Setting Up Google Sheets as a Trigger Application

In this step, you will set Google Sheets as the trigger application in Pabbly Connect. Select Google Sheets and choose the trigger event as ‘New or Updated Spreadsheet Row.’ This setup allows Pabbly Connect to monitor your Google Sheet for changes.

  • Copy the webhook URL provided by Pabbly Connect.
  • In Google Sheets, go to Extensions > Add-ons > Get Add-ons and search for ‘Pabbly Connect Webhooks.’
  • Install the add-on and refresh your Google Sheet.

After refreshing, navigate back to Extensions, select ‘Pabbly Connect Webhooks,’ and click on ‘Initial Setup.’ Paste the copied webhook URL and set the trigger column, which is usually the last column where data updates occur. Click on ‘Send Test’ to verify the setup.


3. Integrating Infinity with Pabbly Connect

Next, you will integrate Infinity into your workflow using Pabbly Connect. After setting up Google Sheets as the trigger, add an action step and select Infinity as the application. Choose the action event ‘Get Attributes’ to retrieve necessary attribute IDs from Infinity.

Connect your Infinity account by clicking on ‘Connect’ and authorizing Pabbly Connect. Select the appropriate workspace and board where your data is stored. This step is crucial because it allows Pabbly Connect to access your Infinity data.

  • Select the correct workspace and board in Infinity.
  • Map the attribute IDs from the Google Sheets trigger response.
  • Click ‘Save and Send Test Request’ to retrieve the attribute IDs.

This step is essential for ensuring that Pabbly Connect can match the data from Google Sheets to the corresponding entries in Infinity.


4. Using Look Up Table Action in Pabbly Connect

Now, you will utilize the Look Up Table action in Pabbly Connect to map the attribute IDs retrieved from Infinity. Add another action step and select ‘Lookup Table’ as the application. This action allows you to create a mapping between the status labels (like paid, failed, refund) and their corresponding attribute IDs.

Map the status from the previous steps to the lookup key in the Lookup Table action. Enter the labels and their corresponding attribute IDs. After configuring the lookup table, click on ‘Save and Send Test Request’ to validate the mapping.

Define labels such as ‘paid,’ ‘failed,’ and ‘refund.’ Map the corresponding attribute IDs for these labels. Ensure the lookup key accurately reflects the status from the Google Sheets trigger.

This process ensures that the correct status is updated in your Infinity table when changes occur in Google Sheets, facilitated by Pabbly Connect.


5. Updating Infinity with the Mapped Data

Finally, you will update the Infinity table using the mapped data from the Lookup Table action in Pabbly Connect. Add another action step and choose Infinity again, but this time select ‘Update Item’ as the action event. This step will apply the changes from Google Sheets to your Infinity table.

Connect to Infinity and select the workspace and board as previously done. You will need to map the item ID from the search item action to ensure the correct entry is updated. Map the status column to the value retrieved from the Lookup Table action.

Select the correct item ID to update. Map the status field to the updated attribute ID from the Lookup Table. Click ‘Save and Send Test Request’ to finalize the update.

Upon successful execution, your Infinity table will reflect the updated payment statuses from Google Sheets, demonstrating the power of Pabbly Connect in automating your workflows.


Conclusion

In this tutorial, we explored how to use the Look Up Table action for Infinity inside Pabbly Connect. By following these steps, you can seamlessly integrate Google Sheets and Infinity, ensuring that your data remains synchronized and up-to-date. This integration not only saves time but also enhances data accuracy across your applications.

Ensure you check out Pabbly Connect to create business automation workflows and reduce manual tasks. Pabbly Connect currently offer integration with 2,000+ applications.

How to Send WhatsApp Messages to Slack Channel Using Pabbly Connect

Learn how to send WhatsApp messages directly to a Slack channel using Pabbly Connect. This step-by-step guide covers the entire integration process. Implement the precise methodologies leading organizations use to automate repetitive tasks, illustrated with practical examples designed for immediate application.

Watch Step By Step Video Tutorial Below


1. Accessing Pabbly Connect for WhatsApp to Slack Integration

To start the process of sending WhatsApp messages to a Slack channel, you need to access Pabbly Connect. Begin by visiting the Pabbly website, where you can sign up for a free account or log in if you already have one.

Once logged in, locate the ‘Create Workflow’ button on the top right corner. Click it and name your workflow as ‘WhatsApp to Slack’. This sets the stage for the automation process, which will link WhatsApp messages to your Slack channel.


2. Setting Up the Trigger in Pabbly Connect

In this step, you will set up the trigger for the automation. Select ‘WhatsApp Cloud API’ as the trigger application and choose the ‘Message Notification’ event. This event triggers when a new WhatsApp message is sent, delivered, or received.

  • Select WhatsApp Cloud API as the trigger application.
  • Choose ‘Message Notification’ as the trigger event.
  • Copy the generated webhook URL provided by Pabbly Connect.

After copying the webhook URL, you will need to set it up in your WhatsApp developer account. This URL connects WhatsApp to Pabbly Connect, allowing message data to flow into your workflow.


3. Configuring the WhatsApp Webhook

To configure the webhook, navigate to the webhooks section of your WhatsApp developer account. Here, you will paste the copied webhook URL into the designated field. Ensure you also enter the verification token provided in Pabbly Connect. using Pabbly Connect

After pasting the URL and verification token, click on the ‘Verify and Save’ button. This step confirms that the webhook is correctly set up and ready to receive messages from WhatsApp. Once verified, subscribe to the messages option to complete the integration.


4. Setting Up the Action Step in Pabbly Connect

Now, you will set up the action step in Pabbly Connect. Select ‘Slack’ as your action application and choose the ‘Send Channel Message’ event. This allows you to send the WhatsApp message to your chosen Slack channel.

Connect to Slack by adding a new connection. You will need to provide the token type, which can either be a user or bot token. Select the ‘User’ token type and click ‘Allow’ to grant Pabbly Connect access to your Slack account.


5. Mapping WhatsApp Messages to Slack Channel

In this final step, you will map the WhatsApp message to the Slack channel. Choose the ‘General’ channel in Slack where you want the messages to be sent. Then, map the body text of the WhatsApp message to the message field in Slack. using Pabbly Connect

Once completed, click on ‘Save and Send Test Request’. This will send a test message to your Slack channel, confirming that the integration is successful. You will see the message appear in your selected Slack channel, indicating that the automation is functioning correctly.


Conclusion

By following these steps, you can seamlessly send WhatsApp messages to a Slack channel using Pabbly Connect. This automation enhances communication efficiency, ensuring important messages are shared instantly across platforms.

Ensure you check out Pabbly Connect to create business automation workflows and reduce manual tasks. Pabbly Connect currently offer integration with 2,000+ applications.

Convert Dropbox Files Using Pabbly Connect and Upload to Google Drive

Learn how to automate file conversion from Dropbox to Google Drive using Pabbly Connect. A step-by-step tutorial on setting up the integration seamlessly. Navigate the automation landscape confidently with clear, structured guidance suitable for professionals regardless of prior technical experience.

Watch Step By Step Video Tutorial Below


1. Accessing Pabbly Connect for Dropbox to Google Drive Integration

To start automating the conversion of Dropbox files to Google Drive, you first need to access Pabbly Connect. Visit the Pabbly website and either sign in or sign up for a free account, which gives you access to free tasks each month.

Once logged in, click on the ‘Create Workflow’ button. You’ll be prompted to name your workflow; for this integration, name it ‘Dropbox to Google Drive.’ This initial setup will guide you through the trigger and action steps necessary for automation.


2. Setting Up the Dropbox Trigger in Pabbly Connect

In the workflow, select Dropbox as your trigger application. Choose the event ‘New File’ which triggers the automation when a new file is added to a specified folder. Click on ‘Add New Connection’ to link your Dropbox account to Pabbly Connect.

  • Select the folder path where the new files will be uploaded.
  • Map the folder name correctly, ensuring to include the necessary slashes.
  • Upload a test file to see if the integration captures the response successfully.

After uploading a test file, click on ‘Save and Send Test Request’ to verify that Pabbly Connect has successfully connected to Dropbox and captured the file details.


3. Configuring CloudConvert Action in Pabbly Connect

Next, add an action step by selecting CloudConvert as your action application. Choose the action event ‘Convert a File’. Connect your CloudConvert account to Pabbly Connect to facilitate the file conversion process.

In this step, you will need to map the file URL obtained from the Dropbox trigger. Specify the input format of the file (for example, JPG) and the desired output format (like PNG). Additionally, provide the output file name, ensuring it includes the correct extension.

  • Map the file URL from the Dropbox response.
  • Set the input format based on the file type you uploaded.
  • Make sure to format the output file name correctly with the new extension.

After configuring these settings, click on ‘Save and Send Test Request’ to ensure that the file conversion works correctly through Pabbly Connect.


4. Uploading the Converted File to Google Drive

Once the file is converted, the next action is to upload it to Google Drive. Select Google Drive as the action application and choose the event ‘Upload a File’. Connect your Google Drive account to Pabbly Connect to enable the upload process.

In this step, you will need to provide the file URL generated from the CloudConvert action. Additionally, specify the folder ID in Google Drive where the file should be saved, along with the file name.

Map the file URL from the CloudConvert response. Extract the folder ID from the Google Drive URL. Ensure the file name is correctly mapped from the CloudConvert response.

After mapping these fields, click on ‘Save and Send Test Request’ to confirm that the file has been successfully uploaded to Google Drive via Pabbly Connect.


5. Finalizing the Integration and Testing

To finalize the integration, ensure that all fields are mapped correctly. This includes the file URL, folder ID, and file name. Once everything is set, click on ‘Save’ to complete the setup.

Test the entire workflow by uploading a new file to Dropbox. After the file is uploaded, check Google Drive to verify that the converted file appears in the specified folder. This end-to-end process demonstrates how Pabbly Connect seamlessly integrates Dropbox and Google Drive.


Conclusion

In this tutorial, we explored how to automate the conversion of Dropbox files to Google Drive using Pabbly Connect. By following the outlined steps, you can efficiently manage file conversions and uploads without manual intervention. This integration not only saves time but also enhances productivity.

Ensure you check out Pabbly Connect to create business automation workflows and reduce manual tasks. Pabbly Connect currently offer integration with 2,000+ applications.