How to Automate Microsoft Outlook Calendar Events to Google Sheets Using Pabbly Connect

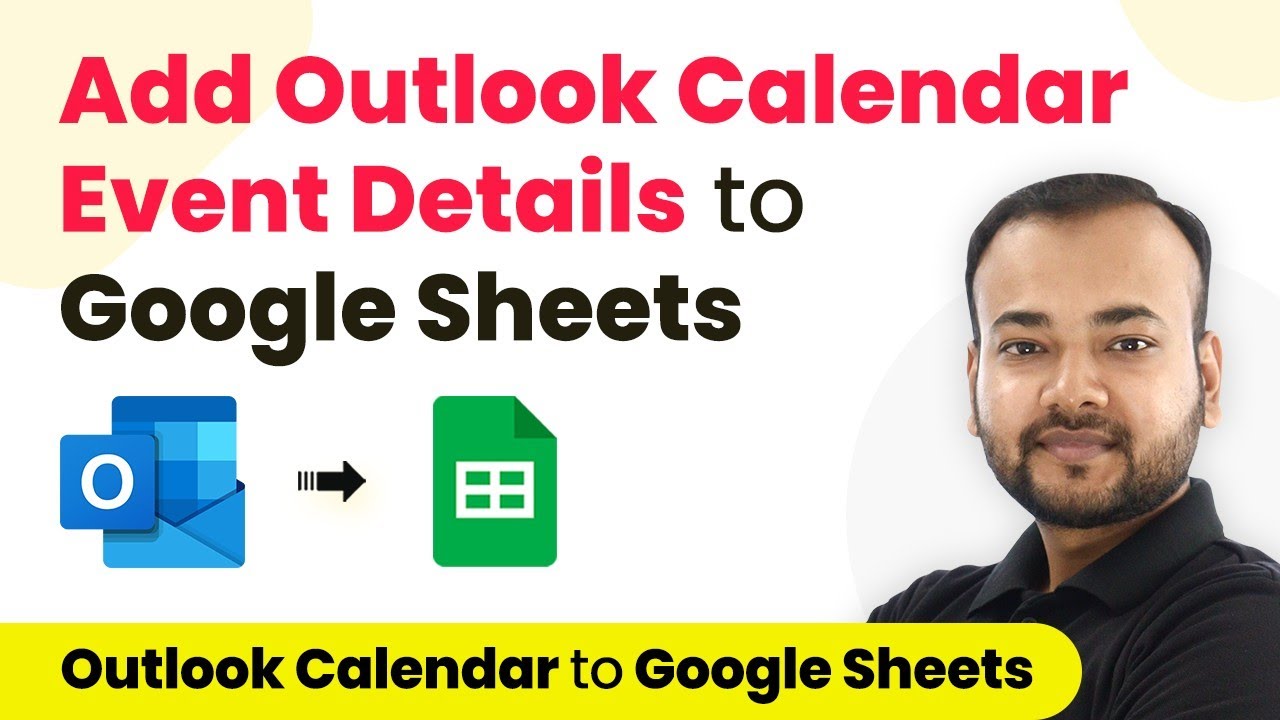
Learn how to automatically add Microsoft Outlook calendar events to Google Sheets with Pabbly Connect. Follow this detailed tutorial for seamless integration. Master proven automation processes with practical implementation examples and strategic recommendations you can apply immediately in your workflow.

Watch Step By Step Video Tutorial Below


1. Setting Up Pabbly Connect for Outlook Calendar Events

In this section, we will explore how to set up Pabbly Connect to automate the process of adding Microsoft Outlook calendar events to Google Sheets. Begin by visiting the Pabbly Connect landing page and signing up for a free account. This will allow you to access automation tasks that can help you streamline your workflow.

Once you have created your account, sign in to Pabbly Connect and navigate to the dashboard. Click on the ‘Create Workflow’ button to start a new automation. You can name your workflow something like ‘Microsoft Outlook Events to Google Sheets’ for easy reference.


2. Configuring Microsoft Outlook as the Trigger in Pabbly Connect

To set up the automation, you need to configure Microsoft Outlook as the trigger application within Pabbly Connect. In the trigger section, search for ‘Microsoft Office 365’ and select it. Then, choose the trigger event ‘New Calendar Event’ to initiate the workflow when a new event is added.

  • Search and select Microsoft Office 365 as the trigger application.
  • Choose the trigger event ‘New Calendar Event’.
  • Click on ‘Connect’ and select ‘Add New Connection’.

After this, grant the necessary permissions for Pabbly Connect to access your Microsoft Outlook account. Select your calendar from the list provided and click on ‘Save and Send Test Request’. This action will fetch the most recent event details from your Outlook calendar, which will be used in the subsequent steps.


3. Formatting Event Details for Google Sheets

Once you have successfully fetched the event details from Microsoft Outlook, the next step involves formatting these details for Google Sheets using Pabbly Connect. This is crucial as the data needs to be organized appropriately before being sent to Google Sheets.

To convert the UTC time to your local time zone, add a new step and select the ‘Date Time Formatter’ action event. Map the date and time from the previous step, ensuring the format matches your requirements. This will help in getting the correct local time for your events.

  • Select ‘Date Time Formatter’ as the action event.
  • Map the date and time from the trigger step.
  • Choose the desired output format and time zone.

After formatting the date and time, you can split the date and time into separate fields if necessary. This can be done using the ‘Text Formatter’ action event where you can specify the text to split by a space.


4. Adding Event Data to Google Sheets

The final step involves sending the formatted event details to Google Sheets using Pabbly Connect. In this step, you will select Google Sheets as the action application and choose the action event ‘Add New Row’. This allows you to add a new row in your specified Google Sheet with the event details.

Connect your Google Sheets account by clicking on ‘Connect’ and selecting ‘Add New Connection’. You will need to choose the spreadsheet you wish to update and map the relevant fields to the columns in your Google Sheet, such as event title, description, date, and time.

Select Google Sheets as the action application. Choose the action event ‘Add New Row’. Map the event details to the corresponding columns in the sheet.

After mapping the fields, click on ‘Save and Send Test Request’ to verify that the data is added to your Google Sheet. Check your spreadsheet to ensure that the event details appear correctly in a new row.


5. Conclusion

By following these steps, you can effectively automate the process of adding Microsoft Outlook calendar events to Google Sheets using Pabbly Connect. This integration saves time and ensures that your event details are always up-to-date in your spreadsheet without manual intervention.

Ensure you check out Pabbly Connect to create business automation workflows and reduce manual tasks. Pabbly Connect currently offer integration with 2,000+ applications.

Now, whenever you add a new event in Microsoft Outlook, the details will automatically populate in your Google Sheet, streamlining your workflow and enhancing productivity. Start using Pabbly Connect today to simplify your automation tasks!


How to Get Employees Weekly Report on WhatsApp Automatically Using Pabbly Connect

Learn how to automate employee weekly reports to WhatsApp using Pabbly Connect. This detailed tutorial walks you through each step for seamless integration. Follow this definitive guide to creating powerful automated workflows with straightforward, efficiency-focused solutions that save valuable time.

Watch Step By Step Video Tutorial Below


1. Setting Up Pabbly Connect for Automation

To get started with automating weekly reports to WhatsApp, you will first need to access Pabbly Connect. This platform allows you to create workflows that connect different applications seamlessly.

Begin by signing up for a free account on the Pabbly Connect landing page. After signing in, navigate to the dashboard and click on the ‘Create Workflow’ button. Name your workflow, for instance, ‘Weekly Employee Reports on WhatsApp’, and click on the ‘Create’ button to proceed.


2. Scheduling Weekly Reports with Pabbly Connect

In this section, you will set up a scheduler in Pabbly Connect to automate the sending of weekly reports. Select the ‘Scheduler’ module as your trigger application. This feature allows you to specify how often you want the workflow to run.

  • Choose the frequency as ‘Weekly’.
  • Select the day of the week, for example, ‘Saturday’.
  • Set the time you want the report to be sent, ensuring it aligns with your time zone.

After configuring these settings, click on ‘Save’ to finalize the scheduling. This setup ensures that the workflow will run automatically every Saturday at your specified time.


3. Collecting Employee Reports via Google Forms

Next, you will need to collect the weekly reports from employees using Google Forms. Create a Google Form that includes fields for employee details, such as name, WhatsApp number, designation, email address, weekly goals, and accomplishments.

In Pabbly Connect, add a new action step and select ‘Google Sheets’ as your application. Choose the action event ‘Get Rows’ to retrieve data from the Google Sheets linked with your Google Form.

  • Connect your Google account and grant necessary permissions.
  • Select the spreadsheet where your Google Form responses are collected.
  • Specify the data range for dynamic retrieval of responses.

After mapping these fields, click on ‘Save’ and send a test request to ensure that data is being fetched correctly from the Google Sheets.


4. Sending Reports to WhatsApp Using Pabbly Connect

Now that you have the employee data, it’s time to send the reports via WhatsApp. Add another action step in Pabbly Connect and select ‘WhatsApp Cloud API’ as your application. Choose the action event ‘Send Template Message’ to configure the message structure.

Before sending the message, ensure that you have set up your WhatsApp Cloud API and created a message template. Map the fields from your Google Sheets responses to the WhatsApp message template, including employee names and their accomplishments.

Input the WhatsApp number formatted without the plus sign. Map the body fields to personalize the message for each employee.

Click on ‘Save’ and send a test request to verify that the message is sent successfully to WhatsApp. You should see the report summary appear in your WhatsApp chat.


5. Finalizing Automation in Pabbly Connect

To complete your automation setup, you need to handle different scenarios based on employee performance. Use the ‘Router’ feature in Pabbly Connect to create paths for different conditions: one for when targets are met and another for when they are not.

Set filters for each path, using conditions based on the results from the number formatter. For example, if the target is completed, send a message indicating success; if not, send a different message stating the target was not achieved.

For the ‘Target Completed’ path, check if the result equals zero. For the ‘Target Not Completed’ path, check if the result is greater than zero.

After setting up these paths, click on ‘Save’ to finalize your workflow. Your automation is now complete, and you will receive weekly reports automatically on WhatsApp without any manual intervention.


Conclusion

By following this tutorial, you have successfully set up a workflow using Pabbly Connect to receive weekly employee reports on WhatsApp automatically. This integration enhances productivity and keeps you informed about your team’s performance.

Ensure you check out Pabbly Connect to create business automation workflows and reduce manual tasks. Pabbly Connect currently offer integration with 2,000+ applications.

Integrating Applications Using Parameter Based Authentication Inside Pabbly Connect

Learn how to integrate applications like Facebook, YouTube, and more using Parameter Based Authentication inside Pabbly Connect with this detailed step-by-step tutorial. Learn to create powerful connections between your critical applications without requiring specialized programming knowledge or extensive technical background.

Watch Step By Step Video Tutorial Below


1. Accessing Pabbly Connect for Integration

To begin integrating applications using Pabbly Connect, first navigate to the Pabbly Connect dashboard. This is where you will manage your integrations seamlessly. You can access the backend developer platform by entering connect.Pabbly.com/app in your browser.

Once you are on the application integration page, click on the ‘Create New App’ button. Here, you will need to name your application and save it. For demonstration purposes, we will refer to the email marketing application, MooseSend, which uses parameter-based authentication.


2. Setting Up Application Details in Pabbly Connect

After creating your application in Pabbly Connect, the next step is to enter specific details about the application. This includes the application’s name, description, and logo, which should be 64×64 pixels. You will also select the authentication type, which in this case is ‘Parameter’ based on the API documentation of MooseSend.

  • Enter the application name and description.
  • Upload the application logo.
  • Select ‘Parameter’ as the authentication type.

Once you have filled out these details, create a parameter for the API key. This parameter will collect the API key from the user. Click on the settings button to configure the label and description for the API key field. This setup allows users to understand what information they need to provide.


3. Creating Triggers in Pabbly Connect

Next, you will create triggers that will initiate actions within Pabbly Connect. Go to the trigger section and click on the ‘Create Trigger’ button. You will need to enter a name for your trigger event and a description of what it does. For this integration, we will create a trigger called ‘New Subscriber’.

Choose the trigger type based on how your application supports webhooks. MooseSend allows users to manually enter the webhook URL, so select ‘Webhook Setup by Instruction’. Additionally, provide instructions for users on how to set up this webhook within their MooseSend account.

  • Enter the trigger name and description.
  • Select the trigger type as ‘Webhook Setup by Instruction’.
  • Provide detailed instructions for users.

After saving your trigger, you can proceed to create additional triggers as necessary to enhance the integration capabilities of your application.


4. Building Actions in Pabbly Connect

Once the triggers are set, it’s time to build actions using Pabbly Connect. Navigate to the action section and click on the ‘Create New Action’ button. Similar to triggers, you will enter the action name and description. For this integration, we will create an action called ‘Add New Subscriber’.

In this step, you will need to configure the API call for the action. Select the appropriate HTTP method and enter the API endpoint URL required to add a new subscriber to the MooseSend account. Since MooseSend uses parameter-based authentication, ensure that you pass the API key as a parameter in your API call.

Enter the action name and description. Select the HTTP method and enter the API endpoint. Configure the parameters needed for the API call.

After configuring the action, you can test it to ensure that it works as expected. This testing phase is crucial for verifying that the integration is functioning correctly.


5. Finalizing Integration in Pabbly Connect

With your triggers and actions set up, you can now finalize the integration in Pabbly Connect. Go back to the workflow you created earlier and select the MooseSend app. Choose the action event ‘Add New Subscriber’ and connect your MooseSend account using the API key.

After entering the API key, you will see options to select the mailing list and input the subscriber’s name and email address. Fill in these details and click on ‘Save and Test Request’. Upon successful execution, you will receive a positive response indicating that the subscriber has been added to the MooseSend account.

By following these steps, you can continuously add triggers and actions, thereby enhancing your application’s capabilities within Pabbly Connect. You can also share your integrated application with others once it is fully functional.


Conclusion

This tutorial provided a detailed guide on how to integrate applications using Parameter Based Authentication inside Pabbly Connect. By following the steps outlined, you can successfully connect various applications and automate workflows efficiently.

Ensure you check out Pabbly Connect to create business automation workflows and reduce manual tasks. Pabbly Connect currently offer integration with 2,000+ applications.

Integrate Zoho Sign with Google Sheets Using Pabbly Connect

Learn how to seamlessly add signed document details from Zoho Sign to Google Sheets using Pabbly Connect in this step-by-step tutorial. Discover hidden automation capabilities within your existing tools. This guide shows you how to connect your essential applications and permanently eliminate redundant manual processes.

Watch Step By Step Video Tutorial Below


1. Accessing Pabbly Connect for Integration

To integrate Zoho Sign with Google Sheets, the first step is to access Pabbly Connect. Go to the Pabbly Connect website and sign up or log in to your account.

If you are a new user, click on the ‘Sign Up’ button to create your account. Existing users can simply log in. Once logged in, you will be directed to the Pabbly Connect dashboard where you can create a new workflow.


2. Creating a Workflow in Pabbly Connect

In Pabbly Connect, create a new workflow by clicking on the ‘Create Workflow’ button. Name your workflow something like ‘Zoho Sign to Google Sheets Integration’. This will help you easily identify the workflow later.

  • Click on ‘Create’ to proceed.
  • Select ‘Zoho Sign’ as your trigger application.
  • Choose ‘Document Signed’ as the trigger event.

After selecting the trigger, click on ‘Connect’ to link your Zoho Sign account with Pabbly Connect. You will need to authorize the connection by providing your Zoho Sign domain and accepting the permissions requested.


3. Setting Up Zoho Sign for Document Signing

Once Pabbly Connect is connected to Zoho Sign, you will need to test the connection. Go to Zoho Sign and upload a document to be signed. Add the recipient details, including their email address, and set the signing options. using Pabbly Connect

  • Select the signature fields in the document.
  • Click on ‘Send for Signatures’.
  • Confirm the signing process.

After sending the document for signing, Pabbly Connect will receive a notification when the document is signed. This information will be used to update your Google Sheets automatically.


4. Connecting Google Sheets to Pabbly Connect

Next, you will set up Google Sheets as the action application in Pabbly Connect. Choose ‘Google Sheets’ from the list of applications and select ‘Add New Row’ as the action event. using Pabbly Connect

Click on ‘Connect’ to authorize Pabbly Connect to access your Google Sheets account. Select the spreadsheet where you want to add the signed document details. Map the fields from Zoho Sign to the corresponding columns in Google Sheets.

This mapping will ensure that every time a document is signed, the recipient’s name, document name, signing status, and signing time are recorded in Google Sheets.


5. Testing the Integration Process

To finalize the integration, perform a test to ensure that the data flows correctly from Zoho Sign to Google Sheets through Pabbly Connect. After signing a document in Zoho Sign, check your Google Sheets to see if the details appear accurately.

Verify that all required information such as recipient’s name, email address, document name, signing status, and signing time are recorded. If everything looks good, your integration is successful!

This process not only saves time but also helps in maintaining organized records of signed documents. With Pabbly Connect, you can automate many such workflows to enhance productivity.


Conclusion

Integrating Zoho Sign with Google Sheets using Pabbly Connect allows you to automate the tracking of signed documents efficiently. This tutorial outlined the step-by-step process to set up the integration, ensuring that all signed document details are captured automatically. With Pabbly Connect, managing your document workflows becomes seamless and effective.

Ensure you check out Pabbly Connect to create business automation workflows and reduce manual tasks. Pabbly Connect currently offer integration with 2,000+ applications.

How to Auto-Generate Articles Using AI with Pabbly Connect, Google Sheets, and Google Docs

Learn how to auto-generate articles using Pabbly Connect, Google Sheets, and Google Docs. This step-by-step tutorial covers the integration process and features. Develop expertise in application integration and learn how to design streamlined automation workflows using proven, simplified approaches.

Watch Step By Step Video Tutorial Below


1. Accessing Pabbly Connect for Integration

To start the process of auto-generating articles, you need to access Pabbly Connect. Begin by navigating to the URL Pabbly.com/connect. Here, you will find options to sign in or sign up for a new account.

If you are new to Pabbly Connect, signing up is quick and provides you with 100 free tasks. Once logged in, you will arrive at the All Applications page where you can create a new workflow for your automation.


2. Creating a Workflow in Pabbly Connect

Once you are on the dashboard of Pabbly Connect, click on the ‘Create Workflow’ button. A dialog box will prompt you to name your workflow, which in this case can be named ‘Auto-Generate Articles’. After naming, click on ‘Create’ to proceed.

In the next window, you will see two crucial components: Trigger and Action. Choose Google Sheets as your trigger application. The event should be set to ‘New or Updated Spreadsheet Row’. This will initiate the workflow whenever a new title is added to your Google Sheet.


3. Setting Up Google Sheets with Pabbly Connect

After selecting Google Sheets, Pabbly Connect will provide you with a webhook URL. This URL acts as a bridge between Google Sheets and Pabbly Connect. Copy this URL for later use in your Google Sheet.

Now, open your Google Sheet where you have the article titles. Navigate to Extensions > Add-ons > Get add-ons, and search for ‘Pabbly Connect Webhooks’. Ensure this add-on is installed. Once installed, go back to Extensions > Pabbly Connect Webhooks and select ‘Initial Setup’. Paste the webhook URL you copied earlier and set the trigger column to the final data column (usually column B).

  • Copy the webhook URL from Pabbly Connect.
  • Install the Pabbly Connect Webhooks add-on in Google Sheets.
  • Set the trigger column in the initial setup.

After completing the setup, click ‘Send Test’ to ensure the data is sent successfully. Once confirmed, click ‘Submit’ to finalize the setup.


4. Integrating OpenAI with Pabbly Connect

With the Google Sheets setup complete, the next step is to integrate OpenAI. In Pabbly Connect, select OpenAI as your action application. The action event should be set to ‘Generate Content’. Click on ‘Connect’ and then ‘Add New Connection’. You will need to provide your OpenAI API token, which can be found in your OpenAI account.

After successfully connecting OpenAI, fill in the required fields such as AI model and prompt. For the prompt, you can use something like ‘Write an article on the title’ and map the title from the previous step. Set the maximum tokens to 300 and adjust the sampling type as needed.


5. Creating Google Docs with Pabbly Connect

Now that you have generated the article content, the next step is to create a Google Doc. In Pabbly Connect, select Google Docs as the action application. Choose the event ‘Create Blank Document’. Connect your Google Docs account and set the document name to the article title.

After creating the document, add another action step in Pabbly Connect to ‘Append Paragraph to Document’. Map the document ID from the previous step and insert the generated article text. Finally, click ‘Save and Send Test Request’ to complete the integration.

By refreshing your Google Docs, you can see that the document has been created with the article content successfully appended. This means the entire auto-generation process using Pabbly Connect is a success!


Conclusion

In this tutorial, we demonstrated how to auto-generate articles using Pabbly Connect, Google Sheets, and Google Docs. By following the steps outlined, you can efficiently automate your content generation process, saving time and effort.

Ensure you check out Pabbly Connect to create business automation workflows and reduce manual tasks. Pabbly Connect currently offer integration with 2,000+ applications.

How to Add Clientjoy CRM Leads as Subscribers in Mailchimp Using Pabbly Connect

Learn how to integrate Clientjoy CRM with Mailchimp using Pabbly Connect. This step-by-step tutorial guides you through the process of adding leads as subscribers. Master proven automation processes with practical implementation examples and strategic recommendations you can apply immediately in your workflow.

Watch Step By Step Video Tutorial Below


1. Accessing Pabbly Connect for Integration

To start integrating Clientjoy CRM with Mailchimp, you first need to access Pabbly Connect. Begin by navigating to the Pabbly website at Pabbly.com.

Once there, you will see options to either sign in or sign up. If you are a new user, click on the ‘Sign Up Free’ button to create your account. Returning users can simply log in via the ‘Sign In’ option, allowing you to access Pabbly Connect and begin the integration process.


2. Creating a Workflow in Pabbly Connect

After logging into Pabbly Connect, you will be directed to the dashboard. Here, you need to create a new workflow by clicking on the plus sign.

Assign a name to your workflow, such as ‘Clientjoy to Mailchimp Integration’. This name can be customized based on your preferences. Once named, click on the ‘Create’ button to proceed. You will now see options for setting a trigger and an action.

  • Click on the trigger window and select Clientjoy as the application.
  • Choose ‘New Lead’ as the trigger event.
  • Click on ‘Connect’ and then ‘Add New Connection’.

After setting up the connection, select your workspace name in Clientjoy and click on ‘Save and Send Test Request’ to capture the response.


3. Capturing Lead Details from Clientjoy

To test the integration, you will need to create a new lead in your Clientjoy account. Navigate to the sales section, and click on ‘Leads’. From there, click on the plus sign to add a new lead.

Fill in the lead details such as name, email address, phone number, company name, and deal information. For instance, you might enter ‘Demo Lead’ as the name, ‘[email protected]’ as the email, and other relevant details. Once all information is filled, click ‘Save’ to create the lead.

  • Ensure all fields are correctly filled out.
  • The lead’s details will be captured by Pabbly Connect.

Once saved, return to Pabbly Connect, where you will see the response from Clientjoy, confirming that the lead details have been successfully captured.


4. Adding Subscribers to Mailchimp via Pabbly Connect

Now that the lead details are captured, you need to integrate Mailchimp with Pabbly Connect. Scroll down to the action window and select Mailchimp as the application.

Choose the action event ‘Add New Member with Custom Fields’. Click on ‘Connect’ and then ‘Add New Connection’. Here, you will need to enter your Mailchimp API key and data center information.

Find your API key in Mailchimp under ‘Profile’ > ‘Extras’ > ‘API Keys’. Enter the data center from your Mailchimp account URL.

Once connected, select your audience list in Mailchimp where the new subscriber will be added. Then, map the lead details captured from Clientjoy to the appropriate fields in Mailchimp, such as email address, first name, and last name.


5. Testing and Finalizing Your Integration

After mapping the details, click on ‘Save and Send Test Request’. If successful, you will see a confirmation that a new subscriber has been added to your Mailchimp account.

To verify, navigate to the ‘All Contacts’ section in Mailchimp and check for the newly added subscriber. The subscriber should reflect the details you entered for the lead in Clientjoy.

Ensure that the subscriber’s status is set to ‘subscribed’. Confirm that all details match what was entered in Clientjoy.

Finally, save your workflow in Pabbly Connect. This setup is now automated, meaning every time a new lead is added in Clientjoy, it will automatically create a subscriber in Mailchimp.


Conclusion

Integrating Clientjoy CRM with Mailchimp using Pabbly Connect allows for seamless management of leads and subscribers. By following these detailed steps, you can automate your lead generation process effectively.

Ensure you check out Pabbly Connect to create business automation workflows and reduce manual tasks. Pabbly Connect currently offer integration with 2,000+ applications.

How to Create Tasks in Asana from Microsoft Excel Using Pabbly Connect

Learn how to integrate Microsoft Excel with Asana using Pabbly Connect. This detailed tutorial covers step-by-step instructions for task creation automation. Revolutionize your productivity approach with just a few strategic clicks. Uncover professional methods for connecting applications and creating workflows that reclaim hours of your week.

Watch Step By Step Video Tutorial Below


1. Accessing Pabbly Connect for Microsoft Excel and Asana Integration

To create tasks in Asana from Microsoft Excel, first, you need to access Pabbly Connect. Start by visiting the Pabbly website and logging in or signing up for a new account. This platform serves as the central hub for integrating various applications, including Microsoft Excel and Asana.

After logging in, navigate to the dashboard where you can create a new workflow. Click on the plus sign to initiate the workflow creation process. You’ll need to name this workflow, for example, ‘Microsoft Excel to Asana Integration’. This name will help you identify the workflow later.


2. Setting Up Microsoft Excel as the Trigger Application

In Pabbly Connect, the integration relies on a trigger-action mechanism. Here, Microsoft Excel acts as the trigger application. To set this up, click on the trigger window and select Microsoft Excel as your application, then choose the trigger event as ‘New Row in a Worksheet’.

  • Click on ‘Connect’ and then ‘Add New Connection’.
  • Authorize the connection by clicking ‘Connect with Microsoft Excel’.
  • Select the workbook containing your task details.

Once connected, select the specific worksheet that contains the task details. After saving and sending a test request, you will see the response with the captured data from your Excel spreadsheet.


3. Mapping Excel Data to Create Tasks in Asana

Next, you will integrate Asana with Pabbly Connect to create tasks using the data captured from Excel. In the action window, select Asana as the application and the action event as ‘Create a Task’. This step is crucial as it links the data from Excel to your Asana account.

  • Click on ‘Connect’ and then ‘Add New Connection’ for Asana.
  • Authorize the connection to your Asana account.
  • Select the workspace and project where the task will be created.

Now, map the task details from the trigger response to the fields required by Asana, such as task name, notes, and due date. Make sure to format the due date correctly as per Asana’s requirements.


4. Testing the Integration Between Microsoft Excel and Asana

After mapping the data, it’s time to test the integration. Click on ‘Save’ and send a test request. If everything is configured correctly, you will receive a success response indicating that a new task has been created in Asana.

To verify, log into your Asana account and check the project where you created the task. You should see the new task listed with the details you provided from Excel. This confirmation ensures that your integration via Pabbly Connect is functioning as expected.


5. Automating Future Task Creations with Pabbly Connect

With the integration successfully set up, any new data entered in your Microsoft Excel spreadsheet will automatically create a task in Asana. This automation saves time and ensures that all tasks are tracked efficiently in your project management software.

Remember, the trigger in Pabbly Connect checks for new data periodically, so there may be a slight delay in task creation. However, once set up, this workflow will operate seamlessly, allowing you to focus on more important tasks.


Conclusion

In this tutorial, we learned how to integrate Microsoft Excel with Asana using Pabbly Connect. By following the steps to set up triggers and actions, you can automate task creation, enhancing your productivity and workflow efficiency.

Ensure you check out Pabbly Connect to create business automation workflows and reduce manual tasks. Pabbly Connect currently offer integration with 2,000+ applications.

Automate Telegram Photo and Video Sharing with Pabbly Connect and Google Sheets

Learn how to automatically send multiple photos and videos on Telegram using Pabbly Connect and Google Sheets. Step-by-step guide included! Transform complex automation concepts into accessible, actionable steps that eliminate unnecessary manual work while maximizing existing application capabilities.

Watch Step By Step Video Tutorial Below


1. Setting Up Pabbly Connect for Google Sheets and Telegram Integration

To start sending multiple photos and videos on Telegram automatically, you need to set up Pabbly Connect. Begin by logging into the Pabbly website at Pabbly.com. If you are a new user, click on the ‘Sign Up Free’ button to create your account. Existing users can simply sign in to access Pabbly Connect.

Once logged in, navigate to the dashboard and create a new workflow. Click the plus sign to create a workflow and name it, for example, ‘Share Album on Telegram Channel from Google Sheets’. This name will help you identify the workflow later. Now, you will see a trigger window and an action window to set up your automation.


2. Configuring Google Sheets as the Trigger in Pabbly Connect

In this step, you will configure Google Sheets as the trigger application in Pabbly Connect. Open the trigger window and select Google Sheets as the application. Then, choose the trigger event as ‘New or Updated Spreadsheet Row’. This means that every time a new row is added or an existing row is updated in your Google Sheet, it will trigger the workflow.

  • Copy the webhook URL provided by Pabbly Connect.
  • Open your Google Sheet and navigate to Extensions > Add-ons > Get Add-ons.
  • Search for ‘Pabbly Connect Webhooks’ and install it.

After installation, refresh your Google Sheet. Go back to Extensions > Pabbly Connect Webhooks > Initial Setup. Paste the copied webhook URL and set the trigger column to the final data column where you will add photo and video URLs. Click on ‘Send Test’ to ensure the setup is successful, then click ‘Submit’.


3. Setting Up Telegram as the Action in Pabbly Connect

After configuring Google Sheets, the next step is to set up Telegram as the action application in Pabbly Connect. In the action window, select Telegram and choose the action event ‘Send an Album’. Click on ‘Connect’ and then ‘Add New Connection’. You will need a token from the Telegram BotFather to establish this connection.

To get the token, open Telegram and search for ‘BotFather’. Start a chat and type ‘/newbot’ to create a new bot. Follow the prompts to name your bot and set a username. After creation, BotFather will provide you with a token. Copy this token and paste it into Pabbly Connect to connect your bot.


4. Configuring the Album Settings in Pabbly Connect

Now that Telegram is connected, you need to configure the settings for the album you want to send. In Pabbly Connect, you will need to provide the chat ID of the group or channel where you want to send the album. To find the chat ID, add your bot to the desired group and retrieve the chat ID from the group URL.

Next, you will specify the media type. The media type must be either ‘photo’ or ‘video’, and you need to ensure that at least two items are included. For example, if you have both photo and video URLs, you will format them as ‘photo, video’. Map the media URLs from your Google Sheet into Pabbly Connect by selecting the appropriate fields from the trigger response.

  • Map the line item caption for the album.
  • Ensure the media URLs are formatted correctly with commas separating them.
  • Click on ‘Save and Send Test Request’ to check if the album is sent successfully.

Once you receive a successful response, your setup is complete. The album will automatically be shared on Telegram whenever you add new URLs to your Google Sheet.


5. Testing the Integration in Real-Time

To ensure everything is working correctly, perform a real-time test of your integration. Go back to your Google Sheet and add a new row with the title and URLs for photos or videos. For example, enter ‘Group 2’ as the title and add the video URLs formatted as ‘video, video’. This action will trigger Pabbly Connect to send the album to your Telegram channel.

Check your Telegram channel to see if the album has been shared successfully. You should see the title and all the media included in the album. This confirms that your automation is functioning as intended. If any issues arise, revisit the steps in Pabbly Connect to ensure all configurations are correct.

In conclusion, utilizing Pabbly Connect to automate the sharing of photos and videos on Telegram from Google Sheets streamlines your workflow and enhances your efficiency. This integration allows for seamless communication and sharing, making it a valuable tool for any user.


Conclusion

In this tutorial, we demonstrated how to use Pabbly Connect to send multiple photos and videos on Telegram automatically through Google Sheets. This integration simplifies the process of sharing media and enhances productivity.

Ensure you check out Pabbly Connect to create business automation workflows and reduce manual tasks. Pabbly Connect currently offer integration with 2,000+ applications.

Automatically Export YouTube Comments to Google Sheets Using Pabbly Connect

Learn how to automatically export YouTube comments from a specific video to Google Sheets using Pabbly Connect. Step-by-step tutorial included. Transform complex automation concepts into accessible, actionable steps that eliminate unnecessary manual work while maximizing existing application capabilities.

Watch Step By Step Video Tutorial Below


1. Setting Up Pabbly Connect for YouTube Comments Export

To start exporting YouTube comments to Google Sheets automatically, you need to use Pabbly Connect. First, visit the Pabbly Connect website and create a free account. If you already have an account, simply sign in to access your dashboard.

Once logged in, click on the ‘Create Workflow’ button to initiate the process. You will be prompted to enter a name for your workflow. For this integration, you can name it ‘Export YouTube Comments to Google Sheets’. This name will help you identify the workflow later.


2. Selecting YouTube and Google Sheets in Pabbly Connect

In this step, you will set up the trigger and action applications in Pabbly Connect. The first application you need to select is YouTube, where the trigger event will be set to ‘New Comment on Video’. This means that every time a new comment is posted on the specified video, it will trigger the workflow.

  • Select YouTube as the first application.
  • Choose the trigger event: ‘New Comment on Video’.
  • Connect your YouTube account to Pabbly Connect.

After connecting, you will need to specify the channel name and the specific video you want to track. This allows Pabbly Connect to fetch comments from that video. Once the connection is established, you can test it to ensure that it captures the most recent comment successfully.


3. Connecting Google Sheets to Pabbly Connect

Next, you will need to set up Google Sheets as the action application in Pabbly Connect. Select Google Sheets and choose the action event ‘Add New Row’. This action will automatically add any new comments fetched from YouTube into your specified Google Sheet.

To connect Google Sheets, click on the ‘Connect’ button and authorize Pabbly Connect to access your Google account. Once connected, select the spreadsheet you want to use for storing comments. Make sure the columns in your sheet correspond to the data being fetched, such as Comment and Author.


4. Mapping Data from YouTube to Google Sheets

After establishing the connection, it’s time to map the data from YouTube comments to your Google Sheet using Pabbly Connect. In the mapping section, you will see fields for the comment and author. Select the appropriate data from the dropdown options that Pabbly Connect has fetched from YouTube.

  • Map the comment text from the YouTube response.
  • Map the author’s display name to the corresponding column in Google Sheets.

Once you have completed the mapping, click on ‘Save and Send Test Request’. This will send the data to your Google Sheet, allowing you to verify that everything is working correctly. You should see the most recent comment appear in your sheet automatically.


5. Finalizing the Automation Process

After successfully mapping the data, your automation setup with Pabbly Connect is now complete. You can close the Pabbly Connect window, as the automation will continue to run in the background. Pabbly Connect checks for new comments every 10 minutes and updates your Google Sheet accordingly.

To test the automation, post a new comment on your YouTube video and wait for a few minutes. You should see the new comment reflected in your Google Sheet automatically. This setup allows you to keep track of all comments on your specific video effortlessly.


Conclusion

By following this tutorial, you can easily export YouTube comments from a specific video to Google Sheets automatically using Pabbly Connect. This integration not only helps in tracking comments but also in gathering feedback and content ideas effectively.

Ensure you check out Pabbly Connect to create business automation workflows and reduce manual tasks. Pabbly Connect currently offer integration with 2,000+ applications.

How to Integrate Apps Using Header Based Authentication Inside Pabbly Connect

Learn how to integrate Facebook, YouTube, and Gmail using Header Based Authentication inside Pabbly Connect with this step-by-step tutorial. Navigate the automation landscape confidently with clear, structured guidance suitable for professionals regardless of prior technical experience.

Watch Step By Step Video Tutorial Below


1. Accessing Pabbly Connect for Integration

To begin integrating applications using header based authentication inside Pabbly Connect, first access the Pabbly Connect dashboard. Navigate to the URL section and enter connect.Pabbly.com/a to reach the app integration page.

Once on the integration page, click on the ‘Create New App’ button. Enter a name for your application, such as ‘Sendin Blue Clone,’ and click on save. This step sets the foundation for your integration with Pabbly Connect.


2. Configuring Application Details in Pabbly Connect

After creating your app in Pabbly Connect, you need to configure essential details. This includes the application name, description, and logo, which should be 64×64 pixels.

  • Enter the application name and description.
  • Upload the logo as specified.
  • Select the type of authentication, which in this case is ‘Header’.

Additionally, provide help text that guides users on how to retrieve their API key necessary for authentication. This ensures a smooth setup process within Pabbly Connect.


3. Creating Triggers in Pabbly Connect

Next, you will create triggers in Pabbly Connect to respond to events in your application. Click on the ‘Trigger’ section and then select the ‘Create Trigger’ button. Name your trigger event appropriately, such as ‘Contact Deleted’ for the Sendin Blue integration.

When setting up your trigger, specify the trigger type. You have three options:

  • Webhook Setup by Instructions
  • Webhook Setup by API Request
  • Polling to Check New Data

Select the appropriate option based on your application’s capabilities. After completing these details, click on ‘Save’ to finalize the trigger setup in Pabbly Connect.


4. Setting Up Actions in Pabbly Connect

With triggers in place, the next step is to define actions within Pabbly Connect. Navigate to the actions window and click on the ‘Create New Action’ button. Provide a name and description for the action, such as ‘Add Existing Contact to a List’.

In this section, you will configure the API endpoint and the HTTP method needed to perform the action. Ensure you select the right HTTP method and enter the API endpoint URL obtained from the Sendin Blue API documentation. You will also need to set up HTTP headers for authentication.

Select the API method (e.g., POST). Enter the API endpoint URL. Configure the header details, including the API key.

Once you have filled in these details, click ‘Save’ to complete the action setup in Pabbly Connect.


5. Testing the Integration in Pabbly Connect

Finally, it’s time to test your integration. Go back to the workflow section in Pabbly Connect and select the trigger you created. Once selected, you will see a webhook URL generated. This URL needs to be configured in your Sendin Blue account.

After setting up the webhook, proceed to test the action by selecting the contact and list from the dropdowns provided. Click on ‘Save and Send Test Request’. If everything is set up correctly, you should receive a positive response indicating that the contact was successfully added to the list.

Verify the results by checking your Sendin Blue account to confirm that the contact has been added to the specified list. This step validates that your integration using Pabbly Connect is functioning as intended.


Conclusion

In this tutorial, we explored how to integrate applications using header based authentication inside Pabbly Connect. By following the steps outlined, you can successfully connect Facebook, YouTube, and Gmail, enhancing your automation capabilities.

Ensure you check out Pabbly Connect to create business automation workflows and reduce manual tasks. Pabbly Connect currently offer integration with 2,000+ applications.