How to Create Feature Images from Google Sheets in Bulk with Pabbly Connect

Learn how to automate the creation of feature images from Google Sheets in bulk using Pabbly Connect. Follow our detailed tutorial for step-by-step integration. Build sophisticated automated workflows in less time than you think. This guide translates complex integrations into straightforward steps for immediate implementation.

Watch Step By Step Video Tutorial Below


1. Setting Up Pabbly Connect for Google Sheets Integration

To create feature images from Google Sheets in bulk, start by accessing Pabbly Connect. This platform allows you to automate the process seamlessly. First, sign up for a free account on the Pabbly Connect website, where you can also find free automation tasks each month.

Once signed in, navigate to the dashboard and click on the ‘Create Workflow’ button. You can name your workflow, for instance, ‘Bulk Thumbnails from Google Sheets’. This step is crucial because it sets the foundation for your automation process.


2. Scheduling the Workflow with Pabbly Connect

In this section, you will schedule your workflow using Pabbly Connect. This involves setting up a trigger to run the automation daily at a specified time. Select the ‘Scheduler’ as the trigger application, allowing you to automate image creation.

  • Choose ‘Every Day’ as the frequency.
  • Set the time to 6 PM in your timezone.
  • Click ‘Save’ to confirm your schedule.

This setup ensures that your workflow will check for new data in your Google Sheets spreadsheet every day at the specified time, ready to create feature images automatically.


3. Connecting Google Sheets to Pabbly Connect

Next, you need to connect Google Sheets as the action application in Pabbly Connect. This is where the data for your feature images will be pulled from. Search for Google Sheets and select the action event ‘Get Rows’.

After connecting, you will need to authorize Pabbly Connect to access your Google Sheets account. Choose the spreadsheet containing the data, and specify the range of rows you want to retrieve. For dynamic data, use a range like A2:B to ensure all future rows are captured.


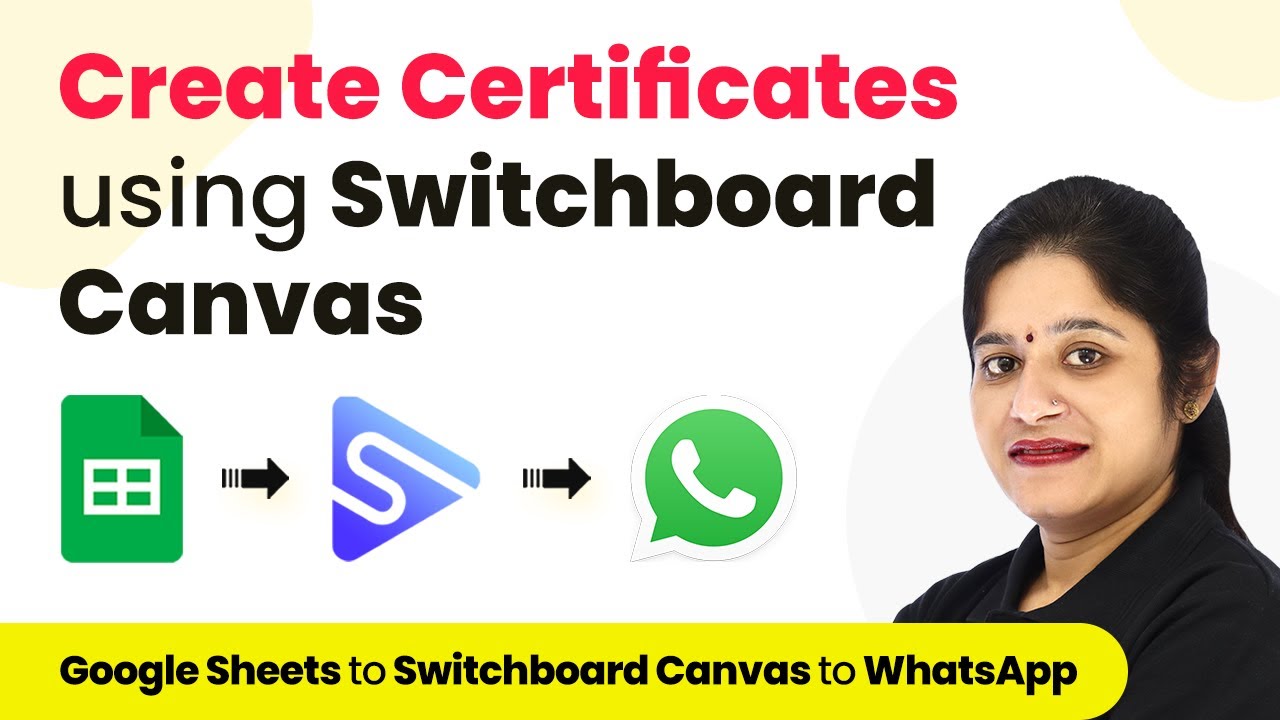
4. Creating Images with SwitchBoard Canvas via Pabbly Connect

Once the data is retrieved, it’s time to create images using SwitchBoard Canvas through Pabbly Connect. Add a new action step and select SwitchBoard Canvas, then choose the action event ‘Create Images’.

  • Input your API key from SwitchBoard Canvas.
  • Select the template you created for thumbnails.
  • Map the data retrieved from Google Sheets to the corresponding fields in the template.

This step allows you to generate images based on the data from your Google Sheets, ensuring that each image is unique and tailored to the content specified.


5. Updating Google Sheets with Image URLs

After creating the images, you will want to update your Google Sheets with the URLs of the newly created images using Pabbly Connect. Add another action step and select Google Sheets again, choosing ‘Update Cell Value’ as the action event.

Specify the cell where you want to place the image URL. Use the row index from the previous steps to map the correct row. This ensures that each generated image link is placed in the correct cell next to its corresponding data.


Conclusion

In this tutorial, we demonstrated how to automate the creation of feature images from Google Sheets in bulk using Pabbly Connect. By following the steps outlined, you can efficiently manage your image creation process, saving time and effort while ensuring accuracy in your content management.

Ensure you check out Pabbly Connect to create business automation workflows and reduce manual tasks. Pabbly Connect currently offer integration with 2,000+ applications.

How to Create Blog Content in Bulk from Google Sheets Using Pabbly Connect and OpenAI

Learn how to automate blog content creation in bulk using Google Sheets and OpenAI with Pabbly Connect. Follow this step-by-step tutorial for seamless integration. Implement the precise methodologies leading organizations use to automate repetitive tasks, illustrated with practical examples designed for immediate application.

Watch Step By Step Video Tutorial Below


1. Accessing Pabbly Connect for Integration

To begin automating your blog content creation, you first need to access Pabbly Connect. Start by navigating to the Pabbly Connect website. Here, you can either sign in if you already have an account or sign up for a new one. Signing up is quick and provides you with 100 free tasks upon account creation.

Once logged in, you will reach the all apps page. Click on the option to access Pabbly Connect. This will take you to the dashboard, where you can create a new workflow tailored for integrating Google Sheets and OpenAI.


2. Creating a Workflow in Pabbly Connect

In this section, you will create a workflow that automates the process of generating blog content from Google Sheets using OpenAI. Click on the ‘Create Workflow’ button and name your workflow something descriptive, like ‘Create Blog Content in Bulk from Google Sheets Using OpenAI’. This name helps identify the purpose of the workflow. using Pabbly Connect

After naming your workflow, you will be prompted to set up a trigger and an action. The trigger for this workflow will be Google Sheets. Choose ‘Get Row’ as the event to initiate the workflow. This action will fetch the data from your Google Sheets.

  • Select Google Sheets as the trigger application.
  • Choose ‘Get Row’ as the trigger event.
  • Connect your Google Sheets account to Pabbly Connect.

Now that you have set up the trigger, the next step is to specify which Google Sheet and the range of data you want to pull. This is done by selecting the appropriate spreadsheet and defining the range to ensure you get the necessary data for blog creation.


3. Fetching Data from Google Sheets

After setting up your trigger, it’s time to fetch the required data from Google Sheets using Pabbly Connect. You will need to specify the spreadsheet that contains your blog topics. Ensure you choose the correct sheet and set your range appropriately, such as from A2 to B, which allows for dynamic growth in your data.

Once you have configured the range, click on ‘Save and Send Test Request’. This action will retrieve the data from your Google Sheets, allowing you to preview the information that will be used for generating blog content.

  • Select the correct Google Sheet for blog topics.
  • Define the data range to fetch.
  • Test the connection to ensure data retrieval is successful.

With your data successfully fetched, you can now move on to the next step: connecting this data to OpenAI for content generation. This integration is crucial for automating the writing process.


4. Connecting OpenAI for Content Generation

Now that you have the data from Google Sheets, the next step is to connect to OpenAI using Pabbly Connect. Choose OpenAI as the action application and select the ‘Generate Content’ event. This will allow you to create blog content based on the titles you fetched from Google Sheets.

To establish the connection, you will need an API token from your OpenAI account. Click on the provided link to retrieve your secret key, then paste it into Pabbly Connect to authenticate the connection. Once connected, you will configure the parameters for content generation, such as the AI model, prompt, and maximum tokens.

Select OpenAI as the action application. Choose ‘Generate Content’ as the action event. Input the necessary parameters for content generation.

With everything set up, you can now generate blog content based on the titles in your Google Sheet, streamlining your content creation process.


5. Updating Google Sheets with Generated Content

After generating the blog content using OpenAI, the final step is to send this content back to Google Sheets using Pabbly Connect. You will need to add another action step to update the corresponding cell in your Google Sheet with the generated blog content.

Select Google Sheets again as the action application, and this time choose the ‘Update Cell Value’ event. Specify the sheet and the range where the content should be updated. Make sure to map the generated content to the correct cell to ensure it appears in the right place.

Choose ‘Update Cell Value’ as the action event. Map the generated content to the appropriate cell. Test the update to confirm successful integration.

This completes the automation process, allowing you to generate blog content in bulk efficiently. You can now see the generated content in your Google Sheet, ready for further editing or publishing.


Conclusion

In this tutorial, we explored how to create blog content in bulk from Google Sheets using Pabbly Connect and OpenAI. By following the steps outlined, you can automate your content creation process, saving time and enhancing productivity. With the integration of these powerful tools, generating high-quality content has never been easier!

Ensure you check out Pabbly Connect to create business automation workflows and reduce manual tasks. Pabbly Connect currently offer integration with 2,000+ applications.

How to Send Diwali Discount Offers on WhatsApp with Clickable Buttons Using Pabbly Connect

Learn how to send Diwali discount offers on WhatsApp with clickable buttons using Pabbly Connect. Step-by-step guide for seamless integration. Eliminate manual repetitive tasks from your workflow. Discover proven automation methods with intuitive steps designed for efficiency-minded professionals.

Watch Step By Step Video Tutorial Below


1. Setting Up Pabbly Connect for WhatsApp Integration

To send Diwali discount offers on WhatsApp, the first step is to set up Pabbly Connect. Start by visiting the Pabbly website and log in to your account. If you are new, click on the ‘Sign Up Free’ button to create an account. Once logged in, access the Pabbly Connect dashboard, where you can create a new workflow.

Click on the plus sign to create a workflow and name it ‘Send Diwali Discount Offers on WhatsApp with Clickable Buttons.’ This naming helps in identifying the workflow easily. After naming, click on the ‘Create’ button to proceed to the trigger and action setup.


2. Configuring the Trigger in Pabbly Connect

The next step is to configure the trigger in Pabbly Connect. In the trigger window, select the application as ‘Schedule by Pabbly’. This allows you to set when the workflow will run. Choose how often you want the workflow to trigger, such as every two days at 10 AM.

  • Select ‘Schedule by Pabbly’ as the trigger application.
  • Set the frequency to ‘Every two days’.
  • Specify the time as 10 AM.

After configuring the schedule, click on ‘Save’ to finalize the trigger settings. This ensures that your workflow will run at the specified intervals, allowing you to send timely discount offers to your customers.


3. Integrating Google Sheets with Pabbly Connect

Now that the trigger is set, it’s time to integrate Google Sheets with Pabbly Connect. In the action window, choose ‘Google Sheets’ as the application. Select the action event as ‘Get Rows’ to retrieve customer data from your Google Sheet.

Click on ‘Connect’ and then ‘Add New Connection’. You will need to authenticate your Google account to allow Pabbly to access your sheets. Once connected, select the spreadsheet containing your customer data and specify the data range as A2:C. This setup allows you to pull in all customer details for sending messages.


4. Sending Messages via WhatsApp Cloud API

After retrieving customer data, the next step is to send messages using the WhatsApp Cloud API through Pabbly Connect. Add a new action step and select ‘WhatsApp Cloud API’ as the application. Choose ‘Send Template Message’ as the action event.

To connect your WhatsApp account, you’ll need to provide your WhatsApp Cloud API credentials, including the token, phone number ID, and WhatsApp business account ID. These details are crucial for authenticating your connection and allowing Pabbly to send messages on your behalf.

  • Enter your WhatsApp Cloud API token.
  • Provide the phone number ID and business account ID.
  • Select the approved message template for Diwali offers.

Once everything is set, you can map the recipient’s mobile number and the customer name into the message. Click ‘Save and Send Test Request’ to verify that the message is successfully delivered to the customer’s WhatsApp.


5. Finalizing the Automation in Pabbly Connect

With the WhatsApp messaging setup complete, review your entire workflow in Pabbly Connect. Ensure that the trigger is correctly set to run every two days, and that the Google Sheets integration is pulling the latest customer data. Finally, verify that the WhatsApp Cloud API is configured to send the correct message template.

Once confirmed, your automation is ready to go. Every two days, customers will receive their Diwali discount offers on WhatsApp, complete with clickable buttons for easy access to your website and contact options. This seamless integration not only saves time but also enhances customer engagement during the festive season.


Conclusion

In conclusion, using Pabbly Connect to send Diwali discount offers on WhatsApp with clickable buttons is a straightforward process. By following the steps outlined in this tutorial, you can automate your outreach efforts and ensure your customers receive timely offers. This integration not only boosts sales but also improves customer satisfaction during the festive season.

Ensure you check out Pabbly Connect to create business automation workflows and reduce manual tasks. Pabbly Connect currently offer integration with 2,000+ applications.

Send Diwali Wishes to Clients on WhatsApp Using Pabbly Connect

Learn how to automate sending Diwali wishes to clients on WhatsApp using Pabbly Connect. Step-by-step tutorial for seamless integration with Google Sheets. Transform complex automation concepts into accessible, actionable steps that eliminate unnecessary manual work while maximizing existing application capabilities.

Watch Step By Step Video Tutorial Below


1. Accessing Pabbly Connect for WhatsApp Automation

To send Diwali wishes to your clients on WhatsApp, you need to access Pabbly Connect. Start by navigating to the Pabbly Connect website. If you are a new user, click on the ‘Sign Up’ button to create an account, which takes less than two minutes.

Once your account is created, you will receive 100 free tasks. For existing users, simply log in. After logging in, you will be directed to the all applications page. Click on the ‘Access Now’ button for Pabbly Connect to reach the dashboard.


2. Creating a Workflow in Pabbly Connect

In the Pabbly Connect dashboard, you need to create a new workflow for sending Diwali wishes. Click on the ‘Create Workflow’ button. A dialog box will prompt you to name your workflow; enter a name like ‘Google Sheets to WhatsApp Integration’ and click ‘Create’. using Pabbly Connect

  • Name your workflow appropriately.
  • Select the trigger and action applications.
  • Set up the schedule for Diwali Day.

Once the workflow is created, you will see options for setting up a trigger and an action. The first step is to set a schedule since you only want this workflow to run once on Diwali Day. Choose the schedule option and set the date and time for sending the messages.


3. Integrating Google Sheets with Pabbly Connect

After scheduling the workflow, the next step is to integrate Google Sheets. In the action event, select Google Sheets and choose the action event as ‘Get Rows’. Click on connect to link your Google Sheets account with Pabbly Connect.

Upon connecting, you will be prompted to select your spreadsheet. Make sure your spreadsheet contains the necessary columns: name, email address, and contact number. Set the range to include all relevant rows where client data is stored, ensuring the range starts from A2 to C.


4. Sending Messages via WhatsApp Cloud API

With the data retrieved from Google Sheets, the next step is to send WhatsApp messages using the WhatsApp Cloud API. Choose WhatsApp Cloud API as the next action application and select ‘Send Template Message’ as the action event. using Pabbly Connect

To connect, you will need your token, phone number ID, and WhatsApp business account ID. These can be obtained from the Meta developers page. Once connected, fill in the template name and map the recipient’s mobile number. Make sure to include the country code without the plus sign.

  • Enter the template name for your message.
  • Map the recipient’s mobile number.
  • Include any images or additional content in your message.

After completing these steps, click on ‘Save and Send Test Request’ to send a test message. If successful, you will receive a confirmation on your WhatsApp, indicating that the integration is working correctly.


5. Testing the Integration in Real-Time

To ensure everything is functioning as expected, add a new entry in your Google Sheets with a test client. Once you save the new entry, the workflow should automatically trigger, sending a WhatsApp message to the newly added client.

Check your WhatsApp for the message. If you receive it, this confirms that your Pabbly Connect workflow is set up correctly and ready to automate sending Diwali wishes to all your clients.

In summary, you have successfully set up a workflow using Pabbly Connect to automate sending Diwali wishes via WhatsApp. This integration not only saves time but also ensures that your clients feel valued during the festive season.


Conclusion

In this tutorial, we explored how to use Pabbly Connect to send personalized Diwali wishes to clients on WhatsApp. By integrating Google Sheets and WhatsApp Cloud API, you can automate your client communications effectively.

Ensure you check out Pabbly Connect to create business automation workflows and reduce manual tasks. Pabbly Connect currently offer integration with 2,000+ applications.

How to Send Diwali Discount Offer Message on WhatsApp Using Pabbly Connect

Learn how to automate sending Diwali discount offers via WhatsApp using Pabbly Connect. Step-by-step guide for seamless integration with your eCommerce store. Explore efficient methods for automating routine tasks with clear, concise instructions suited for both newcomers and experienced professionals.

Watch Step By Step Video Tutorial Below


1. Setting Up Pabbly Connect for WhatsApp Automation

To start sending Diwali discount offers via WhatsApp, you need to set up Pabbly Connect. First, create a free account on the Pabbly Connect website, which only takes a couple of minutes. Once signed up, sign in to access your dashboard where you can create your first automation workflow.

In the Pabbly Connect dashboard, click on the ‘Create Workflow’ button. Name your workflow something relevant, like ‘Diwali Discount Codes on WhatsApp’, and click ‘Create’. This will take you to the workflow setup page where you can define your trigger and action.


2. Integrating Elementor Form with Pabbly Connect

Next, you will integrate your Elementor Form with Pabbly Connect to capture customer details. Select Elementor as your trigger application and choose the ‘New Form Submission’ event. This means your workflow will start when someone submits the form on your eCommerce site.

  • Search for Elementor in the trigger application list.
  • Select ‘New Form Submission’ as the trigger event.
  • Copy the webhook URL generated by Pabbly Connect.

Now, navigate to your Elementor Form’s settings, find the ‘Actions After Submit’ section, and add a Webhook action. Paste the copied webhook URL into the designated field and update your form. This will allow Pabbly Connect to receive the form submission data.


3. Generating Coupon Codes with WooCommerce

Once the form is set up, the next step is to generate coupon codes using WooCommerce through Pabbly Connect. Add a new action step in your workflow and select WooCommerce as your application. Choose the ‘Create a Coupon’ action event.

To connect WooCommerce, you will need your Consumer Key, Consumer Secret, and Store URL. You can find these in your WooCommerce settings under the REST API section. After entering these details, you can define the coupon parameters like discount type, amount, and expiry date.

  • Select a unique coupon code format.
  • Set the discount type (fixed or percentage).
  • Define the expiry date for the coupon.

After filling in these details, save the action to generate the coupon code whenever a form is submitted.


4. Saving Customer Data to Google Sheets

To keep track of customer details along with their coupon codes, integrate Google Sheets with Pabbly Connect. Add another action step and select Google Sheets as the application. Choose the ‘Add New Row’ action event to save customer data.

Connect your Google account and select the spreadsheet you want to use. Map the customer details captured from the Elementor Form submission, such as name, email, and WhatsApp number. This ensures that every time a customer fills out the form, their information is automatically saved in your Google Sheets.


5. Sending WhatsApp Messages Using Cloud API

Finally, to send the generated coupon codes to customers, integrate WhatsApp Cloud API with Pabbly Connect. Add a new action step, select WhatsApp Cloud API, and choose the ‘Send Template Message’ action.

Connect your WhatsApp Cloud API account by entering your permanent access token and other required details. Then, map the recipient’s WhatsApp number and the message body, including the customer’s name and coupon code. This will allow you to send personalized messages automatically.

Select the message template you created for Diwali offers. Map the variables in the message body correctly. Test the message to ensure it sends correctly.

After saving this action, your workflow will be complete. Whenever a customer fills out the form, they will receive their Diwali discount code via WhatsApp automatically.


Conclusion

Using Pabbly Connect, you can effortlessly automate sending Diwali discount offers through WhatsApp. This integration not only saves time but also enhances customer engagement during the festive season. Follow these steps to set up your automation and enjoy seamless communication with your customers.

Ensure you check out Pabbly Connect to create business automation workflows and reduce manual tasks. Pabbly Connect currently offer integration with 2,000+ applications.

How to Design Diwali Festival Post & Send on WhatsApp Using Pabbly Connect

Learn how to design a Diwali Festival post and send it via WhatsApp using Pabbly Connect in this step-by-step tutorial. Discover hidden automation capabilities within your existing tools. This guide shows you how to connect your essential applications and permanently eliminate redundant manual processes.

Watch Step By Step Video Tutorial Below


1. Accessing Pabbly Connect for Diwali Festival Post

To start designing your Diwali Festival post and sending it on WhatsApp, first, you need to access Pabbly Connect. Go to the Pabbly website and log in to your account. If you are a new user, click on the ‘Sign up for free’ button to create your account.

Once logged in, navigate to the dashboard of Pabbly Connect. Here, you will create a new workflow by clicking the plus sign. Name your workflow, for example, ‘Design Diwali Festival Post and Send on WhatsApp,’ and click on create to proceed.


2. Setting Up the Trigger in Pabbly Connect

In this section, you will set up a trigger for your workflow using Pabbly Connect. Select the application as ‘Schedule’ to determine when your workflow should run. Choose the option to run the workflow ‘Once’ on a specific date and time.

  • Select the date: 24th October 2022
  • Set the time: 10 AM

After scheduling, click on ‘Save’. This setup ensures that your workflow will trigger at the specified time to send Diwali wishes to your customers.


3. Integrating Google Sheets with Pabbly Connect

Next, you need to integrate Google Sheets with Pabbly Connect to fetch customer details. In the action window, select ‘Google Sheets’ and choose the action event as ‘Get Rows’. Click on connect, and then add a new connection to link your Google account.

Once connected, select your spreadsheet named ‘Customer Data’ and specify the range as A2:C to capture all filled rows. Make sure to enable the option to switch from simple response to advanced response to capture all customer data in one go.


4. Designing the Diwali Post Using Pabbly Connect

With customer data ready, you can now design the Diwali post using Pabbly Connect and Switchboard Canvas. Add a new action step and choose ‘Switchboard Canvas’ as the application. Select the action event as ‘Create Images’ and connect your Switchboard account by entering your API key.

Choose the Diwali template you created earlier and specify the dimensions (1920 width, 1080 height). Map the customer name from the iterator response to personalize each post. Click ‘Save and send test request’ to generate the customized image for each customer.


5. Sending the Diwali Post on WhatsApp

Finally, to send the customized Diwali post to customers, integrate WhatsApp with Pabbly Connect. Add another action step, select ‘WhatsApp Cloud API’, and choose ‘Send Template Message’ as the action event. Connect your WhatsApp account using the required credentials.

Select the message template for Diwali wishes and map the recipient’s mobile number from the iterator response. Provide the header image URL from the generated post and fill in any other required fields. Click ‘Save and send test request’ to deliver the message via WhatsApp.


Conclusion

In this tutorial, you learned how to design a Diwali Festival post and send it via WhatsApp using Pabbly Connect. By integrating Google Sheets, Switchboard Canvas, and WhatsApp, you can automate holiday greetings effectively.

Ensure you check out Pabbly Connect to create business automation workflows and reduce manual tasks. Pabbly Connect currently offer integration with 2,000+ applications.

Boost User Engagement by Sending Offers on WhatsApp with Pabbly Connect

Learn how to boost your business’s user engagement by sending offers on WhatsApp using Pabbly Connect. Step-by-step tutorial included! Discover how to seamlessly connect your essential tools through accessible instructions that make powerful automation available to professionals at every skill level.

Watch Step By Step Video Tutorial Below


1. Setting Up Pabbly Connect for WhatsApp Automation

To start boosting your business’s user engagement using Pabbly Connect, first, access the platform. Visit the Pabbly website and either sign in or sign up for a free account. Signing up allows you to utilize free tasks every month, which is beneficial for testing your automations. using Pabbly Connect

Once logged in, navigate to Pabbly Connect and click on the ‘Create Workflow’ button. Name your workflow, for instance, ‘WooCommerce to WhatsApp’. This will be the foundation for automating your offer sending process via WhatsApp.


2. Integrating WooCommerce as a Trigger in Pabbly Connect

In this section, we will set up WooCommerce as the trigger application in Pabbly Connect. Select WooCommerce as your trigger application and choose the event ‘New Order Created’. This will allow Pabbly Connect to initiate the workflow whenever a new cash on delivery order is placed. using Pabbly Connect

  • Select WooCommerce as the trigger application.
  • Choose ‘New Order Created’ as the trigger event.
  • Copy the generated webhook URL provided by Pabbly Connect.

Next, you will need to paste this webhook URL into your WooCommerce settings. Go to your WordPress dashboard, navigate to WooCommerce, and select ‘Settings’. Under the ‘Advanced’ tab, click on ‘Webhooks’ and then ‘Add Webhook’. Name it and set the status to active, ensuring the topic is set to ‘Order Created’. This will establish a connection between WooCommerce and Pabbly Connect.


3. Testing the Webhook Connection in Pabbly Connect

After setting up the webhook, it’s essential to test the connection to ensure everything is working correctly. Go back to Pabbly Connect and click on ‘Recapture Webhook Response’. This action will allow Pabbly Connect to listen for new orders being placed in WooCommerce. using Pabbly Connect

To test the webhook, place a dummy order in your WooCommerce store. Fill in the necessary order details and select cash on delivery as the payment method. Once the order is placed, return to Pabbly Connect to see if it has captured the response successfully.

  • Place a dummy order in WooCommerce with cash on delivery.
  • Check Pabbly Connect for the captured order details.
  • Ensure the order details are correctly displayed in Pabbly Connect.

If the webhook response is captured successfully, this indicates that your WooCommerce and Pabbly Connect integration is functioning correctly. You are now ready to proceed to the next step of adding filters for your workflow.


4. Adding Filters and Creating Coupons in Pabbly Connect

To ensure that messages are only sent to customers who chose cash on delivery, add a filter in Pabbly Connect. This filter will check if the payment method is cash on delivery before proceeding with the workflow. Select the filter option and set the condition to check if the payment method equals cash on delivery. using Pabbly Connect

Once the filter is set, the next step is to create a coupon in WooCommerce. Add an action step and select WooCommerce again, this time choosing the action event ‘Create Coupon’. Fill in the coupon details, such as the coupon code and discount type. For example, you might create a coupon code ‘BigDiwali10’ with a 10% discount.

Set the coupon code and discount type in the action step. Define the coupon expiry date to ensure it is valid for a limited time. Map necessary fields from the WooCommerce order details.

After successfully creating the coupon, return to Pabbly Connect to ensure that all details are correctly mapped. This will allow the coupon details to be sent in the WhatsApp message later.


5. Sending WhatsApp Messages with Pabbly Connect

With the coupon created, the final step is to send a WhatsApp message to the customer. In Pabbly Connect, add another action step and select the WhatsApp Cloud API. Choose the action event ‘Send Template Message’. You will need to connect your WhatsApp account by providing the access token, phone number ID, and WhatsApp business account ID. using Pabbly Connect

Once connected, select the message template you created earlier. Map the customer’s name, coupon code, and expiry date into the message template. Ensure that the recipient’s mobile number is formatted correctly, including the country code.

Map the customer’s name to personalize the message. Include the coupon code and expiry date in the message. Test the WhatsApp message to ensure it is sent correctly.

After sending the test message, check the recipient’s WhatsApp account to confirm that the message has been received. This completes the automation process, allowing you to boost user engagement by sending offers on WhatsApp using Pabbly Connect.


Conclusion

In this tutorial, we demonstrated how to boost your business’s user engagement by sending offers on WhatsApp using Pabbly Connect. By integrating WooCommerce and automating the process, you can efficiently send personalized offers to your customers, enhancing their shopping experience.

Ensure you check out Pabbly Connect to create business automation workflows and reduce manual tasks. Pabbly Connect currently offer integration with 2,000+ applications.

How to Add HelloSign Signed Document Details to Google Sheets Using Pabbly Connect

Learn how to automate adding HelloSign signed document details to Google Sheets using Pabbly Connect. Step-by-step guide included! Build sophisticated automated workflows in less time than you think. This guide translates complex integrations into straightforward steps for immediate implementation.

Watch Step By Step Video Tutorial Below


1. Accessing Pabbly Connect for Automation

To start automating the process of adding HelloSign signed document details into Google Sheets, you’ll need to access Pabbly Connect. This powerful integration platform allows you to connect various applications seamlessly.

Begin by signing up for a free account on Pabbly Connect. Once registered, navigate to the dashboard where you can create a new workflow. This workflow will automate the process of sending signed document details from HelloSign to Google Sheets.


2. Creating Your Workflow in Pabbly Connect

In your Pabbly Connect dashboard, click on ‘Create Workflow’ and name it something descriptive, like ‘HelloSign to Google Sheets’. This will help you identify the purpose of the workflow easily.

Next, you will be presented with two windows: the trigger window and the action window. The trigger window is where you will set up the event that starts the automation. Choose HelloSign as the app and select the trigger event. Here are the steps to follow:

  • Search for HelloSign in the trigger app.
  • Select ‘Web Configuration’ as the trigger event.
  • Connect your HelloSign account by entering your API key and password.

After completing these steps, you will have successfully set up the trigger in Pabbly Connect.


3. Filtering Events for Signed Documents

Once the trigger is set up, the next step is to filter the events to ensure only signed documents are processed. In Pabbly Connect, you can add a filter for this purpose. First, scroll down to the action window and select the filter option.

In the filter settings, specify the condition to check for the event type. You want to filter for the event type that indicates a signed document. Here’s how to set it up:

  • Select the event type from the dropdown list.
  • Set the condition to match ‘signature_request_signed’.
  • Test the filter to ensure it works correctly.

By implementing this filter, Pabbly Connect will only proceed with the signed document events, making your workflow efficient.


4. Formatting Date and Time in Pabbly Connect

After filtering the events, the next step is to format the date and time of the signed documents. This is essential for readability in Google Sheets. In Pabbly Connect, you can use the Date Time Formatter to achieve this.

Here’s how to format the date and time:

Add a new action step and select Date Time Formatter. Choose ‘Format Date’ as the action event. Map the timestamp from the signed document response.

By following these steps, you can ensure that the timestamp is converted into a readable format before sending it to Google Sheets using Pabbly Connect.


5. Sending Signed Document Details to Google Sheets

The final step is to send the formatted details to Google Sheets. In Pabbly Connect, you will add another action step to accomplish this. Select Google Sheets as the app and configure the action.

Here’s how to set it up:

Choose ‘Add New Row’ as the action event. Connect your Google Sheets account. Map the fields such as signer name, email, document name, and formatted date.

After completing these steps, Pabbly Connect will automatically add a new row to your specified Google Sheet every time a document is signed, streamlining your workflow significantly.


Conclusion

In this tutorial, we explored how to use Pabbly Connect to automate the process of adding HelloSign signed document details to Google Sheets. By following the steps outlined, you can efficiently manage signed documents without manual input. This integration not only saves time but also ensures accuracy in your records.

Ensure you check out Pabbly Connect to create business automation workflows and reduce manual tasks. Pabbly Connect currently offer integration with 2,000+ applications.

How to Create Certificates Using Pabbly Connect with Google Sheets and Switchboard Canvas

Learn how to create automated certificates using Pabbly Connect, Google Sheets, and Switchboard Canvas in this detailed tutorial. Transform complex automation concepts into accessible, actionable steps that eliminate unnecessary manual work while maximizing existing application capabilities.

Watch Step By Step Video Tutorial Below


1. Accessing Pabbly Connect for Certificate Creation

To start creating certificates using Pabbly Connect, first, log into your Pabbly Connect account. If you’re new, you can sign up for free and enjoy several tasks each month. Once logged in, navigate to the dashboard to create a new workflow.

Click on the plus sign to create a workflow and name it ‘Create Certificates Using Google Sheets’. This naming helps in identifying the workflow later. The Pabbly Connect platform operates on a trigger-action model, where a trigger initiates a sequence of actions.


2. Setting Up Google Sheets Integration with Pabbly Connect

To integrate Google Sheets with Pabbly Connect, first select Google Sheets as your application in the trigger window. Choose the ‘New or Updated Spreadsheet Row’ as the trigger event. Pabbly Connect will provide you with a webhook URL to capture data from your Google Sheets.

  • Copy the webhook URL provided by Pabbly Connect.
  • Open your Google Sheets and go to Extensions > Add-ons > Get Add-ons to install the Pabbly Connect Webhooks add-on.
  • After installation, refresh your Google Sheet and set up the webhook URL in the Pabbly Connect Webhooks add-on.

Now, specify the trigger column, which will be the final data column in your sheet. This column will trigger the data capture each time new information is added. This setup ensures that every time you add a new employee’s details, it gets sent to Pabbly Connect automatically.


3. Integrating Switchboard Canvas with Pabbly Connect

Once you have set up Google Sheets, the next step is to integrate Switchboard Canvas using Pabbly Connect. In the action window, select Switchboard Canvas and choose the action event as ‘Create Images’. This action allows Pabbly Connect to generate certificates based on the data received from Google Sheets.

To connect Switchboard Canvas, you will need to enter your API key. This key can be found in your Switchboard account under the API settings. After entering the key, select the certificate template you want to use for the certificates. Make sure to map the employee name and other details from the Google Sheets response to the corresponding fields in the certificate template.


4. Converting Certificate Images to PDF Using Cloud Convert

After generating the certificate image, the next step is to convert it into a PDF format using Cloud Convert, facilitated by Pabbly Connect. Add an action step and select Cloud Convert as the application. Choose the action event ‘Convert a File’ and connect your Cloud Convert account.

  • Map the image URL received from the Switchboard Canvas response as the file URL.
  • Specify the input format as PNG and the output format as PDF.
  • Set a file name that includes the employee’s name and ‘certificate’.

After configuring these settings, send a test request to ensure that the PDF is generated successfully. If the process takes time, you can add a delay action step to allow for the conversion to complete before proceeding.


5. Sending the PDF Certificate via WhatsApp Using Pabbly Connect

The final step is to send the generated PDF certificate to the employee’s WhatsApp number using Pabbly Connect. Add another action step and select WhatsApp Cloud API as the application. Choose the action event ‘Send Template Message’ and connect your WhatsApp Cloud API account.

In this step, you will need to select the message template that you previously created and approved on WhatsApp. Map the recipient’s mobile number from the Google Sheets response and include the PDF URL of the certificate in the message. This ensures that the employee receives their certificate directly via WhatsApp.

Once everything is set up, send a test request to verify that the message is sent successfully, confirming that your integration works as intended.


Conclusion

In this tutorial, you learned how to create automated certificates using Pabbly Connect, Google Sheets, and Switchboard Canvas. By following these steps, you can efficiently manage certificate generation and distribution through WhatsApp, streamlining your workflow and enhancing productivity.

Ensure you check out Pabbly Connect to create business automation workflows and reduce manual tasks. Pabbly Connect currently offer integration with 2,000+ applications.

How to Connect WHMCS with Pabbly Connect: A Step-by-Step Guide

Learn how to connect WHMCS with Pabbly Connect to automate your workflow seamlessly. This detailed tutorial covers all steps and integrations. Explore systematic approaches to creating efficient automation solutions that convert technical concepts into practical, implementable instructions.

Watch Step By Step Video Tutorial Below


1. Accessing Pabbly Connect for WHMCS Integration

To start integrating WHMCS with Pabbly Connect, you first need to access the Pabbly Connect dashboard. Log in to your Pabbly Connect account and navigate to the ‘Create Workflow’ section. Here, you will set up the connection between WHMCS and other applications.

Once in the workflow section, select WHMCS as your trigger application. The next step is to choose the trigger event. For this tutorial, we will select the ‘New Order’ trigger event. This event will activate your workflow whenever a new order is placed in WHMCS.


2. Configuring WHMCS Connection in Pabbly Connect

Now that you have selected the trigger event, you need to configure the WHMCS connection in Pabbly Connect. Click on ‘Connect’ and then select ‘Add New Connection’. You will be prompted to enter specific details for the connection.

  • Enter the Host URL where WHMCS is installed, ensuring it includes the HTTPS prefix without an ending slash.
  • Provide the Access Key from your WHMCS configuration.
  • Input your WHMCS username and the MD5 hashed password.

After entering these details, click on ‘Save’ to establish the connection. Pabbly Connect will now link your WHMCS account, allowing it to fetch data automatically for further processing.


3. Testing the WHMCS Connection in Pabbly Connect

With your WHMCS connection set up in Pabbly Connect, it’s time to test the integration. You can do this by clicking on the ‘Save and Send Test Request’ button. This action will fetch the most recent order from your WHMCS account.

To ensure the connection is working, check your WHMCS account for the latest order details. You should see the client name, product name, and order amount reflected in the Pabbly Connect dashboard. Confirm that these details match what is displayed in WHMCS.


4. Automating Workflow with WHMCS and Pabbly Connect

Once you have verified that the WHMCS connection is functioning correctly, you can start automating your workflow through Pabbly Connect. You can send the fetched order details to various applications such as Google Sheets, email services, or CRM tools.

To set this up, simply choose the desired action application in Pabbly Connect and map the order data fields accordingly. This allows you to create a seamless workflow that automatically processes new orders from WHMCS to your chosen applications.

For instance, you can set up a workflow to automatically add new orders to a Google Sheet or send a confirmation email to the customer. This integration enhances your business efficiency and reduces manual data entry.


5. Conclusion: Streamlining Your Business with Pabbly Connect

In conclusion, connecting WHMCS with Pabbly Connect allows you to streamline your business processes effectively. By following the steps outlined in this tutorial, you can automate the handling of new orders and integrate them with other applications seamlessly.

Ensure you check out Pabbly Connect to create business automation workflows and reduce manual tasks. Pabbly Connect currently offer integration with 2,000+ applications.

Utilizing Pabbly Connect for this integration not only saves time but also enhances accuracy in data management. Start automating your workflows today to improve your operational efficiency!