Automatically Send Booking Reminders to Customers on WhatsApp Using Pabbly Connect

Learn how to automate sending booking reminders for vehicle servicing to customers on WhatsApp using Pabbly Connect. Follow this detailed tutorial for seamless integration. Build sophisticated automated workflows in less time than you think. This guide translates complex integrations into straightforward steps for immediate implementation.

Watch Step By Step Video Tutorial Below


1. Setting Up Pabbly Connect for WhatsApp Booking Reminders

To automate sending booking reminders for vehicle servicing, first, access Pabbly Connect. Go to the Pabbly website and sign in to your account. If you don’t have an account, sign up for free to receive monthly tasks.

After signing in, click on the ‘Create Workflow’ button at the top right. Name your workflow as ‘Google Sheets to WhatsApp’ to identify the purpose of this automation easily. This setup will allow you to send WhatsApp messages automatically based on Google Sheets data.


2. Trigger Setup Using Pabbly Connect

Next, set up the trigger for your automation in Pabbly Connect. Choose ‘Schedule by Pabbly’ as your trigger application. This will determine how often the workflow runs. Select the frequency as daily, and set the time to 10 AM, based on your local time zone (Asia/Kolkata).

  • Select ‘Schedule by Pabbly’ as the trigger application.
  • Set the frequency to daily and choose 10 AM as the time.
  • Save the trigger settings to initiate the workflow.

Once saved, the trigger will run daily at the specified time, allowing the workflow to proceed to the next steps of fetching customer data from Google Sheets.


3. Modifying the Current Date in Pabbly Connect

The next step involves modifying the current date using Pabbly Connect. Add the ‘Date Time Formatter’ as an action step and select ‘Modify Current Date’ as the action event. This will allow you to add two days to today’s date, which is essential for sending reminders two days ahead of the service date.

Set the time zone to Asia/Kolkata and specify the value to add as two days. After saving this step, test the action to ensure it correctly calculates the date two days from now. This modification is crucial for determining which customers will receive reminders.


4. Integrating Google Sheets to Fetch Customer Data

Now, integrate Google Sheets with Pabbly Connect to fetch customer details. Choose Google Sheets as the action application and select ‘Lookup Spreadsheet Rows’ as the action event. Connect your Google Sheets account and select the spreadsheet containing customer data for vehicle servicing.

  • Select the spreadsheet related to vehicle servicing.
  • Use the due date column to look up customer details.
  • Test the action to ensure it retrieves the correct customer data.

This integration allows Pabbly Connect to pull customer information whose vehicle servicing is due based on the modified date from the previous step.


5. Sending WhatsApp Notifications to Customers

Finally, set up the action to send WhatsApp notifications using the WhatsApp Cloud API through Pabbly Connect. Select ‘Send Template Message’ as the action event. Connect your WhatsApp account by providing the necessary credentials such as the temporary access token, phone number ID, and WhatsApp business account ID.

Map the required fields such as recipient mobile number, customer name, vehicle name, and due date into the WhatsApp message template. After configuring these fields, save and test the action to ensure that the reminder message is sent correctly to the customer’s WhatsApp account.


Conclusion

By following these steps, you can effectively automate sending booking reminders for vehicle servicing to customers on WhatsApp using Pabbly Connect. This integration streamlines your communication process and ensures timely reminders for your customers, enhancing their service experience.

Ensure you check out Pabbly Connect to create business automation workflows and reduce manual tasks. Pabbly Connect currently offer integration with 2,000+ applications.

Optimize Your Google My Business with Automation Using Pabbly Connect

Learn how to optimize your Google My Business using Pabbly Connect for seamless automation across various platforms like Facebook, YouTube, and more. Explore efficient methods for automating routine tasks with clear, concise instructions suited for both newcomers and experienced professionals.

Watch Step By Step Video Tutorial Below


1. Introduction to Automating Google My Business with Pabbly Connect

In this section, we will explore how to use Pabbly Connect to optimize your Google My Business through automation. Automating tasks can save time and enhance efficiency, allowing you to focus on growing your business. Pabbly Connect serves as the central platform for integrating various applications, making your Google My Business management seamless and effective.

Automation can include tasks like auto-replying to reviews and exporting feedback to Google Sheets. With Pabbly Connect, these processes can be executed effortlessly, providing you with real-time updates and notifications. By utilizing this powerful tool, you can ensure that your Google My Business is always up-to-date and engaging.


2. Auto Replying to Google Map Business Reviews Using Pabbly Connect

One of the first automations we will set up is auto-replying to Google Map business reviews through Pabbly Connect. This process involves using an AI platform like OpenAI to generate replies to customer reviews automatically. By integrating OpenAI with your Google My Business account via Pabbly Connect, you can streamline your response process.

  • Set up a trigger in Pabbly Connect for new reviews on Google My Business.
  • Connect OpenAI as the action app to generate a reply based on the review content.
  • Post the generated reply back to Google My Business automatically.

This automation ensures that every review receives a timely and relevant response, enhancing customer satisfaction and engagement with your business. With Pabbly Connect, you can maintain a consistent communication flow without the manual effort.


3. Exporting Google My Business Reviews to Google Sheets with Pabbly Connect

Next, we will discuss how to export Google My Business reviews to Google Sheets using Pabbly Connect. This automation helps in tracking and managing customer feedback efficiently. By exporting reviews, you can maintain a comprehensive record that can be easily analyzed and shared.

To set up this automation, follow these steps:

  • Create a new workflow in Pabbly Connect and set Google My Business as the trigger app for new reviews.
  • Select Google Sheets as the action app and configure it to add new rows for each review.
  • Map the necessary fields from Google My Business to Google Sheets.

This integration allows you to have all your reviews in one place, making it easier to analyze customer sentiments and share insights with your team. Utilizing Pabbly Connect for this task ensures that you have an automated and organized approach to managing customer feedback.


4. Sharing Facebook Posts on Google My Business Using Pabbly Connect

Another useful automation is sharing your Facebook posts directly to Google My Business. With Pabbly Connect, you can automate this process and ensure that your updates reach customers across multiple platforms without manual duplication.

To implement this, you will need to:

Set up Facebook as the trigger app in Pabbly Connect for new posts. Choose Google My Business as the action app to create a new post. Map the content of your Facebook post to the Google My Business post format.

This automation allows you to keep your Google My Business profile updated with your latest Facebook content, ensuring that your audience remains informed without the extra effort. By leveraging Pabbly Connect, you can maintain a dynamic presence across platforms.


5. Automatically Sharing Google My Business Reviews on Social Media with Pabbly Connect

Lastly, we will explore how to automatically share Google My Business reviews on social media platforms like Facebook, LinkedIn, and Twitter using Pabbly Connect. This automation can help you showcase positive feedback from customers and enhance your online reputation.

To set up this automation, follow these steps:

Create a trigger in Pabbly Connect for new reviews on Google My Business. Add a filter to only share reviews that are 4 stars and above. Connect each social media platform as action apps to post the review automatically.

This integration allows you to amplify your positive reviews across multiple channels, increasing visibility and attracting new customers. With Pabbly Connect, you can automate the sharing process, ensuring that your best reviews are highlighted effortlessly.


Conclusion

In conclusion, using Pabbly Connect to automate your Google My Business processes can significantly enhance your business management. From auto-replying to reviews to sharing feedback on social media, these integrations streamline your operations. By leveraging automation, you can save time and improve customer engagement, ultimately leading to business growth.

Ensure you check out Pabbly Connect to create business automation workflows and reduce manual tasks. Pabbly Connect currently offer integration with 2,000+ applications.

Send Appointment Reminders for Routine Checkups on WhatsApp Using Pabbly Connect

Learn how to send appointment reminders for routine checkups on WhatsApp using Pabbly Connect. Step-by-step guide to automate reminders effectively. Discover hidden automation capabilities within your existing tools. This guide shows you how to connect your essential applications and permanently eliminate redundant manual processes.

Watch Step By Step Video Tutorial Below


1. Setting Up Pabbly Connect for Appointment Reminders

To send appointment reminders for routine checkups on WhatsApp, you need to set up Pabbly Connect. Start by creating a free account on the Pabbly Connect website. Once you have signed up, log in to your dashboard.

In your Pabbly Connect dashboard, click on the ‘Create Workflow’ button. Name your workflow something descriptive, like ‘Send Reminders for Routine Appointments on WhatsApp’ and click the ‘Create’ button. This will set the foundation for your automation process.


2. Scheduling the Workflow with Pabbly Connect

Next, you’ll need to schedule your workflow to run daily using Pabbly Connect. Click on the trigger module and select the ‘Scheduler’ feature. Set it to run every day at a specific time, for example, 9 AM. This ensures that your workflow checks for appointments regularly.

  • Select the Scheduler feature in Pabbly Connect.
  • Choose a daily schedule and set the time (e.g., 9 AM).
  • Click ‘Save’ to activate the schedule.

Once saved, your workflow will now run daily at the specified time, checking the Google Sheets for patient appointment dates.


3. Fetching Appointment Data from Google Sheets

After scheduling, the next step is to fetch appointment data from Google Sheets. Use the ‘Google Sheets’ action in Pabbly Connect. Select the ‘Lookup Spreadsheet Rows’ action event to look for appointments scheduled for the next day.

Connect your Google account and select the appropriate spreadsheet containing your appointment data. Make sure to specify the correct sheet name and the column where appointment dates are stored (e.g., column C). This setup allows Pabbly Connect to retrieve the relevant appointment details.


4. Sending WhatsApp Reminders Using Pabbly Connect

Now that you have the appointment data, it’s time to send reminders via WhatsApp. Use the ‘WhatsApp Cloud API’ in Pabbly Connect to send messages. You need to connect your WhatsApp Cloud API with Pabbly Connect by providing the necessary credentials.

  • Select the ‘Send Template Message’ action in WhatsApp Cloud API.
  • Map the recipient’s WhatsApp number and the message template.
  • Test the connection to ensure messages are sent successfully.

By doing this, you ensure that each patient receives their appointment reminder automatically on WhatsApp, enhancing communication and reducing no-shows.


5. Iterating Over Patients for Individual Messages

Finally, to send personalized messages to each patient, use the ‘Iterator’ feature in Pabbly Connect. After fetching the patient details, this feature allows you to handle multiple patients individually.

Map the patient data retrieved from Google Sheets to the WhatsApp message template. This ensures that each message contains specific details like the patient’s name, appointment date, and time. By using the iterator, you can send tailored messages without any manual effort.


Conclusion

Using Pabbly Connect, you can seamlessly automate the process of sending appointment reminders for routine checkups via WhatsApp. This integration not only saves time but also improves patient engagement. Set up your workflow today to enhance your hospital’s communication efficiency.

Ensure you check out Pabbly Connect to create business automation workflows and reduce manual tasks. Pabbly Connect currently offer integration with 2,000+ applications.

Google Sheets WhatsApp Integration: Send Payment Reminders with Pabbly Connect

Learn how to automate sending payment reminders via WhatsApp from Google Sheets using Pabbly Connect. Follow this detailed tutorial for step-by-step guidance. This comprehensive guide reveals exactly how to connect your applications and automate repetitive tasks — accessible for professionals of all technical backgrounds.

Watch Step By Step Video Tutorial Below


1. Setting Up Pabbly Connect for Automation

To start sending payment reminders via WhatsApp from Google Sheets, you need to set up Pabbly Connect. This automation tool allows you to create workflows that connect your Google Sheets with WhatsApp, facilitating seamless communication.

First, create an account on Pabbly Connect. Once signed in, navigate to the dashboard where you can create a new workflow. Click on the ‘Create Workflow’ button and give it a name like ‘Automated Payment Reminders on WhatsApp from Google Sheets’. This will be the foundation for your automation process.


2. Configuring the Workflow Trigger in Pabbly Connect

In your newly created workflow, the first step is to set up a trigger. This trigger will determine when your payment reminders are sent. For this, we will use the ‘Scheduler’ feature in Pabbly Connect.

  • Select the trigger as ‘Scheduler’ and set it to run every Saturday at 9:00 AM.
  • Save your settings to ensure the trigger is activated.

This setup ensures that your workflow checks the Google Sheets for due payments every week, allowing you to send reminders in a timely manner.


3. Integrating Google Sheets with Pabbly Connect

Next, we need to connect Pabbly Connect with Google Sheets to fetch the customer payment details. This integration will allow the workflow to access the spreadsheet containing customer information.

Search for ‘Google Sheets’ in the action step and select ‘Lookup Spreadsheet Rows’. Connect your Google account and choose the spreadsheet that contains the customer details. Specify the sheet name and set the lookup column to the payment status (e.g., Column E) to filter out customers with pending payments.


4. Setting Up the Iterator for Individual Messages

After fetching the data from Google Sheets, use the ‘Iterator’ feature in Pabbly Connect to process each customer individually. This feature will allow you to send personalized reminders to each customer whose payment is due.

  • Toggle the response to advanced format to capture the data in an array.
  • Select the array from the previous step in the iterator setup.

This ensures that your workflow can handle multiple reminders in a single run, sending them one by one for each customer.


5. Sending Payment Reminders via WhatsApp

Now that we have the customer data ready, it’s time to send the payment reminders. Use the WhatsApp Cloud API integrated with Pabbly Connect to send messages directly to your customers.

Search for ‘WhatsApp Cloud API’ and choose the action event ‘Send Template Message’. Connect your WhatsApp account using the permanent access token, phone number ID, and business account ID. Map the necessary fields such as the recipient’s WhatsApp number, customer name, and payment due date in the message template.

Finally, click ‘Save and Send Test Request’ to verify that the message is sent successfully. This completes the integration, allowing you to automate payment reminders effortlessly.


Conclusion

By utilizing Pabbly Connect, you can automate the process of sending payment reminders via WhatsApp from Google Sheets. This integration not only saves time but also enhances communication with your customers. With just a few steps, you can set up an efficient reminder system that operates automatically.

Ensure you check out Pabbly Connect to create business automation workflows and reduce manual tasks. Pabbly Connect currently offer integration with 2,000+ applications.

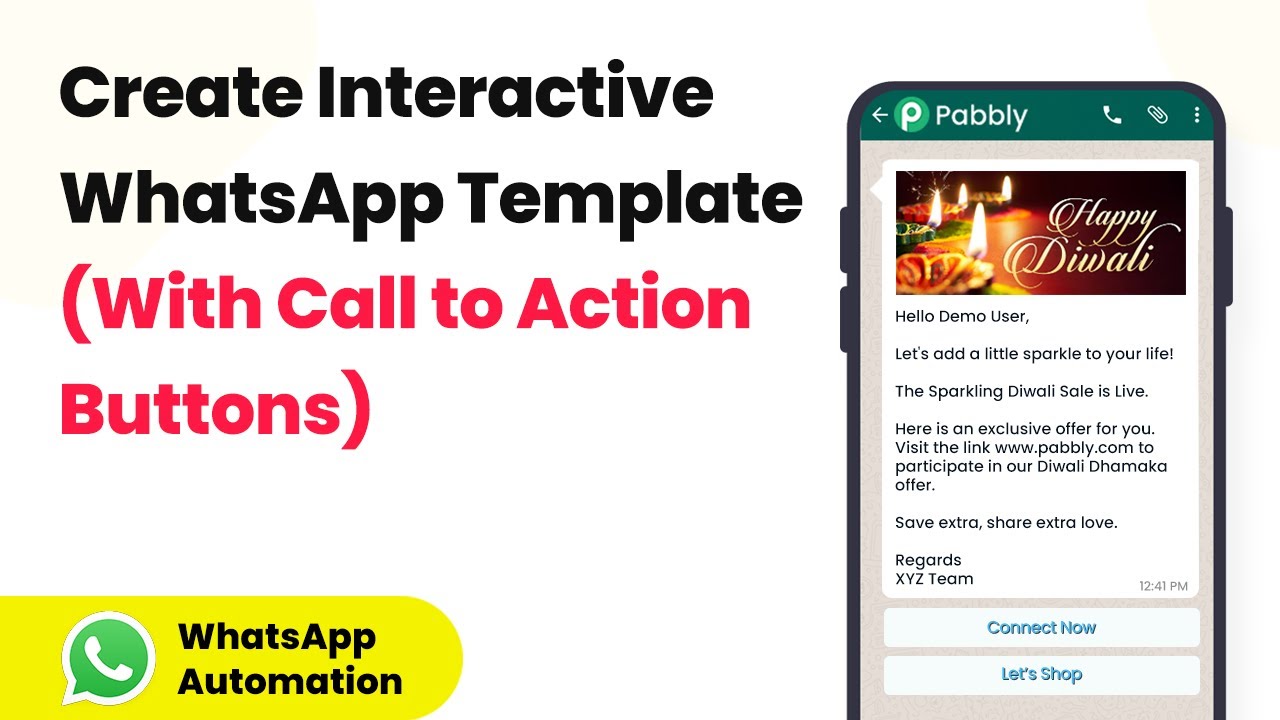
How to Create Interactive WhatsApp Templates with Call to Action Buttons Using Pabbly Connect

Learn how to create interactive WhatsApp templates with call to action buttons using Pabbly Connect. Step-by-step guide for seamless integration! Transform complex automation concepts into accessible, actionable steps that eliminate unnecessary manual work while maximizing existing application capabilities.

Watch Step By Step Video Tutorial Below


1. Creating WhatsApp Template Using Pabbly Connect

To create interactive WhatsApp templates with call to action buttons, you will first need to access Pabbly Connect. Start by logging into your Pabbly Connect account and navigating to the WhatsApp Cloud API section.

Here, you will find options to create a new template. Click on the ‘Create Template’ tab to begin the process. This interface allows you to select the type of message you want to create, such as transactional or marketing messages.


2. Setting Up Your WhatsApp Template

Within the Pabbly Connect interface, you will now set up your WhatsApp template. Select the marketing message category and name your template, such as ‘Interactive WhatsApp Buttons New’. Choose the English language for your template. using Pabbly Connect

  • Choose a header type: text or media.
  • Input the body of the message, including dynamic variables within double curly braces.
  • Add call to action buttons with specified actions, such as connecting via phone or visiting a website.

Once you have filled in all required fields, click on ‘Add Sample’ to preview how your message will appear on WhatsApp. After reviewing, submit the template for approval, which may take a few hours.


3. Automating the Workflow with Pabbly Connect

After creating your WhatsApp template, the next step is to automate the messaging workflow using Pabbly Connect. To do this, select the Google Sheets integration to pull client data for sending messages.

Set up a schedule in Pabbly Connect to send the messages at a specific time, such as on Diwali. Use the Iterator feature to map individual client data from your Google Sheets to ensure personalized messages.

  • Schedule the workflow to run at a chosen time.
  • Map recipient mobile numbers with the appropriate country code.
  • Insert the image URL from your WooCommerce account for visual appeal.

Finalize your workflow by selecting the WhatsApp Cloud API action to send the template message, ensuring all mapped data is accurate.


4. Testing the Integration with Pabbly Connect

Before going live, it’s essential to test your integration using Pabbly Connect. Click on ‘Save and Send Test Request’ to verify that your WhatsApp message is sent correctly.

Check your WhatsApp account to see if the message appears as intended, with the personalized greeting and call to action buttons available for interaction. This testing phase is crucial to ensure that everything functions smoothly before the official rollout.

Once you confirm that the message is delivered correctly, you can proceed with the scheduled sending of messages to all clients in your Google Sheets.


5. Conclusion

Using Pabbly Connect, you can seamlessly create interactive WhatsApp templates with call to action buttons. This process enhances customer engagement and provides a personalized touch to your messages.

Ensure you check out Pabbly Connect to create business automation workflows and reduce manual tasks. Pabbly Connect currently offer integration with 2,000+ applications.

By following the steps outlined in this tutorial, you can effectively utilize Pabbly Connect to automate your WhatsApp communications, ensuring timely and relevant outreach to your customers.


How to Send Emails When Zoho Sign Document’s Signature Requests Expire Using Pabbly Connect

Learn how to automate email notifications for expired Zoho Sign document requests using Pabbly Connect with Gmail integration. Step-by-step tutorial included. Transform complex automation concepts into accessible, actionable steps that eliminate unnecessary manual work while maximizing existing application capabilities.

Watch Step By Step Video Tutorial Below


1. Accessing Pabbly Connect for Automation

To send emails when Zoho Sign document’s signature requests expire, you need to access Pabbly Connect. Start by visiting the Pabbly Connect website at Pabbly.com/connect. Here, you will find options to sign in or sign up for a new account. If you’re a new user, click on the ‘Sign Up’ button to create your account, which takes less than two minutes.

Once you have signed up, you will receive 100 free tasks to explore the platform. For existing users, simply click on ‘Sign In’ to access your dashboard. Now, navigate to the dashboard and click on the ‘Create Workflow’ button to begin setting up your automation.


2. Creating a Workflow in Pabbly Connect

In this step, you will create a workflow in Pabbly Connect to automate email notifications. After clicking on ‘Create Workflow’, a dialog box will prompt you to name your workflow. Name it something descriptive, like ‘Zoho Sign Gmail Integration’ to reflect its purpose.

  • Select a trigger application: Zoho Sign
  • Choose the trigger event: Document Expired
  • Connect to your Zoho Sign account through Pabbly Connect

After naming your workflow, click on ‘Create’. You will then need to connect Pabbly Connect to your Zoho Sign account. Click on ‘Connect’, enter your domain name (e.g., zoho.com), and authorize the connection. This step is crucial for capturing the expiration event from Zoho Sign.


3. Testing the Zoho Sign Integration

Now that you have set up the trigger, it’s time to test the integration. Use your Zoho Sign account to send a document for signatures. Make sure to set the expiration period to a short time frame, such as one day, to facilitate testing. This way, you can verify if the email notification is sent after the document expires.

After sending the document, return to Pabbly Connect and wait for the trigger to capture the expired status. You should see a response indicating that the document has expired, along with relevant details such as the document name and recipient’s email address.


4. Formatting Date and Time for Email

The next step in the workflow involves formatting the date and time for the email notification. Add an action step in Pabbly Connect by selecting the ‘Date Time Formatter’ feature. This will allow you to convert the timestamp received from Zoho Sign into a readable format.

  • Choose the action event: Format Date
  • Map the data from the previous step
  • Set the time zone to Kolkata Asia Kolkata

Once the date and time are formatted, you can proceed to the next action step to send the email through Gmail.


5. Sending Email Notification via Gmail

The final step in the automation is to send an email notification using Gmail. In Pabbly Connect, select Gmail as your action application and choose the action event to send an email. Connect your Gmail account by following the authorization steps provided by Pabbly Connect.

In the email setup, map the necessary fields such as recipient email, sender name, subject, and body. Make sure to include dynamic data from the previous steps, like the document name and the formatted expiration date. Once everything is set, click on ‘Save and Send Test Request’ to send a test email.

Check your Gmail inbox to confirm that the email notification has been received. The email should inform the recipient that the document has expired, along with the relevant details. This verifies that your workflow is functioning correctly.


Conclusion

In this tutorial, we have successfully demonstrated how to use Pabbly Connect to send emails when Zoho Sign document’s signature requests expire. By integrating Zoho Sign with Gmail, you can automate the notification process efficiently. This not only saves time but also ensures that your clients are promptly informed about expired documents.

Ensure you check out Pabbly Connect to create business automation workflows and reduce manual tasks. Pabbly Connect currently offer integration with 2,000+ applications.

Automate Your Marketing Operations with Pabbly Connect: A Step-by-Step Guide

Learn how to automate your marketing operations using Pabbly Connect with Facebook, YouTube, Google, Gmail, and more. Follow our detailed tutorial for effective integration. Implement the precise methodologies leading organizations use to automate repetitive tasks, illustrated with practical examples designed for immediate application.

Watch Step By Step Video Tutorial Below


1. Understanding the Importance of Marketing Automation with Pabbly Connect

Marketing automation is essential for effective operations in any business. Using Pabbly Connect, you can streamline various marketing processes, making them more efficient and effective. This tutorial will guide you through automating your marketing operations using Pabbly Connect with applications such as Facebook, YouTube, Google, and more.

By automating your marketing operations, you can improve lead generation, nurture leads better, and enhance your conversion rates. Pabbly Connect serves as the central platform that facilitates these integrations, ensuring seamless communication between all your marketing tools.


2. Setting Up Pabbly Connect for Facebook Lead Ads Integration

The first step in automating your marketing processes is integrating Facebook Lead Ads with Google Sheets using Pabbly Connect. This integration allows you to add new leads generated through Facebook directly into Google Sheets, ensuring all your data is collected in one place.

  • Log in to your Pabbly Connect account.
  • Create a new workflow and select Facebook Lead Ads as the trigger app.
  • Choose the trigger event as ‘New Lead’.
  • Connect your Facebook account and select the specific lead form.
  • Add Google Sheets as the action app and select ‘Add Row’ as the action event.
  • Map the fields from Facebook to Google Sheets.

This setup ensures that every new lead from Facebook is automatically added to Google Sheets, making it easier to manage and analyze your leads using Pabbly Connect.


3. Nurturing Leads with Pabbly Connect: Facebook to Mailchimp Integration

Nurturing leads is crucial for converting potential customers into actual sales. By integrating Facebook Lead Ads with Mailchimp through Pabbly Connect, you can automatically add new leads as subscribers in your Mailchimp account.

To set this up, follow these steps:

  • In Pabbly Connect, create a new workflow for Facebook Lead Ads.
  • Select ‘New Lead’ as the trigger event.
  • Connect your Facebook account and choose the lead form.
  • Add Mailchimp as the action app and select ‘Add Subscriber’ as the action event.
  • Map the fields accordingly from Facebook to Mailchimp.

This integration allows you to nurture your leads effectively by adding them to your email marketing campaigns automatically, leveraging the power of Pabbly Connect to enhance your marketing operations.


4. Improving Internal Communication with Pabbly Connect: Slack Notifications

Effective communication within your team is vital for smooth operations. Using Pabbly Connect, you can automate notifications in Slack whenever a new lead is generated from Facebook Lead Ads.

To set up this integration, follow these steps:

Create a new workflow in Pabbly Connect. Select Facebook Lead Ads as the trigger app and ‘New Lead’ as the trigger event. Connect your Facebook account and select the lead form. Add Slack as the action app and choose ‘Send Channel Message’ as the action event. Map the necessary fields and customize your Slack message.

This way, your team will be immediately notified about new leads, enhancing collaboration and responsiveness, all made possible by Pabbly Connect.


5. Analyzing Data with Pabbly Connect: Google Sheets to Airtable Integration

Data analysis is crucial for making informed business decisions. With Pabbly Connect, you can sync data from Google Sheets to Airtable, allowing your team to have real-time access to updated information.

To implement this integration, follow these steps:

In Pabbly Connect, create a new workflow. Select Google Sheets as the trigger app and ‘New Row’ as the trigger event. Connect your Google Sheets account and select the spreadsheet. Add Airtable as the action app and choose ‘Create Record’ as the action event. Map the fields from Google Sheets to Airtable.

This setup ensures that any updates in Google Sheets are reflected in Airtable, streamlining your data management processes with the help of Pabbly Connect.


Conclusion

In conclusion, automating your marketing operations using Pabbly Connect can significantly enhance lead generation, nurturing, and internal communication. By integrating applications like Facebook, YouTube, Google, Gmail, and more, you can streamline your processes for better efficiency and effectiveness.

Ensure you check out Pabbly Connect to create business automation workflows and reduce manual tasks. Pabbly Connect currently offer integration with 2,000+ applications.

Automatically Send Birthday Wishes to Customers from CRM Using Pabbly Connect

Learn how to automatically send birthday wishes to customers using Pabbly Connect, integrating HubSpot and WhatsApp seamlessly for effective customer engagement. Learn to create powerful connections between your critical applications without requiring specialized programming knowledge or extensive technical background.

Watch Step By Step Video Tutorial Below


1. Accessing Pabbly Connect for Automation

To get started with automating birthday wishes, first, access Pabbly Connect by visiting their official website. If you are a new user, click on the ‘Sign Up Free’ button to create an account in just a few minutes. Existing users can simply sign in to access their dashboard and begin creating workflows.

Once logged in, locate the option to create a workflow by clicking the plus sign. Name your workflow, such as ‘Send Birthday Wishes to Customers from CRM,’ and click on create. This sets the foundation for your automation using Pabbly Connect.


2. Setting Up the Scheduler in Pabbly Connect

In this step, you will configure the scheduler that triggers the birthday wishes automation. In the trigger window, select the application name as ‘Scheduler’ from Pabbly Connect. Choose how often you want this workflow to run—select ‘Every Day’ and set the time to 10:00 AM.

  • Select ‘Scheduler’ from Pabbly Connect.
  • Set the frequency to ‘Every Day’.
  • Choose the time as 10:00 AM.

After saving, you will receive a confirmation that your workflow is scheduled to run daily at the specified time. This ensures that the birthday wishes will be sent out automatically each day using Pabbly Connect.


3. Capturing Customer Birthday Details

Next, you need to capture the current date to compare it with customer birthdays. In the action window, select ‘Date and Time Formatter’ from Pabbly Connect and choose the action event as ‘Current Date’. Connect and set the date format to DD/MM/YY.

After setting the format, click on ‘Save and Send Test Request’ to retrieve today’s date. You will now compare this date with the birthdays stored in your HubSpot CRM. This step is crucial for ensuring that the right customers receive their birthday wishes.


4. Integrating HubSpot CRM with Pabbly Connect

To fetch the birthday details, you need to integrate HubSpot CRM with Pabbly Connect. Click on the plus sign to add an action step, select ‘HubSpot CRM’, and choose the action event as ‘Search or Contact’. Connect your HubSpot account by following the prompts.

  • Choose ‘Search or Contact’ in HubSpot CRM.
  • Map the date of birth property.
  • Set the matching operator to ‘Contains Token’.

Map the required output properties such as the customer’s name, email, and phone number. By doing this, Pabbly Connect will retrieve all necessary information to send birthday wishes effectively.


5. Sending Birthday Wishes via WhatsApp

Finally, to send birthday wishes, integrate WhatsApp Cloud API with Pabbly Connect. Add an action step, select ‘WhatsApp Cloud API’, and choose ‘Send Template Message’ as the action event. Connect your WhatsApp account using the provided credentials.

Choose the approved birthday wish template and map the customer’s phone number from the iterator response. Once all details are filled out, click on ‘Save and Send Test Request’ to verify if the message is sent successfully. This completes the automation process, ensuring that customers receive their birthday wishes directly on WhatsApp.


Conclusion

By following these steps, you can effectively automate the process of sending birthday wishes to customers using Pabbly Connect. This integration not only enhances customer engagement but also ensures timely communication. With Pabbly Connect, automating such tasks becomes seamless and efficient.

Ensure you check out Pabbly Connect to create business automation workflows and reduce manual tasks. Pabbly Connect currently offer integration with 2,000+ applications.

How to Convert Tweets into Images and Post on Instagram Using Pabbly Connect

Learn how to automate converting tweets into images and posting them on Instagram using Pabbly Connect. Step-by-step tutorial for seamless integration. Follow this definitive guide to creating powerful automated workflows with straightforward, efficiency-focused solutions that save valuable time.

Watch Step By Step Video Tutorial Below


1. Access Pabbly Connect to Set Up Automation

To start automating the process of converting tweets into images and posting them on Instagram, you need to access Pabbly Connect. Simply navigate to the Pabbly website and sign in or create a free account.

After signing in, you will be directed to your dashboard. Here, you can create a new workflow by clicking on the blue ‘Create Workflow’ button. Name your workflow, for example, ‘Auto post Twitter data on Instagram,’ and click on ‘Create’ to initiate the setup.


2. Connecting Twitter to Pabbly Connect

In this step, you will connect your Twitter account to Pabbly Connect. To do this, select Twitter as the trigger application. Choose the event ‘New Tweet’ to trigger the automation whenever you post a new tweet.

Click on ‘Connect’ and then select ‘Add New Connection’. Authorize Pabbly Connect to access your Twitter account. Once connected, you can fetch the most recent tweet data to use in your automation.

  • Select Twitter as the trigger application.
  • Choose ‘New Tweet’ as the trigger event.
  • Authorize access to your Twitter account.

Once the connection is established, you can test it by posting a tweet. This will allow Pabbly Connect to capture the tweet data for the next steps.


3. Creating an Image from the Tweet Using Switchboard

The next step involves converting the tweet into an image using the Switchboard Canvas application through Pabbly Connect. First, select Switchboard Canvas as the action application and choose the action event ‘Create Image’.

Connect to your Switchboard Canvas account by providing your API key. Once connected, you will need to select the template you created in Switchboard Canvas for generating images. This template will define how your tweet will appear as an image.

  • Select ‘Create Image’ as the action event.
  • Provide your Switchboard API key to establish the connection.
  • Choose the appropriate template for the image.

After selecting the template, you will map the tweet’s text and media URL to the corresponding fields in the Switchboard Canvas setup. This allows the image to be generated dynamically based on the tweet content.


4. Posting the Image to Instagram

Now that the image is created, the next step is to post it on Instagram using Pabbly Connect. Select Instagram for Business as the action application and choose the action event ‘Publish Photo’.

Connect your Instagram account by authorizing Pabbly Connect to access your Instagram for Business account. You will then need to map the photo URL generated from the Switchboard Canvas step and add a caption for your post.

Select ‘Publish Photo’ as the action event. Map the photo URL from the Switchboard Canvas step. Add a caption using the tweet text mapped from the previous steps.

Once everything is set up, you can test the workflow. If successful, your image will be posted on Instagram with the caption derived from your tweet, completing the automation process.


Conclusion: Automating Your Social Media with Pabbly Connect

In this tutorial, we explored how to automate the process of converting tweets into images and posting them on Instagram using Pabbly Connect. By following the steps outlined, you can efficiently manage your social media presence without manual effort.

Ensure you check out Pabbly Connect to create business automation workflows and reduce manual tasks. Pabbly Connect currently offer integration with 2,000+ applications.

Check out Pabbly Connect – Automate your business workflows effortlessly! Sign Up Free – Start your journey with ease! 10,000+ Video Tutorials – Learn step by step! Join Pabbly Facebook Group – Connect with 21,000+ like minded people!
With Pabbly Connect, you can seamlessly integrate multiple applications, allowing you to focus more on content creation while the automation handles posting tasks in the background. Start using Pabbly Connect today to enhance your social media automation!

Integrating WooCommerce with Pabbly Subscription Billing Using Pabbly Connect

Learn how to automate adding customers to WooCommerce with Pabbly Connect and Pabbly Connect in this step-by-step tutorial. Explore efficient methods for automating routine tasks with clear, concise instructions suited for both newcomers and experienced professionals.

Watch Step By Step Video Tutorial Below


1. Accessing Pabbly Connect for Integration

To start integrating WooCommerce with Pabbly Subscription Billing, first, access Pabbly Connect. Visit the Pabbly website and sign in to your account. If you don’t have an account, you can sign up for free and receive monthly tasks.

Once logged in, navigate to the top right corner and click on the ‘Create Workflow’ button. Name your workflow something descriptive, such as ‘Pabbly Subscription Billing to WooCommerce’. This sets the stage for automating the process of adding new customers from Pabbly Subscription Billing to WooCommerce.


2. Setting Up the Trigger in Pabbly Connect

In this step, you will define the trigger event in Pabbly Connect. Select ‘Pabbly Subscription Billing’ as your trigger application. The trigger event will be set to ‘New Subscription’, which activates whenever a new subscription is created.

  • Select the trigger application: Pabbly Subscription Billing.
  • Choose the trigger event: New Subscription.
  • Copy the generated webhook URL for later use.

After setting up the trigger, you will see a webhook URL generated by Pabbly Connect. This URL will be used to connect your Pabbly Subscription Billing account to the workflow. Make sure to copy this URL as you’ll need it in the next steps.


3. Configuring Pabbly Subscription Billing for Webhooks

Next, log into your Pabbly Subscription Billing account. Navigate to the ‘Settings’ section on the left sidebar and select ‘Webhooks’. Here, you can manage your webhook settings.

  • Click on the ‘Add Webhook’ button.
  • Enter a name for your webhook, such as ‘WooCommerce Integration’.
  • Paste the copied webhook URL into the Webhook URL field.

Set the event to ‘Subscription Created’ to ensure that every time a new subscription is created, the details will be sent to Pabbly Connect. After entering all necessary details, click on the ‘Save’ button to activate your webhook.


4. Testing the Integration with Dummy Data

To verify that the integration is functioning correctly, you need to create a test subscription in Pabbly Subscription Billing. Navigate to the ‘Subscriptions’ section and click on the ‘Add Subscription’ button.

Select a customer email from your existing list or add a new customer. Choose the product and plan for the subscription. Set the subscription terms and click ‘Save’.

After saving the subscription, return to Pabbly Connect to see if the webhook captured the response. You should see the details of the newly created subscription, confirming that the integration is working as intended.


5. Adding Customers to WooCommerce via Pabbly Connect

Now that the trigger is set and tested, it’s time to configure the action step in Pabbly Connect. Select ‘WooCommerce’ as the action application and choose ‘Add New Customer’ as the action event.

Connect your WooCommerce account by entering the required details such as the Consumer Key, Consumer Secret, and Website URL. This information can be found in your WooCommerce settings under the REST API section. Once connected, map the customer details from the Pabbly Subscription Billing webhook data to WooCommerce fields.

Map the email, first name, and last name fields from the webhook data. Add any additional details like billing address if necessary. Click on ‘Save & Send Test Request’ to finalize the setup.

After sending the test request, check your WooCommerce dashboard under the ‘Customers’ section to verify if the new customer has been added successfully. This confirms that the integration is complete and functioning correctly.


Conclusion

In this tutorial, we explored how to use Pabbly Connect to automate the process of adding customers to WooCommerce from Pabbly Subscription Billing. By following the steps outlined, you can streamline your subscription management and enhance your business operations.

Ensure you check out Pabbly Connect to create business automation workflows and reduce manual tasks. Pabbly Connect currently offer integration with 2,000+ applications.

Utilizing Pabbly Connect not only saves time but also ensures accuracy in customer data management across platforms.