Send Fee Payment Reminders To Students On WhatsApp Using Pabbly Connect

Learn how to send fee payment reminders to students on WhatsApp using Pabbly Connect with this detailed tutorial. Automate your reminders easily! Implement the precise methodologies leading organizations use to automate repetitive tasks, illustrated with practical examples designed for immediate application.

Watch Step By Step Video Tutorial Below


1. Setting Up Pabbly Connect for Fee Reminders

To send fee payment reminders to students on WhatsApp, you will first need to set up Pabbly Connect. Access the Pabbly Connect landing page and create your free account. This platform will help automate the entire process seamlessly.

After signing in, you will be directed to the dashboard. Click on the ‘Create Workflow’ button to initiate the setup process. Name your workflow, for instance, ‘Fee Payment Reminders on WhatsApp,’ and then click on the ‘Create’ button to proceed.


2. Scheduling the Workflow to Check Payments Daily

In this section, you will schedule your workflow to check for fee payments daily using Pabbly Connect. Select the ‘Scheduler’ as your trigger application. This will allow the workflow to run automatically at specified intervals.

  • Select ‘Every Day’ from the scheduling options.
  • Choose a time for the workflow to run, such as 9 AM.

Once you have set the schedule, click ‘Save’ to confirm the settings. Your workflow is now configured to check for due payments every day at the selected time.


3. Integrating Google Sheets to Check Payment Statuses

Next, you will integrate Google Sheets with Pabbly Connect to retrieve the payment statuses of your students. In the action step, select ‘Google Sheets’ and choose the ‘Lookup Spreadsheet Rows’ option. This will allow you to find specific entries in your spreadsheet.

Connect your Google account to allow Pabbly Connect access to your spreadsheet. Ensure you select the correct spreadsheet containing the students’ details, including their WhatsApp numbers and payment statuses.


4. Using Iterator to Process Each Student’s Payment Status

Once the data is retrieved, utilize the Pabbly Connect iterator feature to process each student with a pending payment. The iterator will ensure that the workflow runs for each student one at a time.

  • Select the array of student data from the previous step.
  • Click ‘Save’ to finalize the iterator setup.

This setup will allow you to send reminders for each student whose payment status is marked as ‘not paid’.


5. Sending Payment Reminders via WhatsApp Cloud API

In the final step, connect to the WhatsApp Cloud API through Pabbly Connect to send the payment reminders. Choose ‘WhatsApp Cloud API’ as your action application and select ‘Send Template Message’. This step will enable you to send pre-defined messages to students.

Ensure you have created a message template in the WhatsApp Cloud API that includes placeholders for student names, due amounts, and payment links. Map these placeholders to the respective fields from the iterator step in Pabbly Connect.

Finally, test your setup by sending a message to verify that the integration works correctly. Once confirmed, your automated reminders will be sent to students without any manual intervention.


Conclusion

By following these steps, you can effectively automate the process of sending fee payment reminders to students on WhatsApp using Pabbly Connect. This integration not only saves time but also ensures timely communication with students.

Ensure you check out Pabbly Connect to create business automation workflows and reduce manual tasks. Pabbly Connect currently offer integration with 2,000+ applications.

How to Send Insurance Claim Notifications on WhatsApp Using Pabbly Connect

Learn how to automate insurance claim notifications via WhatsApp using Pabbly Connect. Step-by-step guide for seamless integration. This comprehensive guide reveals exactly how to connect your applications and automate repetitive tasks — accessible for professionals of all technical backgrounds.

Watch Step By Step Video Tutorial Below


1. Setting Up Pabbly Connect for Insurance Notifications

To send insurance claim notifications via WhatsApp, you first need to set up Pabbly Connect. This automation tool allows you to connect various applications seamlessly. Start by visiting the Pabbly Connect website and signing up for a free account. Once signed up, log in to access your dashboard.

After logging in, click on the ‘Create Workflow’ button. Name your workflow something like ‘Insurance Claim Alerts on WhatsApp’ and click on the ‘Create’ button. This will take you to the workflow page where you can begin setting up your automation.


2. Configuring Google Forms as the Trigger

In this step, we will configure Google Forms as the trigger application to start the automation process. Select Google Forms as your trigger application in Pabbly Connect. The trigger event will be set to ‘New Response Received’ to capture form submissions.

  • Select Google Forms as the trigger application.
  • Choose the trigger event as ‘New Response Received’.
  • Copy the webhook URL provided by Pabbly Connect.

Next, you need to connect your Google Forms to a Google Sheets spreadsheet, which will store the responses. Open the connected spreadsheet in incognito mode if you have multiple Google accounts. Install the Pabbly Connect Webhooks add-on from the Google Workspace Marketplace, and set up the initial configuration by pasting the webhook URL into the appropriate field.


3. Connecting WhatsApp Cloud API for Notifications

After setting up Google Forms as the trigger, the next step is to connect the WhatsApp Cloud API for sending notifications. In Pabbly Connect, add WhatsApp Cloud API as the action application. Choose the action event ‘Send Template Message’ to send notifications to users.

  • Select WhatsApp Cloud API as the action application.
  • Choose ‘Send Template Message’ as the action event.
  • Input your WhatsApp Cloud API credentials including the permanent access token.

Once the connection is established, map the recipient’s phone number and the message template you created for notifications. This ensures that each time a claim is submitted, the respective policyholder receives an automated message confirming receipt of their application.


4. Testing the Automation Workflow

With everything set up, it’s essential to test your automation workflow. In Pabbly Connect, send a test submission through your Google Forms to see if the WhatsApp notification is triggered correctly. Ensure that the message format is as expected and that all mapped fields are populated accurately.

Submit a test claim through Google Forms. Check your WhatsApp for the notification message. Verify that all details are accurately reflected in the message.

Once you confirm that the test notification works correctly, your automation is fully functional. This means every time a new claim is submitted, the relevant notification will be sent automatically without any manual intervention.


5. Conclusion

By following these steps, you can effectively send insurance claim notifications via WhatsApp using Pabbly Connect. This integration not only saves time but also enhances communication with policyholders, ensuring they are promptly informed about their claim status. Automate your processes today for a more efficient workflow!

Ensure you check out Pabbly Connect to create business automation workflows and reduce manual tasks. Pabbly Connect currently offer integration with 2,000+ applications.

How to Share Resources with New Hires Using Pabbly Connect, Google Forms, and Asana

Learn how to automate resource sharing with new hires using Pabbly Connect to integrate Google Forms, Asana, and Gmail efficiently. Explore systematic approaches to creating efficient automation solutions that convert technical concepts into practical, implementable instructions.

Watch Step By Step Video Tutorial Below


1. Accessing Pabbly Connect for Integration

To begin the automation process using Pabbly Connect, first, navigate to the website by typing ‘Pabbly.com/connect’ in your browser. This will take you to the landing page where you can either sign in or sign up for a new account. If you are new, click on the ‘Sign Up’ button to create your account, which is a quick process that only takes a couple of minutes.

Once you have signed in, you will be directed to the dashboard of Pabbly Connect. Here, look for the ‘Create Workflow’ button on the right side. Click on this button to initiate the setup process for sharing documents with new hires.


2. Setting Up Google Forms as the Trigger

The next step is to set up Google Forms as the trigger application in your workflow using Pabbly Connect. Select Google Forms and choose the trigger event as ‘New Response Received’. This means that the workflow will be activated every time a new form is filled out by a new hire.

  • Copy the Webhook URL provided by Pabbly Connect.
  • Go to your Google Form and navigate to the settings.
  • Set up email notifications for new responses and link the responses to a new Google Sheet.

After linking your Google Form to a Google Sheet, ensure you enable the ‘Send on Event’ option in the Google Sheets add-on for Pabbly Connect. This allows real-time data capture from Google Forms to your workflow.


3. Integrating Asana to Add New Hires

Next, you will connect Asana as an action application in your Pabbly Connect workflow. The action event here will be to ‘Get User’, which checks if the new hire already exists in Asana. This prevents duplication and ensures that only new hires are added to the project management tool.

To set this up, connect your Asana account through Pabbly Connect. Map the email address from the Google Form response to check if the user exists. If the user does not exist, the workflow will proceed to add them to Asana.

  • Click on ‘Add User to Workspace’ in Asana if the user is new.
  • Map the email address from the previous step to ensure accurate data entry.

This integration through Pabbly Connect allows seamless management of new hires in Asana, ensuring they are part of the team from day one.


4. Sharing Documents via Google Drive

After successfully adding the new hire to Asana, the next step involves sharing the necessary documents stored in Google Drive. Using Pabbly Connect, select Google Drive as your action application and choose the action event ‘Share a File or Folder by ID’. This will enable you to share the folder containing essential documents like travel and leave application forms.

To set this up correctly, you will need the folder ID from your Google Drive. Once you have the folder ID, paste it into Pabbly Connect and specify the email address of the new hire. Additionally, set the permission level to ‘Viewer’ to control access.

Select the appropriate role for the new hire (Viewer, Commenter, etc.). Send a test request to ensure the sharing process works as intended.

This step ensures that the new hire receives all necessary documents via email, completing the integration process through Pabbly Connect.


5. Testing the Integration Workflow

Finally, to ensure everything works smoothly, conduct a test by filling out the Google Form again with a new hire’s details. Once submitted, check both Asana and the email inbox of the new hire to confirm they have been added to Asana and received the shared documents.

By using Pabbly Connect, you can automate this entire process, saving time and ensuring that every new hire is onboarded effectively. If the integration is successful, you will see the new hire listed in Asana and an email notification confirming the shared folder.

In conclusion, this integration process showcases how Pabbly Connect simplifies the onboarding of new hires by seamlessly connecting Google Forms, Asana, and Google Drive, ensuring that all necessary resources are shared automatically.


Conclusion

Using Pabbly Connect, you can effectively automate the sharing of resources with new hires by integrating Google Forms, Asana, and Gmail. This process not only saves time but also enhances the onboarding experience for new employees, ensuring they have immediate access to essential documents.

Ensure you check out Pabbly Connect to create business automation workflows and reduce manual tasks. Pabbly Connect currently offer integration with 2,000+ applications.

How to Deliver Files on WhatsApp for Cashfree Payments Using Pabbly Connect

Learn how to automate file delivery on WhatsApp for Cashfree payments using Pabbly Connect. Step-by-step tutorial with detailed instructions. Navigate the automation landscape confidently with clear, structured guidance suitable for professionals regardless of prior technical experience.

Watch Step By Step Video Tutorial Below


1. Setting Up Pabbly Connect for Cashfree Payments

To automate file delivery on WhatsApp for Cashfree payments, start by accessing Pabbly Connect. First, create a free account on the Pabbly Connect dashboard. After signing in, click on ‘Create Workflow’ and name it appropriately, such as ‘Cashfree to WhatsApp’. This naming helps in identifying your workflow later.

Once the workflow is created, you will see two windows: the Trigger window and the Action window. The Trigger window is where you set the event that starts the automation, while the Action window is where you define what happens after the trigger. This setup is crucial for the automation process.


2. Configuring Cashfree as the Trigger in Pabbly Connect

In the Trigger window of Pabbly Connect, search for Cashfree and select it as the app. Choose the trigger event as ‘Payment via Form’, which will capture payment details from your Cashfree account. After selecting the trigger event, Pabbly Connect will generate a webhook URL.

  • Copy the webhook URL provided by Pabbly Connect.
  • Log in to your Cashfree account and navigate to the Developers section.
  • Under Payment Gateway, select Webhooks and add the copied URL.

After adding the webhook URL, test the connection by making a sample payment. This will allow Pabbly Connect to receive data from Cashfree, including customer details and payment information.


3. Adding Filter Condition in Pabbly Connect

After successfully capturing payment details, the next step is to add a filter condition in Pabbly Connect. This ensures that only specific payments trigger the WhatsApp message. In the Action window, search for ‘Filter by Pabbly’ and select it.

  • Set the filter condition to check if the payment URL matches the specific form used for the course.
  • If the condition is true, the automation will proceed to send the WhatsApp message.

This filtering process is essential as it allows you to customize the automation for different products or services, ensuring that only the relevant files are sent to customers.


4. Sending WhatsApp Messages Using Pabbly Connect

Now, configure the final action step to send a WhatsApp message using the WhatsApp Cloud API through Pabbly Connect. In the Action window, search for ‘WhatsApp Cloud API’ and select ‘Send Template Message’. Connect your WhatsApp Cloud API account by entering the necessary credentials.

Once connected, you will need to select the message template you created in the WhatsApp Cloud API. Ensure that your template includes dynamic fields for customer names and other personalized information. Map the recipient’s mobile number from the Cashfree response to ensure the message is sent to the correct customer.


5. Testing and Verifying the Integration

After completing the setup in Pabbly Connect, it’s crucial to test the entire workflow. Make a test payment through your Cashfree payment form. Upon successful payment, check if the WhatsApp message is sent to the customer with the attached file.

If everything is set up correctly, the customer will receive a WhatsApp message confirming their payment and providing a link to download the purchased file. This verification step ensures that your automation is functioning seamlessly.


Conclusion

In this tutorial, we demonstrated how to use Pabbly Connect to automate file delivery on WhatsApp for payments received through Cashfree. By following the steps outlined, you can streamline your payment processes and enhance customer satisfaction with instant file delivery.

Ensure you check out Pabbly Connect to create business automation workflows and reduce manual tasks. Pabbly Connect currently offer integration with 2,000+ applications.

How to Add Leads to SalesBlink as Prospects Using Pabbly Connect

Learn how to seamlessly add Facebook leads as prospects in SalesBlink using Pabbly Connect with this step-by-step tutorial. Transform complex automation concepts into accessible, actionable steps that eliminate unnecessary manual work while maximizing existing application capabilities.

Watch Step By Step Video Tutorial Below


1. Accessing Pabbly Connect for Integration

To begin the process of adding Facebook leads as prospects in SalesBlink, you first need to access Pabbly Connect. This platform allows you to automate workflows effectively. Start by visiting the Pabbly website and logging into your account. If you do not have an account, sign up for free to receive monthly tasks.

Once logged in, navigate to the top right corner and click on the ‘Create Workflow’ button. You will be prompted to name your workflow. Enter a suitable name like ‘Facebook Lead Ads to SalesBlink’ and click on the ‘Create’ button to proceed. This initiates the setup process for your integration.


2. Setting Up the Trigger in Pabbly Connect

In this step, you will configure the trigger for your workflow. Select ‘Facebook Lead Ads’ as your trigger application within Pabbly Connect. For the trigger event, choose ‘New Lead Instant’. This setup is crucial as it determines when the automation will be activated.

  • Select ‘Add New Connection’ to connect your Facebook account.
  • Authorize the connection by logging into your Facebook account.
  • Choose the Facebook page that generates leads, such as your hair transplant clinic.

After selecting your page, choose the lead generation form you want to use. Click ‘Save and Send Test Request’ to capture the lead data. This step ensures that Pabbly Connect is set up to receive leads from your Facebook page.


3. Testing the Trigger in Pabbly Connect

After setting up the trigger, it’s time to test it. You need to generate a dummy lead to see if Pabbly Connect captures the data correctly. Navigate to your Facebook lead form and submit a test entry with details like name, email, and phone number.

Once the form is submitted, return to Pabbly Connect. You should see the lead data captured successfully, including the email address, full name, and contact number. This confirms that your trigger is functioning as intended.


4. Configuring the Action in Pabbly Connect

Now, you will configure the action step in Pabbly Connect. Select ‘SalesBlink’ as your action application and choose ‘Add Prospect’ as the action event. This step is essential for adding the captured leads as prospects in SalesBlink.

  • Add a new connection and input your SalesBlink API key.
  • Select the campaign name where the prospects will be added.
  • Map the lead details from Facebook to the corresponding fields in SalesBlink.

After mapping the details, click on ‘Save and Send Test Request’. If successful, Pabbly Connect will confirm that the prospect has been added to your SalesBlink campaign.


5. Finalizing the Integration with Pabbly Connect

To finalize your integration, ensure that all mapped fields are correct in Pabbly Connect. This includes first name, last name, email address, and phone number. After verifying, click ‘Save and Send Test Request’ once more.

Upon successful completion, head over to your SalesBlink account to check if the new lead appears as a prospect. Refresh the page to see the newly added prospect listed alongside existing ones. This confirms that your integration is complete and functioning correctly.


Conclusion

In this tutorial, we demonstrated how to effectively use Pabbly Connect to integrate Facebook leads as prospects in SalesBlink. By following these steps, you can automate your lead management process and enhance your marketing campaigns efficiently.

Ensure you check out Pabbly Connect to create business automation workflows and reduce manual tasks. Pabbly Connect currently offer integration with 2,000+ applications.

How to Integrate OfficeRnD Members with Mailchimp Using Pabbly Connect

Learn how to seamlessly add OfficeRnD members to Mailchimp using Pabbly Connect with this step-by-step tutorial. Follow this definitive guide to creating powerful automated workflows with straightforward, efficiency-focused solutions that save valuable time.

Watch Step By Step Video Tutorial Below


1. Access Pabbly Connect for Integration

To begin adding OfficeRnD members to Mailchimp, first access Pabbly Connect. Start by visiting the official Pabbly website and logging in. If you are a new user, click on the ‘Sign Up Free’ button to create an account, which takes just two minutes. Once logged in, you will find yourself on the Pabbly Connect dashboard.

Next, to create a new workflow, click on the plus sign to initiate a new integration. In the workflow setup, name your workflow something like ‘Add OfficeRnD Members to Mailchimp’. This name helps in identifying the workflow later. After naming your workflow, click on ‘Create’ to proceed.


2. Setting Up the Trigger in Pabbly Connect

In this step, you will set up the trigger using Pabbly Connect. The trigger application is OfficeRnD, and the trigger event is ‘New Member’. Select OfficeRnD from the application list and choose ‘New Member’ as the trigger event. You will then see a webhook URL generated by Pabbly Connect.

  • Copy the webhook URL provided.
  • Log in to your OfficeRnD account and navigate to the ‘Settings’ section.
  • Under ‘Developer Tools’, find and click on ‘Webhooks’.
  • Click ‘Add Endpoint’ and paste the copied webhook URL.
  • Set the description for the webhook and select the event as ‘Member Created’.

After adding the endpoint, click on ‘Add’ to save the webhook. Now, return to Pabbly Connect to test the webhook. It should be waiting for a response from OfficeRnD.


3. Creating a New Member in OfficeRnD

Now it’s time to create a new member in OfficeRnD, which will trigger the webhook. Go to the ‘Community’ section in OfficeRnD and click on ‘Members’. Click on ‘Add Member’ to enter the member’s details. Fill in the required fields such as Full Name, Company Name, and Email Address.

After entering the details, click on ‘Add Member’. This action will send the member’s information to Pabbly Connect through the webhook you set up earlier. Check back in Pabbly Connect to see if the response has been received successfully.


4. Adding the Member to Mailchimp via Pabbly Connect

After successfully capturing the member details in Pabbly Connect, the next step is to add this member to your Mailchimp account. In the action section, select Mailchimp as the application and choose ‘Add New Member with Custom Fields’ as the action event. Click on ‘Connect’ to link your Mailchimp account to Pabbly Connect.

To establish this connection, you will need to provide your Mailchimp API key and data center. You can find your API key by logging into Mailchimp, clicking on your profile picture, selecting ‘Extras’, and then ‘API Keys’. Copy the API key and paste it into Pabbly Connect. For the data center, find it in your Mailchimp account URL (e.g., US19) and enter it as well.


5. Finalizing the Integration

With the Mailchimp account connected, select the audience list where you want to add the new member. Map the details from the trigger response, such as email address, first name, and last name. To split the full name into first and last names, use the ‘Text Formatter’ action in Pabbly Connect to format the name accordingly.

Finally, test the integration by saving and sending a test request. Check your Mailchimp account to confirm that the new member appears in your subscriber list with the designated tags. This process demonstrates how Pabbly Connect seamlessly integrates OfficeRnD members into Mailchimp automatically.


Conclusion

In this tutorial, we explored how to effectively use Pabbly Connect to integrate OfficeRnD members with Mailchimp. By following the steps outlined, you can automate the process of adding new members to your Mailchimp subscriber list, ensuring efficient communication and management. With Pabbly Connect, you can streamline your workflows and enhance productivity across various applications.

Ensure you check out Pabbly Connect to create business automation workflows and reduce manual tasks. Pabbly Connect currently offer integration with 2,000+ applications.

How to Send Google Forms Responses to Mailchimp Using Pabbly Connect

Learn how to automate adding subscribers to Mailchimp from Google Forms using Pabbly Connect. Step-by-step tutorial for seamless integration. Navigate the automation landscape confidently with clear, structured guidance suitable for professionals regardless of prior technical experience.

Watch Step By Step Video Tutorial Below


1. Setting Up Pabbly Connect for Google Forms and Mailchimp Integration

To automate the process of adding subscribers in Mailchimp from Google Forms responses, we begin by using Pabbly Connect. First, visit the Pabbly website and sign up for an account if you haven’t already. Once signed in, locate the ‘Create Workflow’ button at the top right of the dashboard.

After clicking the button, name your workflow, for example, ‘Google Forms to Mailchimp’. This sets the stage for the integration process, which revolves around triggers and actions. In this case, the trigger will be a new response received from Google Forms, and the action will be adding that response as a subscriber in Mailchimp.


2. Configuring Google Forms to Capture Responses

Next, we need to configure Google Forms to send responses to Pabbly Connect. Open your Google Form and ensure it has the necessary fields, such as first name, last name, email, and phone number. After setting up your form, go to the ‘Responses’ tab and click on the ‘Create Spreadsheet’ button to generate a linked Google Sheets document.

  • Ensure the spreadsheet captures all relevant fields.
  • Install the Pabbly Connect Webhooks add-on from the Extensions menu.
  • Set up the Webhook URL in the add-on to connect with Pabbly Connect.

Once the spreadsheet is created, go to the Extensions menu, select Pabbly Connect Webhooks, and click on ‘Initial Setup’. Here, paste the Webhook URL provided by Pabbly Connect and set the trigger column to the last column of your spreadsheet. This setup allows Pabbly to capture the entire row of responses upon submission.


3. Testing the Webhook Connection with Pabbly Connect

With the Webhook URL configured, it’s time to test the connection. Go back to your Google Form and submit a test response. This step is crucial as it allows Pabbly Connect to capture the data from your form submission. After submitting, check your Google Sheets to confirm that the response appears correctly.

Upon successful submission, return to Pabbly Connect where it will show that it is waiting for a webhook response. The captured data should display the details from your test submission, confirming that the integration is functioning correctly.


4. Adding Mailchimp as an Action in Pabbly Connect

Now that we have successfully captured Google Forms responses, we can proceed to add Mailchimp as an action in Pabbly Connect. Select Mailchimp as the action application and choose the action event ‘Add New Member with Custom Fields’. You will need to connect your Mailchimp account by entering the required API key and data center from your Mailchimp account settings.

  • Locate your Mailchimp API key in the account settings under Profile > Extras > API keys.
  • Copy the data center from your Mailchimp URL (e.g., us6).
  • Map the fields from Google Forms to the corresponding fields in Mailchimp.

This mapping ensures that every new form submission will automatically add the respondent’s details as a subscriber in your Mailchimp audience list.


5. Finalizing the Integration and Testing

After mapping the fields, click on ‘Save and Send Test Request’ in Pabbly Connect. This action will send the test data to Mailchimp, allowing you to verify that the subscriber has been added successfully. Check your Mailchimp audience list to confirm that the new subscriber appears there with the correct details.

Once confirmed, your integration is complete. You can now enjoy the seamless automation of adding subscribers in Mailchimp directly from Google Forms responses using Pabbly Connect. This setup not only saves time but also enhances your email marketing efforts by ensuring that every interested respondent is added to your mailing list automatically.


Conclusion

In this tutorial, we explored how to use Pabbly Connect to automate the addition of subscribers in Mailchimp from Google Forms responses. By following the steps outlined, you can streamline your subscriber management and enhance your marketing campaigns effortlessly.

Ensure you check out Pabbly Connect to create business automation workflows and reduce manual tasks. Pabbly Connect currently offer integration with 2,000+ applications.

How to Send Medicine Purchase Reminder to Customers on WhatsApp Using Pabbly Connect

Learn how to automate sending medicine purchase reminders via WhatsApp using Pabbly Connect. Step-by-step guide for integrating Google Sheets and WhatsApp Cloud API. Navigate the automation landscape confidently with clear, structured guidance suitable for professionals regardless of prior technical experience.

Watch Step By Step Video Tutorial Below


1. Access Pabbly Connect for Automation

To begin sending medicine purchase reminders on WhatsApp, you first need to access Pabbly Connect. Start by visiting the Pabbly website and logging in to your account. If you are a new user, you can sign up for free, which allows you to create your own account quickly.

Once logged in, navigate to the Pabbly Connect dashboard. Here, you will find the option to create a new workflow. Click on the ‘+ Create Workflow’ button, and name your workflow something like ‘Medicine Purchase Reminder to Customers on WhatsApp’. This sets the stage for automating your reminders.


2. Set Up the Trigger in Pabbly Connect

In this step, we will configure the trigger for our automation using Pabbly Connect. Click on the trigger window and select ‘Schedule by Pabbly’ as the application. This allows you to schedule how often the workflow runs.

  • Choose the frequency as ‘Every day’.
  • Set the time for the workflow to run, e.g., 10 AM.

After setting these parameters, click on ‘Save’. This ensures that your workflow will run daily at the specified time, allowing you to send timely reminders to your customers.


3. Retrieve End Dates from Google Sheets

Next, we will configure Pabbly Connect to retrieve the end dates of the medicines from Google Sheets. Scroll down to the action window and select ‘Date and Time Formatter’ as the application. Choose the action event as ‘Modify Current Date’.

Set the date format as DDM and YY, and select the timezone as Asia/Kolkata. Choose to add 2 days to the current date, which will help in determining when to send the reminders. Click on ‘Save and Send Test Request’ to verify that the date is correctly calculated.


4. Search Customer Details in Google Sheets

Now, we will utilize Pabbly Connect to search for customer details in Google Sheets. Add a new action step and select ‘Google Sheets’ as the application, then choose the action event ‘Lookup Spreadsheet Row’.

  • Select the spreadsheet where your customer data is stored.
  • Map the end date column to search for customers whose medicines are about to finish.

After configuring the lookup, click on ‘Save and Send Test Request’. This action will retrieve the necessary customer details, which will be used for sending reminders.


5. Send Medicine Purchase Reminders via WhatsApp

Finally, we will set up the integration to send messages via WhatsApp using Pabbly Connect. Add a new action step and select ‘WhatsApp Cloud API’ as the application, then choose the action event ‘Send Template Message’.

Map the recipient’s mobile number, customer name, and medicine type in the template message. Ensure that you have created and approved a message template in your WhatsApp Cloud API account beforehand. Click on ‘Save and Send Test Request’ to send the reminder message.


Conclusion

In this tutorial, we demonstrated how to use Pabbly Connect to automate sending medicine purchase reminders via WhatsApp. By integrating Google Sheets and WhatsApp Cloud API, you can efficiently manage customer communications and enhance your medical store automation.

Ensure you check out Pabbly Connect to create business automation workflows and reduce manual tasks. Pabbly Connect currently offer integration with 2,000+ applications.

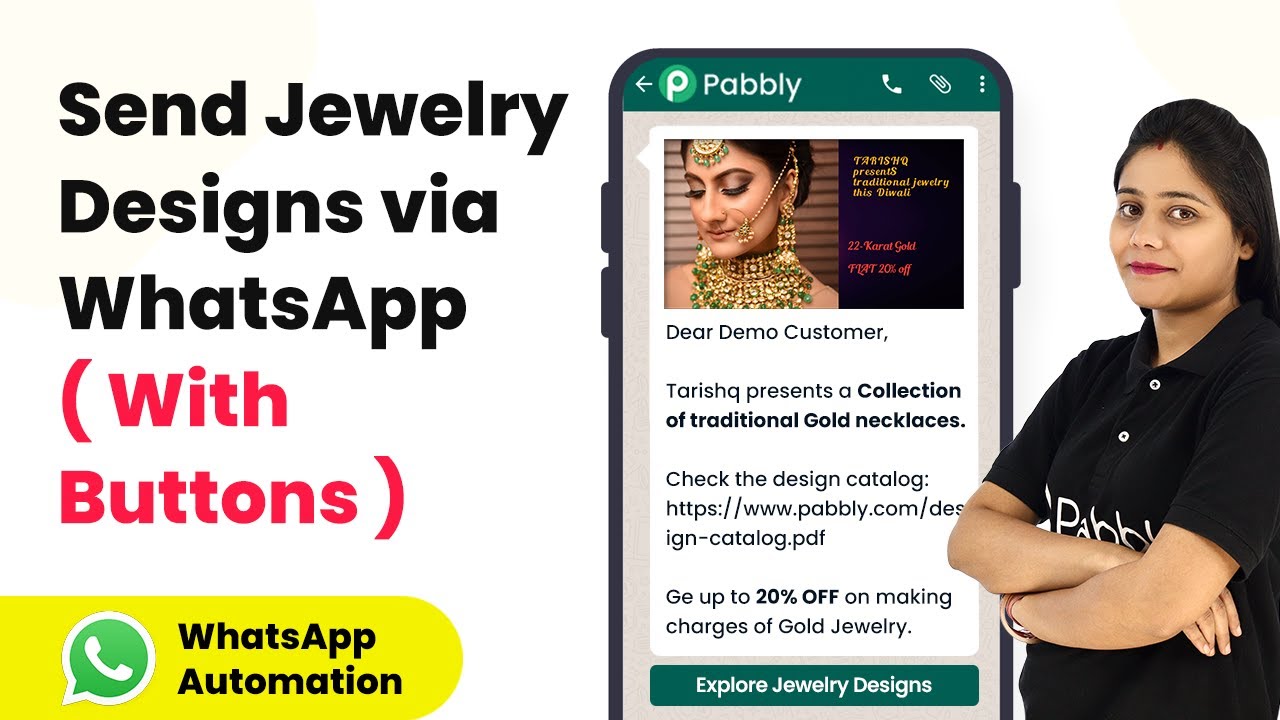
How to Automatically Send Jewelry Designs to Customers on WhatsApp Using Pabbly Connect

Learn how to automate sending jewelry designs to customers on WhatsApp using Pabbly Connect. Follow our step-by-step tutorial for seamless integration! This comprehensive guide reveals exactly how to connect your applications and automate repetitive tasks — accessible for professionals of all technical backgrounds.

Watch Step By Step Video Tutorial Below


1. Setting Up Pabbly Connect for Jewelry Designs

To automate sending jewelry designs to customers on WhatsApp, you first need to set up Pabbly Connect. Start by creating a free account on the Pabbly Connect website. This integration platform allows you to connect various applications seamlessly, ensuring that your automation runs smoothly.

Once your account is set up, log in to access the dashboard. Here, you can create a new workflow by clicking on the ‘Create Workflow’ button. This will initiate the process of connecting your Google Drive, WhatsApp, and other applications through Pabbly Connect.


2. Creating a Workflow in Pabbly Connect

After accessing the dashboard of Pabbly Connect, click on the ‘Create Workflow’ button to start your automation. You will need to name your workflow, such as ‘Auto Send Jewelry Designs on WhatsApp’. This name helps you identify the workflow later.

  • Click on the ‘Create’ button.
  • Select Google Drive as the trigger application.
  • Choose the trigger event to detect when a new file is added.

This setup will allow Pabbly Connect to monitor your Google Drive for new jewelry design files, triggering the automation whenever a new file is uploaded.


3. Connecting Google Drive to Pabbly Connect

To connect Google Drive to Pabbly Connect, you need to authorize access to your Google account. Click on ‘Connect’, then ‘Add New Connection’ to link your Google Drive account. Make sure you select the correct folder where your jewelry designs are stored.

After connecting, specify the folder name in Pabbly Connect. The system will check this folder for new files every 10 minutes, ensuring that any new designs are sent out promptly. Once set, click ‘Save’ to finalize the connection.


4. Fetching Customer Data from Google Sheets

Now that your Google Drive is connected, the next step is to fetch customer data from Google Sheets using Pabbly Connect. Select Google Sheets as the action application and choose the ‘Get Row’ option. This allows you to retrieve customer details one by one.

  • Connect your Google Sheets account to Pabbly Connect.
  • Select the spreadsheet containing your customer list.
  • Set the range to include the necessary customer details.

This step ensures that Pabbly Connect can access all your customer information, which will be used for sending WhatsApp messages.


5. Sending WhatsApp Messages through Pabbly Connect

After retrieving customer data, the final step is to send WhatsApp messages. Select WhatsApp Cloud API as the action application in Pabbly Connect. Choose the ‘Send Template Message’ option, and connect your WhatsApp account.

Fill in the required fields, including the recipient’s mobile number and the message template. Ensure that the message template is pre-approved by Facebook, as this is a requirement for sending messages. Once everything is set, click ‘Save’ and test the integration.


Conclusion

By following these steps, you can effectively automate the process of sending jewelry designs to your customers on WhatsApp using Pabbly Connect. This integration not only saves time but also enhances customer engagement, allowing you to focus on your business growth.

Ensure you check out Pabbly Connect to create business automation workflows and reduce manual tasks. Pabbly Connect currently offer integration with 2,000+ applications.

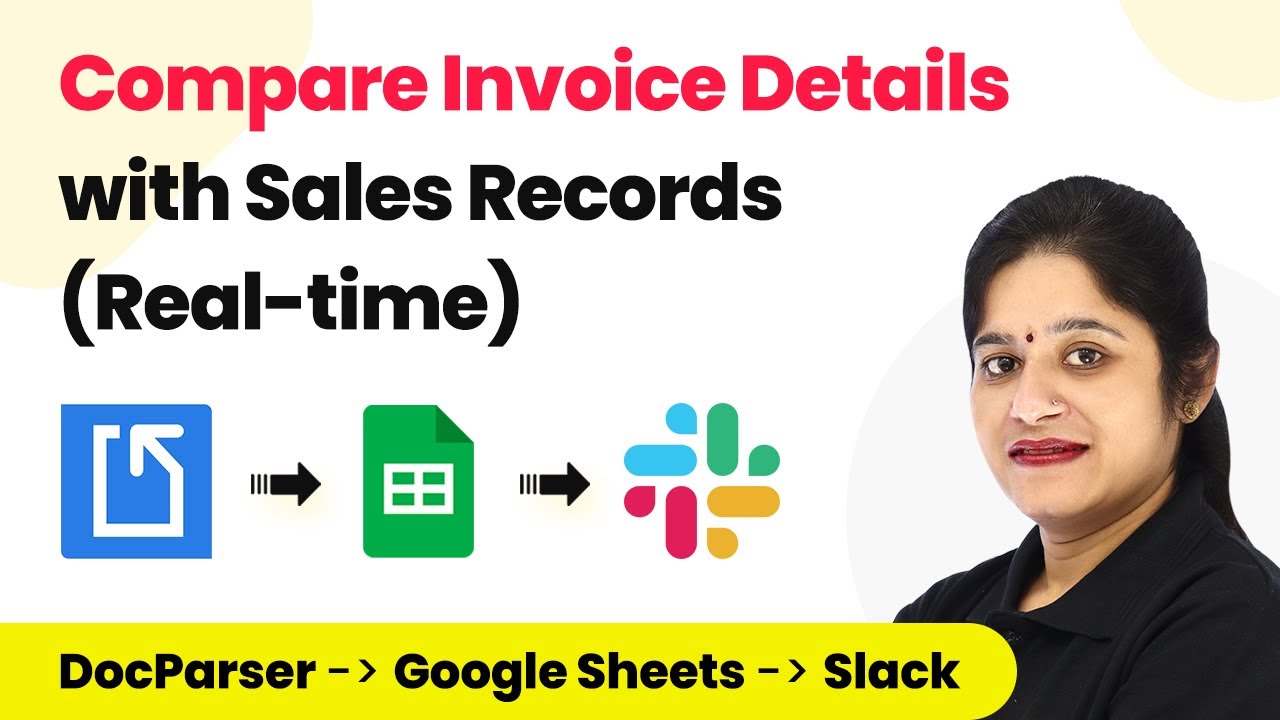
How to Compare Invoice Details with Sales Record in Real Time Using Pabbly Connect

Learn how to compare invoice details with sales records in real time using Pabbly Connect, DocParser, Google Sheets, and Slack. Follow this step-by-step tutorial. Build sophisticated automated workflows in less time than you think. This guide translates complex integrations into straightforward steps for immediate implementation.

Watch Step By Step Video Tutorial Below


1. Accessing Pabbly Connect to Start Your Workflow

To compare invoice details with sales records in real time, start by accessing Pabbly Connect. Visit the official Pabbly website and log in to your account. If you are a new user, click on the ‘Sign Up Free’ button to create an account and enjoy free tasks every month.

Once logged in, navigate to the Pabbly Connect dashboard. Here, you can create a new workflow by clicking on the plus sign. Name your workflow something descriptive like ‘Compare Invoice Details with Sales Record’ and click on ‘Create’. This sets the stage for integrating all necessary applications.


2. Setting Up DocParser with Pabbly Connect

Next, you need to set up DocParser to extract invoice details. In your Pabbly Connect workflow, select DocParser as your application in the trigger window. Choose the trigger event as ‘Parse Documents’. You will see a webhook URL that you need to copy. using Pabbly Connect

  • Log into your DocParser account.
  • Navigate to the Integrations section and select the Webhook option.
  • Paste the copied webhook URL and set the payload format to JSON.

After saving the integration, upload a new PDF invoice in DocParser. This triggers Pabbly Connect to capture the invoice details, which will be used for comparison with sales records.


3. Integrating Google Sheets with Pabbly Connect

With the invoice details extracted, the next step is to compare these with the sales records stored in Google Sheets. In your Pabbly Connect workflow, add a new action by selecting Google Sheets. Choose the action event as ‘Lookup Spreadsheet Rows’. using Pabbly Connect

Connect your Google account to Pabbly Connect by clicking on ‘Add New Connection’. Once connected, select your sales record spreadsheet from the dropdown. Specify the lookup column where your invoice numbers are stored, typically column A, and map the invoice number extracted from DocParser.


4. Applying Filters to Compare Invoice and Sales Records

After fetching the sales record, it’s crucial to apply filters to compare the invoice details. Add a new action step and select the Filter application. Set up conditions to compare the item name, quantity, and amount from the invoice against the sales records. using Pabbly Connect

  • Map the item name from DocParser and check if it equals the item name in Google Sheets.
  • Map the quantity and ensure it matches the quantity in the sales records.
  • Lastly, compare the amounts to ensure they match.

Once the conditions are set, save and test the request to confirm that the filter is working correctly. If the conditions are not met, the workflow will proceed to notify the accounts team.


5. Notifying the Accounts Team on Slack

Finally, integrate Slack with Pabbly Connect to notify your accounts team if invoice details do not match. Add a new action step, select Slack, and choose the action event ‘Send Channel Message’. Connect your Slack account and select the channel where notifications will be sent.

Compose your notification message, including details such as the invoice number, customer name, product name, and amount. Map these fields from the previous steps to personalize the message. After completing the setup, save and test the workflow to ensure messages are sent correctly.


Conclusion

In this tutorial, we explored how to compare invoice details with sales records in real time using Pabbly Connect. By integrating DocParser, Google Sheets, and Slack, you can automate the process of verifying invoices efficiently. This integration not only saves time but also ensures accuracy in your financial records.

Ensure you check out Pabbly Connect to create business automation workflows and reduce manual tasks. Pabbly Connect currently offer integration with 2,000+ applications.