How to Create an Employee in Freshteam from Google Sheets Using Pabbly Connect

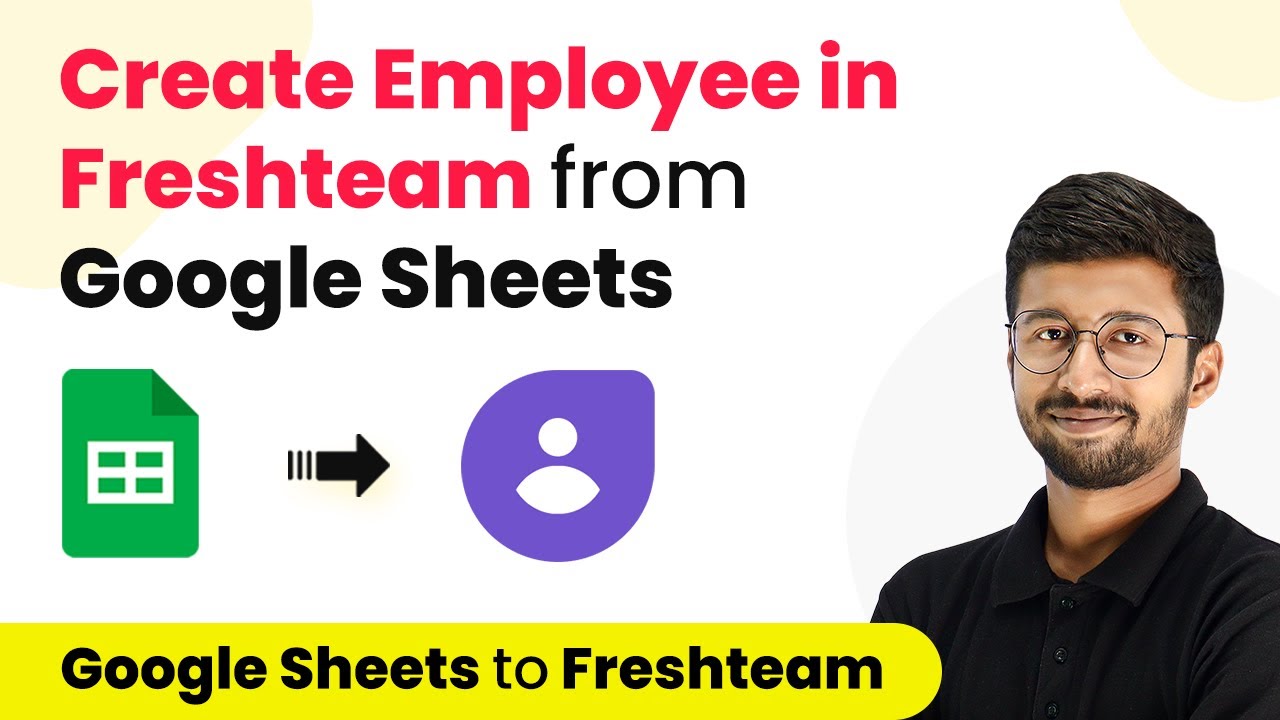
Learn how to automate employee creation in Freshteam from Google Sheets using Pabbly Connect. Follow this step-by-step guide for seamless integration. Develop expertise in application integration and learn how to design streamlined automation workflows using proven, simplified approaches.

Watch Step By Step Video Tutorial Below


1. Setting Up Pabbly Connect for Google Sheets Integration

To create an employee in Freshteam from Google Sheets, the first step is to set up Pabbly Connect. This platform allows seamless integration between Google Sheets and Freshteam. Start by signing up for a free account on Pabbly Connect and navigate to your dashboard.

Once on the dashboard, click on ‘Create Workflow’ and name it appropriately, such as ‘Google Sheets to Freshteam’. This workflow will automate the process of adding new employee details from Google Sheets into Freshteam.


2. Trigger Setup in Google Sheets Using Pabbly Connect

In this step, we will set up the trigger that will initiate the automation when a new employee is added to Google Sheets. In the trigger window, select Google Sheets as the app and choose the event ‘New or Updated Spreadsheet Row’. This will allow Pabbly Connect to monitor changes in your Google Sheets. using Pabbly Connect

  • Search for Google Sheets in the app list.
  • Select ‘New or Updated Spreadsheet Row’ as the trigger event.
  • Copy the webhook URL provided by Pabbly Connect.

Next, go to your Google Sheets where you maintain employee data. Under ‘Extensions’, click on ‘Add-ons’ and search for ‘Pabbly Connect Webhooks’ to install it. After installation, refresh your Google Sheets to ensure the add-on is active. Then, navigate back to ‘Extensions’, select ‘Pabbly Connect Webhooks’, and click on ‘Initial Setup’. Here, paste the copied webhook URL and specify the trigger column, which is the last column containing data.


3. Action Setup to Create Employee in Freshteam

After configuring the trigger, the next step is to set up the action that will create an employee in Freshteam using the data gathered from Google Sheets. In the action window of Pabbly Connect, search for Freshteam and select it as the application.

Choose the action event ‘Create Employee’ and connect your Freshteam account by entering the API token and account name. The account name can be found in the URL of your Freshteam account, while the API key is accessible in your profile settings under API key. Once connected, you will be prompted to map the fields from your Google Sheets to the corresponding fields in Freshteam.

  • Map fields like First Name, Last Name, Email, and Date of Birth from Google Sheets.
  • Ensure to select the correct format for Date of Birth (YYYY-MM-DD).
  • Click ‘Save and Send Test Request’ to verify the integration.

After testing, if the response is successful, a new employee record will be created in your Freshteam account automatically using the data from Google Sheets.


4. Testing the Integration with New Employee Data

With the integration set up, it’s crucial to test it by adding a new employee entry in Google Sheets. Enter the details for a new employee, including First Name, Last Name, Email, and other relevant information. Once you save this new entry, Pabbly Connect will automatically trigger the workflow.

Check your Freshteam account to confirm that the new employee has been created successfully. You can search for the employee by their email address or name in the employee directory. This step ensures that the automation is functioning correctly and that all data is accurately transferred.


5. Conclusion: Automate Employee Creation with Pabbly Connect

By following this tutorial, you can efficiently automate the process of creating employees in Freshteam using data from Google Sheets through Pabbly Connect. This integration not only saves time but also reduces the chances of manual errors in data entry.

Ensure you check out Pabbly Connect to create business automation workflows and reduce manual tasks. Pabbly Connect currently offer integration with 2,000+ applications.

Utilizing Pabbly Connect allows you to streamline HR processes, making it easier to manage employee information from various sources. Start using this automation today to enhance your organizational efficiency.

How to Register User to WordPress on Successful Cashfree Payment Using Pabbly Connect

Learn how to register users to WordPress automatically after a successful Cashfree payment using Pabbly Connect. Follow our detailed tutorial for seamless integration. Discover hidden automation capabilities within your existing tools. This guide shows you how to connect your essential applications and permanently eliminate redundant manual processes.

Watch Step By Step Video Tutorial Below


1. Setting Up Pabbly Connect for Cashfree and WordPress Integration

In this section, we will explore how to set up Pabbly Connect to automate user registration on WordPress after a successful Cashfree payment. First, access your Pabbly Connect dashboard by signing up through the link provided in the description. Once logged in, click on ‘Create Workflow’ and name it, for example, ‘Cashfree to WordPress’. This workflow will manage the entire automation process.

After creating the workflow, you’ll notice two windows: the trigger window and the action window. The trigger window will capture payment details from Cashfree, while the action window will handle user registration on WordPress. This setup ensures that whenever a payment is received, the corresponding user is automatically registered on your WordPress site.


2. Configuring Cashfree Trigger in Pabbly Connect

The next step involves configuring the Cashfree trigger in Pabbly Connect. In the trigger window, search for Cashfree and select it. You will then choose the trigger event, which should be set to ‘Payment via Payment Form’. This selection allows Pabbly Connect to listen for new payment notifications from your Cashfree account.

  • Select Cashfree as the app.
  • Choose ‘Payment via Payment Form’ as the trigger event.
  • Copy the provided webhook URL.

After selecting the trigger event, copy the webhook URL generated by Pabbly Connect. This URL will be used to connect Cashfree with your Pabbly Connect account. Next, log in to your Cashfree account, switch to test mode, and navigate to the developer section to add the webhook URL under the payment forms settings. By doing this, you establish a connection that allows Cashfree to send payment details directly to Pabbly Connect.


3. Mapping User Details from Cashfree to WordPress

Once the Cashfree trigger is set up, it’s essential to map the user details to WordPress. After receiving a test payment, Pabbly Connect will display the details of the payment, including the customer’s name, email, and mobile number. These details are crucial for creating a new user in WordPress.

In the action window, search for WordPress and select it as the application. Choose the action event ‘Create a User’. You will need to connect your WordPress account with Pabbly Connect by entering the username, password, and the base URL of your WordPress site. Ensure the base URL is correctly formatted to prevent connection issues.

  • Enter the email address received from Cashfree as the new user’s email.
  • Map the email address as the username for the new user.
  • Set the mobile number as the default password.

Additionally, you can set the first name, last name, and role of the user. For this example, assign the role as ‘Subscriber’. Once all fields are mapped correctly, click on ‘Save and Send Test Request’ to finalize the setup. This step confirms that the user has been successfully registered in WordPress.


4. Testing the Integration of Cashfree and WordPress

To ensure everything is functioning correctly, it is vital to test the integration. After setting up the workflow in Pabbly Connect, conduct a test payment using the Cashfree payment form. Enter the details of a dummy user and complete the payment process. This action will trigger the workflow, sending the payment details to Pabbly Connect.

Upon successful payment, return to your Pabbly Connect dashboard and check the workflow for the response. You should see the details of the payment, confirming that the information was received correctly. Navigate to your WordPress dashboard to verify if the user has been added under the users section.

If the user appears in WordPress with the correct details, the integration is successful. If not, double-check the mapping and connection settings in Pabbly Connect to troubleshoot any issues.


5. Conclusion: Automate User Registration with Pabbly Connect

In conclusion, using Pabbly Connect to integrate Cashfree with WordPress allows for seamless user registration upon successful payments. This automation not only saves time but also enhances the user experience by providing immediate access to paid content. By following the steps outlined in this tutorial, you can efficiently set up this integration.

Ensure you check out Pabbly Connect to create business automation workflows and reduce manual tasks. Pabbly Connect currently offer integration with 2,000+ applications.

With Pabbly Connect, you can automate various workflows and enhance your online business processes. Start using Pabbly Connect today to streamline your operations and improve customer satisfaction.

Automate YouTube Thumbnail Creation with Pabbly Connect

Learn how to automate YouTube thumbnail creation using Pabbly Connect and Google Sheets. Follow this detailed step-by-step tutorial to streamline your workflow. Transform complex automation concepts into accessible, actionable steps that eliminate unnecessary manual work while maximizing existing application capabilities.

Watch Step By Step Video Tutorial Below


1. Introduction to Pabbly Connect for Thumbnail Automation

Pabbly Connect is an essential tool for automating the creation of YouTube thumbnails. By integrating Google Sheets with other applications, you can streamline your thumbnail generation process. This automation saves time and enhances productivity, allowing you to focus on content creation. using Pabbly Connect

To get started, sign up for a free Pabbly Connect account. Once logged in, you can create workflows that connect various applications like Google Sheets and Switchboard Canvas to generate thumbnails automatically. This setup will enable you to manage your thumbnail data efficiently.


2. Setting Up Google Sheets with Pabbly Connect

The first step in automating thumbnail creation is to set up your Google Sheets. This spreadsheet will hold the data needed for your thumbnails, such as the photo URL, main title, and secondary text. Pabbly Connect will pull this data to generate thumbnails automatically. using Pabbly Connect

  • Create a new Google Sheet.
  • Add columns for the photo URL, main title, and secondary text.
  • Fill in the rows with the relevant data for each thumbnail.

Once your Google Sheet is ready, you can proceed to connect it with Pabbly Connect. This connection will enable Pabbly Connect to access the data and automate the thumbnail creation process.


3. Creating the Workflow in Pabbly Connect

Now that your Google Sheet is set up, it’s time to create the workflow in Pabbly Connect. This workflow will automate the process of generating thumbnails based on the data from your Google Sheet. Start by creating a new workflow and naming it appropriately. using Pabbly Connect

Within Pabbly Connect, you will set a trigger for when new data is added to your Google Sheet. This involves selecting Google Sheets as the trigger application and choosing the event as ‘New or Updated Spreadsheet Row.’ After selecting your Google Sheet, copy the webhook URL provided by Pabbly Connect.

  • Go to your Google Sheet and install the Pabbly Connect Webhooks add-on.
  • Paste the webhook URL into the add-on settings.
  • Set the trigger column where the data will be filled.

After completing these steps, you can test the connection to ensure that data is correctly sent to Pabbly Connect when new entries are made in your Google Sheet.


4. Integrating Switchboard Canvas with Pabbly Connect

With the Google Sheet integration completed, the next step is to integrate Switchboard Canvas. This application will create the actual thumbnails using the data pulled from Google Sheets via Pabbly Connect. In your Pabbly Connect workflow, add Switchboard Canvas as the action application. using Pabbly Connect

Choose the action event as ‘Create Image Only’ and connect your Switchboard Canvas account using the API key. You can find the API key in your Switchboard account settings. Once connected, select the thumbnail template you created earlier and map the fields from your Google Sheet to the corresponding elements in the template.

Map the photo URL to the designated image field. Map the main title and secondary text to their respective text fields. Set the dimensions for the thumbnail as required.

After mapping all the required fields, save your workflow. This configuration will ensure that whenever new data is added to your Google Sheet, Pabbly Connect will automatically generate a thumbnail using Switchboard Canvas.


5. Testing the Automation Process

After setting up the workflow, it’s crucial to test the automation process. Add a new row to your Google Sheet with the necessary data for a thumbnail. This should include the photo URL, main title, and secondary text. Once you have added this data, Pabbly Connect will trigger the automation. using Pabbly Connect

Check Pabbly Connect to see if the thumbnail was generated successfully. You should receive a URL link to the created thumbnail image. If everything works as intended, your automation is complete!

To ensure continuous operation, make sure the ‘Send on Event’ option is enabled in your Google Sheet. This setting allows Pabbly Connect to trigger the automation every time new data is added.


Conclusion

By using Pabbly Connect, you can automate the process of creating YouTube thumbnails effortlessly. This integration with Google Sheets and Switchboard Canvas allows for quick and efficient thumbnail generation, saving you valuable time. With just a few simple steps, you can ensure that your YouTube channel maintains a professional look with customized thumbnails.

Ensure you check out Pabbly Connect to create business automation workflows and reduce manual tasks. Pabbly Connect currently offer integration with 2,000+ applications.

Automatically Get Image Links on Google Sheets Using Pabbly Connect

Learn how to automatically get image links on Google Sheets using Pabbly Connect and Pexels. Follow this detailed tutorial for seamless integration. Eliminate manual repetitive tasks from your workflow. Discover proven automation methods with intuitive steps designed for efficiency-minded professionals.

Watch Step By Step Video Tutorial Below


1. Accessing Pabbly Connect for Integration

To automatically get image links on Google Sheets, you need to access Pabbly Connect. First, visit the Pabbly Connect website and sign up for an account if you don’t have one. If you already have an account, simply sign in to proceed with the integration process.

Once logged in, you will see the Pabbly Connect dashboard. Click on the ‘Create Workflow’ button to start setting up your automation. This is where you will define the trigger and action applications needed for your workflow.


2. Setting Up Google Sheets as the Trigger Application

The first step in your automation is to set Google Sheets as the trigger application in Pabbly Connect. Select Google Sheets from the list of applications and choose the trigger event as ‘New or Updated Spreadsheet Row’. This event will initiate the workflow whenever a new row is added or an existing row is updated in your Google Sheets.

  • Select Google Sheets as the trigger application.
  • Choose the event ‘New or Updated Spreadsheet Row’.
  • Copy the generated webhook URL for the next steps.

After copying the webhook URL, you need to set it in your Google Sheets. Go to your Google Sheets, click on Extensions, and navigate to Add-ons, then Get Add-ons. Search for the Pabbly Connect Webhooks add-on, install it, and ensure it’s activated for your sheet.


3. Configuring the Google Sheets Webhook

To finalize the connection between Pabbly Connect and Google Sheets, go back to Extensions, find Pabbly Connect Webhooks, and select ‘Initial Setup’. Paste the webhook URL you copied earlier into the designated field. Specify the trigger column where the data will be entered, which is column B in this case.

Ensure that the ‘Send on Event’ option is checked to allow data to be sent after each event. Once set up, send a test request to confirm that the connection is working correctly. You should see a success message indicating that the test data has been sent successfully.


4. Integrating Pexels for Image Retrieval

With the Google Sheets trigger set up, the next step is to integrate Pexels as the action application in Pabbly Connect. Choose Pexels from the application list and select the action event as ‘Search for Photos’. This action will allow you to retrieve image links based on the keywords specified in your Google Sheets.

  • Select Pexels as the action application.
  • Choose the action event ‘Search for Photos’.
  • Connect your Pexels account by providing the API key.

After connecting, you will need to map the data fields from Google Sheets to the Pexels search parameters. Input the keywords you want to search for, set the orientation and size of the images, and send a test request to retrieve the image URLs. You will see multiple image links generated based on your keywords.


Finally, you will update your Google Sheets with the retrieved image links. Select Google Sheets again as the action application in Pabbly Connect and choose the action event ‘Update Range Values’. This step is crucial as it allows you to insert the image links into the appropriate cells in your Google Sheets.

Map the values you received from Pexels to the correct range in your Google Sheets. Specify the range where you want the image links to appear, such as C2 to E2, and format the values correctly within brackets and quotation marks. Once everything is set, send a test request to update the sheet.


Conclusion

By following this tutorial, you can successfully use Pabbly Connect to automate the process of getting image links on Google Sheets. This integration with Pexels allows you to efficiently retrieve high-quality images based on specific keywords, enhancing your productivity and workflow management. Start automating your tasks today using Pabbly Connect!

Ensure you check out Pabbly Connect to create business automation workflows and reduce manual tasks. Pabbly Connect currently offer integration with 2,000+ applications.

Automatically Get Video URLs on Google Sheets Using Pabbly Connect and Pexels

Learn how to automatically retrieve video URLs from Pexels into Google Sheets using Pabbly Connect, streamlining your workflow effortlessly. Eliminate manual repetitive tasks from your workflow. Discover proven automation methods with intuitive steps designed for efficiency-minded professionals.

Watch Step By Step Video Tutorial Below


1. Setting Up Pabbly Connect for Integration

To begin with, you need to access Pabbly Connect by visiting the official website. Here, you can either sign in if you’re an existing user or create a new account to get started. The sign-up process is quick and provides you with 100 free tasks to explore the platform.

Once you log into Pabbly Connect, navigate to the dashboard and click on the ‘Create Workflow’ button. You will be prompted to name your workflow. For this integration, name it ‘Automatically Get the Video URL on Google Sheets through Pexels’ and click ‘Create’. This sets the foundation for automating the retrieval of video URLs into your Google Sheets.


2. Setting Up Google Sheets as the Trigger Application

In this step, you will configure Google Sheets as the trigger application within Pabbly Connect. Select Google Sheets from the list of applications and choose the trigger event as ‘New or Updated Spreadsheet Row’. This means any new or updated entry in your Google Sheet will initiate the workflow.

  • Select Google Sheets as the trigger application.
  • Choose the trigger event: New or Updated Spreadsheet Row.
  • Copy the webhook URL provided by Pabbly Connect.

Next, you will need to set up the Google Sheet that contains your titles and keywords. Ensure your sheet has columns for titles, keywords, and the video URLs where the retrieved URLs will be stored. This setup is crucial for the integration to function correctly.


3. Configuring Pabbly Connect Webhooks in Google Sheets

After setting up your Google Sheet, return to Pabbly Connect and configure the webhook. Go to the ‘Extensions’ menu in Google Sheets, select ‘Add-ons’, and find Pabbly Connect Webhooks. Make sure it is installed and refresh your Google Sheet after installation.

Once refreshed, go back to ‘Extensions’, select Pabbly Connect Webhooks, and initiate the ‘Initial Setup’. Here, paste the webhook URL you copied earlier and specify the trigger column, which is where new data will be added. For example, if your titles are in column B, enter ‘B’ as the trigger column. After entering the details, send a test to ensure everything is working smoothly.


4. Using Pexels to Search for Videos

The next step in your automation process involves using Pexels to search for videos based on the keywords from your Google Sheet. In Pabbly Connect, add Pexels as the action application and select the action event as ‘Search for Videos’. This allows you to retrieve video URLs based on the keywords provided.

  • Select Pexels as the action application.
  • Choose ‘Search for Videos’ as the action event.
  • Map the keywords from the previous step to retrieve relevant video URLs.

After mapping the keywords, test the action to ensure that video URLs are successfully retrieved from Pexels. This step is crucial for ensuring that your Google Sheet will be updated with the correct video links.


5. Updating Google Sheets with Retrieved Video URLs

Finally, you will set up another action in Pabbly Connect to update your Google Sheet with the video URLs retrieved from Pexels. Select Google Sheets again as the action application and choose ‘Update Range Values’ as the action event.

In this setup, specify the range in your Google Sheet where the video URLs will be placed. For instance, if you want to update columns C to E, you would set the range as C2:E. Map the video URLs retrieved from Pexels to the corresponding columns in your Google Sheet. Once everything is mapped, send a test request to confirm that the updates are reflected in your Google Sheet.


Conclusion

In conclusion, using Pabbly Connect to automatically retrieve video URLs from Pexels into Google Sheets streamlines your workflow significantly. By setting up triggers and actions effectively, you can automate the process of updating your sheets with relevant video content based on your keywords. This integration not only saves time but also enhances productivity, allowing you to focus on other important tasks.

Ensure you check out Pabbly Connect to create business automation workflows and reduce manual tasks. Pabbly Connect currently offer integration with 2,000+ applications.

How to Generate 100% Unique Articles using AI with Pabbly Connect

Learn how to generate 100% unique articles using AI with Pabbly Connect. Follow this step-by-step tutorial to automate your blog writing process. Navigate the automation landscape confidently with clear, structured guidance suitable for professionals regardless of prior technical experience.

Watch Step By Step Video Tutorial Below


1. Setting Up Pabbly Connect for Article Generation

To generate 100% unique articles using AI, the first step is to set up Pabbly Connect. Access your Pabbly Connect dashboard by signing up for an account if you haven’t already. Once logged in, click on ‘Create Workflow’ and name your workflow, for example, ‘Google Sheets to OpenAI to WordPress’.

After naming your workflow, you will see two windows: the trigger window and the action window. The trigger window is where we will set up the Google Sheets integration to capture the titles for articles. The action window will facilitate the creation of the articles using OpenAI and posting them to WordPress.


2. Trigger Setup with Google Sheets in Pabbly Connect

In this section, we will configure the trigger for our workflow using Google Sheets. In the trigger window, select Google Sheets as the app and choose the event ‘New or Updated Spreadsheet Row’. This setup allows Pabbly Connect to monitor your Google Sheets for any new titles added.

After selecting the trigger event, copy the webhook URL provided by Pabbly Connect. This URL will be used to connect Google Sheets with Pabbly Connect. Follow these steps to set it up:

  • Go to your Google Sheet, click on Extensions, and select Get Add-ons.
  • Search for ‘Pabbly Connect Webhooks’ and install the add-on.
  • After installation, refresh your Google Sheet and go back to Extensions > Pabbly Connect Webhooks > Initial Setup.

In the Initial Setup window, select the sheet you want to use, paste the webhook URL you copied, and set the trigger column (the last column where data will be entered). Click on ‘Send Test’ to ensure the setup is working correctly.


3. Generating Content with OpenAI via Pabbly Connect

Now that we have set up the trigger, the next step is to generate content using OpenAI. In the action window of Pabbly Connect, search for OpenAI and select it as the app. Choose the action event ‘Generate Content’ to create unique articles based on the titles from Google Sheets.

You’ll need to connect your OpenAI account by entering your API key. To find your API key, log into OpenAI, hover over your profile, and select ‘View API Key’. Copy the key and paste it into Pabbly Connect. After connecting, configure the following settings:

  • Select the AI model (e.g., Text-Davinci-002).
  • Set the prompt to ‘Write a blog on {title}’ where {title} is mapped from the Google Sheets response.
  • Define the maximum tokens (default is 256) and other parameters as needed.

Once configured, click on ‘Save and Send Test Request’ to generate the article content. The response will include the generated blog content.


4. Posting Generated Content to WordPress via Pabbly Connect

The next step is to post the generated content to your WordPress site. In the action window of Pabbly Connect, add another action step and select WordPress as the app. Choose the action event ‘Create a Post’ to publish your unique articles.

Connect your WordPress account by entering the base URL, username, and password. After a successful connection, set the following parameters for your post:

Post Type: Select ‘Post’. Post Title: Map the title from the Google Sheets response. Post Content: Map the generated content from OpenAI.

After mapping these fields, click on ‘Save and Send Test Request’ to create the post as a draft on WordPress.


5. Updating Google Sheets with the Post Link

Finally, we need to update our Google Sheets with the link to the newly created post. Add another action step in Pabbly Connect and select Google Sheets again. Choose the action event ‘Update Cell Value’ to modify the cell with the blog link.

Connect again to Google Sheets and select the spreadsheet and sheet where you want to update the link. Specify the range to update the cell where the blog link should be placed. Map the row index from the previous steps to ensure the correct link is updated in the right row. After that, map the link response from WordPress to the value field.

Click on ‘Save and Send Test Request’ to complete the setup. Now, whenever you add a new title to Google Sheets, Pabbly Connect will automate the entire process from generating content to posting it on WordPress and updating the link back in Google Sheets.


Conclusion

By following this tutorial, you can efficiently generate 100% unique articles using AI with Pabbly Connect. This automation allows you to streamline your blogging process, saving time while ensuring high-quality content creation. Start using Pabbly Connect today to enhance your blogging workflow.

Ensure you check out Pabbly Connect to create business automation workflows and reduce manual tasks. Pabbly Connect currently offer integration with 2,000+ applications.

How HR Automation Saves Your Team Time & Stress with Pabbly Connect

Explore how Pabbly Connect streamlines HR processes through automation, saving time and reducing stress with real-world examples. Transform complex automation concepts into accessible, actionable steps that eliminate unnecessary manual work while maximizing existing application capabilities.

Watch Step By Step Video Tutorial Below


1. Automatically Shortlisting Applicants Using Pabbly Connect

In your organization, automating HR tasks like shortlisting applicants can save significant time and effort. Using Pabbly Connect, you can streamline the candidate selection process effectively. Start by creating a Google Form that candidates fill out to submit their applications.

Once the form is created, integrate it with Pabbly Connect. This integration allows you to set specific criteria for shortlisting candidates based on their skills and experience. For example, if a candidate indicates they have less than five years of experience, they can automatically be rejected. Candidates meeting the criteria will receive an email via Gmail confirming their application status.


2. Creating and Sending Offer Letters with Pabbly Connect

After hiring candidates, sending offer letters can be a tedious task. With Pabbly Connect, this process can be automated to save time. Enter the new employee’s details into a Google Sheet, and the automation will take care of the rest.

  • Input new candidate details into Google Sheets.
  • Use a Google Docs template to generate the offer letter.
  • Automatically send the generated offer letter to the candidate via Google Drive.

This automated process ensures that you can efficiently manage new hires without the manual effort of drafting and sending letters individually.


3. Setting Up an Automated Leave Management System Using Pabbly Connect

Managing employee leaves can be complex, but with Pabbly Connect, it becomes straightforward. First, create a leave management form using JotForm or a similar tool. Employees can fill out this form to request their leaves.

Once the form is submitted, Pabbly Connect will automatically store the leave requests in a Google Sheet. HR managers can then approve or reject these requests directly from the sheet. Based on their actions, notifications can be sent to employees via WhatsApp, email, or SMS, informing them of their leave status.


4. Sending Shift Timing Updates via Pabbly Connect

Keeping employees informed about their shift timings is crucial in organizations with multiple shifts. Using Pabbly Connect, you can automate this communication efficiently. Start by entering employee shift details into a Google Sheet.

  • Include employee names, phone numbers, and shift timings in the sheet.
  • Set up automation to send WhatsApp messages or emails with their shift details.

This ensures that all employees receive timely updates without the HR team needing to contact each individual manually.


5. Automatically Creating Salary Slips with Pabbly Connect

Generating salary slips for employees can be a time-consuming process, but it can be automated with Pabbly Connect. Start by entering all employee salary data into a Google Sheet. This data will serve as the basis for generating the salary slips.

Using the information in the Google Sheet, Pabbly Connect can create salary slips in Google Docs. Once the slips are generated, they can be sent via Gmail to each employee. This automation not only saves time but also reduces the stress of manual calculations and sending emails.


Conclusion

In conclusion, using Pabbly Connect for HR automation can significantly enhance efficiency by saving time and reducing stress. From shortlisting candidates to sending salary slips, each automated process allows HR teams to focus on more strategic tasks. Implementing these automations can transform your organization’s HR operations.

Ensure you check out Pabbly Connect to create business automation workflows and reduce manual tasks. Pabbly Connect currently offer integration with 2,000+ applications.

How to Add Dynamic Buttons in WhatsApp Messages Using Pabbly Connect

Learn how to add dynamic buttons in WhatsApp messages using Pabbly Connect and the WhatsApp Cloud API. Step-by-step tutorial included. Transform complex automation concepts into accessible, actionable steps that eliminate unnecessary manual work while maximizing existing application capabilities.

Watch Step By Step Video Tutorial Below


1. Setting Up Pabbly Connect for WhatsApp Integration

To add dynamic buttons in WhatsApp messages, start by accessing Pabbly Connect. This platform allows seamless integration between various applications, including WhatsApp Cloud API, Google Sheets, and more.

First, create an account on Pabbly Connect if you haven’t already. After signing in, you will be directed to the dashboard where you can create a new workflow. This workflow will facilitate the automation of sending WhatsApp messages with dynamic links.


2. Creating a WhatsApp Template with Dynamic Buttons

Next, you need to create a WhatsApp message template that includes dynamic buttons. To do this, navigate to your WhatsApp Cloud API dashboard. Here, you will create a new message template that will include the dynamic button links. using Pabbly Connect

  • Choose the category for your template.
  • Add a header, body, and button text.
  • Set the button action to ‘Visit Website’ and select ‘Dynamic’ for the URL type.

After configuring your template, ensure that you submit it for approval. Only approved templates can be used to send messages via the WhatsApp Cloud API. This process is crucial for ensuring that your messages are compliant with WhatsApp policies.


3. Setting Up Google Sheets for Data Management

Now that your WhatsApp template is ready, you need to set up a Google Sheet that will hold the data for your dynamic buttons. This sheet should include the URLs and any other relevant information that will be sent to your subscribers.

In your Google Sheet, ensure that you have a column that indicates when to send a message (for example, a column labeled ‘Send’). This column will trigger the automation in Pabbly Connect when a new entry is added.

  • Create a new Google Sheet and add columns for subscriber names, phone numbers, and article URLs.
  • Make sure to format the phone numbers correctly with country codes.
  • Fill in the data for your subscribers and ensure the trigger column is set.

Once your Google Sheet is set up, you’ll be able to pull this data into Pabbly Connect to automate the message sending process.


4. Automating Message Sending with Pabbly Connect

With your Google Sheet ready, return to Pabbly Connect to create an automation workflow. This workflow will connect Google Sheets to WhatsApp Cloud API, allowing you to send messages automatically when a new entry is added to your sheet.

In your Pabbly Connect workflow, set Google Sheets as the trigger application. Select the trigger event to be when a new row is added. You will need to connect your Google Sheets account and specify the sheet that contains your subscriber data.

After the trigger is set, add an action step to send a message via WhatsApp. Select WhatsApp Cloud API as the action application and choose ‘Send Template Message’ as the action event. You will need to map the fields from your Google Sheet to the WhatsApp message template you created earlier.


5. Testing and Finalizing Your Automation

Once your automation is set up, it’s crucial to test it to ensure everything works as expected. In Pabbly Connect, you can send a test message to verify that the dynamic buttons are functioning correctly.

To test, fill in your Google Sheet with a new entry and mark the trigger column. After a few moments, check your WhatsApp to see if the message was received. The dynamic button should link to the correct URL based on the data in your sheet.

After confirming that the test was successful, your automation is ready to go. From now on, whenever you add a new article link to your Google Sheet and mark it as ‘Send,’ Pabbly Connect will handle the rest, sending messages automatically to your subscribers.


Conclusion

By utilizing Pabbly Connect, you can easily add dynamic buttons to your WhatsApp messages, automating the process of sending updates to your subscribers. This integration streamlines communication and ensures that your audience always has access to the latest content.

Ensure you check out Pabbly Connect to create business automation workflows and reduce manual tasks. Pabbly Connect currently offer integration with 2,000+ applications.

Integrate YouTube Video Details in Google Sheets Using Pabbly Connect

Learn how to automate the process of adding YouTube video details to Google Sheets using Pabbly Connect. Step-by-step guide included. Explore efficient methods for automating routine tasks with clear, concise instructions suited for both newcomers and experienced professionals.

Watch Step By Step Video Tutorial Below


1. Accessing Pabbly Connect for Integration

To begin adding YouTube video details in Google Sheets, access Pabbly Connect by visiting Pabbly.com/connect. This platform enables seamless integration between various applications like YouTube and Google Sheets.

Upon reaching the Pabbly Connect landing page, you will find options to either sign in or sign up. If you are a new user, click on the sign-up tab, which will take less than two minutes. Upon account creation, you will receive 100 free tasks to use for your integrations.


2. Creating Your Workflow in Pabbly Connect

Once logged in, navigate to the dashboard and click on the ‘Create Workflow’ button. Here, you will name your workflow. For this integration, name it ‘Add YouTube Video Details in Google Sheets.’ This title reflects the purpose of your automation.

  • Click on the ‘Create’ button to initialize your workflow.
  • You will be prompted to set up a trigger and an action application.

In this case, select YouTube as your trigger application. The trigger event will be ‘New Video in Channel’ which activates when a new video is uploaded. Click on ‘Connect’ to link your YouTube account with Pabbly Connect.


3. Setting Up the YouTube Integration

After connecting to YouTube, you need to authorize Pabbly Connect to access your YouTube account. Select the appropriate account and click ‘Continue’ to complete the authorization process. using Pabbly Connect

Next, you will need to provide your Channel ID. This ID can be found in your YouTube channel settings. Once you have entered the Channel ID, click on ‘Send Test Request’ to retrieve the details of the latest video.

  • Ensure that the test request retrieves the video title, URL, and description.
  • If the description is incomplete, proceed to the next step.

To get the complete description, repeat the process by selecting YouTube again as your action application, and choose the event ‘List Video by ID.’ This will allow you to fetch the full details of the video.


4. Integrating Google Sheets with Pabbly Connect

Now that you have the complete video details, it’s time to send this information to Google Sheets. Select Google Sheets as your action application and choose the action event ‘Add New Row.’ This will automatically add the video details to your Google Sheet. using Pabbly Connect

Connect your Google Sheets account by clicking on ‘Add New Connection.’ Authorize the connection and select the specific spreadsheet you created for this integration. Map the fields accordingly to ensure the video title, URL, description, and published date are correctly added to the sheet.

Map the video title, URL, and description from the previous steps. Format the published date correctly to ensure it appears as intended in your sheet.

After mapping all the necessary fields, click on ‘Save and Send Test Request’ to confirm that the data is being sent to Google Sheets successfully.


5. Testing the Integration in Real-Time

With your workflow set up, it’s crucial to test the integration to ensure it works in real-time. After setting everything up, upload a new video to your YouTube channel. Make sure to include a unique title and description. using Pabbly Connect

After uploading, remember that Pabbly Connect checks for new data every 10 minutes. After this interval, check your Google Sheets to see if the new video details have been added. This confirms that the integration is functioning as expected.

If the details appear in your Google Sheets, your integration is successful! You can now automate the process of adding YouTube video details to your Google Sheets every time a new video is uploaded.


Conclusion

In this tutorial, we explored how to use Pabbly Connect to automate the process of adding YouTube video details to Google Sheets. By following the steps outlined, you can streamline your workflow and ensure that your video information is always up to date in your sheets.

Ensure you check out Pabbly Connect to create business automation workflows and reduce manual tasks. Pabbly Connect currently offer integration with 2,000+ applications.

Integrate simPRO Service Job Details to Google Sheets Using Pabbly Connect

Learn how to integrate simPRO service job details into Google Sheets using Pabbly Connect. Follow our step-by-step tutorial for seamless automation. Discover hidden automation capabilities within your existing tools. This guide shows you how to connect your essential applications and permanently eliminate redundant manual processes.

Watch Step By Step Video Tutorial Below


1. Accessing Pabbly Connect for Integration

To begin integrating simPRO service job details with Google Sheets, you need to access Pabbly Connect. Start by navigating to the Pabbly Connect website at Pabbly.com/connect. If you already have an account, simply sign in; if not, click on the sign-up option to create a new account.

Once logged in, you will see the dashboard where you can create a new workflow. Click on the ‘Create Workflow’ button to initiate the process of adding simPRO service job details to Google Sheets. Here, you will name your workflow, for instance, ‘Add simPRO Service Job Details to Google Sheets’. This name will help you identify the workflow later.


2. Setting Up the Trigger in Pabbly Connect

In this step, you will set up the trigger application in Pabbly Connect. Your trigger application will be simPRO, and you need to select the event that will initiate the workflow. Choose ‘New Job’ as the trigger event, which means that every time a new job is created in simPRO, the workflow will run.

After selecting the trigger event, Pabbly Connect will provide you with a webhook URL. This URL acts as a bridge between simPRO and Pabbly Connect, allowing it to access the necessary information. You will need to copy this URL and set up a webhook subscription in your simPRO account.

  • Log in to your simPRO account and navigate to Settings.
  • Go to API and then Webhook Subscriptions.
  • Create a new subscription, paste the copied webhook URL, and toggle the necessary settings.

Once the webhook is set up, return to Pabbly Connect, which will be waiting for the webhook response, indicating that the integration is ready to test.


3. Creating a Service Job in simPRO

Now that your trigger is set up, it’s time to create a service job in simPRO. In the simPRO interface, navigate to the Jobs section and click on ‘Service Job’. Fill in the customer details, site information, and job title. For example, you might enter ‘User 123’ as the customer name and ‘First Job’ as the job title.

After filling in the necessary fields, click on ‘Finish’ to save the job. This action will trigger the webhook you set up earlier, and you should see a response in Pabbly Connect. This response will include details such as the job ID and other relevant information.

  • Ensure all fields are filled correctly to avoid errors.
  • Use existing customer and site information to streamline the process.

With the job created, you can now proceed to the next step of retrieving the job details using Pabbly Connect.


4. Retrieving Job Details Using Pabbly Connect

Next, you need to retrieve the job details using Pabbly Connect. Add another action step in your workflow and select simPRO once again. This time, choose the event ‘Get Job by ID’. This action allows you to fetch detailed information about the job you just created.

After selecting the action event, connect to the existing simPRO connection. You will need to map the job ID and company ID from the previous webhook response to ensure that the correct details are fetched. Mapping is crucial as it ensures that the integration works seamlessly for future jobs as well.

Once you have mapped the necessary IDs, click on ‘Save and Send Test Request’. You should receive a detailed response containing all the job details, which you can then send to Google Sheets.


5. Adding Job Details to Google Sheets

Finally, you will add the job details to Google Sheets using Pabbly Connect. Add another action step and select Google Sheets as the application. Choose the action event ‘Add New Row’. This action will automatically add a new row in your specified Google Sheets every time a new job is created in simPRO.

Connect Pabbly Connect to your Google Sheets account, and authorize it to access your sheets. Next, select the spreadsheet where you want the job details to be stored. You will need to map the fields from the previous step to the corresponding columns in Google Sheets, such as customer name, site name, job title, and issue date.

After mapping the fields, click on ‘Save and Send Test Request’. You should see a confirmation that the data has been successfully added to your Google Sheets. You can check your Google Sheets to verify that the job details have been recorded accurately.


Conclusion

In this tutorial, we demonstrated how to integrate simPRO service job details into Google Sheets using Pabbly Connect. By following these steps, you can automate the process of transferring job details seamlessly, enhancing your workflow efficiency. With Pabbly Connect, integrating multiple applications has never been easier.

Ensure you check out Pabbly Connect to create business automation workflows and reduce manual tasks. Pabbly Connect currently offer integration with 2,000+ applications.