How to Promote and Market Your Ayurvedic Products Using WhatsApp with Pabbly Connect

Learn how to integrate Facebook and WhatsApp for promoting Ayurvedic products using Pabbly Connect. Step-by-step guide with detailed instructions. Implement the precise methodologies leading organizations use to automate repetitive tasks, illustrated with practical examples designed for immediate application.

Watch Step By Step Video Tutorial Below


1. Accessing Pabbly Connect for Integration

To promote and market your Ayurvedic products using WhatsApp, the first step is to access Pabbly Connect. Visit the URL Pabbly.com/connect to reach the landing page of this powerful automation tool.

Once there, you will see options to sign in or sign up for free. If you already have an account, simply sign in. New users can create an account quickly, and upon signing up, you will receive 100 free tasks to get started.


2. Creating a Workflow in Pabbly Connect

After signing in, navigate to the dashboard of Pabbly Connect. Click on the ‘Create Workflow’ button to start building your automation. Name your workflow something descriptive, like ‘Promote and Market Your Ayurvedic Products Using WhatsApp’.

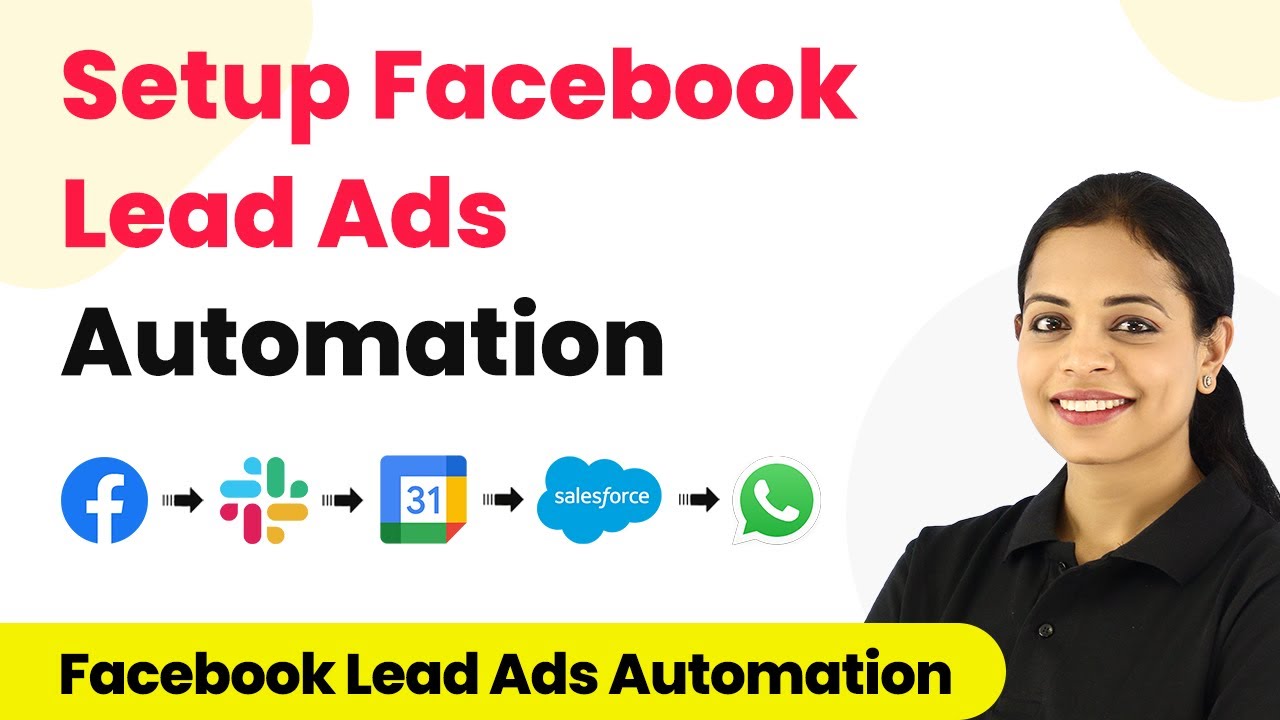
In this workflow, your trigger application will be Facebook Lead Ads, and the action application will be WhatsApp. This setup means every time you receive a new lead from Facebook, a WhatsApp message will automatically be sent to that lead.

  • Click on the ‘Create’ button to proceed.
  • Select ‘Facebook Lead Ads’ as your trigger application.
  • Choose the ‘New Lead Instant’ trigger event.

Once these steps are completed, you need to connect your Facebook account to Pabbly Connect to start receiving leads.


3. Configuring Facebook Lead Ads in Pabbly Connect

With your trigger set, the next step in Pabbly Connect is to configure your Facebook Lead Ads. You will be prompted to connect your Facebook account, which allows Pabbly Connect to access your lead data.

After connecting, select the Facebook page you are using for your Ayurvedic products. Ensure you have a lead generation form created for this page. Once selected, click on ‘Save and Send Test Request’ to test the connection.

  • Choose your specific lead generation form.
  • Use the Facebook Lead Ads Testing Tool to create a test lead.
  • Submit the form to confirm data reception.

After submitting the test lead, you should see the data captured in Pabbly Connect, confirming that the integration is successful.


4. Sending WhatsApp Messages via Pabbly Connect

Now that your Facebook Lead Ads are connected, it’s time to set up the action in Pabbly Connect. Choose the WhatsApp Cloud API as your action application. The action event will be to send a template message to the new lead.

To establish this connection, you will need your WhatsApp Cloud API credentials, including the token, phone number ID, and WhatsApp business account ID. These can be obtained from your Meta developer account.

Paste the token, phone number ID, and WhatsApp account ID into the fields provided. Map the data from the previous step to personalize the message. Select your pre-written WhatsApp message template.

After configuring these settings, click on ‘Save and Send Test Request’ to check if the WhatsApp message is sent successfully.


5. Testing and Verifying Your Integration

Once the WhatsApp message has been configured in Pabbly Connect, it is crucial to test the entire workflow. Use the Facebook Lead Ads Testing Tool to submit another test lead and verify that a WhatsApp message is sent to the provided phone number.

Check your WhatsApp account to see if you received the message. It should include the brochure and relevant details about your Ayurvedic products. If the message is received, it indicates that the integration is functioning correctly.

For future leads, this automated process will continue to operate seamlessly, ensuring that every new lead receives immediate communication via WhatsApp.


Conclusion

In conclusion, using Pabbly Connect to integrate Facebook Lead Ads and WhatsApp allows you to efficiently market your Ayurvedic products. This automation not only saves time but also enhances customer engagement through immediate communication. By following the steps outlined in this tutorial, you can successfully set up this integration and promote your products effectively.

Ensure you check out Pabbly Connect to create business automation workflows and reduce manual tasks. Pabbly Connect currently offer integration with 2,000+ applications.

How to Setup Facebook Lead Ads Automation with Slack, Google Calendar, Salesforce & WhatsApp using Pabbly Connect

Learn how to automate Facebook Lead Ads with Slack, Google Calendar, Salesforce, and WhatsApp using Pabbly Connect. Follow this step-by-step tutorial for seamless integration. Learn to create powerful connections between your critical applications without requiring specialized programming knowledge or extensive technical background.

Watch Step By Step Video Tutorial Below


1. How to Setup Pabbly Connect for Facebook Lead Ads Automation

To begin the automation process using Pabbly Connect, first, visit the Pabbly Connect website at Pabbly.com/connect. Here, you will find options to sign in or sign up for free.

If you are a new user, click on the sign-up button and complete the registration process. Once registered, you will receive 100 free tasks. After signing in, navigate to the dashboard and click on the ‘Create Workflow’ button to start setting up your automation.


2. Creating a Workflow in Pabbly Connect

In Pabbly Connect, you need to name your workflow for easy identification. For instance, you can name it ‘Setup Facebook Lead Ads Automation with Slack, Google Calendar, Salesforce, and WhatsApp’. This will help you keep track of the specific integration you are working on.

After naming your workflow, you will encounter two essential components: Trigger and Action. The Trigger is what initiates the workflow, while the Action is what occurs as a result. Here’s how to set it up:

  • Select Facebook Lead Ads as the Trigger application.
  • Choose the Trigger event as ‘New Lead Instant’.
  • Click on Connect and add a new connection with your Facebook account.

Once you have connected, select the relevant Facebook page and lead generation form. This setup ensures that every time a new lead is captured through Facebook, it will trigger the workflow.


3. Integrating Slack with Pabbly Connect

After setting up the trigger with Facebook Lead Ads, the next step is to integrate Slack using Pabbly Connect. This allows your team to be notified immediately when a new lead is generated.

Select Slack as the Action application and choose the action event as ‘Send Channel Message’. You will need to connect your Slack account, allowing Pabbly Connect to access your Slack workspace. Once connected, map the necessary fields to create a message that includes the lead’s details.

  • Choose the channel where the message should be sent.
  • Compose a message that includes the lead’s name, email address, contact number, and class.

Finally, save the settings and send a test request to ensure that the message is being sent correctly to your Slack channel.


4. Adding Leads to Salesforce through Pabbly Connect

Next, you will want to add the new lead to your CRM, Salesforce, using Pabbly Connect. Select Salesforce as the next action application and choose the action event ‘Create Contact’.

Connect your Salesforce account to Pabbly Connect and allow access. You will need to map the lead’s details from the previous steps into the required fields in Salesforce, such as first name, last name, email address, and phone number.

Ensure you split the full name into first and last name using the Text Formatter feature in Pabbly Connect. Save and send a test request to confirm that the contact is created successfully in Salesforce.

This integration will help you keep your leads organized and accessible for follow-ups.


5. Adding Leads to Google Calendar Events via Pabbly Connect

The final step in this automation process is to add the new leads to a Google Calendar event using Pabbly Connect. Select Google Calendar as the action application and choose the action event ‘Add Guest to Event’.

Connect your Google Calendar account and select the specific event where you want to add the leads. Ensure you map the email address of the lead to the guest field. This will automatically register the lead for the event.

Select the calendar and the event for which guests should be added. Save and send a test request to verify that the lead is added as a guest.

Once this is set up, you can be assured that all new leads will be automatically registered for your events, enhancing your communication and engagement efforts.


6. Sending WhatsApp Messages Using Pabbly Connect

As a final touch, you can send a confirmation message to the lead via WhatsApp using Pabbly Connect. Select WhatsApp Cloud API as the action application and choose ‘Send Template Message’ as the action event.

Connect your WhatsApp account to Pabbly Connect and fill in the necessary details, including the template name and the lead’s mobile number. Ensure that you format the mobile number correctly by including the country code without the plus sign.

After setting up the message template, which can include variables like the lead’s name and event details, save the settings and send a test request. This will confirm that the lead receives a personalized WhatsApp message about their registration.


Conclusion

In conclusion, using Pabbly Connect to automate Facebook Lead Ads with Slack, Google Calendar, Salesforce, and WhatsApp streamlines your lead management process. Each step, from capturing leads to notifying your team and adding contacts to your CRM, is simplified through effective integration. This setup not only enhances team communication but also improves lead engagement through timely notifications.

Ensure you check out Pabbly Connect to create business automation workflows and reduce manual tasks. Pabbly Connect currently offer integration with 2,000+ applications.

Top 5 HubSpot Automation Tutorials Using Pabbly Connect

Explore the top 5 HubSpot automation tutorials leveraging Pabbly Connect for seamless integration with applications like Google Sheets, WhatsApp, Excel, and Facebook. Explore systematic approaches to creating efficient automation solutions that convert technical concepts into practical, implementable instructions.

Watch Step By Step Video Tutorial Below


1. Integrate HubSpot with Google Sheets Using Pabbly Connect

Pabbly Connect allows you to seamlessly integrate HubSpot with Google Sheets. This integration enables you to automatically add contacts from Google Sheets to HubSpot CRM. Every time a new row is added to your Google Sheet, Pabbly Connect will convert this information into a contact in HubSpot.

To set this up, follow these steps:

  • Log in to your Pabbly Connect account.
  • Create a new workflow by selecting Google Sheets as the trigger application.
  • Choose the trigger event as ‘New Row’.
  • Connect your Google Sheets account and select the appropriate spreadsheet.
  • Set HubSpot as the action application and select ‘Create Contact’ as the action event.

By using Pabbly Connect, you can efficiently manage and organize your CRM data without manual entry, saving you valuable time.


2. Send WhatsApp Messages from HubSpot Using Pabbly Connect

With Pabbly Connect, you can automate sending WhatsApp messages to leads whenever there is a new form submission in HubSpot. This feature enhances communication with your leads and keeps them informed.

To set up this automation, follow these steps:

  • Log into Pabbly Connect and create a new workflow.
  • Select HubSpot as the trigger application and choose ‘New Form Submission’ as the trigger event.
  • Connect your HubSpot account to Pabbly Connect.
  • Set WhatsApp as the action application and choose ‘Send Message’ as the action event.
  • Map the required fields and customize your message.

This integration through Pabbly Connect ensures that your leads receive timely responses, enhancing your marketing efforts.


3. Create Deals in HubSpot CRM from Microsoft Excel Using Pabbly Connect

Pabbly Connect makes it easy to create deals in HubSpot CRM whenever new contact details are added in Microsoft Excel. This integration streamlines your project management and helps in tracking potential sales.

Here’s how to set this up:

Start by logging into your Pabbly Connect account. Create a new workflow and select Microsoft Excel as the trigger application. Choose ‘New Row’ as the trigger event. Connect your Microsoft Excel account and select the spreadsheet with contact details. Set HubSpot as the action application and select ‘Create Deal’ as the action event.

This way, every time you add a new contact in Excel, Pabbly Connect will automatically create a deal in HubSpot, making it easier to manage your sales processes.


4. Send SMS to HubSpot Records Using Pabbly Connect

Another powerful feature of Pabbly Connect is the ability to send SMS notifications to HubSpot records. This helps in keeping your leads informed about important updates or offers.

To set up SMS notifications, follow these steps:

Log into Pabbly Connect and create a new workflow. Select HubSpot as the trigger application and choose ‘New Contact’ as the trigger event. Connect your HubSpot account to Pabbly Connect. Set your SMS application as the action application and select ‘Send SMS’ as the action event. Map the necessary fields and customize your SMS content.

This integration allows you to reach out to your leads effectively through SMS, enhancing your overall marketing strategy with Pabbly Connect.


5. Connect Facebook Leads to HubSpot Using Pabbly Connect

Lastly, Pabbly Connect enables you to automatically add new leads from Facebook lead ads as contacts in HubSpot. This integration simplifies the process of managing leads generated from social media.

To set up this integration, follow these steps:

Log in to your Pabbly Connect account and create a new workflow. Select Facebook as the trigger application and choose ‘New Lead’ as the trigger event. Connect your Facebook account to Pabbly Connect. Set HubSpot as the action application and select ‘Create Contact’ as the action event.

This way, every time you receive a new lead from Facebook, Pabbly Connect will automatically add that lead as a contact in HubSpot, allowing for better lead management.


Conclusion

In summary, Pabbly Connect is a powerful tool that facilitates seamless integration between HubSpot and various applications like Google Sheets, WhatsApp, Excel, and Facebook. By automating these processes, you can enhance your marketing efforts and improve lead management effectively.

Ensure you check out Pabbly Connect to create business automation workflows and reduce manual tasks. Pabbly Connect currently offer integration with 2,000+ applications.

Send Black Friday Sale Messages with WhatsApp Cloud API Using Pabbly Connect

Learn how to send Black Friday sale messages using Pabbly Connect and WhatsApp Cloud API. Follow this detailed tutorial for seamless integration with Google Sheets and more.

Watch Step By Step Video Tutorial Below


1. Setting Up Pabbly Connect for WhatsApp Integration

To send Black Friday sale messages using Pabbly Connect, first navigate to the Pabbly Connect website. You can access it by typing ‘Pabbly.com/connect’ in your browser. Once there, you’ll see options to either sign in or sign up for a new account.

If you are new to Pabbly Connect, click on the ‘Sign Up’ button. The account creation process is quick and provides you with 100 free tasks to get started. After signing in, you will be directed to the applications page.


2. Creating a Workflow for Black Friday Sale Messages

After accessing the dashboard of Pabbly Connect, the next step is to create a workflow. Click on the ‘Create Workflow’ button. A dialog box will appear asking you to name your workflow. For this integration, name it ‘Send Black Friday Sale Messages with WhatsApp Cloud API’ and click ‘Create’.

  • Click on ‘Create Workflow’ to initiate.
  • Name your workflow appropriately for easy identification.
  • Select the trigger application as ‘Google Sheets’.
  • Set the action application as ‘WhatsApp Cloud API’.

After naming your workflow, you will see options for setting up triggers and actions. Since you want to send messages on a specific date, select the ‘Scheduled’ feature from Pabbly Connect. Choose the date and time for your messages to be sent, ensuring it aligns with your Black Friday sale schedule.


3. Connecting Google Sheets to Pabbly Connect

Next, you will need to connect your Google Sheets to Pabbly Connect. Choose Google Sheets as your action application and select the action event as ‘Get Rows’. This allows Pabbly Connect to retrieve data from your specified Google Sheet.

Click on ‘Connect’ to link your Google account with Pabbly Connect. You will need to grant access to your Google Sheets data. Once connected, select the spreadsheet that contains your customer details for the Black Friday sale.

  • Select the correct spreadsheet containing customer data.
  • Map the data range from A2 to D6 (or further if needed).
  • Click ‘Save and Send Test Request’ to ensure data retrieval is successful.

After mapping the data, you should receive a response containing customer details. This data will be used to personalize your messages sent via WhatsApp.


4. Sending Messages via WhatsApp Cloud API

With your Google Sheets data now integrated, the next step is to send messages through WhatsApp using Pabbly Connect. Choose the WhatsApp Cloud API as your action application and select ‘Send Template Message’ as the action event.

To connect to WhatsApp, you will need a token, phone number ID, and WhatsApp business account ID. These can be obtained from the Meta Developer page. Once you have this information, paste it into the respective fields in Pabbly Connect.

Ensure you have the necessary credentials ready for WhatsApp integration. Map the message template and recipient’s mobile number correctly. Test the setup by clicking ‘Save and Send Test Request’ to verify message delivery.

Upon successful testing, you will be able to see the messages delivered to your WhatsApp, confirming that the integration is working seamlessly.


5. Finalizing Your Black Friday Sale Message Workflow

The last step in your workflow setup using Pabbly Connect is to ensure everything is configured correctly. Review the entire workflow from scheduling the message to sending it via WhatsApp. Make sure all data fields are correctly mapped and the message template is set up as desired.

Once you are satisfied with the setup, you can activate your workflow. This will ensure that your Black Friday sale messages are sent out automatically at the scheduled time, allowing you to focus on other aspects of your sale.

Remember, with Pabbly Connect, you can easily manage multiple integrations and automate various tasks, making your business operations much more efficient. If you encounter any issues, refer to the Pabbly Connect support for assistance.


Conclusion

Using Pabbly Connect, you can effectively send Black Friday sale messages via WhatsApp Cloud API. This automation streamlines your communication process, ensuring timely delivery of promotional messages to your customers.

Ensure you check out Pabbly Connect to create business automation workflows and reduce manual tasks. Pabbly Connect currently offer integration with 2,000+ applications.

Top 5 Recruitment Automations to Save Time and Efforts Using Pabbly Connect

Discover the top 5 recruitment automations using Pabbly Connect to streamline your hiring process across platforms like Slack, Facebook, and LinkedIn. Discover hidden automation capabilities within your existing tools. This guide shows you how to connect your essential applications and permanently eliminate redundant manual processes.

Watch Step By Step Video Tutorial Below


1. Post Job Listings Across Multiple Platforms Using Pabbly Connect

The first automation is about posting job listings across multiple platforms using Pabbly Connect. This automation streamlines the process of sharing job vacancies on platforms like Facebook, Twitter, and LinkedIn. Instead of manually posting each job listing, you can automate this process by entering job details into a Google Sheet.

Once you set up the integration in Pabbly Connect, every time you add a new job listing in your Google Sheet, the automation triggers and posts the job on your selected social media platforms. This saves significant time and effort, allowing you to focus on other essential recruitment tasks.


2. Send Job Alerts to Candidates on WhatsApp via Pabbly Connect

The second automation allows you to send job alerts to candidates on WhatsApp using Pabbly Connect. This is particularly useful for candidates who have expressed interest in job openings but may not be aware of new vacancies. By storing candidate details in a Google Sheet, you can automate sending WhatsApp notifications whenever a new job is published.

  • Store candidate details in Google Sheets.
  • Set up an automation in Pabbly Connect to trigger WhatsApp notifications.
  • Automatically notify candidates when new job positions are available.

This automation ensures that interested candidates are promptly informed about new job opportunities, enhancing your recruitment efficiency.


3. Get Slack Notifications for New Job Applications via Pabbly Connect

The third automation focuses on receiving Slack notifications for new job applications using Pabbly Connect. This integration is beneficial if you have a job application form on your website. When candidates apply through this form, Pabbly Connect automatically sends a notification to your designated Slack channel.

This process keeps your team updated on new applications in real-time, ensuring that no application goes unnoticed. Setting up this integration is straightforward and allows you to manage applications more effectively.


4. Automatically Shortlist Candidates and Send Emails Using Pabbly Connect

The fourth automation streamlines the candidate shortlisting process using Pabbly Connect. Instead of manually sorting through applications, you can set conditions in Pabbly Connect to automatically filter candidates based on specific criteria. When candidates fill out a Google Form, the automation evaluates their details against your criteria.

  • Create a Google Form for job applications.
  • Set up a workflow in Pabbly Connect to evaluate applications.
  • Automatically send approval or rejection emails based on the evaluation.

This automation not only saves time but also enhances the accuracy of your hiring process, allowing you to focus on the best candidates.


5. Notify Team Members About New Hires Using Pabbly Connect

The final automation is about notifying team members when a new candidate is hired using Pabbly Connect. This ensures that your team is always informed about new hires. Whenever a new candidate is added to your recruitment application, Pabbly Connect can send notifications to your team’s preferred communication platform, such as Slack or Telegram.

This integration helps maintain transparency within your team and fosters a collaborative environment. By automating this notification process, you can ensure that everyone is on the same page regarding new team members.


Conclusion

In conclusion, utilizing Pabbly Connect for recruitment automations can significantly enhance your hiring process. From posting job listings to notifying team members about new hires, these automations save time and effort, allowing you to focus on finding the right candidates. Implementing these automations will streamline your recruitment efforts and improve overall efficiency.

Ensure you check out Pabbly Connect to create business automation workflows and reduce manual tasks. Pabbly Connect currently offer integration with 2,000+ applications.

How to Create Records in Airtable for Delighted Responses Using Pabbly Connect

Learn how to automate the creation of records in Airtable from Delighted responses using Pabbly Connect. Follow this step-by-step guide for seamless integration. Navigate the automation landscape confidently with clear, structured guidance suitable for professionals regardless of prior technical experience.

Watch Step By Step Video Tutorial Below


1. Setup Pabbly Connect for Automation

To create records in Airtable for Delighted responses, we will use Pabbly Connect. Start by signing up for a Pabbly Connect account using the signup link provided. Once logged in, navigate to your dashboard.

Click on ‘Create Workflow’ and name it, for example, ‘Delighted to Airtable’. This workflow will facilitate the automation process, allowing you to integrate Delighted and Airtable seamlessly through Pabbly Connect.


2. Setting Up the Trigger for Delighted Responses

In the trigger window of Pabbly Connect, search for and select the Delighted app. Choose ‘New Survey Response’ as the trigger event. This setup will allow you to capture responses from your surveys automatically.

After selecting the trigger event, Pabbly Connect will provide you with a webhook URL. Copy this URL and head to your Delighted account. In Delighted, navigate to the Integrations section and select ‘Webhook’. Here, add a new rule and paste the copied webhook URL into the designated field.

  • Select the type of responses you want to capture (e.g., all responses).
  • Save the rule and enable it.

Click on ‘Send Test’ to send a test response to Pabbly Connect. Check back in your workflow to confirm that the response has been received.


3. Configuring the Action to Create Records in Airtable

Next, scroll down to the action window in Pabbly Connect and search for Airtable. Select it and choose ‘Create Record’ as the action event. You will then need to connect your Airtable account by entering the API key, which you can find in your Airtable account settings.

Once connected, select the base and table where you want to create the records. For this example, choose the base named ‘Delighted’ and the table named ‘Table 2’. Pabbly Connect will display the fields from your Airtable table, allowing you to map the data received from Delighted.

  • Map the name, email, score, and comment fields to the corresponding data from Delighted.
  • Ensure all necessary fields are mapped correctly before proceeding.

After mapping the fields, click on ‘Save and Send Test Request’ to check if the record is created successfully in Airtable.


4. Formatting Date and Time for Airtable Records

To ensure the date and time are in a readable format, use the DateTime Formatter feature in Pabbly Connect. Add an action step before the Airtable step and select DateTime Formatter.

Choose ‘Format Date with Time Zone’ as the action event. Map the created date from the Delighted response and select the current format as timestamp. Set the desired output format and time zone (for example, Asia/Kolkata) to convert the timestamp into a standard date format.

After setting up the DateTime Formatter, reconnect your Airtable account in Pabbly Connect to ensure the new mapping is recognized. Remap the date and time field in Airtable with the formatted date from the DateTime Formatter.


5. Testing the Automation in Real-Time

Finally, it’s time to test the entire automation workflow. Send a real-time survey through Delighted to a test user. Once the user responds, check your Airtable database to see if the response has been recorded correctly.

If everything is set up correctly, you will see the new record in Airtable reflecting the user’s name, email, score, comment, and the correct date and time. This confirms that your automation using Pabbly Connect is functioning as intended.

With this setup, every time a user responds to your survey in Delighted, their responses will automatically populate in your Airtable records, streamlining your data collection process.


Conclusion

Using Pabbly Connect, you can effortlessly automate the integration between Delighted and Airtable, ensuring that all survey responses are captured in real-time. This setup not only saves time but also enhances data accuracy and accessibility.

Ensure you check out Pabbly Connect to create business automation workflows and reduce manual tasks. Pabbly Connect currently offer integration with 2,000+ applications.

Integrate Heights Platform with Google Sheets Using Pabbly Connect

Learn how to automatically add students from Heights Platform to Google Sheets using Pabbly Connect. Step-by-step guide to streamline your workflow. Discover hidden automation capabilities within your existing tools. This guide shows you how to connect your essential applications and permanently eliminate redundant manual processes.

Watch Step By Step Video Tutorial Below


1. Accessing Pabbly Connect for Heights Platform Integration

To start integrating Heights Platform with Google Sheets, you need to access Pabbly Connect. This powerful platform enables seamless automation between various applications. Begin by visiting the Pabbly Connect website and signing up for a free account if you are a new user.

Once you have signed up, log in to your Pabbly Connect dashboard. From here, click on the blue button labeled ‘Create Workflow’. This initiates the process of setting up your automation. You will be prompted to name your workflow, so enter something descriptive like ‘Collect Heights Platform Students in Google Sheets Automatically’.


2. Setting Up Trigger Event in Pabbly Connect

In this step, you will configure the trigger event to start your automation process using Pabbly Connect. Select ‘Heights Platform’ as your trigger application. The trigger event should be set to ‘New Student Signup’. This means that every time a new student registers on the Heights Platform, the automation will be triggered.

  • Choose ‘Heights Platform’ as the trigger application.
  • Set the trigger event to ‘New Student Signup’.
  • Connect your Heights Platform account by providing the required API key and subdomain.

After entering the necessary details, click on ‘Save and Send Test Request’. This action will prepare Pabbly Connect to receive student data from Heights Platform. Ensure you create a test student in Heights Platform to capture the response.


3. Capturing Student Data from Heights Platform

Now that you have set up the trigger, it is time to capture the student data using Pabbly Connect. When you create a new student in Heights Platform, their details such as name and email will be sent to Pabbly Connect. This is essential for the subsequent step where we will add this data to Google Sheets.

To test this, open the Heights Platform landing page and sign up a new student. For example, use the name ‘Dummy User’ and an email like ‘[email protected]’. After signing up, return to Pabbly Connect. You should see the student details captured in the response section, confirming that the integration is working correctly.


4. Adding Student Data to Google Sheets via Pabbly Connect

With the student data captured, the next step is to add this information to Google Sheets using Pabbly Connect. Select ‘Google Sheets’ as the action application. The action event should be set to ‘Add New Row’. This action will ensure that every new student signup results in a new row being added to your designated Google Sheets document.

  • Select ‘Google Sheets’ as the action application.
  • Set the action event to ‘Add New Row’.
  • Connect your Google account and select the spreadsheet where you want the data to be added.

Once connected, map the student data fields from the previous step to the corresponding columns in Google Sheets. For instance, map the ‘Name’ to the name column and ‘Email’ to the email column. After mapping, click on ‘Save and Send Test Request’ to verify that the data is correctly added to Google Sheets.


5. Finalizing the Heights Platform and Google Sheets Integration

After confirming that the student data is successfully added to Google Sheets, your integration process using Pabbly Connect is complete. This automation will now run in the background, ensuring that every new student who signs up on Heights Platform will automatically have their details recorded in Google Sheets.

This one-time setup allows you to focus on your course while Pabbly Connect handles the data management. You can revisit the Pabbly Connect dashboard anytime to monitor or adjust your automation settings as needed.


Conclusion

In this tutorial, we explored how to integrate Heights Platform with Google Sheets using Pabbly Connect. This automation streamlines the process of collecting student data, ensuring you have real-time access to all signups. With Pabbly Connect, you can enhance your workflow and focus on delivering quality education.

Ensure you check out Pabbly Connect to create business automation workflows and reduce manual tasks. Pabbly Connect currently offer integration with 2,000+ applications.

Automatically Share Blogger Posts to Medium Using Pabbly Connect

Learn how to automatically share your Blogger posts to Medium using Pabbly Connect. Follow this step-by-step guide for seamless integration. Eliminate manual repetitive tasks from your workflow. Discover proven automation methods with intuitive steps designed for efficiency-minded professionals.

Watch Step By Step Video Tutorial Below


1. Accessing Pabbly Connect for Integration

To automatically share Blogger posts to Medium, you first need to access Pabbly Connect. This powerful integration platform allows you to connect various applications seamlessly. Start by visiting the Pabbly Connect website and signing in or creating a new account if you are a new user.

Once logged in, you will be directed to the Pabbly Connect dashboard. Here, you can begin creating your automation workflow. For this integration, we will connect Google Blogger and Medium through Pabbly Connect, allowing for automatic sharing of posts.


2. Creating an Automation Workflow in Pabbly Connect

After accessing your Pabbly Connect dashboard, you can start by creating a new workflow. Click on the ‘Create Workflow’ button and give your automation a name, such as ‘Automatically Share Blogger Posts to Medium’. This title helps you identify the workflow easily. using Pabbly Connect

  • Select Google Blogger as the trigger application.
  • Choose the trigger event as ‘New Post’ when a new post is published.
  • Connect your Google Blogger account by signing in and granting access.

After successfully connecting your Blogger account, select the specific blog and set the status to ‘Live’. This ensures that only published posts are shared automatically to Medium. Now, you are ready to proceed to the next step in Pabbly Connect.


3. Fetching Blogger Post Details with Pabbly Connect

Once the Google Blogger trigger is set, you can test the connection to ensure it is working correctly. Create a new post in your Blogger account, and then return to Pabbly Connect. Click on the ‘Fetch Data’ button to retrieve the latest post details.

During this step, Pabbly Connect will capture essential information like the post title, content, and URL. This data will be used to create a corresponding post on Medium. It’s crucial to ensure that the formatting, including HTML tags, is preserved during this process.


4. Connecting Medium to Pabbly Connect

Now that you have fetched the Blogger post details, the next step is to connect Medium to Pabbly Connect. Select Medium as the action application and choose the action event as ‘Create Post’. This action will allow Pabbly Connect to publish the fetched Blogger post on Medium.

  • Click on ‘Connect’ and add a new connection to Medium.
  • Provide the integration token from your Medium account to authorize the connection.
  • Map the post title and content from the previous step to the respective fields in Medium.

After mapping the fields, click on the ‘Save’ button to finalize the connection. This allows Pabbly Connect to automatically publish your Blogger posts to Medium whenever a new post is created.


5. Conclusion: Automate Sharing with Pabbly Connect

In conclusion, using Pabbly Connect to automatically share your Blogger posts to Medium is an efficient way to streamline your blogging process. By following the steps outlined in this tutorial, you can set up an automation that saves time and ensures your content reaches a broader audience.

Ensure you check out Pabbly Connect to create business automation workflows and reduce manual tasks. Pabbly Connect currently offer integration with 2,000+ applications.

Now, every time you publish a new post on Blogger, it will automatically appear on Medium, thanks to the seamless integration provided by Pabbly Connect. Start automating your blogging today and enjoy the benefits of increased visibility and engagement!

Automate Twitter Posts from Jotform Submissions Using Pabbly Connect

Learn how to automate Twitter posts from Jotform submissions using Pabbly Connect. This detailed tutorial guides you through the integration process step-by-step. Eliminate manual repetitive tasks from your workflow. Discover proven automation methods with intuitive steps designed for efficiency-minded professionals.

Watch Step By Step Video Tutorial Below


1. Setting Up Your Pabbly Connect Account

To begin automating Twitter posts from Jotform submissions, first, access Pabbly Connect. This platform enables seamless integration between various applications, including Jotform and Twitter. Start by creating a free Pabbly Connect account on their website.

Once you have registered, sign in to your Pabbly Connect dashboard. From there, you can create a new workflow by clicking on the ‘Create Workflow’ button, which will guide you through the setup process.


2. Creating a Workflow in Pabbly Connect

After accessing your Pabbly Connect dashboard, it’s time to create a workflow for the Jotform to Twitter integration. Name your workflow, for example, ‘Jotform to Twitter’, and click on the ‘Create’ button. This initiates the creation of your automation workflow. using Pabbly Connect

  • Select Jotform as the trigger application.
  • Choose ‘New Response’ as the trigger event.
  • Copy the webhook URL provided by Pabbly Connect.

This setup allows Pabbly Connect to listen for new submissions from your Jotform. Ensure you have your Jotform account ready for the next steps.


3. Integrating Jotform with Pabbly Connect

Now that your Pabbly Connect workflow is set up, navigate to your Jotform account. Open the form you want to use for posting tweets. Under the form settings, locate the ‘Integrations’ tab, and select ‘Webhooks’. using Pabbly Connect

  • Paste the copied webhook URL from Pabbly Connect into the Webhooks field.
  • Click ‘Complete Integration’ to finalize the setup.
  • Test the integration by submitting the form.

Once the webhook is set up, Pabbly Connect will be ready to capture form submissions and trigger the next steps in your workflow.


4. Configuring Twitter Action in Pabbly Connect

With the Jotform integration complete, return to your Pabbly Connect workflow to configure the action step. Here, you’ll select Twitter as the action application. Choose ‘Create Tweet’ as the action event. using Pabbly Connect

Click on the ‘Connect’ button to authorize Pabbly Connect to access your Twitter account. Follow the prompts to authorize the app, ensuring that Pabbly Connect has the necessary permissions to post on your behalf.


5. Finalizing Your Automation and Testing

Once the Twitter connection is established, you can map the data received from Jotform into your tweet. Use the data fields from the trigger step to populate your tweet’s content, including the title and message. using Pabbly Connect

After mapping the fields, click on ‘Save and Send Test Request’ to verify that the integration works correctly. Check your Twitter account to see if the tweet has been posted successfully.

After the initial setup, your automation will function seamlessly, posting tweets automatically whenever a new form submission is received.


Conclusion

By using Pabbly Connect, you can effectively automate the process of posting tweets from Jotform submissions. This integration streamlines your social media management, allowing you to focus on creating content while Pabbly Connect handles the posting for you.

Ensure you check out Pabbly Connect to create business automation workflows and reduce manual tasks. Pabbly Connect currently offer integration with 2,000+ applications.

WhatsApp Automation: Best Ways to Use WhatsApp for Collecting Payments Automatically

Discover how to automate payment collection on WhatsApp using Pabbly Connect with WooCommerce, Razorpay, and more. Learn the best ways to streamline your process. Explore systematic approaches to creating efficient automation solutions that convert technical concepts into practical, implementable instructions.

Watch Step By Step Video Tutorial Below


1. Introduction to WhatsApp Automation for Payments

In this section, we will explore how Pabbly Connect can streamline your payment collection process through WhatsApp. Automating payments is crucial for businesses with numerous customers, as it saves time and reduces manual errors.

With Pabbly Connect, you can integrate various applications like WooCommerce and Razorpay to automatically send payment links via WhatsApp. This automation ensures that your customers receive payment requests promptly, enhancing their purchasing experience.


2. Integrating WooCommerce with Pabbly Connect

To begin automating payments, first, you need to connect your WooCommerce store with Pabbly Connect. This integration allows you to manage orders seamlessly. Start by logging into your Pabbly Connect account.

  • Go to the ‘Create Workflow’ section.
  • Select WooCommerce as your trigger application.
  • Choose the ‘New Order’ event.

Once set up, every time a customer places an order on your WooCommerce store, Pabbly Connect will trigger the next steps in the workflow, ensuring that payment links are generated automatically.


3. Using Razorpay for Payment Links

The next step involves integrating Razorpay with Pabbly Connect. This integration is essential for generating payment links that will be sent to customers via WhatsApp. After setting up WooCommerce, proceed to add Razorpay.

  • Select Razorpay as your action application in Pabbly Connect.
  • Choose the ‘Create Payment Link’ action event.
  • Map the necessary fields such as amount and currency.

With Razorpay configured, Pabbly Connect will automatically generate a payment link whenever an order is placed, making the payment process efficient and hassle-free.


4. Sending Payment Links via WhatsApp

The final step is to send the generated payment link to customers through WhatsApp using Pabbly Connect. This ensures that customers receive their payment requests directly in their preferred communication channel.

Add WhatsApp as the final action in your workflow. Select the ‘Send Message’ action. Map the fields to include the customer’s phone number and the payment link.

Once configured, Pabbly Connect will automatically send the payment link to the customer’s WhatsApp after an order is placed, ensuring a smooth payment collection experience.


5. Conclusion: Automating Payments with Pabbly Connect

In conclusion, using Pabbly Connect to automate payment collection via WhatsApp is an effective strategy for businesses. By integrating WooCommerce and Razorpay, you can streamline your payment processes and enhance customer satisfaction.

Ensure you check out Pabbly Connect to create business automation workflows and reduce manual tasks. Pabbly Connect currently offer integration with 2,000+ applications.

Automating this workflow not only saves time but also reduces manual errors, allowing you to focus on growing your business. Start using Pabbly Connect today to revolutionize your payment collection process!