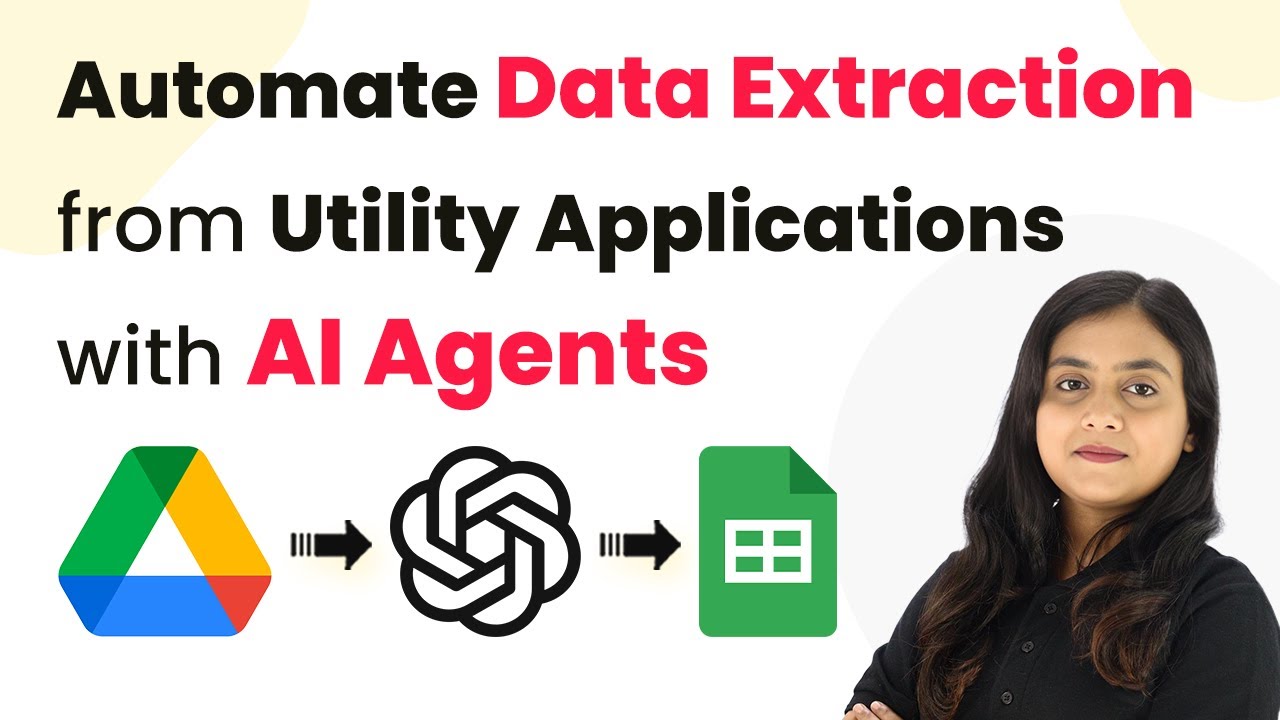
Automatically Post Facebook Media to Twitter, LinkedIn & Tumblr Using Pabbly Connect

Learn how to automate posting Facebook media to Twitter, LinkedIn, and Tumblr using Pabbly Connect. Streamline your social media sharing effortlessly! Develop expertise in application integration and learn how to design streamlined automation workflows using proven, simplified approaches.

Watch Step By Step Video Tutorial Below


1. Setting Up Pabbly Connect for Social Media Automation

To automate posting Facebook media to Twitter, LinkedIn, and Tumblr, you need to utilize Pabbly Connect, an integration and automation tool. First, log in to your Pabbly Connect account and navigate to the dashboard. If you don’t have an account, you can create one easily and start with 100 free automation tasks per month.

Once you are on the dashboard, click on the ‘Create Workflow’ button. Here, you can name your workflow something like ‘Share Facebook Media on Different Social Platforms’. After naming it, click on the ‘Create’ button to proceed.


2. Setting Up the Facebook Trigger in Pabbly Connect

The first step in your automation is to set up the trigger, which will be the action of posting on Facebook. Within Pabbly Connect, search for ‘Facebook Pages’ as the trigger application. Choose the ‘New Post’ option as the trigger event.

  • Select ‘Add New Connection’ to connect your Facebook account.
  • Choose the Facebook page you want to monitor for new posts.
  • Enter the number of posts to retrieve (set it to 1 for this setup).

After configuring these settings, click on ‘Save and Send Test Request’. This will fetch the most recent post from your chosen Facebook page, allowing you to use its content in the next steps of your automation.


3. Connecting Twitter for Automatic Posting

With the Facebook trigger set, the next step is to connect Twitter to your workflow using Pabbly Connect. Search for Twitter as your action application and select the ‘Create Tweet with Media’ option. Click on ‘Connect’ and then select ‘Add New Connection’ to link your Twitter account.

  • Authorize Pabbly Connect to access your Twitter account.
  • Map the message and media file URL from the Facebook post data you retrieved earlier.

After mapping the necessary fields, click on ‘Save and Send Test Request’. You should see a new tweet on your Twitter handle that mirrors the content from your Facebook post, complete with any media attached.


4. Integrating LinkedIn for Seamless Sharing

Next, you will integrate LinkedIn into your workflow using Pabbly Connect. Search for LinkedIn as the action application and select the ‘Share an Article or URL’ option. Click on ‘Connect’ and authorize Pabbly Connect to access your LinkedIn account.

Enter the author’s name and map the message you pulled from the Facebook post. For the article URL, map the link of the Facebook post.

After setting these fields, click on ‘Save and Send Test Request’. This will create a new LinkedIn post with the same content and link back to your Facebook post, effectively sharing your media across platforms.


5. Finalizing the Integration with Tumblr

The last step is to connect Tumblr to your automation using Pabbly Connect. Search for Tumblr and select the ‘Create Photo Post’ option. Click on ‘Connect’ and grant Pabbly Connect permission to access your Tumblr account.

Select your blog from the options available. Map the media URL and caption from the Twitter post data you received earlier.

Click on ‘Save and Send Test Request’ to finalize the process. You should see a new photo post on your Tumblr account that includes the same image and caption, completing the automation of posting from Facebook to Twitter, LinkedIn, and Tumblr.


Conclusion

By using Pabbly Connect, you can effortlessly automate the process of posting Facebook media to Twitter, LinkedIn, and Tumblr. This integration streamlines your social media sharing, saving you time and ensuring consistent content distribution across platforms.

Ensure you check out Pabbly Connect to create business automation workflows and reduce manual tasks. Pabbly Connect currently offer integration with 2,000+ applications.

Integrate Gravity Forms with Rocket.Chat Using Pabbly Connect

Learn how to send Gravity Forms submission data to Rocket.Chat automatically using Pabbly Connect. Follow our detailed step-by-step tutorial for seamless integration. Revolutionize your productivity approach with just a few strategic clicks. Uncover professional methods for connecting applications and creating workflows that reclaim hours of your week.

Watch Step By Step Video Tutorial Below


1. Setting Up Pabbly Connect for Gravity Forms and Rocket.Chat Integration

To start sending Gravity Forms submission data to Rocket.Chat, first, you need to access Pabbly Connect. Log in to your Pabbly Connect account and navigate to the dashboard. If you don’t have an account yet, you can create one for free and get 100 automation tasks every month.

Once logged in, click on the ‘Create Workflow’ button. You will be prompted to name your workflow. For this integration, you can name it ‘Gravity Forms to Rocket.Chat Automation’. After naming, click on ‘Create’ to proceed.


2. Configuring the Trigger in Pabbly Connect

The first step in your workflow is to set up the trigger. Select ‘Gravity Forms’ as your trigger application from the ‘Choose App’ dropdown. The trigger event you need to select is ‘New Response’. This event will activate the workflow when a new form submission is received. using Pabbly Connect

After selecting the trigger event, Pabbly Connect will provide you with a webhook URL. This URL is essential for fetching data from Gravity Forms. Follow these steps to configure the webhook:

  • Navigate to your Gravity Forms settings in your WordPress dashboard.
  • Install the Gravity Forms Webhooks add-on if you haven’t already.
  • Select the form you want to use and go to its settings.
  • Add a new webhook and paste the webhook URL from Pabbly Connect.

Save the settings in Gravity Forms, and you will see that it is now waiting for a response from the webhook, indicating that the setup is complete.


3. Testing the Gravity Forms Submission

Now that the trigger is set, it’s time to test the integration. Fill out the Gravity Forms on your website as a test user. For example, enter the name ‘Peter Parker’, an email address, and a use case description. using Pabbly Connect

After submitting the form, head back to Pabbly Connect. You should see the form submission data captured in the ‘Response Received’ section. This data includes all the fields you entered, confirming that your webhook is functioning correctly.


4. Configuring the Action to Send Data to Rocket.Chat

Next, you need to set up the action in Pabbly Connect to send the captured data to Rocket.Chat. Select ‘Rocket.Chat’ as the action application. The action event should be set to ‘Send Channel Message’. This will allow you to send a message to your team whenever a new form submission is received. using Pabbly Connect

To connect to Rocket.Chat, you will need your user ID, personal access token, and chat URL. You can find these details in your Rocket.Chat account under the ‘My Account’ section. Copy and paste these details into the corresponding fields in Pabbly Connect.

  • User ID: Copy from the Rocket.Chat account.
  • Personal Access Token: Create a new token in Rocket.Chat.
  • Chat URL: Copy the Pabbly domain URL of your Rocket.Chat instance.

Once all fields are filled, save the connection and proceed to configure the message that will be sent to Rocket.Chat.


5. Setting Up the Message Format for Rocket.Chat

In this step, you will define the message that will be sent to your team in Rocket.Chat. You can customize the message to include the details from the Gravity Forms submission. For instance, you could write: ‘Hey team, we have received a new submission from Gravity Forms. The details are as follows: Name, Email, Phone, and Use Case.’ using Pabbly Connect

To include the dynamic data from the form submission, use the mapping feature in Pabbly Connect. Click on the corresponding fields to insert the data from the Gravity Forms response. This ensures that each message sent to Rocket.Chat will contain the relevant information from the form submission.

After setting up the message, you can test the connection by clicking on ‘Save and Send Test Request’. If everything is configured correctly, you will see the message appear in your Rocket.Chat channel, confirming that the integration is successful.


Conclusion

Using Pabbly Connect, you can seamlessly integrate Gravity Forms with Rocket.Chat to automate the data transfer process. This integration allows you to receive form submissions in real-time, enhancing team collaboration and efficiency.

Ensure you check out Pabbly Connect to create business automation workflows and reduce manual tasks. Pabbly Connect currently offer integration with 2,000+ applications.

By following the steps outlined in this tutorial, you can set up the automation without any coding skills. This ensures that your team stays updated with new submissions effortlessly.

Integrate Google Calendar with Flo CRM Using Pabbly Connect: A Step-by-Step Guide

Learn how to integrate Google Calendar with Flo CRM using Pabbly Connect. Follow this detailed tutorial to automate adding contacts seamlessly. Transform complex automation concepts into accessible, actionable steps that eliminate unnecessary manual work while maximizing existing application capabilities.

Watch Step By Step Video Tutorial Below


1. Access Pabbly Connect to Start Integration

To begin integrating Google Calendar with Flo CRM, you need to access Pabbly Connect. Start by visiting the Pabbly website and navigating to the Pabbly Connect product page. If you are a new user, click on the ‘Sign Up for Free’ option to create an account.

For existing users, simply log in to your account. Once logged in, you will be directed to the Pabbly Connect dashboard. This platform allows you to automate workflows without any coding knowledge, making it user-friendly for everyone.


2. Create a New Workflow in Pabbly Connect

In your Pabbly Connect dashboard, click on the plus sign to create a new workflow. Name your workflow something descriptive, such as ‘Google Calendar to Flo Integration’. After naming it, click on the ‘Create’ button to proceed.

In this workflow, you will set up the trigger and action. The trigger will be a new event in Google Calendar, and the action will be adding a contact to your Flo CRM. This setup allows Pabbly Connect to automate the entire process seamlessly.


3. Set Up Google Calendar as Trigger in Pabbly Connect

To configure the trigger, select Google Calendar as the application and choose the trigger event as ‘New Event’. Click on ‘Connect’ and then ‘Add New Connection’. You will be prompted to connect with your Google account. Select your account and allow the necessary permissions for Pabbly Connect to access your calendar.

After connecting, select the calendar you want to monitor for new events. For example, choose your ‘P Integration’ calendar. Before finalizing this step, create a test event in Google Calendar to ensure that Pabbly Connect captures the correct data.


4. Set Up Flo CRM as Action in Pabbly Connect

Next, you will set the action to create a new contact in Flo CRM. In the action step, choose Flo CRM as the application and select ‘Create CRM Account Contact’ as the action event. Click on ‘Connect’ and enter the API key and account URL from your Flo CRM settings.

After connecting, map the fields from the Google Calendar event to the Flo CRM contact. Use the name extracted from the event title and the email address from the attendee details. This mapping is crucial for Pabbly Connect to create the contact accurately in your CRM.


5. Test Your Integration with Pabbly Connect

Once everything is set up, it’s time to test your integration. Go back to your Google Calendar and create a new event, such as an appointment with Adam Smith. Ensure you include all necessary details like the date and description. After saving the event, return to Pabbly Connect and click on ‘Save and Send Test Request’.

  • Create a new event in Google Calendar with guest details.
  • Check the response in Pabbly Connect to ensure the data is captured correctly.
  • Verify that the contact appears in your Flo CRM account.

After confirming that the contact has been added successfully, you can save your workflow in Pabbly Connect. This integration will now automatically add new contacts to Flo CRM whenever you create an event in Google Calendar.


Conclusion

Integrating Google Calendar with Flo CRM using Pabbly Connect streamlines your contact management process. By following this tutorial, you can automate adding contacts from your calendar events, saving time and improving efficiency in your business operations.

Ensure you check out Pabbly Connect to create business automation workflows and reduce manual tasks. Pabbly Connect currently offer integration with 2,000+ applications.

Automate Google Forms Responses to Mattermost Using Pabbly Connect

Learn how to automate sharing Google Form responses with Mattermost using Pabbly Connect. Follow this detailed tutorial for a seamless integration. This comprehensive guide reveals exactly how to connect your applications and automate repetitive tasks — accessible for professionals of all technical backgrounds.

Watch Step By Step Video Tutorial Below


1. Overview of Pabbly Connect for Google Forms Automation

In this tutorial, we will explore how to use Pabbly Connect to automate the sharing of Google Form responses with your team on Mattermost. This integration allows for seamless communication without manual intervention.

To start, you need to create a free account on Pabbly Connect and access the dashboard. This platform allows you to set up automation workflows without needing coding skills.


2. Creating a Workflow in Pabbly Connect

Once logged into your Pabbly Connect account, click on the ‘Create Workflow’ button to initiate a new automation process. Name your workflow something like ‘Google Forms to Mattermost Automation’ for easy identification.

Next, you will need to set up the trigger, which is the event that starts the workflow. Select ‘Google Forms’ as the trigger application and choose the event ‘New Response Received’. This will allow Pabbly Connect to capture data whenever a new form is submitted.

  • Login to your Pabbly Connect account.
  • Click on ‘Create Workflow’.
  • Name your workflow.
  • Select ‘Google Forms’ as the trigger application.
  • Choose ‘New Response Received’ as the trigger event.

After setting up the trigger, Pabbly Connect will provide you with a webhook URL. This URL is essential for connecting your Google Form to Pabbly Connect, enabling it to fetch data from the form submissions.


3. Connecting Google Forms to Pabbly Connect

To connect Google Forms to Pabbly Connect, open your Google Form and navigate to the connected spreadsheet. Click on ‘Extensions’, then select ‘Add-ons’ and search for ‘Pabbly Connect Webhooks’. Install this add-on to facilitate the connection.

Once installed, refresh your spreadsheet and go back to the ‘Extensions’ menu to find the Pabbly Connect option. Click on ‘Initial Setup’ and paste the webhook URL provided by Pabbly Connect into the designated field. Specify the trigger column, which is typically the last column where data entries will be made.

  • Open your Google Form’s connected spreadsheet.
  • Navigate to ‘Extensions’ and install the ‘Pabbly Connect Webhooks’ add-on.
  • Refresh the spreadsheet after installation.
  • Go to ‘Initial Setup’ under the Pabbly Connect menu.
  • Paste the webhook URL and define the trigger column.

After completing this setup, Pabbly Connect will be ready to receive data from your Google Form submissions.


4. Sending Data from Pabbly Connect to Mattermost

With the Google Form now connected, the next step is to set up the action in Pabbly Connect to send the form responses to Mattermost. Choose Mattermost as your action application and select the event ‘Create a Post’.

You will need to connect your Mattermost account by providing a token. To generate this token, go to your Mattermost profile settings, navigate to the ‘Security’ section, and create a new personal access token. Copy this token and paste it into Pabbly Connect to establish the connection.

Select Mattermost as the action application. Choose ‘Create a Post’ as the action event. Generate a personal access token in Mattermost. Paste the token into Pabbly Connect to connect. Select the channel where you want to post the message.

Once connected, you can map the fields from the Google Form response to the message format you want to send to your Mattermost channel. This ensures that every time a new response is received, the relevant details are automatically posted in your specified Mattermost channel.


5. Testing and Activating Your Pabbly Connect Workflow

After setting up the action, it’s crucial to test your workflow in Pabbly Connect. Click on the ‘Save and Send Test Request’ option to send a test message to Mattermost. This will confirm that the integration is working as expected.

Finally, ensure that the ‘Send on Event’ option is enabled in the Pabbly Connect settings. This feature allows your workflow to automatically trigger every time a new response is submitted to the Google Form, ensuring that your team stays updated in real-time.

Click ‘Save and Send Test Request’ to test the workflow. Check Mattermost for the test message. Enable ‘Send on Event’ for automatic updates.

Once you confirm that everything is working correctly, your automation is complete. Now, every time someone submits a response to your Google Form, it will be automatically sent to your Mattermost channel via Pabbly Connect.


Conclusion

In this tutorial, we demonstrated how to use Pabbly Connect to share Google Form responses automatically with your team on Mattermost. This integration streamlines communication and saves time by eliminating manual message sending.

Ensure you check out Pabbly Connect to create business automation workflows and reduce manual tasks. Pabbly Connect currently offer integration with 2,000+ applications.

By following the steps outlined above, you can set up your own Google Forms automation in just a few minutes, enhancing your team’s productivity and collaboration.

Automate Data Entry in Airtable from Wix Forms Using Pabbly Connect

Learn how to automate data entry from Wix Forms to Airtable using Pabbly Connect. This step-by-step tutorial covers all necessary actions and integrations. Learn to create powerful connections between your critical applications without requiring specialized programming knowledge or extensive technical background.

Watch Step By Step Video Tutorial Below


1. Setting Up Pabbly Connect for Automation

To automate data entry in Airtable from Wix Forms, you first need to set up Pabbly Connect. Start by logging into your Pabbly Connect account and navigating to the dashboard. If you don’t have an account, you can create one using the link provided in the description, which grants you 100 free automation tasks each month.

Once logged in, click on the ‘Create Workflow’ button. You will be prompted to name your workflow; for this tutorial, name it ‘Wix Form to Airtable Integration’. After naming, click on the ‘Create’ button to proceed.


2. Configuring the Wix Forms Trigger in Pabbly Connect

In the workflow, you will set up the trigger that initiates the automation. Choose ‘Wix Forms’ as the trigger application. In the trigger event dropdown, select ‘New Form Submission’. This action will provide you with a webhook URL necessary for connecting your Wix site to Pabbly Connect.

  • Select ‘Wix Forms’ from the application list.
  • Choose ‘New Form Submission’ as the trigger event.
  • Copy the provided webhook URL for later steps.

Next, navigate to your Wix dashboard and select the site where your form is hosted. Under the site dashboard, find the ‘Automations’ option and click on it to create a new automation. Set the trigger to ‘Visitor Submits a Form’ and choose the specific form you want to connect.


3. Testing Form Submission to Capture Data

After setting up the trigger, it’s time to test the form submission. Go back to your website and fill out the form as a test user. For instance, enter a name, email, and message, then submit the form. This action will trigger the webhook and send the data to Pabbly Connect.

Check your Pabbly Connect dashboard to see if the data has been captured. You should see the details of the test submission reflected in the response section. This confirms that the integration is working correctly and that Pabbly Connect is successfully receiving data from Wix Forms.


4. Connecting Airtable to Pabbly Connect

Now that you have captured the form submission data, the next step is to connect Airtable. In the actions section of your workflow, select ‘Airtable’ as the application and choose ‘Create Record’ as the action event. This step allows you to save the captured data directly to your Airtable base. using Pabbly Connect

  • Select ‘Airtable’ from the application list.
  • Choose ‘Create Record’ as the action event.
  • Connect your Airtable account using the API key.

To connect, you will need to enter your Airtable API key, which can be found in your Airtable account settings. After entering the key, select the base and table where you want to store the data. Map the fields from the form submission to the corresponding fields in your Airtable table.


5. Finalizing the Automation Workflow

After mapping the fields, click on ‘Save and Send Test Request’ to verify that the data is being sent correctly to Airtable. Check your Airtable base to confirm that a new record has been created with the submitted form data. This step is crucial as it ensures that Pabbly Connect is functioning as intended, automating the data entry process.

Once the test is successful, your automation is complete. From now on, every time a form is submitted on your Wix site, the data will automatically be entered into Airtable without any manual effort. This integration significantly enhances efficiency and saves time.


Conclusion

This tutorial demonstrated how to automate data entry in Airtable from Wix Forms using Pabbly Connect. By following these steps, you can streamline your data management process and reduce the need for manual data entry. Automating tasks not only saves time but also minimizes errors, making your workflow more efficient.

Ensure you check out Pabbly Connect to create business automation workflows and reduce manual tasks. Pabbly Connect currently offer integration with 2,000+ applications.

Automatically Save Tumblr Blogs Data to Dropbox Using Pabbly Connect

Learn how to automatically save Tumblr blog data to Dropbox using Pabbly Connect with this step-by-step tutorial. Integrate effortlessly without coding! Discover how to seamlessly connect your essential tools through accessible instructions that make powerful automation available to professionals at every skill level.

Watch Step By Step Video Tutorial Below


1. Accessing Pabbly Connect for Tumblr and Dropbox Integration

To start saving Tumblr blogs data into Dropbox automatically, you need to access Pabbly Connect. Open your browser and go to the Pabbly website.

Once there, navigate to the products section and select Pabbly Connect. If you’re a first-time user, click on the ‘Sign up for free’ option to create an account. After signing up, log in to your Pabbly Connect account to begin the integration process.


2. Creating a Workflow in Pabbly Connect

After logging in, you will be directed to the Pabbly Connect dashboard. Here, click on the plus sign to create a new workflow. Name your workflow something like ‘Tumblr to Dropbox Integration’ and click on create. using Pabbly Connect

  • Navigate to the trigger window and select Tumblr as the application.
  • Choose the trigger event as ‘New Post in My Blog’.
  • Click on connect to establish a connection with your Tumblr account.

Once connected, you will need to authorize Pabbly Connect to access your Tumblr account. Make sure to allow all permissions requested to ensure a smooth integration.


3. Mapping Tumblr Data to Dropbox Using Pabbly Connect

After setting up the trigger, you will need to create a post in your Tumblr account. This will allow Pabbly Connect to capture the new post details. Once the post is created, return to Pabbly Connect and click on ‘Save and Send Test Request’ to retrieve the post data. using Pabbly Connect

The response will include all details of the new post, such as the title, URL, and caption. Use this data to map it to the next step, which involves extracting the URL. Choose the Text Formatter application in Pabbly Connect for this action.

  • Select the action event as ‘Basic Formatting’.
  • Map the body of the Tumblr post to extract the URL.
  • Click on ‘Save and Send Test Request’ to confirm the extraction.

Now that you have the URL, you can proceed to the next step to save this data into Dropbox.


4. Uploading Extracted Data to Dropbox Using Pabbly Connect

In this step, you will upload the extracted Tumblr post data to Dropbox. Click on the plus sign to add a new action step and select Dropbox as the application. Choose the action event as ‘Upload File’. using Pabbly Connect

Connect your Dropbox account to Pabbly Connect by clicking on ‘Add New Connection’. Make sure you are logged into your Dropbox account to avoid any authorization issues. Once connected, you will need to specify the file URL and file name.

Map the file URL extracted from the previous step. Specify the file name and ensure it includes the correct extension (e.g., .PNG). Define the folder path in Dropbox where you want to save the file.

Click on ‘Save and Send Test Request’ to complete the upload process. You should see a success response indicating that the file has been uploaded to your Dropbox account.


5. Testing the Tumblr to Dropbox Integration

Now that you have set up the integration, it’s time to test it. Go back to your Tumblr account and create another new post. This will trigger the workflow you set up in Pabbly Connect.

After posting, return to your Dropbox account and refresh the page. You should see the new file saved in your specified folder. This confirms that the integration between Tumblr and Dropbox via Pabbly Connect is working effectively.

Next time you upload a new blog post to Tumblr, it will automatically save to your Dropbox without any manual effort.


Conclusion

Using Pabbly Connect, you can effortlessly automate the process of saving Tumblr blogs data to Dropbox. This integration not only saves time but also ensures that your blog posts are backed up automatically. With just a few simple steps, you can enhance your workflow and keep your content secure.

Ensure you check out Pabbly Connect to create business automation workflows and reduce manual tasks. Pabbly Connect currently offer integration with 2,000+ applications.

Integrate Google Forms with Teamwork Using Pabbly Connect

Learn how to automate task creation in Teamwork from Google Form responses using Pabbly Connect. Step-by-step tutorial for seamless integration. Navigate the automation landscape confidently with clear, structured guidance suitable for professionals regardless of prior technical experience.

Watch Step By Step Video Tutorial Below


1. Setting Up Pabbly Connect for Google Forms Integration

To integrate Google Forms with Teamwork using Pabbly Connect, start by logging into your Pabbly Connect account. This platform serves as the central hub for automating tasks between various applications, including Google Forms and Teamwork.

Once you’re on the dashboard, click on the ‘Create Workflow’ button. Give your workflow a name, such as ‘Google Forms to Teamwork Automation,’ and click on ‘Create’. This sets the stage for the automation process.


2. Configuring the Trigger with Google Forms

The next step involves setting up the trigger in Pabbly Connect. For this, select Google Forms as the trigger application. The specific event you want to choose is ‘New Response Received.’ This action will initiate the automation whenever a new form submission occurs.

  • Select Google Forms as the trigger application.
  • Choose ‘New Response Received’ as the trigger event.
  • Copy the provided webhook URL for later use.

After setting this up, you’ll need to link your Google Form to Pabbly Connect. Open your Google Form, navigate to the connected spreadsheet, and install the Pabbly Connect Webhooks add-on. This connection allows data from Google Forms to flow into Pabbly Connect seamlessly.


3. Configuring Google Form and Spreadsheet for Webhook

In your Google Sheets, click on Extensions, then select Pabbly Connect Webhooks, and choose ‘Initial Setup’. Here, paste the webhook URL you copied earlier. Specify the trigger column, which is typically the last data entry column in your spreadsheet. using Pabbly Connect

Afterward, refresh your spreadsheet to ensure the add-on is functional. Once refreshed, you can test the setup by sending a test submission from your Google Form to see if the data is captured correctly in Pabbly Connect.

  • Navigate to Extensions > Pabbly Connect Webhooks > Initial Setup.
  • Paste the webhook URL and specify the trigger column.
  • Click ‘Send Test’ to verify data is received.

After sending the test, check Pabbly Connect for the received data. This confirms that your integration is set up correctly, allowing further actions to be taken.


4. Creating Tasks in Teamwork via Pabbly Connect

With the data received from Google Forms, it’s time to create tasks in Teamwork. In Pabbly Connect, add a new action step and select Teamwork as the application. Choose ‘Create Task’ as the action event. using Pabbly Connect

When prompted, connect your Teamwork account by entering your subdomain. This is crucial for Pabbly Connect to communicate with your Teamwork account effectively. After connecting, you will need to map the project ID and task details from the Google Form responses.

Select Teamwork as the action application. Choose ‘Create Task’ as the action event. Map the project ID and task details from the previous step.

After mapping these details, click ‘Save and Send Test Request’ to verify that a new task is created in Teamwork. Check your Teamwork project to ensure the task appears as expected.


5. Conclusion: Automating Task Creation with Pabbly Connect

In conclusion, using Pabbly Connect to automate task creation from Google Form responses to Teamwork significantly streamlines project management. This integration not only saves time but also enhances productivity by eliminating manual entry.

Ensure you check out Pabbly Connect to create business automation workflows and reduce manual tasks. Pabbly Connect currently offer integration with 2,000+ applications.

Check out Pabbly Connect – Automate your business workflows effortlessly! Sign Up Free – Start your journey with ease! 10,000+ Video Tutorials – Learn step by step! Join Pabbly Facebook Group – Connect with 21,000+ like minded people!

By following the steps outlined in this tutorial, you can set up a seamless workflow that automatically creates tasks in Teamwork based on Google Form submissions. With Pabbly Connect, automation becomes accessible to everyone, regardless of technical expertise.

Auto Forward Messages from Rocket.Chat to Slack Channel Using Pabbly Connect

Learn how to automate message forwarding from Rocket.Chat to Slack channel using Pabbly Connect in this step-by-step tutorial. Discover how to seamlessly connect your essential tools through accessible instructions that make powerful automation available to professionals at every skill level.

Watch Step By Step Video Tutorial Below


1. Setting Up Pabbly Connect for Automation

To begin with the automation of forwarding messages from Rocket.Chat to Slack, you need to access Pabbly Connect. First, log in to your Pabbly Connect account and navigate to the dashboard. If you don’t have an account yet, you can easily create one in just two minutes and enjoy 100 free automation tasks each month.

Once you’re on the dashboard, click on the ‘Create Workflow’ button. You will be prompted to name your workflow; for this integration, you can name it ‘Rocket.Chat to Slack Automation’. After naming, click on the ‘Create’ button to proceed. This is where the automation process begins, utilizing Pabbly Connect to link the two applications.


2. Configuring the Trigger in Pabbly Connect

In this section, you will set up the trigger that initiates the workflow. Choose Rocket.Chat as your trigger application in Pabbly Connect. The specific trigger event you need to select is ‘New Message Posted to Private Group’. This will allow Pabbly Connect to monitor messages sent in your Rocket.Chat group.

  • Select ‘Rocket.Chat’ from the drop-down list.
  • Choose the trigger event as ‘New Message Posted to Private Group’.
  • Follow the instructions provided to connect Rocket.Chat to Pabbly Connect.

As you proceed, you will see a webhook URL generated by Pabbly Connect. This URL is crucial as it will be used to send data from Rocket.Chat to Pabbly Connect. Copy this webhook URL, as you will need it for the next steps.


3. Setting Up Rocket.Chat Integration

Now, navigate to your Rocket.Chat account to establish the integration. Click on your profile icon and select ‘Administration’. From the left panel, find and click on ‘Integrations’. Here, you will create a new outgoing integration that will utilize the webhook URL you copied earlier. using Pabbly Connect

  • Click on the ‘New’ button to create a new integration.
  • Select the outgoing option and choose ‘Message Sent’ as the event trigger.
  • Paste the copied webhook URL into the URL field.

Make sure to fill in the username field with the name of an existing user in Rocket.Chat. This username will appear as the sender of the messages in Slack. After filling in the necessary details, click on ‘Save’ to complete the integration setup.


4. Testing the Integration in Pabbly Connect

With the integration set up, it’s time to test if everything is working correctly. Go back to your Rocket.Chat channel and send a test message. This message can be anything, such as ‘Hey team, we have got a new lead from our website form.’ Once the message is sent, return to Pabbly Connect to check if the data has been captured correctly.

You should see the response section in Pabbly Connect showing the details of the test message sent. This includes the channel ID, message ID, username, and the text of the message. If you see this data, it confirms that Pabbly Connect has successfully captured the message from Rocket.Chat.


5. Configuring Slack Integration in Pabbly Connect

The final step is to set up Slack as the action application in Pabbly Connect. Select Slack and choose the action event as ‘Send Channel Message’. Click on ‘Connect’, and then select ‘Add New Connection’. You will need to authorize Pabbly Connect to access your Slack account.

Once connected, choose the Slack channel where you want the messages to be sent. In the message field, map the text label from the Rocket.Chat response. This ensures that the same message sent in Rocket.Chat is forwarded to the selected Slack channel. After configuring the message settings, click on ‘Save’ and then send a test request to verify the integration.

Check your selected Slack channel to confirm that the message has been received. If everything is set up correctly, you should see the same message that was sent in Rocket.Chat appear in Slack, demonstrating the successful automation using Pabbly Connect.


Conclusion

In this tutorial, we detailed how to automate the forwarding of messages from Rocket.Chat to Slack using Pabbly Connect. By following these steps, you can streamline communication between teams using different chat applications, ensuring that no important messages are missed. Start using Pabbly Connect today to enhance your team’s productivity!

Ensure you check out Pabbly Connect to create business automation workflows and reduce manual tasks. Pabbly Connect currently offer integration with 2,000+ applications.

How to Add Jira Issues as Tasks in Teamwork Projects Using Pabbly Connect

Learn how to integrate Jira and Teamwork Projects using Pabbly Connect to automate task creation from Jira issues effortlessly. Develop expertise in application integration and learn how to design streamlined automation workflows using proven, simplified approaches.

Watch Step By Step Video Tutorial Below


1. Accessing Pabbly Connect for Jira and Teamwork Integration

To begin integrating Jira issues as tasks in Teamwork Projects, first access Pabbly Connect. This platform allows seamless automation between applications without any coding skills required.

Start by visiting the Pabbly website and navigate to the products section. Click on Pabbly Connect and sign up for a free account. After signing in, you will be directed to the dashboard where you can create your workflows.


2. Creating a Workflow in Pabbly Connect

Once logged into Pabbly Connect, you will need to create a new workflow. Click on the plus sign to initiate the workflow creation process. Name your workflow something like ‘Jira to Teamwork Integration’ to keep it organized.

  • Click on ‘Create Workflow’.
  • Select Jira as the trigger application.
  • Choose the trigger event to be ‘New Issue’.

After naming your workflow, you will see a trigger window. Here, select Jira Software as the application and configure the trigger event. This setup will ensure that every new issue created in Jira will automatically trigger the creation of a task in Teamwork Projects.


3. Setting Up the Webhook in Jira

To connect Jira with Pabbly Connect, you need to set up a webhook. Copy the webhook URL provided by Pabbly Connect and navigate to your Jira account settings.

In Jira, go to the ‘System’ settings, then find the ‘Webhooks’ section. Here, create a new webhook by clicking the plus sign. Enter a name for it, such as ‘Teamwork Integration’, and paste the copied webhook URL. Make sure to enable the webhook and specify it to trigger when a new issue is created.


4. Mapping Data from Jira to Teamwork

Once the webhook is set up, return to Pabbly Connect to capture the webhook response. Create a test issue in Jira to trigger the webhook and watch as the data is captured in Pabbly Connect.

Next, set up the action step in Pabbly Connect by selecting Teamwork as the application and choosing ‘Create Task’ as the action event. Map the fields from the captured Jira issue to the corresponding fields in Teamwork. For example, map the issue title to the task title and the issue description to the task description.

  • Select the project in Teamwork where the task should be created.
  • Choose the task list for the new task.
  • Assign the task to a team member.

After mapping the required fields, save the configuration and send a test request to verify that the task is created successfully in Teamwork Projects.


5. Testing the Integration

With everything set up, it’s time to test the integration between Jira and Teamwork Projects using Pabbly Connect. Create another issue in your Jira project to see if a new task is automatically created in Teamwork.

Refresh your Teamwork account to check for the new task. You should see the task with the title and description pulled directly from the Jira issue you created. This confirms that the integration is working correctly and that tasks are being created automatically based on Jira issues.

By utilizing Pabbly Connect, you’ve successfully automated the process of transferring tasks from Jira to Teamwork Projects, enhancing your team’s productivity and workflow management.


Conclusion

In this tutorial, we explored how to use Pabbly Connect to integrate Jira and Teamwork Projects. By automating the task creation process, you can streamline your project management and enhance team collaboration. This integration saves time and ensures that all issues in Jira are promptly addressed as tasks in Teamwork.

Ensure you check out Pabbly Connect to create business automation workflows and reduce manual tasks. Pabbly Connect currently offer integration with 2,000+ applications.

Integrate RSS Feeds with Rocket.Chat Using Pabbly Connect

Learn how to share RSS feeds as messages to Rocket.Chat channels using Pabbly Connect in this detailed tutorial. Follow the steps for seamless integration. Build sophisticated automated workflows in less time than you think. This guide translates complex integrations into straightforward steps for immediate implementation.

Watch Step By Step Video Tutorial Below


1. Accessing Pabbly Connect for RSS Integration

To start sharing RSS feeds as messages in Rocket.Chat, you need to access Pabbly Connect. Begin by visiting the Pabbly website and navigating to the products section. Select Pabbly Connect to proceed.

As a first-time user, you must sign up for an account. Click on the ‘Sign Up for Free’ option and create your account in just a few minutes. Once registered, you can log in and access the Pabbly Connect dashboard to initiate your workflow.


2. Creating a Workflow in Pabbly Connect

In the Pabbly Connect dashboard, click on the plus sign to create a new workflow. Name your workflow something like ‘RSS to Rocket.Chat Integration’ to reflect its purpose. This naming helps in organizing your workflows effectively. using Pabbly Connect

  • Click on ‘Create Workflow’.
  • Select ‘RSS by Pabbly’ as the trigger application.
  • Choose ‘New Item in Feed’ as the trigger event.

After selecting the trigger, you’ll need to connect your RSS feed. Paste the feed URL that you want to monitor for updates. Pabbly Connect will check for new items in this feed every eight hours, ensuring that your team stays updated.


3. Setting Up Rocket.Chat Integration

Once your RSS feed is configured, it’s time to set up the action in Rocket.Chat. In the action step, select Rocket.Chat as the application and choose ‘Send Channel Message’ as the action event. This step is crucial for sending your RSS feed updates to the designated channel. using Pabbly Connect

  • Connect your Rocket.Chat account by entering the User ID and Personal Access Token.
  • Specify the channel where you want to send the messages.
  • Map the message text with the title and link of the RSS feed.

After mapping the required fields, click on ‘Save and Send Test Request’ to ensure that the integration is functioning correctly. You should see the message appear in your Rocket.Chat channel, confirming that the setup is successful.


4. Finalizing Integration and Testing

After successfully sending the test message, it’s essential to finalize your integration in Pabbly Connect. Make sure to save your workflow so that it can run automatically every eight hours, checking for new RSS feed updates and sending them to Rocket.Chat.

This automation ensures that your team receives timely updates without manual intervention. You can monitor the workflow’s performance directly from the Pabbly Connect dashboard, adjusting settings as necessary.


5. Conclusion

In this tutorial, we demonstrated how to use Pabbly Connect to integrate RSS feeds with Rocket.Chat effectively. By following these steps, you can automate the sharing of important updates with your team, enhancing communication and efficiency.

Ensure you check out Pabbly Connect to create business automation workflows and reduce manual tasks. Pabbly Connect currently offer integration with 2,000+ applications.

Utilizing Pabbly Connect for this integration not only saves time but also ensures that crucial information is shared promptly. Start using Pabbly Connect today to streamline your workflow!