Integrate Google Ads with Discord Using Pabbly Connect: A Step-by-Step Guide

Learn how to automate sending Discord channel messages for new Google Ads leads using Pabbly Connect. Follow this detailed tutorial for seamless integration. Implement the precise methodologies leading organizations use to automate repetitive tasks, illustrated with practical examples designed for immediate application.

Watch Step By Step Video Tutorial Below


1. Setting Up Pabbly Connect for Google Ads and Discord Integration

To begin automating the process of sending Discord channel messages for new Google Ads leads, you’ll first need to access Pabbly Connect. This platform allows you to create a seamless workflow between Google Ads and Discord.

Start by signing up for a free account on Pabbly Connect. Once logged in, navigate to the dashboard and click on ‘Create Workflow.’ Name your workflow, for example, ‘Google Ads to Discord,’ and click ‘Create’ to proceed.


2. Setting Up Google Ads Trigger in Pabbly Connect

The next step involves configuring the trigger in Pabbly Connect to capture new leads from Google Ads. In the trigger window, search for and select ‘Google Ads.’ Choose the trigger event as ‘New Lead Form Entry’ to ensure that the workflow activates upon receiving new lead data.

After selecting the trigger event, Pabbly Connect will generate a webhook URL. This URL is crucial as it connects your Google Ads lead form to Pabbly Connect. Copy this URL and head over to your Google Ads account to integrate it into your lead form settings.

  • Log in to your Google Ads account.
  • Navigate to ‘Ads & Assets’ and select ‘Assets.’
  • Click on the plus button and select ‘Lead Form.’
  • Under ‘Export Leads from Google Ads,’ paste the copied webhook URL.

After configuring your lead form, test the integration by sending test data from Google Ads to Pabbly Connect. This ensures that the connection is successful and leads are being captured correctly.


3. Sending Data to Discord via Pabbly Connect

Once the Google Ads trigger is set up, the next step is to send the captured lead data to your Discord channel. In the action window of Pabbly Connect, search for and select ‘Discord.’ Choose the action event as ‘Send Channel Message’ to configure how the data will be sent.

To connect your Discord channel, you will need to create a webhook URL. Go to your Discord server, select the channel where you want to send messages, and access the channel settings. Under ‘Integrations,’ create a new webhook, select your channel, and copy the generated URL.

  • Click on the down arrow next to the channel name and select ‘Edit Channel.’
  • Navigate to ‘Integrations’ and click on ‘Webhooks.’
  • Create a new webhook and copy the webhook URL.

Return to Pabbly Connect and paste the Discord webhook URL into the designated field. Now, you can customize the message that will be sent to your Discord channel, incorporating lead details such as name, email, and phone number.


4. Testing the Integration Between Google Ads and Discord

After setting up your message format in Pabbly Connect, it’s crucial to test the entire workflow. Click on ‘Save and Send Test Request’ to send a test message to your Discord channel. This step verifies that all configurations are correct and that the message is being sent as intended.

Check your Discord channel to confirm that the test message appears with the lead information. If the message is displayed correctly, your integration is functioning properly. If not, revisit your settings in Pabbly Connect and Discord to troubleshoot any issues.

To ensure you receive real-time updates, make sure your Google Ads campaigns are active. As new leads come in, they will automatically trigger the workflow in Pabbly Connect, sending messages to your Discord channel without any manual intervention.


5. Conclusion: Automate Your Google Ads Leads Notifications with Pabbly Connect

In this tutorial, we’ve demonstrated how to use Pabbly Connect to automate sending Discord channel messages for new Google Ads leads. By following the steps outlined, you can keep your team updated in real-time without the need for manual data entry.

Ensure you check out Pabbly Connect to create business automation workflows and reduce manual tasks. Pabbly Connect currently offer integration with 2,000+ applications.

Check out Pabbly Connect – Automate your business workflows effortlessly! Sign Up Free – Start your journey with ease! 10,000+ Video Tutorials – Learn step by step! Join Pabbly Facebook Group – Connect with 21,000+ like minded people!

Utilizing Pabbly Connect streamlines your workflow and enhances communication among team members, ensuring that every lead is promptly acknowledged. Start leveraging this powerful integration today to boost your team’s efficiency!

How to Add Leads from Facebook Lead Ads to Pabbly Email Marketing

Learn how to seamlessly integrate Facebook Lead Ads with Pabbly Connect using Pabbly Connect for automated lead management. This comprehensive guide reveals exactly how to connect your applications and automate repetitive tasks — accessible for professionals of all technical backgrounds.

Watch Step By Step Video Tutorial Below


1. Accessing Pabbly Connect for Lead Integration

To add leads from Facebook Lead Ads to Pabbly Email Marketing, start by accessing Pabbly Connect. You can create a free account by signing up through the link provided in the description.

Once you are on the Pabbly Connect dashboard, click on the ‘Create Workflow’ button. Here, you will name your workflow, for instance, ‘Facebook Lead Ads to Pabbly Email Marketing.’ This establishes the foundation for your integration process.


2. Setting Up the Trigger in Pabbly Connect

The next step involves setting up the trigger in Pabbly Connect. In the trigger window, select ‘Facebook Lead Ads’ from the app options. Then, choose the event ‘New Lead Instant’ from the dropdown menu.

  • Click on the ‘Connect’ button and select ‘Add New Connection’.
  • Authenticate your Facebook account to allow Pabbly Connect to access your lead data.
  • Select your Facebook page and the specific lead generation form you are using.

After completing these steps, click on ‘Test Request’. This will allow Pabbly Connect to listen for new lead responses from your Facebook Lead Ads.


3. Adding New Leads as Subscribers in Pabbly Email Marketing

Once the trigger is set up, the next step is to add the new leads as subscribers in Pabbly Email Marketing. In the action window of your workflow, search for ‘Pabbly Email Marketing’ and select it.

For the action event, choose ‘Add Subscribers’. Click on ‘Connect’ and select ‘Add New Connection’. You will need to enter your bearer token from Pabbly Email Marketing to establish this connection.

  • Navigate to your Pabbly Email Marketing dashboard and click on ‘Integrations’.
  • Select ‘Developer API’ to find your bearer token.
  • Copy the bearer token and paste it into Pabbly Connect.

After saving the connection, select the list where you want to add your new leads. Map the email address and name fields using the data captured from Facebook Lead Ads.


4. Testing the Integration of Facebook Lead Ads with Pabbly Email Marketing

With your integration set up, it’s essential to test whether it works effectively. Create a test lead using the Facebook Lead Ads testing tool to ensure that the data flows correctly into Pabbly Connect.

Once you submit the test lead, Pabbly Connect should capture the details automatically. You will see the lead’s information reflected in your Pabbly Email Marketing account, confirming that the integration is functioning as expected.

To verify, refresh your subscriber list in Pabbly Email Marketing. If the new lead appears, your setup is successful, and the automation is working correctly.


5. Conclusion: Automating Your Lead Management

Using Pabbly Connect to integrate Facebook Lead Ads with Pabbly Email Marketing streamlines your lead management process. This automation allows you to effortlessly add new leads as subscribers, enhancing your marketing efforts.

Ensure you check out Pabbly Connect to create business automation workflows and reduce manual tasks. Pabbly Connect currently offer integration with 2,000+ applications.

Check out Pabbly Connect – Automate your business workflows effortlessly! Sign Up Free – Start your journey with ease! 10,000+ Video Tutorials – Learn step by step! Join Pabbly Facebook Group – Connect with 21,000+ like minded people!

By following the steps outlined in this tutorial, you can ensure that every new lead from your Facebook ads is captured and added to your email marketing list, improving your outreach and engagement.


In summary, utilizing Pabbly Connect for adding leads from Facebook Lead Ads to Pabbly Email Marketing automates your workflow efficiently. This integration not only saves time but also enhances your marketing strategy.

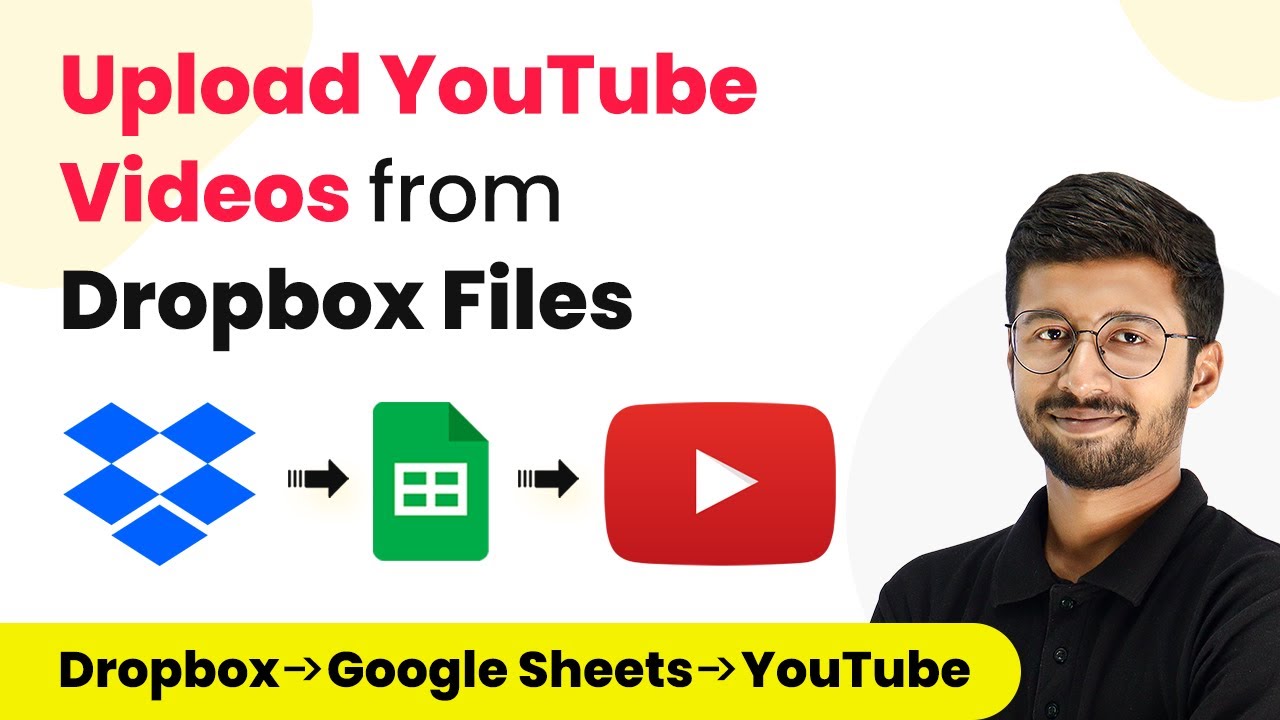
How to Upload YouTube Videos from Dropbox Files Using Pabbly Connect

Learn step-by-step how to automate uploading YouTube videos from Dropbox files using Pabbly Connect, Google Sheets, and more. Build sophisticated automated workflows in less time than you think. This guide translates complex integrations into straightforward steps for immediate implementation.

Watch Step By Step Video Tutorial Below


1. Setting Up Pabbly Connect for YouTube Automation

To begin automating the process of uploading YouTube videos from Dropbox files, you first need to access Pabbly Connect. Start by signing up for a free account on the Pabbly Connect dashboard. This platform will facilitate the integration of various applications, including Dropbox and YouTube.

Once logged into your Pabbly Connect dashboard, click on ‘Create Workflow’. Name your workflow something descriptive, like ‘Dropbox to Google Sheets to YouTube’. This naming will help you identify the workflow later, especially when managing multiple automations.


2. Setting the Trigger: Dropbox File Upload

The first step in your automation is to set up a trigger that detects when a new file is uploaded to Dropbox. In your Pabbly Connect workflow, select Dropbox as the application and choose the trigger event ‘New File’. This will initiate the automation process whenever a new video file is uploaded.

Next, connect your Dropbox account by clicking on ‘Connect’ and selecting ‘Add New Connection’. Once connected, specify the folder path in your Dropbox where the video files will be uploaded. For example, enter ‘/YouTube Videos’ as the path. Then, click on ‘Save and Send Test Request’ to test the connection. If successful, you will receive details of the uploaded video file.


3. Fetching Video Details from Google Sheets

After successfully setting the trigger, the next step is to extract video details from Google Sheets. This is crucial as you will need the video title, description, and tags for the YouTube upload. In your Pabbly Connect workflow, add a new action step and select Google Sheets as the application.

Choose the action event ‘Lookup Spreadsheet Row’. Connect to your Google Sheets account and select the spreadsheet containing the video details. Specify the column that contains the video titles, which should match the file names uploaded to Dropbox. After mapping these details, click on ‘Save and Send Test Request’ to retrieve the necessary video information.


4. Uploading Video to YouTube via Pabbly Connect

Now that you have the video details, it’s time to upload the video to YouTube. In your Pabbly Connect workflow, add another action step and select YouTube as the application. Choose the action event ‘Upload Video’. Connect your YouTube account and select the channel where you want to upload the video.

Map the video title, description, and tags from the previous Google Sheets step into the corresponding fields in the YouTube action. Also, map the video URL you received from Dropbox. Once everything is set, click on ‘Save and Send Test Request’ to initiate the upload. You will receive a response confirming the upload status.


5. Updating Google Sheets with the Video URL

Once the video is successfully uploaded to YouTube, the final step is to update your Google Sheets with the video URL. In your Pabbly Connect workflow, add another action step for Google Sheets and select ‘Update Cell’ as the action event.

Map the row index obtained from the previous steps to specify the exact location where the YouTube video URL should be updated. Input the URL of the uploaded video from the YouTube response. Click on ‘Save and Send Test Request’ to complete the process. This will ensure that the video URL is recorded in your Google Sheets for future reference.


Conclusion

By following these steps, you can effectively automate the process of uploading YouTube videos from Dropbox using Pabbly Connect. This integration not only saves time but also streamlines your content management workflow. Whenever you upload a new video file to Dropbox, it will automatically be uploaded to your YouTube channel with all the necessary details fetched from Google Sheets.

Ensure you check out Pabbly Connect to create business automation workflows and reduce manual tasks. Pabbly Connect currently offer integration with 2,000+ applications.

How to Notify Your Team on Slack to Send Gifts to Clients After Onboarding Using Pabbly Connect

Learn how to automate notifications for sending gifts to clients after onboarding using Pabbly Connect and Slack. Step-by-step guide included. Master proven automation processes with practical implementation examples and strategic recommendations you can apply immediately in your workflow.

Watch Step By Step Video Tutorial Below


1. Setting Up Pabbly Connect for Automation

To automate notifications for sending gifts to clients after onboarding, you first need to set up Pabbly Connect. Begin by visiting the Pabbly Connect landing page and signing up for a free account. This account will allow you to create automation workflows seamlessly.

After signing in, you will land on the Pabbly Connect dashboard. Click on the ‘Create Workflow’ button to initiate your automation setup. You can name your workflow something like ‘Notify Team for Client Gifts’. This will help you easily identify the workflow later.


2. Creating the Trigger Integration with Jotform

In the workflow setup, the first step is to create a trigger. For our use case, the trigger will be the submission of the onboarding form created in Jotform. Select Jotform as your trigger application in Pabbly Connect and choose the event as ‘New Response’. This will allow Pabbly Connect to capture the form submissions.

  • Search for Jotform in the application list.
  • Select the ‘New Response’ trigger event.
  • Copy the webhook URL provided by Pabbly Connect.

Next, navigate to your Jotform dashboard. Open the onboarding form you created, go to the settings, and find the Integrations tab. Here, you will add the webhook URL to connect Jotform with Pabbly Connect. Once the integration is set, Pabbly Connect will be ready to capture responses from the form.


3. Capturing Response Data from Jotform

After integrating the webhook URL in Jotform, it’s time to test the connection. Fill out the onboarding form as a demo client to simulate a submission. Once you submit the form, Pabbly Connect will capture this data in real-time.

Check the Pabbly Connect workflow to see if the response has been captured. You should see all the details filled in the form, such as client name, email, and business name. This data will be crucial for sending notifications to your team.


4. Delaying Notification for One Month

To ensure that your team receives a notification after one month of onboarding, you will need to add a delay in your workflow. In Pabbly Connect, use the Delay feature to hold the workflow for 30 days. Select ‘Delay’ from the action options and set it to 30 days.

  • Choose ‘Delay’ from action options.
  • Set the delay time to 30 days.
  • Click ‘Save and send test request’ to confirm.

This delay will ensure that after the client has been onboarded, the system will wait for one month before sending a notification message to your Slack channel.


5. Sending Notifications to Slack

The final step is to send a notification to your team on Slack. In Pabbly Connect, add a new action step and select Slack as the application. Choose ‘Send Channel Message’ as the action event, allowing you to notify your team.

You will need to connect your Slack account by adding a new connection. Choose the token type (User or Bot) based on your preference and allow Pabbly Connect the necessary permissions. After connecting, select the appropriate channel where the notification will be sent.


Conclusion

Automating notifications for sending gifts to clients after onboarding is made easy with Pabbly Connect. By following the steps outlined, you can ensure your team is always informed and ready to enhance client retention through thoughtful gestures. Start using Pabbly Connect today to streamline your workflows.

Ensure you check out Pabbly Connect to create business automation workflows and reduce manual tasks. Pabbly Connect currently offer integration with 2,000+ applications.

10 Most Popular Automations of Pabbly Connect | Pabbly Automation Tutorial

Discover the 10 most popular automations using Pabbly Connect. Learn how to integrate Google, Gmail, WooCommerce, and more for seamless workflows. This comprehensive guide reveals exactly how to connect your applications and automate repetitive tasks — accessible for professionals of all technical backgrounds.

Watch Step By Step Video Tutorial Below


1. Send Bulk Messages from Google Sheets to WhatsApp Using Pabbly Connect

The first automation using Pabbly Connect allows you to send bulk messages from Google Sheets to WhatsApp automatically. This automation is perfect for businesses needing to communicate with multiple clients simultaneously.

To set this up, follow these steps:

  • Use the Scheduler feature in Pabbly Connect to trigger the workflow.
  • Connect Google Sheets in the action step to collect contact details.
  • Use the Iterator to process each contact row by row.
  • Fetch WhatsApp numbers using the JSON Extractor.
  • Send messages using the WhatsApp Cloud API.

Once set up, this automation will send messages according to your schedule, saving you significant time.


2. Send WhatsApp Messages on New Form Submission via Pabbly Connect

This automation sends WhatsApp messages whenever a new form is submitted. Using Pabbly Connect, you can connect Google Forms or any other form builder to WhatsApp.

To set this automation, you need to:

  • Connect your form application in the trigger section.
  • Set WhatsApp Cloud API in the action step.
  • Configure the message to be sent to the form submitter automatically.

This setup ensures that every form submission is acknowledged promptly via WhatsApp, enhancing customer engagement.


3. Share Posts from Facebook Page to Facebook Group with Pabbly Connect

Using Pabbly Connect, you can automate sharing posts from your Facebook Page to a Facebook Group. This can streamline your social media management significantly.

To set this up:

Connect your Facebook Page in the trigger section. In the actions tab, connect your Facebook Group. Configure the settings to post messages or photos automatically.

This integration saves time by eliminating the need to manually copy and paste posts between your Facebook assets.


4. WooCommerce to WhatsApp Notifications via Pabbly Connect

This automation integrates WooCommerce with WhatsApp to send order notifications. With Pabbly Connect, you can keep customers informed about their orders seamlessly.

To create this automation:

Connect WooCommerce as the trigger application with the event ‘New Order Created’. Use Text Formatter to extract customer details. Send WhatsApp messages using the WhatsApp Cloud API.

This automation ensures that both you and your customers receive timely notifications about their orders, enhancing the overall shopping experience.


5. Send SMS from Google Sheets in Real Time with Pabbly Connect

With Pabbly Connect, you can automate sending SMS messages directly from Google Sheets. This is particularly useful for businesses needing to communicate updates quickly.

To set this up:

Connect Google Sheets in the trigger with the event ‘New Row’. Select your SMS sending application in the action step, such as SMS Horizon. Configure the message content to be sent as SMS.

This integration allows for immediate communication based on updates in your Google Sheets, saving time and effort.


Conclusion

In summary, Pabbly Connect offers powerful automation capabilities that can streamline your workflows across various applications, including Google, WooCommerce, and WhatsApp. By implementing these popular automations, you can save time and enhance productivity in your business processes.

Ensure you check out Pabbly Connect to create business automation workflows and reduce manual tasks. Pabbly Connect currently offer integration with 2,000+ applications.

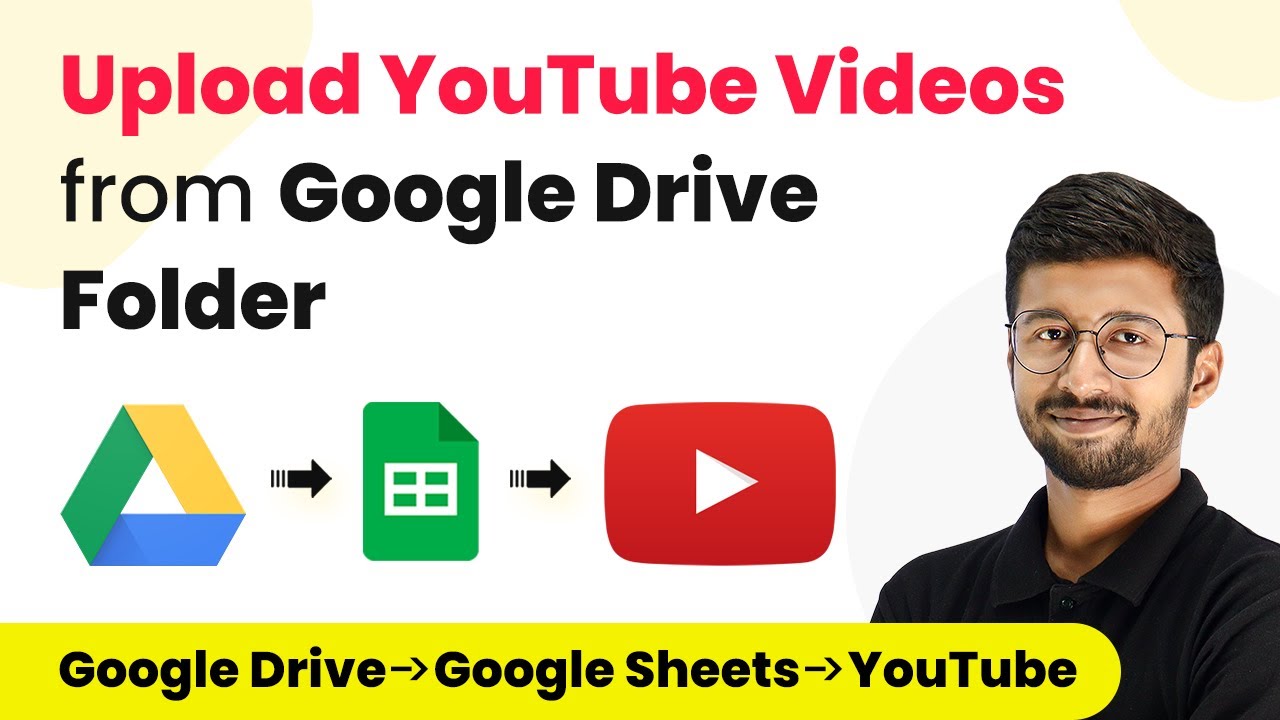
How to Upload YouTube Videos from Google Drive Folder Using Pabbly Connect

Learn how to automate your YouTube video uploads from Google Drive using Pabbly Connect. Follow this detailed tutorial for seamless integration! This comprehensive guide reveals exactly how to connect your applications and automate repetitive tasks — accessible for professionals of all technical backgrounds.

Watch Step By Step Video Tutorial Below


1. Setting Up Pabbly Connect for YouTube Automation

To begin automating your YouTube video uploads from Google Drive, the first step is to set up Pabbly Connect. This platform allows you to connect various applications seamlessly. Start by signing up for a free account on Pabbly Connect, which can be done in just a few minutes.

Once logged in, navigate to the dashboard and click on ‘Create Workflow’. Name your workflow, such as ‘Google Drive to YouTube Automation’. This simple setup will enable you to manage your video uploads efficiently.


2. Configuring Google Drive Trigger in Pabbly Connect

The next step is to configure the Google Drive trigger within Pabbly Connect. In the trigger window, select Google Drive as the application. You will then choose the event ‘New File in Specific Folder’ to ensure that only files uploaded in a designated folder trigger the automation.

  • Click on ‘Connect’ and sign in with your Google account.
  • Select the specific folder where your YouTube videos will be uploaded.
  • Save the settings and test the trigger to ensure it’s working correctly.

After testing, you will receive a response containing the details of the uploaded video, which will be crucial for the next steps in your automation.


3. Extracting Video Details from Google Sheets

Now that you have the video file details, the next step is to extract additional information like the title, description, and tags from Google Sheets using Pabbly Connect. Add a new action step and select Google Sheets, then choose the action event ‘Lookup Spreadsheet Row’.

Connect your Google Sheets account, select the spreadsheet that contains your video details, and specify the lookup column where the video titles are stored. This process allows Pabbly Connect to retrieve all necessary information for the video upload.


4. Uploading Video to YouTube via Pabbly Connect

With all the required details gathered, it’s time to upload the video to YouTube. In Pabbly Connect, add another action step, select YouTube, and then choose the action event ‘Upload Video’. Connect your YouTube account to allow Pabbly Connect to manage your uploads.

  • Map the title, description, and tags from the Google Sheets response.
  • Select the visibility status of the video (Pabbly, unlisted, or private).
  • Save and test the upload action to ensure everything works properly.

Upon successful upload, you will receive a response confirming the video has been uploaded, including the video URL.


5. Finalizing the Automation and Updating Google Sheets

The last step in this automation process is to update your Google Sheets with the uploaded video URL. In Pabbly Connect, add another action step, select Google Sheets, and this time choose the action event ‘Update Cell’.

Specify the spreadsheet and the cell range where you want to update the video URL. Map the row index from the previous Google Sheets lookup response to ensure the correct row is updated with the video link. Save and test this action to confirm that the URL is successfully added to your sheet.


Conclusion

By utilizing Pabbly Connect, you can effortlessly automate the process of uploading videos from Google Drive to YouTube, streamlining your content management. This integration not only saves time but also ensures that all video details are accurately captured from Google Sheets, enhancing your overall workflow efficiency.

Ensure you check out Pabbly Connect to create business automation workflows and reduce manual tasks. Pabbly Connect currently offer integration with 2,000+ applications.

How to Send WhatsApp Messages on Successful Course Enrollment in Kajabi Using Pabbly Connect

Learn how to automate WhatsApp messages for successful course enrollments in Kajabi using Pabbly Connect. Step-by-step guide with detailed instructions. Navigate the automation landscape confidently with clear, structured guidance suitable for professionals regardless of prior technical experience.

Watch Step By Step Video Tutorial Below


1. Accessing Pabbly Connect for WhatsApp Integration

To send WhatsApp messages on successful course enrollment in Kajabi, you need to access Pabbly Connect, the integration platform that facilitates this automation. Start by navigating to the Pabbly Connect website and signing in. If you are a new user, you can create a free account to explore automation features.

After signing in, you will reach the Pabbly Connect dashboard. Here, click on the blue button labeled ‘Create Workflow’ to initiate the automation setup. You will be prompted to name your workflow; for this example, name it ‘When Student is Enrolled in Course Inform Them on WhatsApp’. Click on ‘Create’ to proceed.


2. Setting Up the Trigger Event in Pabbly Connect

In this section, you will set up the trigger event to capture successful course enrollments in Kajabi using Pabbly Connect. The trigger application will be Kajabi, and the event will be ‘New Purchase’. This means that whenever a new purchase is made, the automation will trigger.

  • Select Kajabi as the trigger application.
  • Choose the ‘New Purchase’ event.
  • Copy the provided webhook URL.

Now, navigate back to your Kajabi dashboard. Open the specific course you want to automate and go to the ‘Offer’ section. Here, click on the three dots in the top right corner and select ‘Webhooks’. Paste the copied webhook URL into the designated field and click ‘Save’. This action connects Kajabi with Pabbly Connect, enabling the automation to capture enrollment data.


3. Testing the Trigger Event in Kajabi

To ensure that the trigger setup is working correctly, you need to perform a test submission. This involves making a dummy purchase in Kajabi, which will send data to Pabbly Connect. Open a new tab and navigate to the purchase link for your course.

  • Log out of any existing accounts to simulate a new user.
  • Fill in the dummy details, including a name, email, and phone number.
  • Complete the purchase process.

After completing the purchase, return to Pabbly Connect and click on the ‘Recapture Webhook Response’ button. This will allow you to see the data received from Kajabi, confirming that the trigger event is functioning as intended.


4. Sending WhatsApp Messages through Pabbly Connect

Now that the trigger is set up and tested, it’s time to configure the action that sends WhatsApp messages using Pabbly Connect. For this, select the WhatsApp Cloud API as the action application. Choose ‘Send Template Message’ as the action event.

Create a new connection to WhatsApp Cloud API by entering your token, phone number ID, and WhatsApp business account ID. Select the appropriate message template that you have created for course enrollment notifications. Map the recipient’s phone number and name from the data received from Kajabi.

Once all fields are filled in, click on the ‘Send’ button to test the WhatsApp message. You should receive a confirmation message in WhatsApp, indicating that the automation is working seamlessly through Pabbly Connect.


5. Conclusion: Automate Your Course Enrollment Notifications

In this tutorial, you learned how to send WhatsApp messages for successful course enrollments in Kajabi using Pabbly Connect. By following the steps outlined, you can automate your communication process, ensuring that students receive timely notifications after enrolling in courses.

Ensure you check out Pabbly Connect to create business automation workflows and reduce manual tasks. Pabbly Connect currently offer integration with 2,000+ applications.

Check out Pabbly Connect – Automate your business workflows effortlessly! Sign Up Free – Start your journey with ease! 10,000+ Video Tutorials – Learn step by step! Join Pabbly Facebook Group – Connect with 21,000+ like minded people!

Utilizing Pabbly Connect not only streamlines your workflow but also enhances your customer engagement by keeping them informed. Start automating your WhatsApp messages today and improve your course management experience!

How to Add Graphy Subscribers to LeadSquared CRM Using Pabbly Connect

Learn how to seamlessly integrate Graphy subscribers into LeadSquared CRM using Pabbly Connect with this detailed step-by-step tutorial. Follow this definitive guide to creating powerful automated workflows with straightforward, efficiency-focused solutions that save valuable time.

Watch Step By Step Video Tutorial Below


1. Accessing Pabbly Connect for Integration

To begin the integration process, access Pabbly Connect by visiting Pabbly.com/connect. This is where you will create a seamless workflow between Graphy and LeadSquared CRM.

Once on the landing page, you can either sign in if you are an existing user or click on ‘Sign up for free’ to create a new account. Signing up takes just a couple of minutes, and you will receive 100 free tasks upon account creation.


2. Creating a Workflow in Pabbly Connect

After signing in, navigate to the dashboard and click on the ‘Create Workflow’ button. Here, you will name your workflow, such as ‘Add Graphy Subscribers to LeadSquared CRM,’ which will allow you to automate the process of adding new subscribers as leads.

  • Click on ‘Create’ to proceed to the next step.
  • Select Graphy as the trigger application.
  • Choose ‘New Subscriber’ as the trigger event.

Once selected, you will receive a webhook URL. This URL acts as a bridge allowing Pabbly Connect to access subscriber information from Graphy.


3. Setting Up Graphy for Integration

Log in to your Graphy account and navigate to the ‘Integrations’ section. Here, you will find third-party integrations, including Pabbly Connect.

  • Select ‘New Subscriber’ as the event to send.
  • Paste the webhook URL from Pabbly Connect.
  • Click on ‘Test’ to ensure the webhook is triggered successfully.

Once the test is successful, click on ‘Save’ to finalize the integration in Graphy. This enables Pabbly Connect to capture subscriber data when a new subscriber is added.


4. Connecting LeadSquared CRM in Pabbly Connect

Next, return to Pabbly Connect and set LeadSquared CRM as the action application. Choose the action event as ‘Create or Update Lead.’ This step is crucial as it allows you to automatically create leads in your CRM based on new subscribers from Graphy.

To connect LeadSquared CRM, click on ‘Connect’ and select ‘Add New Connection.’ You will need the API key, secret key, and API host from your LeadSquared account. Follow these steps:

Log in to your LeadSquared account and navigate to Settings. Access the API and Webhooks section to retrieve your API access key and secret key. Paste the API details into Pabbly Connect and click on ‘Save.’

This completes the connection setup and allows Pabbly Connect to send subscriber data to LeadSquared CRM.


5. Mapping Data and Testing the Integration

Now, it’s time to map the data received from Graphy to the fields in LeadSquared CRM. Use the data captured from the webhook response to fill in the necessary fields such as first name, last name, email address, and phone number.

To split the full name into first and last names, utilize the Text Formatter feature in Pabbly Connect. Set the action event to ‘Split Text’ and specify a space as the separator. This ensures that the information is accurately mapped to the CRM.

Save and send a test request to confirm that the lead is created in LeadSquared CRM. Check LeadSquared to see if the new lead appears correctly.

Once confirmed, your integration is complete, and you can now automatically add new Graphy subscribers as leads in LeadSquared CRM using Pabbly Connect.


Conclusion

Integrating Graphy subscribers into LeadSquared CRM using Pabbly Connect streamlines your workflow, ensuring that every new subscriber is automatically added as a lead. This process enhances efficiency and allows you to manage your leads effectively.

Ensure you check out Pabbly Connect to create business automation workflows and reduce manual tasks. Pabbly Connect currently offer integration with 2,000+ applications.

With the steps outlined in this tutorial, you can easily set up this integration and leverage the powerful capabilities of Pabbly Connect for your business needs.

Integrate Google Forms with Graphy Using Pabbly Connect

Learn how to integrate Google Forms with Graphy using Pabbly Connect. Follow our step-by-step tutorial to automate adding learners seamlessly. Develop expertise in application integration and learn how to design streamlined automation workflows using proven, simplified approaches.

Watch Step By Step Video Tutorial Below


1. Access Pabbly Connect for Google Forms and Graphy Integration

To begin the integration of Google Forms with Graphy using Pabbly Connect, you need to access the Pabbly Connect platform. Start by navigating to the URL Pabbly.com/connect. Here, you will find options to sign in or sign up for free. If you are a new user, signing up takes less than two minutes, and you will receive 100 free tasks upon account creation.

Once signed in, you will arrive at the Pabbly Connect dashboard. Click on the ‘Create Workflow’ button, which prompts you to name your workflow. For this integration, you can name it ‘Add Learner to Graphy from Google Forms’. After naming your workflow, click on ‘Create’ to proceed to the next step.


2. Set Up Google Forms as the Trigger in Pabbly Connect

In this step, you will set up Google Forms as the trigger application in Pabbly Connect. The trigger event will be ‘New Response Received’. This means that every time a new submission is made through Google Forms, it will activate the workflow.

  • Select Google Forms as the trigger application.
  • Choose ‘New Response Received’ as the trigger event.
  • Copy the provided webhook URL to connect Google Forms to Pabbly Connect.

After copying the webhook URL, you will need to configure your Google Form to send responses to this URL. This setup allows the integration to capture data from Google Forms automatically.


3. Configure Google Forms to Send Data to Pabbly Connect

Now, you need to configure your Google Form to send data to Pabbly Connect. First, ensure your form is set up with the necessary fields such as first name, last name, course name, contact number, and email address. Once your form is complete, navigate to the responses section and select the option to create a new spreadsheet for the responses.

After creating the spreadsheet, you will need to install the Pabbly Connect Webhooks add-on in Google Sheets. This is crucial as it enables data to be sent from the spreadsheet back to Pabbly Connect. Make sure to refresh the Google Sheets page after installation to see the changes.


4. Map Data to Create a Learner in Graphy

With your Google Form responses now being captured, the next step involves mapping this data to create a learner in Graphy using Pabbly Connect. Select Graphy as your action application and choose the action event ‘Create Learner’. This step will require you to connect Pabbly Connect to your Graphy account using the API key and subdomain found in the Graphy integrations section.

  • Log in to your Graphy account and navigate to the Integrations section.
  • Copy the API key and subdomain to configure the connection in Pabbly Connect.
  • Map the fields from the Google Form to the corresponding fields in Graphy.

This mapping is essential as it ensures that the data captured from Google Forms is accurately sent to Graphy, creating a new learner with the provided details.


5. Test the Integration and Confirm Success

After setting everything up, it’s time to test the integration between Google Forms and Graphy using Pabbly Connect. Submit a test response in your Google Form to see if the data is correctly sent to Graphy. Once the response is submitted, check your Graphy account under the Learners section to confirm that the new learner has been created.

If the integration is successful, you will see the new learner’s information reflected in Graphy. You can repeat this process with different test submissions to ensure consistency and reliability in the integration.


Conclusion

In this tutorial, we explored how to integrate Google Forms with Graphy using Pabbly Connect. By following these steps, you can automate the process of adding learners seamlessly, making your workflow efficient and effective. This integration allows for real-time data transfer, enhancing your course management experience.

Ensure you check out Pabbly Connect to create business automation workflows and reduce manual tasks. Pabbly Connect currently offer integration with 2,000+ applications.

How to Use OpenAI Inside Pabbly Connect: A Step-by-Step Tutorial

Learn how to integrate OpenAI with Pabbly Connect for generating content, replying to comments, and more in this detailed tutorial. This comprehensive guide reveals exactly how to connect your applications and automate repetitive tasks — accessible for professionals of all technical backgrounds.

Watch Step By Step Video Tutorial Below


1. Accessing Pabbly Connect for OpenAI Integration

To begin using Pabbly Connect for integrating OpenAI, you first need to access the Pabbly Connect platform. Simply log in to your Pabbly account and navigate to the Pabbly Connect dashboard. This is where you will set up your automation workflows.

Once you are in Pabbly Connect, you can start creating a new workflow. Click on the ‘Create Workflow’ button, and give your workflow a name that reflects its purpose, such as ‘OpenAI Content Generation’. This is the first step in utilizing Pabbly Connect to connect with OpenAI.


2. Setting Up Google Sheets in Pabbly Connect

The next step involves integrating Google Sheets with Pabbly Connect. This will allow you to input titles for your blogs or articles that OpenAI will generate content for. Select Google Sheets as your trigger application. Choose the event as ‘New Spreadsheet Row’ to fetch the titles from your spreadsheet.

  • Select the specific spreadsheet that contains your blog titles.
  • Map the relevant fields to ensure that the titles are correctly fetched.

After setting up the Google Sheets integration, you will see a confirmation that the connection has been successfully established. This allows Pabbly Connect to pull data from your Google Sheets for use in the OpenAI integration.


3. Integrating OpenAI with Pabbly Connect

Now that you have set up Google Sheets, the next step is to integrate OpenAI with Pabbly Connect. In the next action step, select OpenAI as your application. The action event should be set to ‘Generate Content’. This is where the magic happens, as OpenAI will create content based on the titles you provide.

Click on ‘Connect’ to establish a connection with your OpenAI account. You will need to enter an API token to set up this connection. To generate this token, log in to your OpenAI account, navigate to the API section, and create a new secret key.


4. Configuring OpenAI Settings in Pabbly Connect

With OpenAI integrated into Pabbly Connect, you now need to configure the settings for content generation. Fill in the necessary fields such as AI model, prompt, maximum tokens, and sampling type. For instance, you might set the AI model to ‘text-davinci-003’ for generating high-quality text.

  • Set the prompt to something like ‘Write a blog on the title: [Your Title]’.
  • Adjust the maximum tokens to 256 for shorter responses or up to 4000 for longer articles.

Once you have configured these settings, click on ‘Save and Send Test Request’. You should receive a response from OpenAI with the generated content, confirming that your integration is successful.


5. Using OpenAI to Reply to YouTube Comments

In addition to generating blog content, you can also use Pabbly Connect to automate replies to comments on your YouTube videos. Set up YouTube as your trigger application, selecting ‘New Comment on Video’ as the event. This allows you to capture comments as they come in.

After setting up the trigger, repeat the integration steps with OpenAI to generate replies. For the prompt, you might use ‘Generate a reply for the comment: [Comment]’. Ensure that you map the comment data correctly to get relevant responses from OpenAI.

Finally, once you have received the generated reply, you can send this back to YouTube as a response to the original comment. This demonstrates the versatility of Pabbly Connect in automating both content creation and engagement tasks.


Conclusion

In this tutorial, we explored how to use OpenAI inside Pabbly Connect for various applications, including content generation and responding to comments. By following the steps outlined, you can streamline your content creation process and enhance engagement on platforms like YouTube. Start using Pabbly Connect today to automate your workflows effectively!

Ensure you check out Pabbly Connect to create business automation workflows and reduce manual tasks. Pabbly Connect currently offer integration with 2,000+ applications.