Automate Tracking Competitor Tweets to MS Excel Using Pabbly Connect

Learn how to track competitor tweets and save them to MS Excel automatically using Pabbly Connect. This guide provides a step-by-step tutorial for seamless integration.

Watch Step By Step Video Tutorial Below


1. Setting Up Pabbly Connect for Twitter and MS Excel Integration

To track competitor tweets and save them to MS Excel automatically, the first step is to set up Pabbly Connect. Begin by creating a free account on Pabbly Connect, which allows you to integrate various applications seamlessly. Once logged in, navigate to the dashboard to start creating your workflow.

Click on the blue button labeled ‘Create Workflow’ and assign a name to your workflow, such as ‘Save Competitor Tweets to MS Excel Automatically’. This sets the stage for the automation process where you will connect Twitter and MS Excel through Pabbly Connect.


2. Selecting Twitter and MS Excel Applications

In the workflow setup, you will see two boxes for Trigger and Action. In this case, select Twitter as the trigger application. This means that every time a specific user tweets, the action will be to save that tweet to MS Excel. Hence, you need to choose Microsoft Excel as the action application.

  • Select Twitter from the trigger options.
  • Choose the action as Microsoft Excel.
  • Define the specific trigger event as ‘New Tweet by User’.

This setup ensures that whenever your competitor tweets, Pabbly Connect will automatically capture the tweet details and prepare them for saving to MS Excel.


3. Connecting Your Twitter Account

After selecting Twitter as the trigger, you will need to connect your Twitter account to Pabbly Connect. Click on the button to authorize the app. If prompted, log into your Twitter account and grant the necessary permissions for Pabbly Connect to access your tweets.

Once authorized, enter the username of the competitor whose tweets you wish to track. For example, if tracking the user ‘@GaryMonroe2’, input this username in the specified field. After entering the username, click on the button to fetch the latest tweets from this account.


4. Saving Tweets to MS Excel Using Pabbly Connect

Now that you have connected your Twitter account, it’s time to set up the action to save tweets to MS Excel. Select the action event as ‘Add Row to Worksheet’. This ensures that every new tweet will create a new entry in your Excel sheet.

  • Click on ‘Add a New Connection’ to connect your Microsoft Excel account.
  • Authorize Pabbly Connect to access your Excel account.
  • Select the workbook where you want to save the tweets.

After the connection is established, map the necessary fields like tweet content and date to ensure that the data is saved correctly every time a new tweet is captured.


5. Testing the Integration and Finalizing the Setup

To ensure that everything is working correctly, perform a test by tweeting from the selected competitor account. After tweeting, return to Pabbly Connect and click on the button to fetch the latest tweets. You should see the new tweet captured in the response.

Once confirmed, save the workflow and enable it. From now on, Pabbly Connect will check for new tweets every 10 minutes and automatically add them to your specified MS Excel worksheet. This automation saves you time and ensures you never miss a tweet from your competitors.


Conclusion

Using Pabbly Connect, you can efficiently track competitor tweets and save them to MS Excel automatically. This integration allows you to stay updated with your competitors’ activities without manual effort, ensuring you capture every important tweet seamlessly.

Ensure you check out Pabbly Connect to create business automation workflows and reduce manual tasks. Pabbly Connect currently offer integration with 2,000+ applications.

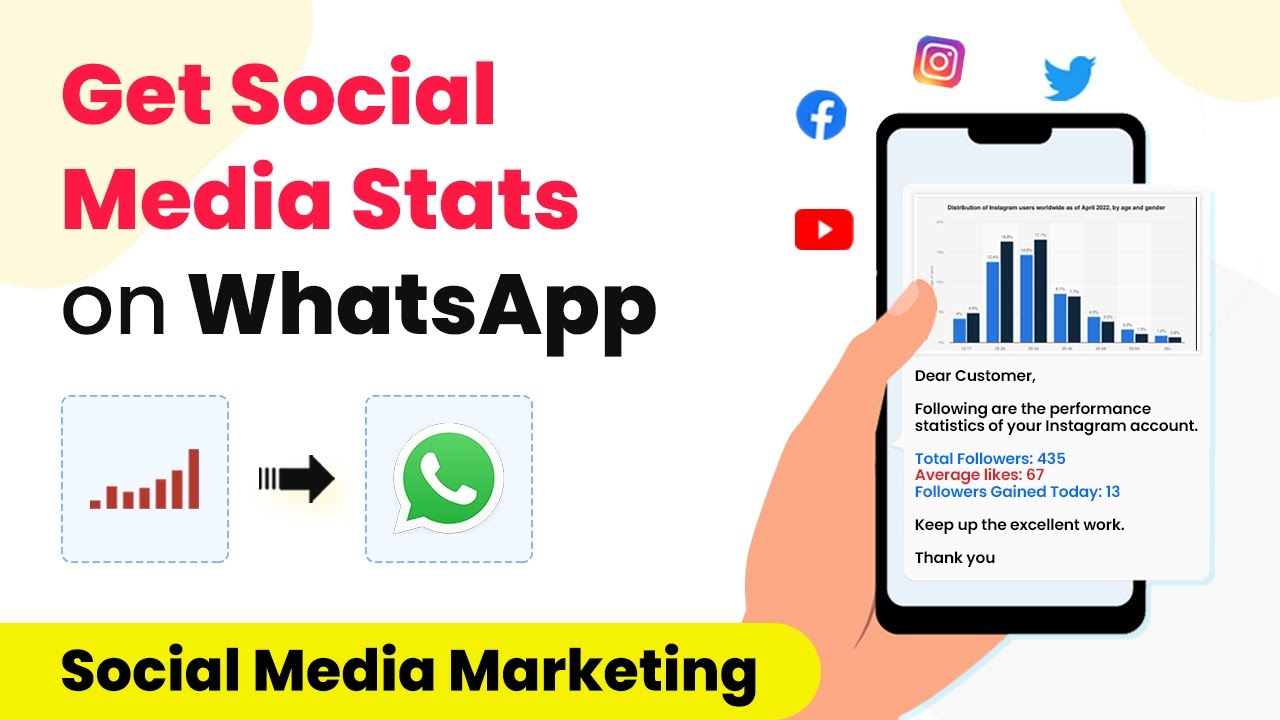
How to Get Social Media Weekly Stats on WhatsApp using Pabbly Connect

Learn how to automate weekly social media stats delivery to WhatsApp using Pabbly Connect and Social Blade. Follow this detailed tutorial for setup. Explore efficient methods for automating routine tasks with clear, concise instructions suited for both newcomers and experienced professionals.

Watch Step By Step Video Tutorial Below


1. Setting Up Pabbly Connect for Automation

To get started with automating your social media stats delivery to WhatsApp, first, access Pabbly Connect. This platform is crucial for integrating different applications like Social Blade and WhatsApp. Begin by signing up for a free account on the Pabbly Connect website.

Once registered, log in to your Pabbly Connect dashboard. Here, you will click on the ‘Create Workflow’ button to initiate the automation process. Name your workflow something descriptive, like ‘Social Media Stats on WhatsApp’. This will help you easily identify your automation later.


2. Scheduling the Workflow with Pabbly Connect

In this step, you will set up a schedule to run your workflow automatically. Use the built-in scheduler feature of Pabbly Connect to run your workflow weekly. Select the day of the week you want the stats to be sent, for example, Sunday at 7 PM.

  • Choose the ‘Scheduler’ option in Pabbly Connect.
  • Select the day of the week (e.g., Sunday).
  • Set the time for the workflow to run (e.g., 7 PM).

After configuring these settings, click ‘Save’. Your workflow is now set to collect social media statistics automatically every week at the specified time.


3. Integrating Social Blade with Pabbly Connect

Next, you will connect the Pabbly Connect workflow to Social Blade, which is the analytics tool that will gather your social media stats. In the actions section, search for Social Blade and select the ‘Get Statistics’ action event.

To connect, you will need to provide your Social Blade client ID and access token. Log into your Social Blade account to retrieve these credentials. Once you have them, paste them into the appropriate fields in Pabbly Connect.

  • Use the ‘Add New Connection’ option to input your credentials.
  • Select the social media platform (e.g., Twitter, Instagram, Facebook) for which you want to collect stats.
  • Enter the account name to retrieve the statistics.

After saving your connection, you will be able to fetch the statistics for the selected platform automatically.


4. Generating a Report Using Google Docs

Once the statistics are collected, the next step is to generate a report using Google Docs through Pabbly Connect. Add a new action step to your workflow and select Google Docs, then choose the ‘Create Document from Template’ action event.

Connect your Google account to Pabbly Connect and select the document template you have prepared for your report. This template should include placeholders for the statistics you want to include, such as likes and followers.

Choose the correct template for your report. Map the statistics data from Social Blade into the appropriate placeholders. Save and send a test request to generate the report.

Once the report is generated, it will be stored in your Google Drive, ready for sharing.


5. Sending the Report to WhatsApp

Finally, to deliver the report to WhatsApp, you will need to use the WhatsApp Cloud API integrated with Pabbly Connect. Add another action step and select WhatsApp Cloud API, then choose ‘Send Template Message’ as the action event.

Connect your WhatsApp account and fill in the required fields, including the recipient’s number and the shareable link to the report generated in Google Docs. Ensure you format the phone number correctly, including the country code.

Select the message template you created for sending reports. Map the shareable link of the report to the message. Send a test message to verify the setup.

Once everything is set up correctly, your weekly social media stats will be delivered automatically to your WhatsApp every week.


Conclusion

In this tutorial, we explored how to automate the process of getting weekly social media stats on WhatsApp using Pabbly Connect and Social Blade. By following the steps outlined, you can ensure that your social media performance is tracked and reported seamlessly every week.

Ensure you check out Pabbly Connect to create business automation workflows and reduce manual tasks. Pabbly Connect currently offer integration with 2,000+ applications.

Using Pabbly Connect allows you to integrate multiple applications without any coding, making it a powerful tool for automating your workflows.

Automate Saving Tweets to Airtable with Pabbly Connect

Learn how to save your tweets to Airtable using Pabbly Connect. This detailed tutorial walks you through each step of the integration process. Transform complex automation concepts into accessible, actionable steps that eliminate unnecessary manual work while maximizing existing application capabilities.

Watch Step By Step Video Tutorial Below


1. Introduction to Pabbly Connect for Saving Tweets

In this tutorial, we will explore how to use Pabbly Connect to save your tweets to Airtable. This automation will allow you to create a backup of your tweets effortlessly. By integrating Twitter with Airtable through Pabbly Connect, every tweet you make will be automatically stored in your Airtable database.

To start, you need to have a Pabbly Connect account. If you don’t have one, you can create a free account in just a few minutes. Once logged in, you will have access to the dashboard where you can create your automation workflows.


2. Setting Up Your Workflow in Pabbly Connect

To set up the workflow for saving tweets, first navigate to your Pabbly Connect dashboard and click on the blue button labeled ‘Create Workflow’. You will need to provide a name for your workflow, such as ‘Save Your Tweet to Airtable’. After naming your workflow, click on the ‘Create’ button to proceed.

  • Click on ‘Create Workflow’
  • Name your workflow (e.g., ‘Save Your Tweet to Airtable’)
  • Select Twitter as the trigger application
  • Select Airtable as the action application

Now, you will see two boxes representing the trigger and action. The trigger is set to Twitter, which means whenever you tweet something new, it will trigger the action to save that tweet in Airtable. Click on the Twitter box to connect your Twitter account to Pabbly Connect.


3. Connecting Twitter to Pabbly Connect

Upon clicking the Twitter box, you will be prompted to connect your Twitter account. This is crucial for Pabbly Connect to fetch your tweets. If this is your first time connecting Twitter, you will need to authorize Pabbly Connect to access your Twitter account. After authorization, you can select your existing connection.

Once connected, click on the ‘Save and Send Test Request’ button. This action will fetch the most recent tweet from your Twitter profile. Ensure that you have tweeted something recently, as this will allow Pabbly Connect to capture the details of your latest tweet.


4. Saving Tweets to Airtable Using Pabbly Connect

After successfully fetching your tweet, the next step is to set up Airtable to receive this data. In Pabbly Connect, select Airtable as your action app. You will need to create a new record in Airtable for each tweet. To do this, you will need an API key from Airtable.

  • Go to your Airtable account and create a new API key.
  • Select the base and table where you want to save your tweets.
  • Map the tweet content and date fields from Twitter to Airtable.

Once you have configured the mapping, click on ‘Save and Send Test Request’ again to verify that the tweet data is being saved correctly in Airtable. You can then check your Airtable account to confirm that the tweet details have been successfully added.


5. Conclusion: Automate Your Tweet Backup with Pabbly Connect

By following these steps, you can effectively automate the process of saving your tweets to Airtable using Pabbly Connect. This integration not only helps in backing up your tweets but also streamlines your workflow, allowing you to focus on creating content without worrying about losing your posts.

Ensure you check out Pabbly Connect to create business automation workflows and reduce manual tasks. Pabbly Connect currently offer integration with 2,000+ applications.

Check out Pabbly Connect – Automate your business workflows effortlessly! Sign Up Free – Start your journey with ease! 10,000+ Video Tutorials – Learn step by step! Join Pabbly Facebook Group – Connect with 21,000+ like minded people!

Once set up, Pabbly Connect will handle the automation seamlessly, ensuring that your tweets are saved in Airtable every time you post. Enjoy the peace of mind that comes with having a reliable backup of your social media activity!


How to Add LinkedIn Lead Gen Ads Leads in Salesforce Using Pabbly Connect

Learn how to seamlessly integrate LinkedIn Lead Gen Ads leads into Salesforce using Pabbly Connect with this step-by-step tutorial. Transform complex automation concepts into accessible, actionable steps that eliminate unnecessary manual work while maximizing existing application capabilities.

Watch Step By Step Video Tutorial Below


1. Setting Up Pabbly Connect for Integration

To start adding LinkedIn Lead Gen Ads leads into Salesforce, first, access Pabbly Connect. This platform allows seamless integration between LinkedIn and Salesforce, ensuring that leads from your LinkedIn forms are captured automatically.

Visit Pabbly Connect and sign up for a free account if you’re a new user. Once signed in, you’ll be directed to the dashboard where you can create workflows. Click on the ‘Create Workflow’ button and name your workflow, for example, ‘Add LinkedIn Lead Gen Ads Leads to Salesforce’.


2. Connecting LinkedIn Lead Gen Ads with Pabbly Connect

In this section, we will connect your LinkedIn Lead Gen Ads to Pabbly Connect. Select LinkedIn Lead Gen Forms as the trigger application. This setup will initiate the workflow whenever a lead is generated from your LinkedIn form.

  • Choose ‘LinkedIn Lead Gen Forms’ as the trigger application.
  • Select ‘New Lead’ as the trigger event.
  • Click on ‘Connect’ and add a new connection.

After connecting, you will need to authorize Pabbly Connect to access your LinkedIn account. Once authorized, select the lead generation form you want to use, for example, ‘Tour and Travel Booking Form’. This is crucial as it specifies which leads will be captured.


3. Capturing Leads from LinkedIn

Once your LinkedIn Lead Gen Form is connected to Pabbly Connect, you can capture leads automatically. To test this, submit a dummy entry through your LinkedIn form. Ensure that the lead details are filled out correctly, including the first name, last name, email, and phone number.

  • Fill in the required fields in your LinkedIn form.
  • Submit the form to generate a lead.
  • Check Pabbly Connect to see if the lead data has been captured.

After submission, Pabbly Connect will retrieve the latest lead details from your LinkedIn form. This step is essential as it verifies that the integration is functioning correctly before moving on to Salesforce.


4. Integrating Salesforce with Pabbly Connect

Now that your leads are being captured in Pabbly Connect, the next step is to send this data to Salesforce. Select Salesforce as the action application and choose the action event as ‘Create Contact’. This will allow Pabbly Connect to create new contacts in Salesforce automatically.

Connect your Salesforce account to Pabbly Connect by clicking on ‘Connect’ and adding a new connection. You will need to authorize Pabbly Connect to access your Salesforce account. Once connected, you can map the lead details from LinkedIn to the corresponding fields in Salesforce.


5. Finalizing the Automation Process

After mapping the necessary details, such as first name, last name, email, and phone number, you can finalize the automation process. Click on the ‘Save’ button in Pabbly Connect to ensure that your workflow is active. This setup guarantees that every time a lead is submitted through your LinkedIn form, a new contact will be created in Salesforce.

Keep in mind that Pabbly Connect checks for new entries every three hours. Therefore, it may take some time for the new contacts to appear in Salesforce. Patience is key as the system processes the data.


Conclusion

In this tutorial, we explored how to use Pabbly Connect to automate the process of adding LinkedIn Lead Gen Ads leads to Salesforce. By following these steps, you can streamline your lead management efficiently and effectively. Automating this process saves time and ensures that no lead is missed, allowing you to focus on converting leads into customers.

Ensure you check out Pabbly Connect to create business automation workflows and reduce manual tasks. Pabbly Connect currently offer integration with 2,000+ applications.

Automate Saving Email Attachments to Google Sheets & Google Drive with Pabbly Connect

Learn how to automatically save email attachments to Google Sheets and Google Drive using Pabbly Connect. Follow this step-by-step guide for seamless integration. Discover hidden automation capabilities within your existing tools. This guide shows you how to connect your essential applications and permanently eliminate redundant manual processes.

Watch Step By Step Video Tutorial Below


1. Introduction to Pabbly Connect for Email Automation

Pabbly Connect is a powerful automation platform that streamlines the process of saving email attachments to Google Sheets and Google Drive automatically. By integrating Gmail, Google Sheets, and Google Drive, you can create a seamless workflow that saves time and effort. using Pabbly Connect

To get started, log into your existing Pabbly Connect account or create a new one. Once logged in, navigate to the dashboard where you can start building your automation. This tutorial will guide you through the steps to set up the integration effectively.


2. Creating a New Workflow in Pabbly Connect

To create a new workflow in Pabbly Connect, click on the ‘Create Workflow’ button. You will be prompted to name your workflow, which can be something like ‘Integrate Gmail, Google Sheets, and Google Drive.’ After naming your workflow, click on the ‘Create’ button to proceed. using Pabbly Connect

  • Select ‘Email Parser’ as the trigger application to capture incoming emails.
  • Choose the action event that will add data to Google Sheets.
  • Set up the action to upload files to Google Drive.

These steps will set the foundation for your automation, ensuring that every email received with an attachment is captured and processed correctly.


3. Configuring Gmail Forwarding with Pabbly Connect

After creating your workflow, the next step is to configure Gmail to forward emails to Pabbly Connect. Copy the email address provided by Pabbly Connect in the Email Parser settings. Then, go to your Gmail settings and navigate to the ‘Forwarding and POP/IMAP’ tab. using Pabbly Connect

  • Click on ‘Add a forwarding address’ and paste the email address from Pabbly Connect.
  • Follow the verification steps to confirm the forwarding address.
  • Ensure that the forwarding option is enabled for all incoming emails.

This setup allows Pabbly Connect to receive and process emails automatically, ensuring that all attachments are captured for further action.


4. Mapping Data to Google Sheets and Google Drive

Once your Gmail is configured, it’s time to map the data to Google Sheets. In Pabbly Connect, select Google Sheets as the action application and choose the event to add a new row. Connect your Google account and select the spreadsheet where you want to store the email data. using Pabbly Connect

Map the relevant fields from the email, such as:

Date of the email Email content Attachment link

After mapping these fields, you can test the integration to ensure that the data is saved correctly in Google Sheets. This step is crucial for verifying that your automation is functioning as intended.


5. Finalizing the Automation Process with Pabbly Connect

The final step in this automation process involves uploading the email attachments to Google Drive. In Pabbly Connect, select Google Drive as the action application and choose the event to upload a file. Connect your Google Drive account and specify the folder where the attachments will be saved.

Map the attachment URL from the email data to ensure that the correct files are uploaded. Once everything is set up, you can save and test the workflow.

This automation will now ensure that every time you receive an email with an attachment, the data will be logged in Google Sheets and the attachment will be saved in Google Drive. Enjoy the benefits of automated workflows with Pabbly Connect!


Conclusion

In this tutorial, we covered how to automate saving email attachments to Google Sheets and Google Drive using Pabbly Connect. By following these steps, you can streamline your workflow and ensure that important emails and attachments are backed up automatically.

Ensure you check out Pabbly Connect to create business automation workflows and reduce manual tasks. Pabbly Connect currently offer integration with 2,000+ applications.

How to Add LinkedIn Lead Gen Form Leads to ActiveCampaign Using Pabbly Connect

Learn how to integrate LinkedIn Lead Gen Form leads with ActiveCampaign using Pabbly Connect. Follow this step-by-step tutorial to automate your lead management process. Explore systematic approaches to creating efficient automation solutions that convert technical concepts into practical, implementable instructions.

Watch Step By Step Video Tutorial Below


1. Accessing Pabbly Connect for Integration

To begin integrating LinkedIn Lead Gen Form leads with ActiveCampaign, first access Pabbly Connect. This powerful automation tool allows you to seamlessly connect various applications, enabling efficient data transfer.

Start by visiting Pabbly Connect at Pabbly.com/connect. If you’re a new user, sign up for a free account. Existing users can simply log in. Once you’re in, click on the blue button labeled ‘Create Workflow’ to initiate your automation setup.


2. Setting Up Your Automation Workflow in Pabbly Connect

In this section, you will create a workflow to automate the addition of leads from LinkedIn to ActiveCampaign. After clicking ‘Create Workflow,’ provide a name for your workflow, such as ‘Add LinkedIn Lead Gen Form Leads to ActiveCampaign.’This identifies the purpose of your automation clearly.

  • Click on the ‘Create’ button.
  • Select ‘LinkedIn Lead Generation Forms’ as your trigger application.
  • Choose ‘New Form Response’ as the trigger event.

After selecting the trigger, click on ‘Connect’ and then ‘Add New Connection’ to link your LinkedIn account. This will require you to log in and authorize Pabbly Connect to access your LinkedIn Lead Gen Forms.


3. Capturing Lead Data from LinkedIn Lead Gen Forms

Once your LinkedIn account is connected, select the specific lead generation form you want to use. For example, choose the ‘Tour and Travel Booking Form’. This is where potential leads will submit their information.

To test the connection, submit a lead through your LinkedIn form. After submission, return to Pabbly Connect and click on the button to fetch the most recent lead data. You should see the details captured, including the email address, phone number, and names of the lead.

  • Verify that the captured details match the submitted information.
  • Ensure that Pabbly Connect displays the lead’s information accurately.

This step confirms that your LinkedIn Lead Gen Form is correctly integrated with Pabbly Connect to capture lead data automatically.


4. Sending Captured Data to ActiveCampaign

Now that you have captured the lead data, it’s time to send this information to ActiveCampaign. In Pabbly Connect, select ActiveCampaign as the action application. Choose the action event as ‘Create Contact’ to add the lead as a new contact.

Click on ‘Connect’ and then ‘Add New Connection’. You will need to enter your ActiveCampaign API key and URL. To find this information, log into your ActiveCampaign account, navigate to the ‘Settings’ tab, and then to ‘Developer’ to copy your API key.

Paste the API key into Pabbly Connect. Enter your ActiveCampaign URL without the ‘https://’ prefix.

After connecting, map the lead data fields from LinkedIn to the corresponding fields in ActiveCampaign, such as email, first name, last name, and phone number. This mapping ensures that the correct data is transferred to the right fields in ActiveCampaign.


5. Testing the Integration and Finalizing Setup

After mapping the fields, click the button to send the data to ActiveCampaign. You should see a success message indicating that the contact has been created. To verify, refresh your ActiveCampaign dashboard, and check for the new contact.

As a final step, ensure that your automation is set to check for new leads every three hours. This means that any leads submitted through your LinkedIn Lead Gen Form will be added to ActiveCampaign without manual intervention.

With Pabbly Connect, you have successfully automated the process of adding LinkedIn leads to ActiveCampaign. This integration not only saves time but also ensures that you never miss a lead.


Conclusion

In this tutorial, you learned how to integrate LinkedIn Lead Gen Form leads with ActiveCampaign using Pabbly Connect. This automation streamlines your lead management process, allowing you to focus on converting leads into customers.

Ensure you check out Pabbly Connect to create business automation workflows and reduce manual tasks. Pabbly Connect currently offer integration with 2,000+ applications.

Automatically Send SMS to LinkedIn Leads Using Pabbly Connect

Learn how to automatically send SMS to LinkedIn leads using Pabbly Connect. Follow this step-by-step tutorial to streamline your lead communication. Explore efficient methods for automating routine tasks with clear, concise instructions suited for both newcomers and experienced professionals.

Watch Step By Step Video Tutorial Below


1. Introduction to Pabbly Connect for SMS Automation

Pabbly Connect is a powerful automation platform that enables you to connect various applications seamlessly. In this tutorial, we will explore how to use Pabbly Connect to automatically send SMS messages to leads captured through LinkedIn Lead Generation Forms. This integration helps streamline your communication and ensures timely follow-ups with potential clients.

To get started, create a free account on Pabbly Connect. Once logged in, you can access the dashboard where you will set up the automation workflow for sending SMS to your LinkedIn leads.


2. Setting Up Your Pabbly Connect Workflow

To initiate the integration process, click on the blue button labeled ‘Create Workflow’ in your Pabbly Connect dashboard. You will need to provide a name for your workflow, such as ‘Send SMS to New LinkedIn Leads.’ This name helps you identify the workflow later.

  • Click on ‘Create’ to proceed.
  • You will see two boxes: Trigger and Action.
  • Select ‘LinkedIn Lead Generation Form’ as the trigger application.

After selecting the trigger, you will need to choose the event that triggers the SMS sending process. In this case, select ‘New Lead Generation Form Response’. This event will activate every time a new lead fills out your LinkedIn form.


3. Connecting LinkedIn Lead Generation Form to Pabbly Connect

Once you have set up the trigger, it’s time to connect your LinkedIn account to Pabbly Connect. Click on ‘Connect’ and then select ‘Add New Connection’. You will be prompted to authorize Pabbly Connect to access your LinkedIn account.

After successful authorization, refresh the connection to fetch your lead generation forms. Select the specific form you want to connect, ensuring it corresponds to your active LinkedIn advertisement. This step is crucial as it determines which leads will trigger the SMS notifications.


4. Configuring SMS Sending via Twilio in Pabbly Connect

With the LinkedIn form connected, the next step involves configuring the action to send SMS through Twilio. In the action section of Pabbly Connect, choose ‘Twilio’ as the application and select ‘Send SMS’ as the action event. You will be required to connect your Twilio account by entering the necessary credentials.

  • Provide your Twilio Account SID and Auth Token.
  • Map the lead’s phone number from the LinkedIn form to the recipient number field.
  • Compose your SMS message, incorporating dynamic fields for personalization.

Once you have completed these configurations, click on ‘Save’. This action will finalize the setup, allowing Pabbly Connect to send SMS messages automatically whenever a new lead is captured.


5. Testing Your Pabbly Connect Automation

After setting up your automation, it is essential to test the integration to ensure everything is working correctly. Fill out the LinkedIn Lead Generation Form with test data, including a valid phone number. Once submitted, return to your Pabbly Connect dashboard and click the ‘Refresh’ button to check for new responses.

If the integration is successful, you should see the lead information populated in Pabbly Connect, and the SMS should be sent to the provided phone number. Monitor your Twilio account to confirm the SMS delivery. If everything works as intended, your automation is now live!


Conclusion

In this tutorial, we explored how to use Pabbly Connect to automatically send SMS messages to leads captured through LinkedIn Lead Generation Forms. By following these steps, you can streamline your lead communication and enhance your marketing efforts effectively.

Ensure you check out Pabbly Connect to create business automation workflows and reduce manual tasks. Pabbly Connect currently offer integration with 2,000+ applications.

How to Create Zoom Meetings from Google Sheets Using Pabbly Connect

Learn how to automate Zoom meeting creation from Google Sheets using Pabbly Connect in this detailed tutorial. Follow step-by-step instructions for seamless integration. Transform complex automation concepts into accessible, actionable steps that eliminate unnecessary manual work while maximizing existing application capabilities.

Watch Step By Step Video Tutorial Below


1. Setting Up Pabbly Connect for Zoom Meetings

To create Zoom meetings from Google Sheets, we will use Pabbly Connect as our automation platform. Start by signing up for a free Pabbly Connect account, which allows you to set up automation tasks easily. After signing in, navigate to the dashboard and click on the ‘Create Workflow’ button.

Here, you will name your workflow. For this tutorial, we will name it ‘Create Zoom Meetings from Google Sheets’. After naming, click the ‘Create’ button to proceed. You will see a page with two modules: Trigger and Action, which are essential for setting up the automation.


2. Configuring Google Sheets as the Trigger

In this step, we will configure Google Sheets as the trigger application in Pabbly Connect. Click on the trigger module and search for Google Sheets. Select the ‘New or Updated Row’ trigger event. This event will activate whenever new meeting details are added to a row in your Google Sheet.

  • Search for Google Sheets in the trigger module.
  • Select ‘New or Updated Row’ as the trigger event.
  • Copy the provided webhook URL to connect Google Sheets.

Next, open your Google Sheet in an incognito window to avoid any account conflicts. Click on ‘Extensions’, then ‘Add-ons’, and select ‘Get Add-ons’. Search for ‘Pabbly Connect Webhooks’ and install it. After installation, refresh your spreadsheet and go back to the ‘Extensions’ menu to find the Pabbly Connect add-on.


3. Initializing the Webhook Setup

Once you have the Pabbly Connect add-on ready, click on ‘Initial Setup’ from the Pabbly Connect menu. You will see two fields: the Webhook URL and the Trigger Column. Paste the copied webhook URL into the Webhook URL field and specify the trigger column, which is the last column where you will add meeting details. using Pabbly Connect

For instance, if you are entering meeting details in column C, you will set the Trigger Column to C. After setting this up, go back to your Pabbly Connect workflow. The workflow will show that it’s waiting for a response from the webhook, indicating that it is ready to receive data.

  • Paste the Webhook URL in the designated field.
  • Set the Trigger Column to the column where you will add meeting details.
  • Ensure the workflow is ready to receive data.

Now, add some test data in your Google Sheet to trigger the webhook. Click on ‘Send Test’ from the add-on to send this data to Pabbly Connect.


4. Creating a Zoom Meeting Action

After successfully sending test data, it’s time to create a Zoom meeting using Pabbly Connect. In the Action module, search for Zoom and select ‘Create Meeting’ as the action event. Click on ‘Connect’ and choose to add a new connection. You will be prompted to log in to your Zoom account to establish this connection.

Once connected, map the required fields for the Zoom meeting. You will need to fill in the topic, start time, duration, and other details. Make sure to format the start time correctly in GMT as per Zoom’s requirements. You can use the Date Time Formatter feature in Pabbly Connect to adjust the date format as needed.

Search for Zoom in the Action module and select ‘Create Meeting’. Log in to your Zoom account to connect. Map the fields from the Google Sheets data to the Zoom meeting fields.

After mapping all the fields, click on ‘Save and Send Test Request’ to create the meeting. Check your Zoom account to confirm that the meeting has been created successfully.


The final step is to update the meeting link back in your Google Sheet using Pabbly Connect. Add another action step and search for Google Sheets again. This time, select ‘Update Cell Value’ as the action event. Connect to your Google Sheets account if not already connected.

Specify the spreadsheet name, sheet name, and the range where the meeting link should be updated. For example, if you want to update the meeting link in column D, you will specify the range accordingly. Map the joining link received from the Zoom action to the cell value you want to update.

Select ‘Update Cell Value’ in Google Sheets as the action event. Map the joining link from the Zoom meeting response to the cell. Test the action to ensure the link updates correctly in Google Sheets.

After clicking ‘Save and Send Test Request’, verify that the meeting link has been updated in the specified cell of your Google Sheet. This completes the automation process, allowing seamless scheduling of Zoom meetings directly from Google Sheets.


Conclusion

Using Pabbly Connect, you can effortlessly automate Zoom meeting creation directly from Google Sheets. This integration streamlines your workflow, ensuring that every meeting detail is captured and updated seamlessly. By following the steps outlined in this tutorial, you’ll enhance productivity and simplify scheduling tasks.

Ensure you check out Pabbly Connect to create business automation workflows and reduce manual tasks. Pabbly Connect currently offer integration with 2,000+ applications.

How to Add LinkedIn Lead Gen Form Leads to Mailchimp Using Pabbly Connect

Learn how to integrate LinkedIn Lead Gen Form leads into Mailchimp using Pabbly Connect with this step-by-step tutorial. Eliminate manual repetitive tasks from your workflow. Discover proven automation methods with intuitive steps designed for efficiency-minded professionals.

Watch Step By Step Video Tutorial Below


1. Setting Up Pabbly Connect for LinkedIn and Mailchimp Integration

In this section, we will discuss how to access Pabbly Connect to set up the integration between LinkedIn Lead Gen Forms and Mailchimp. First, log into your Pabbly Connect account. If you are new, you can create a free account in just two minutes, allowing you to start testing automation.

Once logged in, click on the blue button labeled ‘Create Workflow’. You will be prompted to name your workflow; for example, you can name it ‘Add New Lead as Subscriber in Mailchimp’. After naming, click on the ‘Create’ button to proceed. This will open two boxes for Trigger and Action, where you will set up your automation steps.


2. Configuring the Trigger with LinkedIn Lead Generation Form

To initiate the integration, select LinkedIn Lead Generation Form as your trigger application in Pabbly Connect. This means every time a new lead is captured through your LinkedIn form, it will trigger the automation. Click on ‘Connect’, then choose ‘Add a New Connection’ for LinkedIn.

  • Select LinkedIn Lead Generation Form as the trigger event.
  • Provide access to your LinkedIn account by entering your credentials.
  • Refresh to fetch your LinkedIn account details and select the appropriate lead generation form.

After selecting the form, click on ‘Save and Send Test Request’. This action will fetch the most recent lead data from your LinkedIn form, confirming that the connection is established successfully.


3. Mapping LinkedIn Lead Data to Mailchimp

Now that your LinkedIn Lead Generation Form is connected to Pabbly Connect, the next step is to map the lead data to Mailchimp. This involves connecting Mailchimp as the action application. Click on ‘Add Action’ and select Mailchimp from the list.

In the Mailchimp connection setup, you will need to provide your Mailchimp API key. To find this, go to your Mailchimp account, navigate to your profile, and select ‘Extras’ followed by ‘API keys’. Generate a new key if necessary, copy it, and then paste it into Pabbly Connect.

  • Select the audience list where you want to add the new subscriber.
  • Map the email address, first name, last name, and phone number from LinkedIn to the corresponding fields in Mailchimp.

Once you have mapped the fields, click on ‘Save and Send Test Request’. This will create a new subscriber in your Mailchimp account using the data from the LinkedIn lead.


4. Testing the Automation Workflow

To ensure everything is working correctly, it’s essential to test your automation workflow in Pabbly Connect. Start by filling out the LinkedIn Lead Gen Form as if you were a prospective lead. Include your email, phone number, and any other required fields.

After submitting the form, return to Pabbly Connect and click on ‘Save and Send Test Request’ once more. This action will capture the new lead data and attempt to create a subscriber in Mailchimp. Check your Mailchimp account to confirm that the lead was successfully added.

Remember, Pabbly Connect will check for new leads every 10 minutes, so if you don’t see immediate results, wait a bit. This polling mechanism ensures that your leads are captured without manual intervention.


Conclusion: Streamlining Your LinkedIn to Mailchimp Integration with Pabbly Connect

By following this detailed tutorial, you can efficiently integrate LinkedIn Lead Gen Forms with Mailchimp using Pabbly Connect. This automation allows you to collect leads seamlessly and add them as subscribers in your email marketing campaigns. Once set up, this process runs in the background, saving you time and effort.

Ensure you check out Pabbly Connect to create business automation workflows and reduce manual tasks. Pabbly Connect currently offer integration with 2,000+ applications.

Check out Pabbly Connect – Automate your business workflows effortlessly! Sign Up Free – Start your journey with ease! 10,000+ Video Tutorials – Learn step by step! Join Pabbly Facebook Group – Connect with 21,000+ like minded people!
Utilizing Pabbly Connect not only streamlines your workflow but also enhances your marketing efforts, ensuring no lead goes unnoticed. Start automating today and focus on what truly matters in your business!

How to Send a Discord Message for a New Zoom Meeting Registrant Using Pabbly Connect

Learn how to integrate Zoom and Discord using Pabbly Connect to send messages for new meeting registrants. Step-by-step tutorial included. Learn to create powerful connections between your critical applications without requiring specialized programming knowledge or extensive technical background.

Watch Step By Step Video Tutorial Below


1. Setting Up Pabbly Connect for Zoom and Discord Integration

To start automating your Zoom and Discord integration, you need to access Pabbly Connect. Sign up for a free account to reach the dashboard where you can create your workflows. Click on ‘Create Workflow’ and name it, for example, ‘Zoom to Discord’.

This workflow includes a trigger and an action. The trigger will be a new registration in your Zoom meeting, and the action will be sending a message to your Discord channel. This setup allows you to receive immediate notifications on Discord whenever someone registers for your Zoom meeting.


2. Connecting Zoom to Pabbly Connect

In the trigger window of Pabbly Connect, search for ‘Zoom’ and select it. Choose the trigger event as ‘New Registration’. This action will generate a webhook URL that you will use to connect your Zoom account with Pabbly Connect.

  • Navigate to your Zoom account, click on ‘Advanced’, then ‘App Marketplace’.
  • Hover over ‘Develop’ and select ‘Build App’.
  • Create a Webhook-only app and enter the required details.

Once you have created the app, you need to set up event subscriptions. Turn on the event subscription toggle and add a new subscription. Paste the webhook URL you copied from Pabbly Connect into the event notification endpoint. Select the event type as ‘Meeting Registration Created’ and save your settings.


3. Creating a Discord Integration in Pabbly Connect

After setting up Zoom, navigate to the action window in Pabbly Connect and search for ‘Discord’. Select it and choose the action event as ‘Send Channel Message’. Click on connect and you will need to provide a webhook URL from your Discord server.

To get this URL, go to your Discord server, select your channel, and access the server settings. Under ‘Integrations’, create a new webhook. Choose the channel where you want to send notifications and copy the webhook URL back to Pabbly Connect.

  • Set the message format for the Discord notification.
  • Map the user details such as first name, last name, and email from the Zoom registration data.
  • Test the integration to ensure messages are sent correctly.

After configuring the message, you can send a test request to see if the integration works. If successful, you will receive a message in your Discord channel confirming the registration details.


4. Testing the Automation with Pabbly Connect

To ensure everything is functioning correctly, create a test registration for your Zoom meeting. Use the registration link and fill in the details for a new user. After submitting the registration, check your Zoom account to verify that the user appears in the registrant list.

With Pabbly Connect set up, the details of the new registration will automatically be captured in your workflow. You will see the registration data, including the name, email, and meeting details, in the Pabbly Connect dashboard.

Once the test registration is successful, check your Discord channel for the notification. The message should include all relevant information about the new registrant, confirming that the integration is working seamlessly.


5. Conclusion: Automating Zoom Registrations with Discord Notifications

Using Pabbly Connect, you can effectively automate the process of sending Discord messages for new Zoom meeting registrants. This integration not only saves time but also ensures that your team stays informed about new registrations instantly.

Ensure you check out Pabbly Connect to create business automation workflows and reduce manual tasks. Pabbly Connect currently offer integration with 2,000+ applications.

By following the steps outlined in this tutorial, you can set up this automation quickly and efficiently. With Pabbly Connect, you can connect various applications to streamline your workflows and enhance productivity.

Start using Pabbly Connect today to automate your Zoom and Discord integration and never miss a registration update again!