Integrating LinkedIn Lead Gen Form Responses with Gmail Using Pabbly Connect

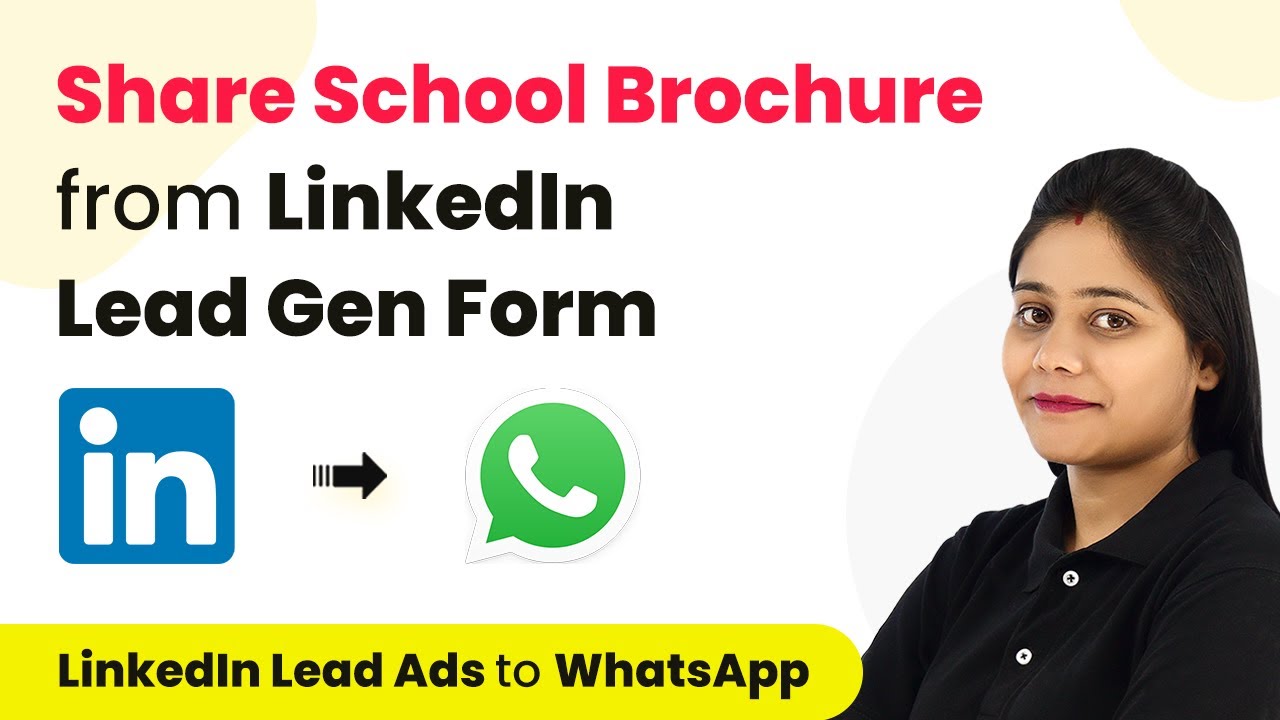
Learn how to integrate LinkedIn Lead Gen Form responses with Gmail using Pabbly Connect for seamless lead sharing. Step-by-step tutorial included. Revolutionize your productivity approach with just a few strategic clicks. Uncover professional methods for connecting applications and creating workflows that reclaim hours of your week.

Watch Step By Step Video Tutorial Below


1. Accessing Pabbly Connect for Integration

To start integrating LinkedIn Lead Gen Form responses with Gmail, you first need to access Pabbly Connect. Open your browser and type the URL Pabbly.com/connect. This will take you to the Pabbly Connect landing page.

If you’re a new user, click on the ‘Sign Up’ button to create an account. Existing users can simply click ‘Sign In’ to access their dashboard. Pabbly Connect offers 100 free tasks upon signing up, making it easy to get started with your automation needs.


2. Creating Your Workflow in Pabbly Connect

Once logged into Pabbly Connect, navigate to the dashboard and click on the ‘Create Workflow’ button. Name your workflow something descriptive, such as ‘Send New LinkedIn Lead Generation Form Responses in Gmail’. This name will help you identify the workflow later.

  • Click on ‘Create’ to proceed.
  • You will see options for ‘Trigger’ and ‘Action’.
  • Select ‘LinkedIn Lead Generation Forms’ as your trigger application.

After selecting the trigger application, choose the event ‘New Lead Generation Forms Response’. This event will check for new data every 10 minutes, ensuring timely responses are captured.


3. Connecting LinkedIn Lead Generation Forms

In this step, you will connect your LinkedIn account with Pabbly Connect. Click on the ‘Connect’ button to initiate the connection. You will be prompted to log into your LinkedIn account if not already signed in.

Once logged in, authorize Pabbly Connect to access your LinkedIn Lead Generation Forms. After successful authorization, you will need to select the specific lead form you want to connect. This can be done by navigating to your LinkedIn Campaign Manager and selecting the desired lead form from the list.


4. Setting Up Gmail as Action Application

After successfully connecting LinkedIn, it’s time to set up Gmail as your action application in Pabbly Connect. Choose ‘Gmail’ from the action applications list and select the ‘Send Email’ event.

  • Click ‘Connect’ to authorize Pabbly Connect to access your Gmail account.
  • Select the Gmail account you want to use for sending emails.
  • Authorize the access by clicking ‘Allow’.

Now, you need to configure the email settings. Enter the recipient’s email address, subject, and body content. You can map the lead details from the previous step to include in your email, ensuring that each new lead is shared with your team effectively.


5. Testing Your Integration

Once everything is set up, it’s crucial to test your integration. In Pabbly Connect, click on ‘Save and Send Test Request’. This will simulate a new lead submission from your LinkedIn form.

Check the recipient’s Gmail inbox for the test email. If the email arrives with the lead details, your integration is successful! Remember that the trigger checks for new leads every 10 minutes, so real-time testing may require a little patience.

With this setup, you can now seamlessly share LinkedIn Lead Gen Form responses via Gmail, enhancing your team’s responsiveness to new leads.


Conclusion

Integrating LinkedIn Lead Gen Form responses with Gmail using Pabbly Connect allows for efficient lead management. By following the steps outlined above, you can automate the sharing of new leads with your team, ensuring timely follow-ups and improved communication.

Ensure you check out Pabbly Connect to create business automation workflows and reduce manual tasks. Pabbly Connect currently offer integration with 2,000+ applications.

How to Create Meeting Notes Document from New Calendly Events Using Pabbly Connect

Learn how to automate meeting notes creation from new Calendly events using Pabbly Connect. Step-by-step guide to enhance your productivity. Transform complex automation concepts into accessible, actionable steps that eliminate unnecessary manual work while maximizing existing application capabilities.

Watch Step By Step Video Tutorial Below


1. Set Up Pabbly Connect for Your Workflow

To create a meeting notes document from new Calendly events, you first need to set up Pabbly Connect. Begin by signing up for a free Pabbly Connect account. Once signed in, navigate to the dashboard and click on ‘Create Workflow’. Name your workflow appropriately, for example, ‘Calendly to Google Docs to Airtable’.

After naming your workflow, you will see two windows: the trigger window and the action window. The trigger window is where you will set up the event that initiates the workflow. In this case, you will select Calendly as your trigger app.


2. Connect Calendly as the Trigger in Pabbly Connect

In the trigger window of Pabbly Connect, search for Calendly and select it. Then, choose the trigger event as ‘Invitee Created’. Click on the ‘Connect’ button and proceed to add a new connection to your Calendly account.

Once you click the ‘Connect with Calendly’ button, Pabbly Connect will prompt you to select the organization associated with your Calendly account. Make sure to select the correct organization, as this is crucial for capturing the event data correctly. After selecting, click on ‘Save and Test Request’ to ensure that Pabbly Connect is ready to receive data from Calendly.


3. Create Meeting Notes Document in Google Docs

After capturing the event data from Calendly, the next step is to create a meeting notes document in Google Docs. In the action window of Pabbly Connect, search for Google Docs and select it. Choose the action event as ‘Create Document from Template’.

Connect your Google Docs account by clicking ‘Sign in with Google’. Select the template document you previously created for meeting notes. You can name the new document based on the candidate’s name and email by mapping those fields from the Calendly response. Ensure you select the correct folder in Google Drive where the document will be stored.


4. Share the Google Doc and Retrieve the Link

Once the meeting notes document is created, you need to share it so that anyone with the link can access it. In the next action step in Pabbly Connect, search for Google Drive and select it. Then, choose the action event as ‘Share a File with Anyone’.

Connect your Google Drive account and map the document ID received from the previous step. This will allow Pabbly Connect to change the sharing permissions of the newly created document. After setting this up, click on ‘Save and Send Test Request’ to confirm the sharing settings.


5. Store Meeting Details in Airtable

The final step in this automation workflow is to store the meeting details in Airtable. In Pabbly Connect, add a new action step and search for Airtable. Select the action event as ‘Create Record’ and connect your Airtable account using the API key.

Next, select the base and table where you want to store the meeting details. Map the fields from the Calendly response, including the candidate’s name, email, and the document link from Google Drive. After mapping all necessary fields, click on ‘Save and Send Test Request’ to create the new record in Airtable.


Conclusion

By using Pabbly Connect, you can automate the process of creating meeting notes documents from new Calendly events efficiently. This integration not only saves time but also ensures that all meeting details are organized and accessible in your preferred applications.

Ensure you check out Pabbly Connect to create business automation workflows and reduce manual tasks. Pabbly Connect currently offer integration with 2,000+ applications.

How to Send Google Chat Message for New YouTube Comment Using Pabbly Connect

Learn how to automate notifications for new YouTube comments by sending messages to Google Chat using Pabbly Connect. Step-by-step tutorial included. Build sophisticated automated workflows in less time than you think. This guide translates complex integrations into straightforward steps for immediate implementation.

Watch Step By Step Video Tutorial Below


1. Accessing Pabbly Connect for YouTube and Google Chat Integration

To begin automating your YouTube comments notifications, first, access Pabbly Connect. This platform allows you to integrate various applications without coding. Visit the Pabbly Connect website and sign up for a free account to get started.

Once you have signed up, log into your Pabbly Connect account. From the dashboard, click on the ‘Create Workflow’ button to initiate the process. You will be prompted to name your workflow, so enter a suitable name like ‘YouTube to Google Chat Automation’ and click on the ‘Create’ button to proceed.


2. Setting Up the YouTube Trigger in Pabbly Connect

In this step, you will configure the trigger event in Pabbly Connect. Click on the trigger section and search for ‘YouTube’ as your trigger application. Select the trigger event as ‘New Comment on a Channel’ or ‘New Comment on a Video’.

  • Choose ‘New Comment on a Channel’ or ‘New Comment on a Video’
  • Click on the ‘Connect’ button and select ‘Add New Connection’
  • Log in with the Google account linked to your YouTube channel

After connecting, select your YouTube channel from the dropdown menu. Specify the maximum results you want to fetch, with a default value of 20. This means Pabbly Connect will check for new comments every 10 minutes based on this value.


3. Fetching New Comments from YouTube

After setting up the trigger, you need to test the connection to ensure everything is working correctly. Click on ‘Save and Send Test Request’ to fetch the most recent comment from your YouTube channel. The response section will display the details of the latest comment.

You will see various details such as the comment text, reply count, and the date the comment was posted. This information is crucial for the next steps where you will send these details to Google Chat using Pabbly Connect.


4. Setting Up Google Chat Action in Pabbly Connect

Now, it’s time to configure the action event for Google Chat. In Pabbly Connect, select Google Chat as your action application and choose the action event as ‘Create Message’. Click on the ‘Connect’ button to proceed.

  • Enter the Chat Web URL, which can be obtained from your Google Chat settings
  • Type the message you want to send when a new comment is received
  • Map the relevant details from the YouTube comment response

After entering the Chat Web URL, type a message such as, ‘Hey there! We have received a new comment on our YouTube channel. The details are as follows:’. You will then map the comment text, reply count, channel name, and comment date into this message. This mapping ensures that every new comment triggers a notification with the latest details.


5. Testing the Integration with Google Chat

To finalize the setup, test the Google Chat integration by clicking on ‘Save and Send Test Request’. This will send a test message to your Google Chat space with the details of the latest YouTube comment.

Once the test is successful, you will see a notification in your Google Chat confirming that the integration is working perfectly. With this setup, Pabbly Connect will continuously monitor your YouTube comments and send notifications to Google Chat automatically, eliminating the need for manual checks.


Conclusion

By using Pabbly Connect, you can seamlessly integrate YouTube and Google Chat to automate notifications for new comments. This setup saves time and enhances engagement with your audience by ensuring you never miss a comment notification. Start using this automation today to streamline your YouTube comment management!

Ensure you check out Pabbly Connect to create business automation workflows and reduce manual tasks. Pabbly Connect currently offer integration with 2,000+ applications.

Creating Onboarding Zoom Meetings for New Employees Using Pabbly Connect

Learn how to automate onboarding Zoom meetings for new employees using Pabbly Connect, Airtable, and Gmail. Step-by-step guide included. Discover how to seamlessly connect your essential tools through accessible instructions that make powerful automation available to professionals at every skill level.

Watch Step By Step Video Tutorial Below


1. Setting Up Pabbly Connect for Automation

To automate the onboarding process for new employees using Pabbly Connect, you first need to create an account. Visit the Pabbly Connect website and click on the ‘Sign Up Free’ button. This will allow you to set up your account and gain access to free automation tasks every month.

Once you have created your account, log in to access the Pabbly Connect dashboard. From here, click on the ‘Create Workflow’ button to begin setting up your automation workflow for employee onboarding meetings. Name your workflow something recognizable, such as ‘Employee Onboarding Meeting on Zoom via Airtable’. After naming it, click on the ‘Create’ button to proceed.


2. Triggering the Workflow with Airtable

The next step involves integrating Airtable as the trigger application in Pabbly Connect. In the trigger module, select Airtable and set the trigger event to ‘New Record’. This means that whenever a new employee’s details are added to your Airtable base, it will trigger the workflow.

  • Select ‘Add New Connection’ to connect your Airtable account.
  • Enter your Airtable API key, which can be found in the account section of your Airtable base.
  • Choose the base name where employee details are stored, e.g., ‘Employee Details’.

After connecting, ensure that your Airtable base has a ‘Created Time’ field to capture the date and time of the new records. This field will be essential for triggering the workflow accurately.


3. Creating a Zoom Meeting Automatically

Once the trigger is set up, the next action is to create a Zoom meeting automatically using Pabbly Connect. In the action step, search for Zoom and select the action event ‘Create Meeting’. Then, click on the connect button and authorize your Zoom account.

You need to fill out several fields for the Zoom meeting, including the topic, type, start time, and duration. For instance, set the topic as ‘Employee Onboarding Meeting’ and choose ‘Scheduled Meeting’ as the type. Ensure that the start time is set to one day after the record is created in Airtable.

  • Map the start time using the created time from the Airtable trigger.
  • Set the duration of the meeting, e.g., 45 minutes.
  • Optionally add an agenda for the meeting.

After filling in these details, test the connection to ensure that a meeting is created successfully in your Zoom account.


4. Sending Email Notifications via Gmail

After creating the Zoom meeting, the next step is to send an email notification to the new employee using Pabbly Connect. In this action step, select Gmail and choose the action event ‘Send Email’. Connect your Gmail account by clicking on ‘Add New Connection’.

Fill in the necessary fields such as the recipient’s email address, subject, and email content. You can map the employee’s name and the Zoom meeting link directly from the previous steps. This ensures that the email is personalized and contains all relevant information for the new employee.

Map the recipient’s email address from the Airtable trigger. Set the email subject to ‘Employee Onboarding Meeting’. Compose the email body, including details about the meeting and a joining link.

Once you have filled in all the details, send a test email to ensure everything is functioning correctly. This completes the automation process for onboarding new employees.


5. Conclusion

Using Pabbly Connect, you can streamline the onboarding process for new employees by automating Zoom meeting creation and email notifications. This integration not only saves time but also ensures that all necessary information is communicated effectively. By following the steps outlined above, you can set up a seamless onboarding experience for your new hires.

Ensure you check out Pabbly Connect to create business automation workflows and reduce manual tasks. Pabbly Connect currently offer integration with 2,000+ applications.

Check out Pabbly Connect – Automate your business workflows effortlessly! Sign Up Free – Start your journey with ease! 10,000+ Video Tutorials – Learn step by step! Join Pabbly Facebook Group – Connect with 21,000+ like minded people!

With this automation in place, every time you add a new employee in Airtable, a Zoom meeting will be scheduled automatically, and they will receive an email with all the details. This efficient workflow allows HR teams to focus on more strategic tasks while ensuring new employees are onboarded smoothly.

Automate Sending School Brochure via WhatsApp with Pabbly Connect and LinkedIn Leads

Learn how to automate sending your school brochure on WhatsApp using Pabbly Connect with LinkedIn Lead Gen Forms. Step-by-step tutorial included! This comprehensive guide reveals exactly how to connect your applications and automate repetitive tasks — accessible for professionals of all technical backgrounds.

Watch Step By Step Video Tutorial Below


1. Accessing Pabbly Connect for Automation

To automate the process of sending your school brochure on WhatsApp using LinkedIn leads, start by accessing Pabbly Connect. This integration platform allows you to connect various applications seamlessly.

Once you have created your account on Pabbly Connect, log into your dashboard. Click on the blue button labeled ‘Create Workflow’ to initiate the process. Name your workflow something descriptive, like ‘Send School Brochure with LinkedIn Leads,’ and click on ‘Create’ to proceed.


2. Setting Up the Trigger Event with LinkedIn Leads

In this step, you will configure the trigger event in Pabbly Connect. Select ‘LinkedIn Lead Generation’ as your application. The specific trigger event you need is ‘New Lead Generation Forms Response.’ This event will activate whenever a new lead submits their information.

  • Choose ‘New Lead Generation Forms Response’ as your trigger event.
  • Connect your LinkedIn account by providing the necessary permissions.
  • Select the specific lead form you want to use for this automation.

After setting this up, save your changes and proceed to test the connection. Ensure that the LinkedIn lead form is correctly capturing the necessary data to be sent via WhatsApp.


3. Sending the School Brochure via WhatsApp

Now that your trigger event is set up, it’s time to configure the action that will send the school brochure through WhatsApp. For this, you will use the ‘WhatsApp Cloud API’ via the Interact application integrated with Pabbly Connect.

Select ‘Send WhatsApp Message Template’ as your action event. You will need to connect your Interact account by entering your secret key, which you can find in your Interact dashboard. This step is crucial as it allows Pabbly Connect to send messages on your behalf.

  • Choose ‘Send WhatsApp Message Template’ as the action event.
  • Enter your Interact secret key to establish the connection.
  • Map the recipient’s phone number from the LinkedIn lead data.

After mapping the necessary fields, save the configuration. This setup will ensure that every time a new lead fills out the LinkedIn form, they will receive the school brochure automatically on WhatsApp.


4. Configuring the WhatsApp Message Template

In this section, you will create a message template that will be sent to your leads via WhatsApp. Use Pabbly Connect to define the message content and attach the school brochure as a document.

When creating the template, include variables such as the lead’s name and the brochure link. This personalization will enhance engagement. Remember to copy the template code from your Interact account and paste it into Pabbly Connect.

Define the message body using variables for personalization. Attach the school brochure link as a document in the message. Ensure to save the template settings in your Interact account.

Finalizing this template ensures that all leads receive a consistent and informative message along with the brochure, enhancing their experience with your school.


5. Finalizing Your Automation Setup

With everything configured, it’s time to finalize your automation in Pabbly Connect. Test the entire workflow to ensure that when a new lead submits their information, they receive the brochure as intended.

After testing, you can enable the automation and let Pabbly Connect handle the rest. This means every new lead will automatically receive your school brochure on WhatsApp without any manual effort from your side.

Keep in mind that the response may take a few minutes due to polling intervals in Pabbly Connect. However, once set up, this automation will save you time and streamline your communication with potential leads.


Conclusion

In conclusion, using Pabbly Connect to automate sending your school brochure via WhatsApp is an efficient way to manage leads from LinkedIn. This step-by-step process simplifies communication and enhances engagement with prospective students. By implementing this automation, you can focus on other important tasks while ensuring that every lead receives timely information.

Ensure you check out Pabbly Connect to create business automation workflows and reduce manual tasks. Pabbly Connect currently offer integration with 2,000+ applications.

Save New Ticket Tailor Orders to Google Sheets Using Pabbly Connect

Learn how to automate saving new Ticket Tailor orders to Google Sheets using Pabbly Connect. Step-by-step guide for seamless integration. Follow this definitive guide to creating powerful automated workflows with straightforward, efficiency-focused solutions that save valuable time.

Watch Step By Step Video Tutorial Below


1. Setting Up Pabbly Connect for Integration

To start automating your ticket orders, you need to set up Pabbly Connect. This platform allows you to connect Ticket Tailor with Google Sheets seamlessly. First, visit the Pabbly Connect website and sign up for a free account to access automation tasks every month.

Once you’re signed in, navigate to the dashboard and click on the ‘Create Workflow’ button. Here, you can name your workflow, for example, ‘Ticket Tailor Orders to Google Sheets’. After naming your workflow, click on the ‘Create’ button to begin the setup.


2. Configuring the Trigger in Pabbly Connect

In this step, you will configure the trigger for your workflow using Pabbly Connect. The trigger application will be Ticket Tailor, and the event will be ‘New Ticket Order’. This setup ensures that every time a new order is placed, your workflow is activated.

  • Search for Ticket Tailor in the trigger application field.
  • Select ‘New Ticket Order’ as the trigger event.
  • Copy the generated Webhook URL to connect with Ticket Tailor.

Next, go to your Ticket Tailor dashboard, click on ‘Settings’, then find the ‘API’ option. Under API, select ‘Webhooks’ and create a new webhook. Paste the copied Webhook URL here and select ‘Order Created’ as the event. Make sure to set the status to active, then click ‘Create’. This connection will allow Pabbly Connect to receive order data automatically.


3. Testing the Integration with a Sample Order

After setting up the trigger, it’s essential to test the integration using Pabbly Connect. To do this, you need to create a test order in Ticket Tailor. This will help you verify that the data is captured correctly in your workflow.

Create a new ticket order by selecting the event and filling in the customer details. Once the order is completed, return to Pabbly Connect, where you should see the test data captured. This includes details like buyer’s name, email, and order description.


4. Configuring Google Sheets as the Action Application

Now that you have tested the trigger, it’s time to set up Google Sheets as the action application in Pabbly Connect. This step will allow you to save the captured order details into a Google Sheet automatically.

  • Select Google Sheets as the action application.
  • Choose ‘Add a New Row’ as the action event.
  • Connect your Google account to allow access to your spreadsheets.

After connecting, select the spreadsheet you created for Ticket Tailor orders. Map the fields from the trigger data to the corresponding columns in your Google Sheet. Ensure that fields like buyer’s name, email, and order date are accurately mapped.


5. Finalizing the Automation and Testing

To complete the automation setup, click on the ‘Save and Send Test Request’ button in Pabbly Connect. This action will send the mapped data to your Google Sheet, creating a new row with the order details.

Check your Google Sheet to confirm that the data appears correctly. Once verified, your automation is set up and will run automatically for future orders. This means every new ticket sale will be logged in your Google Sheet without manual entry.


Conclusion

By utilizing Pabbly Connect, you can effortlessly save new Ticket Tailor orders to Google Sheets. This integration automates your ticket sales data management, ensuring accuracy and saving time. Set it up once, and let it work for you!

Ensure you check out Pabbly Connect to create business automation workflows and reduce manual tasks. Pabbly Connect currently offer integration with 2,000+ applications.

Automate Your YouTube Workflow with Pabbly Connect: A Step-by-Step Guide

Learn how to automate your YouTube tasks using Pabbly Connect. This guide covers triggers, actions, and seamless integration with Facebook, Google, and Dropbox. Eliminate manual repetitive tasks from your workflow. Discover proven automation methods with intuitive steps designed for efficiency-minded professionals.

Watch Step By Step Video Tutorial Below


1. Setting Up Pabbly Connect for YouTube Automation

To begin automating your YouTube tasks, first access Pabbly Connect. This platform allows you to integrate various applications seamlessly. Start by creating a new workflow by clicking on the ‘Create Workflow’ button and naming it appropriately, such as ‘YouTube Automation’.

Next, you will set up a trigger in your workflow. To do this, search for ‘YouTube’ in the app selection. Select it and choose the trigger event ‘New Video in Channel with Video URL’. This will initiate your automation whenever a new video is uploaded to your channel.


2. Connecting Your YouTube Account to Pabbly Connect

After selecting the trigger, the next step involves connecting your YouTube account to Pabbly Connect. Click on the ‘Connect’ button and then select ‘Add New Connection’. This action opens a new tab where you will choose your Google account associated with YouTube.

Once you select your account, click on ‘Continue’ to authorize the connection. If you have multiple YouTube channels, you will see a dropdown menu to select the specific channel you want to automate. After selecting the channel, click on ‘Save’ to finalize the connection.


3. Triggering Automation with New YouTube Videos

With your YouTube account connected to Pabbly Connect, you can now test the trigger. Click on the ‘See Events and Test Request’ button. This action retrieves the details of the most recent video uploaded to your channel, including the title, description, and video URL.

Once the test is successful, you can proceed to set up actions that will follow this trigger. The data received from the trigger can be utilized in various ways to enhance your automation workflow, such as notifying your team or posting updates on social media.


4. Setting Up Actions for YouTube Automation

Next, you will define the actions that should occur in response to the trigger. In the action event section, search for ‘YouTube’ again and select it. The available actions include uploading videos, listing channel videos, and posting comments. Choose an action that fits your workflow needs. using Pabbly Connect

  • Upload Video: Automate video uploads from cloud storage.
  • List Channel Videos: Retrieve a list of all videos on your channel.
  • Post Comment: Automatically comment on your videos.

After selecting your desired action, click on ‘Connect’ to link it with your YouTube account. You can reuse the existing connection made earlier, making the process seamless and efficient.


5. Optimizing Your YouTube Automation Workflow

To optimize your YouTube automation, consider adding multiple actions based on your needs. For example, after uploading a video, you can set a delay and then retrieve the upload status to ensure the video is successfully published. This can be done using the ‘Get Video Upload Status’ action. using Pabbly Connect

Additionally, you can enhance user engagement by automatically responding to comments using the ‘Reply to Comment’ action. This allows you to maintain interaction with your audience without manual effort, making your workflow efficient.

Conclusion

This guide summarizes the key points and helps you understand the essential features and benefits of using this tool.

Ensure you check out Pabbly Connect to create business automation workflows and reduce manual tasks. Pabbly Connect currently offer integration with 2,000+ applications.


In conclusion, using Pabbly Connect for YouTube automation allows you to streamline your content creation process effectively. By following the steps outlined in this guide, busy creators can automate repetitive tasks, saving time and enhancing productivity. Start integrating your YouTube channel with Pabbly Connect today to experience the benefits of automation.

How to Send Coaching Classes Details to LinkedIn Leads on WhatsApp Using Pabbly Connect

Learn how to seamlessly integrate LinkedIn Lead Gen Forms with WhatsApp using Pabbly Connect to send coaching classes details to your leads effectively. This comprehensive guide reveals exactly how to connect your applications and automate repetitive tasks — accessible for professionals of all technical backgrounds.

Watch Step By Step Video Tutorial Below


1. Accessing Pabbly Connect for Integration

To start sending coaching classes details to LinkedIn leads on WhatsApp, the first step is to access Pabbly Connect. You can do this by visiting the website at Pabbly.com/connect. Once there, you will see options to sign in or sign up for free.

If you’re a new user, click on the sign-up option, which will take only a couple of minutes. After signing up, you will receive 100 free tasks to begin using Pabbly Connect. For existing users, simply click on the sign-in button to access your dashboard.


2. Creating a Workflow in Pabbly Connect

Once logged into Pabbly Connect, navigate to the dashboard and click on the ‘Create Workflow’ button. A dialog box will appear asking you to name your workflow. For this integration, name it ‘Send Coaching Classes Details to LinkedIn Leads on WhatsApp’.

  • Click on ‘Create’ to proceed.
  • Select LinkedIn Lead Generation Forms as your trigger application.
  • Choose ‘New Lead Generation Form Response’ as the trigger event.

After setting up the trigger, Pabbly Connect will check for new leads every 10 minutes. Click ‘Connect’ to link your LinkedIn Lead Generation Forms account with Pabbly Connect.


3. Setting Up Triggers and Action in Pabbly Connect

After connecting your LinkedIn account, you will need to select the specific lead form you want to use. This is crucial as it dictates which leads will trigger the workflow. Ensure you have the lead form created in LinkedIn.

Once you select the lead form, click on ‘Save and Send Test Request’. This action will fetch the latest lead data, including the phone number and email address, which will be used to send the WhatsApp message.

  • Make sure to test the connection to ensure everything is working properly.
  • Check that the lead information is correctly pulled into Pabbly Connect.

This step is essential as it ensures that the integration is set up correctly before moving on to the action application.


4. Sending WhatsApp Messages Using Pabbly Connect

The next step involves selecting your action application, which will be Interact, used for sending WhatsApp messages. Choose ‘Send WhatsApp Template Message’ as the action event. Click on ‘Connect’ to link your Interact account with Pabbly Connect.

To establish this connection, you will need to enter your Interact secret key, which can be found in your Interact account under developer settings. After pasting the key, click ‘Save’ to finalize the connection.

Input the country code and phone number of the lead. Specify the template code name for the WhatsApp message. Map the variables in the message body to personalize it for the lead.

Once all fields are filled, click ‘Save and Send Test Request’ to send a test message to the lead’s WhatsApp number. Check WhatsApp to confirm the message was received successfully.


5. Verifying the Integration Success

To ensure that everything is set up correctly, fill out the LinkedIn lead generation form again with a new lead’s details. After submitting, wait for Pabbly Connect to process the information and send the WhatsApp message.

Within 10 minutes, you should receive the WhatsApp message containing the coaching classes details. This confirms that your integration between LinkedIn leads and WhatsApp through Pabbly Connect is functioning perfectly.

If you encounter any issues, review the steps taken in Pabbly Connect to ensure all connections and mappings are correct. Always double-check the lead form and WhatsApp template settings for accuracy.


Conclusion

In this tutorial, we explored how to use Pabbly Connect to send coaching classes details to LinkedIn leads via WhatsApp. By following these steps, you can automate your lead communication effectively.

Ensure you check out Pabbly Connect to create business automation workflows and reduce manual tasks. Pabbly Connect currently offer integration with 2,000+ applications.

Integrate Ticket Tailor with Sendinblue Using Pabbly Connect

Learn how to automate adding new Ticket Tailor customers to Sendinblue using Pabbly Connect with this step-by-step tutorial. Build sophisticated automated workflows in less time than you think. This guide translates complex integrations into straightforward steps for immediate implementation.

Watch Step By Step Video Tutorial Below


1. Setting Up Pabbly Connect for Ticket Tailor and Sendinblue Integration

To begin, you need to access Pabbly Connect, which is the central platform for this integration. Start by signing up for a free account on the Pabbly Connect dashboard. Once you are logged in, click on ‘Create Workflow’ and name it something relevant, such as ‘Ticket Tailor to Sendinblue’.

After creating the workflow, you will see two windows: the trigger window and the action window. The trigger window is where you set the event that starts the automation, while the action window defines what happens next. This setup will allow you to automate the process of adding new Ticket Tailor customers to your Sendinblue account.


2. Configuring the Ticket Tailor Trigger in Pabbly Connect

In the trigger window of Pabbly Connect, select ‘Ticket Tailor’ as the app. From the trigger event dropdown, choose ‘New Ticket Order’. This event will trigger every time a customer purchases a ticket. Once selected, Pabbly Connect will provide you with a webhook URL that you will need to connect to your Ticket Tailor account.

  • Go to your Ticket Tailor account and navigate to the settings.
  • Select the API option and then click on Webhooks.
  • Click on ‘Create New Webhook’ and paste the webhook URL from Pabbly Connect.
  • Set the event to ‘Order Created’ and ensure the status is active.

After completing these steps, every time a new ticket is ordered, the customer details will be sent to Pabbly Connect. You should see a message indicating that Pabbly Connect is waiting for a webhook response, confirming the connection is set up correctly.


3. Testing the Ticket Tailor Integration with Pabbly Connect

To test the integration, you will need to create a test order in Ticket Tailor. Navigate to your event page and select the option to join the guest list or purchase a ticket. Enter the customer details, including name and email, and complete the order process.

Once the order is placed, return to Pabbly Connect. You should see the details of the new order appear in the webhook response. This response includes crucial information such as the customer’s name, email address, and ticket details. This confirms that the integration is functioning as intended, capturing customer data from Ticket Tailor.


4. Setting Up the Sendinblue Action in Pabbly Connect

Now that the trigger is working, it’s time to set up the action in Pabbly Connect. In the action window, search for and select ‘Sendinblue’. Choose the action event ‘Create Contact’. This will allow you to add the customer details captured from Ticket Tailor to your Sendinblue contacts.

  • Connect your Sendinblue account by entering the API key, which you can find in your Sendinblue account settings under SMTP & API.
  • Select the contact list where you want to add new contacts.
  • Map the email and other customer details from the webhook response to the corresponding fields in Sendinblue.

After mapping the fields, click on ‘Send Test Request’. If everything is set up correctly, you should receive a positive response indicating that the new contact has been successfully created in your Sendinblue account.


5. Verifying the Success of the Integration

To verify the integration, go back to your Sendinblue account and check the contacts list you selected earlier. You should see the newly added contact with the same details you entered during the test order in Ticket Tailor. This confirms that the integration via Pabbly Connect is working seamlessly.

To further test, you can repeat the order process with different customer details. Each new order in Ticket Tailor should automatically add the customer to Sendinblue, demonstrating the efficiency of this automation. This setup not only saves time but also ensures that your customer data is consistently updated across platforms.


Conclusion

In this tutorial, we explored how to integrate Ticket Tailor with Sendinblue using Pabbly Connect. This integration automates the process of adding new customers, ensuring that your email marketing efforts can be more effective and timely. By following these steps, you can streamline your ticketing and email marketing processes effortlessly.

Ensure you check out Pabbly Connect to create business automation workflows and reduce manual tasks. Pabbly Connect currently offer integration with 2,000+ applications.

How to Create a Google Drive Folder Link & Email to Candidates Using Pabbly Connect

Learn how to automate the process of creating a Google Drive folder link and emailing candidates using Pabbly Connect. Step-by-step tutorial included! Build sophisticated automated workflows in less time than you think. This guide translates complex integrations into straightforward steps for immediate implementation.

Watch Step By Step Video Tutorial Below


1. Setting Up Pabbly Connect for Automation

To create a Google Drive folder link and email it to candidates, the first step is to access Pabbly Connect. Sign in to your account and navigate to the dashboard. Click on the blue button to create a new workflow and name it appropriately, such as ‘Create Google Drive Folder Link’. This will initiate the setup process.

In the workflow, you will have two boxes: one for the trigger and another for the action. The trigger will be set to ‘ClickUp’ since the automation starts when a task is updated in ClickUp. Select the event as ‘Task Updated’ to ensure the workflow responds to the correct action.


2. Connecting ClickUp to Pabbly Connect

After setting the trigger, you need to connect your ClickUp account to Pabbly Connect. Click on ‘Add New Connection’ and enter your API token from ClickUp. You can find this token in your ClickUp profile under the apps section. Once entered, click ‘Save’ to establish the connection.

  • Go to your ClickUp profile.
  • Select the apps section to find your API token.
  • Copy and paste the API token into Pabbly Connect.

After saving the connection, ensure you select the correct workspace and space name where your tasks are located. This will allow Pabbly Connect to pull the relevant task details accurately.


3. Fetching Task Details from ClickUp

Once ClickUp is connected, you need to fetch the details of the updated task. Add another action step in Pabbly Connect and select ClickUp again, this time choosing the action event ‘Find Task by Task ID’. Use the task ID from the previous step to locate the specific task.

After entering the task ID, click ‘Save and Send Test Request’. This will retrieve all details related to the task, including the assignee’s email address, which is crucial for the next steps. Make sure to save this information as it will be used later to send the email.


4. Creating a Google Drive Folder

With the task details fetched, the next action is to create a Google Drive folder for the candidate. Choose Google Drive as the action application in Pabbly Connect and select the event ‘Create a File or Folder’. Connect your Google account to allow Pabbly Connect to create the folder.

  • Choose the Google account you wish to connect.
  • Set the folder name to the candidate’s name.
  • Select the file type as a folder.

After configuring these settings, click ‘Save and Send Test Request’. This will create the folder in Google Drive and return the folder ID, which you will need to construct the sharing link later.


5. Updating Airtable with the Google Drive Link

After creating the Google Drive folder, the next step is to update Airtable with the newly created folder link. Select Airtable as the action application in Pabbly Connect and choose the event ‘Update a Record’. Connect your Airtable account and ensure you select the correct base and table.

In the record update step, you need to map the folder link using the ID received from the Google Drive creation step. Construct the full link by combining the base URL of Google Drive with the folder ID. Once configured, click ‘Save and Send Test Request’ to update the record in Airtable with the new link.


Conclusion: Automating Candidate Assessment Links with Pabbly Connect

In this tutorial, we explored how to automate the process of creating a Google Drive folder link and emailing it to candidates using Pabbly Connect. By integrating ClickUp, Google Drive, and Airtable, you can streamline your workflow and save valuable time. Using Pabbly Connect allows you to set up these automations effortlessly, ensuring candidates receive their assignment links promptly.

Ensure you check out Pabbly Connect to create business automation workflows and reduce manual tasks. Pabbly Connect currently offer integration with 2,000+ applications.

Check out Pabbly Connect – Automate your business workflows effortlessly! Sign Up Free – Start your journey with ease! 10,000+ Video Tutorials – Learn step by step! Join Pabbly Facebook Group – Connect with 21,000+ like minded people!

With just a few steps, you can significantly enhance your recruitment process and provide a seamless experience for candidates. Start using Pabbly Connect today to automate your workflows and improve efficiency!