Integrate Knorish with WhatsApp Using Pabbly Connect: A Step-by-Step Guide

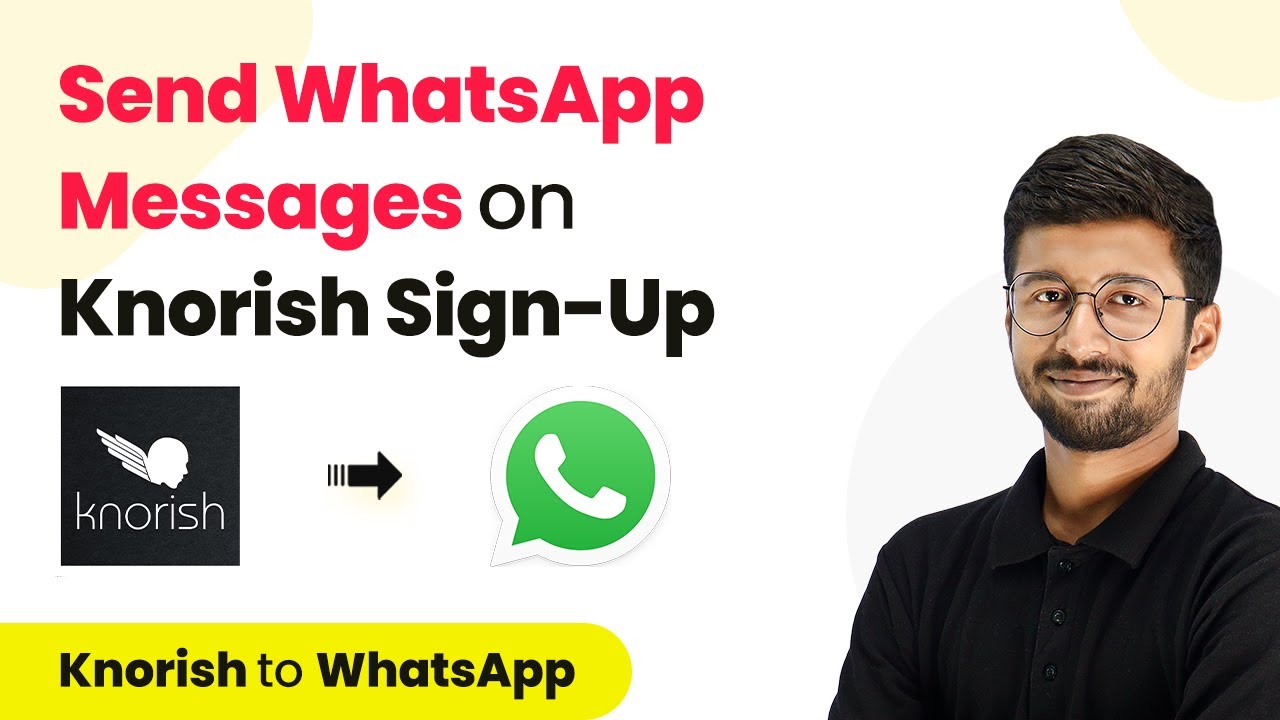
Learn how to automate WhatsApp messages for new Knorish sign-ups using Pabbly Connect. Follow this detailed tutorial to set up your integration seamlessly. Build sophisticated automated workflows in less time than you think. This guide translates complex integrations into straightforward steps for immediate implementation.

Watch Step By Step Video Tutorial Below


1. Setting Up Pabbly Connect for Knorish Integration

To send WhatsApp messages on a new Knorish sign-up, you need to set up Pabbly Connect first. Start by signing up for a free account on Pabbly Connect. Once logged in, navigate to the dashboard and click on ‘Create Workflow’ to begin.

After naming your workflow, for example, ‘Knorish to WhatsApp’, click on ‘Create’. This action opens the workflow editor where you will configure both the trigger and action components to automate the message sending process.


2. Connecting Knorish to Pabbly Connect

In the workflow editor, you will first set up the trigger. Select ‘Knorish’ as the application from the trigger options. For the trigger event, choose ‘New Sign Up’. This event will initiate the workflow each time a new user registers on your Knorish website. using Pabbly Connect

  • Select ‘Knorish’ as the trigger application.
  • Choose ‘New Sign Up’ as the trigger event.
  • Copy the webhook URL provided by Pabbly Connect.

Next, paste this webhook URL into your Knorish account under the Integrations section. This step allows Pabbly Connect to receive data from Knorish whenever a new user signs up, effectively linking the two platforms.


3. Sending WhatsApp Messages Using Pabbly Connect

Once you have successfully connected Knorish, it’s time to set up the action to send WhatsApp messages. In the action window of your Pabbly Connect workflow, search for and select ‘Interact’ as the application. This is essential for sending WhatsApp messages. using Pabbly Connect

Choose the action event as ‘Send WhatsApp Template Message’. You will need to connect your Interact account by entering the secret key from your Interact settings. This key is crucial for authenticating your account with Pabbly Connect.

  • Select ‘Interact’ as the action application.
  • Choose ‘Send WhatsApp Template Message’ as the action event.
  • Enter your Interact secret key to establish the connection.

After connecting, you will need to specify the user’s country code and phone number, which you can map from the data received from Knorish. This mapping ensures that the WhatsApp message is sent to the correct user.


4. Configuring the WhatsApp Template Message

To send a personalized message, you need to configure the WhatsApp template in Interact. In the Pabbly Connect action setup, enter the template code that you created in your Interact account. This code identifies the specific message template you want to use for the WhatsApp message. using Pabbly Connect

Additionally, specify the language code for your template (e.g., ‘en’ for English) and any dynamic variables you want to include in the message. For instance, you can personalize the message with the user’s name and your organization’s name using placeholders in the template.

Enter the template code from your Interact account. Specify the language code for the message. Map any dynamic variables for personalization.

This step is crucial as it ensures that each new user receives a tailored welcome message upon signing up, enhancing their experience with your service.


5. Testing the Integration

After configuring the message, it’s time to test your integration. Go back to your Knorish website and sign up with a test user account. This action should trigger the workflow you set up in Pabbly Connect, sending a WhatsApp message to the newly registered user.

Check the WhatsApp account associated with the test number to confirm that the message has been successfully sent. You should see the personalized welcome message, verifying that your integration is functioning correctly.

This testing phase is essential to ensure that everything is working as intended. If the message is sent successfully, you can be confident that your automation setup is complete and ready for live use.


Conclusion

By following this tutorial, you have learned how to automate WhatsApp messages for new sign-ups on Knorish using Pabbly Connect. This integration not only saves time but also enhances user engagement through personalized communication. Start using this powerful automation to improve your user onboarding process today!

Ensure you check out Pabbly Connect to create business automation workflows and reduce manual tasks. Pabbly Connect currently offer integration with 2,000+ applications.

Integrate Salesforce and Sendinblue Using Pabbly Connect: A Step-by-Step Guide

Learn how to automate adding Sendinblue contacts from new Salesforce leads using Pabbly Connect. Follow this detailed tutorial for seamless integration. Follow this definitive guide to creating powerful automated workflows with straightforward, efficiency-focused solutions that save valuable time.

Watch Step By Step Video Tutorial Below


1. Accessing Pabbly Connect for Salesforce and Sendinblue Integration

To begin the integration of Salesforce and Sendinblue, you need to access Pabbly Connect. This platform enables seamless automation between various applications. Start by visiting Pabbly.com/connect and signing up for a free account if you are a new user.

After signing up, log into your account and navigate to the dashboard. Here, you will find a blue button labeled ‘Create Workflow’. Click on it to initiate the setup for integrating Salesforce with Sendinblue.


2. Creating a Workflow in Pabbly Connect

Once you click on ‘Create Workflow’, you will need to provide a name for your workflow. For this integration, name it ‘Add Contact in Sendinblue When Lead is Added in Salesforce’. This name helps to identify the workflow’s purpose easily. using Pabbly Connect

Next, you will see two boxes in front of you, representing the trigger and action. The trigger is the event that starts the automation, while the action is what happens as a result. In this case, the trigger is a new lead in Salesforce, and the action is to create a contact in Sendinblue.

  • Click on the ‘Select App’ dropdown and choose Salesforce.
  • Select the trigger event as ‘New Lead’.
  • Connect your Salesforce account by following the prompts.

This setup ensures that whenever a new lead is added to Salesforce, Pabbly Connect will capture the lead’s details and prepare to send them to Sendinblue.


3. Adding a New Contact in Salesforce

Before testing the integration, you need to create a new contact in Salesforce. Navigate to your Salesforce dashboard and click on the ‘Contacts’ tab. Here, you can add a new contact by filling in the required fields such as first name, last name, phone number, and email address. using Pabbly Connect

Once you have filled in the details, click on ‘Save’. This action will create a new lead in Salesforce. After saving, return to Pabbly Connect and click the button to fetch the latest contact. Pabbly Connect will retrieve the details of the newly added lead.

After fetching the contact details, you will see the information displayed in Pabbly Connect. This confirms that the integration is working correctly up to this point.


4. Setting Up Sendinblue in Pabbly Connect

Now that you have connected Salesforce to Pabbly Connect and added a new lead, it’s time to set up Sendinblue. Go back to your Pabbly Connect workflow and select Sendinblue as the action application. using Pabbly Connect

For the action event, choose ‘Create Contact’. You will need to connect your Sendinblue account by providing your API key. To find your API key, log into your Sendinblue account, navigate to the SMTP & API section, and generate a new API key if you haven’t done so already.

Generate a new API key in Sendinblue. Copy the API key and paste it into Pabbly Connect. Select the appropriate list in Sendinblue where the contact should be added.

After entering the API key and selecting the list, map the fields from Salesforce to Sendinblue, ensuring that the first name, last name, phone number, and email address are correctly aligned.


5. Finalizing the Integration and Testing

With all the necessary fields mapped, click on the button to finalize the integration in Pabbly Connect. This action will send the contact details from Salesforce to Sendinblue automatically. You should see a confirmation message indicating that the contact was created successfully.

To verify the integration, log into your Sendinblue account and navigate to the Contacts section. You should see the newly created contact listed there, confirming that the automation works as intended. From this point onward, every time a new lead is added in Salesforce, that contact will automatically be created in Sendinblue without any manual effort.

This seamless integration using Pabbly Connect not only saves time but also ensures that your email marketing lists are always up-to-date with the latest leads from Salesforce.


Conclusion

In this tutorial, we demonstrated how to integrate Salesforce and Sendinblue using Pabbly Connect. By following these steps, you can automate the process of adding new contacts from Salesforce to Sendinblue, enhancing your email marketing efficiency.

Ensure you check out Pabbly Connect to create business automation workflows and reduce manual tasks. Pabbly Connect currently offer integration with 2,000+ applications.

How to Send Emails When You Receive New Form Submissions in HubSpot CRM Using Pabbly Connect

Learn how to automate sending emails for new HubSpot form submissions using Pabbly Connect. Follow our step-by-step guide to streamline your workflow. Navigate the automation landscape confidently with clear, structured guidance suitable for professionals regardless of prior technical experience.

Watch Step By Step Video Tutorial Below


1. Setting Up Pabbly Connect for HubSpot CRM Integration

To send emails when you receive new form submissions in HubSpot CRM, start by accessing Pabbly Connect. Log in to your Pabbly Connect account and click on the ‘Access Now’ button under the Pabbly Connect section. This will direct you to the Pabbly Connect dashboard.

Once on the dashboard, locate the big blue button labeled ‘Create Workflow’. Click on it and name your workflow appropriately, such as ‘Send email via Gmail for new form submissions in HubSpot’. After naming your workflow, click on ‘Create’ to proceed to the next step where you can set up your trigger and action.


2. Configuring HubSpot as the Trigger Application

In this step, you will configure HubSpot as the trigger application in Pabbly Connect. Select HubSpot from the list of applications and choose the event as ‘New Form Submission’. This event will trigger the workflow whenever there is a new submission on your HubSpot form.

  • Select ‘New Form Submission’ from the event dropdown.
  • Copy the provided webhook URL.
  • Follow the instructions to set up this webhook in your HubSpot account.

To complete the trigger setup, go to your HubSpot account, navigate to ‘Automation’, and then ‘Workflows’. Click on ‘Create a Workflow’ and select ‘From Scratch’. Set the trigger to ‘Contact Enrollment Trigger’ and select ‘Form Submission’. This ensures that every time a form is submitted, the trigger in Pabbly Connect will activate.


3. Setting Up Gmail as the Action Application

After configuring HubSpot as the trigger, the next step is to set up Gmail as the action application in Pabbly Connect. Choose Gmail from the list of applications and select the action event as ‘Send Email’. This will allow you to automate the email confirmation process.

To connect your Gmail account, click on ‘Add New Connection’. You will be prompted to log in to your Google account. After logging in, grant Pabbly Connect the necessary permissions to send emails on your behalf. This connection will enable the automation to send confirmation emails to the users who submit the HubSpot form.


4. Mapping Data for the Confirmation Email

Now that you have set up the Gmail action, it’s time to map the data for the email. In the email setup section, you will need to fill in several fields such as the recipient’s email address, sender name, subject, and email body. This is where Pabbly Connect allows you to dynamically insert data from the HubSpot form submission.

  • Recipient’s Email: Map the email address from the HubSpot submission.
  • Sender Name: Set as HubSpot.
  • Email Subject: Use a relevant subject like ‘Complaint Form Submission’.

For the email content, you can personalize it by addressing the recipient by name and confirming receipt of their complaint. The mapping feature in Pabbly Connect allows you to pull the recipient’s name directly from the form submission, enhancing the personalization of your automated emails.


5. Testing and Publishing Your Workflow

After setting up the email content, it’s crucial to test the workflow to ensure everything functions correctly. In Pabbly Connect, click on ‘Save and Send Test Request’ to simulate a form submission. This will send a test email to the mapped recipient address, allowing you to verify that the email is sent successfully.

Once the test is successful, return to your HubSpot workflow and turn it on. Make sure to select the option to only enroll contacts who meet the trigger criteria. This ensures that only relevant submissions will trigger the email automation through Pabbly Connect.

Finally, after turning on the workflow in HubSpot, fill out the form to see the entire process in action. You should receive a confirmation email shortly after submitting the form, demonstrating that the integration between HubSpot and Gmail via Pabbly Connect is working seamlessly.


Conclusion

In this tutorial, we explored how to automate sending confirmation emails for new form submissions in HubSpot CRM using Pabbly Connect. By integrating HubSpot and Gmail, we streamlined the process, ensuring timely communication with users. This automation not only saves time but also enhances user experience.

Ensure you check out Pabbly Connect to create business automation workflows and reduce manual tasks. Pabbly Connect currently offer integration with 2,000+ applications.

How to Add New Ticket Tailor Customers to Mailchimp Subscriber List Using Pabbly Connect

Learn how to seamlessly integrate Ticket Tailor with Mailchimp using Pabbly Connect for automated customer management. Explore systematic approaches to creating efficient automation solutions that convert technical concepts into practical, implementable instructions.

Watch Step By Step Video Tutorial Below


1. Setting Up Pabbly Connect for Ticket Tailor and Mailchimp Integration

To begin the integration process, you need to access Pabbly Connect, which serves as the automation tool connecting Ticket Tailor and Mailchimp. Start by signing up for a free account on the Pabbly Connect landing page. Once registered, log in to your account and navigate to the dashboard.

From the dashboard, click on the ‘Create Workflow’ button. Name your workflow something descriptive, such as ‘Ticket Tailor to Mailchimp’. After naming your workflow, click the ‘Create’ button to proceed. This is where you will establish the trigger and action for your automation.


2. Defining the Trigger Event in Pabbly Connect

In this step, you will set up the trigger event that initiates the automation. For this integration, Ticket Tailor will be the trigger application. Select Ticket Tailor from the list of applications in Pabbly Connect and choose the ‘New Ticket Order’ event as your trigger.

  • Select Ticket Tailor as the trigger application.
  • Choose ‘New Ticket Order’ as the trigger event.
  • Copy the provided webhook URL for integration with Ticket Tailor.

After selecting the trigger, you will see a webhook URL. This URL is crucial for connecting Ticket Tailor with Pabbly Connect. You will need to paste this URL into the webhook settings of your Ticket Tailor account to capture customer data.


3. Connecting Ticket Tailor to Pabbly Connect

To establish the connection between Ticket Tailor and Pabbly Connect, go to your Ticket Tailor dashboard and navigate to the Settings page. Under the Settings menu, find the API section and click on the Webhooks tab. Here, you can create a new webhook.

  • Click on ‘Create New Webhook’.
  • Select the ‘Order Created’ event to trigger the workflow.
  • Paste the copied webhook URL from Pabbly Connect into the URL field.

Once you create the webhook, ensure it’s active. This connection will allow Ticket Tailor to send customer data to Pabbly Connect whenever a new ticket order is placed, thereby automating the process.


4. Testing the Connection with a Sample Order

After setting up the webhook, it’s time to test the connection. Perform a test order on your Ticket Tailor page to simulate a customer purchasing a ticket. This step is crucial as it will allow Pabbly Connect to capture the response data from the order.

Once the order is completed, return to your Pabbly Connect workflow to check if the data has been captured. You should see details such as the ticket description, event name, and customer information. This data will be essential for adding the customer to your Mailchimp list.


5. Adding Customers to Mailchimp via Pabbly Connect

Now that you have the customer data from Ticket Tailor, the next step is to add this information to Mailchimp. In your Pabbly Connect workflow, select Mailchimp as the action application. Choose the action event ‘Add New Member with Custom Fields’.

To connect Mailchimp with Pabbly Connect, click on ‘Add New Connection’. You will need to provide your Mailchimp API key and data center name. You can find these details in your Mailchimp account settings under the API keys section. Once connected, select the audience list where the new customers will be added.

Map the customer details from the trigger step to the Mailchimp fields. Ensure you include essential fields like email, first name, and last name.

After mapping all the necessary fields, save the workflow. Now, every time a new ticket is ordered, the customer’s information will be automatically added to your Mailchimp subscriber list without any manual effort.


Conclusion

Integrating Ticket Tailor with Mailchimp using Pabbly Connect streamlines the process of managing customer information. By automating this workflow, you can save time and improve efficiency, ensuring that every new ticket buyer is added to your Mailchimp list seamlessly. This setup enhances your marketing efforts and keeps your subscriber list updated automatically.

Ensure you check out Pabbly Connect to create business automation workflows and reduce manual tasks. Pabbly Connect currently offer integration with 2,000+ applications.

How to Post New Pinterest Pins to Slack Channels Using Pabbly Connect

Learn how to automate posting new Pinterest pins to Slack channels using Pabbly Connect. Step-by-step tutorial for seamless integration. Learn to create powerful connections between your critical applications without requiring specialized programming knowledge or extensive technical background.

Watch Step By Step Video Tutorial Below


1. Access Pabbly Connect for Pinterest and Slack Integration

To begin the process of posting new Pinterest pins to Slack channels, you need to access Pabbly Connect. Start by signing into your Pabbly Connect account and navigate to the dashboard.

Once you are on the dashboard, locate the big blue button on the right side labeled ‘Create Workflow’. Click on it to initiate the workflow creation process.


2. Create a New Workflow in Pabbly Connect

In this step, you will create a workflow specifically for sending messages to Slack when a new Pinterest pin is created. Name the workflow something like ‘Send Channel Messages on Slack for New Pins on Pinterest’ and click on ‘Create’. using Pabbly Connect

After creating the workflow, you will see two boxes: one for the trigger and another for the action. The trigger application here will be Pinterest, as the workflow needs to initiate when a new pin is created.

  • Click on the ‘Add New Connection’ button to connect Pabbly Connect to your Pinterest account.
  • Grant Pabbly Connect the necessary permissions to access your Pinterest data.

After establishing the connection, select the board where you will be adding new pins. Click ‘Save’ to proceed.


3. Add a New Pin to Pinterest

Now that your Pinterest account is connected to Pabbly Connect, you need to add a new pin to the selected board. This action will trigger the workflow you just created.

Go to your Pinterest board and click on the ‘+’ icon to add a new pin. Select any image or idea you want to pin and click ‘Add’. Once the new pin is added, return to Pabbly Connect and click on ‘Save and Send Test Request’ to capture the response.

  • Ensure you have the correct pin details, including the title, image URL, and description.
  • Confirm that the response from Pabbly Connect shows the new pin’s details.

If everything is correct, save this step and close the trigger window.


4. Connect Slack to Pabbly Connect

The next step is to connect your Slack account to Pabbly Connect. Click on the action application and choose Slack. Then, select the ‘Send Channel Message’ event.

Click ‘Add New Connection’ to link your Slack account. You will need to enter a token type, choosing either user or bot. For this integration, select ‘bot’ and click ‘Save’. After a brief wait, allow Pabbly Connect to access your Slack account.

Choose the channel in Slack where you want to send the message. Draft the message to notify your team about the new Pinterest pin.

Include details such as the pin title and description in the message. Once you have filled in the required fields, click ‘Save and Send Test Request’ to verify the setup.


5. Test and Confirm the Integration

After setting up the connection between Slack and Pabbly Connect, it’s time to test the integration. When you send a test request, check your Slack channel to confirm that the message was successfully posted.

If the message appears in your designated Slack channel, it confirms that the integration is working correctly. You should see the pin’s title, description, and image URL in the message.

To recap, the process involved connecting Pinterest to Pabbly Connect, adding a new pin, and then configuring Slack to receive messages about new pins. This automation ensures your team is always updated on new content.


Conclusion

Using Pabbly Connect to post new Pinterest pins to Slack channels is a straightforward process that enhances team communication. By automating this workflow, you can ensure that your team is instantly notified whenever new content is added to Pinterest, improving collaboration and efficiency.

Ensure you check out Pabbly Connect to create business automation workflows and reduce manual tasks. Pabbly Connect currently offer integration with 2,000+ applications.

How to Send WhatsApp Messages on Subscription Expiration Using Pabbly Connect

Learn how to automatically send WhatsApp messages on subscription expiration using Pabbly Connect and Pabbly Connect in this detailed tutorial. Learn to create powerful connections between your critical applications without requiring specialized programming knowledge or extensive technical background.

Watch Step By Step Video Tutorial Below


1. Introduction to Pabbly Connect and Subscription Expiration

In this tutorial, we will explore how to use Pabbly Connect to automatically send WhatsApp messages when a subscription expires. This process is crucial for businesses that rely on subscription models, such as streaming services.

By integrating Pabbly Subscription Billing with WhatsApp Cloud API through Pabbly Connect, you can ensure your customers are promptly notified about their subscription status. This automation not only enhances customer experience but also encourages renewals.


2. Setting Up Pabbly Connect for Automation

To get started, log in to your Pabbly Connect account. If you are a new user, you can sign up for free and explore the features available. Once logged in, navigate to the dashboard and click on the ‘Create Workflow’ button.

Here are the steps to set up your workflow:

  • Click on ‘Create Workflow’ and give it a name, such as ‘Notify Customer on Subscription Expiration.’
  • Select ‘Pabbly Subscription Billing’ as the trigger application.
  • Choose ‘Subscription Expired’ as the trigger event.

With these steps, you will have set the foundation for your automation using Pabbly Connect.


3. Connecting Pabbly Subscription Billing with Pabbly Connect

Next, you need to connect your Pabbly Subscription Billing account to Pabbly Connect. This is done by copying the webhook URL provided by Pabbly Connect and adding it to your Pabbly Subscription Billing settings.

To complete this connection, follow these steps:

  • Go to your Pabbly Subscription Billing account and navigate to the ‘Settings’ tab.
  • Under the ‘Webhooks’ section, click on ‘Add Webhook’ and paste the copied URL.
  • Save the settings to establish the connection.

Once configured, Pabbly Subscription Billing will send subscription expiration details to Pabbly Connect whenever a subscription ends.


4. Sending WhatsApp Messages Using Pabbly Connect

Now that you have connected Pabbly Subscription Billing with Pabbly Connect, the next step is to set up the WhatsApp integration. You will use the WhatsApp Cloud API to send notifications to your customers.

Follow these steps to configure WhatsApp messaging:

Search for ‘WhatsApp Cloud API’ in Pabbly Connect and select ‘Send Template Message’ as the action event. Connect your WhatsApp account by entering the required credentials such as token, phone number ID, and business account ID. Map the required fields such as customer name, subscription details, and the message template you created in WhatsApp.

By completing these steps, you will enable Pabbly Connect to send automated WhatsApp messages to customers whose subscriptions have expired.


5. Testing Your Workflow in Pabbly Connect

After setting up the WhatsApp messaging, it is crucial to test the entire workflow to ensure everything is functioning correctly. This involves manually expiring a subscription in Pabbly Subscription Billing to trigger the automation.

To test your setup:

Expire a test subscription in your Pabbly Subscription Billing account. Check the response in Pabbly Connect to ensure that the subscription expiration data is captured. Verify that the WhatsApp message is sent to the customer’s number successfully.

Testing ensures that your automation using Pabbly Connect works seamlessly and that customers receive timely notifications about their subscription status.


Conclusion

In this tutorial, we have demonstrated how to use Pabbly Connect to automate the process of sending WhatsApp messages when subscriptions expire. By integrating Pabbly Subscription Billing with WhatsApp Cloud API, businesses can enhance customer engagement and streamline renewal processes.

Ensure you check out Pabbly Connect to create business automation workflows and reduce manual tasks. Pabbly Connect currently offer integration with 2,000+ applications.

Implementing this automation not only saves time but also ensures that your customers are always informed about their subscription status, leading to higher retention rates. Start using Pabbly Connect today to take advantage of these powerful automation capabilities.

Automate WhatsApp Product Catalog Sending via Google Sheets with Pabbly Connect

Learn how to automate sending your product catalog on WhatsApp using Google Sheets and Pabbly Connect. Step-by-step guide for seamless integration. Eliminate manual repetitive tasks from your workflow. Discover proven automation methods with intuitive steps designed for efficiency-minded professionals.

Watch Step By Step Video Tutorial Below


1. Access Pabbly Connect for Automation

To start sending your product catalog on WhatsApp using Google Sheets, you need to access Pabbly Connect. This platform allows you to create automated workflows easily. Begin by signing up for a free account on Pabbly Connect, which takes just a couple of minutes.

Once logged in, you will see the dashboard. Click on the blue button labeled ‘Create Workflow’ to initiate your automation setup. Name your workflow something like ‘Send Product Catalog on WhatsApp Automatically’ to keep it organized.


2. Set Up Trigger Event in Google Sheets

In this step, you will configure the trigger event that initiates the automation. Select Google Sheets as your trigger application within Pabbly Connect. The specific trigger event you need is ‘New or Updated Spreadsheet Row,’ which activates whenever new data is added to your Google Sheets.

To connect Google Sheets with Pabbly Connect, you will need to copy the webhook URL provided by Pabbly Connect. Follow these steps:

  • Copy the webhook URL from the Pabbly Connect dashboard.
  • Open your Google Sheets and go to Extensions > Add-ons > Get add-ons.
  • Search for the Pabbly Connect Webhooks add-on and install it.
  • Open the add-on and paste the webhook URL in the initial setup section.

After pasting the URL, specify the trigger column that will activate the automation. This is typically the column where you input the final data. Once you have configured this, click on ‘Send Test Data’ to ensure the connection is established successfully.


3. Enable Automation Settings in Google Sheets

After successfully connecting Google Sheets to Pabbly Connect, you need to enable specific settings to ensure automation works seamlessly. Click on the Pabbly Connect Webhooks add-on again and enable the ‘Send on Event’ option. This setting allows the data to be sent automatically whenever new entries are made in Google Sheets.

Additionally, it’s important to note that when using Google Sheets, you should either work in an incognito window or ensure that multiple Gmail accounts are not logged in simultaneously. This helps prevent any conflicts during the automation process.


4. Connect Interact for WhatsApp Messaging

The next step involves connecting the Interact application to Pabbly Connect to send WhatsApp messages. Select Interact as your action application and choose the action event ‘Send WhatsApp Message Template’. You will need to log into your Interact account and obtain a secret key to establish this connection.

Once connected, you must create a WhatsApp message template in the Interact dashboard. This template is essential for sending messages via the WhatsApp API. Ensure that your template is approved by WhatsApp before proceeding. After creating your template, copy the template code and return to Pabbly Connect to paste it into the appropriate field.

  • Provide the country code and phone number for the recipient.
  • Specify the message body using variables for personalization.
  • Attach your product catalog link in the header section of the message.

After filling in the necessary details, save your configuration and test the setup to ensure that messages are sent correctly.


5. Test and Activate Your Workflow

Finally, it’s time to test your entire workflow to confirm that everything is functioning as expected. Add a new row to your Google Sheets with customer data, including their WhatsApp number. Once this data is added, Pabbly Connect will automatically trigger and send the product catalog via WhatsApp to the specified number.

Check your WhatsApp to verify that the message has been received with the correct details and the attached product catalog. If everything looks good, your automation is now complete! You won’t need to manually send catalogs anymore, as Pabbly Connect will handle it seamlessly in the background.


Conclusion

In conclusion, automating the process of sending your product catalog via WhatsApp using Google Sheets and Pabbly Connect is a straightforward task. With the right setup, you can ensure that your customers receive timely updates without manual intervention. This integration not only saves time but also enhances customer communication.

Ensure you check out Pabbly Connect to create business automation workflows and reduce manual tasks. Pabbly Connect currently offer integration with 2,000+ applications.

How to Get Emails for New Ticket Tailor Orders | Ticket Tailor Gmail Integration

Learn how to automate email notifications for new Ticket Tailor orders using Pabbly Connect. Step-by-step guide for seamless integration with Gmail. Explore efficient methods for automating routine tasks with clear, concise instructions suited for both newcomers and experienced professionals.

Watch Step By Step Video Tutorial Below


1. Setting Up Pabbly Connect for Ticket Tailor Integration

To get started with automating email notifications for new Ticket Tailor orders, you need to utilize Pabbly Connect. First, access the Pabbly Connect website and sign up for a free account. Once you have signed up, log in to reach the dashboard where you can manage your automation tasks. This is crucial for setting up your integration with Gmail and Ticket Tailor.

After logging in, click on the ‘Create Workflow’ button to initiate the setup. In the workflow name field, you can label your workflow as ‘Ticket Tailor Notifications’. This name helps you easily identify the automation later. Click the ‘Create’ button to proceed to the workflow page where you will set up your trigger and action.


2. Selecting Trigger and Action in Pabbly Connect

In this section, you will configure the trigger and action for your Pabbly Connect workflow. The trigger application will be Ticket Tailor, and the action application will be Gmail. For the trigger, search for ‘Ticket Tailor’ and select it. The trigger event will be ‘New Ticket Order’, which indicates that a new ticket sale will initiate the workflow.

  • Select ‘New Ticket Order’ as the trigger event.
  • Copy the webhook URL provided by Pabbly Connect.
  • Set up the webhook in Ticket Tailor to capture ticket sales.

Next, you will need to configure the webhook in Ticket Tailor. Go to the Ticket Tailor dashboard, click on ‘Settings’, then select ‘API’ from the left panel. Here, navigate to the ‘Web Hooks’ tab and create a new webhook connection. Paste the copied webhook URL into the designated field and select the event ‘order.created’ to trigger the automation whenever a new ticket is sold.


3. Testing the Ticket Tailor and Gmail Integration

After setting up the webhook, it’s essential to test the integration to ensure everything is working as expected. You will perform a test submission by creating a dummy ticket order through the Ticket Tailor selling page. This step is crucial as it helps confirm that the data flows correctly from Ticket Tailor to Pabbly Connect.

To do this, visit your Ticket Tailor event page and complete a test ticket purchase. Fill in the necessary customer details and finalize the order. Once the order is completed, return to your Pabbly Connect workflow to check if the data from the ticket order has been captured in the response section.

  • Verify that the response includes ticket details and customer information.
  • Ensure that the total amount and event name are correct.

If the data appears correctly, you can proceed to set up the Gmail action to receive email notifications for new ticket sales. This confirms that your integration is successfully capturing ticket sales data.


4. Configuring Gmail to Receive Notifications

The next step is to configure Gmail to send notifications for new ticket orders. In your Pabbly Connect workflow, select Gmail as the action application. Choose ‘Send Email’ as the action event. Click on ‘Connect’ and then select ‘Add New Connection’ to link your Gmail account to Pabbly Connect.

After authorizing your Gmail account, you will need to fill in the email details. Specify the recipient’s email address where you want to receive notifications. Set the sender’s name, subject line as ‘New Ticket Sold’, and compose the email content. You can utilize the mapped data from the trigger step to personalize the email with event and customer details.

Map the event name and customer details in the email content. Ensure the email content is clear and informative.

Once you have filled in all the necessary fields, click on ‘Save and Send Test Request’ to send a test email. This step allows you to verify that the email notifications are functioning correctly and that you receive the expected information.


5. Conclusion

In conclusion, using Pabbly Connect for automating email notifications for new Ticket Tailor orders is a straightforward process. By following the steps outlined in this tutorial, you can easily set up an integration that sends you notifications via Gmail every time a ticket is sold. This automation helps streamline your event management process and ensures you stay updated on ticket sales.

Ensure you check out Pabbly Connect to create business automation workflows and reduce manual tasks. Pabbly Connect currently offer integration with 2,000+ applications.

With Pabbly Connect, you can enhance your event organization by receiving timely notifications without any manual effort. Start using this powerful automation tool today to manage your ticket sales efficiently.

How to Create or Update HubSpot Contacts from New Customers on Stripe Using Pabbly Connect

Learn to automate the creation and updating of HubSpot contacts from new customers on Stripe using Pabbly Connect. Step-by-step tutorial included. Discover hidden automation capabilities within your existing tools. This guide shows you how to connect your essential applications and permanently eliminate redundant manual processes.

Watch Step By Step Video Tutorial Below


1. Setting Up Pabbly Connect for HubSpot and Stripe Integration

To start the integration process, you need to use Pabbly Connect. This platform allows you to connect various applications seamlessly. First, log in to your Pabbly Connect account and navigate to the dashboard.

Once on the dashboard, click on the big blue button labeled ‘Create Workflow’. You will then be prompted to name your workflow. For this integration, name it something descriptive like ‘Create HubSpot Contacts from New Customers on Stripe’. After naming, click on the ‘Create’ button to proceed.


2. Choosing the Trigger Application: Stripe

Next, you need to set up the trigger application in Pabbly Connect. The trigger will be Stripe, which means that any new customer created in Stripe will initiate the workflow. Select Stripe as your trigger application.

  • Choose ‘New Customer’ as the trigger event.
  • Pabbly Connect will generate a webhook URL for you.
  • Copy this webhook URL to connect it with your Stripe account.

After copying the URL, navigate to your Stripe dashboard and go to the webhooks settings. Here, you will add a new endpoint using the copied URL. Select the event ‘Customer Created’ to ensure that every time a customer is added in Stripe, it triggers the Pabbly Connect workflow.


3. Setting Up the Action Application: HubSpot

Now that you have set up the trigger, it’s time to configure the action application in Pabbly Connect. Select HubSpot as your action application. The action will be to create or update a contact in HubSpot whenever a new customer is added in Stripe.

You will need to connect your HubSpot account to Pabbly Connect. Click on ‘Connect your application’ and authorize Pabbly Connect to access your HubSpot account. Ensure that you select the correct HubSpot account if you have multiple accounts linked.

  • Fill in the required fields like first name, last name, email, and phone number.
  • Map the fields from the Stripe data to the corresponding HubSpot fields.
  • Save and test the request to ensure data is being sent correctly.

After saving, you should see a confirmation that the contact has been created successfully in HubSpot.


4. Splitting Name Details for HubSpot

When creating a contact in HubSpot, it’s important to split the full name into first and last names. This can be achieved using the Text Formatter feature in Pabbly Connect. Select the Text Formatter as your next action step.

In the Text Formatter settings, choose the option to split text. Use a space as the separator for the full name obtained from Stripe. This will allow you to extract the first and last names separately. Save this step to continue with the workflow.

Once the name is split, you can map the first and last names to the corresponding fields in HubSpot when creating the contact. This ensures that all required information is accurately recorded in your HubSpot CRM.


5. Finalizing the Integration and Testing

After mapping all necessary fields, finalize the integration by saving the workflow in Pabbly Connect. Perform a test by adding a new customer in Stripe to see if the data flows correctly to HubSpot.

If everything is set up correctly, you should receive a confirmation response indicating that the contact has been created in HubSpot. Check your HubSpot account to verify that the new contact appears with the correct details.

This integration not only saves time but also ensures that your customer data is consistent across platforms, showcasing the power of Pabbly Connect in automating workflows effectively.


Conclusion

In this tutorial, we demonstrated how to use Pabbly Connect to create or update HubSpot contacts from new customers on Stripe. By following these steps, you can automate your workflow efficiently and ensure your customer data remains synchronized across both platforms.

Ensure you check out Pabbly Connect to create business automation workflows and reduce manual tasks. Pabbly Connect currently offer integration with 2,000+ applications.

How to Integrate Ticket Tailor Orders with Airtable Using Pabbly Connect

Learn how to automate adding new Ticket Tailor orders to Airtable using Pabbly Connect in this detailed tutorial. Implement the precise methodologies leading organizations use to automate repetitive tasks, illustrated with practical examples designed for immediate application.

Watch Step By Step Video Tutorial Below


1. Setting Up Pabbly Connect for Ticket Tailor and Airtable Integration

To integrate Ticket Tailor orders with Airtable, you first need to set up Pabbly Connect. Access your dashboard by signing up for a free account on Pabbly Connect. Once you are logged in, click on ‘Create Workflow’.

Next, name your workflow. For example, you might name it ‘Ticket Tailor to Airtable’. After naming, click on ‘Create’. This opens a new workflow with a trigger and action window, where you will define how your automation will work.


2. Setting Up the Trigger for New Ticket Tailor Orders

In the trigger window of Pabbly Connect, search for ‘Ticket Tailor’ and select it. Then, choose ‘New Ticket Order’ as the trigger event. This setup allows Pabbly Connect to listen for new ticket orders in your Ticket Tailor account.

  • Search for Ticket Tailor in the trigger apps.
  • Select ‘New Ticket Order’ as the trigger event.
  • Copy the webhook URL generated by Pabbly Connect.

After copying the webhook URL, go to your Ticket Tailor account, navigate to the settings, and select the API option. Create a new webhook by pasting the copied URL and selecting ‘order.created’ as the event. This action connects your Ticket Tailor account with Pabbly Connect.


3. Placing a Test Order in Ticket Tailor

To ensure that your setup works, place a test order in Ticket Tailor. Go to the event page and click on the button to view the event. If the ticket price is set to zero, you will see an option to join the guest list.

Fill in the customer details, such as name and email, and complete the order. Once the order is placed, Pabbly Connect will receive the order details, which you can verify in the workflow response. You should see details like total price, order status, and customer information.


4. Formatting Date and Time Before Sending to Airtable

After receiving the order details, the next step is to format the timestamp into a readable date and time format using Pabbly Connect. In the action window, search for ‘Date Time Formatter’ and select it.

  • Select ‘Format Date with Time Zone’ as the action event.
  • Map the timestamp from the Ticket Tailor response.
  • Choose your desired date format and time zone.

Once you have formatted the date and time, you can proceed to send this information along with other order details to Airtable.


5. Sending Order Details to Airtable

To send the formatted order details to Airtable, add another action step in Pabbly Connect and select ‘Airtable’ as the app. Choose ‘Create Record’ as the action event.

Connect your Airtable account by entering your API key. Once connected, select the base and table where you want to store the order details. Map the fields from the Ticket Tailor order response to the corresponding fields in Airtable.

After mapping all necessary fields, click on ‘Save and Send Test Request’. If successful, you will see a positive response indicating that the order details have been added as a new record in Airtable.


Conclusion

This tutorial demonstrated how to automate the process of adding new Ticket Tailor orders to Airtable using Pabbly Connect. By following the steps outlined, you can easily set up this integration and streamline your order management process. With Pabbly Connect, automating such workflows is not only efficient but also incredibly easy to implement.

Ensure you check out Pabbly Connect to create business automation workflows and reduce manual tasks. Pabbly Connect currently offer integration with 2,000+ applications.