Automate Instagram Giveaway Posts with Pabbly Connect and Google Sheets

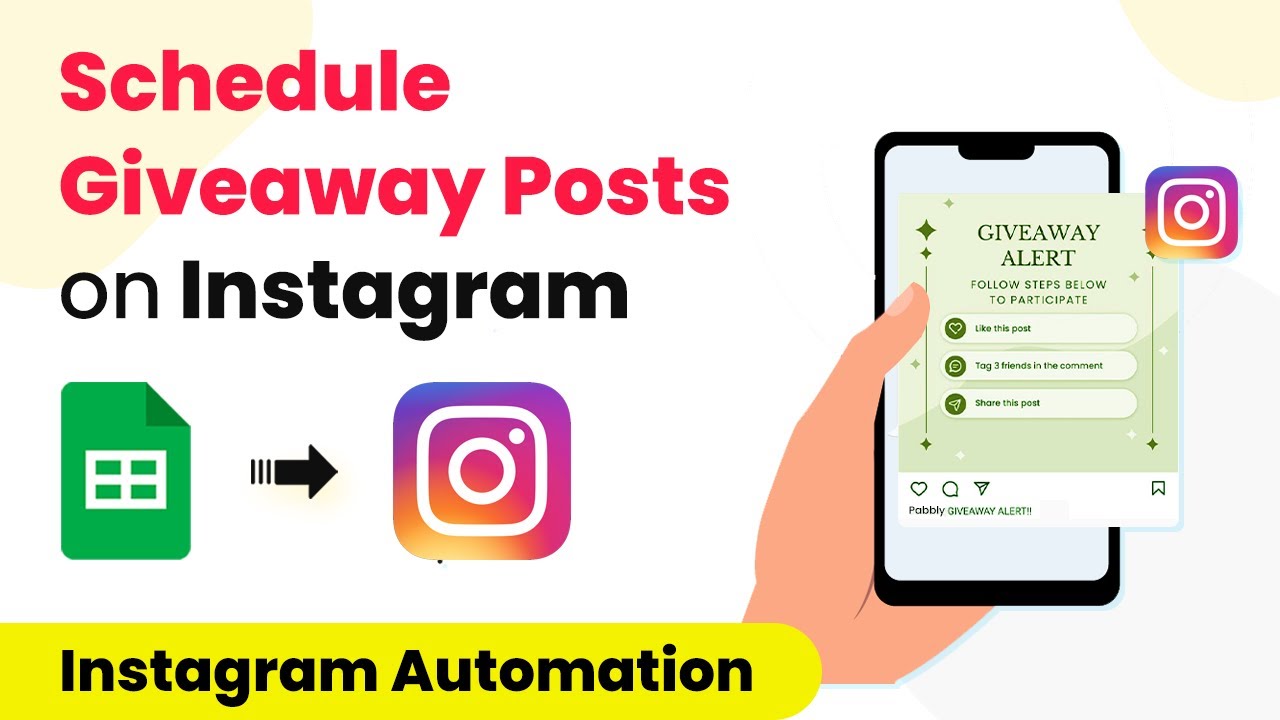
Learn how to schedule Instagram giveaway posts automatically using Pabbly Connect and Google Sheets with this detailed tutorial. Follow this definitive guide to creating powerful automated workflows with straightforward, efficiency-focused solutions that save valuable time.

Watch Step By Step Video Tutorial Below


1. Setting Up Pabbly Connect for Instagram Giveaway Automation

To schedule Instagram giveaway posts automatically, you will first need to access Pabbly Connect. Begin by signing up for a free account on Pabbly Connect’s website. Once logged in, navigate to your dashboard where you can create a new workflow.

Click on the ‘Create Workflow’ button, and name your workflow, for example, ‘Google Sheets to Instagram’. This will help you identify the automation flow you are setting up. After naming your workflow, click on the ‘Create’ button to proceed to the next step.


2. Configuring the Trigger in Pabbly Connect

The next step involves setting up the trigger for your automation. In the Pabbly Connect interface, you will see two windows: the trigger window and the action window. For this automation, you will select ‘Scheduled’ as your trigger, which allows the workflow to run at regular intervals. using Pabbly Connect

  • Select ‘Scheduled’ in the trigger window.
  • Choose the frequency as ‘Every 7 Days’.
  • Set the specific day and time for the workflow to execute.

After configuring the trigger settings, click on the ‘Save’ button. This will schedule your automation to run weekly, ensuring that your Instagram giveaway posts are published automatically based on the details you enter in Google Sheets.


3. Fetching Post Details from Google Sheets

Now that your trigger is set up, the next step is to fetch the post details from Google Sheets. You will need to add the current date to your automation workflow. This step is crucial as it allows Pabbly Connect to retrieve the correct post details based on the date. using Pabbly Connect

  • Add an action step and select ‘Date Time Formatter’.
  • Choose ‘Current Date’ as the action event.
  • Click ‘Connect’ to establish the connection with Pabbly Connect.

After getting the current date, the next step is to look up the specific row in Google Sheets that contains the details of your giveaway post. For this, add another action step and select ‘Google Sheets’ as the application and ‘Lookup Spreadsheet Row’ as the action event. Connect your Google Sheets account, select the relevant spreadsheet, and specify the sheet where your post details are stored.


4. Formatting the Caption for Instagram

Once you have retrieved the post details, you may need to format the caption correctly for Instagram. This step is essential to ensure that the caption appears as intended when the post is published. Add another action step and select ‘Text Formatter’. using Pabbly Connect

Choose ‘Replace Text’ as the action event. Map the caption retrieved from Google Sheets into the text field. Replace any unwanted formatting characters with appropriate line breaks.

After formatting the caption, you can proceed to the final step where you will send the formatted caption and image URL to Instagram. This ensures that your Instagram post will look professional and engaging for your audience.


5. Posting on Instagram Using Pabbly Connect

The last step in this automation process is to send the post details to Instagram. For this, add an action step and select ‘Instagram for Business’ as the application. Choose ‘Publish Photo’ as the action event to create a new post on your Instagram account. using Pabbly Connect

Connect your Instagram account to Pabbly Connect and map the required fields such as the photo URL and the caption. Make sure to verify that both fields are correctly mapped to ensure a successful post. Click on ‘Save and Send Test Request’ to check if the post is shared successfully on Instagram.

After confirming that the post has been published, you can now enjoy the benefits of automating your Instagram giveaway posts. With Pabbly Connect, you can easily manage your giveaways without having to manually post every week, saving you time and effort.


Conclusion

In this tutorial, we explored how to automate Instagram giveaway posts using Pabbly Connect and Google Sheets. By following the steps outlined, you can efficiently manage your Instagram giveaways and ensure your posts are published on time without manual intervention. This automation not only saves time but also enhances your promotional efforts on social media.

Ensure you check out Pabbly Connect to create business automation workflows and reduce manual tasks. Pabbly Connect currently offer integration with 2,000+ applications.

5 Essential Automations You Should Implement Today with Pabbly Connect

Discover how to automate key tasks using Pabbly Connect. Learn to integrate Facebook, YouTube, Google Calendar, and more for enhanced productivity. Learn to create powerful connections between your critical applications without requiring specialized programming knowledge or extensive technical background.

Watch Step By Step Video Tutorial Below


1. Automate Facebook Leads with Pabbly Connect

One of the first tasks you should automate today is messaging your team about new leads or customers using Pabbly Connect. This integration allows you to automatically forward leads generated from Facebook lead ads to a designated email address. By doing this, you save time and enhance your team’s productivity.

To set this up in Pabbly Connect, follow these steps:

  • Log into your Pabbly Connect account.
  • Create a new workflow and select Facebook as the trigger app.
  • Choose the event ‘New Lead’ to set the trigger.
  • Connect your Facebook account and authorize Pabbly Connect.
  • Select the email app as the action app and configure the email settings.

This automation ensures that your team is instantly notified about new leads, allowing for a quicker response time and improved communication.


2. Automate Communication with Leads and Customers via Pabbly Connect

Another critical automation is sending transactional or promotional messages to your leads and customers using Pabbly Connect. This ensures that every lead generated is communicated with promptly, enhancing customer engagement.

To set this automation up in Pabbly Connect, follow these steps:

  • Log into Pabbly Connect and create a new workflow.
  • Select your lead generation app as the trigger.
  • Choose the event that captures new leads.
  • Connect your email or SMS service as the action app.
  • Configure the message template and recipient details.

This setup allows you to automate responses, ensuring that your leads receive timely information without manual input, thus streamlining your communication process.


3. Automate Google Calendar Events with Pabbly Connect

Using Pabbly Connect, you can automate the creation and tracking of your calendar events. This is particularly useful for those who rely on Google Calendar for scheduling.

To automate calendar events in Pabbly Connect, you can follow these steps:

Create a new workflow in Pabbly Connect. Select Google Calendar as the trigger app. Choose ‘New Event’ as the trigger event. Connect your Google account and authorize Pabbly Connect. Set the action to send a WhatsApp reminder for the event.

This integration ensures that you never miss an important event, as it sends reminders directly to your WhatsApp, keeping your schedule organized.


4. Automate Spreadsheet Management with Pabbly Connect

Consolidating information in your spreadsheets can also be automated using Pabbly Connect. This is particularly useful for managing data effectively.

To automate your spreadsheet management with Pabbly Connect, follow these steps:

Start a new workflow in Pabbly Connect. Select Google Sheets as the trigger app. Choose the event that captures new rows. Connect your Google Sheets account to Pabbly Connect. Set the action to update or search specific rows as needed.

This automation allows you to manage your data more efficiently, reducing the time spent on manual updates and ensuring accuracy in your records.


5. Automate Social Media Posts with Pabbly Connect

Lastly, you can streamline your social media management by automating posts using Pabbly Connect. This saves time and ensures consistent posting across platforms.

To set this up in Pabbly Connect, follow these steps:

Create a new workflow in Pabbly Connect. Select Google Sheets as the trigger app where your post details are stored. Choose ‘New Row’ as the trigger event. Connect your social media accounts as action apps. Configure the post details and schedule for each platform.

This integration allows you to schedule posts across various social media platforms automatically, ensuring your audience remains engaged without manual effort.


Conclusion

In conclusion, automating tasks using Pabbly Connect can significantly enhance your productivity. From managing leads and customer communication to automating calendar events and social media posts, Pabbly Connect streamlines your business processes. Implement these automations today to save time and improve efficiency across your operations.

Ensure you check out Pabbly Connect to create business automation workflows and reduce manual tasks. Pabbly Connect currently offer integration with 2,000+ applications.

How to Integrate Facebook Ads Leads with iContact Using Pabbly Connect

Learn how to automate adding Facebook Ads leads to your iContact list using Pabbly Connect. Follow this step-by-step tutorial for seamless integration. This comprehensive guide reveals exactly how to connect your applications and automate repetitive tasks — accessible for professionals of all technical backgrounds.

Watch Step By Step Video Tutorial Below


1. Setting Up Pabbly Connect for Facebook Ads Leads Integration

To automate the process of adding Facebook Ads leads to your iContact list, you will first need to set up Pabbly Connect. This integration allows you to seamlessly connect your Facebook Ads with iContact without any manual effort. Start by creating a free account on the Pabbly Connect website, where you can access automation tasks every month.

Once you have signed up and logged into Pabbly Connect, navigate to the dashboard. Here, click on the ‘Create Workflow’ button to initiate the integration process. You can name your workflow, for example, ‘Facebook Leads to iContact’. After naming your workflow, click on the ‘Create’ button to proceed.


2. Configuring the Trigger Event in Pabbly Connect

The next step involves setting up the trigger event that will start the workflow. In this case, the trigger is when a new lead is generated through Facebook Ads. In Pabbly Connect, search for ‘Facebook Lead Ads’ in the trigger module and select ‘New Lead Instant’ as the trigger event.

  • Select ‘Add New Connection’ and connect with Facebook Lead Ads.
  • Choose the Facebook page where your lead ad is running.
  • Select the specific lead generation form associated with your ad.

After configuring these settings, click on the ‘Save and Test Request’ button. This action will prompt you to create a test lead using the Facebook Lead Ads Testing Tool. Follow the prompts to generate a test lead, which will be used to verify the connection.


3. Adding Leads to iContact Using Pabbly Connect

After successfully capturing the test lead, the next step is to set up the action that will add this lead to iContact. In Pabbly Connect, search for ‘iContact’ in the action module and select ‘Create a Contact’ as the action event. This step allows you to automatically add the captured lead information to your iContact list.

To connect iContact, you will need to input your Application ID, API Password, Username, and API URL. These details can be found in the integrations section of your iContact account. Once you have entered this information, click on ‘Save’ to establish the connection.

  • Map the fields from the test lead to the corresponding fields in iContact.
  • Use the text formatter feature in Pabbly Connect to split full names into first and last names.
  • Use the ‘Save and Send Test Request’ button to finalize the connection.

By following these steps, you will successfully add the leads generated from Facebook Ads to your iContact list through Pabbly Connect. Ensure that all necessary fields are filled out to avoid errors.


4. Testing the Integration of Facebook Ads and iContact

Once the setup is complete, it’s crucial to test the integration to ensure that leads are being added correctly to iContact. In Pabbly Connect, click on the ‘Save and Send Test Request’ button. This will send the test lead data to your iContact account.

After executing the test request, check your iContact account to verify that the new contact has been added. Refresh the contacts list in iContact to see if the test lead appears correctly. If successful, you will see the test lead listed with the information you mapped earlier.

If the test lead does not appear, recheck the mappings and API details to ensure everything is configured properly in Pabbly Connect. It’s important to ensure that all required fields are accounted for to facilitate a smooth integration.


5. Finalizing Your Automation with Pabbly Connect

After confirming that the test lead was successfully added to iContact, you can finalize the automation. This setup in Pabbly Connect only needs to be done once; thereafter, it will work automatically in the background. Whenever a new lead is generated through your Facebook Ads, it will be added to your iContact list without any further action required from you.

To ensure the automation runs smoothly, monitor the Pabbly Connect dashboard for any errors or issues that may arise. You can also clone this workflow for other lead generation forms or Facebook pages as needed. This feature allows you to expand your marketing efforts efficiently.

By using Pabbly Connect, you have streamlined your lead generation process, saving time and improving productivity. This integration is essential for marketers looking to automate their workflows effectively.


Conclusion

In conclusion, integrating Facebook Ads leads with iContact using Pabbly Connect is a straightforward process that enhances your marketing automation. By following the steps outlined, you can ensure seamless lead management and improve your productivity.

Ensure you check out Pabbly Connect to create business automation workflows and reduce manual tasks. Pabbly Connect currently offer integration with 2,000+ applications.

Automate YouTube Video Uploads from Google Sheets Using Pabbly Connect

Learn how to automate YouTube video uploads from Google Sheets using Pabbly Connect. This step-by-step tutorial covers the entire integration process. Follow this definitive guide to creating powerful automated workflows with straightforward, efficiency-focused solutions that save valuable time.

Watch Step By Step Video Tutorial Below


1. Setting Up Pabbly Connect for YouTube Automation

To automate YouTube video uploads from Google Sheets, start by accessing Pabbly Connect. This powerful tool allows seamless integration between various applications, including Google Sheets and YouTube. If you’re a new user, sign up for a free account at Pabbly’s website.

Once logged in, click on the blue button labeled ‘Create Workflow’. Give your workflow a name, such as ‘Upload YouTube Videos from Google Sheets’. This name will help you identify the automation easily in the future. After naming your workflow, you will see two boxes for setting up triggers and actions.


2. Connecting Google Sheets to Pabbly Connect

Now, set up the trigger by selecting Google Sheets as the application. Choose the trigger event ‘New or Updated Spreadsheet Row’. This means that every time a new row is added or updated in your Google Sheets, the automation will trigger, initiating the video upload process. using Pabbly Connect

  • Select Google Sheets as the application.
  • Choose ‘New or Updated Spreadsheet Row’ as the trigger event.
  • Copy the webhook URL provided by Pabbly Connect.

Next, go to your Google Sheets document where you have your video details. Under the ‘Extensions’ menu, find the Pabbly Connect Webhooks add-on and paste the webhook URL into the initial setup. Set the trigger column to the final data column where you will add the video details. This setup ensures that whenever you fill in the specified column, the data will be sent to Pabbly Connect.


3. Uploading Videos to YouTube via Pabbly Connect

After successfully connecting Google Sheets to Pabbly Connect, the next step is to upload the video to YouTube. Select YouTube as the action application and choose the action event ‘Upload Video’. This action will upload the video file based on the details you provided in the Google Sheets.

Authorize Pabbly Connect to access your YouTube channel. Once connected, you will need to map the video details from your Google Sheet to the YouTube upload fields, including the title, description, and video URL. Make sure to fill in all required fields for a successful upload.

  • Map the video title from Google Sheets to the YouTube title field.
  • Map the description and tags accordingly.
  • Ensure the video URL is correctly mapped to the upload field.

With this mapping complete, the video upload process is ready to be automated. You can also set the video visibility status (Pabbly, private, etc.) according to your preferences.


4. Checking the Upload Status of Videos

After the video upload action is set, it’s essential to check the upload status. For this, add a delay action in Pabbly Connect to ensure the video has enough time to upload before checking its status. Set the delay for 8 minutes, which is generally sufficient for most video uploads. using Pabbly Connect

Next, add another action step to check the video upload status using the ‘Get Video Upload Status’ action in YouTube. Connect to your YouTube account again and map the request ID received from the upload step to this action. This will allow you to retrieve the current status of the uploaded video.

Once the status is retrieved, you can see whether the video is uploaded successfully and its visibility status. This step ensures that your automation is functioning correctly, allowing for real-time updates on video uploads.


5. Finalizing the Automation Process

To complete the automation, ensure that your Google Sheets is set to send data on event. This setting allows the automation to work in real-time, meaning that every time a new video detail is added to the sheet, it will trigger the upload process automatically.

Lastly, if you want to update your Google Sheets with the final video URL after the upload, add another action step to update the cell value in Google Sheets. Map the final video URL from the response back to the corresponding cell in your sheet. This way, you’ll have a complete record of uploaded videos directly in your Google Sheets.

With these steps, you’ve successfully set up a fully automated process to upload YouTube videos using Pabbly Connect and Google Sheets. Now, every time you add video details to the sheet, it will automatically upload to YouTube without any manual effort.


Conclusion

In this tutorial, we explored how to automate YouTube video uploads from Google Sheets using Pabbly Connect. By following these steps, you can streamline your video publishing process and save valuable time.

Ensure you check out Pabbly Connect to create business automation workflows and reduce manual tasks. Pabbly Connect currently offer integration with 2,000+ applications.

How to Get WhatsApp Messages for New Payments Using Pabbly Connect

Learn how to set up WhatsApp notifications for Elopage payments using Pabbly Connect. Follow this step-by-step tutorial for seamless automation. Discover how to seamlessly connect your essential tools through accessible instructions that make powerful automation available to professionals at every skill level.

Watch Step By Step Video Tutorial Below


1. Setting Up Pabbly Connect for WhatsApp Notifications

To receive WhatsApp notifications for payments made through Elopage, you first need to set up Pabbly Connect. Start by creating a free account on the Pabbly Connect platform. This will grant you access to automation tasks that you can use to connect various applications seamlessly.

Once you have signed up, log in to your Pabbly Connect dashboard. Click on the ‘Create Workflow’ button to start the integration process. Name your workflow something relevant, like ‘Elopage Payment Messages on WhatsApp’, and click ‘Create’. This sets the stage for your automation.


2. Integrating Elopage with Pabbly Connect

In this step, you will connect Elopage as the trigger application in Pabbly Connect. Search for Elopage in the trigger application section and select it. The trigger event you need is ‘New Payment’. This means that whenever a payment is received through Elopage, it will trigger the automation.

  • Search for Elopage in the trigger application section.
  • Select ‘New Payment’ as the trigger event.
  • Click on ‘Connect’ and choose ‘Add New Connection’.

To establish this connection, you will need the API key and secret from your Elopage account. Navigate to the settings in your Elopage dashboard, go to the technical setup, and find the API section. Copy the API key and secret, and paste them into the corresponding fields in Pabbly Connect. After saving, you can test the connection to ensure it works correctly.


3. Connecting WhatsApp Cloud API in Pabbly Connect

After successfully integrating Elopage, the next step is to connect the WhatsApp Cloud API through Pabbly Connect. This connection allows you to send notifications to your WhatsApp number. Search for ‘WhatsApp Cloud API’ in the action application section and select it.

  • Choose ‘Send Template Message’ as the action event.
  • Click on ‘Connect’ and select ‘Add New Connection’.
  • Provide the required details like the permanent access token and phone number ID.

To get the permanent access token, follow the instructions provided in the WhatsApp Cloud API documentation. After filling in the required fields, click ‘Save’. This will establish the connection between Pabbly Connect and WhatsApp, enabling you to send messages.


4. Creating WhatsApp Message Templates

Now that you have connected the WhatsApp Cloud API, you need to create message templates for your notifications. In Pabbly Connect, select the template you created in the WhatsApp Cloud API setup. This template will define how the messages will appear when sent to your WhatsApp number.

Make sure to include placeholders in your message template for dynamic data such as customer name, payment amount, and product name. For example, your template could look like this: ‘Hi {customer_name}, your payment of {amount} for {product_name} was successful!’


5. Testing the Automation Setup

With everything set up, it’s time to test your automation. In Pabbly Connect, click on ‘Save and Send Test Request’. This will send a test message to your WhatsApp number using the data captured from the Elopage payment.

Check your WhatsApp for the message to confirm that the integration works correctly. If everything is set up properly, you should receive a notification about the test payment you created. This confirms that your Pabbly Connect workflow is functioning as intended.

Once tested, your automation will run in the background, sending you WhatsApp notifications for every new payment received through Elopage.


Conclusion

In conclusion, using Pabbly Connect to automate WhatsApp notifications for Elopage payments is a straightforward process. With the right setup, you can ensure that you receive timely updates on your transactions, enhancing your business efficiency and communication.

Ensure you check out Pabbly Connect to create business automation workflows and reduce manual tasks. Pabbly Connect currently offer integration with 2,000+ applications.

How to Integrate Google Contacts with BombBomb Using Pabbly Connect

Learn how to seamlessly integrate Google Contacts with BombBomb using Pabbly Connect in this step-by-step tutorial. Automate your contact management today! Follow this definitive guide to creating powerful automated workflows with straightforward, efficiency-focused solutions that save valuable time.

Watch Step By Step Video Tutorial Below


1. Accessing Pabbly Connect for Integration

To start integrating Google Contacts with BombBomb, first, access Pabbly Connect by typing the URL Pabbly.com/connect in your browser. This will direct you to the landing page of the application.

If you are a new user, click on the ‘Sign Up for Free’ button to create your account, which includes 100 free tasks. Existing users can simply sign in to their accounts to access the dashboard of Pabbly Connect.


2. Creating a Workflow in Pabbly Connect

Once logged in, navigate to the dashboard and click on the ‘Create Workflow’ button. A dialog box will appear asking you to name your workflow. For this integration, name it something relevant, such as ‘Google Contacts to BombBomb’.

  • Click on ‘Create’ to proceed.
  • Select Google Contacts as the trigger application.
  • Choose ‘New or Updated Contact’ as the trigger event.

This setup allows Pabbly Connect to monitor Google Contacts for any new or updated entries, triggering the workflow accordingly.


3. Connecting Google Contacts to Pabbly Connect

After selecting your trigger event, click on ‘Connect’ to establish a connection between Pabbly Connect and your Google Contacts. You will need to add a new connection and sign in with your Google account.

Once connected, Pabbly Connect will check for new data every 10 minutes. To test this, click on ‘Save and Send Test Request’. If no contacts exist, you will need to create one in Google Contacts to proceed with testing the integration.


4. Creating a Contact in BombBomb

With the Google Contacts integration set up, the next step is to create a contact in BombBomb. Select BombBomb as your action application and choose ‘Create Contact’ as the action event.

  • Click on ‘Connect’ to link Pabbly Connect with your BombBomb account.
  • Allow the necessary permissions to complete the connection.
  • Map the fields from the previous step to the BombBomb contact fields.

This mapping is crucial as it ensures that the data from Google Contacts is accurately transferred to BombBomb, making it seamless.


5. Testing the Integration and Finalizing

After mapping the fields, click on ‘Save and Send Test Request’ to finalize the integration. If successful, you will receive a response indicating that the contact has been created in BombBomb. using Pabbly Connect

To verify, log in to your BombBomb account and check under ‘Contacts’. You should see the new contact listed there. Repeat this process by adding new contacts in Google Contacts to ensure the integration works in real-time.


Conclusion

In this tutorial, we demonstrated how to use Pabbly Connect to integrate Google Contacts with BombBomb efficiently. By following the steps outlined, you can automate your contact management and ensure that your communications are streamlined.

Ensure you check out Pabbly Connect to create business automation workflows and reduce manual tasks. Pabbly Connect currently offer integration with 2,000+ applications.

Integrating Formsite Results into HubSpot Using Pabbly Connect

Learn how to integrate Formsite results into HubSpot using Pabbly Connect with our step-by-step tutorial. Automate your CRM process effortlessly! This comprehensive guide reveals exactly how to connect your applications and automate repetitive tasks — accessible for professionals of all technical backgrounds.

Watch Step By Step Video Tutorial Below


1. Accessing Pabbly Connect for Integration

To begin integrating Formsite results into HubSpot, first access Pabbly Connect. Simply type the URL Pabbly.com/connect in your browser. This will direct you to the landing page of the integration platform.

On the right side, you will find options to sign in or sign up for free. If you are a new user, click on the ‘Sign Up’ option to create an account, which takes less than two minutes. Once you sign in, click on ‘Access Now’ for Pabbly Connect to reach the dashboard.


2. Creating a Workflow in Pabbly Connect

In this section, you will create a workflow to add new Formsite results to HubSpot. Click on the ‘Create Workflow’ button on the dashboard. A dialog box will appear, prompting you to name your workflow. Name it appropriately, such as ‘Add New Formsite Results to HubSpot’ and click ‘Create’.

  • Select Formsite as the trigger application.
  • Choose ‘New Form Result’ as the trigger event.
  • Copy the provided webhook URL for integration.

This webhook URL will act as a bridge between Pabbly Connect and Formsite, enabling data access. Make sure to keep this URL handy for the next steps.


3. Configuring Formsite to Connect with Pabbly Connect

Next, log into your Formsite account and navigate to the form settings. Click on ‘Integrations’ on the left sidebar and select ‘Server Post’. Here, you will edit the service URL to include the webhook URL you copied earlier.

  • Delete any existing service URL in the Server Post settings.
  • Paste the copied webhook URL from Pabbly Connect.
  • Ensure the message format is set to JSON.

After saving these changes, return to Pabbly Connect and perform a test submission of the Formsite form. This will allow Pabbly Connect to capture the data sent from Formsite.


4. Setting Up HubSpot Integration in Pabbly Connect

Now that we have the Formsite data flowing into Pabbly Connect, it’s time to set up HubSpot as the action application. Click on ‘Add Action’ and select HubSpot. Choose ‘Create Contact’ as the action event.

Next, connect your HubSpot account with Pabbly Connect. Click on ‘Add New Connection’ and follow the prompts to authorize Pabbly Connect to access your HubSpot CRM account. Once connected, you will need to map the fields from the Formsite submission to the corresponding fields in HubSpot.

Map the contact’s first name and last name from the Formsite data. Include the email address and phone number as well. Ensure all required fields in HubSpot are filled out correctly.

After mapping the fields, click on ‘Save and Send Test Request’ to verify that a contact is created in HubSpot successfully.


5. Verifying Integration Success in HubSpot

To confirm the integration is successful, navigate to your HubSpot account and go to the contacts section. You should see the newly created contact based on the Formsite submission. For example, if the submitted name was ‘User Test User123’, it should appear in your HubSpot contacts.

To test the integration, fill out the Formsite form again with new details and submit it. After submission, refresh your HubSpot contacts page to check if the new contact has been created. This confirms that Pabbly Connect is effectively automating the data transfer between Formsite and HubSpot.


Conclusion

In this tutorial, we demonstrated how to integrate Formsite results into HubSpot using Pabbly Connect. By following the steps outlined, you can automate your CRM processes and ensure that every new form submission is captured as a contact in HubSpot.

Ensure you check out Pabbly Connect to create business automation workflows and reduce manual tasks. Pabbly Connect currently offer integration with 2,000+ applications.

Using Pabbly Connect simplifies the integration process, allowing you to focus on your business without manual data entry. Start automating your workflows today!

How to Create KanbanFlow Tasks from Google Sheets Using Pabbly Connect

Learn how to automate KanbanFlow task creation from Google Sheets with Pabbly Connect. Follow this step-by-step tutorial to streamline your workflow. Discover how to seamlessly connect your essential tools through accessible instructions that make powerful automation available to professionals at every skill level.

Watch Step By Step Video Tutorial Below


1. Setting Up Pabbly Connect for Google Sheets Integration

To begin automating task creation in KanbanFlow from Google Sheets, you need to set up Pabbly Connect. First, sign up for a free account on Pabbly Connect to access the dashboard. Once logged in, click on ‘Create Workflow’ to initiate your integration.

Give your workflow a name, such as ‘Google Sheets to KanbanFlow’. This will help you identify the integration later. After naming your workflow, click on ‘Create’. You will see a trigger window and an action window in your Pabbly Connect dashboard, which will facilitate the automation process.


2. Configuring the Trigger with Google Sheets

In the trigger window of Pabbly Connect, you need to select Google Sheets as the app. Choose the trigger event as ‘New or Updated Spreadsheet Row’. This event will activate the automation whenever a new row is added to your Google Sheet.

  • Select Google Sheets from the app list.
  • Choose the trigger event: New or Updated Spreadsheet Row.
  • Copy the webhook URL provided by Pabbly Connect.

Next, go to your Google Sheet where you will input task details. Navigate to Extensions > Add-ons > Get Add-ons, and search for ‘Pabbly Connect Webhooks’. Install this add-on and refresh your Google Sheet. After refreshing, go back to Extensions and select ‘Pabbly Connect Webhooks’ to proceed with the initial setup.


3. Setting Up the Initial Configuration in Google Sheets

In the initial setup box, select the sheet from which you want to send data. For example, if you have a sheet named ‘Sheet1’, select that. Then, paste the webhook URL you copied earlier into the designated field. using Pabbly Connect

  • Select the appropriate sheet (e.g., Sheet1).
  • Paste the webhook URL from Pabbly Connect.
  • Specify the trigger column (the last column with data).

After completing these fields, click on ‘Send Test’ to verify the connection. If successful, you will receive a response in Pabbly Connect, confirming that the data from your Google Sheet has been received. This step is crucial for ensuring that your integration is functioning correctly.


4. Connecting KanbanFlow to Pabbly Connect

Now that your Google Sheets are connected through Pabbly Connect, it’s time to set up the action in KanbanFlow. In the action window, search for KanbanFlow and select it. Choose the action event as ‘Create Task’ to automate the task creation process.

To connect your KanbanFlow account, you will need the API token. Go to your KanbanFlow account, navigate to the settings, and find the API section. Generate a new API token and copy it. Return to Pabbly Connect, paste the API token into the connection field, and click on ‘Save’.


5. Mapping Data and Testing the Integration

With your KanbanFlow account connected, you now need to map the data from Google Sheets to the task fields in KanbanFlow. Select the appropriate column for your tasks, such as ‘To Do’, and map the task name, description, color, and subtasks from the Google Sheets data to the corresponding fields in KanbanFlow. using Pabbly Connect

Map the task name from Google Sheets to the task name field. Map the description, color, and any subtasks accordingly.

After mapping the fields, click on ‘Send Test Request’ to create a test task in KanbanFlow. If everything is set up correctly, you will see the newly created task in your KanbanFlow account reflecting the details from your Google Sheet. This confirms that your automation is working as intended.


Conclusion

By using Pabbly Connect, you can seamlessly automate the creation of tasks in KanbanFlow from Google Sheets. This integration saves time and enhances productivity, allowing you to manage your tasks efficiently. Follow the steps outlined in this tutorial to set up your automation and enjoy a streamlined workflow.

Ensure you check out Pabbly Connect to create business automation workflows and reduce manual tasks. Pabbly Connect currently offer integration with 2,000+ applications.

How to Use the API Module Inside Pabbly Connect: A Step-by-Step Guide

Learn how to use the API module inside Pabbly Connect to integrate various applications seamlessly. Follow this detailed tutorial for step-by-step instructions. Discover hidden automation capabilities within your existing tools. This guide shows you how to connect your essential applications and permanently eliminate redundant manual processes.

Watch Step By Step Video Tutorial Below


1. Accessing Pabbly Connect for API Integration

To start using the API module inside Pabbly Connect, first, log into your Pabbly Connect account. Once logged in, navigate to the dashboard where you can create a new workflow. This is where you will set up the integration between various applications using the API module.

In your workflow, select a trigger application first. For this example, we will use the Pabbly Form Builder as our trigger application. After selecting the trigger, you can scroll down to the action window to begin configuring the API module.


2. Configuring the API Module in Pabbly Connect

In the action window, search for the API module by Pabbly. Once selected, you will see options like action event, endpoint URL, and authentication type. The API module allows you to connect to various applications that are not directly integrated with Pabbly Connect.

  • Choose the action event (GET, POST, etc.) based on the API documentation.
  • Enter the endpoint URL for the API you want to connect.
  • Select the authentication type required by the API.

After filling in these details, you can proceed to set parameters for your API call. This step is crucial for sending the correct data to the API endpoint.


3. Sending Data Using the API Module

Next, you need to set parameters in the API call. For instance, if you are using a postal service API, you would typically need to send a PIN code to get the address. In Pabbly Connect, you can add this variable in double curly braces in the endpoint URL.

  • Map the PIN code variable to the corresponding label in the set parameters section.
  • Click on the ‘Send Test Request’ button to check if the API call is successful.

Upon sending the test request, you will receive a response from the API, which you can then use in your workflow for further automation.


4. Using Custom JSON Body in API Requests

If your API requires a custom JSON body, you can select the ‘Custom Request’ action event in the API module. This allows you to enter the endpoint URL and specify the method for your API call. using Pabbly Connect

In the data section, you can enter the JSON body required by the API. For example, if you need to send a PIN code, you can structure your JSON body accordingly and map the values from the Pabbly Form Builder responses.

Make sure to follow the API documentation for the correct format of the JSON body and test the request to verify that you receive the expected response.


5. Sending Data to a Webhook URL

In addition to API calls, Pabbly Connect allows you to send data to a webhook URL using the POST action event. This is useful for sending data to external services.

Paste the webhook URL in the endpoint field. Configure authentication and headers as required. Map the required parameters from the Pabbly Form Builder responses.

After setting up the webhook, click on ‘Save and Send Test Request’ to ensure that the data is sent successfully to the webhook URL. You will see the response confirming the data transmission.


Conclusion

This tutorial has guided you through the process of using the API module inside Pabbly Connect to integrate various applications effectively. You can now automate tasks by sending data through API calls and webhooks, enhancing your workflow automation capabilities.

Ensure you check out Pabbly Connect to create business automation workflows and reduce manual tasks. Pabbly Connect currently offer integration with 2,000+ applications.

How to Write Travel Blogs Automatically Using AI with Pabbly Connect

Learn how to automate your travel blog writing process using Pabbly Connect and various integrations like Google Sheets and OpenAI for seamless content generation. Develop expertise in application integration and learn how to design streamlined automation workflows using proven, simplified approaches.

Watch Step By Step Video Tutorial Below


1. Accessing Pabbly Connect for Travel Blog Automation

To start automating your travel blog writing, you need to access Pabbly Connect. This platform allows you to integrate multiple applications seamlessly. Begin by visiting the Pabbly Connect website and signing up for a free account if you are a new user.

Once you have logged in, you will be directed to the Pabbly Connect dashboard. Here, click on the blue button labeled ‘Create Workflow’ to initiate the automation process. You can name your workflow something like ‘Auto Generate Articles Using Open AI from Google Sheets’. This title reflects the integration of Google Sheets, Open AI, and Google Docs facilitated by Pabbly Connect.


2. Setting Up Google Sheets as a Trigger

In this step, you will configure Google Sheets to act as the trigger for your automation. Select Google Sheets from the application options in Pabbly Connect and choose the trigger event as ‘New or Updated Spreadsheet Row’. This means that any new title added to your Google Sheets will initiate the automation.

  • Choose Google Sheets as the application.
  • Select ‘New or Updated Spreadsheet Row’ as the trigger event.
  • Copy the webhook URL provided by Pabbly Connect.

After copying the webhook URL, go back to your Google Sheet and navigate to the Extensions menu. Here, select Add-ons, then Get Add-ons, and search for the Pabbly Connect Webhooks integration. Install this add-on, and once installed, click on Extensions, select Pabbly Connect Webhooks, and open the Initial Setup. Paste the copied webhook URL and specify the trigger column for your data.


3. Generating Blog Content Using OpenAI

With the trigger set up in Google Sheets, you can now configure Pabbly Connect to generate blog content using OpenAI. After the Google Sheets trigger is activated, you will need to select OpenAI as the next application in your workflow. Choose the action event as ‘Generate Content’. This allows you to create an article based on the title provided in Google Sheets.

In this step, you will need to create an API key from OpenAI. Log in to your OpenAI account and generate a new secret key. Return to Pabbly Connect and paste the API key in the designated field. Set the prompt to include the title of your blog, which you can map directly from the Google Sheets data. This mapping ensures that the content generated will be unique to each title you input.


4. Drafting the Blog in Google Docs

After generating the content with OpenAI, the next step is to draft your blog in Google Docs using Pabbly Connect. Select Google Docs as the application and choose the action event ‘Create Blank Document’. This enables you to create a new document for each blog post automatically.

  • Connect to your Google Drive account through Pabbly Connect.
  • Map the document title from the Google Sheets data.
  • Use the content generated by OpenAI to append it to the new document.

Once the document is created, you will append the generated content to it. This step will ensure that your blog post is fully drafted and ready for review. You can also insert an image generated by OpenAI into the document, completing the automation process.


5. Testing and Optimizing Your Automation

Now that you have set up the entire automation process using Pabbly Connect, it’s time to test it. Enter a new title in your Google Sheets, and observe how the automation triggers the generation of the blog post and the creation of the document in Google Docs. This real-time testing ensures everything is functioning as expected.

Make sure to enable the ‘Send on Event’ option in Pabbly Connect, which allows the automation to run continuously. After testing, you can review the generated content in Google Docs, make any necessary edits, and publish your travel blog posts effortlessly.


Conclusion

Using Pabbly Connect, you can automate the entire process of writing travel blogs by integrating Google Sheets, OpenAI, and Google Docs. This setup not only saves time but also enhances your blogging efficiency by generating unique content automatically.

Ensure you check out Pabbly Connect to create business automation workflows and reduce manual tasks. Pabbly Connect currently offer integration with 2,000+ applications.