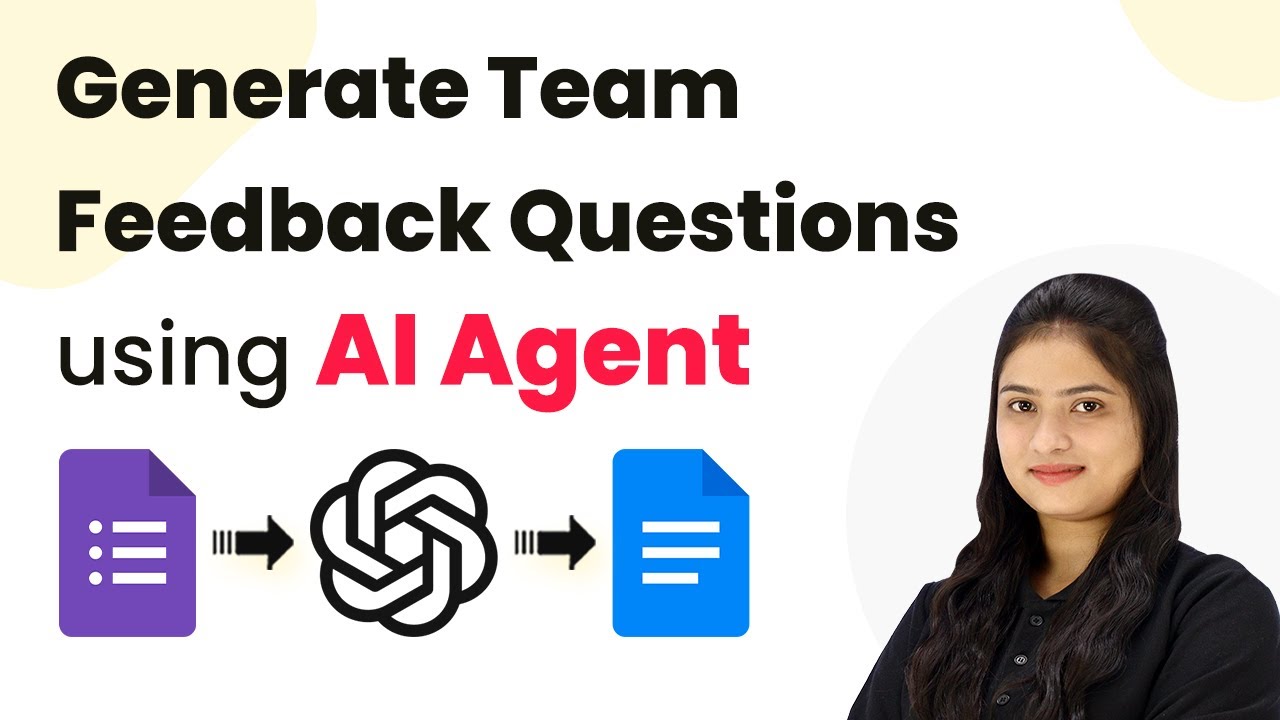
Integrate Pipedrive with WhatsApp Using Pabbly Connect: A Step-by-Step Guide

Learn how to integrate Pipedrive with WhatsApp using Pabbly Connect to automate messaging for new deals efficiently. Explore efficient methods for automating routine tasks with clear, concise instructions suited for both newcomers and experienced professionals.

Watch Step By Step Video Tutorial Below


1. Access Pabbly Connect for Integration Setup

To begin the integration process, you need to access Pabbly Connect. Start by visiting the Pabbly Connect dashboard at Pabbly.com/connect. Here, you can quickly sign up for a free account, which provides you with 100 automation tasks every month.

After logging in, click on the ‘Create Workflow’ button to initiate the setup. Name your workflow something relevant, such as ‘Pipedrive to WhatsApp Automation.’ This naming helps you identify the automation easily in the future.


2. Set Up Trigger in Pipedrive with Pabbly Connect

In this step, you will configure the trigger for your automation using Pabbly Connect. Select Pipedrive as the trigger application. Choose the event ‘New Deal’ to trigger the workflow whenever a new deal is created in Pipedrive.

  • Choose Pipedrive as the application.
  • Select ‘New Deal’ as the trigger event.
  • Connect your Pipedrive account using the API token from your Pipedrive settings.

After connecting, ensure you provide your company’s domain from the Pipedrive URL. This setup allows Pabbly Connect to listen for new deals added to your Pipedrive account.


3. Create a Test Deal in Pipedrive

Next, you need to create a test deal in Pipedrive to test the integration. Go to your Pipedrive dashboard and add a new deal in the ‘Qualified Leads’ stage. Fill in the necessary details such as the contact person’s name, organization, deal title, and WhatsApp number.

Once you save the deal, return to Pabbly Connect and click on ‘Save and Send Test Request’. This action will fetch the deal’s data, which will be used in the subsequent steps to send WhatsApp messages.


4. Fetch WhatsApp Number Using Pabbly Connect

Since the initial data fetched does not include the WhatsApp number, you will need to add another action step to retrieve it. Again, select Pipedrive as the application and use the action event ‘Find Person by ID’. This will allow Pabbly Connect to fetch additional details about the contact associated with the deal.

  • Use the person ID from the first step to find the contact.
  • Connect using the existing Pipedrive connection.
  • Save and send the test request to retrieve the WhatsApp number.

After successfully fetching the WhatsApp number, you are now ready to send messages to the lead automatically.


5. Send WhatsApp Message Using Pabbly Connect

In this final step, set up the action to send a WhatsApp message using the WhatsApp Cloud API. Choose the action event ‘Send Template Message’ and connect your WhatsApp Cloud API account by providing the necessary credentials. using Pabbly Connect

Map the WhatsApp number retrieved from the previous step, select the message template you created, and fill in any dynamic fields required for the message. Click on ‘Save and Send Test Request’ to send a test message.

Once the test is successful, your automation is complete! Now, every time a new deal is created in Pipedrive, a WhatsApp message will be sent automatically to the associated contact, streamlining your communication process.


Conclusion

Integrating Pipedrive with WhatsApp using Pabbly Connect allows you to automate communication for new deals effectively. This setup not only saves time but also enhances your ability to engage with leads promptly.

Ensure you check out Pabbly Connect to create business automation workflows and reduce manual tasks. Pabbly Connect currently offer integration with 2,000+ applications.

Automate Sending Business Brochure to WhatsApp with Pabbly Connect and Jotform

Learn how to automate sending your business brochure to WhatsApp on new Jotform submissions using Pabbly Connect. Step-by-step guide included. Revolutionize your productivity approach with just a few strategic clicks. Uncover professional methods for connecting applications and creating workflows that reclaim hours of your week.

Watch Step By Step Video Tutorial Below


1. Accessing Pabbly Connect for Automation

To start automating the process of sending business brochures to WhatsApp, you need to access Pabbly Connect. First, navigate to the Pabbly website and sign up for a free account. This allows you to create and manage your automation workflows easily.

Once signed in, you will find yourself on the dashboard of Pabbly Connect. Here, you can create a new workflow to integrate Jotform with WhatsApp. Click on the ‘Create Workflow’ button and give your workflow a relevant name, such as ‘Jotform to WhatsApp Automation’.


2. Setting Up Jotform as the Trigger Application

In this step, we will set up Jotform as the trigger application in Pabbly Connect. Select Jotform from the list of applications and choose the trigger event as ‘New Response’. This will initiate the workflow whenever a new form submission occurs.

  • Search for Jotform in the application list.
  • Select the trigger event ‘New Response’.
  • Copy the provided webhook URL for integration.

Next, head over to your Jotform dashboard, locate the form you want to use, and navigate to the settings. Under integrations, add the webhook URL you copied from Pabbly Connect. This connection allows Jotform to send data directly to your workflow.


3. Capturing Test Data from Jotform

After setting up the webhook, it’s time to capture test data from your Jotform submission. Fill out the form with test details, such as name, email, and WhatsApp number. Once submitted, this data will be sent to Pabbly Connect, enabling you to verify that the integration works correctly.

Check your Pabbly Connect workflow to see if the test submission data has been captured. This data will serve as a test response to ensure everything is functioning as expected.


4. Setting Up WhatsApp Action in Pabbly Connect

Now that you have captured the test data, it’s time to set up WhatsApp as the action application in Pabbly Connect. Select WhatsApp Cloud API and the action event as ‘Send Template Message’. This allows you to send a predefined message template to the WhatsApp number provided in the Jotform submission.

  • Select WhatsApp Cloud API as the action app.
  • Choose ‘Send Template Message’ as the action event.
  • Connect your WhatsApp API with the required credentials.

Fill in the template name and map the WhatsApp number from the Jotform submission. This ensures that the brochure is sent to the correct recipient. After setting this up, you can send a test message to confirm that the automation works seamlessly.


5. Finalizing Your Automation Workflow

Once you have tested the WhatsApp message sending successfully, your automation is almost complete. Review all the steps in Pabbly Connect to ensure everything is set up correctly. Remember, the key is to have a valid WhatsApp template that has been approved by WhatsApp for sending messages.

After confirming that the workflow functions as intended, you can activate it. From now on, every time a new submission is made in Jotform, the corresponding WhatsApp message will be sent automatically, saving you time and effort.


Conclusion

In this tutorial, we demonstrated how to automate sending a business brochure to WhatsApp upon new Jotform submissions using Pabbly Connect. With these steps, you can streamline your communication process and enhance customer engagement effectively.

Ensure you check out Pabbly Connect to create business automation workflows and reduce manual tasks. Pabbly Connect currently offer integration with 2,000+ applications.

Email to WhatsApp Cloud API Automation Using Pabbly Connect

Learn how to automate email notifications to WhatsApp using Pabbly Connect. Step-by-step guide to integrate Gmail and WhatsApp Cloud API for seamless communication. Transform complex automation concepts into accessible, actionable steps that eliminate unnecessary manual work while maximizing existing application capabilities.

Watch Step By Step Video Tutorial Below


1. Setting Up Pabbly Connect for Gmail to WhatsApp Integration

To automate email notifications to WhatsApp, first, access Pabbly Connect. This powerful integration platform allows you to connect various applications seamlessly. Begin by signing up at Pabbly’s website and logging into your account.

Once logged in, click on the ‘Create Workflow’ button. Name your workflow, for example, ‘Email Notifications on WhatsApp’. This will help you identify the automation process easily. After naming, click on the ‘Create’ button to proceed to the workflow page.


2. Configuring the Email Parser in Pabbly Connect

To capture specific emails, you will use the Email Parser feature within Pabbly Connect. Select the Email Parser as your trigger application. This tool allows you to parse emails from your inbox automatically.

  • Choose ‘Email Parser’ as the trigger application.
  • Copy the provided email address for forwarding.
  • Set this address as a forwarding email in your Gmail settings.

After setting up the forwarding address in Gmail, you can capture test emails. Send a test email to this address and check if it appears in Pabbly Connect. This confirms that your integration is working correctly.


3. Applying Filters to Manage Email Notifications

To ensure you only receive important notifications, apply filters within Pabbly Connect. This step is crucial for managing which emails trigger WhatsApp notifications. Select the ‘Filter’ action to set conditions based on the sender’s email address.

Map the ‘From’ label from the captured email to the filter condition. Set the filter type to ‘equals to’ and enter the specific email address you want to track. This way, only emails from this address will trigger WhatsApp notifications.


4. Sending WhatsApp Notifications Using WhatsApp Cloud API

Next, configure the action step to send WhatsApp notifications. Choose the WhatsApp Cloud API as your action application in Pabbly Connect. This API allows you to send messages directly to WhatsApp.

  • Select ‘Send Template Message’ as the action event.
  • Connect your WhatsApp Cloud API by entering the required credentials.
  • Map the message template fields with the parsed email data.

After mapping the fields, click on ‘Save and Send Test Request’. This action will send a test message to your WhatsApp, confirming that the setup is correct.


5. Conclusion: Automate Your Email Notifications with Pabbly Connect

Using Pabbly Connect, you can effortlessly automate email notifications to WhatsApp. This integration enhances your communication flow, ensuring you never miss important emails. By following the steps outlined in this tutorial, you can set up your own automation without any coding knowledge.

Ensure you check out Pabbly Connect to create business automation workflows and reduce manual tasks. Pabbly Connect currently offer integration with 2,000+ applications.

Start using Pabbly Connect today to streamline your email notifications and experience the benefits of automation in your daily communication.


Automate Sending Meeting Details from Google Calendar to WhatsApp Using Pabbly Connect

Learn how to automate sending meeting details from Google Calendar to WhatsApp using Pabbly Connect. Follow our step-by-step guide for seamless integration. Implement the precise methodologies leading organizations use to automate repetitive tasks, illustrated with practical examples designed for immediate application.

Watch Step By Step Video Tutorial Below


1. Setting Up Pabbly Connect for Google Calendar and WhatsApp Integration

To send meeting details from Google Calendar on WhatsApp, you first need to set up Pabbly Connect. Start by visiting the Pabbly Connect dashboard. You can create a free account at Pabbly.com/connect, which allows you 100 automation tasks monthly.

Once logged in, click on the ‘Create Workflow’ button. Name your workflow something relevant, like ‘Send Event Details from Google Calendar to WhatsApp’. After naming, click on the ‘Create’ button to proceed to the workflow page.


2. Triggering the Workflow with Google Calendar

The next step is to set up the trigger for your workflow. In the trigger app field, select Pabbly Connect and search for Google Calendar. Choose the trigger event as ‘New Event’. This means that whenever a new event is created in Google Calendar, the workflow will be triggered.

  • Select your Google Calendar account to connect.
  • Choose the specific calendar from which you want to fetch events.
  • Click on ‘Save and Send Test Request’ to fetch the latest event data.

After fetching the event data, you will see the details of the most recent event, which will include the event title, date, time, and attendees. This data will be crucial for sending the WhatsApp message later.


3. Fetching Contact Details Using Google Contacts

Now that you have the event details from Google Calendar, the next step is to fetch the contact details of the attendee. For this, you will again use Pabbly Connect to integrate with Google Contacts.

Select Google Contacts as your action app and choose the action event ‘Search Contact’. Connect to your Google Contacts account and use the attendee’s email fetched from the previous step to locate their WhatsApp number.

  • Map the email ID of the attendee to search for their contact.
  • Once the contact is found, you will retrieve their WhatsApp number.

This step ensures that you have the correct contact information to send the WhatsApp message regarding the meeting.


4. Sending the Message via WhatsApp Cloud API

With both the event and contact details ready, you can now send the WhatsApp message using the WhatsApp Cloud API through Pabbly Connect. Set up another action step and select WhatsApp Cloud API.

Choose the action event ‘Send Template Message’. You will need to connect your WhatsApp Cloud API account, which involves entering your permanent access token, phone number ID, and WhatsApp Business account ID. Make sure you have created message templates in your WhatsApp Cloud API setup for sending messages.

Select the message template you created for meeting notifications. Map the variables in the template with the data fetched from Google Calendar and Google Contacts.

This step finalizes the message that will be sent to the attendee, ensuring they receive all necessary details about the meeting.


5. Conclusion: Automate Your Meeting Notifications

In this tutorial, you learned how to automate sending meeting details from Google Calendar to WhatsApp using Pabbly Connect. This integration allows for seamless communication with attendees, ensuring they are informed of their meeting schedules.

Ensure you check out Pabbly Connect to create business automation workflows and reduce manual tasks. Pabbly Connect currently offer integration with 2,000+ applications.

By following the steps outlined above, you can set up this automation quickly and effectively, enhancing your workflow and saving time.


With Pabbly Connect, you can easily manage your workflows and integrate various applications without any coding knowledge, making it an essential tool for effective automation.

Send WooCommerce Order Updates on WhatsApp with Pabbly Connect

Learn how to send WooCommerce order updates to WhatsApp using Pabbly Connect. Follow this step-by-step tutorial for seamless integration. Explore systematic approaches to creating efficient automation solutions that convert technical concepts into practical, implementable instructions.

Watch Step By Step Video Tutorial Below


1. Setting Up Pabbly Connect for WooCommerce Order Updates

To send WooCommerce order updates via WhatsApp, first, you need to set up Pabbly Connect. Start by visiting the Pabbly Connect dashboard at Pabbly.com/connect. Here, you can create a free account, which allows you to access 100 free automation tasks per month.

Once logged in, click on the ‘Create Workflow’ button to begin. Name your workflow something relevant, such as ‘Send WooCommerce Order Updates on WhatsApp’. This naming will help you identify the workflow later in Pabbly Connect.


2. Configuring the WooCommerce Trigger in Pabbly Connect

After naming your workflow, it’s time to set up the trigger for WooCommerce. In the ‘Choose App’ field, search for and select ‘WooCommerce’. The trigger event should be set to ‘Order Updated’. This event will initiate the workflow whenever an order status changes in your WooCommerce store. using Pabbly Connect

  • Choose ‘WooCommerce’ as the app.
  • Select ‘Order Updated’ as the trigger event.
  • Copy the webhook URL provided by Pabbly Connect.

Next, you’ll need to configure this webhook URL in your WooCommerce settings. Go to your WordPress dashboard, navigate to WooCommerce > Settings > Advanced > Webhooks, and click on ‘Add Webhook’. Enter a name for your webhook, set its status to active, and paste the copied webhook URL into the Delivery URL field.


3. Testing the Connection Between WooCommerce and Pabbly Connect

After setting up the webhook, it’s crucial to test the connection. In Pabbly Connect, click on the ‘Recapture Webhook Response’ button to start listening for updates. Meanwhile, go back to your WooCommerce store and update an order’s status to trigger the webhook. For instance, change an order status from ‘Processing’ to ‘Completed’. using Pabbly Connect

Once you update the order, return to Pabbly Connect. You should see the order details captured in the response. This data includes the order ID, status, customer email, and other relevant information. Make sure to verify that you have all the necessary details for the next steps.


4. Filtering Order Updates for WhatsApp Notifications

To ensure that only relevant updates are sent to customers, apply a filter condition in Pabbly Connect. Add a filter step after capturing the webhook response. Set the filter to check if the order status equals ‘Completed’. This ensures that only completed orders trigger WhatsApp notifications.

  • Choose the status label from the captured data.
  • Set the filter type to ‘Equals’ and input ‘Completed’ as the value.

This filtering step is vital because it prevents unnecessary notifications from being sent for order statuses that do not require customer communication. After setting up the filter, you can proceed to retrieve customer details for the WhatsApp message.


5. Sending Order Update Notifications via WhatsApp

Now that you have set up the filter, it’s time to send the WhatsApp notification. In Pabbly Connect, add another action step and choose ‘WhatsApp Cloud API’ as the app. Select the action event as ‘Send Template Message’. You will need to connect your WhatsApp Cloud API account to Pabbly Connect by entering your API token and other required details.

In the message setup, map the recipient’s phone number and customize the message body using variables from the captured customer data. For example, include the customer’s name and order details in the message template. Once everything is set up, click on ‘Save and Send Test Request’ to verify that the message is sent correctly.


Conclusion

By following this tutorial, you can efficiently use Pabbly Connect to automate sending WooCommerce order updates to your customers via WhatsApp. This integration not only saves time but also enhances customer communication. Start implementing this automation today to improve your order management process.

Ensure you check out Pabbly Connect to create business automation workflows and reduce manual tasks. Pabbly Connect currently offer integration with 2,000+ applications.

Send WhatsApp Notifications for WooCommerce Orders Using Pabbly Connect

Learn how to send WhatsApp notifications for WooCommerce orders using Pabbly Connect and WhatsApp Cloud API in this detailed tutorial. Navigate the automation landscape confidently with clear, structured guidance suitable for professionals regardless of prior technical experience.

Watch Step By Step Video Tutorial Below


1. Setting Up Pabbly Connect to Send WhatsApp Notifications

To send WhatsApp notifications for WooCommerce orders, you will first need to set up Pabbly Connect. Start by creating an account on Pabbly Connect by visiting Pabbly.com/connect. Once registered, sign in to your account.

After logging in, click on the blue button labeled ‘Create Workflow’. Name your workflow, for instance, ‘Send WhatsApp Notifications on Every WooCommerce Order’, and click ‘Create’. This will initiate the integration process to connect WooCommerce with WhatsApp notifications using Pabbly Connect.


2. Integrating WooCommerce with Pabbly Connect

The next step involves integrating WooCommerce with Pabbly Connect. Choose WooCommerce as the app for your trigger event. Select the trigger event as ‘New Order Created’. This means that whenever a new order is placed in WooCommerce, it will trigger the workflow.

  • Log into your WooCommerce account.
  • Navigate to WooCommerce settings, then to the Advanced tab.
  • Select Webhooks and click on ‘Add Webhook’.

After adding the webhook, paste the webhook URL provided by Pabbly Connect in the delivery URL field. Set the status to active and save the webhook. This setup will allow Pabbly Connect to capture order data whenever a new order is created in WooCommerce.


3. Setting Up WhatsApp Cloud API

Now that WooCommerce is integrated with Pabbly Connect, you need to set up your WhatsApp Cloud API account. Go to developers.facebook.com and create an app. Once the app is created, generate a permanent access token.

Make sure to note down the phone number ID and WhatsApp Business Account ID, as you will need these to connect WhatsApp with Pabbly Connect. This step is crucial for sending WhatsApp messages through the Cloud API, enabling you to send notifications directly to customers.


4. Connecting WhatsApp Cloud API to Pabbly Connect

With both WooCommerce and WhatsApp Cloud API set up, it’s time to connect them through Pabbly Connect. Choose WhatsApp Cloud API as your action app and select the action event as ‘Send Template Message’. This action will allow you to send predefined messages to your customers.

  • Input your temporary access token, phone number ID, and WhatsApp Business Account ID.
  • Click on ‘Save’ to establish the connection.
  • Select the message template you created earlier.

Once the connection is established, Pabbly Connect will facilitate sending WhatsApp notifications to customers upon order placement, ensuring they receive timely updates about their purchases.


5. Testing the Automation

After setting up the integration, it’s essential to test the automation. Place a test order in your WooCommerce store and monitor whether the WhatsApp notification is sent successfully. With Pabbly Connect, you can easily check the captured order data and ensure everything is functioning correctly.

Upon placing the order, you should receive a WhatsApp message confirming the order details. This message will include the customer’s name, product ordered, and estimated delivery date. The automation process will now work seamlessly, sending notifications for every new order placed.


Conclusion

In this tutorial, we explored how to send WhatsApp notifications for WooCommerce orders using Pabbly Connect and WhatsApp Cloud API. By following the steps outlined, you can automate customer notifications, enhancing communication and improving customer satisfaction. Start using Pabbly Connect today to streamline your e-commerce operations and keep your customers informed!

Ensure you check out Pabbly Connect to create business automation workflows and reduce manual tasks. Pabbly Connect currently offer integration with 2,000+ applications.

Integrate Your Graphy Account with ActiveCampaign Using Pabbly Connect

Learn how to connect your Graphy account to ActiveCampaign with Pabbly Connect. Step-by-step tutorial to automate your email marketing. Transform complex automation concepts into accessible, actionable steps that eliminate unnecessary manual work while maximizing existing application capabilities.

Watch Step By Step Video Tutorial Below


1. Access Pabbly Connect to Set Up Integration

To begin connecting your Graphy account to ActiveCampaign, you need to access Pabbly Connect. Start by visiting the Pabbly Connect dashboard at Pabbly.com/connect. Here, you can create a free account in just a few minutes, which gives you access to 100 free automation tasks each month.

Once you have signed up and logged in, you will reach the dashboard where you can create a new workflow. Click on the ‘Create Workflow’ button to initiate the integration process. This is the foundation for automating the connection between Graphy and ActiveCampaign.


2. Create a Workflow in Pabbly Connect

After accessing the dashboard of Pabbly Connect, the next step is to create a workflow. Name your workflow something like ‘Graphy to ActiveCampaign Integration’ for clarity. This name will help you identify the workflow later.

  • Click on the ‘Create’ button to proceed.
  • Set the trigger event to ‘New Learner Created’ in Graphy.
  • This will ensure that whenever a new student signs up, it triggers the workflow.

Your workflow is now set up to listen for new sign-ups on Graphy. This is where Pabbly Connect plays a crucial role in facilitating the automation between the two applications.


3. Set Up Trigger in Graphy

For the integration to work, you need to set up the trigger in Graphy through Pabbly Connect. Go to the integrations section in your Graphy dashboard and find the third-party integrations option. Look for Pabbly Connect and select the ‘New Learner Created’ event checkbox.

Once selected, a webhook URL will be generated. Copy this URL and paste it into the webhook field in Graphy. This webhook URL is essential as it allows Graphy to communicate with Pabbly Connect and send data about new learners.


4. Connect to ActiveCampaign in Pabbly Connect

Now that you have set up the trigger, it’s time to define the action in Pabbly Connect. Search for ActiveCampaign in the action step and select the ‘Create a Contact’ action event. This action will add the new learner as a contact in ActiveCampaign.

  • You will need to connect your ActiveCampaign account by entering your API key and URL.
  • Find the API key in the developer section of your ActiveCampaign account settings.
  • Make sure to format the URL correctly by removing the ‘https://’ part.

With these steps, Pabbly Connect will seamlessly add each new learner from Graphy into your ActiveCampaign account as a contact, streamlining your email marketing efforts.


5. Test the Integration and Finalize Setup

Once everything is set up, it’s important to test the integration to ensure it works correctly. Click on the ‘Save and Send Test Request’ button in Pabbly Connect. This action will attempt to create a new contact in ActiveCampaign using the test data received from Graphy.

After running the test, check your ActiveCampaign contacts to verify that the new learner has been added. If successful, you will see the new contact reflecting in your ActiveCampaign dashboard. This confirms that the integration is functioning as intended, allowing for automatic updates from Graphy to ActiveCampaign without manual input.


Conclusion

In this tutorial, we explored how to connect your Graphy account to ActiveCampaign using Pabbly Connect. By following the steps outlined, you can automate the process of adding new learners as contacts in ActiveCampaign, enhancing your email marketing strategy. This integration saves time and ensures that your marketing efforts are always up-to-date.

Ensure you check out Pabbly Connect to create business automation workflows and reduce manual tasks. Pabbly Connect currently offer integration with 2,000+ applications.

Integrating WordPress with WhatsApp Cloud API Using Pabbly Connect

Learn how to automate sending WhatsApp messages to new WordPress users using Pabbly Connect. Step-by-step guide to set up the integration seamlessly. Learn to create powerful connections between your critical applications without requiring specialized programming knowledge or extensive technical background.

Watch Step By Step Video Tutorial Below


1. Setting Up Pabbly Connect for Integration

To begin integrating WhatsApp with your WordPress site, you must first access Pabbly Connect. This platform allows for seamless automation between various applications. Start by visiting Pabbly Connect and signing up for a free account. Once logged in, you will be directed to the dashboard where you can create your automation workflows.

Click on the ‘Create Workflow’ button, and name your workflow, such as ‘Send WhatsApp Messages to New WordPress Users’. After naming your workflow, click on the ‘Create’ button to proceed. This sets the stage for your automation, allowing Pabbly Connect to handle the integration between WordPress and WhatsApp.


2. Setting Up the WordPress Trigger in Pabbly Connect

In this step, you will define the trigger event for your workflow. Select WordPress as your trigger application and choose the event ‘User Registers’. This means that every time a new user registers on your WordPress site, the workflow will be activated. Pabbly Connect will provide you with a webhook URL that you will use to connect your WordPress site.

  • Search for WordPress in the trigger application field.
  • Select the trigger event ‘User Registers’.
  • Copy the provided webhook URL for later use.

Next, you need to set up the Webhook in your WordPress site. Install the WP Webhooks plugin, navigate to its settings, and add the webhook URL under the ‘User Created’ section. This allows your WordPress site to send registration data to Pabbly Connect whenever a new user registers.


3. Testing User Registration to Capture Data

After setting up the webhook, it’s time to test the integration. You need to manually register a new user on your WordPress site to generate a test submission. Fill out the registration form with the necessary details, including the user’s WhatsApp number. Once the form is submitted, Pabbly Connect will capture the registration data sent from the webhook.

Check the workflow in Pabbly Connect to see if the test data has been received successfully. You should see the user’s details, including their name and WhatsApp number. This confirms that the connection between WordPress and Pabbly Connect is functioning correctly.


4. Configuring WhatsApp Cloud API in Pabbly Connect

Now that the user registration data is captured, the next step is to set up WhatsApp Cloud API in your workflow. Select WhatsApp Cloud API as the action application and choose the event ‘Send Template Message’. This setup allows Pabbly Connect to send a personalized message to the newly registered user on WhatsApp.

  • Select WhatsApp Cloud API as the action application.
  • Choose ‘Send Template Message’ as the action event.
  • Connect your WhatsApp account by filling in the required fields.

To connect your WhatsApp Cloud API, you will need a permanent access token and the phone number ID. Once connected, select the message template you created earlier. This template will be used to send a welcome message to the new user. Pabbly Connect will automatically map the user’s name and WhatsApp number to the message template fields, ensuring a personalized experience.


5. Finalizing the Integration and Testing

With everything set up, it’s time to finalize the integration. Click on ‘Save and Send Test Request’ in Pabbly Connect to test the entire workflow. This will send the personalized WhatsApp message to the new user based on the data captured from the registration process.

Check the WhatsApp account associated with the new user to verify that the message has been received. The message should contain the user’s name and any other personalized information included in the template. This confirms that the integration is working as intended, and new users will receive their welcome messages automatically in the future.


Conclusion

In this tutorial, we demonstrated how to use Pabbly Connect to integrate WhatsApp Cloud API with WordPress for sending automated welcome messages to new users. By following these steps, you can streamline your communication and enhance user engagement on your WordPress site.

Ensure you check out Pabbly Connect to create business automation workflows and reduce manual tasks. Pabbly Connect currently offer integration with 2,000+ applications.

Automatically Send PDF Files from Google Sheets to WhatsApp Using Pabbly Connect

Learn how to automatically send PDF files from Google Sheets to WhatsApp using Pabbly Connect. Step-by-step tutorial with detailed instructions. Navigate the automation landscape confidently with clear, structured guidance suitable for professionals regardless of prior technical experience.

Watch Step By Step Video Tutorial Below


1. Setting Up the Pabbly Connect Workflow

To begin sending PDF files automatically from Google Sheets to WhatsApp, you need to set up a workflow in Pabbly Connect. Start by visiting the Pabbly Connect dashboard at Pabbly.com/connect. Here, you can create a free account that gives you 100 free automation tasks every month.

Once logged in, click on the ‘Create Workflow’ button. Assign a suitable name for your workflow, such as ‘Send PDF Files on WhatsApp from Google Sheets’. After naming your workflow, click the ‘Create’ button to load the workflow page.


2. Setting Up the Trigger in Google Sheets

The first step in the automation process is to set up the trigger in Pabbly Connect. Choose Google Sheets as the trigger application and select the trigger event as ‘New or Updated Spreadsheet Rows’. This trigger will activate whenever a new row is added to your Google Sheets.

  • Select Google Sheets as the trigger application.
  • Choose the trigger event: New or Updated Spreadsheet Rows.
  • Copy the webhook URL provided by Pabbly Connect.

Now, navigate to your Google Sheets and install the Pabbly Connect Webhooks add-on. Go to Extensions > Add-ons > Get Add-ons. Search for ‘Pabbly Connect Webhooks’ and install it. After installation, refresh your spreadsheet to see the new options.


3. Initial Setup in Google Sheets

After installing the Pabbly Connect Webhooks add-on, you need to perform the initial setup. Click on Extensions > Pabbly Connect Webhooks > Initial Setup. In the webhook URL field, paste the URL you copied earlier.

Next, specify the trigger column, which is the last column where you will enter data to trigger the automation. For this example, let’s say the trigger column is Column E. After entering the webhook URL and trigger column, click on ‘Submit’ to save your settings.

  • Paste the webhook URL in the designated field.
  • Set the trigger column to Column E.
  • Click ‘Submit’ to finalize the setup.

By completing this initial setup, you have successfully connected Google Sheets to Pabbly Connect, allowing it to capture data from your spreadsheet.


4. Connecting to WhatsApp Cloud API

Next, you will configure the action step in your Pabbly Connect workflow to send messages via WhatsApp. Choose WhatsApp Cloud API as the action application and select the action event as ‘Send Text Message’. Click on ‘Connect’ to set up the connection. using Pabbly Connect

To establish this connection, you will need your WhatsApp Cloud API credentials, including the permanent access token, phone number ID, and WhatsApp Business Account ID. These can be found in the Meta Developer application for WhatsApp.

Select WhatsApp Cloud API as the action application. Choose ‘Send Text Message’ as the action event. Enter the required WhatsApp API credentials.

Once you have entered the credentials, you can map the recipient’s phone number and the message content. Make sure the phone number includes the country code and does not have a plus sign.


5. Testing the Automation

After setting up the WhatsApp Cloud API connection, it’s time to test your automation. Send a test request to ensure everything is working correctly. Click on ‘Save and Send Test Request’ in Pabbly Connect.

If the setup is correct, you will see a confirmation message, and the PDF file will be sent to the specified WhatsApp number. This automation will now run automatically whenever a new row is added to your Google Sheets, sending the PDF file to the recipient’s WhatsApp.

Click ‘Save and Send Test Request’ to initiate the test. Check your WhatsApp for the message confirmation. Ensure the PDF link is included in the message.

This successful test confirms that your automation is set up correctly through Pabbly Connect, allowing seamless communication through WhatsApp.


Conclusion

In this tutorial, we demonstrated how to automatically send PDF files from Google Sheets to WhatsApp using Pabbly Connect. By following the outlined steps, you can efficiently manage your customer communications and streamline your workflow.

Ensure you check out Pabbly Connect to create business automation workflows and reduce manual tasks. Pabbly Connect currently offer integration with 2,000+ applications.

Utilizing Pabbly Connect for this integration not only saves time but also enhances your operational efficiency. Start automating your processes today!

How to Send Wedding Invitations on WhatsApp using Pabbly Connect and WhatsApp Official Cloud API

Learn how to send wedding invitations on WhatsApp using Pabbly Connect and WhatsApp Official Cloud API with this detailed step-by-step tutorial. Eliminate manual repetitive tasks from your workflow. Discover proven automation methods with intuitive steps designed for efficiency-minded professionals.

Watch Step By Step Video Tutorial Below


1. Setting Up Pabbly Connect for Wedding Invitations

To send wedding invitations via WhatsApp, you first need to set up Pabbly Connect. This integration tool connects various applications, allowing you to automate tasks effortlessly. Start by visiting Pabbly.com/connect to create your account, which provides 100 free automation tasks each month.

Once logged in, click on the ‘Create Workflow’ button. Name your workflow, for example, ‘Send Invitations on WhatsApp’. This initial setup is crucial as it lays the foundation for your automation process. After naming your workflow, you will be directed to the workflow page where you can set triggers and actions.


2. Configuring Google Sheets as the Trigger in Pabbly Connect

For this automation, the trigger will be Google Sheets, where you will input the guest details. Select Google Sheets as the trigger application and choose the event ‘New or Updated Spreadsheet Row’. This setup means that whenever a new row is added to your Google Sheet, it will trigger the workflow. using Pabbly Connect

  • Choose Google Sheets from the app list in Pabbly Connect.
  • Select the trigger event as ‘New or Updated Spreadsheet Row’.
  • Copy the webhook URL provided by Pabbly Connect.

Next, you need to connect this webhook to your Google Sheet. Click on ‘Extensions’ in Google Sheets, then go to ‘Add-ons’ and select ‘Get Add-ons’. Search for ‘Pabbly Connect Webhooks’ and install it. After installation, refresh your spreadsheet to see the new add-on.


3. Initializing Webhook in Google Sheets

After refreshing your Google Sheet, navigate to the Pabbly Connect Webhooks add-on, and select ‘Initial Setup’. Here, you’ll paste the webhook URL you copied earlier and specify the trigger column. In this case, the trigger column will be the last data entry column where you will input guest information. using Pabbly Connect

Type the letter corresponding to your trigger column (e.g., ‘B’ for the second column). This setup ensures that as soon as you enter data into this column, the automation will activate and send invitations via WhatsApp.

  • Paste the webhook URL in the designated field.
  • Specify the trigger column (e.g., B).

After completing these steps, go back to Pabbly Connect and click on ‘Test Submission’ to ensure the connection is working. If successful, you will see the data from your Google Sheet reflected in Pabbly Connect.


4. Setting Up WhatsApp Cloud API in Pabbly Connect

Now that your Google Sheets trigger is configured, the next step is to set up the WhatsApp Cloud API in Pabbly Connect. Select WhatsApp Cloud API as the action application and choose the event ‘Send Template Message’. This step is vital as it determines how invitations will be sent to guests.

To connect with WhatsApp Cloud API, you will need your token key, phone number ID, and business ID. These can be obtained from your WhatsApp API setup on the Meta for Developers page. Enter these details in Pabbly Connect to establish the connection.

Select WhatsApp Cloud API and the action event ‘Send Template Message’. Fill in your token key, phone number ID, and business ID. Save your connection settings.

Once connected, you can create message templates in your WhatsApp API setup. These templates will be used to format the wedding invitations sent to guests. Ensure that your templates are approved by WhatsApp before use.


5. Sending Wedding Invitations via WhatsApp

With everything set up, you can now send wedding invitations through WhatsApp using Pabbly Connect. In the action step, select the message template you created for invitations. Map the recipient’s mobile number and fill in the required fields such as the name of the guest, date, time, and venue of the wedding.

After mapping the fields, click on ‘Save and Send Test Request’ to send a test message. This will help you verify that everything is working correctly and that the invitations are being sent as intended.

Select the message template for the wedding invitation. Map the recipient’s mobile number and other required fields. Click ‘Save and Send Test Request’ to verify the setup.

Upon successful testing, your workflow will be ready to send invitations automatically to all guests listed in your Google Sheet. This integration streamlines the process, ensuring that invitations are sent efficiently and accurately through WhatsApp.


Conclusion

In this tutorial, we demonstrated how to use Pabbly Connect to automate sending wedding invitations via WhatsApp using the WhatsApp Official Cloud API. By integrating Google Sheets with WhatsApp, you can effortlessly manage and send invitations to multiple guests. This automation not only saves time but also enhances the overall guest experience.

Ensure you check out Pabbly Connect to create business automation workflows and reduce manual tasks. Pabbly Connect currently offer integration with 2,000+ applications.