How to Write Marketing Emails in Seconds Using Pabbly Connect and OpenAI

Learn how to automate the process of writing marketing emails in seconds using Pabbly Connect and OpenAI. Follow our step-by-step tutorial for seamless integration. Revolutionize your productivity approach with just a few strategic clicks. Uncover professional methods for connecting applications and creating workflows that reclaim hours of your week.

Watch Step By Step Video Tutorial Below


1. Accessing Pabbly Connect for Email Automation

To begin automating your marketing emails, access Pabbly Connect by visiting the official website. Click on the sign-up button to create an account or log in if you are an existing user. This process is quick and gives you access to 100 free tasks to explore the platform.

Once logged in, navigate to the dashboard where you can create a new workflow. This is where you will set up the integration between Google Sheets and OpenAI to automate email generation. Click on the ‘Create Workflow’ button and name your workflow accordingly.


2. Setting Up Google Sheets as the Trigger Application

In this step, you will configure Google Sheets as the trigger application in Pabbly Connect. Select Google Sheets and choose the event ‘New or Updated Spreadsheet Row’. This means that every time you add a new title in your Google Sheet, it will trigger the workflow.

  • Choose Google Sheets as the trigger application.
  • Select the trigger event: New or Updated Spreadsheet Row.
  • Copy the webhook URL provided by Pabbly Connect.

After copying the webhook URL, you will need to set up this connection in your Google Sheet. Go to the extensions menu, add-ons, and select Pabbly Connect Webhooks to paste the URL. Ensure that the trigger column is set correctly to capture the data.


3. Generating Content with OpenAI

Next, set up OpenAI as the action application in Pabbly Connect. Choose the action event ‘Generate Content’. This allows you to automatically create marketing emails based on the titles added to your Google Sheet. Connect your OpenAI account using the API key obtained from the OpenAI dashboard.

Once you have connected OpenAI, configure the parameters for content generation. Specify the AI model, prompt, and other settings such as maximum tokens and stop sequences. For instance, you can set the prompt to ‘Write a marketing email for the product launch of a new organic hair mask’ to generate relevant content.

  • Select the AI model: text-davinci-003.
  • Define the prompt for email generation.
  • Set the maximum number of tokens for the response.

After configuring these settings, send a test request to see if the content is generated successfully. This will allow you to verify that OpenAI is correctly integrated with Pabbly Connect.


4. Updating Google Sheets with Generated Emails

After generating the email content, the next step is to update your Google Sheet with this information using Pabbly Connect. Add another action step in your workflow and select Google Sheets again, this time choosing the ‘Update Cell Value’ action event.

In this action, specify the range and the value to update in your Google Sheet. For example, you will need to indicate the column where the email should be placed and map the generated email content from the previous step. This ensures that the email is saved directly into your spreadsheet.

Select the correct spreadsheet and sheet name. Specify the range in the format ‘ColumnNameRowIndex’. Map the generated email content to the value field.

After mapping these details, send a test request to confirm that the cell in your Google Sheet updates correctly with the generated email content. This finalizes the automation process.


5. Testing the Entire Integration

To ensure everything is functioning as intended, test the integration by adding a new title in your Google Sheet. Once you enter a new title, Pabbly Connect will trigger the workflow, generate the email using OpenAI, and update the Google Sheet with the resultant email content.

For example, if you add ‘New flavor of Maggie is launched’ as a title, the automation will create an email based on this title and update the corresponding cell in your spreadsheet. This is a powerful demonstration of how automation can save time and streamline your email marketing efforts.

With this setup, you can easily generate marketing emails in seconds without manual effort. This integration showcases the capabilities of Pabbly Connect in automating workflows efficiently.


Conclusion

In this tutorial, we explored how to automate the process of writing marketing emails using Pabbly Connect and OpenAI. By integrating Google Sheets with OpenAI, you can generate content quickly and efficiently, making your email marketing efforts more effective.

Ensure you check out Pabbly Connect to create business automation workflows and reduce manual tasks. Pabbly Connect currently offer integration with 2,000+ applications.

Integrating Google Forms with MySQL and Gmail Using Pabbly Connect

Learn how to automate data retrieval from MySQL on form submission using Pabbly Connect, Google Forms, and Gmail. A step-by-step guide for seamless integration. Explore efficient methods for automating routine tasks with clear, concise instructions suited for both newcomers and experienced professionals.

Watch Step By Step Video Tutorial Below


1. Setting Up Pabbly Connect for Google Forms Integration

To start the automation process, we will utilize Pabbly Connect to connect Google Forms with MySQL and Gmail. First, create a free account on Pabbly Connect by following the sign-up link provided. Once logged in, navigate to the dashboard and click on ‘Create Workflow.’

Name your workflow, for instance, ‘Google Forms to MySQL to Gmail,’ and click on ‘Create.’ This action opens a new workflow with a trigger and action window. The trigger will capture data from Google Forms, while the action will process this data through MySQL and send it via Gmail.


2. Connecting Google Forms to Pabbly Connect

In the trigger window of Pabbly Connect, search for ‘Google Forms’ and select it. Choose the trigger event as ‘New Response Received.’ Upon selection, Pabbly Connect will provide a webhook URL. This URL is essential for linking your Google Form to Pabbly Connect.

  • Copy the webhook URL from Pabbly Connect.
  • Open your Google Form and navigate to the Responses tab.
  • Create a new Google Spreadsheet to collect form responses.

After setting up the spreadsheet, go to Extensions, select Add-ons, and click on ‘Get Add-ons.’ Search for ‘Pabbly Connect Webhooks’ and install the add-on. Once installed, refresh your Google Sheets, then navigate to Extensions > Pabbly Connect Webhooks > Initial Setup.


3. Connecting MySQL Database to Pabbly Connect

In the action window, search for ‘MySQL’ and select it. Choose the action event as ‘Get Rows.’ Click on ‘Connect’ and add a new connection by entering your MySQL database credentials, including username, password, and host database. using Pabbly Connect

After establishing the connection, select the table from which you want to fetch customer data. For this example, choose the ‘customer_data’ table. Next, specify the column name containing the email address and set the operator to ‘equals to.’ Map the email address value received from the Google Form response in the value field.

  • Select the table name from the dropdown.
  • Map the email address from the Google Forms response.
  • Set the limit for the number of rows to retrieve.

Click on ‘Save and Send Test Request’ to confirm that Pabbly Connect can successfully retrieve the required data from your MySQL database.


4. Sending Customer Data via Gmail

Next, we will set up Gmail to send the retrieved customer data. In the action window, search for ‘Gmail’ and select it. Choose the action event ‘Send Email.’ Connect your Gmail account by clicking on ‘Connect with Gmail’ and selecting your account. using Pabbly Connect

In the email setup, map the recipient email address to the email address collected from the Google Form. Specify the sender’s name, email subject, and the email body content. For example, you can start the email with ‘Hello’ and include the customer’s details retrieved from MySQL, such as name, email, mobile number, and username.

Map the recipient’s email address from the Google Form response. Set the email subject as ‘Requested Data of the User.’ Compose the email body to include customer details.

After completing the setup, click on ‘Send Test Request’ to verify that the email is sent successfully.


5. Testing the Automation Workflow

To ensure everything works correctly, go back to your Google Form and submit a test response. Fill in the required fields, including the customer’s email address you wish to query from the MySQL database.

Once the form is submitted, check your Gmail inbox. You should receive an email containing the customer data that corresponds to the email address entered in the form. This confirms that your automation setup using Pabbly Connect is functioning as intended.

By following these steps, you have successfully integrated Google Forms, MySQL, and Gmail using Pabbly Connect. This automation allows you to retrieve specific customer data securely and efficiently without giving direct access to your database.


Conclusion

In conclusion, using Pabbly Connect allows you to automate the process of retrieving specific data from MySQL upon form submission. This integration enhances data accessibility while maintaining security, making it an invaluable tool for teams.

Ensure you check out Pabbly Connect to create business automation workflows and reduce manual tasks. Pabbly Connect currently offer integration with 2,000+ applications.

How to Create & Send Customized Invitation Cards to Customers on WhatsApp Using Pabbly Connect

Learn how to automate sending customized invitation cards to customers on WhatsApp using Pabbly Connect with Google, Facebook, and more. Follow this definitive guide to creating powerful automated workflows with straightforward, efficiency-focused solutions that save valuable time.

Watch Step By Step Video Tutorial Below


1. Setting Up Pabbly Connect for Invitation Cards

To start the process of creating and sending customized invitation cards to customers on WhatsApp, you first need to set up Pabbly Connect. This platform allows you to automate the entire workflow seamlessly. Begin by signing up for a free account on the Pabbly Connect website.

Once you’ve created your account, log in and navigate to the dashboard. Click on the ‘Create Workflow’ button to initiate a new automation. Name your workflow something like ‘Automated Invitations’ and click ‘Create’. This sets the stage for integrating various applications.


2. Integrating JotForm with Pabbly Connect

The first integration involves connecting JotForm to Pabbly Connect. JotForm will serve as the trigger application where customers fill out their details for the invitation cards. In your JotForm dashboard, create a new order form that includes fields for customer names, email addresses, WhatsApp numbers, and invitation card designs.

  • Open the settings of your JotForm and select the Integrations option.
  • Search for the Webhooks option and paste the webhook URL provided by Pabbly Connect.
  • Complete the integration and test it by submitting a dummy entry.

After completing these steps, your JotForm will send data to Pabbly Connect whenever a customer fills out the form. This integration is crucial for automating the invitation card creation process.


Next, you will integrate Razorpay with Pabbly Connect to generate payment links for the invitation cards. After receiving a form submission from JotForm, the next action in your workflow should be to create a payment link.

In Pabbly Connect, choose Razorpay as the action application and select the ‘Create Payment Link’ action event. You will need to connect your Razorpay account by entering your key ID and secret from the Razorpay dashboard.

  • Map the amount from the JotForm submission, ensuring it’s in the smallest currency unit.
  • Set the payment link description and customer details based on the form data.
  • Save and test the connection to ensure the payment link is generated successfully.

This step allows you to seamlessly collect payments from customers for their customized invitation cards.


4. Designing Invitation Cards with Switchboard Canvas

After generating the payment link, the next step is to create the invitation card design using Switchboard Canvas integrated through Pabbly Connect. This allows you to generate a customized card based on the customer’s selected template.

In your Pabbly Connect workflow, add Switchboard Canvas as an action application. Select the ‘Create Image’ action event and connect your Switchboard Canvas account using the API key found in the application settings.

Map the selected template name from the JotForm submission to choose the appropriate design. Fill in the necessary variables such as the birthday person’s image, event date, and venue. Click ‘Save and send test request’ to generate a test invitation card.

This step lets you create visually appealing invitation cards that can be sent directly to customers.


5. Sending Invitation Cards via WhatsApp

The final step involves sending the generated invitation card and payment link to the customer via WhatsApp using Pabbly Connect. Integrate the WhatsApp Cloud API into your workflow for this purpose.

In the Pabbly Connect workflow, choose WhatsApp as the action application and select the ‘Send Template Message’ action event. Connect your WhatsApp Cloud API account by entering the required details such as the token key and business account ID.

Map the WhatsApp number from the JotForm submission to send the message directly to the customer. Insert the generated payment link and invitation card URL into the message body. Test the connection to ensure that the message is sent successfully.

This integration allows you to automate the entire process of sending customized invitation cards to your customers via WhatsApp, enhancing your service efficiency.


Conclusion

Using Pabbly Connect, you can automate the entire process of creating and sending customized invitation cards to customers on WhatsApp. This integration not only saves time but also enhances customer satisfaction by providing a seamless experience. Start using Pabbly Connect today to streamline your invitation card services.

Ensure you check out Pabbly Connect to create business automation workflows and reduce manual tasks. Pabbly Connect currently offer integration with 2,000+ applications.

How to Scale Content Creation with AI Using Pabbly Connect

Learn how to scale content creation with AI using Pabbly Connect. This tutorial covers automation with Google Sheets, Docs, Gmail, and more. Develop expertise in application integration and learn how to design streamlined automation workflows using proven, simplified approaches.

Watch Step By Step Video Tutorial Below


1. Understanding Content Creation Scaling with Pabbly Connect

Scaling content creation involves increasing the volume and speed of your content production. With Pabbly Connect, you can automate various aspects of this process, making it more efficient. This tutorial will guide you through how to utilize Pabbly Connect to enhance your content creation workflow.

By integrating applications like Google Sheets, Google Docs, and Gmail through Pabbly Connect, you can automate tasks that traditionally required manual effort. This allows you to focus on strategic tasks while the automation handles repetitive ones.


2. Automating Article Writing with Pabbly Connect

To write articles automatically, you can connect Google Sheets and Google Docs via Pabbly Connect. Start by creating a Google Sheet where you will input your blog titles. Each time you add a title to this sheet, Pabbly Connect will trigger an automation to generate the corresponding blog draft in Google Docs.

  • Open Pabbly Connect and create a new workflow.
  • Set Google Sheets as the trigger app and select the ‘New Row’ event.
  • Connect your Google Sheets account and select the relevant spreadsheet.
  • Choose Google Docs as the action app and select ‘Create Document’ as the action event.
  • Map the title from Google Sheets to the document title in Google Docs.

Once this setup is complete, every new title you add will automatically create a draft in Google Docs, allowing you to scale your content production effortlessly.


3. Automatically Generating Images and Text for Blogs

In addition to writing articles, Pabbly Connect can help you generate images and text for your blogs. By automating this process, you eliminate the need for a design team. You simply input the image title into your Google Sheet, and Pabbly Connect will handle the rest.

  • Create a new workflow in Pabbly Connect.
  • Select Google Sheets as the trigger and set the event to ‘New Row’.
  • Connect your Google Sheets account and specify the relevant spreadsheet.
  • Add an action to generate images based on the titles provided.

This automation ensures that every image you need for your blog is created based on the titles you input, streamlining your content creation process significantly.


4. Writing Articles in Bulk with Pabbly Connect

Writing multiple articles at once is made easy with Pabbly Connect. By inputting a list of article titles into Google Sheets, you can automate the article generation process. Each title will trigger a draft creation in Google Docs, allowing you to write in bulk.

To set this up, follow these steps:

Open Pabbly Connect and create a new workflow. Use Google Sheets as the trigger app with the ‘New Row’ event. Select the specific spreadsheet containing your titles. Set Google Docs as the action app and choose ‘Create Document’. Map your titles to the document titles in Google Docs.

This method allows for efficient bulk content creation, saving you time and effort.


5. Automating Replies to Google My Business Reviews with Pabbly Connect

Content creation extends beyond articles to responding to customer reviews. With Pabbly Connect, you can automate replies to Google My Business reviews. This ensures timely responses without manual intervention.

To automate this process, follow these steps:

Create a new workflow in Pabbly Connect. Select Google My Business as the trigger app and set it to ‘New Review’. Connect your Google My Business account. Choose an action to generate a reply using AI.

This automation allows you to maintain engagement with your customers while saving time on responses.


Conclusion

By utilizing Pabbly Connect, you can significantly scale your content creation process through automation. From writing articles to generating images and automating replies, Pabbly Connect streamlines your workflow, allowing you to focus on more strategic tasks. Embrace automation to enhance your productivity and efficiency in content creation.

Ensure you check out Pabbly Connect to create business automation workflows and reduce manual tasks. Pabbly Connect currently offer integration with 2,000+ applications.

Automate Telegram Image Uploads to Google My Business with Pabbly Connect

Learn how to automate uploading images from Telegram to Google My Business using Pabbly Connect. Step-by-step guide with detailed integration instructions. Develop expertise in application integration and learn how to design streamlined automation workflows using proven, simplified approaches.

Watch Step By Step Video Tutorial Below


1. Setting Up Pabbly Connect for Telegram to Google My Business Integration

To start the integration process, you need to access Pabbly Connect. This platform allows you to automate tasks between apps effortlessly. First, sign up for a free account on Pabbly Connect. Once you are logged in, click on ‘Create Workflow’ and name it something descriptive, like ‘Telegram to Google My Business’.

After naming your workflow, you will see two windows: the trigger window and the action window. The trigger window is where you will set up the Telegram integration, while the action window will handle the Google My Business posting. This setup is crucial for automating the image upload process.


2. Connecting Telegram to Pabbly Connect

In the trigger window, search for ‘Telegram Bot’ and select it. Then, choose the event ‘Set Webhook/Watch Updates’. This will allow Pabbly Connect to monitor your Telegram group for new images and captions. Click on ‘Connect’ and then select ‘Add New Connection’.

  • Create a bot using BotFather in Telegram.
  • Add the bot to your Telegram group and make it an admin.
  • Copy the API token provided by BotFather and paste it into Pabbly Connect.

Once the connection is established, click on ‘Save’ and then ‘Save and Send Test Request’. This allows Pabbly Connect to wait for a new message in your Telegram group, confirming that the integration is functioning correctly.


3. Uploading Images from Telegram to Google My Business

After the connection is set up, you can test it by sharing an image with a caption in your Telegram group. As soon as you send the image, Pabbly Connect will capture the details, including the file name and caption. This confirms that your Telegram bot is working as intended.

Next, you will need to retrieve the image URL. For this, add another action step in your workflow by selecting ‘Telegram Bot’ again and choosing the action event ‘Get File’. This step is essential to obtain the image URL that will be posted to Google My Business.

  • Map the file ID received from the previous step.
  • Click on ‘Save and Send Test Request’ to fetch the image URL.
  • Ensure the response contains the file path and URL.

With the image URL obtained, you’re ready to move on to the next step of posting to Google My Business.


4. Creating a Google My Business Post

In this step, select ‘Google My Business’ as your action app in Pabbly Connect. Choose the action event ‘Create Post’. This step allows you to use the image and caption captured from Telegram to create a new post on your Google My Business profile.

Connect your Google My Business account by clicking on ‘Sign in with Google’. Once connected, you will need to select the business account and location where you want the post to appear. Next, map the caption from the Telegram message to the summary field of the post.

Choose the post type (e.g., call to action). Enter the action type and URL for the button. Paste the media source URL obtained from the previous step.

After entering all the required fields, click on ‘Save and Send Test Request’. This will create a post on your Google My Business profile with the image and caption you provided.


5. Testing the Integration

Now that your automation is set up, it’s time to test it. Share another image in your Telegram group with a caption. Pabbly Connect will automatically capture this new image and caption, creating a new post on your Google My Business profile.

Go to your Google My Business account and refresh the posts section. You should see the new post with the image and caption you just shared on Telegram. This confirms that your automation is working perfectly.

If you encounter any issues, double-check your configurations in Pabbly Connect and ensure that the Telegram bot is correctly set up and has the necessary permissions in the group.


Conclusion

In this tutorial, you learned how to automate the process of uploading images from Telegram to Google My Business using Pabbly Connect. By following the exact steps outlined, you can streamline your image posting process, ensuring that your business stays updated effortlessly.

Ensure you check out Pabbly Connect to create business automation workflows and reduce manual tasks. Pabbly Connect currently offer integration with 2,000+ applications.

How to Write Advertising Copy for Social Media Channels Using Pabbly Connect

Learn how to write advertising copy for social media channels using Pabbly Connect to integrate Google Sheets, OpenAI, and Switchboard seamlessly. Navigate the automation landscape confidently with clear, structured guidance suitable for professionals regardless of prior technical experience.

Watch Step By Step Video Tutorial Below


1. Setup Pabbly Connect for Social Media Integration

To start writing advertising copy for social media channels, you need to access Pabbly Connect. Visit the Pabbly Connect website and either sign in or create a new account. Once logged in, navigate to the dashboard where you can create a new workflow.

Click on the ‘Create Workflow’ button and name your workflow related to advertising copy. This sets the foundation for integrating Google Sheets, OpenAI, and Switchboard through Pabbly Connect.


2. Configure Google Sheets as the Trigger Application

In this step, you will set Google Sheets as the trigger application in Pabbly Connect. Select Google Sheets and choose the trigger event as ‘New or Updated Spreadsheet Row’. This means every time a new row is added, it will trigger the workflow.

  • Select your spreadsheet where the ad copy titles are stored.
  • Copy the webhook URL provided by Pabbly Connect.
  • Go to your Google Sheets and set up the Pabbly Connect Webhooks add-on.

After setting up the Google Sheets integration, ensure that the trigger column is correctly configured to detect changes in the specified column. This ensures that every time a new ad title is entered, it activates the connected applications through Pabbly Connect.


3. Generate Content Using OpenAI

Next, you will configure OpenAI as the action application in Pabbly Connect. Select OpenAI and set the action event to ‘Generate Content’. This allows you to create the advertising copy based on the title provided in Google Sheets.

To connect OpenAI, you will need to input your API key. Log into your OpenAI account, generate a new API key, and paste it into Pabbly Connect. Once connected, you can set the prompt to generate a headline based on the ad title.


4. Create an Image Using Switchboard

After generating the content, the next step is to create an image using Switchboard. In Pabbly Connect, add Switchboard as the next action application and select ‘Create Image’ as the action event. This will allow you to create a visual representation of the ad copy.

  • Connect your Switchboard account using the API key.
  • Map the headline and description generated from OpenAI to the respective fields in Switchboard.
  • Set the template details for the image you want to create.

Once the image is created, you will receive a URL link to the image, which can then be used in your Google Sheets to keep track of all advertising materials. This seamless integration is facilitated by Pabbly Connect.


5. Update Google Sheets with the Image Link

Finally, you will update your Google Sheets with the image link generated by Switchboard. In Pabbly Connect, select Google Sheets again as the action application and choose ‘Update Cell Value’ as the action event.

Provide the necessary details such as the spreadsheet name and the specific cell where you want the image link to be updated. This ensures that all generated content, including the image link, is stored in one place, making it easy to access and manage your advertising campaigns.


Conclusion

In this tutorial, we demonstrated how to use Pabbly Connect to automate the process of writing advertising copy for social media channels. By integrating Google Sheets, OpenAI, and Switchboard, you can effortlessly generate ad titles, descriptions, and images, streamlining your marketing efforts.

Ensure you check out Pabbly Connect to create business automation workflows and reduce manual tasks. Pabbly Connect currently offer integration with 2,000+ applications.

How to Automatically Add Apollo Contacts to Pipedrive Using Pabbly Connect

Learn how to use Pabbly Connect to automatically add Apollo contacts to Pipedrive. Follow these easy steps for seamless integration. Master proven automation processes with practical implementation examples and strategic recommendations you can apply immediately in your workflow.

Watch Step By Step Video Tutorial Below


1. Setting Up Pabbly Connect for Apollo and Pipedrive Integration

To begin integrating Apollo with Pipedrive automatically, you need to access Pabbly Connect. This platform allows you to create workflows that connect various applications seamlessly. Start by signing up for a free account on the Pabbly Connect dashboard.

Once you have logged into your Pabbly Connect account, click on ‘Create Workflow’ and name it, for example, ‘Apollo to Pipedrive’. This workflow will manage the automation process between your Apollo contacts and Pipedrive CRM.


2. Configuring the Apollo Trigger in Pabbly Connect

In this section, you will set up the trigger for your integration. In the workflow, locate the trigger window and search for ‘Apollo’ in the app selection. Select it, and then choose ‘New Contact’ as the trigger event. This event will initiate the workflow whenever a new contact is created in Apollo. using Pabbly Connect

  • Choose Apollo from the app list.
  • Select ‘New Contact’ as the trigger event.
  • Connect your Apollo account by entering the API key.

After connecting your Apollo account, you will need to test the connection. Click on ‘Save and Test Request’ to ensure that Pabbly Connect can retrieve the latest contact details from Apollo. If successful, you should see the contact information appear in Pabbly Connect.


3. Adding Action to Create a New Contact in Pipedrive

Next, you will configure the action that occurs in Pipedrive when a new contact is created in Apollo. In the action window, search for ‘Pipedrive’ and select it. Choose ‘Create Person’ as the action event, which will add the new contact from Apollo to your Pipedrive account. using Pabbly Connect

To connect your Pipedrive account, you will need the API token. Log into your Pipedrive account, navigate to your profile settings, and copy the API token from the API section. Paste this token into Pabbly Connect to establish the connection.


4. Mapping Fields Between Apollo and Pipedrive

Once the connection is established, you’ll need to map the fields from the Apollo contact to the corresponding fields in Pipedrive. For instance, map the name, last name, and email address fields from the Apollo response to the respective fields in Pipedrive. using Pabbly Connect

  • Map the name of the contact to the ‘Name’ field in Pipedrive.
  • Select a label for the contact (e.g., ‘Cool Lead’).
  • Map the email address to the email field in Pipedrive.

After mapping the necessary fields, click on ‘Save and Send Test Request’. If everything is set up correctly, you will receive a confirmation that the contact has been added to Pipedrive successfully.


5. Testing and Verifying Your Integration

Finally, it’s essential to verify that the integration between Apollo and Pipedrive is functioning as intended. To do this, log into your Pipedrive account and check the contacts section. You should see the new contact that was created in Apollo reflected in Pipedrive.

This confirms that the automation workflow you created using Pabbly Connect is working perfectly. Every time a new contact is added in Apollo, it will automatically create a person in Pipedrive without any manual effort.


Conclusion

In this tutorial, we explored how to use Pabbly Connect to automatically add Apollo contacts to Pipedrive. By following the steps outlined, you can streamline your workflow and ensure that your CRM is always up-to-date with the latest contact information from Apollo.

Ensure you check out Pabbly Connect to create business automation workflows and reduce manual tasks. Pabbly Connect currently offer integration with 2,000+ applications.

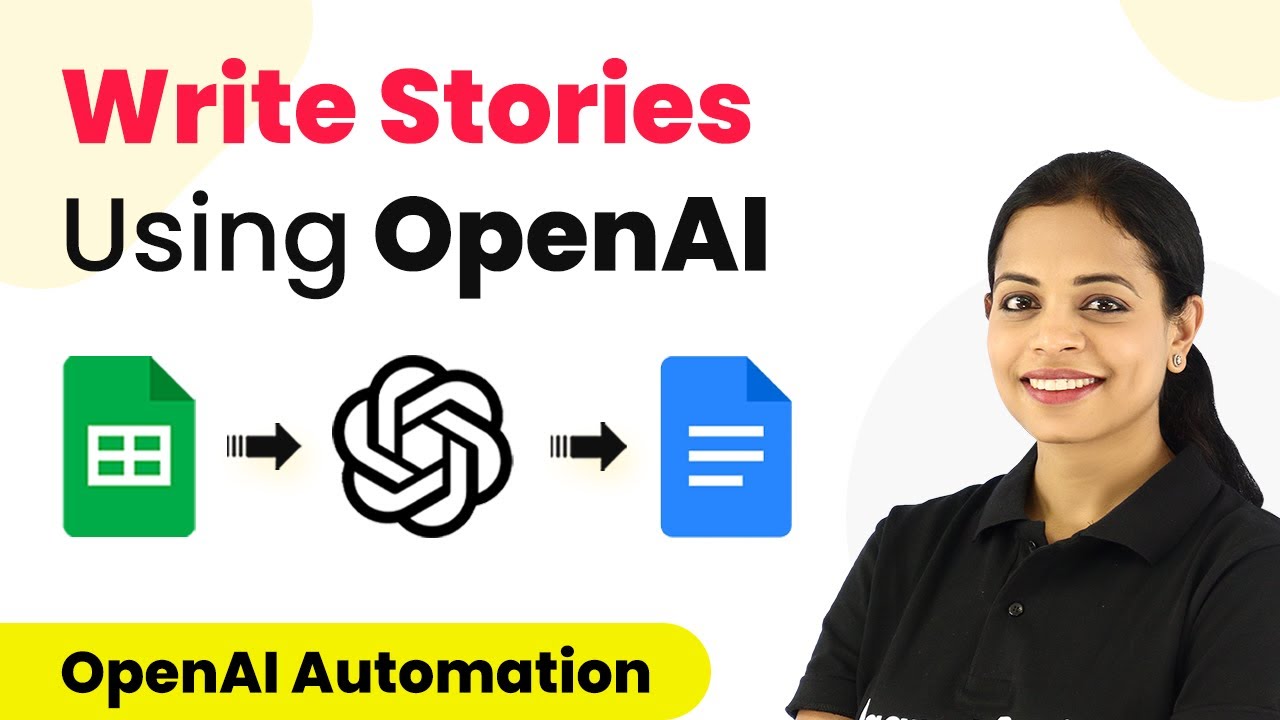
How to Write Stories Using OpenAI with Pabbly Connect: A Step-by-Step Guide

Learn how to automate story generation using OpenAI, Google Sheets, and Google Docs with Pabbly Connect. Follow our detailed tutorial for seamless integration. Discover hidden automation capabilities within your existing tools. This guide shows you how to connect your essential applications and permanently eliminate redundant manual processes.

Watch Step By Step Video Tutorial Below


1. Getting Started with Pabbly Connect

To begin the process of generating stories using OpenAI, you need to access Pabbly Connect. This platform acts as the central hub for integrating Google Sheets, Google Docs, and OpenAI.

Start by visiting the Pabbly Connect website. If you are a new user, sign up for a free account, which will provide you with 100 free tasks to explore the application. Existing users can simply sign in. Once you have logged in, navigate to the dashboard and click on the ‘Create Workflow’ button to set up your automation.


2. Setting Up Google Sheets as the Trigger Application

The first step in this integration is to set Google Sheets as the trigger application in Pabbly Connect. This means that every time a new row is added to your Google Sheet, the automation will be activated.

  • Click on the trigger application and select Google Sheets.
  • Choose the trigger event as ‘New or Updated Spreadsheet Row.’
  • Copy the webhook URL generated by Pabbly Connect.

After setting up the trigger, go to your Google Sheet, navigate to Extensions, and select Pabbly Connect Webhooks to complete the integration. Paste the webhook URL and specify the trigger column (usually column A), then send a test request to ensure the connection is established.


3. Integrating OpenAI for Story Generation

Once the trigger from Google Sheets is set up, the next step is to integrate OpenAI to generate creative stories. In Pabbly Connect, select OpenAI as the action application.

To connect OpenAI, you will need an API key. Log into your OpenAI account, navigate to the API section, and generate a new secret key. Back in Pabbly Connect, paste this API key to establish the connection. Set the action event to ‘Generate Content’ and configure the parameters such as the model, prompt (using the story title from the Google Sheet), and other settings like temperature and maximum tokens.


4. Creating and Appending to Google Docs

After generating the story content, the next step is to create a document in Google Docs. In Pabbly Connect, select Google Docs as the next action application.

  • Choose the action event as ‘Create Document.’
  • Map the document name to the story title from the previous step.

Once the document is created, you need to append the generated story content. Add another action step for Google Docs, selecting ‘Append Paragraph to Document.’ Here, map the document ID from the previous step and insert the generated story text. This will ensure that the story is saved in the newly created document.


5. Sharing the Document and Updating Google Sheets

Now that the story is saved in Google Docs, the next step is to make the document publicly accessible. In Pabbly Connect, add Google Drive as the next action application and select ‘Share the File with Anyone on the Internet.’

After making the document Pabbly, the final step is to update the Google Sheets with the document link. Add another action for Google Sheets, set the action event to ‘Update Cell Value,’ and specify the range where the document link should be updated. Use the row index from the trigger step to ensure the correct cell is updated with the document link.


Conclusion

This tutorial has guided you through the process of automating story generation using OpenAI, Google Sheets, and Google Docs with the help of Pabbly Connect. By following these steps, you can streamline your creative writing process and efficiently manage your story titles and their corresponding documents.

Ensure you check out Pabbly Connect to create business automation workflows and reduce manual tasks. Pabbly Connect currently offer integration with 2,000+ applications.

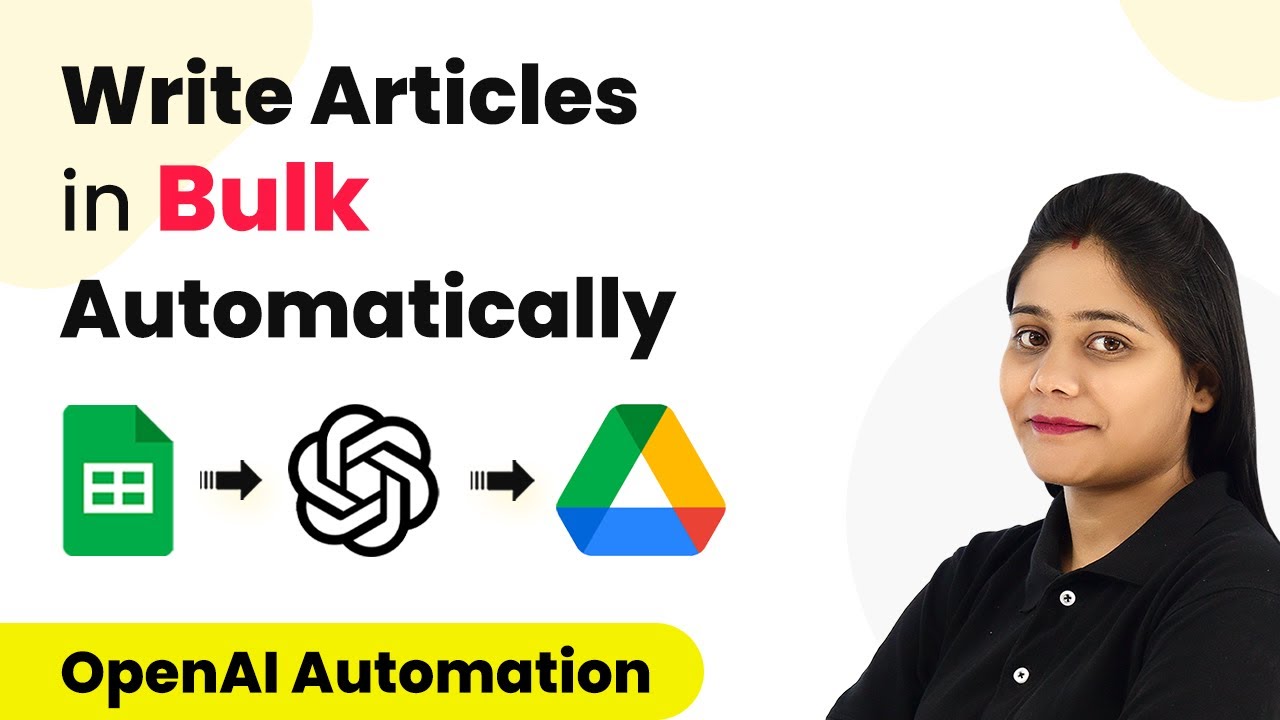
How to Write Articles in Bulk Using Pabbly Connect

Learn how to automate article writing in bulk with Pabbly Connect, integrating Google Sheets, OpenAI, and Google Drive for seamless content generation. Build sophisticated automated workflows in less time than you think. This guide translates complex integrations into straightforward steps for immediate implementation.

Watch Step By Step Video Tutorial Below


1. Setting Up Pabbly Connect for Article Generation

To start automating your article writing process, first, access Pabbly Connect by visiting Pabbly.com/connect. This powerful tool allows you to integrate various applications seamlessly, enabling you to create workflows that automate repetitive tasks.

Once you sign up or log into your Pabbly Connect account, navigate to the dashboard. Click on the blue button labeled ‘Create Workflow’. Here, you can name your workflow, for example, ‘How to Write Articles in Bulk’. This sets the stage for integrating Google Sheets, OpenAI, and Google Drive through Pabbly Connect.


2. Integrating Google Sheets with Pabbly Connect

In this step, you will connect Google Sheets to Pabbly Connect. This integration allows you to trigger the automation whenever new article titles are added to your spreadsheet. Select Google Sheets as your trigger application and choose the event ‘New or Updated Spreadsheet Row’. This action initiates the workflow when a new title is added.

  • Choose your spreadsheet, ensuring it contains a list of article titles.
  • Copy the webhook URL provided by Pabbly Connect and paste it into the Google Sheets add-on settings.
  • Set your trigger column to the one where article titles will be added.

After completing these steps, test the connection by sending a test row from Google Sheets to Pabbly Connect. This confirms that your integration is set up correctly.


3. Connecting OpenAI for Article Generation

Next, you will integrate OpenAI with Pabbly Connect. This is crucial for generating the content based on the titles received from Google Sheets. In Pabbly Connect, select OpenAI as the action application and choose the event ‘Generate Content’. This will allow you to create articles automatically.

To connect OpenAI, you will need an API key. Log into your OpenAI account and navigate to the API section to retrieve your key. Once you have the key, return to Pabbly Connect and input it to establish the connection. Ensure you select the appropriate model, such as ‘text-davinci-003’, for generating high-quality content.

  • Set the prompt to generate content based on the article title mapped from Google Sheets.
  • Configure parameters like temperature and max tokens to control the content generation.

After setting up the parameters, run a test to ensure that OpenAI generates the article as expected. This step is essential to confirm that your integration is functioning properly.


4. Saving Generated Articles to Google Drive

Once the articles are generated, the next step is to save them to Google Drive using Pabbly Connect. Select Google Drive as the next action application and choose the ‘Create File’ event. This allows the generated articles to be stored in a specific folder.

Connect your Google Drive account to Pabbly Connect and specify the folder where you want to save the articles. Map the file name to the article title generated by OpenAI, ensuring that each article is saved with its corresponding title. This organization is key for easy access later.

Select the folder where all articles will be saved. Map the content generated by OpenAI to the file content field.

After configuring these settings, run a test to verify that the articles are saved correctly in Google Drive. This ensures that your workflow is complete and functional.


5. Updating Google Sheets with Article Links

The final step in this automation process is updating Google Sheets with the links to the newly created articles. In this step, select Google Sheets again as the action application and choose the ‘Update Cell Value’ event. This allows you to insert the link to the article back into your spreadsheet.

Connect to your Google Sheets account via Pabbly Connect and specify the spreadsheet and cell where the link should be updated. Map the link from the previous Google Drive step to ensure the correct link is inserted. This finalizes the workflow, creating a seamless process from article title input to content generation and storage.

Map the row index to ensure the correct cell is updated. Run a test to confirm that the link is correctly added to the specified cell.

Once this is set up, you can enable the automation and start generating articles in bulk. Simply add titles to your Google Sheets, and the entire process will run automatically through Pabbly Connect.


Conclusion

By using Pabbly Connect, you can efficiently automate the process of writing articles in bulk. This tutorial demonstrated how to integrate Google Sheets, OpenAI, and Google Drive to create a seamless workflow that saves time and enhances productivity. With just a few simple steps, you can generate high-quality content automatically.

Ensure you check out Pabbly Connect to create business automation workflows and reduce manual tasks. Pabbly Connect currently offer integration with 2,000+ applications.

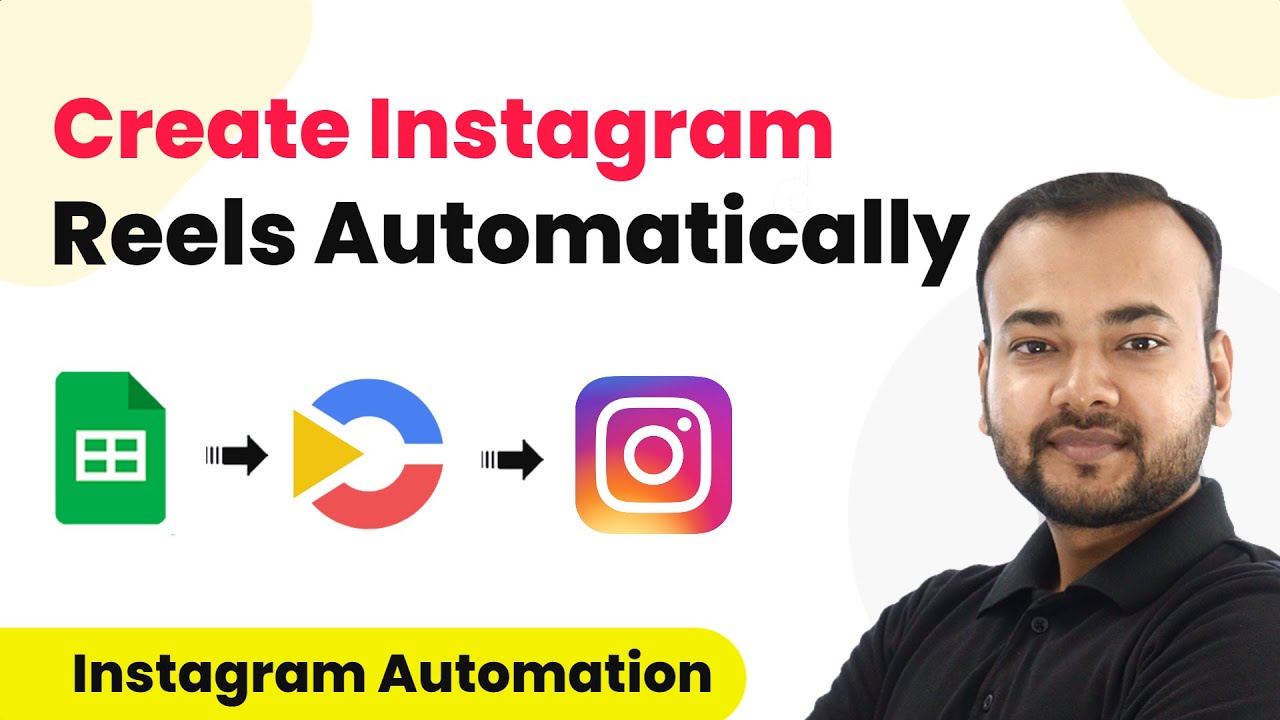
How to Create Instagram Reels Automatically with Pabbly Connect

Learn how to automate the creation and posting of Instagram Reels using Pabbly Connect with Google Sheets, Creator Mat, and more. Master proven automation processes with practical implementation examples and strategic recommendations you can apply immediately in your workflow.

Watch Step By Step Video Tutorial Below


1. Setting Up Pabbly Connect for Instagram Reels

To start automating Instagram Reels, first, you need to access Pabbly Connect. This platform will serve as the central hub for integrating various applications like Google Sheets and Creator Mat. Begin by signing up for a free account on the Pabbly Connect website, which takes just a couple of minutes.

Once you have your account set up, log in to the dashboard. From there, click on the ‘Create Workflow’ button. You can name your workflow something descriptive, such as ‘Automate Instagram Reels’. This name will help you identify the workflow easily in the future.


2. Setting Up Google Sheets Trigger in Pabbly Connect

Next, you will need to set up the trigger for your workflow using Google Sheets. This is where you will enter the details for the Instagram Reels you wish to create. In Pabbly Connect, choose Google Sheets as the application for the trigger event.

  • Select the trigger event as ‘New or Updated Spreadsheet Row’.
  • Pabbly Connect will provide a webhook URL that you will use to connect with Google Sheets.
  • Follow the instructions to install the Pabbly Connect Webhooks add-on in your Google Sheets.

After installing the add-on, refresh your Google Sheets. Click on ‘Extensions’, then ‘Pabbly Connect Webhooks’, and select ‘Initial Setup’. Paste the webhook URL into the designated field and specify the trigger column. This setup is crucial for ensuring that data entered in the sheet triggers the workflow in Pabbly Connect.


3. Creating Videos with Creator Mat

With your Google Sheets trigger set, the next step is to create the video using Creator Mat. In Pabbly Connect, add a new action step and select Creator Mat as the application. For the action event, choose ‘Get Specific Template’. This allows you to pull the necessary details from your video template.

To connect to Creator Mat, you will need to enter your API key from the project settings in Creator Mat. Once connected, select your template ID from the dropdown menu. This ID corresponds to the template you want to use for generating the Instagram Reel.

  • Select the template you created in Creator Mat.
  • Click ‘Save and Send Test Request’ to retrieve template details.
  • Note the key IDs for the video elements you want to modify.

After retrieving the template details, you will use these key IDs to customize the text and visuals in your video. This integration with Pabbly Connect allows seamless video generation based on the data from Google Sheets.


4. Publishing the Reel on Instagram

After generating the video, it’s time to publish your Instagram Reel. Add another action step in Pabbly Connect and select Instagram for Business. Choose the action event ‘Create Reel Video’. You will map the video URL generated from Creator Mat to this step.

Make sure to connect your Instagram account by authorizing Pabbly Connect. Once connected, map the video URL and the caption from your Google Sheets. This step ensures that your newly created video is shared on your Instagram account with the correct caption.

Select ‘Share to Feed’ option as true. Click ‘Save and Send Test Request’ to publish the Reel. Check your Instagram account for the new Reel.

This process highlights how Pabbly Connect streamlines the publishing of Instagram Reels, saving you time and ensuring consistency in your posts.


5. Updating Google Sheets with the Reel URL

The final step is to update your Google Sheets with the URL of the published Reel. This keeps your records organized and allows you to track the Reels created. In Pabbly Connect, add another action step and select Google Sheets again.

Choose the action event ‘Update Cell Value’. Here, you will specify the cell where you want to record the Reel URL. Map the row index from the trigger step to ensure that the correct row is updated each time.

Select the spreadsheet and sheet name where the data is stored. Map the cell where you want to update the Reel URL. Click ‘Save and Send Test Request’ to verify the update.

This step ensures that all information is centralized, making it easy to manage your Instagram content through Pabbly Connect.


Conclusion

By following these steps, you can automate the process of creating and posting Instagram Reels using Pabbly Connect. This integration not only saves time but also enhances your social media presence effortlessly. With tools like Google Sheets and Creator Mat, managing your content has never been easier.

Ensure you check out Pabbly Connect to create business automation workflows and reduce manual tasks. Pabbly Connect currently offer integration with 2,000+ applications.