Top 5 OpenAI Automations of Pabbly Connect

Discover the top 5 OpenAI automations using Pabbly Connect to integrate Facebook, YouTube, Google, WordPress, and more for seamless content creation. Explore systematic approaches to creating efficient automation solutions that convert technical concepts into practical, implementable instructions.

Watch Step By Step Video Tutorial Below


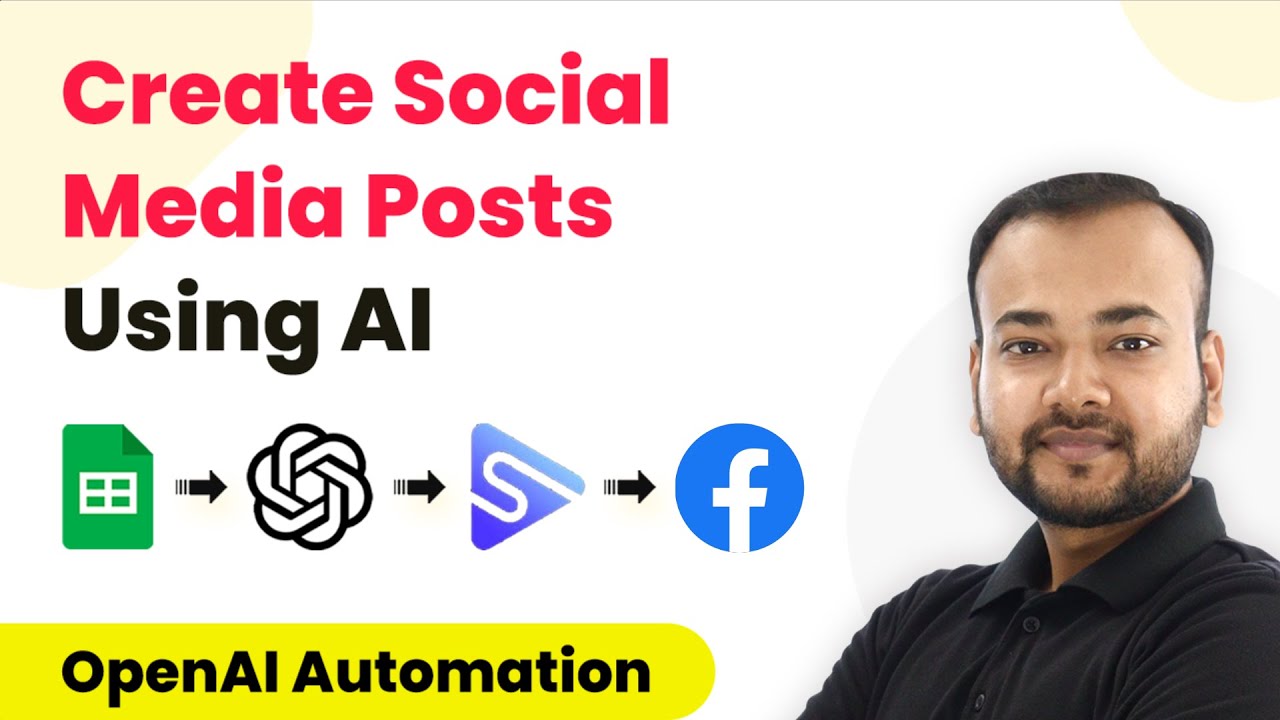
1. Automate Facebook Posts Using Pabbly Connect

Pabbly Connect allows you to automate Facebook posts seamlessly. To start, create a new workflow in Pabbly Connect and select Google Sheets as the trigger app. This will enable you to pull titles from your spreadsheet and generate content using OpenAI. using Pabbly Connect

Once you have set up the Google Sheets trigger, configure the action step to utilize OpenAI. This step will generate social media content based on the titles from your Google Sheets. Finally, connect the action to Facebook, allowing Pabbly Connect to post the generated content automatically.


2. Generate Articles for WordPress with Pabbly Connect

Using Pabbly Connect, you can create unique articles for your WordPress site effortlessly. Start by triggering the workflow with Google Sheets, where you can input article titles. Pabbly Connect will then use OpenAI to generate the article content based on these titles. using Pabbly Connect

  • Create a new workflow in Pabbly Connect.
  • Select Google Sheets as the trigger app.
  • Set OpenAI as the action app to generate content.
  • Finally, connect to WordPress to publish the generated article.

After configuring these steps, Pabbly Connect will post the content directly to your WordPress site, streamlining your content creation process.


3. Auto-Generate Document Summaries with Pabbly Connect

Pabbly Connect can also help you summarize documents automatically. Begin by setting up a workflow that pulls document titles from Google Sheets. Once you have the document, use OpenAI to create a concise summary. using Pabbly Connect

After generating the summary, configure Pabbly Connect to store the summarized content directly in Google Docs. This way, you can quickly access the summarized documents without manual effort.

  • Set Google Sheets as the trigger to pull document titles.
  • Use OpenAI to generate a summary based on the document.
  • Store the summary in Google Docs using Pabbly Connect.

This automation saves time for students and professionals alike, making document handling more efficient.


4. Automatically Reply to YouTube Comments with Pabbly Connect

Pabbly Connect can streamline your engagement on YouTube by automatically replying to comments. Start by creating a new workflow that triggers whenever a new comment is posted on your YouTube video. using Pabbly Connect

Utilize OpenAI to generate a random response for each comment received. Once the response is generated, configure Pabbly Connect to post the reply back to the original comment on YouTube.

This automation not only saves time but also ensures that your audience feels engaged without requiring constant manual intervention.


5. Write Advertising Copy for Social Media Using Pabbly Connect

Pabbly Connect is ideal for generating advertising copy for social media platforms. To begin, create a workflow that pulls product names or titles from Google Sheets. using Pabbly Connect

Next, use OpenAI to generate captivating advertising copy based on the provided titles. Finally, you can connect the generated content to your preferred social media platform for posting.

Trigger the workflow with Google Sheets to get product titles. Generate advertising copy using OpenAI. Post the generated copy to social media through Pabbly Connect.

This automation enhances your marketing efforts by allowing you to create compelling advertising content quickly and efficiently.


Conclusion

In conclusion, Pabbly Connect offers powerful automation capabilities for integrating OpenAI with various applications like Facebook, YouTube, Google, and WordPress. By utilizing these automations, you can enhance your content creation process, making it faster and more efficient.

Ensure you check out Pabbly Connect to create business automation workflows and reduce manual tasks. Pabbly Connect currently offer integration with 2,000+ applications.

How to Share Instagram Posts to WordPress Using Pabbly Connect

Learn how to automate sharing Instagram posts to WordPress with Pabbly Connect. Follow our step-by-step tutorial for seamless integration. This comprehensive guide reveals exactly how to connect your applications and automate repetitive tasks — accessible for professionals of all technical backgrounds.

Watch Step By Step Video Tutorial Below


1. Setting Up Pabbly Connect for Instagram to WordPress Integration

To automate sharing Instagram posts to WordPress, start by accessing Pabbly Connect. Sign up for a free account if you haven’t already. Once logged in, navigate to the dashboard where you can create a new workflow.

Click on the ‘Create Workflow’ button, name your workflow (e.g., ‘Instagram to WordPress’), and click ‘Create’. This initiates the setup for your automation process where Pabbly Connect will facilitate the integration between Instagram and WordPress.


2. Setting Up Instagram Trigger in Pabbly Connect

In the workflow setup, locate the trigger section. Choose ‘Instagram for Business’ as your app and select the trigger event as ‘New Media Posted in My Account’. This ensures that every new post on Instagram will trigger an action in Pabbly Connect. using Pabbly Connect

Next, click on ‘Connect’ and select ‘Add New Connection’. You will be prompted to connect your Instagram account. Click the ‘Connect with Instagram for Business’ button, and if you are already logged in, Pabbly Connect will automatically detect your account. Choose your Instagram account from the dropdown and click ‘Save & Send Test Request’.

  • Select ‘Instagram for Business’ as the app.
  • Choose ‘New Media Posted in My Account’ as the trigger event.
  • Connect your Instagram account through Pabbly Connect.

Once the connection is successful, you will receive a test response with details of your latest Instagram post. This confirms that the trigger is set up correctly, and Pabbly Connect is ready to capture new posts.


3. Configuring the WordPress Action in Pabbly Connect

Now, move to the action section of your workflow. Search for and select ‘WordPress’ as the app. In the action event dropdown, select ‘Create a Post’. This action will allow Pabbly Connect to create a new post on your WordPress site whenever a new Instagram post is made. using Pabbly Connect

Click ‘Connect’ and then ‘Add New Connection’. You will need to input your WordPress account username, password, and the base URL of your WordPress site (excluding ‘/wp-admin’). After entering these details, click ‘Save’. Once connected, specify the post type as ‘Post’.

  • Select ‘Create a Post’ as the action event.
  • Enter your WordPress login credentials and base URL.
  • Choose ‘Post’ as the type of content to create.

After setting the action, you will need to configure the post details such as title, content, and status. This is where Pabbly Connect effectively maps the Instagram post details to your WordPress post.


4. Mapping Instagram Post Details to WordPress

In the action setup, you will be prompted to fill in the details for the new WordPress post. Set the post title to something like ‘New Instagram Post’. For the post content, you will need to embed the Instagram image using HTML tags. Use the image URL captured from the Instagram trigger response. using Pabbly Connect

For example, the content should be structured as follows: <img src='IMAGE_URL'>, where ‘IMAGE_URL’ is the media URL from the Instagram post. Below this, add the caption from the Instagram post. This ensures that the WordPress post will display the same image and caption as the Instagram post.

Set the post title to ‘New Instagram Post’. Embed the Instagram image using the correct HTML format. Add the Instagram caption below the image.

Once all details are mapped, save your settings and send a test request. This will create a draft post in WordPress to verify that everything is functioning correctly through Pabbly Connect.


5. Testing the Instagram to WordPress Integration

To test your integration, create a new post on your Instagram account. Upload an image, add a caption, and share it. After sharing, Pabbly Connect will check for new posts every 10 minutes due to its polling mechanism.

After approximately 10 minutes, check your WordPress site to see if the new post has appeared. You should find a draft post with the same image and caption as the Instagram post. This confirms that your automation is working perfectly, and Pabbly Connect has successfully integrated Instagram with WordPress.

By using Pabbly Connect, you can automate the tedious task of sharing posts across platforms, ensuring that your content reaches audiences on both Instagram and WordPress without manual effort.


Conclusion

In this tutorial, we explored how to use Pabbly Connect to automate the sharing of Instagram posts to WordPress. With simple steps, you can ensure that your Instagram content is seamlessly integrated into your WordPress site, saving time and enhancing your online presence.

Ensure you check out Pabbly Connect to create business automation workflows and reduce manual tasks. Pabbly Connect currently offer integration with 2,000+ applications.

How to Create Airtable Records for New Proposals Accepted in Qwilr Using Pabbly Connect

Learn how to automate the creation of Airtable records for accepted proposals in Qwilr using Pabbly Connect. Step-by-step guide included! Transform complex automation concepts into accessible, actionable steps that eliminate unnecessary manual work while maximizing existing application capabilities.

Watch Step By Step Video Tutorial Below


1. Accessing Pabbly Connect for Automation

To create Airtable records for new proposals accepted in Qwilr, first, access Pabbly Connect. This platform allows you to automate workflows without coding, making it user-friendly and efficient.

Start by visiting the Pabbly Connect landing page. You can set up a free account that offers automation tasks every month. After signing up, log into your dashboard and click on the ‘Create Workflow’ button to begin setting up your automation.


2. Setting Up Your Workflow in Pabbly Connect

In the workflow setup, you will define the trigger and action that will automate the process. The trigger application is Qwilr, which will initiate the workflow when a proposal is accepted. using Pabbly Connect

  • Choose Qwilr as the trigger application.
  • Select the trigger event as ‘Project Accepted’.
  • Connect to Qwilr using your API key found in your account settings.

Once connected, you will need to test the connection. This involves manually accepting a proposal to capture test data, which will be used in the next steps.


3. Accepting a Proposal to Capture Data

To test the integration, go to your Qwilr dashboard and accept a proposal. This action will generate the necessary data that Pabbly Connect will use to create records in Airtable. using Pabbly Connect

After accepting the proposal, Pabbly Connect will display the captured data in the response section. This data includes the project name, acceptor’s name, organization, and acceptance date, which are essential for your Airtable records.


4. Creating Records in Airtable Using Pabbly Connect

Now that you have the data, it’s time to set up the action step in Pabbly Connect. Select Airtable as the action application and choose ‘Create Record’ as the action event. This will allow you to save the accepted proposal data in Airtable. using Pabbly Connect

  • Connect to Airtable using your API key from the account section.
  • Select the appropriate base and table where the data will be stored.
  • Map the data fields from Qwilr to Airtable, such as proposal name and acceptor’s name.

Click ‘Save and Send Test Request’ to ensure the data is correctly routed to your Airtable base. Upon successful execution, you will see the new row added to your Airtable table.


5. Finalizing Your Automation with Pabbly Connect

After successfully adding the test data to Airtable, your automation setup with Pabbly Connect is complete. This automation will now run automatically whenever a proposal is accepted in Qwilr.

By setting this up only once, you can ensure that all future accepted proposals will be logged in Airtable without any manual effort. This integration simplifies tracking and managing your proposals effectively.


Conclusion

In this tutorial, we demonstrated how to automate the creation of Airtable records for new proposals accepted in Qwilr using Pabbly Connect. This integration streamlines your workflow, ensuring that all accepted proposals are efficiently recorded in Airtable.

Ensure you check out Pabbly Connect to create business automation workflows and reduce manual tasks. Pabbly Connect currently offer integration with 2,000+ applications.

How to Send Telegram Messages for Accepted Qwilr Proposals Using Pabbly Connect

Learn how to automate Telegram notifications for accepted Qwilr proposals using Pabbly Connect. Follow our step-by-step guide for seamless integration. Implement the precise methodologies leading organizations use to automate repetitive tasks, illustrated with practical examples designed for immediate application.

Watch Step By Step Video Tutorial Below


1. Setting Up Pabbly Connect for Qwilr and Telegram Integration

To send Telegram messages for accepted Qwilr proposals, we will use Pabbly Connect as our automation platform. Start by accessing the Pabbly Connect website and signing up for a free account. This allows you to create workflows that connect different applications seamlessly.

Once you are logged in, navigate to the Pabbly Connect dashboard. Click on the ‘Create Workflow’ button to initiate the setup. You can name your workflow, for example, ‘Qwilr to Telegram Messages’. This workflow will help automate notifications whenever a proposal is accepted in Qwilr.


2. Configuring the Trigger with Qwilr in Pabbly Connect

In this section, we will configure the trigger in Pabbly Connect to detect when a Qwilr proposal is accepted. Select Qwilr as the trigger application and choose the trigger event as ‘Project Accepted’. This action will initiate the workflow whenever a proposal receives acceptance.

  • Search for Qwilr in the application list.
  • Select ‘Project Accepted’ as the trigger event.
  • Connect your Qwilr account using the API key found in your account settings.

After connecting, click on ‘Save and Send Test Request’ to ensure the connection is successful. This step will allow Pabbly Connect to wait for a response from Qwilr, which will be used to set up the action in the next step.


3. Accepting a Proposal in Qwilr

Now that we have set up the trigger, it’s time to simulate a proposal acceptance in Qwilr. Navigate to your Qwilr dashboard and locate a proposal you want to test. Share the proposal link and open it in a new tab.

Once the proposal is open, click on the ‘Accept’ button and fill in the required details. This action will simulate a customer accepting the proposal, which will send data back to Pabbly Connect. After accepting, return to the Pabbly Connect dashboard to confirm that the data has been captured successfully.


4. Setting Up Telegram to Receive Notifications

Next, we will configure the action in Pabbly Connect to send notifications via Telegram. Select Telegram as the action application and choose the action event as ‘Send a Text Message’. This will allow us to send a message to your team whenever a proposal is accepted.

  • Connect your Telegram account by creating a bot using the BotFather.
  • Get the token key from BotFather and paste it into Pabbly Connect.
  • Add the bot to your team group and make it an admin.

After setting up the bot, you will need to retrieve the chat ID of the group where you want to send messages. This ID will be used in the Pabbly Connect setup to ensure notifications are sent to the correct group.


5. Finalizing the Automation and Testing

With both Qwilr and Telegram set up in Pabbly Connect, it’s time to finalize your automation. In the message field, create a notification message that includes relevant details about the accepted proposal. You can map the project name and client details from the data received in the previous steps.

Click on ‘Save and Send Test Request’ to send a test message to your Telegram group. If everything is configured correctly, you should see a notification in your Telegram group confirming the acceptance of the proposal.

Once the test is successful, your automation is complete. You can now rely on Pabbly Connect to automatically notify your team whenever a proposal is accepted, enhancing communication and productivity.


Conclusion

By using Pabbly Connect, you can easily automate Telegram notifications for accepted Qwilr proposals. This integration streamlines communication and ensures your team is promptly informed about important updates, significantly improving workflow efficiency.

Ensure you check out Pabbly Connect to create business automation workflows and reduce manual tasks. Pabbly Connect currently offer integration with 2,000+ applications.

Automate YouTube Video Uploads from Airtable Records Using Pabbly Connect

Learn how to automate YouTube video uploads from Airtable records using Pabbly Connect. This step-by-step tutorial covers everything you need to know! Discover hidden automation capabilities within your existing tools. This guide shows you how to connect your essential applications and permanently eliminate redundant manual processes.

Watch Step By Step Video Tutorial Below


1. Accessing Pabbly Connect for Automation

To automate the process of uploading YouTube videos from Airtable records, you need to use Pabbly Connect. Start by visiting the Pabbly Connect website and signing up for a free account if you are a new user. Existing users can simply log in to access their dashboard.

Within your Pabbly Connect dashboard, click on the ‘Create Workflow’ button. You will be prompted to name your workflow. For this tutorial, name it ‘When Video Details Added in Airtable, Auto Upload Video on YouTube’. This naming convention helps in identifying your workflow easily later on.


2. Setting Up the Trigger with Airtable

In this step, you will configure the trigger to activate when new video details are added in Airtable. Select Airtable as your first application in Pabbly Connect. You will need to choose the trigger event as ‘New Record’. This means that every time you add a new record in Airtable, the automation will start.

  • Log in to your Airtable account to generate your API key.
  • Paste the API key into Pabbly Connect to connect your Airtable account.
  • Select the base and table that contains your video details.

Once the connection is established, you can proceed to set up the fields. Ensure you have a ‘Created’ field in your Airtable schema to sort records correctly. After setting this up, save your changes and send a test request to confirm that Pabbly Connect can retrieve the video details from Airtable.


3. Uploading Videos to YouTube

Now that you have set up the trigger, the next step is to upload the video to YouTube. In Pabbly Connect, add a new action step and select YouTube as the application. Choose the action event as ‘Upload Video’. This action will automatically upload the video whenever a new record is created in Airtable.

To connect your YouTube account, you will need to authorize Pabbly Connect. Once connected, you will have to fill in the required fields such as video title, description, and file URL. Use the mapping feature in Pabbly Connect to pull data directly from the previous step, ensuring that the correct video details are uploaded.

  • Map the video title from Airtable to the YouTube upload form.
  • Map the video description and tags accordingly.
  • Choose the appropriate video category ID for your content.

After filling out all the necessary fields, save your settings and send a test request to upload the video. This confirms that the integration is functioning as intended.


4. Checking Video Upload Status

Once the video upload action is complete, it’s essential to check the status of the upload. In Pabbly Connect, add another action step and select YouTube once again. This time, choose the action event ‘Get Video Upload Status’. This step will confirm whether the video was successfully uploaded or if there were any issues.

To retrieve the upload status, you will need to map the request ID from the previous upload action. This allows Pabbly Connect to check the final status of the uploaded video. Once you have mapped the request ID, save your changes and send a test request to see the upload status.

Ensure the video visibility status is set to Pabbly if you want the video to be viewable immediately. Check if the upload status indicates success. If successful, proceed to the next step to update Airtable with the video link.

Once you confirm the upload status, you can move on to update the Airtable record with the published video link.


5. Updating the Airtable Record

Finally, to complete the automation, you will want to update the Airtable record with the link to the uploaded video. In Pabbly Connect, add a final action step and select Airtable again. Choose the action event ‘Update a Record’. This will allow you to insert the published video link back into the original record.

Connect your Airtable account using the existing connection and select the base and table where the video details are stored. Map the record ID to ensure you are updating the correct record. Then, map the video URL from the YouTube upload action to the corresponding field in Airtable.

Select the correct base and table to update. Map the record ID to ensure accuracy. Map the published video link to the designated field in Airtable.

After completing this step, save your workflow and send a test request to confirm that the video link updates in Airtable successfully. This marks the end of your automation process, allowing seamless uploads from Airtable to YouTube using Pabbly Connect.


Conclusion

By following this tutorial, you can automate the process of uploading YouTube videos from Airtable records using Pabbly Connect. This integration simplifies your workflow, ensuring that every time you add video details in Airtable, they are uploaded directly to YouTube without manual intervention.

Ensure you check out Pabbly Connect to create business automation workflows and reduce manual tasks. Pabbly Connect currently offer integration with 2,000+ applications.

Discover What’s New in Pabbly Connect – December 2022 Updates

Explore the latest features of Pabbly Connect, including new integrations and automation capabilities introduced in December 2022. Master proven automation processes with practical implementation examples and strategic recommendations you can apply immediately in your workflow.

Watch Step By Step Video Tutorial Below


1. Stopping Workflow Execution in Pabbly Connect

The first exciting feature in Pabbly Connect is the ability to stop the execution of delay tasks at any time. This means if you have a workflow set to execute after a specific delay, you can halt it whenever necessary. For instance, if you have created a workflow that sends a follow-up email to a new customer after two days, you can now stop this automation if you no longer wish for it to execute.

To stop the execution, navigate to the history section of your workflow. Click on the task history ID to view details. There, you will find an option to stop the execution. Once you click this button, the workflow execution will cease immediately, providing you with greater control over your automation.


2. Bulk Operations in Pabbly Connect

Another fantastic feature added to Pabbly Connect is the ability to perform bulk operations on your workflows. You can now select multiple workflows directly from the dashboard and enable, disable, delete, or move them in bulk. This enhancement streamlines workflow management significantly.

  • Select multiple workflows from the dashboard.
  • Choose the desired operation (enable, disable, delete, or move).
  • Execute the operation with a single click.

This feature not only saves time but also enhances productivity when managing multiple workflows at once in Pabbly Connect.


3. Trash System for Deleted Workflows in Pabbly Connect

The new trash system in Pabbly Connect is a game-changer for users who accidentally delete workflows. Instead of losing your workflows permanently, deleted items are moved to the trash section where they can be restored at any time. This feature ensures that you do not lose important automation setups.

To restore a deleted workflow, simply navigate to the trash section, select the workflows you wish to restore, and choose the option to bring them back to your specific folder or the home section. This functionality provides peace of mind when managing your automations.


4. App Analytics in Pabbly Connect

For developers using Pabbly Connect, the app analytics feature is invaluable. This functionality allows you to review the analytics of applications you build within the Pabbly Connect dashboard. You can see how many workflows are using your created triggers and actions, and track their performance.

This feature provides insights into:

  • Total number of workflows connected to each trigger.
  • Active versus inactive workflows.

This information helps in optimizing your applications and ensuring they are functioning effectively within Pabbly Connect.


5. New Integrations in Pabbly Connect

December 2022 also brought exciting new integrations to Pabbly Connect. Notably, the addition of Google Cloud Vision allows users to extract text from images, enhancing automation capabilities. Additionally, the new YouTube upload action enables users to automate video uploads directly to their channels.

Moreover, the integration with LinkedIn lead generation forms facilitates quality lead collection, which can be sent to various CRMs. Finally, the WhatsApp Business Solution integration allows businesses to automate customer support and sales effectively through WhatsApp. These integrations significantly expand the functionality of Pabbly Connect.


Conclusion

In conclusion, the updates in Pabbly Connect for December 2022 introduce vital features that enhance workflow management, provide better control, and expand integration capabilities. With the ability to stop executions, perform bulk operations, and leverage new integrations, Pabbly Connect continues to be a powerful automation tool for businesses.

Ensure you check out Pabbly Connect to create business automation workflows and reduce manual tasks. Pabbly Connect currently offer integration with 2,000+ applications.

Automate Your Social Media Posts with Pabbly Connect and OpenAI

Learn how to create automated social media posts using Pabbly Connect and OpenAI. Follow this detailed guide for seamless integration with Facebook, YouTube, and more.

Watch Step By Step Video Tutorial Below


1. Setting Up Pabbly Connect for Social Media Automation

To start automating your social media posts, first access Pabbly Connect. This platform is essential for integrating various applications, including Google Sheets and OpenAI. After creating an account, sign in to reach the Pabbly Connect dashboard.

In the dashboard, click on the ‘Create Workflow’ button. Name your workflow, for example, ‘Create Social Media Posts Automatically,’ and click the ‘Create’ button to proceed. This workflow will enable you to automate the content generation and posting process seamlessly.


2. Integrating Google Sheets with Pabbly Connect

Next, we will set up Google Sheets as the trigger application using Pabbly Connect. This means that whenever you add a new row in Google Sheets, it will automatically trigger the workflow. Select Google Sheets as your application and choose the trigger event as ‘New or Updated Spreadsheet Row.’

  • Open your Google Sheets in incognito mode to avoid account conflicts.
  • Install the Pabbly Connect Webhooks add-on from the Google Workspace Marketplace.
  • Paste the webhook URL from Pabbly Connect into the add-on’s initial setup.

After completing these steps, click on ‘Send Test Request’ to send the first row’s data to Pabbly Connect. This action confirms that the connection is established successfully.


3. Generating Social Media Content Using OpenAI

After setting up Google Sheets, the next step is to generate content with OpenAI through Pabbly Connect. Select OpenAI as the next application in your workflow. The action event should be set to ‘Generate Content.’ Click to connect and enter your OpenAI API key.

In the OpenAI setup, you will specify the AI model, typically ‘text-davinci-002,’ and create a prompt that includes the social media platform’s name and the post topic. For example, your prompt could be ‘Write an article for social media platforms like [Platform Name].’ Make sure to map the platform name from the previous step.

  • Set the maximum number of tokens to control the length of the generated content.
  • Choose the sampling type and set a value between 0 and 1 for temperature.

Once configured, click on ‘Save and Send Test Request’ to generate a sample article. This will help you verify that the integration is functioning correctly.


4. Creating Images for Your Social Media Posts

To enhance your posts, you can create images using the Switchboard Canvas application integrated with Pabbly Connect. After generating content with OpenAI, add a new action step and select Switchboard Canvas. Choose the action event as ‘Create Image’ and connect your account.

In this step, you will select the template for your image and specify the dimensions. Make sure to map the generated content from OpenAI into the image title field. For example, if you want to display a snippet of the article, use the ‘Truncate’ action in Pabbly Connect to shorten the text.

Select the relevant image template from Switchboard Canvas. Map the text and ensure the image dimensions are correctly set.

Click on ‘Save and Send Test Request’ to generate the image. This image will be used in your social media post, providing a visual element to your content.


5. Posting Generated Content on Social Media

Finally, to share your content, you will connect your desired social media platform, such as Facebook, through Pabbly Connect. Choose Facebook Pages as your application and set the action event to ‘Create Page Post.’ Connect your Facebook account and select the page where you want to post.

In the setup, map the generated content from OpenAI and the image URL from Switchboard Canvas into the respective fields. Once everything is set up, click on ‘Save and Send Test Request’ to publish your post. You should see the new post appear on your Facebook page right away.

Moreover, if you want to update the generated text back in your Google Sheets, add another action step for Google Sheets, selecting ‘Update Cell Value.’ Map the required fields, and this will keep your records updated automatically.


Conclusion

By using Pabbly Connect, you can automate the entire process of creating and posting social media content. This integration simplifies your workflow, allowing you to focus on your core tasks while ensuring a consistent online presence across various platforms. Start using Pabbly Connect today to streamline your social media management!

Ensure you check out Pabbly Connect to create business automation workflows and reduce manual tasks. Pabbly Connect currently offer integration with 2,000+ applications.

Automatically Upload YouTube Videos from Microsoft Excel Using Pabbly Connect

Learn how to automatically upload YouTube videos from Microsoft Excel using Pabbly Connect. Follow this step-by-step tutorial for seamless integration. Learn to create powerful connections between your critical applications without requiring specialized programming knowledge or extensive technical background.

Watch Step By Step Video Tutorial Below


1. Accessing Pabbly Connect for Video Upload Automation

To begin the process of automatically uploading YouTube videos from Microsoft Excel, you first need to access Pabbly Connect. This powerful automation tool allows you to connect various applications seamlessly.

If you’re a new user, visit Pabbly Connect and sign up for a free account. Once you log in, navigate to the dashboard where you can create your first workflow.


2. Creating a Workflow in Pabbly Connect

In Pabbly Connect, click on the blue ‘Create Workflow’ button. Name your workflow something descriptive, like ‘Automatically Upload YouTube Videos from Excel.’ This name helps you identify the purpose of your automation easily.

  • Click on ‘Create’ to proceed.
  • You will see two boxes: Trigger and Action.

In the Trigger box, select Microsoft Excel as the application. Set the trigger event to ‘New Row’ to initiate the automation whenever a new video detail is added to your Excel sheet.


3. Connecting Microsoft Excel to Pabbly Connect

After selecting Microsoft Excel, you will need to connect your Excel account to Pabbly Connect. Authorize access to your OneDrive where your Excel file is stored.

Once connected, choose your workbook from the list. For example, select the workbook named ‘Daily Video Publish’. This step ensures that Pabbly Connect can access the video details you want to upload.

  • Confirm that the details from the latest row are captured correctly.
  • Check the row index, video title, file URL, and other details.

This successful connection is crucial for Pabbly Connect to retrieve video information automatically.


4. Uploading Videos to YouTube via Pabbly Connect

Next, set the Action application to YouTube and select the action event as ‘Upload Video’. This is where Pabbly Connect takes the data from your Excel sheet and uploads it to your YouTube channel.

You will need to connect your YouTube account to Pabbly Connect and provide the necessary details like channel ID, video title, description, and video file URL. Mapping these fields ensures that each new entry in Excel corresponds correctly to the YouTube upload fields.

Map the video title to the corresponding field. Ensure the video file URL is correctly linked from your Excel sheet.

After filling out the required fields, click on ‘Save and Send Test Request’ to check if the upload process works as intended.


5. Finalizing Your Automation Setup

To ensure everything runs smoothly, add a delay step in Pabbly Connect for 8 minutes after the upload action. This allows time for YouTube to process the video upload.

Then, add another action to check the upload status using the ‘Get Video Upload Status’ feature in YouTube. This final check ensures that your video has been uploaded successfully and is Pabbly.

By following these steps, you will have set up a fully automated process that allows you to upload videos to YouTube directly from Microsoft Excel using Pabbly Connect. Each time you add a new row in your Excel sheet, the video will be uploaded automatically without manual intervention.


Conclusion

In this tutorial, we explored how to utilize Pabbly Connect to automate the uploading of YouTube videos from Microsoft Excel. This integration streamlines your workflow, allowing you to focus on content creation rather than manual uploads.

Ensure you check out Pabbly Connect to create business automation workflows and reduce manual tasks. Pabbly Connect currently offer integration with 2,000+ applications.

By following these steps, you can efficiently manage your video uploads, ensuring that new content is published automatically. Start using Pabbly Connect today to enhance your video management process!

Create Short Videos Automatically & Share on Social Media with Pabbly Connect

Learn how to automate video creation and sharing on social media using Pabbly Connect. Step-by-step guide to integrate various platforms effortlessly. Discover how to seamlessly connect your essential tools through accessible instructions that make powerful automation available to professionals at every skill level.

Watch Step By Step Video Tutorial Below


1. Setting Up Pabbly Connect for Video Automation

To create short videos automatically and share them on social media, you first need to set up Pabbly Connect. Start by visiting the Pabbly Connect landing page, where you can sign up for a free account. This process will allow you to access automation tasks for video creation.

Once you’ve signed up, log into your Pabbly Connect dashboard. From here, click on the ‘Create Workflow’ button. You will need to name your workflow, for example, ‘Create and Share Short Videos on Social Media Automatically’. After naming, click on the ‘Create’ button to proceed.


2. Configuring Google Sheets as Trigger in Pabbly Connect

In this step, you will configure Google Sheets as the trigger application in your Pabbly Connect workflow. Search for Google Sheets in the trigger section and select the event labeled ‘New or Updated Spreadsheet Row’. This will activate the workflow whenever a new row is added.

  • Open your Google Sheets in an incognito window to avoid account issues.
  • Install the Pabbly Connect Webhooks add-on from Google Workspace Marketplace.
  • Refresh the spreadsheet to see the new options available under the Extensions menu.

After refreshing, navigate to Extensions > Pabbly Connect Webhooks and select ‘Initial Setup’. Here, paste the webhook URL you received from Pabbly Connect and set the trigger column to the column where you will enter video details. This setup ensures that whenever you enter data in the specified column, the workflow will trigger automatically.


3. Creating Videos Using Creator Mat and Pabbly Connect

Next, you will use Creator Mat to create the video based on the data entered in Google Sheets. In your Pabbly Connect workflow, add an action step and search for Creator Mat. Choose the action event ‘Create Single Render’. This action will generate the video using the specified template.

To connect to Creator Mat, you will need the API key from your Creator Mat project settings. Once connected, specify the template name you wish to use for video creation. The template allows you to customize the text and images used in the video.

  • Input key-value pairs for the text and images you wish to change in the video.
  • Ensure the modifications match the key IDs in your Creator Mat template.

After setting up the modifications, save and send a test request. This will generate a new video based on the changes you made, demonstrating how Pabbly Connect automates this process seamlessly.


4. Sharing Created Videos on Social Media Platforms

After successfully creating the video, the next step is to share it on social media using Pabbly Connect. Add another action step and select the social media platform you want to share the video on, such as Facebook. Choose the action event ‘Create Page Video’.

Connect your Facebook account and select the page where you want to post the video. You will need to map the video URL generated from the previous step into the respective field in this action. Additionally, you can add a description using the caption from your Google Sheets.

Select the appropriate Facebook page from the dropdown list. Map the video URL and caption to ensure they appear correctly in the post.

Once everything is set up, click on ‘Save and Send Test Request’ to post the video on your selected social media page. This demonstrates how Pabbly Connect allows you to automate the sharing of created videos effectively.


5. Finalizing the Automation Workflow with Pabbly Connect

To ensure that the video is properly rendered before sharing, it’s advisable to add a delay in your Pabbly Connect workflow. This can be done by inserting a delay action between the video creation and sharing steps. Set the delay to a few minutes to allow for rendering time.

After the delay, you can add another action step to update the Google Sheets with the video URL. Select Google Sheets again and choose the action event ‘Update Cell Value’. This will allow you to save the video URL back into the spreadsheet for future reference.

Map the row index to ensure the URL is placed in the correct cell. Confirm all connections and mappings before finalizing.

Once you have set up the delay and the update action, your automation workflow is complete. This means you can now simply enter details into Google Sheets, and Pabbly Connect will handle the rest, from video creation to sharing on social media.


Conclusion

By following this tutorial, you have successfully learned how to use Pabbly Connect to automate the process of creating and sharing short videos on various social media platforms. This integration not only saves time but also enhances your content strategy by simplifying video production.

Ensure you check out Pabbly Connect to create business automation workflows and reduce manual tasks. Pabbly Connect currently offer integration with 2,000+ applications.

Utilizing Pabbly Connect for video automation allows you to focus on content quality while the technical aspects are handled seamlessly. Start creating and sharing videos automatically today!

Integrate WildApricot with Google Sheets Using Pabbly Connect

Learn how to automate the integration of WildApricot registration details into Google Sheets using Pabbly Connect. Follow this step-by-step tutorial for seamless automation. Explore systematic approaches to creating efficient automation solutions that convert technical concepts into practical, implementable instructions.

Watch Step By Step Video Tutorial Below


1. Accessing Pabbly Connect for Integration

To start integrating WildApricot with Google Sheets, you first need to access Pabbly Connect. This powerful automation tool allows you to connect various applications seamlessly. Begin by signing up for a free account on Pabbly Connect, which can be done in just a few minutes.

Once you are logged in, navigate to the dashboard. From there, click on the ‘Create Workflow’ button. You will then need to name your workflow; for example, you can name it ‘WildApricot to Google Sheets’. This will set up the foundation for your automation process.


2. Setting Up the Trigger for WildApricot Registration

The next step involves setting up the trigger in Pabbly Connect. In the trigger window, search for ‘WildApricot’ and select it. You will then need to choose the trigger event as ‘Event Registration Created or Modified’. This will allow Pabbly Connect to detect whenever a new registration occurs in your WildApricot account.

  • Select WildApricot from the app list.
  • Choose the trigger event for registration.
  • Copy the webhook URL provided by Pabbly Connect.

After copying the webhook URL, go to your WildApricot account. Locate the ‘Apps’ section on the left, click on ‘Webhooks’, and then select ‘Add Webhook’. Paste the copied URL, name the webhook (e.g., ‘Pabbly Connect Webhook’), and set the notification type to ‘Event Registration’. Finally, save the webhook to establish the connection.


3. Testing the Registration Trigger

After setting up the webhook, it’s essential to test if the connection is working correctly. In Pabbly Connect, you will see a message indicating that it is waiting for a response. To generate a response, create a test registration in WildApricot.

Go to the events section in WildApricot, select an event, and register as a dummy user. Enter the necessary details such as name, email, and organization. Once you confirm the registration, return to Pabbly Connect, where you should see the registration details captured in the response.


4. Retrieving Registration Details with Pabbly Connect

To retrieve more detailed information about the registration, you will need to set up another action in Pabbly Connect. In the action window, search for ‘WildApricot’ again and select the action event ‘Get Registration Details by ID’. Connect your WildApricot account using the API key you generated earlier.

  • Select the account ID from the dropdown.
  • Map the registration ID from the previous trigger response.
  • Save and send a test request to retrieve registration details.

Once you click on ‘Save and Send Test Request’, you should receive a response containing all relevant registration details, including the event name, user details, and registration date. This data will be used to populate your Google Sheets.


5. Adding Registration Details to Google Sheets

The final step is to integrate Google Sheets with Pabbly Connect. In the action step, search for ‘Google Sheets’ and select it. Choose the action event ‘Add New Row’. You will need to connect your Google Sheets account by signing in and allowing access.

After connecting, select the spreadsheet where you want to add the registration details. You will see all the columns from your selected sheet. Map the fields from the WildApricot registration details to the respective columns in Google Sheets, such as first name, last name, email, and event name.

Map the first name field from the WildApricot response. Continue mapping last name, email, and organization. Click ‘Save and Send Test Request’ to finalize the integration.

Once you click on ‘Save and Send Test Request’, check your Google Sheets. You should see a new row populated with the registration details you just mapped. This confirms that your automation is working perfectly!


Conclusion

By following this tutorial, you have successfully integrated WildApricot registration details into Google Sheets using Pabbly Connect. This automation allows you to manage event registrations efficiently and in real-time, enhancing your workflow significantly. With Pabbly Connect, you can connect multiple applications and streamline your processes effortlessly.

Ensure you check out Pabbly Connect to create business automation workflows and reduce manual tasks. Pabbly Connect currently offer integration with 2,000+ applications.