Schedule Meetings in Google Meet from Google Sheets with Pabbly Connect

Learn how to schedule Google Meet meetings from Google Sheets and send SMS alerts using Pabbly Connect. Step-by-step tutorial with detailed instructions. Develop expertise in application integration and learn how to design streamlined automation workflows using proven, simplified approaches.

Watch Step By Step Video Tutorial Below


1. Accessing Pabbly Connect for Meeting Automation

To automate scheduling meetings in Google Meet from Google Sheets, you need to access Pabbly Connect. Start by visiting the Pabbly Connect website and signing up for a free account. This allows you to use the automation features without any initial cost.

Once you are logged in, navigate to the dashboard and click on the ‘Create Workflow’ button. Name your workflow, such as ‘Schedule Meeting in Google Meet from Google Sheets and Send Alerts on SMS’. This sets the stage for integrating Google Sheets and Google Meet through Pabbly Connect.


2. Setting Up the Integration with Google Sheets

In this section, you will configure the integration between Google Sheets and Pabbly Connect. Select Google Sheets as your trigger application and choose the trigger event as ‘New or Updated Spreadsheet Row’. This step ensures that any new meeting details added to your spreadsheet will initiate the automation.

  • Click on ‘Add-ons’ in Google Sheets.
  • Select ‘Get Add-ons’ and search for Pabbly Connect Webhooks.
  • Install the add-on and open it from the Add-ons menu.

After installing, set up the initial connection by pasting the webhook URL provided by Pabbly Connect into the add-on. Specify the trigger column, which should be the column where you will enter meeting details, ensuring the automation triggers correctly.


3. Scheduling Meetings in Google Calendar Using Pabbly Connect

Next, connect Google Calendar to Pabbly Connect to schedule the meetings automatically. Select Google Calendar as the action application and choose the action event as ‘Create Detailed Event’. This action allows you to create a meeting in Google Calendar based on the details from Google Sheets.

Map the necessary fields such as meeting description, start date, and end date. Ensure that the date and time are formatted in UTC, as required by Google Calendar. This is crucial for the meetings to be set correctly in the calendar.

  • Provide the meeting description and map it from the Google Sheets data.
  • Set the start and end times in UTC format to avoid any scheduling errors.
  • Select the appropriate calendar for the event.

After mapping all fields, test the integration to confirm that the meeting is scheduled correctly in Google Calendar. This step ensures that your automation is functioning as intended through Pabbly Connect.


4. Sending SMS Alerts to Attendees via Pabbly Connect

To notify attendees about the scheduled meetings, you will use the Twilio application integrated with Pabbly Connect. After configuring the Google Calendar action, add a new action step to send SMS using Twilio.

Connect Twilio by entering your account SID and authentication token. Set up the SMS body to include meeting details like the meeting time and link. Ensure you map the recipient’s phone number correctly to send the SMS alerts.

Compose the SMS message with relevant meeting details. Map the recipient’s phone number from the Google Sheets data. Test the SMS sending functionality to ensure alerts are dispatched correctly.

Once the SMS action is configured, you can enable the automation to send SMS alerts automatically whenever a new meeting is scheduled through Pabbly Connect.


5. Finalizing Your Automation in Pabbly Connect

After setting up the entire workflow, revisit your automation in Pabbly Connect to ensure all steps are correctly configured. Make sure the trigger and action sequences are functioning as expected, allowing for seamless integration.

To finalize, enable the ‘Send on Event’ feature. This setting ensures that every time you add a new meeting detail to your Google Sheets, the meeting will be automatically scheduled in Google Calendar, and SMS alerts will be sent to the attendees. This makes your meeting scheduling process efficient and hassle-free.

Once everything is set, you can close Pabbly Connect and Google Calendar. The automation will run in the background, managing all tasks without manual intervention. This way, you can focus on your meetings without worrying about the logistics.


Conclusion

In this tutorial, we demonstrated how to schedule meetings in Google Meet from Google Sheets and send SMS alerts using Pabbly Connect. By automating these processes, you can save time and streamline your meeting management.

Ensure you check out Pabbly Connect to create business automation workflows and reduce manual tasks. Pabbly Connect currently offer integration with 2,000+ applications.

How to Import Specific Data from Shopify to Google Sheets Using Pabbly Connect

Learn how to automate the import of specific data from Shopify to Google Sheets using Pabbly Connect. Step-by-step tutorial for seamless integration. Eliminate manual repetitive tasks from your workflow. Discover proven automation methods with intuitive steps designed for efficiency-minded professionals.

Watch Step By Step Video Tutorial Below


1. Setting Up Pabbly Connect for Shopify Google Sheets Integration

To import specific data from Shopify to Google Sheets, you need to start by setting up Pabbly Connect. This platform allows you to automate the transfer of data between different applications seamlessly. First, create a free account on Pabbly Connect if you haven’t done so already. Once you have your account, log in to access the dashboard.

From the dashboard, click on the ‘Create Workflow’ button. Name your workflow, for example, ‘Shopify to Google Sheets Integration’. After naming your workflow, click on the ‘Create’ button to proceed. This will open the workflow editor where you will set up the trigger and action for your automation.


2. Choosing Shopify as Trigger Application in Pabbly Connect

In your Pabbly Connect workflow, select Shopify as the trigger application. The trigger event you need is ‘New Order’ which indicates that a new order has been placed in your Shopify store. This will initiate the workflow each time an order is created. using Pabbly Connect

  • Select Shopify as the trigger application.
  • Choose the trigger event ‘New Order’.
  • Copy the generated webhook URL provided by Pabbly Connect.

Next, you will need to set up this webhook in your Shopify store. Go to your Shopify dashboard, click on ‘Settings’, and then select ‘Notifications’. Scroll down to the ‘Webhooks’ section and click on ‘Create Webhook’. Here, paste the webhook URL you copied from Pabbly Connect into the URL field, and select ‘JSON’ as the format. Save the webhook settings.


3. Testing the Webhook Connection in Pabbly Connect

After setting up the webhook in Shopify, it’s time to test the connection. You need to create a test order in your Shopify store. This is essential to capture the order data and ensure that the webhook is functioning correctly. using Pabbly Connect

To create a test order, navigate back to your Shopify store and select a product to purchase. Complete the checkout process using dummy information for the order. Once the order is created, return to Pabbly Connect, and you will see that it is waiting for a response from Shopify.

  • Create a test order in Shopify.
  • Check Pabbly Connect for the received data.
  • Verify that the order details are captured correctly.

Once the test order is created, Pabbly Connect will capture the order details, including the product ID, which you will need for the next steps. Make sure to check that the data is received as expected before proceeding to the next phase of the integration.


4. Applying Filters in Pabbly Connect for Specific Products

Now that you have the order details captured, the next step is to apply a filter within Pabbly Connect to ensure that only specific products trigger the action. In this case, you want to filter for a specific product, such as the ‘Center Table’. using Pabbly Connect

To do this, add a filter action step in your workflow. Choose the product ID from the previous step and set the condition to equal the product ID of the Center Table. This will ensure that the workflow only continues if the specified product is ordered.

Add a filter action step in Pabbly Connect. Select the product ID from the previous step. Set the condition to ‘equals to’ and input the specific product ID.

Once the filter is set, test the filter to ensure it is configured correctly. If the condition is met, the workflow will proceed to the next action of adding data to Google Sheets.


5. Adding Data to Google Sheets Using Pabbly Connect

The final step in this integration is to add the captured order details to Google Sheets. In your Pabbly Connect workflow, add an action step and select Google Sheets as the application. using Pabbly Connect

Choose the action event as ‘Add New Row’. Then, connect your Google account by clicking on ‘Sign in with Google’. After authorizing Pabbly Connect to access your Google Sheets, select the specific spreadsheet and sheet where you want the data to be added.

Select Google Sheets as the action application. Choose the action event ‘Add New Row’. Map the fields from the Shopify order data to the respective columns in Google Sheets.

After mapping the necessary fields, such as customer name, email, order date, and quantity, click on ‘Save’ and then test the action to ensure that data is being sent correctly to your Google Sheets. Upon successful testing, your integration is complete, and new order details will automatically populate in your spreadsheet as orders are placed for the specified product.


Conclusion

In this tutorial, we demonstrated how to import specific data from Shopify to Google Sheets using Pabbly Connect. By following the steps outlined, you can automate the data transfer process seamlessly, ensuring that your spreadsheets are always up to date with order information.

Ensure you check out Pabbly Connect to create business automation workflows and reduce manual tasks. Pabbly Connect currently offer integration with 2,000+ applications.

How to Generate Text from Airtable Records Using Pabbly Connect

Learn how to generate text automatically from Airtable records using Pabbly Connect, integrating OpenAI for seamless automation. Develop expertise in application integration and learn how to design streamlined automation workflows using proven, simplified approaches.

Watch Step By Step Video Tutorial Below


1. Setting Up Pabbly Connect for Automation

To generate text from Airtable records, start by setting up Pabbly Connect. This powerful automation tool allows you to create workflows that connect various applications seamlessly. First, sign up for a free account on the Pabbly Connect website.

After signing in, navigate to the dashboard and click on the ‘Create Workflow’ button. Here, you can name your workflow, for example, ‘Airtable OpenAI Text Generation’. Once named, click on ‘Create’ to proceed to the workflow setup page.


2. Setting Up Trigger with Airtable

The next step is to configure the trigger in Pabbly Connect. Select Airtable as the trigger application and choose the event as ‘New Record’. This setup will initiate the workflow whenever a new record is added to your Airtable base.

  • Click on ‘Connect’ and select ‘Add New Connection’.
  • Enter your Airtable API key which you can find in your Airtable account settings.
  • Select the base and table where your records are stored.

After saving the connection, click on ‘Save and Send Test Request’ to fetch sample data from your Airtable records. This data will be used in the subsequent steps of your automation.


3. Integrating OpenAI for Text Generation

Now, it’s time to connect OpenAI to your Pabbly Connect workflow. Add a new action step and select OpenAI as the application. Choose the action event as ‘Generate Content’. This step will handle the text generation based on the input from Airtable.

To establish the connection, click on ‘Connect’ and select ‘Add New Connection’. You will need to provide your OpenAI API key, which can be generated from your OpenAI account. Once connected, select the AI model for text generation, typically the ‘text-davinci-003’ model is recommended.

  • Map the prompt field to the request prompt from the Airtable trigger.
  • Set the maximum tokens for the content generation.
  • Specify the sampling type and value for the generated content.

After configuring these settings, click on ‘Save and Send Test Request’ to generate content based on the mapped prompt.


4. Updating Airtable Records with Generated Text

Once you receive the generated content from OpenAI, the next step is to update your Airtable records. Add another action step in Pabbly Connect and select Airtable again, this time choosing the action event as ‘Update Record’. This will allow you to place the generated text back into your Airtable base.

Connect to Airtable using the same API key. Choose the base and table where the record needs to be updated. Map the Record ID from the previous trigger step to ensure the correct record is updated.

Map the generated content from OpenAI to the appropriate text field in Airtable. Click on ‘Save and Send Test Request’ to update the record.

After this step, you should see the newly generated text appear in your Airtable record, confirming that the automation works as intended.


5. Final Steps and Testing Your Automation

With your workflow set up, it’s essential to test the entire process. Add a new record in Airtable with a request prompt, and observe how Pabbly Connect triggers the workflow, generates text with OpenAI, and updates the Airtable record automatically.

Once you confirm that everything functions smoothly, you can rely on this automation for generating text content without any manual effort. This process ensures that whenever you add a new prompt in Airtable, the content is generated and updated seamlessly.

Remember, you can always revisit your Pabbly Connect dashboard to monitor the workflow, make adjustments, or troubleshoot any issues that may arise.


Conclusion

This tutorial demonstrates how to efficiently use Pabbly Connect to automate text generation from Airtable records with OpenAI. By following these steps, you can streamline your content creation process and enhance productivity.

Ensure you check out Pabbly Connect to create business automation workflows and reduce manual tasks. Pabbly Connect currently offer integration with 2,000+ applications.

Implementing this automation not only saves time but also ensures consistency in your content generation efforts. Start using Pabbly Connect today to automate your workflows!

How to Write Creative Arts & Crafts Articles Using AI with Pabbly Connect

Learn to automate writing creative arts & crafts articles using Pabbly Connect with Google Sheets, OpenAI, and WordPress. Step-by-step tutorial included. Follow this definitive guide to creating powerful automated workflows with straightforward, efficiency-focused solutions that save valuable time.

Watch Step By Step Video Tutorial Below


1. Setting Up Pabbly Connect for Automation

To write creative arts and crafts articles using AI, we will utilize Pabbly Connect as the central automation platform. Start by signing up for a free account on Pabbly Connect. Once you log in, navigate to the dashboard and select ‘Create Workflow’ to initiate your automation.

Give your workflow a name, such as ‘Google Sheets to OpenAI to WordPress’. This will help you easily identify the automation later. After naming your workflow, click on the ‘Create’ button to proceed to the next step of setting up the integration.


2. Connecting Google Sheets to Pabbly Connect

The first step in our automation is to connect Google Sheets to Pabbly Connect. In the trigger window, select Google Sheets as the app. From the trigger event dropdown, choose ‘New or Updated Spreadsheet Row’. This setup allows Pabbly Connect to monitor your Google Sheet for any new titles added.

  • Open your Google Sheet where you will enter article titles.
  • Go to Extensions > Add-ons > Get Add-ons and search for ‘Pabbly Connect Webhooks’.
  • Install the add-on and refresh your Google Sheet.

After refreshing, navigate back to Extensions, hover over Pabbly Connect Webhooks, and click on ‘Initial Setup’. Here, you will need to paste the webhook URL provided by Pabbly Connect and select the trigger column, which is usually the last data entry column. This setup allows Pabbly Connect to receive data whenever a new row is added to your Google Sheet.


3. Integrating OpenAI to Generate Content

Next, we will integrate OpenAI using Pabbly Connect to generate creative articles based on the titles entered in Google Sheets. In the action window of Pabbly Connect, choose OpenAI as the app. Select ‘Generate Content’ as the action event. This step allows you to leverage the AI capabilities of OpenAI to create content.

Connect your OpenAI account by entering your API token. To obtain this token, log in to your OpenAI account, navigate to the API key section, and create a new secret key. After entering the API token in Pabbly Connect, select the AI model you wish to use, typically ‘text-davinci-003’, and set the prompt to ‘Write an article on’ followed by the title from Google Sheets.

  • Set the maximum tokens to 256 for concise content generation.
  • Adjust the temperature and other parameters as needed for content variability.

Once you have configured these settings, click on ‘Save and Send Test Request’. You should receive a response containing the generated article text, which confirms that the integration is functioning correctly.


4. Posting the Generated Content to WordPress

With the article generated by OpenAI, the next step is to create a post on your WordPress site using Pabbly Connect. In the action step, select WordPress as the app and choose the ‘Create Post’ action event. This allows you to publish the content generated by OpenAI directly into WordPress.

Connect your WordPress account by entering your username, password, and base URL. Ensure that you only include the main URL without any additional paths. After connecting, specify the post type as ‘Post’ and map the title and content from the previous steps. Set the post status to ‘Draft’ to review the content before publishing.

After mapping the required fields, click on ‘Save and Send Test Request’. A successful response will indicate that a new draft post has been created in your WordPress, containing the title and content generated from OpenAI. You can verify this by checking your WordPress dashboard.


5. Updating Google Sheets with the Post Link

The final step in our automation is to update the Google Sheet with the link to the newly created WordPress post using Pabbly Connect. Add another action step, select Google Sheets, and choose ‘Update Cell Value’ as the action event. This allows you to insert the URL of the newly created post back into your Google Sheet.

Connect your Google Sheets account again and select the spreadsheet and sheet where you want to update the link. For the range, use the appropriate cell reference, mapping the row number from the previous responses to ensure the link goes into the correct row. Finally, map the blog link from the WordPress response to the value field.

Click on ‘Save and Send Test Request’ to finalize this step. The successful response confirms that the blog link has been updated in your Google Sheet, completing the automation workflow. Now, whenever you add a new title in Google Sheets, the entire process will automatically generate an article and update the link back in your sheet.


Conclusion

Using Pabbly Connect, you can seamlessly automate the process of writing creative arts and crafts articles. By integrating Google Sheets, OpenAI, and WordPress, this tutorial provides a comprehensive guide to streamline your content creation workflow. Start utilizing this automation today for efficient article production!

Ensure you check out Pabbly Connect to create business automation workflows and reduce manual tasks. Pabbly Connect currently offer integration with 2,000+ applications.

How to Add Formula in Google Sheets inside Pabbly Connect Workflow

Learn how to integrate Google Sheets with Pabbly Connect and add formulas to automate your workflows effectively. Revolutionize your productivity approach with just a few strategic clicks. Uncover professional methods for connecting applications and creating workflows that reclaim hours of your week.

Watch Step By Step Video Tutorial Below


1. Setting Up Pabbly Connect Workflow

To begin using Pabbly Connect for integrating Google Sheets, first access your Pabbly Connect account. Once logged in, create a new workflow by selecting the trigger application, which in this case is Pabbly Builder. This allows you to capture responses from forms created in Pabbly Builder.

After setting up the trigger, connect your Pabbly Builder form with Pabbly Connect using the provided webhook URL. This integration will enable Pabbly Connect to capture the data, such as first name, last name, and numerical values, which will be used in Google Sheets.


2. Adding Data to Google Sheets Using Formulas

After capturing the form responses, the next step is to add this data into Google Sheets. In your Pabbly Connect workflow, select the Google Sheets application as your next action step. Here, you will map the captured data fields to the corresponding columns in your Google Sheet.

  • Select the Google Sheets action event.
  • Map the first name, last name, and numerical values to their respective columns.
  • In the result column, you will add a formula to sum the numerical values.

In the mapping data, enter the formula directly. For example, use the SUM function to calculate the total of the three numerical values. This formula will automatically update in your Google Sheet whenever a new form submission is processed through Pabbly Connect.


3. Testing the Integration with Pabbly Connect

Once you have set up the formula in your Google Sheets action, it’s essential to test the integration. In Pabbly Connect, click on the ‘Test Request’ button to send a test submission. This will help verify that the data is correctly added to Google Sheets.

After testing, you should see the data in your Google Sheet, including the first name, last name, and the calculated sum in the result column. Ensure that the formula is functioning correctly by checking if the sum reflects the values submitted through the form.


4. Using Number Formatter in Pabbly Connect

Another method to handle formulas in Google Sheets is by using the Number Formatter feature in Pabbly Connect. To do this, add an action step before your Google Sheets action and select the Number Formatter app.

Choose the action event for spreadsheet formulas and enter the desired formula, such as SUM, in the provided field. Map the same numerical values from your form submission into this formula. After saving and sending the test request, you will receive the calculated result directly from the Number Formatter.


5. Mapping Results Back to Google Sheets

After receiving the calculated result from the Number Formatter, you can map this result back into your Google Sheets action step in Pabbly Connect. Clear the previous mapping in the result field and select the response from the Number Formatter.

This method allows you to add the actual calculated value into Google Sheets rather than the formula itself. Click on ‘Save and Send Test Request’ to finalize the integration and ensure that the correct data appears in your Google Sheets.


Conclusion

In this tutorial, we demonstrated how to use Pabbly Connect to integrate Google Sheets and automate the addition of formulas. By following the steps outlined, you can efficiently manage data submissions and calculations within your workflows. This integration streamlines your processes and enhances productivity.

Ensure you check out Pabbly Connect to create business automation workflows and reduce manual tasks. Pabbly Connect currently offer integration with 2,000+ applications.

6 Best Google Sheets and WhatsApp Automation Ideas with Pabbly Connect

Discover the top 6 Google Sheets and WhatsApp automation ideas using Pabbly Connect for seamless integration and enhanced productivity. Eliminate manual repetitive tasks from your workflow. Discover proven automation methods with intuitive steps designed for efficiency-minded professionals.

Watch Step By Step Video Tutorial Below


1. Send WhatsApp Messages from Google Sheets in Bulk

Using Pabbly Connect, you can automate sending WhatsApp messages directly from Google Sheets. This process eliminates the need for manual message sending, allowing for bulk communication with your customers.

To set this up, follow these steps:

  • Connect your Google Sheets account in Pabbly Connect.
  • Set up the WhatsApp integration in Pabbly Connect.
  • Map the fields from Google Sheets to WhatsApp messages.

After completing these steps, whenever you update your Google Sheets, messages will be sent automatically to your customers via WhatsApp.


2. Send Examination Results on WhatsApp

Another effective automation using Pabbly Connect is sending examination results to students via WhatsApp. This is particularly useful for schools and colleges that need to communicate results quickly.

To implement this automation, follow these steps:

  • Gather student data and exam results in Google Sheets.
  • Use Pabbly Connect to connect Google Sheets with WhatsApp.
  • Set triggers to send results automatically when data is updated.

Once set up, results will be sent to students’ WhatsApp accounts immediately after they are entered into the Google Sheets.


3. Send Automatic Reminders on WhatsApp

With Pabbly Connect, you can also automate sending reminders via WhatsApp. This feature is beneficial for businesses that need to remind clients about appointments or deadlines.

Here’s how to set up automatic reminders:

Create a list of reminders in Google Sheets. Connect Google Sheets to WhatsApp using Pabbly Connect. Schedule reminders to be sent before the due dates.

After setting this up, clients will receive timely reminders directly through WhatsApp, ensuring they never miss an important date.


4. Send Salary Slips Automatically via WhatsApp

For HR departments, using Pabbly Connect to send salary slips via WhatsApp can save a lot of time. This automation allows for seamless communication with employees.

To automate salary slip distribution, follow these steps:

Compile employee salary data in Google Sheets. Connect Google Sheets with WhatsApp using Pabbly Connect. Set up the automation to send salary slips automatically each month.

With this setup, employees will receive their salary slips on WhatsApp without any manual effort from HR.


5. Create and Send Certificates Automatically via WhatsApp

Creating and distributing certificates can be automated using Pabbly Connect. This is especially useful for training programs or workshops where multiple certificates need to be issued.

To create and send certificates, follow these steps:

Input participant details into Google Sheets. Use Pabbly Connect to connect Google Sheets with WhatsApp. Automate the generation and sending of certificates via WhatsApp.

Once this is set up, participants will receive their certificates automatically, streamlining the entire process.


Conclusion

In conclusion, using Pabbly Connect to automate tasks between Google Sheets and WhatsApp can significantly enhance productivity. The six automation ideas discussed—sending messages, exam results, reminders, salary slips, and certificates—demonstrate the power of integration for businesses and educational institutions alike.

Ensure you check out Pabbly Connect to create business automation workflows and reduce manual tasks. Pabbly Connect currently offer integration with 2,000+ applications.

How to Notify Team on Slack When a New Inventory Item is Created in Shopify Using Pabbly Connect

Learn how to set up Pabbly Connect to notify your team on Slack whenever a new inventory item is created in Shopify with this detailed tutorial.

Watch Step By Step Video Tutorial Below


1. Accessing Pabbly Connect for Integration

To set up notifications for new inventory items in Shopify, you will need to access Pabbly Connect. Start by visiting the Pabbly Connect website at Pabbly.com/connect. Here, you will find options to sign in or sign up for free if you are a new user.

After signing in, navigate to the dashboard. Look for the ‘Create Workflow’ button on the right side. Click it to initiate the workflow setup. You will be prompted to name your workflow, such as ‘Notify Team on Slack When a New Inventory Item is Created in Shopify’. After naming your workflow, click on the ‘Create’ button to proceed.


2. Setting Up Shopify as the Trigger Application

In this step, you will set Shopify as the trigger application in Pabbly Connect. Once you have created your workflow, you will see options for selecting trigger and action applications. Choose Shopify as your trigger app and select the event ‘New Inventory Item’. This event will activate the workflow whenever a new inventory item is created in Shopify.

  • Select Shopify as the trigger application.
  • Choose ‘New Inventory Item’ as the trigger event.
  • Copy the provided webhook URL for Shopify integration.

Once you have copied the webhook URL, you will need to set this up in your Shopify account. This connection allows Pabbly Connect to access the information needed for the automation.


3. Configuring the Webhook in Shopify

Next, navigate to your Shopify account to set up the webhook. Go to ‘Settings’ and then select ‘Notifications’. Scroll down to find the ‘Create Webhook’ option. Here, you will select the event for ‘Inventory Item Creation’ and paste the webhook URL you copied from Pabbly Connect.

Make sure to select JSON as the format and choose the latest version for the webhook API version. After filling in these details, click ‘Save’. This action will save the webhook successfully, allowing Pabbly Connect to receive notifications when new inventory items are created.


4. Testing the Integration with a New Inventory Item

Now that the webhook is set up, you need to test the integration by creating a new inventory item in Shopify. Go to the ‘Products’ section and click on ‘Add Product’. Fill in the details for your new product, such as name, description, price, SKU, and inventory quantity, then click ‘Save’.

  • Create a product with details like name and SKU.
  • Click ‘Save’ to finalize the product creation.
  • Check Pabbly Connect for the API response.

After saving the product, return to Pabbly Connect to see if the API response has been successfully received. This step ensures that your integration is functioning correctly and that data from Shopify is being captured.


5. Notifying Your Team on Slack

The final step is to set up Slack as the action application in Pabbly Connect. Select Slack and choose the action event ‘Send Channel Message’. You will need to connect your Slack account to Pabbly Connect by selecting ‘Add New Connection’ and entering the required token type.

Once connected, choose the channel where you want to send notifications (e.g., ‘Shopify New Inventory’). Map the message content, including the product name, description, price, and inventory quantity. After completing these steps, click ‘Save and Send Test Request’ to send a test message to your Slack channel.


Conclusion

In this tutorial, we have demonstrated how to use Pabbly Connect to notify your team on Slack whenever a new inventory item is created in Shopify. By following these steps, you can automate your workflow efficiently and ensure your team is always updated with the latest inventory changes.

Ensure you check out Pabbly Connect to create business automation workflows and reduce manual tasks. Pabbly Connect currently offer integration with 2,000+ applications.

Integrate Shopify and Slack Using Pabbly Connect: Notify Team on New Draft Orders

Learn how to integrate Shopify and Slack using Pabbly Connect to notify your team whenever a new draft order is created. Step-by-step tutorial included. Master proven automation processes with practical implementation examples and strategic recommendations you can apply immediately in your workflow.

Watch Step By Step Video Tutorial Below


1. Accessing Pabbly Connect for Shopify and Slack Integration

To integrate Shopify and Slack using Pabbly Connect, start by visiting the Pabbly Connect website. Here, you can either sign in if you are an existing user or sign up for free if you are new. Signing up grants you 100 free tasks to get started.

Once logged in, you will be directed to the Pabbly Connect dashboard. From there, click on the ‘Create Workflow’ button to initiate the integration process. You will need to name your workflow, such as ‘Notify Team on Slack for New Draft Orders in Shopify,’ before proceeding.


2. Setting Up the Trigger Event in Pabbly Connect

The next step involves configuring the trigger event in Pabbly Connect. Select Shopify as your trigger application. The trigger event you need to choose is ‘New Draft Order.’ This event will activate the workflow every time a new draft order is created in Shopify.

  • Select Shopify as the trigger application.
  • Choose ‘New Draft Order’ as the trigger event.
  • Copy the provided webhook URL for connecting Shopify.

After copying the webhook URL, you will need to set this up in your Shopify account. This connection will allow Pabbly Connect to receive data from Shopify whenever a new draft order is created.


3. Creating the Webhook in Shopify

Now, navigate to your Shopify account and go to the ‘Settings’ section. From there, click on ‘Notifications’ and scroll down to the ‘Webhooks’ section. Here, you will create a new webhook for draft order creation. using Pabbly Connect

  • Select ‘Create Webhook’ and choose ‘Draft Order Creation’ as the event type.
  • Set the format to JSON.
  • Paste the copied webhook URL and save the changes.

This setup allows Shopify to send data to Pabbly Connect whenever a new draft order is created, ensuring that your team is notified in real time.


4. Testing the Integration with a Draft Order

After setting up the webhook, you need to create a test draft order in Shopify to ensure the integration works. Go to the ‘Orders’ section and select ‘Drafts’. Click on the ‘Create Order’ button and select a product to add to the draft order.

Once you have created the draft order, return to Pabbly Connect. You should see the API response indicating that the data from the new draft order has been received successfully. This response includes all relevant details, such as the customer’s name, email address, and product information.


5. Sending Notifications to Slack

Now that you have confirmed that the trigger works, it’s time to set up the action application, which is Slack. In Pabbly Connect, select Slack as the action application and choose the event ‘Send Channel Message’. You will need to connect your Slack account by providing the necessary permissions. using Pabbly Connect

Select the channel where you want to send the message. Map the message content, including details like the customer’s name and product information. Click on ‘Save and Send Test Request’ to check if the message is sent successfully.

If everything is set up correctly, you should see a notification in your selected Slack channel confirming the new draft order creation. This integration ensures that your team stays informed in real time.


Conclusion

In this tutorial, we explored how to integrate Shopify with Slack using Pabbly Connect to notify your team whenever a new draft order is created. By following the outlined steps, you can automate notifications and streamline your workflow effectively.

Ensure you check out Pabbly Connect to create business automation workflows and reduce manual tasks. Pabbly Connect currently offer integration with 2,000+ applications.

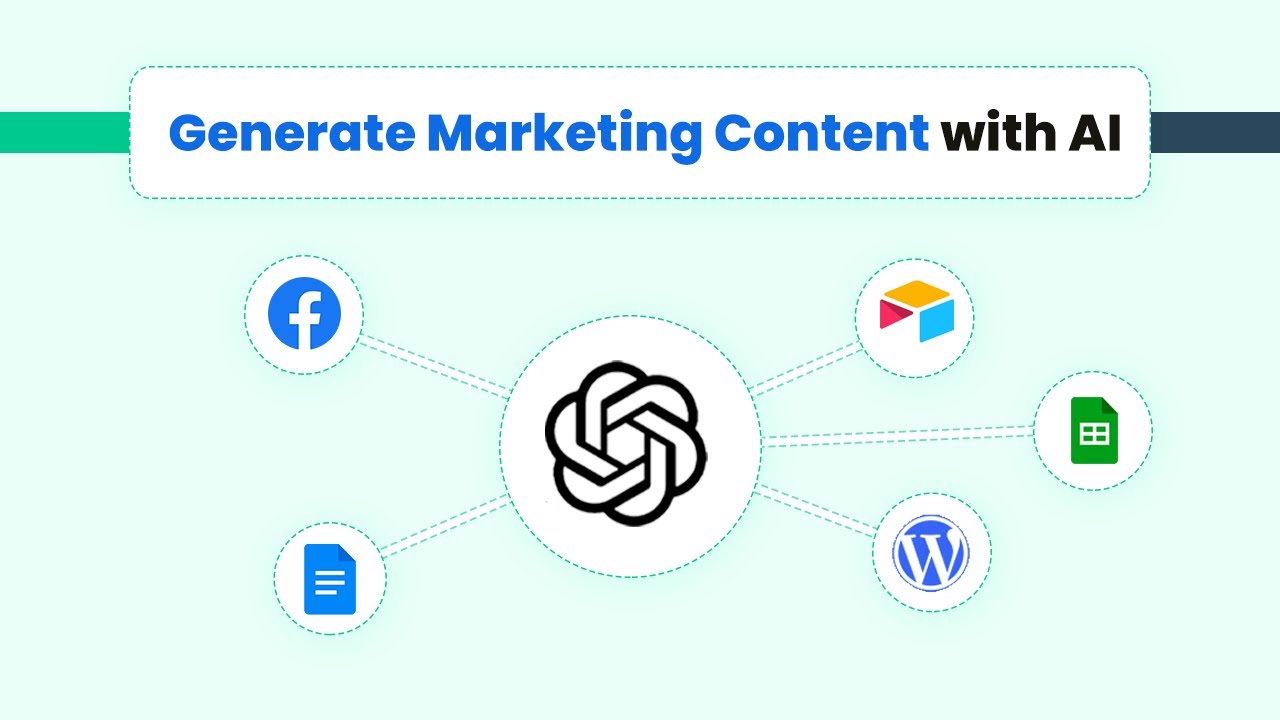
How to Write Better Marketing Copy & Content with AI Using Pabbly Connect

Learn how to write better marketing copy and content using Pabbly Connect to integrate OpenAI with social media platforms effectively. Discover how to seamlessly connect your essential tools through accessible instructions that make powerful automation available to professionals at every skill level.

Watch Step By Step Video Tutorial Below


1. Using Pabbly Connect for Marketing Copy Creation

Pabbly Connect is an essential tool for writing better marketing copy by integrating various applications like Facebook, YouTube, and OpenAI. By utilizing Pabbly Connect, you can streamline your content creation process, making it more efficient and effective.

To begin, access Pabbly Connect and create a new workflow. This workflow will allow you to connect OpenAI with your preferred applications, ensuring that your marketing emails and social media posts are generated automatically based on your input.


2. Integrating OpenAI for Email Marketing with Pabbly Connect

Integrating OpenAI with Pabbly Connect allows you to generate marketing emails quickly. Start by setting up your OpenAI account and preparing a spreadsheet with your email titles. Pabbly Connect will pull these titles and generate the corresponding email content automatically.

Follow these steps to set up the integration:

  • Log into Pabbly Connect and create a new workflow.
  • Select OpenAI as the trigger application.
  • Choose the action event for generating email content.
  • Map the fields from your spreadsheet to OpenAI.

Once you complete these steps, your marketing emails will be generated automatically, saving you time and enhancing your productivity.


3. Creating Google Search Ads with Pabbly Connect

Using Pabbly Connect to create Google Search Ads is another effective way to enhance your marketing efforts. By integrating OpenAI, you can automate the generation of ad copies based on predefined titles and product information.

Here’s how to set it up:

  • In Pabbly Connect, create a new workflow for Google Ads.
  • Select OpenAI as the application to generate ad copies.
  • Input your product details into the workflow.
  • Test the workflow to ensure the ad copies are generated correctly.

This integration will allow you to create compelling ad copies effortlessly, making your marketing campaigns more effective.


4. Automating Social Media Posts with Pabbly Connect

Pabbly Connect also facilitates the automation of social media posts across platforms like Facebook, Instagram, and Twitter. By linking OpenAI and your social media accounts, you can generate and publish posts automatically based on your content calendar.

To automate your social media postings, follow these steps:

Create a new workflow in Pabbly Connect for social media automation. Choose OpenAI to generate the post content. Connect your social media accounts to Pabbly Connect. Schedule the posts based on your content calendar.

This way, you can maintain a consistent online presence without the hassle of manual posting.


5. Generating Articles with Pabbly Connect and OpenAI

Generating unique articles can be a time-consuming task, but with Pabbly Connect and OpenAI, it becomes much simpler. You can automate the article writing process by setting up a workflow that pulls from your title list and generates full articles.

Here’s how to set this up effectively:

In Pabbly Connect, create a workflow specifically for article generation. Select OpenAI as the content generator. Input the titles from your spreadsheet. Publish the generated articles on WordPress or any other platform.

By following these steps, you can produce high-quality articles quickly, enhancing your content marketing strategy.


Conclusion

In conclusion, using Pabbly Connect to integrate OpenAI with various applications allows you to write better marketing copy efficiently. By automating processes for email marketing, Google Ads, social media posts, and article generation, you can significantly enhance your productivity and content quality.

Ensure you check out Pabbly Connect to create business automation workflows and reduce manual tasks. Pabbly Connect currently offer integration with 2,000+ applications.

How to Send Automated Coupons via SMS Using Pabbly Connect: WooCommerce to Twilio Integration

Learn how to automate sending coupons via SMS to customers using Pabbly Connect, integrating WooCommerce and Twilio seamlessly. Develop expertise in application integration and learn how to design streamlined automation workflows using proven, simplified approaches.

Watch Step By Step Video Tutorial Below


1. Accessing Pabbly Connect for Automation

To start sending automated coupons via SMS, first access Pabbly Connect. This integration platform allows you to connect various applications seamlessly. If you’re new to Pabbly Connect, sign up for a free account, where you will receive free tasks monthly to test automation workflows.

Once logged in, navigate to the dashboard and click on the blue button labeled ‘Create Workflow’. Name your workflow, such as ‘Send Automated Coupons on SMS Automatically,’ and click ‘Create’ to proceed. This is your first step towards building the automation that will send SMS coupons to your customers after they place an order.


2. Setting Up WooCommerce as the Trigger Application

In this section, we will set up WooCommerce as the trigger application in Pabbly Connect. Select WooCommerce as the trigger app and choose the event ‘New Order’. This means that every time a new order is placed in your WooCommerce store, it will trigger the subsequent actions defined in your workflow.

  • Select the trigger event as ‘New Order’.
  • Copy the webhook URL provided by Pabbly Connect.
  • Go to your WooCommerce settings and add the webhook URL under the advanced settings.

After adding the webhook, save the settings. Once this is done, Pabbly Connect will start waiting for the webhook response, which confirms that the integration is successful.


3. Generating Coupon Codes in WooCommerce

Next, we will generate coupon codes automatically using WooCommerce via Pabbly Connect. After capturing the order details, add another action step in your workflow and select WooCommerce again. This time, choose the action event ‘Create Coupon’.

To connect WooCommerce with Pabbly Connect, you will need to provide the API keys. Navigate to the WooCommerce settings, create a new REST API key, and copy the consumer key and secret. Paste these keys back into Pabbly Connect.

  • Generate a unique coupon code based on the order ID and customer name.
  • Set the discount type and amount (e.g., 5% off).
  • Define the expiry date for the coupon.

Once you have configured these settings, save the action. Now, whenever an order is placed, a unique coupon code will be generated automatically.


4. Sending SMS via Twilio with Pabbly Connect

After generating the coupon code, the next step is to send it via SMS using Twilio, integrated through Pabbly Connect. Add Twilio as the next action step and select the event ‘Send SMS’. Connect your Twilio account by entering your Account SID and Auth Token, which can be found in your Twilio console.

In the SMS body, craft a message that includes the customer’s name and the coupon code generated earlier. For example, you might write, ‘Hello [Customer Name], thank you for shopping! Use this code [Coupon Code] for your next purchase.’ Ensure to map the customer’s phone number from the WooCommerce data to the recipient field.

Finally, save the action and send a test SMS to verify that everything is functioning correctly. Once confirmed, your automation is complete, and Pabbly Connect will handle sending SMS coupons automatically for every new order placed.


5. Finalizing Your Automation Workflow

Now that you have set up your workflow in Pabbly Connect, it’s time to finalize everything. Review all the steps to ensure that the trigger and actions are correctly configured. You can also test the entire workflow by placing a dummy order in your WooCommerce store.

After confirming that the SMS with the coupon code is delivered successfully, you can relax. Pabbly Connect will run this automation in the background, sending SMS coupons to your customers automatically whenever they place an order.

For further customization, you can explore additional features in Pabbly Connect to enhance your automation capabilities. This setup not only saves time but also improves customer engagement by encouraging repeat purchases.


Conclusion

In this tutorial, we demonstrated how to automate sending SMS coupons using Pabbly Connect, integrating WooCommerce and Twilio effectively. By following these steps, you can enhance customer retention and streamline your marketing efforts.

Ensure you check out Pabbly Connect to create business automation workflows and reduce manual tasks. Pabbly Connect currently offer integration with 2,000+ applications.