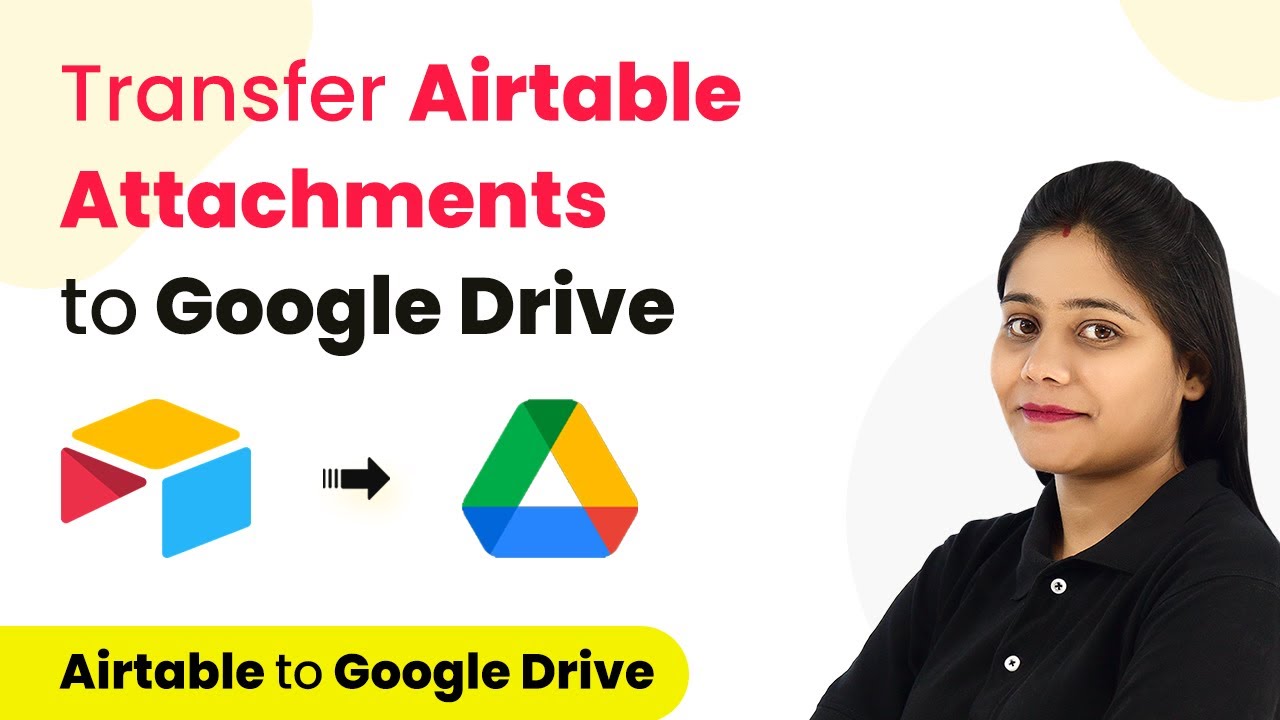
Integrating Razorpay with Privyr Using Pabbly Connect: A Step-by-Step Tutorial

Learn how to automate client creation in Privyr when capturing payments with Razorpay using Pabbly Connect. Follow this detailed tutorial for seamless integration. Follow this definitive guide to creating powerful automated workflows with straightforward, efficiency-focused solutions that save valuable time.

Watch Step By Step Video Tutorial Below


1. Accessing Pabbly Connect for Razorpay Integration

To start automating client creation in Privyr upon capturing payments with Razorpay, you need to access Pabbly Connect. First, sign up for a free account on the Pabbly Connect platform. This will only take a couple of minutes.

Once you are logged in, navigate to the dashboard and click on ‘Create Workflow’. Give your workflow a name, such as ‘Razorpay to Privyr Integration’, and click on ‘Create’. This sets the stage for the automation process to begin.


2. Setting Up the Trigger in Pabbly Connect

In the workflow, the first step involves setting up the trigger. To do this, select Razorpay as the application in the trigger window. Choose the trigger event as ‘Payment Captured’. This event will activate the workflow whenever a new payment is received. using Pabbly Connect

  • Select Razorpay from the app list.
  • Choose the trigger event ‘Payment Captured’.
  • Copy the webhook URL provided by Pabbly Connect.

After copying the webhook URL, go to your Razorpay account. Under the ‘Developers’ section, click on ‘Webhooks’ and then ‘Add New Webhook’. Paste the copied URL into the designated field and select the event ‘payment.captured’. Finally, click on ‘Create Webhook’ to complete this step.


3. Testing the Trigger Setup in Pabbly Connect

Once the webhook is created, Pabbly Connect will wait for the response from Razorpay. To test the setup, you need to make a test payment using your Razorpay payment page. Enter the required customer details such as name, email, phone number, and address. using Pabbly Connect

After submitting the payment, you should see the payment details reflected in Pabbly Connect. This includes the customer’s name, email, and the amount paid. If the details appear correctly, it confirms that the trigger setup is functioning as intended.


4. Adding a Filter Condition in Pabbly Connect

To ensure that only relevant clients are added to Privyr, it’s essential to add a filter condition. This will allow the workflow to check if the payment corresponds to a specific product. In the action window, select ‘Filter’ from the app list. using Pabbly Connect

  • Select the product name from the Razorpay response.
  • Set the filter type to ‘Equals’.
  • Enter the specific product name you want to filter.

Click on ‘Save and Send Test Request’ to verify that the filter condition works correctly. If the condition is met, the workflow will proceed to add the client to Privyr.


5. Creating a Client in Privyr Using Pabbly Connect

The final step is to create a client in Privyr based on the payment details captured from Razorpay. In the action window, select Privyr as the application and choose the action event ‘Create Client’. Connect your Privyr account by entering the authentication token from your Privyr integration settings. using Pabbly Connect

Map the customer details received from Razorpay into the respective fields in Privyr, such as name, email, phone number, and any custom fields you wish to add. After mapping, click on ‘Save and Send Test Request’ to create the client.

Once the test request is successful, you can check your Privyr account to confirm that the new client has been added with all the correct details. This completes the integration process, allowing you to automate client creation seamlessly.


Conclusion

In this tutorial, we demonstrated how to automate the creation of clients in Privyr using Pabbly Connect when payments are captured through Razorpay. This integration streamlines your workflow, ensuring that every payment leads to a new client entry in your CRM.

Ensure you check out Pabbly Connect to create business automation workflows and reduce manual tasks. Pabbly Connect currently offer integration with 2,000+ applications.

How to Email OneDrive Files after Successful Stripe Payments Using Pabbly Connect

Learn how to automate emailing OneDrive files after successful Stripe payments using Pabbly Connect. Step-by-step tutorial for seamless integration. Navigate the automation landscape confidently with clear, structured guidance suitable for professionals regardless of prior technical experience.

Watch Step By Step Video Tutorial Below


1. Accessing Pabbly Connect for Integration

To start automating the email process for OneDrive files after successful Stripe payments, you need to access Pabbly Connect. First, navigate to the Pabbly Connect website by typing ‘Pabbly.com/connect’ in your browser.

Once there, you will find options to sign in or sign up. If you already have an account, click on ‘Sign In’. New users can click on ‘Sign Up’ and create an account in just a few minutes. After signing in, you will reach the dashboard where you can create your workflow.


2. Creating a Workflow in Pabbly Connect

After logging into Pabbly Connect, the next step is to create a new workflow. Click on the ‘Create Workflow’ button located on the right side of the dashboard. A dialog box will appear, prompting you to name your workflow.

  • Name your workflow something descriptive, like ‘Email OneDrive Files after Successful Stripe Payments’.
  • Click on ‘Create’ to proceed.

Once created, you will see options for setting up triggers and actions. The trigger application will be Stripe, and the action application will be Gmail. This setup will automate the process of emailing OneDrive files to users after they make a payment through Stripe.


3. Setting Up the Stripe Trigger

In this step, you will configure the trigger for your workflow using Pabbly Connect. Select Stripe as your trigger application and choose the event ‘New Charge’. This means that every time a successful payment is made, the workflow will be activated.

After selecting the event, Pabbly Connect will provide you with a webhook URL. Copy this URL as it will be used to connect Stripe with your Pabbly Connect workflow. Now, navigate to your Stripe account and go to the ‘Developers’ section, then select ‘Webhooks’.


4. Configuring the Stripe Webhook

To complete the integration, you need to add the webhook URL you copied from Pabbly Connect in your Stripe account. Click on ‘Add Endpoint’ in the Webhooks section and paste the URL. Ensure you select the latest API version and choose the event ‘Charge Succeeded’.

  • Paste the webhook URL from Pabbly Connect.
  • Select the event ‘Charge Succeeded’ from the dropdown menu.

Once the endpoint is added, return to Pabbly Connect and perform a test submission. This test will confirm that the connection between Stripe and Pabbly Connect is working correctly.


Now that the trigger is set up, it’s time to configure the action step where you will send an email via Gmail. In Pabbly Connect, select Gmail as the action application and choose the event ‘Send Email’. Connect your Gmail account to Pabbly Connect to authorize the application.

In the email setup, you will need to map the recipient’s email address, subject, and content. Make sure to include the link to the OneDrive file you want to share. You can get this link from your OneDrive account by sharing the file and copying the shareable link.

Map the recipient’s email address from the Stripe data. Set the email subject to something relevant, like ‘Your Course Files’. Include a personalized message thanking them for their payment and providing the course link.

Finally, test the email action to ensure everything is working as intended. If successful, the recipient will receive the email with the OneDrive file link after making a payment through Stripe.


Conclusion

In this tutorial, we explored how to use Pabbly Connect to automate the process of emailing OneDrive files after successful Stripe payments. By following the steps outlined, you can create an efficient workflow that enhances customer experience and streamlines your operations.

Ensure you check out Pabbly Connect to create business automation workflows and reduce manual tasks. Pabbly Connect currently offer integration with 2,000+ applications.

How to Integrate Facebook Lead Ads with Wix Using Pabbly Connect

Learn how to automate the creation of contacts in Wix from new Facebook Lead Ads using Pabbly Connect with this detailed step-by-step tutorial. This comprehensive guide reveals exactly how to connect your applications and automate repetitive tasks — accessible for professionals of all technical backgrounds.

Watch Step By Step Video Tutorial Below


1. Accessing Pabbly Connect for Integration

To create a contact in Wix from new Facebook Lead Ads, you first need to access Pabbly Connect. Start by navigating to the Pabbly Connect website at Pabbly.com/connect. If you are an existing user, click on the ‘Sign In’ option on the right side of the page.

Once logged in, you will reach the dashboard where you can see various applications. Click on the ‘Access Now’ button for Pabbly Connect. This will take you to the workflow creation page where you can begin setting up your integration.


2. Setting Up the Trigger Event in Pabbly Connect

In this section, you will set up the trigger event for your workflow. Click on the ‘Create Workflow’ button and name your workflow something like ‘Create Contact in Wix from New Facebook Lead Ads’. After naming the workflow, you will see two important events: Trigger and Action. using Pabbly Connect

  • Select Facebook Lead Ads as the Trigger Application.
  • Choose the trigger event as ‘New Lead’.
  • Connect your Facebook Lead Ads account by clicking on ‘Add New Connection’.

After successfully connecting your Facebook account, select the relevant Facebook Page and Lead Generation Form. Once this is done, click on ‘Save and Send Test Request’ to test the connection and ensure data is being captured correctly.


3. Configuring the Action Event to Create Contact in Wix

Now that the trigger is set up, it’s time to configure the action event. Select Wix as the Action Application and choose the action event as ‘Create Contact’. Again, you will need to connect your Wix account by clicking on ‘Add New Connection’. using Pabbly Connect

To set up this connection, you will need your Application ID and Secret Key from the Wix Developer Center. Follow these steps to retrieve them:

  • Log in to Wix Developer Center.
  • Create a new application and navigate to the Auth section.
  • Copy the Application ID and Secret Key.

After entering these details in Pabbly Connect, click on ‘Save’ to establish the connection. This allows Pabbly Connect to create contacts in your Wix account using the data from Facebook Lead Ads.


4. Mapping Data Fields from Facebook to Wix

Once your Wix connection is established, you need to map the data fields from Facebook Lead Ads to Wix. This is crucial for ensuring that the correct data is transferred. Start by mapping the first name, last name, email address, and phone number fields.

For the phone number, you might need to split the country code from the number. To do this, you can use the text formatter feature in Pabbly Connect. Here’s how:

Add a new action step and select the Text Formatter application. Choose the action event as ‘Split Text’. Map the phone number and set the separator as your country code.

After mapping all necessary fields, click on ‘Save and Send Test Request’ to finalize the setup. This will ensure that every time a new lead comes in, the contact will be created in Wix with the correct information.


5. Verifying the Success of Your Integration

To ensure that your integration is working correctly, you should perform a test by submitting a new lead through your Facebook Lead Ads form. After submitting the form, check your Wix account to verify that the contact has been created.

Refresh the contacts page in Wix, and you should see the new contact appearing with the details you entered in the Facebook Lead Ads form. This confirms that your setup using Pabbly Connect was successful.

If you encounter any issues, revisit the steps in your Pabbly Connect workflow to ensure everything is mapped correctly and that connections are established. Remember, Pabbly Connect is key to automating this process seamlessly.


Conclusion

In this tutorial, we explored how to create contacts in Wix from new Facebook Lead Ads using Pabbly Connect. By following the steps outlined, you can automate this process efficiently and ensure that your leads are captured and organized without manual effort. This integration not only saves time but also enhances your workflow significantly.

Ensure you check out Pabbly Connect to create business automation workflows and reduce manual tasks. Pabbly Connect currently offer integration with 2,000+ applications.

Integrate OneDrive with Facebook Page Using Pabbly Connect

Learn how to integrate OneDrive with Facebook Page using Pabbly Connect to automate file sharing seamlessly. Step-by-step tutorial included. Learn to create powerful connections between your critical applications without requiring specialized programming knowledge or extensive technical background.

Watch Step By Step Video Tutorial Below


1. Access Pabbly Connect for Integration

To begin the integration process of sharing OneDrive files on your Facebook page, first access Pabbly Connect by navigating to the website. Here, you can either sign in if you are an existing user or sign up for a free account if you are new.

Once logged in, you will reach the dashboard of Pabbly Connect. On the right side, click on the ‘Create Workflow’ button to start setting up your integration. This is where you will define how OneDrive and Facebook will work together.


2. Create a Workflow in Pabbly Connect

In this step, you will create a workflow specifically for sharing OneDrive files on your Facebook page. Name your workflow something descriptive, like ‘Share OneDrive Files on Facebook Page’.

Next, you will set the trigger application as Microsoft OneDrive. This means that every time a new file is uploaded to OneDrive, it will trigger an action in Facebook. Here’s how to proceed:

  • Click on ‘Create’ to set up your workflow.
  • Select ‘OneDrive’ as the trigger application.
  • Choose the event as ‘New File’ to trigger the workflow.

After selecting the event, Pabbly Connect will check for new files every 10 minutes, ensuring that your workflow stays updated with the latest uploads.


3. Connect OneDrive to Pabbly Connect

To connect your Microsoft OneDrive account with Pabbly Connect, click on the ‘Connect’ button. You will be prompted to add a new connection. Select the option to connect with Microsoft OneDrive.

Once connected, you need to specify the folder path where your files are stored. For instance, if you have a folder named ‘Facebook Post’, type in the folder name without the ‘My Files’ prefix. Then, test the connection to ensure it has been set up correctly.


4. Format File Name Using Pabbly Connect

After successfully connecting to OneDrive, you will want to format the file name before posting it on Facebook. Use the Text Formatter feature in Pabbly Connect to split the file name and remove unnecessary parts, such as the file extension.

Map the file name data from the previous step and specify the separator (in this case, a dot) to split the text. Choose the first segment to get the clean file name for your Facebook post.


5. Create a Facebook Page Post

Now that you have formatted the file name, you can set Facebook as your action application in Pabbly Connect. Select the event as ‘Create Page Post’. This will allow you to post the newly uploaded file to your chosen Facebook page.

Connect your Facebook account by authorizing Pabbly Connect to access your Facebook pages. After successful authorization, you need to specify which Facebook page to post to and include the message and link URL of the file. Once configured, send a test request to ensure everything works correctly.


Conclusion

By following these steps, you can seamlessly integrate OneDrive with your Facebook page using Pabbly Connect. This automation allows you to share files effortlessly every time a new file is uploaded, enhancing your social media presence. Start using Pabbly Connect today to simplify your workflow and improve efficiency.

Ensure you check out Pabbly Connect to create business automation workflows and reduce manual tasks. Pabbly Connect currently offer integration with 2,000+ applications.

Integrate Outlook with Jira Using Pabbly Connect: A Step-by-Step Guide

Learn how to create Jira issues from Outlook emails using Pabbly Connect. This tutorial provides a detailed guide to automate your workflow effectively. This comprehensive guide reveals exactly how to connect your applications and automate repetitive tasks — accessible for professionals of all technical backgrounds.

Watch Step By Step Video Tutorial Below


1. Setting Up Pabbly Connect for Outlook and Jira Integration

To begin the integration process, you will need to access Pabbly Connect. This platform serves as the automation solution that connects your Outlook account with Jira. First, log into your Pabbly Connect account and navigate to the dashboard.

Once you are on the dashboard, click on the big blue button to create a new workflow. Name your workflow something descriptive, like ‘Create Jira Issues from Outlook Mails’. This will allow you to easily identify the automation process in the future.


2. Configuring the Trigger: New Mail in Microsoft 365

After setting up your workflow, the next step is to configure the trigger using Pabbly Connect. Select Microsoft 365 as your trigger application and choose the event ‘New Mail’. This means that every time a new email is received in your Outlook account, the workflow will be activated.

Click on the connect button to link your Microsoft 365 account with Pabbly Connect. A prompt will appear asking for permission to access your account. Confirm the access, and once authorized, click on ‘Save and Send Test Request’. This action will allow Pabbly Connect to fetch the latest email from your Outlook inbox.

  • Select Microsoft 365 as the trigger application.
  • Choose the event ‘New Mail’.
  • Authorize access to your Microsoft account.

After sending a test email to your Outlook, return to Pabbly Connect and check if the email details are successfully retrieved. This ensures that your trigger is configured correctly.


3. Setting Up the Action: Create an Issue in Jira

With the trigger set up, the next step is to define the action in Pabbly Connect. Choose Jira as your action application and select the event ‘Create Issue’. This will allow Pabbly Connect to create a new issue in your Jira project based on the email received.

Before proceeding, you will need the reporter’s ID from Jira. To do this, add a step to search for the user in Jira. Click on ‘Connect’ to establish a connection with your Jira account, and authorize access as you did with Microsoft 365.

  • Select Jira as the action application.
  • Choose the event ‘Create Issue’.
  • Get the reporter’s ID by searching for the user.

Once you have the reporter’s ID, you can map the necessary fields such as project, issue type, summary, and description. Ensure that the issue type is set as ‘Task’ and fill in the summary and description fields with the corresponding data fetched from the email.


4. Testing and Verifying the Integration

After mapping all the required fields in the action step, it is time to test your integration using Pabbly Connect. Click on ‘Save and Send Test Request’. This will attempt to create an issue in Jira based on the information received from the email.

Once the test request is sent, check your Jira account to verify if the issue has been created successfully. Refresh your Jira dashboard and look for the new issue. You should see the summary, description, and any other details you mapped from the email.

If everything is set up correctly, you will see the issue created in Jira with all the relevant information from your Outlook email. This confirms that the integration is working as intended.


5. Conclusion: Automate Your Workflow with Pabbly Connect

Integrating Outlook with Jira using Pabbly Connect allows you to automate the process of creating issues from emails. This not only saves time but also ensures that important tasks are tracked effectively. By following the steps outlined in this tutorial, you can streamline your workflow and enhance productivity.

Ensure you check out Pabbly Connect to create business automation workflows and reduce manual tasks. Pabbly Connect currently offer integration with 2,000+ applications.

Check out Pabbly Connect – Automate your business workflows effortlessly! Sign Up Free – Start your journey with ease! 10,000+ Video Tutorials – Learn step by step! Join Pabbly Facebook Group – Connect with 21,000+ like minded people!

With Pabbly Connect, you can explore further integrations with other applications, making it a versatile tool for automating various tasks. Start using Pabbly Connect today to simplify your work processes!

How to Get WhatsApp Messages for New Stripe Customers Using Pabbly Connect

Learn how to integrate Stripe with WhatsApp using Pabbly Connect to receive messages when new customers are added. Step-by-step tutorial included. Master proven automation processes with practical implementation examples and strategic recommendations you can apply immediately in your workflow.

Watch Step By Step Video Tutorial Below


1. Accessing Pabbly Connect for Stripe WhatsApp Integration

To begin the integration of Stripe with WhatsApp, you will first need to access Pabbly Connect. Go to the Pabbly Connect website by typing the URL Pabbly.com/connect in your browser. This will bring you to the registration page.

Here, you will see options to either sign in if you are an existing user or sign up if you are new. Signing up is quick and takes less than two minutes. Once signed in, you will be redirected to the Pabbly Connect dashboard, where you can create a new workflow for your integration.


2. Creating a Workflow in Pabbly Connect

Once you are on the Pabbly Connect dashboard, click on the ‘Create Workflow’ button. A dialog box will prompt you to name your workflow. For this integration, name it ‘Get WhatsApp Message When a New Stripe Customer is Added’ and click on ‘Create’. This sets the stage for your automation. using Pabbly Connect

  • Name your workflow appropriately for easy identification.
  • Select the trigger application as Stripe.
  • Choose the trigger event as ‘New Customer’.

After creating the workflow, you will see two main sections: Trigger and Action. The trigger is the event that starts the workflow, while the action is what happens as a result. In this case, the trigger application is Stripe, and the action will involve sending a WhatsApp message via another application.


3. Setting Up the Stripe Webhook

Next, you need to set up a webhook in Stripe to connect with Pabbly Connect. Copy the webhook URL generated by Pabbly Connect. Then, go to your Stripe dashboard, navigate to the ‘Developers’ section, and select ‘Webhooks’.

Click on ‘Add Endpoint’ and paste the copied URL in the URL field. Add a description, select the latest API version, and choose the event ‘Customer Created’. Finally, click on ‘Add Events’ to complete the setup. This webhook will now send data to Pabbly Connect every time a new customer is created.


4. Testing the Integration with a Dummy Customer

To test your integration, you need to create a dummy customer in Stripe. Go to the ‘Customers’ tab and click on ‘Create Customer’. Fill in the customer details such as name, email, and address, ensuring that you select the language as English (United Kingdom) and the currency as INR.

  • Enter a name like ‘Smart User One’.
  • Provide an email address, e.g., [email protected].
  • Select the appropriate billing and shipping details.

After saving the customer, return to Pabbly Connect to see if the webhook has received the customer data. If successful, you will see the customer details captured in Pabbly Connect, which confirms that the integration is working correctly.


5. Sending WhatsApp Messages via Pabbly Connect

Now, you will set up the action to send a WhatsApp message. In Pabbly Connect, select your action application as WhatsApp. The action event will be to send a WhatsApp template message. Click on ‘Connect’ and enter your WhatsApp API key to establish the connection. using Pabbly Connect

Map the required fields such as phone number, message template, and any variables you want to include in the message. Ensure that the message template is created in your WhatsApp account and includes dynamic variables for the customer details. After mapping all the necessary fields, send a test request to verify if the WhatsApp message is delivered successfully.


Conclusion

This tutorial demonstrated how to use Pabbly Connect to automate WhatsApp notifications for new customers added in Stripe. By following these steps, you can set up a seamless integration that keeps your team informed instantly. With Pabbly Connect, automating workflows between applications has never been easier.

Ensure you check out Pabbly Connect to create business automation workflows and reduce manual tasks. Pabbly Connect currently offer integration with 2,000+ applications.

How to Send Slack Notifications for Outlook Calendar Events Using Pabbly Connect

Learn how to integrate Outlook Calendar with Slack using Pabbly Connect to automate notifications for new events. Step-by-step guide included. Transform complex automation concepts into accessible, actionable steps that eliminate unnecessary manual work while maximizing existing application capabilities.

Watch Step By Step Video Tutorial Below


1. Setting Up Pabbly Connect for Outlook and Slack Integration

To begin the process of sending Slack notifications for Outlook Calendar events, you need to set up Pabbly Connect. First, visit the Pabbly Connect dashboard by signing up for a free account. Once you’re logged in, click on the ‘Create Workflow’ button to initiate the integration.

Give your workflow a name, such as ‘Microsoft 365 Calendar to Slack’. This name will help you identify the workflow later. After naming your workflow, click on the ‘Create’ button to open the workflow editor.


2. Configuring the Trigger Event in Pabbly Connect

In the Pabbly Connect workflow editor, the first step is to set up the trigger event. This involves connecting your Microsoft 365 Calendar to Pabbly Connect. In the trigger window, search for ‘Microsoft 365’ and select it. Then, choose the trigger event as ‘New Calendar Event’.

  • Select ‘Add New Connection’ to connect your Outlook account.
  • Authorize the connection by selecting your Outlook account and clicking ‘Yes’.
  • Choose the calendar from which you want to receive event details.

After setting up the trigger, click on ‘Save and Send Test Request’ to confirm the connection. This will pull the details of the most recent event from your selected calendar into Pabbly Connect.


3. Formatting Date and Time for Slack Notifications

Once you have the event details in Pabbly Connect, the next step is to format the date and time correctly. This is crucial because the event details received from Microsoft 365 are in UTC format. To do this, add a new action step and search for ‘Date Time Formatter’.

  • Select ‘Format Date with Time Zone’ as the action event.
  • Map the start date and time from the previous step.
  • Set the from time zone as UTC and to time zone as Asia/Kolkata.

Click on ‘Save and Send Test Request’ to see the formatted date and time. Repeat this process for the end date and time to ensure all event details are correctly formatted before sending them to Slack.


4. Sending Notifications to Slack Using Pabbly Connect

After formatting the date and time, the next step is to send a notification to Slack. In the action window, search for ‘Slack’ and select it. Choose the action event as ‘Send Channel Message’. This will allow you to post messages to your desired Slack channel. using Pabbly Connect

Connect your Slack account by selecting ‘Add New Connection’ and authorizing the connection. Once connected, select the channel where you want to send notifications, such as ‘New Event Details’. In the message field, you can create a custom message that includes the event name, description, start date, and end date.


5. Testing the Integration Workflow

With everything set up, it’s time to test your integration. Create a new event in your Outlook Calendar with a specific name, date, and time. Once the event is saved, Pabbly Connect will check for new events every 10 minutes.

After 10 minutes, check your Slack channel to see if the notification has been sent. The message should include all the details of the new event you created. This confirms that the integration is working properly and that Pabbly Connect is successfully automating the notifications between Outlook and Slack.


Conclusion

In this tutorial, we explored how to use Pabbly Connect to send Slack notifications for new Outlook Calendar events. By following the steps outlined, you can automate the process of keeping your team informed about upcoming events, enhancing communication and efficiency.

Ensure you check out Pabbly Connect to create business automation workflows and reduce manual tasks. Pabbly Connect currently offer integration with 2,000+ applications.

How to Create Google Drive Folders From New Rows in Google Sheets Using Pabbly Connect

Learn how to automate folder creation in Google Drive from new rows in Google Sheets with Pabbly Connect. Step-by-step tutorial included. Learn to create powerful connections between your critical applications without requiring specialized programming knowledge or extensive technical background.

Watch Step By Step Video Tutorial Below


1. Setting Up Pabbly Connect for Google Sheets and Google Drive Integration

In this section, we will learn how to set up Pabbly Connect to automate the creation of Google Drive folders from new rows in Google Sheets. First, access your Pabbly Connect dashboard by signing up for a free account if you haven’t already. You can find the sign-up link in the description below.

Once logged in, click on ‘Create Workflow’ and name your workflow, for instance, ‘Google Sheets to Google Drive.’ This will initiate the connection process, where you will set up triggers and actions to automate your tasks.


2. Configuring the Trigger in Pabbly Connect

The next step involves configuring the trigger in Pabbly Connect. In the trigger window, select ‘Google Sheets’ as the app and choose the trigger event as ‘New or Updated Spreadsheet Row.’ This event will allow Pabbly Connect to monitor your Google Sheet for any new rows added.

After selecting the trigger event, you will receive a webhook URL. Copy this URL as it will be used to connect your Google Sheet with Pabbly Connect. Follow these steps to set it up:

  • Go to your Google Sheet, click on Extensions, and select Add-ons.
  • Search for the Pabbly Connect Webhooks add-on and install it.
  • After installation, refresh your Google Sheet.

Next, go to Extensions > Pabbly Connect Webhooks > Initial Setup. Here, select the sheet you are using, paste the webhook URL, and specify the trigger column, which is the last data entry column in your sheet. Click on ‘Send Test’ to verify the setup.


3. Setting Up the Action to Create Folders in Google Drive

Now that the trigger is configured, we will set up the action to create folders in Google Drive using Pabbly Connect. In the action window, search for ‘Google Drive’ as the app. Choose the action event ‘Create a File in a Specific Folder’ to ensure folders are created in your desired directory.

Connect your Google Drive account with Pabbly Connect by clicking on ‘Sign in with Google’ and selecting your account. After connecting, choose the specific folder where the new folders will be created. Map the folder name from the trigger data by selecting the project name from the dropdown.

  • Select the folder in Google Drive where new folders will be created.
  • Map the project name to the file name field.
  • Set the file type to ‘Drive Folder’ and click on ‘Save & Send Test Request.’

Confirm that a new folder has been created in the selected directory in Google Drive, verifying that the integration works as intended.


4. Testing the Integration Workflow

After setting up the action in Pabbly Connect, it’s essential to test the integration to ensure everything functions correctly. Go back to your Google Sheet and add a new row with project details, including the project name, client name, and email address.

Once you add the new row, Pabbly Connect will automatically create a new folder in Google Drive with the same name as the project. This real-time test confirms that your automation is working as designed. Check your Google Drive folder to see if the new folder appears.

If the folder is created successfully, the integration is fully functional. You can repeat this process for any new projects by simply adding rows to your Google Sheet.


5. Conclusion: Automate Your Workflow with Pabbly Connect

In this tutorial, we explored how to automate the creation of Google Drive folders from new rows in Google Sheets using Pabbly Connect. By setting up triggers and actions, you can streamline your workflow and save time.

Ensure you check out Pabbly Connect to create business automation workflows and reduce manual tasks. Pabbly Connect currently offer integration with 2,000+ applications.

Check out Pabbly Connect – Automate your business workflows effortlessly! Sign Up Free – Start your journey with ease! 10,000+ Video Tutorials – Learn step by step! Join Pabbly Facebook Group – Connect with 21,000+ like minded people!

With the steps outlined in this guide, you can easily implement this automation for various applications and enhance your productivity. Remember, Pabbly Connect allows you to integrate multiple applications seamlessly, making it a powerful tool for any business.

Start using Pabbly Connect today to automate your tasks and improve your efficiency!

Integrate Zendesk Tickets to Google Chat Using Pabbly Connect

Learn how to seamlessly integrate Zendesk tickets into Google Chat using Pabbly Connect with this step-by-step tutorial. Learn to create powerful connections between your critical applications without requiring specialized programming knowledge or extensive technical background.

Watch Step By Step Video Tutorial Below


1. Setting Up Pabbly Connect for Zendesk and Google Chat Integration

To start integrating Zendesk tickets into Google Chat, you will need to access Pabbly Connect. This platform serves as the central integration solution that connects various applications seamlessly. Begin by signing into your Pabbly Connect account to access the dashboard.

Once you are on the dashboard, click on the blue button labeled ‘Create Workflow’. This will allow you to initiate the process of setting up your integration. You will be prompted to name your workflow. I am going to name it ‘Zendesk to Google Chat’. After naming it, click on ‘Create’ to proceed.


2. Choosing Trigger Application in Pabbly Connect

In this step, we will define the trigger application in Pabbly Connect. The trigger application is Zendesk, and the event we want to capture is when a new ticket is raised. Click on ‘Choose App’ and select Zendesk from the list.

  • Select ‘New Ticket’ as the event.
  • Pabbly Connect will generate a webhook URL.
  • Copy this webhook URL for integration with Zendesk.

After copying the webhook URL, you will need to set it up in your Zendesk account. This step is crucial for connecting Zendesk with Pabbly Connect.


3. Configuring Webhooks in Zendesk

Now, navigate to your Zendesk account to configure the webhook. Go to the left panel, select ‘Views’, and then click on ‘Manage Views’. From there, click on ‘Apps and Integrations’ and scroll down to find ‘Webhooks’. Here, you will create a new webhook.

Click on ‘Create Webhook’ and fill in the necessary details:

  • Name your webhook (e.g., Google Chat Notification).
  • Paste the copied webhook URL from Pabbly Connect.
  • Select the request method and format accordingly.

Once the webhook is created, click on ‘Test Webhook’ to ensure it is working correctly. This step confirms that your integration is set up properly between Zendesk and Pabbly Connect.


4. Creating the Action in Pabbly Connect for Google Chat

After successfully setting up the trigger, we will now create the action that sends a message to Google Chat. In Pabbly Connect, select Google Chat as the action application. The event for this action will be ‘Create Message’.

Next, you will need to connect your Google Chat account. This requires a webhook URL from Google Chat. To get this URL, go to your Google Chat space, click on the dropdown arrow, and select ‘Manage Webhooks’. Create a new webhook, giving it a name (e.g., Zendesk Ticket Raised).

Make sure to copy the newly generated webhook URL and paste it back into Pabbly Connect. You’ll also need to format the message that will be sent to Google Chat:

Type a message like ‘A new ticket has been created.’ Include ticket details such as title and description.

After setting up the message, click on ‘Save and Send Test Request’. This will send a test message to your Google Chat to ensure everything is working seamlessly with Pabbly Connect.


5. Testing the Integration Between Zendesk and Google Chat

The final step is to test the entire integration to ensure that new tickets in Zendesk are posted to Google Chat. Go back to your Zendesk homepage and create a new ticket by filling out the necessary fields such as requester, subject, and description.

Once the ticket is submitted, return to Pabbly Connect to check if the response has been received. You should see all the details of the ticket captured successfully. After this, check your Google Chat space to see if the notification message has arrived.

If everything is configured correctly, you will receive a message in Google Chat confirming that a new ticket has been created. This successful integration demonstrates how Pabbly Connect can effectively connect Zendesk and Google Chat to automate your workflow.


Conclusion

In this tutorial, we have successfully integrated Zendesk tickets into Google Chat using Pabbly Connect. By following these steps, you can automate notifications and streamline your workflow effectively. Enjoy the benefits of seamless integration!

Ensure you check out Pabbly Connect to create business automation workflows and reduce manual tasks. Pabbly Connect currently offer integration with 2,000+ applications.

Automate Google My Business Review Replies Using Pabbly Connect and ChatGPT

Learn how to automate replies to Google My Business reviews using Pabbly Connect and ChatGPT. Step-by-step guide for seamless integration. Explore systematic approaches to creating efficient automation solutions that convert technical concepts into practical, implementable instructions.

Watch Step By Step Video Tutorial Below


1. Setting Up Pabbly Connect for Google My Business Reviews

To automate replies to Google My Business reviews, start by accessing Pabbly Connect. Sign in to your account and navigate to the dashboard where you can create a new workflow.

Click on the ‘Create Workflow’ button and name your workflow, for example, ‘Automated Review Replies Using ChatGPT’. This will set the stage for integrating Google My Business and ChatGPT for automated responses.


2. Choosing Google My Business as the Trigger Application

In this step, you will select Google My Business as the trigger application in Pabbly Connect. The event you need to choose is ‘New Review’. This means every time a new review is posted, it will trigger the workflow.

  • Select ‘Google My Business’ as the trigger application.
  • Choose the event as ‘New Review’.
  • Connect your Google account to Pabbly Connect.

Once connected, select the account name and location associated with your Google My Business profile. Click on ‘Save and Send Test Request’ to proceed, ensuring a new review is generated for testing.


3. Generating a Reply with ChatGPT

After fetching the new review, the next step involves using ChatGPT to create a unique reply. Choose ChatGPT as the action application in Pabbly Connect. Ensure your ChatGPT account is open in a separate tab for easy access.

Click on ‘Connect’ and add a new connection using your OpenAI API key. Once connected, enter the prompt in the ChatGPT action setup. The prompt should be something like ‘Write a response to the Google My Business review’ followed by the mapped review content.

  • Map the review content to the prompt field.
  • Click on ‘Save and Send Test Request’ to generate the reply.

Once ChatGPT processes the request, it will return a unique response tailored to the review, ready to be posted back on Google My Business.


4. Posting the Reply on Google My Business

The final step involves posting the generated reply back to the Google My Business review. In Pabbly Connect, add another action step and select Google My Business again, this time choosing the ‘Create Reply’ event.

Since you have already connected your Google account, select the existing connection. Map the reply generated by ChatGPT to the appropriate field in the Google My Business action setup. Click on ‘Save and Send Test Request’ to post the reply.

After successfully posting, you can refresh your Google My Business page to see the newly added response to the customer’s review, completing the automation process.


Conclusion

Using Pabbly Connect to automate replies to Google My Business reviews with ChatGPT streamlines customer engagement significantly. By following these steps, you can ensure timely and personalized responses to customer feedback, enhancing your business’s online presence.

Ensure you check out Pabbly Connect to create business automation workflows and reduce manual tasks. Pabbly Connect currently offer integration with 2,000+ applications.