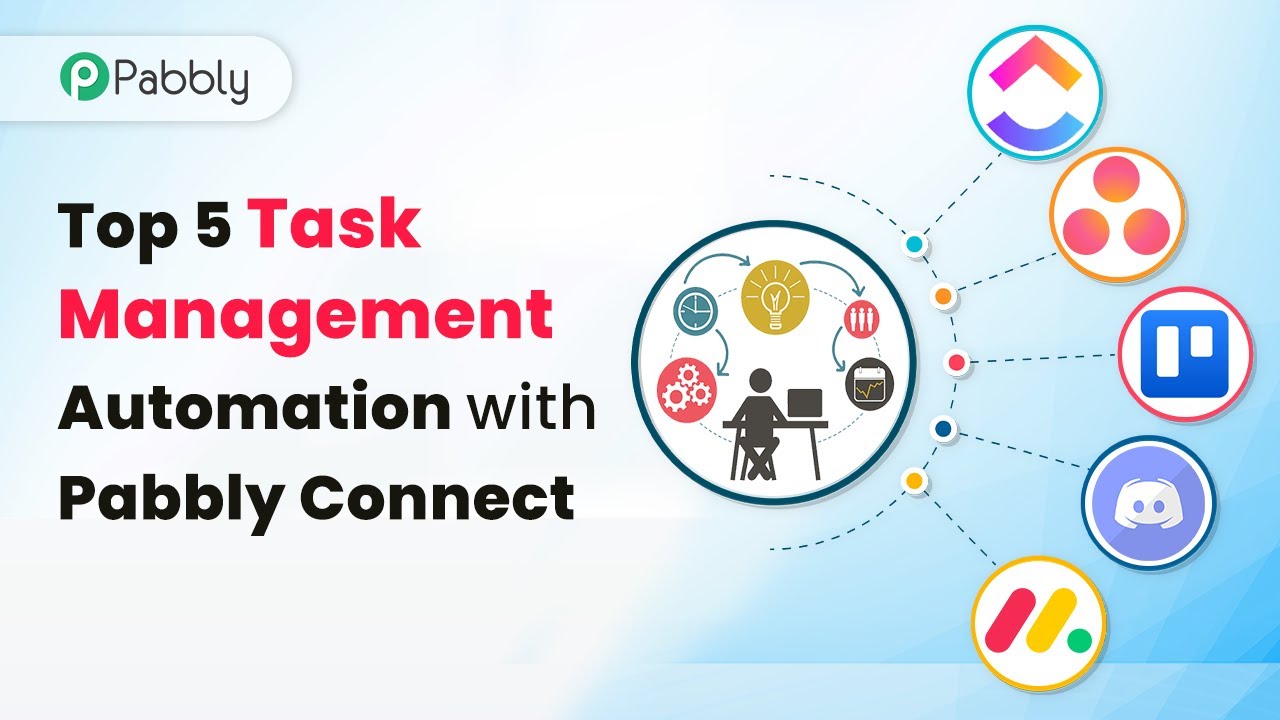
Top 5 ChatGPT Automation with Pabbly Connect

Discover how to automate tasks using Pabbly Connect and ChatGPT with this detailed tutorial covering integrations with Facebook, YouTube, Google, and more. Learn to create powerful connections between your critical applications without requiring specialized programming knowledge or extensive technical background.

Watch Step By Step Video Tutorial Below


1. Automate Newsletter Creation with Pabbly Connect and ChatGPT

Using Pabbly Connect, you can easily automate the process of creating newsletters. The integration begins with Google Sheets as the trigger application. Whenever a new title is added to your Google Sheet, it triggers Pabbly Connect to initiate the workflow.

Next, the action application is ChatGPT, which generates the content for your newsletter based on the title. After generating the newsletter, you can either create a new document or update the existing cell in Google Sheets with the generated content. This process saves time and ensures your newsletters are ready without manual effort.


2. Schedule Facebook Posts Using Pabbly Connect and ChatGPT

Another powerful use of Pabbly Connect is scheduling Facebook posts. This automation can greatly enhance your social media presence. Start by setting Google Sheets as your trigger application, where you can input the content you want to post.

  • Add your post content in Google Sheets.
  • Set a schedule in Pabbly Connect for when the post should go live.
  • Use ChatGPT to generate engaging content for your posts.

Once everything is set in Pabbly Connect, your posts will be published automatically on Facebook at the scheduled times, allowing you to maintain a consistent social media presence without daily manual posting.


3. Generate Social Media Bios and Posts with Pabbly Connect

Creating engaging bios and posts for social media platforms like Instagram and LinkedIn can be challenging. With Pabbly Connect, you can automate this process as well. Start by entering your desired titles in Google Sheets.

ChatGPT will then generate the content based on these titles. After the content is generated, you can update the respective cell in Google Sheets with the new bio or post. This automation ensures that your social media profiles are always up-to-date with fresh content, enhancing your online presence effortlessly.


4. Write Stories Using Pabbly Connect and ChatGPT

For teachers, students, or anyone who needs to create stories, Pabbly Connect can streamline this process. Begin by inputting the title of the story in Google Sheets, which serves as the trigger for the workflow.

  • Set Google Sheets as the trigger application.
  • Use ChatGPT to generate the story based on the title provided.
  • Create a document with the story or save it back to Google Sheets.

This method not only saves time but also provides you with high-quality content that can be shared with your audience or used for personal projects, all thanks to the integration capabilities of Pabbly Connect.


5. Generate YouTube Scripts with Pabbly Connect and ChatGPT

For YouTubers, creating scripts can be a time-consuming task. With Pabbly Connect, you can automate script generation. Start by entering the title of your video in Google Sheets.

As soon as a new title is added, Pabbly Connect triggers ChatGPT to generate a complete script for your YouTube video. Once the script is ready, it can be updated directly in Google Sheets, allowing you to focus on filming rather than scripting.


Conclusion

In conclusion, using Pabbly Connect for automating tasks with ChatGPT can significantly enhance productivity across various applications like Facebook, YouTube, and Google Sheets. This integration allows users to streamline their workflows, saving time and improving efficiency.

Ensure you check out Pabbly Connect to create business automation workflows and reduce manual tasks. Pabbly Connect currently offer integration with 2,000+ applications.

How to Send Welcome Message to Facebook Leads on WhatsApp Using Pabbly Connect

Learn how to automate sending welcome messages to Facebook leads on WhatsApp using Pabbly Connect. Follow our step-by-step guide for seamless integration. Explore systematic approaches to creating efficient automation solutions that convert technical concepts into practical, implementable instructions.

Watch Step By Step Video Tutorial Below


1. Accessing Pabbly Connect for Facebook WhatsApp Integration

To send welcome messages to Facebook leads on WhatsApp, you will first need to access Pabbly Connect. This powerful automation tool allows you to create workflows that connect various applications seamlessly. Start by signing up for a free account on Pabbly Connect, which can be done in just a couple of minutes.

Once you have created your account, log in to your dashboard. Click on the blue button labeled ‘Create Workflow’ to initiate the setup process. You can name your workflow something like ‘Send Welcome Message on WhatsApp to Facebook Leads’. This name will help you easily identify your workflow later.


2. Setting Up Trigger Event in Pabbly Connect

The next step involves setting up the trigger event in Pabbly Connect. For this automation, select the trigger event as ‘New Lead’ from the Facebook Lead Ads application. This event will activate the workflow whenever a new lead submits their information through your Facebook lead generation form.

  • Choose Facebook Lead Ads as the application.
  • Select the trigger event as ‘New Lead’.
  • Connect your Facebook account by clicking on ‘Connect’.

After connecting your Facebook account, you will need to select the specific Facebook page and lead form from which you want to capture leads. Once selected, click on the ‘Save and Send Test Request’ button to verify that the connection is working correctly.


3. Configuring WhatsApp Integration with Pabbly Connect

After setting up the Facebook trigger, the next step is to configure the WhatsApp integration using Pabbly Connect. You will use the Interact application for this purpose, which facilitates access to the WhatsApp Cloud API. Begin by selecting Interact as your action application.

To connect Interact, click on ‘Connect’ and add a new connection. You will be prompted to enter a secret key from your Interact account. Once connected, you need to provide the recipient’s phone number and the template code for the message you want to send. Make sure to map the phone number field from the Facebook lead data.

  • Select the action event as ‘Send Message’.
  • Paste the WhatsApp template code you created earlier.
  • Map the required fields such as customer name and company name.

After filling out all necessary fields, click on ‘Save and Send Test Request’ to ensure that the WhatsApp message is sent successfully to the lead.


4. Testing the Integration with Pabbly Connect

Once you have configured both Facebook and WhatsApp integrations in Pabbly Connect, it’s time to test the entire workflow. To do this, go back to your Facebook lead generation form and submit a test lead. Ensure that the information provided matches the fields you have mapped in your Pabbly Connect workflow.

After submitting the test lead, return to your Pabbly Connect dashboard to check if the response is recorded. You should see the details of the submitted lead, including their name, email, and phone number. If everything is set up correctly, you will receive a WhatsApp message on the specified number shortly after the test submission.


5. Finalizing and Automating Your Workflow with Pabbly Connect

After successful testing, you can finalize your automation in Pabbly Connect. This automation will now run in the background, sending welcome messages to every new lead that submits the Facebook form. You can close Pabbly Connect and let the automation work without any further intervention.

Moreover, this workflow can be adapted for other platforms like Google Ads or LinkedIn Ads by simply changing the trigger application in Pabbly Connect. This flexibility allows you to automate your communications across different channels with ease.

By implementing this integration, you not only enhance your customer engagement but also streamline your lead management process, saving you significant time and effort.


Conclusion

In this tutorial, we explored how to send welcome messages to Facebook leads on WhatsApp using Pabbly Connect. By automating this process, you can ensure timely communication with your leads, enhancing engagement and improving customer satisfaction. Start using Pabbly Connect today to streamline your workflows and boost your business efficiency.

Ensure you check out Pabbly Connect to create business automation workflows and reduce manual tasks. Pabbly Connect currently offer integration with 2,000+ applications.

How to Save Gmail Attachments to OneDrive Using Pabbly Connect

Learn how to automate saving Gmail attachments to OneDrive using Pabbly Connect. Follow this step-by-step tutorial for seamless integration. Explore systematic approaches to creating efficient automation solutions that convert technical concepts into practical, implementable instructions.

Watch Step By Step Video Tutorial Below


1. Setting Up Pabbly Connect for Gmail and OneDrive Integration

To start saving Gmail attachments to OneDrive, you need to set up Pabbly Connect. This integration tool allows you to automate workflows between Gmail and OneDrive seamlessly. Begin by creating a free account on Pabbly Connect, which only takes a couple of minutes.

Once logged in, navigate to the dashboard and click on the blue ‘Create Workflow’ button. Name your workflow, for instance, ‘Sync Gmail and OneDrive Automatically,’ and click on ‘Create’. This initiates the process of connecting Gmail and OneDrive through Pabbly Connect.


2. Selecting Gmail and OneDrive in Pabbly Connect

In the workflow setup, you will see two boxes for Trigger and Action. The Trigger is the event that starts the workflow, while the Action is what happens as a result. For this integration, select ‘Email Parser by Pabbly’ as the trigger. This feature allows you to receive emails in Pabbly Connect directly.

  • Select ‘Email Parser by Pabbly’ as the trigger application.
  • Copy the email address provided by Pabbly Connect.
  • Set up forwarding from your Gmail account to this email address.

Now, proceed to your Gmail settings, navigate to ‘Forwarding and POP/IMAP’, and add the copied email parser address as a forwarding address. Confirm the forwarding by verifying the code sent to your Pabbly Connect email parser. This step is crucial for connecting Gmail to Pabbly Connect.


3. Testing the Gmail and OneDrive Connection

After setting up the forwarding, it’s time to test if the connection is working correctly. Send a test email with an attachment to your Gmail account. Go back to Pabbly Connect and click on the ‘Recapture Email Response’ button. This action will capture the incoming email data.

Once the email is received, check the response in Pabbly Connect. You should see the email details, including the subject and the attachment. This confirms that your Gmail is successfully connected to Pabbly Connect and ready to automate saving attachments.


4. Filtering Email Attachments for Specific Criteria

Next, you can set conditions to filter which attachments should be saved to OneDrive. In Pabbly Connect, use the filter feature to specify criteria based on the email subject or body. For instance, you can filter emails that contain the words ‘design’ or ‘bridal’ in the subject line.

  • Select the filter condition based on the subject line or body text.
  • Choose ‘contains’ for the filter type.
  • Add multiple conditions as needed (e.g., ‘design’ OR ‘bridal’).

After setting your filter conditions, click on ‘Save and Send Test Request’. If the conditions are met, the automation will proceed to save the attachment to OneDrive, ensuring only relevant files are stored.


5. Uploading Attachments to OneDrive Using Pabbly Connect

Finally, to upload the attachments to OneDrive, you need to set up the Action in Pabbly Connect. Select ‘Microsoft OneDrive’ as the action application, and choose the action event ‘Upload a File’. Connect your OneDrive account by providing the necessary permissions.

Once connected, select the folder in OneDrive where you want to save the attachments. Map the fields from the Gmail data to the OneDrive upload fields, such as the file name and file URL. After mapping, click on ‘Save and Send Test Request’. If successful, the attachment will appear in your OneDrive folder, confirming the integration works seamlessly.


Conclusion

With Pabbly Connect, automating the process of saving Gmail attachments to OneDrive is straightforward and efficient. This tutorial provided a step-by-step guide to set up the integration, ensuring only relevant attachments are saved automatically. Enjoy the convenience of having your important files backed up effortlessly!

Ensure you check out Pabbly Connect to create business automation workflows and reduce manual tasks. Pabbly Connect currently offer integration with 2,000+ applications.

How to Create Google Contacts from Typeform Responses Using Pabbly Connect

Learn how to automate the creation of Google Contacts from Typeform responses using Pabbly Connect. Follow this step-by-step guide for seamless integration. Discover how to seamlessly connect your essential tools through accessible instructions that make powerful automation available to professionals at every skill level.

Watch Step By Step Video Tutorial Below


1. Setting Up Pabbly Connect for Google Contacts Integration

To create Google Contacts from Typeform responses, you first need to access Pabbly Connect. This platform allows seamless integration between various applications. Start by signing in to your Pabbly account and navigating to the dashboard.

Once on the dashboard, locate the blue button labeled ‘Create Workflow’. Click on it and name your workflow (e.g., ‘Create Google Contacts from Typeform Responses’). This action will set the stage for automating the contact creation process.


2. Setting Typeform as the Trigger in Pabbly Connect

In this step, you will configure Typeform as the trigger application in Pabbly Connect. Select Typeform from the application list and choose the event labeled ‘New Entry’. This event will trigger the workflow every time a new form submission occurs.

To connect Typeform with Pabbly Connect, click on ‘Add New Connection’. Authorize the connection by accepting the permissions requested. Once connected, select the specific form (e.g., ‘Request Form’) you want to use for this integration.


3. Mapping Data from Typeform Responses

After setting up the trigger, you need to test the connection by submitting a Typeform response. Fill out the form with the necessary details such as name, birth date, email address, address, and contact number. Once submitted, return to Pabbly Connect to see the captured response.

  • Name
  • Birth Date
  • Email Address
  • Address
  • Contact Number

Next, you will need to add a step to split the birth date into three parts (month, date, year) using the Text Formatter built into Pabbly Connect. Set the action event to ‘Split Text’ and map the birth date from the previous response.


4. Creating Google Contacts with Pabbly Connect

Now that the data is mapped, it’s time to create the Google Contact. Select Google Contacts as your action application in Pabbly Connect. Choose the event ‘Create Contact’ and connect your Google account by authorizing Pabbly to access it.

In the setup for creating a contact, map the fields such as email address, display name, family name, and address using the data captured from Typeform. Make sure to map the split birth date fields correctly to the respective fields in Google Contacts.


5. Testing the Integration and Verifying Contacts

Once you have set up the Google Contacts action, click on ‘Save and Send Test Request’ to create a test contact. If the response indicates success, it means your integration is set up correctly.

To verify, go to your Google Contacts and refresh the page. You should see the newly created contact with all the mapped details including name, email address, phone number, and address. This confirms that every time someone fills out the Typeform, a new Google Contact will be automatically created through Pabbly Connect.


Conclusion

In this tutorial, we explored how to automate the creation of Google Contacts from Typeform responses using Pabbly Connect. By following these steps, you can streamline your contact management process effectively.

Ensure you check out Pabbly Connect to create business automation workflows and reduce manual tasks. Pabbly Connect currently offer integration with 2,000+ applications.

Top 5 Microsoft Excel Automations Using Pabbly Connect

Discover the top 5 Microsoft Excel automations using Pabbly Connect. Learn how to integrate Excel with Google Forms, Razerpay, HubSpot, and more! Follow this definitive guide to creating powerful automated workflows with straightforward, efficiency-focused solutions that save valuable time.

Watch Step By Step Video Tutorial Below


1. Automatically Add Google Forms Responses to Microsoft Excel Using Pabbly Connect

Using Pabbly Connect, you can seamlessly integrate Google Forms with Microsoft Excel. This automation ensures that every time a new form response is received, the data is automatically added to your Excel spreadsheet without any manual input.

To set this up, follow these steps:

  • Open Pabbly Connect and create a new workflow.
  • Set Google Forms as the trigger application.
  • Select ‘New Response’ as the trigger event.
  • Connect your Google account and select the form you wish to integrate.
  • Choose Microsoft Excel as the action application.
  • Select ‘Add Row’ as the action event and map the fields accordingly.

Once set up, every new response from Google Forms will automatically populate your Microsoft Excel spreadsheet, streamlining your data management process.


2. Capture Razorpay Payment Details in Microsoft Excel with Pabbly Connect

Integrating Razorpay with Microsoft Excel using Pabbly Connect allows you to automatically log payment details into your Excel spreadsheet. This ensures that you keep track of every transaction without manual entry.

To automate this process, follow these steps:

  • Create a new workflow in Pabbly Connect.
  • Set Razorpay as the trigger application.
  • Select ‘Payment Captured’ as the trigger event.
  • Connect your Razorpay account.
  • Choose Microsoft Excel as the action application.
  • Select ‘Add Row’ as the action event and map the payment details to the corresponding Excel fields.

With this integration, every time a payment is made through Razorpay, the details will be automatically recorded in your Microsoft Excel spreadsheet, enhancing financial tracking.


3. Create Deals in HubSpot CRM from Microsoft Excel Using Pabbly Connect

Utilizing Pabbly Connect for integrating Microsoft Excel with HubSpot CRM allows you to create new deals automatically whenever you add new entries in Excel. This integration helps in managing customer relationships efficiently.

To set this up, follow these steps:

Open Pabbly Connect and create a new workflow. Set Microsoft Excel as the trigger application. Select ‘New Row’ as the trigger event. Connect your Microsoft account and choose the relevant spreadsheet. Choose HubSpot as the action application. Select ‘Create Deal’ as the action event and map the required fields accordingly.

This setup ensures that any new entry in your Excel spreadsheet will automatically generate a new deal in HubSpot, streamlining your sales process.


4. Log Telegram Messages into Microsoft Excel with Pabbly Connect

With Pabbly Connect, you can integrate Telegram with Microsoft Excel to automatically log messages received on Telegram into your Excel spreadsheet. This is useful for tracking communication.

To automate this process, follow these steps:

Create a new workflow in Pabbly Connect. Set Telegram as the trigger application. Select ‘New Message’ as the trigger event. Connect your Telegram account. Choose Microsoft Excel as the action application. Select ‘Add Row’ as the action event and map the message details to the corresponding Excel fields.

Once configured, every new message received on Telegram will automatically populate your Microsoft Excel spreadsheet, allowing for easy reference and analysis.


5. Capture YouTube Comments into Microsoft Excel Using Pabbly Connect

Integrating YouTube with Microsoft Excel via Pabbly Connect allows you to automatically log comments from your YouTube videos into an Excel spreadsheet. This is beneficial for content creators who want to analyze viewer feedback.

To set this up, follow these steps:

Open Pabbly Connect and create a new workflow. Set YouTube as the trigger application. Select ‘New Comment’ as the trigger event. Connect your YouTube account. Choose Microsoft Excel as the action application. Select ‘Add Row’ as the action event and map the comment details to the corresponding Excel fields.

After this integration is set up, every new comment on your YouTube videos will be automatically recorded in your Microsoft Excel spreadsheet, making it easier to track and respond to viewer engagement.


Conclusion

In conclusion, using Pabbly Connect for automating Microsoft Excel tasks enhances productivity by seamlessly integrating various applications like Google Forms, Razorpay, HubSpot, Telegram, and YouTube. These automations eliminate manual data entry, ensuring you can focus on more strategic tasks.

Ensure you check out Pabbly Connect to create business automation workflows and reduce manual tasks. Pabbly Connect currently offer integration with 2,000+ applications.

How to Send Purchase Events to Facebook Conversion API from Google Sheets Using Pabbly Connect

Learn how to automate sending purchase events to Facebook Conversion API from Google Sheets using Pabbly Connect with this step-by-step tutorial. Build sophisticated automated workflows in less time than you think. This guide translates complex integrations into straightforward steps for immediate implementation.

Watch Step By Step Video Tutorial Below


1. Setting Up Pabbly Connect for Google Sheets and Facebook Conversion API

To send purchase events to Facebook Conversion API from Google Sheets, we first need to set up Pabbly Connect. Start by accessing your Pabbly Connect account. If you don’t have one, you can create a free account using the link provided in the description.

Once logged in, click on ‘Create Workflow’ and name your workflow, for instance, ‘Google Sheets to Facebook Conversion API’. This workflow will facilitate the automation process, allowing you to send purchase details directly from Google Sheets to Facebook.


2. Configuring the Trigger in Pabbly Connect

In the trigger window of Pabbly Connect, select Google Sheets as the application. Choose the event as ‘New or Updated Spreadsheet Row’. This setup ensures that every time you add a new purchase detail in your Google Sheet, it triggers the automation.

  • Select Google Sheets as the app.
  • Choose ‘New or Updated Spreadsheet Row’ as the event.
  • Copy the webhook URL provided by Pabbly Connect.

After copying the webhook URL, go to your Google Sheet, navigate to Extensions, and then to Add-ons. Install the Pabbly Webhooks add-on if you haven’t already. Refresh your Google Sheet, then go to Extensions again, hover over Pabbly Connect Webhooks, and click on Initial Setup to paste the webhook URL.


3. Configuring Google Sheets for Automation

In the Initial Setup box, you will need to select the specific sheet from which you want to send data. This is crucial as it defines the source of your purchase event data. Paste the copied webhook URL into the designated field and specify the trigger column, which is usually the last column where data is entered.

After configuring these settings, click on ‘Send Test’ to ensure that the data is being captured correctly. You should see a confirmation that the test data was sent successfully, indicating that your Google Sheets is now connected to Pabbly Connect.


4. Setting Up the Action to Send Data to Facebook Conversion API

Next, we need to configure the action in Pabbly Connect. In the action window, search for Facebook Conversion API and select it. Choose the action event as ‘Send Purchase Event’. This will allow the purchase details captured from Google Sheets to be sent to Facebook.

  • Connect your Facebook account through the provided button.
  • Enter your Facebook Pixel ID, which can be found in your Facebook Business Manager.
  • Map the necessary fields such as event ID, event time, and customer details.

By mapping these fields correctly, you ensure that the purchase events are accurately recorded in Facebook’s system, optimizing your ad campaigns effectively.


5. Testing the Automation Workflow

After configuring all settings, it’s time to test the automation workflow. Go back to your Google Sheet and add a new row with the purchase details. Once added, check the Facebook Event Manager to see if the purchase event appears.

If everything is set up correctly, you should see the new purchase event recorded in your Facebook account. Remember to remove any test event codes before going live to ensure accurate data is sent to Facebook.

This automation allows you to streamline the process of sending purchase events from Google Sheets to Facebook Conversion API using Pabbly Connect, ensuring your advertising efforts are optimized efficiently.


Conclusion

In this tutorial, we demonstrated how to automate sending purchase events to Facebook Conversion API from Google Sheets using Pabbly Connect. By following these steps, you can enhance your ad optimization process effortlessly.

Ensure you check out Pabbly Connect to create business automation workflows and reduce manual tasks. Pabbly Connect currently offer integration with 2,000+ applications.

How to Share New OneDrive Files on Pinterest Using Pabbly Connect

Learn how to seamlessly share new OneDrive files as pins on Pinterest using Pabbly Connect in this detailed tutorial. Step-by-step guidance included! Eliminate manual repetitive tasks from your workflow. Discover proven automation methods with intuitive steps designed for efficiency-minded professionals.

Watch Step By Step Video Tutorial Below


1. Introduction to Pabbly Connect for OneDrive and Pinterest Integration

In this section, we will explore how to use Pabbly Connect to automate the process of sharing new OneDrive files as pins on Pinterest. This integration allows users to streamline their workflow, ensuring that every new image uploaded to OneDrive is automatically shared on Pinterest.

By utilizing Pabbly Connect, you can easily set up a workflow that connects OneDrive and Pinterest, making it a powerful tool for users who frequently upload images. Let’s dive into the steps required to set this up.


2. Setting Up Your Pabbly Connect Account

To get started, you need to create an account with Pabbly Connect. This process is simple and can be done in just a few minutes. Visit the Pabbly Connect website and sign up for a free account.

  • Go to the Pabbly Connect website.
  • Click on the sign-up button.
  • Fill in the required details to create your account.

Once your account is created, log into your Pabbly Connect dashboard. From here, you can begin creating your workflow to connect OneDrive and Pinterest.


3. Creating a New Workflow in Pabbly Connect

After logging into your Pabbly Connect dashboard, the next step is to create a new workflow. Click on the ‘Create Workflow’ button and name your workflow, for example, ‘OneDrive to Pinterest’. This will help you identify the workflow later. using Pabbly Connect

In your new workflow, you will see two sections: the trigger window and the action window. The trigger window is where you will set up the connection to OneDrive, and the action window is for Pinterest.

  • Select OneDrive as your trigger app.
  • Choose ‘New File’ as the trigger event.
  • Connect your OneDrive account to Pabbly Connect.

Follow the prompts to authenticate your OneDrive account, allowing Pabbly Connect to access your files. This step is crucial for capturing new files uploaded to your OneDrive folder.


4. Configuring the Trigger Settings for OneDrive

Now that your OneDrive account is connected, you need to specify the folder from which Pabbly Connect will monitor new files. In the trigger settings, enter the folder path, such as ‘Pinterest’. Make sure to remove any unnecessary prefixes that Pabbly Connect may include. using Pabbly Connect

After setting the folder path, select the event type as ‘New File Created’. This tells Pabbly Connect to trigger the workflow whenever a new file is added to that folder. Click on the ‘Save and Send Test Request’ button to ensure that Pabbly Connect can retrieve the most recent file details.

Confirm the folder path is correct. Select the correct event type. Test the trigger to ensure it captures the latest file.

Once you receive a successful response from Pabbly Connect, you can proceed to set up the action for Pinterest.


5. Adding the Action to Create a Pin on Pinterest

In the action window, select Pinterest as the app where you want to create a new pin. Choose the action event ‘Create Pin’. Connect your Pinterest account to Pabbly Connect by following the prompts and granting the necessary permissions. using Pabbly Connect

After connecting, you will need to specify the board where the new pin will be added. Map the image URL received from the OneDrive trigger to the image URL field in Pinterest. You can also set the title for the pin based on the file name uploaded to OneDrive.

Select the appropriate Pinterest board for the pin. Map the image URL from OneDrive to Pinterest. Enter the title for the pin.

After completing these settings, click on ‘Save and Send Test Request’ to verify that the pin is created in your Pinterest account. If everything is set up correctly, you will see the new pin appear on your selected Pinterest board.


Conclusion

Using Pabbly Connect, you can effortlessly share new OneDrive files as pins on Pinterest. This integration not only saves time but also ensures that your creative content reaches your audience without manual effort. By following the steps outlined in this tutorial, you can automate your workflow and enhance your productivity.

Ensure you check out Pabbly Connect to create business automation workflows and reduce manual tasks. Pabbly Connect currently offer integration with 2,000+ applications.

How to Send Slack Channel Messages for Newly Scheduled DaySchedule Events Using Pabbly Connect

Learn how to use Pabbly Connect to automate sending Slack messages for newly scheduled DaySchedule events. Step-by-step guide included. Discover how to seamlessly connect your essential tools through accessible instructions that make powerful automation available to professionals at every skill level.

Watch Step By Step Video Tutorial Below


1. Setting Up Pabbly Connect for Integration

To send Slack channel messages for newly scheduled DaySchedule events, you first need to access Pabbly Connect. This platform allows you to create automated workflows that connect different applications seamlessly. Start by signing into your Pabbly Connect account.

Once logged in, navigate to the dashboard where you can see various applications provided by Pabbly. Click on the blue button labeled ‘Create Workflow’ to begin setting up your integration. Name your workflow something descriptive, like ‘Send Slack Channel Messages for Bookings at DaySchedule,’ and click on ‘Create’ to proceed.


2. Configuring DaySchedule Trigger in Pabbly Connect

In this step, you will configure the trigger that will initiate the workflow. The trigger application will be DaySchedule, and the trigger event will be ‘New Appointment’ or ‘New Booking Event Scheduled.’ This means that every time a new booking is confirmed, it will trigger the workflow. using Pabbly Connect

  • Select ‘DaySchedule’ as your trigger application.
  • Choose the trigger event as ‘New Appointment’.
  • Click on ‘Add New Connection’ to connect your DaySchedule account.

After connecting, allow Pabbly Connect to access your DaySchedule account. Once connected, click on ‘Save and Send Test Request’ to start waiting for the response. To test this, make a demo booking in your DaySchedule account and confirm it. This will send the relevant data back to Pabbly Connect.


3. Sending Messages to Slack Using Pabbly Connect

After successfully receiving the response from DaySchedule, it’s time to set up the action that sends messages to Slack. In this case, the action application will be Slack, and the event will be ‘Send Channel Message.’ This allows you to send a notification to your Slack channel whenever a new booking is made.

To connect Slack, select it as your action application and click on ‘Add New Connection.’ You will need to enter a token for either a user or a bot. It is recommended to use a bot token for sending messages. After entering the token, click on ‘Save’ and allow Pabbly Connect to access your Slack account.

  • Choose the channel where you want to send the message (e.g., New Leads).
  • Compose your message, including details like the name, contact number, and query of the booking.
  • Click on ‘Save and Send Test Request’ to send the message to Slack.

Once the test is successful, you will see the message appear in your Slack channel. This confirms that the integration between DaySchedule and Slack via Pabbly Connect is working as intended.


4. Benefits of Using Pabbly Connect for Automation

Integrating DaySchedule with Slack using Pabbly Connect offers several advantages. This automation ensures that your team is instantly informed about new bookings without giving them direct access to your DaySchedule account. This is particularly useful for teams that rely on real-time updates.

By setting up this integration, you streamline communication and enhance productivity. Your team can quickly access booking details shared in the Slack channel, enabling them to respond promptly to client inquiries. Additionally, using Pabbly Connect allows you to integrate multiple applications effortlessly.


5. Conclusion

In conclusion, using Pabbly Connect to send Slack channel messages for newly scheduled DaySchedule events is a straightforward process. By following the steps outlined above, you can automate notifications and improve team communication. This integration not only saves time but also enhances efficiency within your team.

Ensure you check out Pabbly Connect to create business automation workflows and reduce manual tasks. Pabbly Connect currently offer integration with 2,000+ applications.

Automating your workflows with Pabbly Connect allows you to focus on more critical tasks while ensuring your team stays informed about important events. Start integrating today to experience the benefits of automation!

How to Add DaySchedule Confirmed Bookings to Google Sheets Using Pabbly Connect

Learn how to automate adding confirmed bookings from DaySchedule to Google Sheets using Pabbly Connect. Step-by-step tutorial for seamless integration. Explore efficient methods for automating routine tasks with clear, concise instructions suited for both newcomers and experienced professionals.

Watch Step By Step Video Tutorial Below


1. Access Pabbly Connect for Integration

To automate the process of adding DaySchedule confirmed bookings to Google Sheets, start by accessing Pabbly Connect. This platform is essential for creating the integration you need.

First, sign in to your Pabbly Connect account. Once logged in, navigate to the dashboard where you can see all available applications. Here, you will initiate the workflow that connects DaySchedule to Google Sheets.


2. Create a New Workflow in Pabbly Connect

In the Pabbly Connect dashboard, locate the blue button labeled ‘Create Workflow’ on the right-hand side. Click this button to start setting up your integration.

After clicking, name your workflow something descriptive, like ‘Add New Row in Google Sheets for DaySchedule Bookings’. Click on ‘Create’ to generate a blank workflow. You will now see the Trigger and Action windows where you can specify your integration details.


3. Set Up the Trigger for DaySchedule

In the Trigger section, select DaySchedule as your application. The event you want to trigger this integration is ‘New Event Scheduled’. This means every time a new booking is confirmed in DaySchedule, it will activate the workflow.

Next, you need to connect your DaySchedule account to Pabbly Connect. Click on ‘Connect’, then ‘Add New Connection’. Allow Pabbly Connect to access your DaySchedule account by clicking ‘Allow’. This connection is crucial for retrieving booking details.


4. Format Contact Number Before Sending to Google Sheets

After setting up your trigger, you need to ensure the contact number is formatted correctly. Use the Text Formatter feature within Pabbly Connect to replace any spaces between the country code and the mobile number.

  • Click on the plus sign between the Trigger and Action windows.
  • Select ‘Text Formatter’ and choose the ‘Replace Text’ action.
  • Map the contact number from the previous step and replace the space with nothing.

By doing this, you ensure that the contact number is formatted correctly when it gets added to Google Sheets. This step is essential for maintaining data integrity.


5. Add a Row to Google Sheets

Now that you have formatted the contact number, it’s time to set up the Action step. Choose Google Sheets as your action application and select ‘Add New Row’ as the event. using Pabbly Connect

Connect your Google account by clicking ‘Add New Connection’. Choose your Google account and allow access. Select the specific Google Sheet where you want to add the booking details, such as ‘Career Consultation Bookings’. Map the necessary fields like name, contact, email, and date from the previous steps to the corresponding columns in Google Sheets.


Conclusion

This tutorial has guided you through the process of using Pabbly Connect to automatically add confirmed bookings from DaySchedule to Google Sheets. By following these steps, you can streamline your booking management process efficiently.

Ensure you check out Pabbly Connect to create business automation workflows and reduce manual tasks. Pabbly Connect currently offer integration with 2,000+ applications.

Integrate LinkedIn Leads with MS Excel Using Pabbly Connect

Learn how to automatically add LinkedIn leads to MS Excel using Pabbly Connect. Follow our step-by-step guide for seamless integration. Eliminate manual repetitive tasks from your workflow. Discover proven automation methods with intuitive steps designed for efficiency-minded professionals.

Watch Step By Step Video Tutorial Below


1. Accessing Pabbly Connect for LinkedIn Leads Integration

To start integrating LinkedIn leads into MS Excel, you first need to access Pabbly Connect. This automation platform allows seamless integration between various applications, including LinkedIn and MS Excel.

Log into your existing Pabbly Connect account or create a free account if you haven’t yet. Once logged in, you will reach the dashboard where you can create a new workflow for this integration.


2. Creating a New Workflow in Pabbly Connect

After accessing Pabbly Connect, click on the blue button labeled ‘Create Workflow’. You will need to provide a name for your workflow; for example, ‘Sync LinkedIn Leads with MS Excel Automatically’.

  • Click on ‘Create’ to proceed.
  • You will see two boxes—Trigger and Action.
  • Select ‘LinkedIn Lead Generation Form’ as the trigger application.

This step is crucial as it sets up the automation process. By selecting the trigger, you specify that whenever a new lead is generated through your LinkedIn form, it will initiate the action to add that lead to MS Excel.


3. Setting Up LinkedIn Lead Generation as Trigger

In this step, you will configure the trigger event in Pabbly Connect. Choose the trigger event as ‘New Form Response’. Click on ‘Connect’, then select ‘Add New Connection’ to link your LinkedIn account.

Once connected, you will see a list of your LinkedIn lead generation forms. Select the specific lead form you want to use. This allows Pabbly Connect to fetch lead data from that form whenever a new lead is submitted.

  • Select your LinkedIn account and grant necessary permissions.
  • Choose the lead form from the dropdown list.
  • Click on ‘Save and Send Test Request’ to ensure the connection is working.

This successful connection will allow Pabbly Connect to capture lead data from LinkedIn in real time. You will receive a response indicating the data has been successfully fetched.


4. Adding Leads to MS Excel Using Pabbly Connect

Now that you have set up the trigger, the next step is to configure the action in Pabbly Connect. Choose ‘Microsoft Excel’ as the action application and select ‘Add a Row to Worksheet’ as the action event.

Connect your Microsoft Excel account to Pabbly Connect. Once connected, select the specific workbook and worksheet where you want the lead data to be added. This is crucial for ensuring that the leads are stored correctly.

Choose the workbook containing your lead data. Select the worksheet where the data will be inserted. Map the fields from the LinkedIn response to the corresponding columns in Excel.

By mapping these fields, you ensure that every time a lead is generated, their information will automatically populate into MS Excel without manual intervention.


5. Testing and Activating Your Integration

After mapping the fields, click on ‘Save and Send Test Request’ to test the integration. This will send a test lead to your selected MS Excel worksheet. Refresh the worksheet to see if the data appears correctly.

If the test is successful, your integration is complete! From now on, every time a new lead is generated in your LinkedIn lead form, Pabbly Connect will add that lead to your MS Excel automatically every ten minutes.

This automation saves you time and ensures that your lead data is always up to date. You can further customize the workflow in Pabbly Connect to suit your business needs.


Conclusion

Integrating LinkedIn leads into MS Excel using Pabbly Connect streamlines your lead management process. This tutorial detailed how to set up and automate this integration effectively, ensuring your lead data is always current and accessible.

Ensure you check out Pabbly Connect to create business automation workflows and reduce manual tasks. Pabbly Connect currently offer integration with 2,000+ applications.