Integrate Airtable and Basecamp Using Pabbly Connect: A Step-by-Step Guide

Learn how to automate the creation of Basecamp To-Dos from Airtable records using Pabbly Connect. Follow this detailed tutorial for seamless integration. Develop expertise in application integration and learn how to design streamlined automation workflows using proven, simplified approaches.

Watch Step By Step Video Tutorial Below


1. Setting Up Pabbly Connect for Integration

To start integrating Airtable with Basecamp, first, access Pabbly Connect by visiting the official website. If you’re new, sign up for a free account to explore its features. This platform enables seamless automation between your applications, making your workflow efficient.

Once logged in, navigate to the dashboard. Click on the ‘Create Workflow’ button to begin. Name your workflow something like ‘Create To-Dos in Basecamp from Airtable Records’ and click ‘Create’. This step sets up the foundation for your automation.


2. Selecting Trigger and Action in Pabbly Connect

In the workflow setup, you will see two boxes labeled ‘Trigger’ and ‘Action’. For this integration, select Airtable as your trigger application. Choose the event ‘New Record’ to initiate the workflow whenever a new task is added to Airtable. using Pabbly Connect

  • Select Airtable from the application list.
  • Choose ‘New Record’ as the trigger event.
  • Click on ‘Save and Send Test Request’ to connect Pabbly Connect with Airtable.

After saving, you will need an API token from your Airtable account. Click on the hyperlink provided in Pabbly Connect to retrieve your token. Paste it into the required field to establish the connection.


3. Configuring Airtable for Pabbly Connect

Now that Pabbly Connect is connected to Airtable, configure your Airtable settings. Select the base and table where your tasks are stored. For instance, if your base is named ‘All Task List for Family Team’, search and select it in Pabbly Connect. using Pabbly Connect

Next, you must create a trigger field in Airtable. This field should be named ‘Created’ with a type of ‘Created Time’. Ensure this field is added to your table schema, as it will help Pabbly Connect identify when a new record is created.

  • Create a field named ‘Created’ in Airtable.
  • Set the field type to ‘Created Time’.
  • Refresh the Pabbly Connect page to capture the new field.

After refreshing, ensure the trigger field is accurately captured. Click on ‘Save and Send Test Request’ again to verify the connection and data retrieval.


4. Setting Up Basecamp as the Action Application

With Airtable configured, it’s time to set up Basecamp as the action application in Pabbly Connect. Search for Basecamp in the action application field and select it. Choose ‘Create To-Do’ as the action event to create tasks in Basecamp automatically.

You’ll need to connect your Basecamp account to Pabbly Connect. Click ‘Add New Connection’ and authorize the connection. Once connected, specify the project and list ID where the tasks will be created. You can retrieve the list ID from your Basecamp account by navigating to the specific list.

Select the appropriate project in Basecamp. Copy the list ID from your Basecamp list. Paste the list ID into Pabbly Connect.

After setting up the project and list, map the fields from Airtable to Basecamp. Ensure to map the task name, description, due date, and assignee correctly to automate the process effectively.


5. Testing the Airtable to Basecamp Integration

Now it’s time to test the integration. Click on ‘Save and Send Test Request’ to send the data from Airtable to Basecamp. If everything is set up correctly, you will see a confirmation that the task has been created in Basecamp.

Check your Basecamp account to ensure the new To-Do appears with all the mapped details. You should see the task name, description, and due date as specified in Airtable. This confirms that Pabbly Connect is functioning as intended, automating the task creation process.

From now on, every time a new record is added to Airtable, Pabbly Connect will automatically create a corresponding To-Do in Basecamp without any manual intervention. This integration saves time and enhances productivity.


Conclusion

In this tutorial, we explored how to integrate Airtable with Basecamp using Pabbly Connect. By automating the creation of To-Dos from Airtable records, you can streamline your project management workflow effectively. Start using Pabbly Connect today to enhance your automation capabilities.

Ensure you check out Pabbly Connect to create business automation workflows and reduce manual tasks. Pabbly Connect currently offer integration with 2,000+ applications.

Integrate Google Forms with Todoist Using Pabbly Connect: A Step-by-Step Guide

Learn how to automate task creation in Todoist from Google Forms responses using Pabbly Connect. Follow our detailed tutorial for seamless integration. Explore systematic approaches to creating efficient automation solutions that convert technical concepts into practical, implementable instructions.

Watch Step By Step Video Tutorial Below


1. Accessing Pabbly Connect for Integration

To begin integrating Google Forms with Todoist, first access Pabbly Connect by visiting the official website. If you are a new user, you can sign up for free and receive 100 free tasks to get started. Existing users can simply log in to their accounts.

Once logged in, navigate to the dashboard. Here, you will find the option to create a new workflow. Click on ‘Create Workflow’ to start setting up the integration process between Google Forms and Todoist.


2. Setting Up Google Forms for Task Creation

In this step, we will set up Google Forms to collect information for creating tasks in Todoist. Open Google Forms and create a new form titled ‘Task Details’. Make sure to include fields such as task name, description, project associated, and due date.

  • Task Name
  • Description
  • Project Associated
  • Due Date

Ensure that the fields are required where necessary. After setting up the form, go to the responses tab and select the option to create a new spreadsheet for response collection. This spreadsheet will be used to send data to Pabbly Connect.


3. Configuring Pabbly Connect with Google Forms

Now, return to Pabbly Connect to configure the integration. Create a new workflow and select Google Forms as your trigger application. Choose the event ‘New Response Received’. Pabbly Connect will generate a webhook URL that you need to copy.

Next, go back to Google Forms, and in the add-ons menu, search for the Pabbly Connect Webhooks application. After installation, refresh your Google Sheet and paste the copied webhook URL in the initial setup of the add-on. Specify the trigger column, which is usually the final column where responses are recorded.


4. Creating Tasks in Todoist via Pabbly Connect

After configuring Google Forms, the next step is to set up Todoist in Pabbly Connect. Select Todoist as the action application and choose the action event ‘Create Task’. You will need to connect your Todoist account by providing an API token, which can be found in your Todoist developer settings.

Once connected, map the fields from Google Forms to the corresponding fields in Todoist. This includes the task name, description, associated project, and due date. Make sure to format the due date correctly to match Todoist’s requirements.

  • Map Task Name to the corresponding field
  • Map Description accordingly
  • Select the correct Project ID
  • Format Due Date as required

After mapping, save the configuration and test the workflow to ensure that tasks are being created correctly in Todoist whenever a new response is submitted via Google Forms.


5. Testing the Integration for Success

To verify that the integration is working correctly, submit a test response in your Google Form. Check the associated Google Sheet to confirm that the data has been recorded. Then, visit your Todoist account to see if the task has been created successfully.

If everything is set up correctly, you should see the newly created task in your specified project in Todoist. This confirms that Pabbly Connect is functioning as intended, automating the task creation process seamlessly.


Conclusion

This tutorial demonstrated how to integrate Google Forms with Todoist using Pabbly Connect. By following these steps, you can automate task creation based on form responses, enhancing your productivity and workflow efficiency. Start using Pabbly Connect today to streamline your task management!

Ensure you check out Pabbly Connect to create business automation workflows and reduce manual tasks. Pabbly Connect currently offer integration with 2,000+ applications.

Integrating Google Forms with Google Tasks Using Pabbly Connect: A Step-by-Step Guide

Learn how to integrate Google Forms with Google Tasks using Pabbly Connect. Follow this detailed tutorial to automate task creation effortlessly. Implement the precise methodologies leading organizations use to automate repetitive tasks, illustrated with practical examples designed for immediate application.

Watch Step By Step Video Tutorial Below


1. Accessing Pabbly Connect for Integration

To create Google tasks from new Google Forms responses, the first step is to access Pabbly Connect. You can do this by visiting the URL Pabbly.com/connect. This platform serves as the central integration tool that connects Google Forms with Google Tasks.

Once you reach the Pabbly Connect landing page, you will see options to either sign in or sign up. If you are a new user, click on the ‘Sign up for free’ button, which will allow you to create an account and receive 100 free tasks. After signing in, navigate to the dashboard where you can create a new workflow.


2. Creating a Workflow in Pabbly Connect

The next step is to create a workflow in Pabbly Connect. Click on the ‘Create Workflow’ button in the dashboard. A dialog box will appear, prompting you to name your workflow. For this tutorial, name it ‘Create Google Task for New Google Form Responses’.

After naming your workflow, you will be taken to a new window with two important sections: Trigger and Action. Your trigger application will be Google Forms, and the action application will be Google Tasks. To set up the trigger, select Google Forms and choose the event ‘New Response Received’. This event will capture new incoming data instantly without any delay.

  • Select Google Forms as the trigger application.
  • Choose the trigger event ‘New Response Received’.
  • Copy the webhook URL provided by Pabbly Connect.

Once you have copied the webhook URL, you will use it to connect Google Forms with Pabbly Connect.


3. Setting Up Google Forms for Integration

Now, navigate to your Google Forms to set up the integration. Create a new form or use an existing one where you want to collect task information. Make sure to include fields like Task Name, Notes, Task List, and Due Date. These fields are essential for creating a task in Google Tasks.

After setting up the form, go to the Responses tab and click on the three dots to select the response destination. Choose ‘Create a new spreadsheet’ and click on ‘Create’. This will link your form responses to a new Google Sheet, which will be used for data mapping in Pabbly Connect.

  • Ensure all necessary fields are included in the Google Form.
  • Link the form to a new Google Sheet for response management.
  • Format the sheet to ensure clarity of the data collected.

With your Google Form and linked spreadsheet ready, you can now proceed to connect this with Pabbly Connect.


4. Connecting Google Sheets with Pabbly Connect

To connect your Google Sheets with Pabbly Connect, go back to the Google Sheet linked to your form responses. Click on Extensions, then Add-ons, and select Get Add-ons. Search for Pabbly Connect Webhooks and install it if it’s not already done.

After installation, refresh the Google Sheet page. Go back to Extensions, select Pabbly Connect Webhooks, and then click on Initial Setup. Paste the copied webhook URL from Pabbly Connect into the designated field. Specify the trigger column, which is the column that contains the final data entry. In this case, it would be column E.

Install Pabbly Connect Webhooks from Google Workspace Marketplace. Paste the webhook URL into the Initial Setup. Set the trigger column to E.

Once you have completed these steps, click on Send Test to verify the connection. If successful, you will be ready to set up the action in Pabbly Connect.


5. Creating a Task in Google Tasks via Pabbly Connect

Now that you have set up the trigger, it’s time to create a task in Google Tasks. Go back to Pabbly Connect and set the action application as Google Tasks. Select the action event ‘Create Task’. You will need to connect your Google Tasks account by clicking on Add New Connection and signing in with your Google account.

Once connected, you will need to map the information from the Google Form to the fields in Google Tasks. This includes mapping the Task Name, Notes, Task List, and Due Date. Ensure the due date is formatted correctly according to Google Tasks requirements. You can use the Date Time Formatter feature in Pabbly Connect to adjust the date format as needed.

Set Google Tasks as the action application. Map the fields from Google Forms to Google Tasks. Use Date Time Formatter to ensure the due date is in the correct format.

After mapping all necessary fields, click on Save and Send Test Request. If successful, your task will be created in Google Tasks, verifying that the integration through Pabbly Connect is working perfectly.


Conclusion

In this tutorial, we demonstrated how to integrate Google Forms with Google Tasks using Pabbly Connect. By following the steps outlined, you can automate task creation effortlessly whenever a new response is submitted in Google Forms. This integration streamlines your workflow and enhances productivity.

Ensure you check out Pabbly Connect to create business automation workflows and reduce manual tasks. Pabbly Connect currently offer integration with 2,000+ applications.

Automate Eventbrite Attendees to HubSpot with Pabbly Connect

Learn how to seamlessly integrate Eventbrite attendees into HubSpot CRM using Pabbly Connect for automated workflows. Explore systematic approaches to creating efficient automation solutions that convert technical concepts into practical, implementable instructions.

Watch Step By Step Video Tutorial Below


1. Accessing Pabbly Connect for Integration

To begin integrating Eventbrite attendees with HubSpot CRM, you first need to access Pabbly Connect. This platform allows you to automate tasks between different applications without manual intervention. Simply visit the Pabbly Connect website and sign up for a free account if you’re a new user.

Once logged in, navigate to the dashboard where you can create a new workflow. Click on the blue button labeled ‘Create Workflow’. This will allow you to set up the automation process that will connect Eventbrite and HubSpot CRM.


2. Creating the Workflow in Pabbly Connect

After accessing your Pabbly Connect dashboard, click on the ‘Create Workflow’ button. Name your workflow something descriptive, like ‘When Attendee Registers in Eventbrite, Create Contact in HubSpot CRM’. This will help you identify the purpose of the workflow later. using Pabbly Connect

  • Select Eventbrite as the trigger application.
  • Choose the trigger event ‘When a new order is placed for tickets to an event’.
  • Connect your Eventbrite account to Pabbly Connect.

Once connected, you will be able to select the specific event for which you want to track registrations. This ensures that every time someone registers, their details will be captured and sent to HubSpot CRM automatically.


3. Capturing Attendee Data from Eventbrite

With the trigger set, the next step is to capture the attendee data. After a successful connection with Eventbrite, you must perform a test registration to generate an attendee record. This will allow Pabbly Connect to capture the necessary data fields, such as name and email address. using Pabbly Connect

To do this, go to your Eventbrite dashboard and register as an attendee for the event you set up. After completing the registration, return to Pabbly Connect and check if the attendee details have been captured. You should see fields populated with the attendee’s information.

  • Locate the order ID from the captured data.
  • Use this order ID to fetch the attendee details.
  • Add a new step in Pabbly Connect to retrieve attendee details via Eventbrite.

By doing so, you ensure that every attendee’s information is ready to be sent to HubSpot CRM for contact creation.


4. Sending Attendee Data to HubSpot CRM

Now that you have the attendee details, it’s time to send this data to HubSpot CRM. In Pabbly Connect, add a new action step and select HubSpot as the application to connect. You will need to authorize Pabbly Connect to access your HubSpot account. using Pabbly Connect

Once connected, you will see various fields where you can map the attendee data. Map the first name, last name, and email address to the corresponding fields in HubSpot. This ensures that every time someone registers through Eventbrite, their contact details are automatically created in HubSpot CRM.

Map the attendee’s email to the HubSpot email field. Map the first name and last name accordingly. Save the mapping and test the action to ensure it works.

This integration allows you to maintain an updated contact list in HubSpot without manual data entry, streamlining your follow-up process.


5. Finalizing the Integration with Pabbly Connect

After mapping all necessary fields, finalize the integration by saving your workflow in Pabbly Connect. This will activate the automation, meaning every new Eventbrite registration will automatically create a contact in HubSpot CRM. using Pabbly Connect

To confirm that everything is working correctly, perform another test registration on Eventbrite. Check your HubSpot CRM to see if the new contact has been added. This real-time integration ensures that you can follow up with attendees promptly and efficiently.

Once you are satisfied with the setup, you can close Pabbly Connect and let it run in the background. You will not need to manually intervene for future registrations, as Pabbly Connect will handle all data transfers seamlessly.


Conclusion

By using Pabbly Connect to integrate Eventbrite attendees with HubSpot CRM, you automate the contact creation process. This integration saves time and ensures accurate data transfer, allowing for efficient follow-up with your attendees.

Ensure you check out Pabbly Connect to create business automation workflows and reduce manual tasks. Pabbly Connect currently offer integration with 2,000+ applications.

How to Share Images from Instagram Posts on Twitter Automatically Using Pabbly Connect

Learn how to automate sharing images from Instagram to Twitter using Pabbly Connect. Follow this detailed tutorial for seamless integration. Navigate the automation landscape confidently with clear, structured guidance suitable for professionals regardless of prior technical experience.

Watch Step By Step Video Tutorial Below


1. Setting Up Pabbly Connect for Instagram to Twitter Automation

To share images from Instagram posts on Twitter automatically, you will need to set up Pabbly Connect. Start by signing up for a free Pabbly account and accessing the dashboard. From here, click on ‘Create Workflow’ to begin.

Give your workflow a name, such as ‘Instagram to Twitter’, and click on ‘Create’. You will see two windows: the trigger window and the action window, which are essential for the automation process.


2. Connecting Instagram to Pabbly Connect

In the trigger window, select ‘Instagram for Business’ as the application. Choose the trigger event ‘New Media posted in my account’. This will allow Pabbly Connect to detect new posts automatically.

Next, click on ‘Connect’ and then ‘Add New Connection’. You will see a button labeled ‘Connect with Instagram for Business’. Click this button to link your Instagram account with Pabbly Connect. Once connected, the details of the latest Instagram post will be captured.


3. Formatting the Instagram Caption for Twitter

In this step, we will ensure that the caption from Instagram does not exceed Twitter’s 280 character limit. In the action window, select ‘Text Formatter’ from the dropdown menu. Then, choose the action event ‘Truncate Text’. This feature of Pabbly Connect will help shorten the caption if necessary.

After clicking ‘Connect’, map the Instagram caption to the text field. Set the maximum length to 275 characters to allow for Twitter’s character limit. Ensure that you enable the option to append ellipsis at the end of the text. This way, if the caption is longer than 275 characters, it will be truncated appropriately.

  • Select ‘Text Formatter’ in the action window.
  • Choose ‘Truncate Text’ as the action event.
  • Map the Instagram caption response to the text field.

After configuring these settings, click on ‘Save and Send Test Request’ to verify that the caption is formatted correctly. This ensures that you will have a suitable caption for your tweets.


4. Tweeting the Instagram Image Using Pabbly Connect

Now that the caption is formatted, we will proceed to create a tweet on Twitter. In the action window, click on ‘Add Action Step’ and select ‘Twitter’. Choose ‘Create Tweet with Media’ as the action event. This step is crucial as it allows Pabbly Connect to post the image and caption to your Twitter account.

After clicking ‘Connect’, you will need to authorize Pabbly Connect to access your Twitter account. Click on the ‘Connect with Twitter’ button and authorize the application. Once connected, you will need to fill in the message field with the mapped caption, include the Instagram post link, and select the media URL from the Instagram response.

  • Map the truncated caption to the message field.
  • Include the Instagram post URL in the tweet.
  • Select the media URL from the Instagram response.

After filling in these fields, click ‘Save and Send Test Request’ to send the tweet. If successful, you will see the tweet appear on your Twitter profile, showcasing the image and caption from your Instagram post.


5. Testing the Automation Workflow

To finalize the automation, create a new post on Instagram to test if the automation works correctly. Share a new image and caption on your Instagram account. After approximately 10 minutes, Pabbly Connect will check for new posts and automatically tweet the image along with the caption.

Once the tweet is posted, verify it by refreshing your Twitter profile. You should see the new tweet with the correct image, caption, and a link to your Instagram post. This confirms that your automation is functioning as intended.

By following these steps, you can efficiently automate the sharing of your Instagram posts on Twitter using Pabbly Connect. This will save you time and ensure your content reaches a wider audience without manual posting.


Conclusion

In this tutorial, we explored how to use Pabbly Connect to automate sharing images from Instagram to Twitter. By following the steps outlined, you can streamline your social media management and enhance your online presence effortlessly.

Ensure you check out Pabbly Connect to create business automation workflows and reduce manual tasks. Pabbly Connect currently offer integration with 2,000+ applications.

How to Post Multiple Images on Instagram in Single Post Using Pabbly Connect

Learn how to automate posting multiple images on Instagram from Google Sheets using Pabbly Connect. Step-by-step guide for seamless integration. Develop expertise in application integration and learn how to design streamlined automation workflows using proven, simplified approaches.

Watch Step By Step Video Tutorial Below


1. Setting Up Pabbly Connect for Instagram Integration

To automate posting multiple images on Instagram, you need to start by accessing Pabbly Connect. First, sign up for a free account on the Pabbly website. After logging in, navigate to your dashboard and click on ‘Create Workflow’. Here, name your workflow, for example, ‘Google Sheets to Instagram’.

This workflow will help automate the process of posting multiple images on Instagram. The first step is to set the trigger by selecting Google Sheets as the app. Choose the event ‘New or Updated Spreadsheet Row’ to initiate the workflow whenever a new row is added in your Google Sheet.


2. Configuring Google Sheets with Pabbly Connect

In your Google Sheet, you will need to add the details for your Instagram post, including the caption and image URLs. The structure should have the caption in one column and the image links in another, separated by commas. This is crucial for the Pabbly Connect integration to work correctly.

  • Add the caption in the first column.
  • Insert the image URLs in the second column, separated by commas.
  • Ensure the status of the post is set to ‘Post’ in the same row.

Once the details are set, go back to Pabbly Connect and copy the webhook URL provided in the trigger setup. Return to your Google Sheet, navigate to ‘Extensions’, and select ‘Pabbly Connect Webhooks’ to set up the connection.


3. Testing the Integration Between Google Sheets and Instagram

After setting up the webhook, you need to test the connection. In the Pabbly Connect dashboard, click on ‘Send Test’ to ensure that the data is correctly sent from Google Sheets to Pabbly Connect. You should see a confirmation that the test data has been sent successfully.

Next, check the response in Pabbly Connect. You should see the caption and image URLs you entered in your Google Sheet. This confirms that the connection is working properly and data can flow between the two platforms.


4. Adding Filters for Conditional Posting on Instagram

To ensure that posts are only created when necessary, you should add a filter in Pabbly Connect. This filter will check if the status of the post is set to ‘Post’. If the condition is met, the workflow will proceed to create a post on Instagram.

  • Select ‘Filter’ as the action in the workflow.
  • Choose the status field from the Google Sheets response.
  • Set the filter type to ‘Equals’ and the value to ‘Post’.

After setting up the filter, test it to ensure it works correctly. If the status is ‘Post’, the workflow will continue to the next step, which is creating the Instagram post.


5. Creating Posts with Multiple Images on Instagram

In this step, you’ll configure the action to create a post on Instagram using Pabbly Connect. Select ‘Instagram for Business’ as the app and choose the action event as ‘Carousel Post’. This allows you to post multiple images in a single post.

Connect your Instagram account by clicking on ‘Connect with Instagram for Business’. Once connected, map the image URLs and caption from the Google Sheets response to the respective fields in Pabbly Connect. After mapping, click on ‘Save and Send Test Request’ to create the post.

Upon successful execution, check your Instagram account to see the new post with multiple images. You should see all the images you added in the Google Sheet, along with the caption displayed correctly. This confirms that the integration is functioning as intended, and you can now automate your Instagram posts seamlessly.


Conclusion

Using Pabbly Connect, you can easily automate the process of posting multiple images on Instagram from Google Sheets. By following the steps outlined, you can streamline your social media posting and save time. This integration not only enhances your workflow but also ensures that your Instagram feed remains up-to-date with minimal effort.

Ensure you check out Pabbly Connect to create business automation workflows and reduce manual tasks. Pabbly Connect currently offer integration with 2,000+ applications.

Best Ways to Automate Twitter for Your Business Using Pabbly Connect

Explore effective Twitter automation strategies for your business using Pabbly Connect. Learn how to integrate various applications seamlessly to enhance your social media presence. Revolutionize your productivity approach with just a few strategic clicks. Uncover professional methods for connecting applications and creating workflows that reclaim hours of your week.

Watch Step By Step Video Tutorial Below


1. Automate Twitter Notifications Using Pabbly Connect

Automating Twitter notifications is essential for businesses to stay updated. With Pabbly Connect, you can set up a workflow that sends notifications every time you post a new tweet. This ensures your team is always informed about the latest updates without manual checks.

To start, select Twitter as your trigger application and choose the event as ‘New Tweet.’ Next, choose your action application, for example, Telegram, and set the event to send a text message. This integration allows real-time notifications to your team on platforms like Discord or Slack.


2. Schedule Tweets from Google Sheets with Pabbly Connect

Using Pabbly Connect, you can automate tweeting directly from your Google Sheets. This is particularly useful for businesses that maintain a content calendar. By scheduling tweets, you can ensure that your audience receives consistent updates without daily manual posting.

Here’s how to set this up:

  • Select the ‘Schedule’ feature in Pabbly Connect to run your workflow daily.
  • Choose Google Sheets as your action application and set the event to ‘Get Rows’ to fetch your tweet data.
  • Use the ‘Iterator’ to segregate the data for individual tweets.

Finally, set the action to create a tweet on Twitter. This automated process allows you to manage your Twitter content effectively and ensures timely posts.


3. Automatically Tweet RSS Feeds Using Pabbly Connect

Another great feature of Pabbly Connect is the ability to tweet RSS feeds automatically. This is particularly beneficial for businesses that publish regular content updates. By automating RSS feed tweets, you can keep your audience engaged with the latest information without manual effort.

To implement this, select ‘RSS by Pabbly’ as your trigger application and set the event to ‘New Item in Feed.’ Then, choose Twitter as your action application and set the event to ‘Create Tweet.’ This setup ensures that every new item in your RSS feed is tweeted automatically.

This integration not only saves time but also helps maintain a consistent online presence, which is crucial for brand visibility.


4. Cross-Post Twitter Content to Other Platforms Using Pabbly Connect

Cross-posting content from Twitter to other platforms can significantly enhance your business’s reach. With Pabbly Connect, you can streamline this process, ensuring that tweets are shared across various channels like Facebook, Instagram, and LinkedIn.

For instance, set Twitter as your trigger application and choose the event as ‘New Tweet.’ Then, select your action applications (e.g., Facebook or Instagram) and set the event to create a post. This way, every time you tweet, it can also be posted on your other social media accounts.

This automation helps you maximize your content’s visibility and engage with your audience across different platforms effortlessly.


5. Conclusion

In conclusion, utilizing Pabbly Connect to automate Twitter for your business can save time and increase engagement. By integrating various applications like Google Sheets, RSS feeds, and social media platforms, you can maintain a consistent online presence. Automation allows you to focus on more impactful work while ensuring your audience receives timely updates.

Ensure you check out Pabbly Connect to create business automation workflows and reduce manual tasks. Pabbly Connect currently offer integration with 2,000+ applications.

Implementing these automation strategies will not only streamline your workflow but also enhance your overall business efficiency on social media.

Automate Eventbrite Attendees to Google Sheets with Pabbly Connect

Learn how to automate saving new Eventbrite attendees to Google Sheets using Pabbly Connect. Follow our step-by-step guide for seamless integration. Develop expertise in application integration and learn how to design streamlined automation workflows using proven, simplified approaches.

Watch Step By Step Video Tutorial Below


1. Accessing Pabbly Connect for Integration

To automate saving new Eventbrite attendees to Google Sheets, you need to access Pabbly Connect. This platform allows seamless integration between various applications, including Eventbrite and Google Sheets.

If you’re new to Pabbly Connect, sign up for a free account where you can test automation features. Existing users can log in directly to access their dashboard and start creating workflows.


2. Creating a Workflow in Pabbly Connect

Once logged into Pabbly Connect, click on the blue button labeled ‘Create Workflow’. You will need to name your workflow; for example, ‘When Attendee Registers for Event, Auto Add Attendee in Sheet’.

After naming your workflow, you will see two sections: Trigger and Action. Select Eventbrite as the application for the trigger, specifically the ‘New Order’ event, which activates when a new attendee registers for an event.

  • Click on ‘Connect’ to link Eventbrite with Pabbly Connect.
  • Authorize the connection by logging into your Eventbrite account.
  • Select the organization and event you wish to integrate.

After setting up the trigger, click on ‘Save and Send Test Request’ to capture attendee details for the next steps.


3. Registering an Attendee to Test the Integration

To test the integration, you need to register a dummy attendee for your Eventbrite event. Copy the event registration URL and paste it into a new browser tab.

Fill out the registration form with dummy details, such as first name, last name, and email. Once completed, click on ‘Register’. After the registration, return to Pabbly Connect to check if the attendee details were captured successfully.

  • Ensure you see the response from Eventbrite in Pabbly Connect.
  • Verify that the attendee details, such as order ID and email, are displayed.

This step confirms that your Eventbrite and Pabbly Connect integration is working correctly, capturing real-time data.


4. Fetching Attendee Details Using Pabbly Connect

After confirming the registration, you need to fetch the attendee details using the order ID received from the previous step. In your Pabbly Connect workflow, add a new action by selecting Eventbrite again, and choose the ‘Get Attendee by Order ID’ option.

Connect Eventbrite to Pabbly Connect using the existing connection. Input the order ID from the previous response to retrieve detailed attendee information.

After fetching the details, you will have access to the attendee’s name, email, and registration date, which you will later add to Google Sheets.


5. Adding Attendee Details to Google Sheets

The final step involves adding the fetched attendee details to Google Sheets. In your Pabbly Connect workflow, add another action by selecting Google Sheets and choosing ‘Add New Row’.

Connect your Google Sheets account to Pabbly Connect and select the spreadsheet where you want to store the attendee information. Map the fields such as attendee name, email, and registration date to the corresponding columns in your Google Sheets.

Select your spreadsheet from the list. Map the attendee name, email, and registration date to the correct columns.

Once everything is set, click on ‘Save and Send Test Request’ to see if the data is correctly added to Google Sheets. This will confirm that the integration is functioning as expected.


Conclusion

By following these steps, you can automate the process of saving new Eventbrite attendees to Google Sheets using Pabbly Connect. This integration allows for real-time data capture, eliminating manual data entry and streamlining your event management process.

Ensure you check out Pabbly Connect to create business automation workflows and reduce manual tasks. Pabbly Connect currently offer integration with 2,000+ applications.

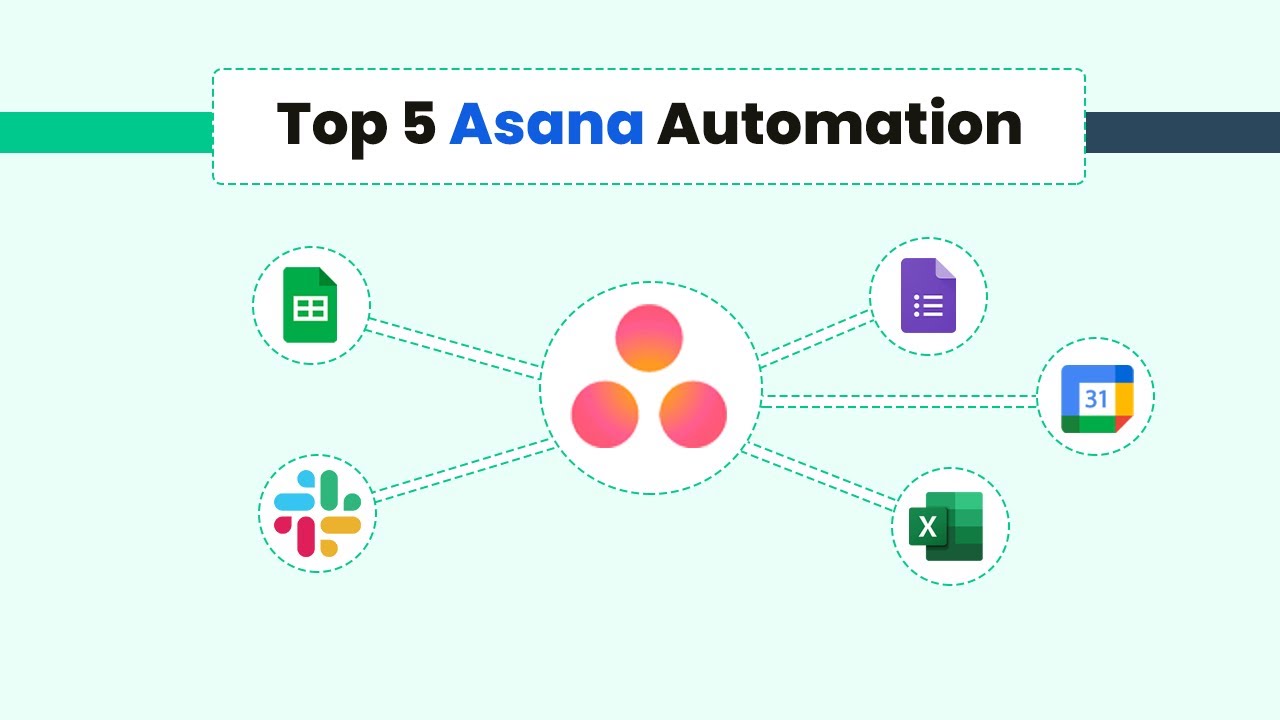
Best Ways to Automate Asana with Pabbly Connect

Discover how to automate Asana using Pabbly Connect. Learn step-by-step integrations with Google Sheets, Google Calendar, Slack, and more for improved productivity. Learn to create powerful connections between your critical applications without requiring specialized programming knowledge or extensive technical background.

Watch Step By Step Video Tutorial Below


1. Automate Asana with Google Forms Integration

To automate Asana using Pabbly Connect, the first step is integrating Google Forms. This integration allows you to create tasks in Asana automatically whenever a form is submitted. By sharing a Google Form with your team, they can fill it out, and the tasks will be created in Asana without manual input, enhancing productivity.

Follow these steps to set up the integration:

  • Create a Google Form with the necessary fields for task creation.
  • Connect Google Forms to Pabbly Connect as the trigger.
  • Set Asana as the action app in Pabbly Connect.
  • Map the fields from Google Forms to Asana task fields.

This automation streamlines the task creation process and saves time, allowing your team to focus on more critical tasks.


2. Integrate Asana with Slack for Task Notifications

Another effective way to automate Asana using Pabbly Connect is by integrating it with Slack. This allows your team to receive notifications in Slack whenever a new task is created in Asana. This integration enhances communication and keeps everyone informed about task updates.

To set this up, follow these steps:

  • Select Asana as the trigger app in Pabbly Connect.
  • Choose the appropriate trigger event for task creation.
  • Connect Slack as the action app.
  • Set up the Slack message format to notify the team about the new task.

This integration not only saves time but also improves team collaboration by ensuring everyone is updated on task developments.


3. Sync Asana Tasks with Google Calendar

Using Pabbly Connect, you can also automate the synchronization of Asana tasks with Google Calendar. This integration ensures that every task created in Asana appears as an event in your Google Calendar, allowing for better time management.

To set up this integration:

Choose Asana as the trigger app in Pabbly Connect. Select the trigger event for new tasks. Connect Google Calendar as the action app. Map the Asana task details to Google Calendar event fields.

This automation allows you to view your tasks in a calendar format, improving your scheduling and planning capabilities.


4. Create Asana Projects from Google Sheets

Integrating Google Sheets with Pabbly Connect allows you to automatically create projects in Asana based on the data entered in Google Sheets. This is particularly useful for maintaining a backup of your projects and avoiding manual data entry.

To automate this process:

Set Google Sheets as the trigger app in Pabbly Connect. Select the trigger event for new rows added. Connect Asana as the action app. Map the Google Sheets columns to Asana project fields.

This integration not only saves time but also helps in maintaining an organized record of your projects.


5. Backup Asana Tasks to Microsoft Excel

Lastly, automating the backup of your Asana tasks to Microsoft Excel using Pabbly Connect is a valuable integration. This ensures that all task details are saved in Excel for future reference, enhancing data management.

To set up this integration:

Choose Asana as the trigger app in Pabbly Connect. Select the trigger event for new tasks created. Connect Microsoft Excel as the action app. Map the Asana task details to Excel columns.

This allows you to maintain a backup of your tasks, providing easy access to historical data.


Conclusion

In conclusion, automating Asana with Pabbly Connect significantly enhances productivity. By integrating with Google Forms, Slack, Google Calendar, Google Sheets, and Microsoft Excel, you can streamline your task management processes. These automations not only save time but also improve collaboration and data organization.

Ensure you check out Pabbly Connect to create business automation workflows and reduce manual tasks. Pabbly Connect currently offer integration with 2,000+ applications.

Automate Eventbrite Attendees to Salesforce with Pabbly Connect

Learn how to automatically add Eventbrite attendees to Salesforce using Pabbly Connect. Step-by-step tutorial for seamless integration. Eliminate manual repetitive tasks from your workflow. Discover proven automation methods with intuitive steps designed for efficiency-minded professionals.

Watch Step By Step Video Tutorial Below


1. Accessing Pabbly Connect for Eventbrite and Salesforce Integration

To begin the process of integrating Eventbrite attendees to Salesforce, you will first need to access Pabbly Connect. This platform allows you to automate tasks seamlessly between different applications. Start by visiting the Pabbly Connect website and signing in or creating a free account.

Once you are logged in, navigate to the dashboard. Here, you can create a new workflow by giving it a name like ‘Add Eventbrite Attendees to Salesforce Automatically’. Click on the blue ‘Create’ button to proceed with setting up your automation.


2. Setting Up the Trigger Event in Pabbly Connect

In this step, you will configure the trigger event that will initiate the automation process. Choose Eventbrite as your trigger application and select the event type as ‘New Order’. This means that whenever someone registers for an event, it will trigger the automation. using Pabbly Connect

  • Select ‘Eventbrite’ as the trigger application.
  • Choose ‘New Order’ as the trigger event.
  • Connect your Eventbrite account to Pabbly Connect.

After connecting your Eventbrite account, you will need to perform a test submission by registering for an event. This will allow Pabbly Connect to capture the attendee details, which will be used in the next steps of the integration.


3. Fetching Attendee Details from Eventbrite

Once you have successfully registered as an attendee, Pabbly Connect will capture the attendee’s details. You will see the response from Eventbrite, which includes important information like the attendee’s name and email address. using Pabbly Connect

To get the specific details of the attendee, you will need to set up an action event using the ‘Get Order by ID’ option in Eventbrite. This allows you to retrieve the complete details of the attendee based on their order ID.

  • Select ‘Get Order by ID’ as the action event.
  • Connect to your existing Eventbrite connection.
  • Map the order ID received from the previous step.

After setting this up, you will be able to see all the attendee details, which can now be sent to Salesforce.


4. Adding Attendees to Salesforce Using Pabbly Connect

With the attendee details captured, the next step is to add this information to Salesforce. Choose Salesforce as your action application and select the action event as ‘Create Contact’. This will allow you to create a new contact in Salesforce for each attendee. using Pabbly Connect

Connect your Salesforce account to Pabbly Connect. Once connected, you will need to map the attendee details such as first name, last name, and email address into the corresponding fields in Salesforce.

Select ‘Create Contact’ as the action event. Map the attendee’s first name, last name, and email address to Salesforce fields. Click ‘Save and Send Test Request’ to finalize the integration.

After completing this step, you will see that each new attendee from Eventbrite is automatically added as a contact in your Salesforce CRM.


5. Conclusion

In this tutorial, we explored how to use Pabbly Connect to automate the process of adding Eventbrite attendees to Salesforce. By following the steps outlined, you can ensure that every attendee is automatically registered as a contact in Salesforce, streamlining your follow-up processes.

Ensure you check out Pabbly Connect to create business automation workflows and reduce manual tasks. Pabbly Connect currently offer integration with 2,000+ applications.

This automation not only saves time but also enhances your ability to manage attendee information effectively. With Pabbly Connect, you can easily integrate multiple applications and automate your business tasks efficiently.