Integrating GitHub Issues with Basecamp To-Do List Using Pabbly Connect

Learn how to automate adding GitHub issues to your Basecamp To-Do list using Pabbly Connect in this detailed step-by-step tutorial. Explore systematic approaches to creating efficient automation solutions that convert technical concepts into practical, implementable instructions.

Watch Step By Step Video Tutorial Below


1. Introduction to Pabbly Connect for GitHub and Basecamp Integration

Pabbly Connect is an automation tool that simplifies the process of integrating applications like GitHub and Basecamp. In this tutorial, we will explore how to set up an automation that adds GitHub issues directly to your Basecamp To-Do list.

Using Pabbly Connect, you can streamline your project management by ensuring that every issue created in GitHub is automatically reflected in Basecamp, allowing for seamless tracking of tasks.


2. Setting Up Your Pabbly Connect Account

To begin, access the Pabbly Connect platform by signing up for a free account. Once registered, log in to your account and navigate to the Pabbly Connect dashboard. using Pabbly Connect

Here are the steps to set up your account:

  • Sign up for a free Pabbly Connect account.
  • Log in to your Pabbly Connect dashboard.
  • Click on the ‘Create Workflow’ button to start a new automation.

Once you click on ‘Create Workflow’, give your workflow a name, such as ‘GitHub to Basecamp’, and click on the create button to proceed.


3. Connecting GitHub as the Trigger App in Pabbly Connect

In this step, we will set GitHub as the trigger application in your Pabbly Connect workflow. This means that any new issues created in GitHub will initiate the workflow. using Pabbly Connect

Follow these steps to connect GitHub:

  • Select GitHub as the trigger application.
  • Choose the trigger event as ‘Issues’.
  • Click on ‘Connect’ and add a new connection.

After connecting, authorize Pabbly Connect with your GitHub account. You will need to enter your GitHub password to complete the authorization process.


4. Creating a To-Do in Basecamp from GitHub Issues

Once the GitHub trigger is set up, we can now configure the action to create a new To-Do in Basecamp. This means that every time a new issue is created in GitHub, a corresponding task will be added to your Basecamp To-Do list. using Pabbly Connect

To set this up, follow these steps:

Search for Basecamp as the action application. Select the action event as ‘Create To-Do’. Connect to Basecamp and authorize Pabbly Connect.

After connecting, you will need to select your Basecamp account and specify the project and list ID where the To-Do should be created. You can map the issue title and description from GitHub to the corresponding fields in Basecamp.


5. Testing and Finalizing Your Pabbly Connect Workflow

Now that both applications are connected, it’s time to test the workflow. Click on ‘Save and Send Test Request’ to verify that a new To-Do is created in Basecamp based on the GitHub issue.

If everything is set up correctly, you should see the new To-Do in your Basecamp list. This confirms that your automation is working perfectly, and you no longer need to manually transfer tasks between GitHub and Basecamp.

With Pabbly Connect, this integration not only saves time but also enhances productivity by keeping all your project tasks organized in one place.


Conclusion

In this guide, we demonstrated how to use Pabbly Connect to automatically add GitHub issues to your Basecamp To-Do list. This integration simplifies task management and ensures that you stay organized without manual effort. Start using Pabbly Connect today to enhance your workflow efficiency.

Ensure you check out Pabbly Connect to create business automation workflows and reduce manual tasks. Pabbly Connect currently offer integration with 2,000+ applications.

How to Send WhatsApp Notifications for WooCommerce Orders Using Pabbly Connect

Learn how to integrate WooCommerce with WhatsApp notifications using Pabbly Connect for seamless order confirmations. Explore efficient methods for automating routine tasks with clear, concise instructions suited for both newcomers and experienced professionals.

Watch Step By Step Video Tutorial Below


1. Setting Up Pabbly Connect for WooCommerce Integration

To send WhatsApp notifications for WooCommerce orders, you first need to set up Pabbly Connect. This platform enables seamless integration between WooCommerce and WhatsApp through the Interakt service.

Begin by signing up for Pabbly Connect. You can find a free sign-up link in the description. Once logged in, click on ‘Create Workflow’ and name it something like ‘WooCommerce to Interakt’. This sets the stage for your automation.


2. Configuring WooCommerce as the Trigger in Pabbly Connect

In this step, you will set WooCommerce as the trigger app in Pabbly Connect. Search for WooCommerce in the trigger window and select it. From the dropdown, choose the event ‘New Order Created’.

  • Select WooCommerce as the app.
  • Choose ‘New Order Created’ as the trigger event.
  • Copy the provided webhook URL.

Next, go to your WordPress site and navigate to WooCommerce settings. Under the ‘Advanced’ tab, click on ‘Webhooks’. Here, add a new webhook using the copied URL, set it to active, and select the topic as ‘Order Created’. This connects your WooCommerce store with Pabbly Connect.


3. Testing the Webhook Response in Pabbly Connect

Once your WooCommerce store is connected to Pabbly Connect, it’s crucial to test the webhook. Click on the ‘Capture Webhook Response’ button in the trigger window. This will allow you to receive data from WooCommerce.

Now, place a test order on your WooCommerce store. Fill in the customer details, including a mobile number, and proceed to checkout. After placing the order, go back to Pabbly Connect to check if you received the order details.

  • Ensure the test order includes a valid mobile number.
  • Verify that the order details appear in Pabbly Connect.

If successful, you will see the order details in Pabbly Connect, confirming the connection is established.


4. Sending WhatsApp Notifications Using Interakt

Now that you have successfully captured the order details, the next step is to send a WhatsApp notification using Interakt through Pabbly Connect. In the action window, search for Interakt and select it. Choose the action event ‘Send WhatsApp Template Message’.

Connect your Interakt account by entering the secret key found in the Interakt settings. After connecting, you will need to map the customer’s phone number and the template code for the message you want to send.

Map the customer’s phone number from the WooCommerce response. Enter the template code for the WhatsApp message. Configure any additional variables you wish to include in the message.

Once all fields are filled, send a test request to ensure the WhatsApp message is sent correctly. You should see a confirmation that the message was sent successfully.


5. Final Testing and Conclusion

To ensure everything is working as intended, place another test order on your WooCommerce store. This time, use different customer details to see if the WhatsApp notification reflects the new information.

After placing the order, check your WhatsApp account for the notification. The message should include all the dynamic details such as the customer’s name and order total, confirming that Pabbly Connect has successfully automated the process.

By following these steps, you have integrated WooCommerce with WhatsApp notifications using Pabbly Connect and Interakt. This automation not only enhances customer communication but also streamlines your order confirmation process.

Conclusion

This guide summarizes the key points and helps you understand the essential features and benefits of using this tool.

Ensure you check out Pabbly Connect to create business automation workflows and reduce manual tasks. Pabbly Connect currently offer integration with 2,000+ applications.


In conclusion, utilizing Pabbly Connect to send WhatsApp notifications for WooCommerce orders is a straightforward process. By following the detailed steps outlined above, you can ensure that your customers receive timely updates about their orders, enhancing their overall shopping experience.

How to Extract WooCommerce Sales to Excel Using Pabbly Connect: A Step-by-Step Guide

Learn how to extract WooCommerce sales data into Microsoft Excel using Pabbly Connect. This detailed tutorial covers every step for seamless integration. Revolutionize your productivity approach with just a few strategic clicks. Uncover professional methods for connecting applications and creating workflows that reclaim hours of your week.

Watch Step By Step Video Tutorial Below


1. Setting Up Pabbly Connect for WooCommerce and Excel Integration

To begin extracting WooCommerce sales data into Microsoft Excel, you need to access Pabbly Connect. Start by signing up for a free account on the Pabbly website. This will allow you to utilize the automation tasks offered by Pabbly Connect, enabling seamless integration between WooCommerce and Excel.

Once signed in, navigate to the Pabbly Connect dashboard. Here, you can create a new workflow by clicking on the ‘Create Workflow’ button. Name your workflow, for example, ‘WooCommerce to MS Excel’, to easily identify it later. This setup will facilitate the automatic transfer of sales data from WooCommerce to your Excel sheet.


2. Configuring the Trigger Event in Pabbly Connect

In this step, you will configure the trigger event in Pabbly Connect that initiates the workflow. Select WooCommerce as your trigger application and choose the ‘New Order Created’ event. This means every time a new order is placed in your WooCommerce store, it will trigger the workflow.

After selecting the trigger event, you will receive a webhook URL from Pabbly Connect. Follow these steps to connect WooCommerce to this webhook:

  • Go to your WooCommerce settings in WordPress.
  • Select the ‘Advanced’ tab and click on ‘Webhooks’.
  • Click ‘Add Webhook’ and enter a name like ‘Sales’.
  • Set the status to ‘Active’ and paste the webhook URL.
  • Choose the topic ‘Order Created’ and save the webhook.

Now, every time a new order is created, WooCommerce will send the sales data to Pabbly Connect.


3. Capturing Sales Data from WooCommerce

Once the connection is established, you can capture sales data using Pabbly Connect. After setting up the webhook, create a test order in your WooCommerce store. This test order will help you verify that the integration is working correctly.

After placing the test order, return to Pabbly Connect and click on the ‘Recapture Webhook Response’ button. This action will allow Pabbly Connect to capture the details of the new order, including the total amount and any taxes. Ensure that you toggle the ‘Simple Response’ option to off to receive the data in array format, which is essential for the next steps in your workflow.


4. Formatting Sales Data for Excel Integration

Now that you have captured the sales data, the next step is to format it for Microsoft Excel using Pabbly Connect. First, use the ‘Date Time Formatter’ feature to convert the order date into a more readable format. Select the action event ‘Format Date with Time Zone’ and map the order date from the previous step.

After formatting the date, add a new action step by selecting Google Sheets as your application. Choose the action event ‘Add New Row’ to send the formatted data to your Google Sheets. Map the fields accordingly, ensuring that the date and total sales values are correctly assigned to the respective columns in your Google Sheets spreadsheet.


5. Sending Data to Microsoft Excel

Finally, you will send the formatted sales data to Microsoft Excel using Pabbly Connect. Select the action event ‘Add Row to Worksheet’ under Microsoft Excel. Connect your Microsoft Excel account by authorizing Pabbly Connect to access your Excel files.

Choose the workbook and worksheet where you want to store the sales data. Map the date and total sales fields from the previous steps. Once everything is set up, click on ‘Save and Send Test Request’ to verify that the data is correctly sent to your Excel sheet. This automation will now run in the background, capturing sales data automatically and populating your Excel sheet without manual intervention.


Conclusion

In this tutorial, we demonstrated how to extract WooCommerce sales data into Microsoft Excel using Pabbly Connect. By following these steps, you can automate the process of capturing and formatting your sales data, making it easier to analyze and improve your business operations.

Ensure you check out Pabbly Connect to create business automation workflows and reduce manual tasks. Pabbly Connect currently offer integration with 2,000+ applications.

7 Best Discord Channel Automation Ideas Using Pabbly Connect

Discover the top 7 Discord channel automation ideas using Pabbly Connect. Learn how to integrate Google, Stripe, Zoom, and more for seamless automation. Master proven automation processes with practical implementation examples and strategic recommendations you can apply immediately in your workflow.

Watch Step By Step Video Tutorial Below


1. Automate Telegram Messages to Discord with Pabbly Connect

Using Pabbly Connect, you can automate the process of posting new Telegram messages directly to your Discord channel. This integration ensures that any message you send on Telegram is automatically shared in your Discord community, saving you time and effort.

To set up this automation, follow these steps:

  • Create a new workflow in Pabbly Connect.
  • Select Telegram as the trigger app and set the trigger event to ‘New Message’.
  • Connect your Telegram account and select the channel.
  • Choose Discord as the action app and set the action event to ‘Send Message’.
  • Connect your Discord account and specify the channel where the message should be sent.

Once this setup is complete, every new message sent on Telegram will automatically appear in your Discord channel, enhancing communication between platforms.


2. Post New YouTube Videos to Discord Automatically Using Pabbly Connect

With Pabbly Connect, you can also automate the posting of new YouTube videos to your Discord server. This ensures that your community stays updated with your latest content without you having to manually share each link.

To implement this automation, follow these steps:

  • Create a new workflow in Pabbly Connect.
  • Select YouTube as the trigger app and choose ‘New Video in Channel’ as the trigger event.
  • Connect your YouTube account and select the channel.
  • Choose Discord as the action app and set the action event to ‘Send Message’.
  • Connect your Discord account and specify the channel for posting.

After configuring these settings, every time you publish a new video, it will automatically be shared in your Discord channel, keeping your audience engaged.


3. Send Google Form Responses to Discord with Pabbly Connect

Using Pabbly Connect, you can automate the process of sending Google Form responses directly to your Discord channel. This is particularly useful for teams that need to keep track of responses without manually sharing them.

To set this automation up, follow these steps:

Create a new workflow in Pabbly Connect. Select Google Forms as the trigger app and choose ‘New Response in Spreadsheet’ as the trigger event. Connect your Google account and select the form. Choose Discord as the action app and set the action event to ‘Send Message’. Connect your Discord account and specify the channel for posting.

With this setup, every time a new response is submitted via Google Forms, it will be automatically sent to your Discord channel, streamlining communication.


4. Share Zoom Recordings on Discord Using Pabbly Connect

Another great automation idea is to share Zoom meeting recordings directly to your Discord channel using Pabbly Connect. This is especially helpful for teams that need to review meeting content without manual sharing.

To set up this automation, follow these steps:

Create a new workflow in Pabbly Connect. Select Zoom as the trigger app and choose ‘New Recording’ as the trigger event. Connect your Zoom account. Choose Discord as the action app and set the action event to ‘Send Message’. Connect your Discord account and specify the channel for posting.

Once configured, every time a Zoom meeting recording is available, it will be automatically shared in your Discord channel for easy access.


5. Automate Facebook Page Posts to Discord with Pabbly Connect

With Pabbly Connect, you can also automate the posting of new Facebook page posts to your Discord server. This allows you to maintain engagement across platforms without manual effort.

To set this automation up, follow these steps:

Create a new workflow in Pabbly Connect. Select Facebook Pages as the trigger app and choose ‘New Post’ as the trigger event. Connect your Facebook account and select the page. Choose Discord as the action app and set the action event to ‘Send Message’. Connect your Discord account and specify the channel for posting.

After this setup, any new post on your Facebook page will automatically be shared in your Discord channel, enhancing your social media management.


6. Send Stripe Payment Notifications to Discord with Pabbly Connect

Lastly, you can set up an automation to send Stripe payment notifications to your Discord channel using Pabbly Connect. This is essential for teams to stay updated on payment activities.

To implement this automation, follow these steps:

Create a new workflow in Pabbly Connect. Select Stripe as the trigger app and choose ‘New Charge’ as the trigger event. Connect your Stripe account. Choose Discord as the action app and set the action event to ‘Send Message’. Connect your Discord account and specify the channel for posting.

Once this is configured, every new payment received will automatically notify your Discord channel, keeping your team informed.


7. Send Discord Messages When a Trello Card is Created Using Pabbly Connect

Another unique automation is to send a Discord message when a new card is created in Trello using Pabbly Connect. This helps teams stay updated on task assignments without manual notifications.

To set this automation up, follow these steps:

Create a new workflow in Pabbly Connect. Select Trello as the trigger app and choose ‘New Card’ as the trigger event. Connect your Trello account. Choose Discord as the action app and set the action event to ‘Send Message’. Connect your Discord account and specify the channel for posting.

With this automation in place, every time a new card is created in Trello, a message will be automatically sent to your Discord channel, ensuring that everyone is informed of new tasks.


Conclusion

In conclusion, using Pabbly Connect for automating Discord channel tasks can significantly enhance your workflow. By implementing these automation ideas, such as posting YouTube videos, sharing Google Form responses, and notifying about Stripe payments, you can save time and improve communication within your team. Start automating today and experience the benefits of seamless integration.

Ensure you check out Pabbly Connect to create business automation workflows and reduce manual tasks. Pabbly Connect currently offer integration with 2,000+ applications.

How to Send Birthday Cards & Wishes on WhatsApp from Google Sheets Using Pabbly Connect

Learn how to automate sending birthday cards and wishes on WhatsApp from Google Sheets using Pabbly Connect. Step-by-step tutorial included. Eliminate manual repetitive tasks from your workflow. Discover proven automation methods with intuitive steps designed for efficiency-minded professionals.

Watch Step By Step Video Tutorial Below


1. Setting Up Pabbly Connect for Automation

To send birthday cards and wishes on WhatsApp using Pabbly Connect, you first need to access the Pabbly Connect dashboard. Start by signing up for a free account if you haven’t already. Once logged in, click on ‘Create Workflow’ to initiate your automation process.

Give your workflow a name, like ‘Google Sheets to WhatsApp Birthday Wishes’, and click on ‘Create’. This opens a new window with two sections: the Trigger and Action windows. The Trigger is where you set the event that starts the automation, while the Action is what happens after the trigger. In this case, we will be using Google Sheets as the trigger to fetch customer details.


2. Configuring the Trigger with Google Sheets

In the Trigger window, select the ‘Schedule’ feature from Pabbly Connect. This allows you to set how often the workflow runs. Choose ‘Every Day’ to ensure it checks for birthdays daily at a specific time.

  • Select the time, for example, 9:00 AM.
  • Click ‘Save’ to schedule the automation.

This setup ensures that every day at 9:00 AM, Pabbly Connect will trigger the workflow to check for customers whose birthdays fall on that day. Next, we will introduce the current date into the workflow.


3. Adding Current Date to the Workflow

To fetch the correct birthday details, we need the current date. In the Action window, search for ‘DateTime Format’ in Pabbly Connect. Select the action event as ‘Current Date’ to retrieve today’s date.

Choose the format as ‘DD/MM/YYYY’ and ensure that time is not included in the response. Click on ‘Save and Send Test Request’ to verify that the current date is captured correctly. This date will be crucial for looking up customer birthdays in the next steps.


4. Fetching Customers with Birthdays from Google Sheets

Now that we have the current date, it’s time to fetch customer details from Google Sheets. Add another action step in Pabbly Connect and select ‘Google Sheets’. Choose the action event as ‘Lookup Spreadsheet Row’.

  • Connect your Google Sheets account to Pabbly Connect.
  • Select the spreadsheet containing customer data.
  • Use the column with the birthday month and day as the lookup column.

Map the values for the day and month obtained from the current date. This allows Pabbly Connect to find customers whose birthdays are today, enabling automated wishes to be sent.


5. Sending Birthday Wishes via WhatsApp

With the customer details fetched, the final step is to send birthday wishes via WhatsApp. Add a new action step and select ‘Interact’, which is the API service for WhatsApp messages. Choose the action event as ‘Send WhatsApp Template Message’. using Pabbly Connect

Connect your Interact account by entering the secret key obtained from your Interact account settings. Map the WhatsApp number of each customer from the iterator response. Ensure to include the message template created in Interact, which can include variables for personalization such as the customer’s name.

Click ‘Save and Send Test Request’ to send a test message to verify the setup. If successful, you will see the birthday message sent to the customer on WhatsApp, completing the automation process.


Conclusion

This tutorial demonstrated how to automate sending birthday cards and wishes on WhatsApp from Google Sheets using Pabbly Connect. By following these steps, businesses can ensure timely and personalized birthday greetings for their customers.

Ensure you check out Pabbly Connect to create business automation workflows and reduce manual tasks. Pabbly Connect currently offer integration with 2,000+ applications.

Integrate Typeform with Todoist Using Pabbly Connect: A Step-by-Step Guide

Learn how to automate task creation in Todoist from Typeform submissions using Pabbly Connect. Follow this detailed tutorial for seamless integration. Revolutionize your productivity approach with just a few strategic clicks. Uncover professional methods for connecting applications and creating workflows that reclaim hours of your week.

Watch Step By Step Video Tutorial Below


1. Access Pabbly Connect for Integration

To begin integrating Typeform with Todoist, you first need to access Pabbly Connect. Navigate to the Pabbly website and sign in to your account. If you are a new user, you can sign up for free and get free tasks every month to explore the automation capabilities.

Once logged in, you will be directed to the Pabbly Connect dashboard where you can create new workflows. This platform is essential for automating tasks between different applications like Typeform and Todoist.


2. Create a New Workflow in Pabbly Connect

Click on the blue button labeled ‘Create Workflow’ to start setting up your integration. Name your workflow something descriptive, such as ‘When Typeform Form is Submitted, Create Task in Todoist.’ This naming helps in identifying the automation later.

In this step, you will see two boxes labeled ‘Trigger’ and ‘Action.’ The trigger is the event that starts the automation, and the action is what happens as a result. Select Typeform as the trigger application and choose ‘New Entry’ as the trigger event.

  • Click on ‘Add New Connection’ to link your Typeform account with Pabbly Connect.
  • Authorize the connection by providing necessary permissions to Pabbly Connect.
  • Once connected, select the specific form you want to use for this automation.

This step is crucial as it establishes the link between Typeform and Pabbly Connect, allowing the automation to proceed smoothly.


3. Test Your Typeform Connection

After connecting Typeform, it’s essential to test the integration to ensure data is being captured correctly. You will need to make a test submission on your Typeform form. This action will generate a sample entry that Pabbly Connect can use to verify the connection.

Fill out the form fields with example data, such as task name, description, and deadline. Submit the form, and Pabbly Connect will capture this submission. You should see a response indicating that the data was received successfully.

  • Check that all required fields are populated in the response, including task name and deadline.
  • Ensure that the data is correctly formatted for Todoist.

Confirming this connection is vital as it ensures that the data flow from Typeform to Pabbly Connect is functioning correctly before proceeding to the next step.


4. Setup Todoist Action in Pabbly Connect

Now that your Typeform connection is established and tested, it’s time to set up the action in Todoist. Choose Todoist as the next application and select ‘Create Task’ as the action event. This step tells Pabbly Connect what to do with the data received from Typeform.

You will need to connect your Todoist account by providing an API token. Follow the instructions provided in the Pabbly Connect interface to obtain your token from Todoist. Once connected, map the fields from your Typeform submission to the corresponding fields in Todoist.

Map the task name from Typeform to the task name field in Todoist. Map the task description and due date accordingly. Select the appropriate project ID in Todoist where the task should be created.

Completing this step ensures that every time a Typeform entry is submitted, a corresponding task is automatically created in Todoist through Pabbly Connect.


5. Finalize and Test Your Workflow

With the connections established and mappings done, it’s time to finalize your workflow. Click on the ‘Save and Send Test Request’ button in Pabbly Connect. This action will trigger the automation using the test data you submitted earlier.

Check your Todoist account to verify that the task has been created successfully with all the mapped details. If everything appears correctly, your automation is set up and ready to go. You can now close Pabbly Connect and let it run in the background.

From now on, every time a new entry is submitted via Typeform, Pabbly Connect will automatically create a task in Todoist, streamlining your workflow significantly.


Conclusion

In conclusion, using Pabbly Connect to integrate Typeform with Todoist allows for seamless automation of task creation. This setup saves time and enhances productivity by eliminating manual entry. Follow these steps to streamline your workflow today.

Ensure you check out Pabbly Connect to create business automation workflows and reduce manual tasks. Pabbly Connect currently offer integration with 2,000+ applications.

How to Create Asana Tasks from New Saved Slack Messages Using Pabbly Connect

Learn how to automate task creation in Asana from saved messages in Slack using Pabbly Connect. Follow this detailed tutorial for seamless integration. Explore systematic approaches to creating efficient automation solutions that convert technical concepts into practical, implementable instructions.

Watch Step By Step Video Tutorial Below


1. Setting Up Pabbly Connect for Slack and Asana Integration

To create tasks in Asana from saved messages in Slack, you first need to set up Pabbly Connect. Start by visiting the Pabbly Connect dashboard after signing up for an account. This automation tool allows seamless integration between Slack and Asana.

Once logged in, click on the ‘Create Workflow’ button. Name your workflow, for example, ‘Slack to Asana’. After naming, click on the ‘Create’ button to proceed to the workflow page where you can define your trigger and action.


2. Defining the Trigger in Pabbly Connect

In this step, you will define the trigger event for your workflow. Select Slack as the trigger application in Pabbly Connect. The trigger event is set to ‘New Saved Message,’ which checks for saved messages in Slack every 10 minutes.

  • Choose Slack as the trigger application.
  • Select the trigger event ‘New Saved Message’.
  • Click ‘Connect’ and add a new connection to Slack.

After connecting, allow Pabbly Connect to access your Slack account. This connection enables Pabbly Connect to fetch details of saved messages, which will be used to create tasks in Asana.


3. Filtering Messages in Pabbly Connect

Next, you will filter the messages to ensure that only specific saved messages trigger the task creation in Asana. This is done using the filter option in Pabbly Connect.

Set the filter to check if the channel ID of the saved message matches the desired channel. This ensures that only messages from the specified Slack channel will create tasks in Asana. To do this, map the channel ID from the previous step and set the filter type to ‘Equals’.


4. Formatting Text for Asana Tasks Using Pabbly Connect

In this step, you will format the text from the saved Slack message to extract the task title and description. Use the Text Formatter feature in Pabbly Connect to split the text based on a defined separator.

  • Select the Text Formatter action event as ‘Split Text’.
  • Map the text from the saved message.
  • Define the separator (e.g., ‘note:’) to split the message into title and description.

This allows you to create a structured task in Asana using the mapped title and description from the saved Slack message.


5. Creating Asana Task Using Pabbly Connect

Finally, you will create a task in Asana using the formatted data from the previous step. Select Asana as the action application in Pabbly Connect and choose the action event ‘Create Task’.

Map the task name and notes fields using the results from the text formatter. Select the appropriate workspace and project in Asana where the task should be created. Once everything is set, click on ‘Save and Send Test Request’ to verify the integration.


Conclusion

In this tutorial, we demonstrated how to automate the creation of Asana tasks from new saved Slack messages using Pabbly Connect. By following these steps, you can enhance your workflow efficiency and ensure that important tasks are never missed. Start using Pabbly Connect to streamline your task management process today!

Ensure you check out Pabbly Connect to create business automation workflows and reduce manual tasks. Pabbly Connect currently offer integration with 2,000+ applications.

How to Create Google Calendar Detailed Event from New Google Tasks Using Pabbly Connect

Learn how to integrate Google Tasks with Google Calendar using Pabbly Connect to automate detailed event creation seamlessly. Learn to create powerful connections between your critical applications without requiring specialized programming knowledge or extensive technical background.

Watch Step By Step Video Tutorial Below


1. Access Pabbly Connect for Integration

To begin creating a Google Calendar detailed event from new Google Tasks, you first need to access Pabbly Connect. Visit the URL Pabbly.com/connect to reach the landing page where you can sign in or sign up for free.

If you are a new user, click on the ‘Sign up’ option to create an account. Existing users can simply click ‘Sign in’. Once logged in, navigate to the Pabbly Connect dashboard to start your integration process.


2. Create a New Workflow in Pabbly Connect

After accessing Pabbly Connect, locate the ‘Create Workflow’ button on the dashboard. Click it to open a dialog box prompting you to name your workflow. For this integration, name it something descriptive, like ‘Google Tasks to Google Calendar Event’.

Once named, you will be taken to a new window where you can set up your trigger and action applications. Your trigger application should be Google Tasks, and the action application will be Google Calendar. This setup is essential for automating the event creation process.


3. Set Up Google Tasks as the Trigger Application

In this step, you will configure Google Tasks as your trigger application in Pabbly Connect. Select Google Tasks and choose the trigger event as ‘New Task’. This means that every time a new task is created, the workflow will initiate.

Once you select the trigger, click on ‘Connect’ to link your Google Tasks account. You will need to authorize Pabbly Connect to access your Google account by signing in and allowing the necessary permissions.

  • Select ‘Add New Connection’.
  • Sign in with your Google account.
  • Allow access to Google Tasks.

After successful authorization, select the task list you want to monitor for new tasks. Click on ‘Save and Send Test Request’ to confirm that your connection is working and retrieve the latest task details.


4. Configure Google Calendar as the Action Application

Now that you have set up Google Tasks as your trigger, the next step is to configure Google Calendar as your action application in Pabbly Connect. Select Google Calendar and choose the action event as ‘Create Detailed Event’. This will allow you to create an event in your Google Calendar based on the new tasks created in Google Tasks.

Click ‘Connect’ again to link your Google Calendar account. Just like before, you will need to authorize Pabbly Connect to access your Google Calendar. Follow the same steps as you did for Google Tasks.

  • Select ‘Add New Connection’.
  • Sign in with your Google account.
  • Allow access to Google Calendar.

Once authorized, you will need to map the details from the Google Tasks to the Google Calendar event fields, such as title, description, start date, and time zone. This mapping is crucial for ensuring that the correct information is transferred.


5. Finalize and Test the Integration

After mapping the necessary fields, click on ‘Save and Send Test Request’ within Pabbly Connect. This action will create a detailed event in your Google Calendar based on the latest task from Google Tasks.

To verify that the integration works correctly, create a new task in Google Tasks and check if a corresponding event is automatically created in your Google Calendar. This real-time test confirms that your integration is successful.

With this simple two-step process using Pabbly Connect, you can automate the creation of detailed events in Google Calendar from new tasks in Google Tasks, streamlining your workflow.


Conclusion

In this tutorial, we explored how to create a Google Calendar detailed event from new Google Tasks using Pabbly Connect. By following these steps, you can automate your tasks efficiently, ensuring your calendar is always up-to-date with new events.

Ensure you check out Pabbly Connect to create business automation workflows and reduce manual tasks. Pabbly Connect currently offer integration with 2,000+ applications.

How to Automatically Save Tweets to Google Sheets Using Pabbly Connect

Learn how to automate saving tweets to Google Sheets using Pabbly Connect. Create backups of your tweets effortlessly with this detailed tutorial. Navigate the automation landscape confidently with clear, structured guidance suitable for professionals regardless of prior technical experience.

Watch Step By Step Video Tutorial Below


1. Setting Up Pabbly Connect for Twitter and Google Sheets Integration

In this section, we will explore how to set up Pabbly Connect to automate the saving of tweets into Google Sheets. Start by signing up for a free account on the Pabbly Connect website. Once you have signed up, log in to access your dashboard.

From the dashboard, click on the ‘Create Workflow’ button. You will be prompted to name your workflow; for this tutorial, let’s name it ‘Twitter to Google Sheets.’ After naming your workflow, click on the ‘Create’ button to proceed. This action will load your workflow page featuring both the trigger and action modules.


2. Choosing Twitter as the Trigger Application

To automate the process, we need to select Twitter as the trigger application in Pabbly Connect. Click on the trigger application dropdown and choose Twitter. The trigger event you need to select is ‘New Tweet,’ which will check for new tweets every 10 minutes.

  • Click on ‘Connect’ to establish a connection with Twitter.
  • Select ‘Add New Connection’ and then click on ‘Connect with Twitter.’
  • Authorize the app to connect with your Twitter account.

After successfully authorizing, you can test the connection by clicking on the ‘Save and Send Test Request’ button. This will fetch the most recent tweet data, which will be used in the next steps.


3. Connecting Google Sheets for Data Storage

With the Twitter trigger set up, the next step is to connect Google Sheets using Pabbly Connect. In the action application dropdown, search for and select Google Sheets. The action event should be set to ‘Add New Row.’ Click on ‘Connect’ to proceed.

Select ‘Add New Connection’ and sign in with the Google account that has access to the Google Sheets where you want to save your tweets. After granting the necessary permissions, you will need to select the specific spreadsheet. In this case, choose the spreadsheet named ‘Tweet Sheet.’

  • Ensure the sheet name is automatically selected as ‘Sheet1.’
  • Map the required fields such as Tweet text, media URL, and tweet date.
  • Click on ‘Save and Send Test Request’ to check if the data is being added correctly.

Once you have mapped all the necessary fields, you can test the connection to ensure everything is functioning properly. If successful, the data from your most recent tweet will be added to the specified Google Sheets document.


4. Verifying the Integration and Data Backup

After setting up the integration between Twitter and Google Sheets using Pabbly Connect, it’s essential to verify that the data is being saved correctly. Go to your Google Sheets document and check if the most recent tweet has been added as a new row.

You should see the tweet text, any images shared, the tweet’s date, and the link to the tweet. This confirms that your automation is working as intended. If you do not see the data, revisit the previous steps to ensure all connections and mappings are correct.


Conclusion

In this tutorial, we have successfully set up an automation using Pabbly Connect to save tweets into Google Sheets, creating an efficient backup system for your tweets. This integration allows you to keep track of your tweets without manual effort, ensuring that you have a reliable record of your social media activity.

Ensure you check out Pabbly Connect to create business automation workflows and reduce manual tasks. Pabbly Connect currently offer integration with 2,000+ applications.

By following these steps, you can automate the process of saving tweets to Google Sheets, making it easier to analyze and manage your social media content in the future.

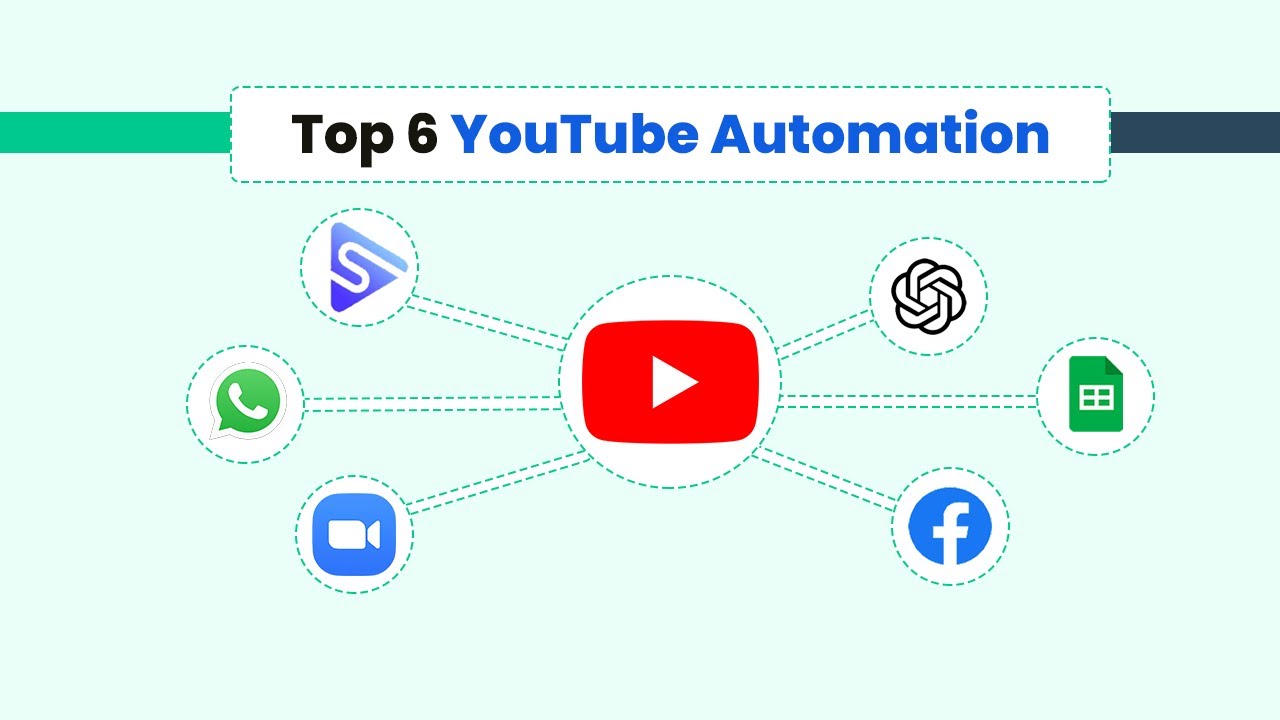
Best Ways to Automate Your YouTube Channel with Pabbly Connect

Discover the top 6 automation ideas for your YouTube channel using Pabbly Connect. Learn how to automate video sharing, uploads, and more! Follow this definitive guide to creating powerful automated workflows with straightforward, efficiency-focused solutions that save valuable time.

Watch Step By Step Video Tutorial Below


1. Automate Sharing YouTube Videos on Facebook with Pabbly Connect

Automating your YouTube channel can significantly enhance your workflow. One effective way to do this is by automatically sharing YouTube videos on your Facebook page using Pabbly Connect. This integration allows you to upload a video on your YouTube channel and have it shared on Facebook simultaneously.

To set up this automation, follow these steps in Pabbly Connect:

  • Connect your YouTube account to Pabbly Connect.
  • Select the trigger event as ‘New Video Uploaded’.
  • Connect your Facebook account to Pabbly Connect.
  • Choose the action event as ‘Share Video’.
  • Map the video URL from YouTube to Facebook.

Now, every time you upload a new video, it will be automatically shared on your Facebook page without any manual effort.


2. Automatically Upload Zoom Meeting Recordings to YouTube via Pabbly Connect

Another powerful automation involves uploading Zoom meeting recordings directly to your YouTube channel using Pabbly Connect. This feature is beneficial for content creators who conduct webinars or meetings frequently and want to share them with their audience.

To automate this process, you need to connect your Zoom account with Pabbly Connect and set the following steps:

  • Select Zoom as the trigger application.
  • Choose ‘New Recording’ as the trigger event.
  • Connect your YouTube account in Pabbly Connect.
  • Select ‘Upload Video’ as the action event.
  • Map the recording file URL to the video upload fields in YouTube.

With this setup, every time a Zoom meeting is recorded, it will automatically upload to your YouTube channel, saving you time and effort.


3. Upload YouTube Videos from Google Sheets Using Pabbly Connect

Utilizing Google Sheets to manage your YouTube uploads can be a game changer. With Pabbly Connect, you can automate the process of uploading videos directly from a Google Sheet, which is especially useful for teams managing multiple video uploads.

Here’s how to set it up:

Create a Google Sheet with columns for video URL, title, tags, and description. Connect Google Sheets to Pabbly Connect. Set the trigger as ‘New Row Added’. Connect your YouTube account as the action application. Choose ‘Upload Video’ as the action event and map the fields accordingly.

Now, whenever a new row is added to your Google Sheet, the video will be uploaded to your YouTube channel automatically.


4. Automatically Update YouTube Video Thumbnails with Pabbly Connect

Keeping your YouTube thumbnails fresh is crucial for attracting viewers. With Pabbly Connect, you can automate the process of updating video thumbnails, which can save you time and ensure consistency across your channel.

To set this up, follow these steps:

Prepare a Google Sheet with video IDs and corresponding thumbnail URLs. Connect Google Sheets to Pabbly Connect. Set the trigger as ‘New Row Added’. Connect your YouTube account in Pabbly Connect. Select ‘Update Thumbnail’ as the action event and map the video ID and thumbnail URL.

With this automation, you can update the thumbnails of your videos without needing to log into YouTube each time.


5. Automatically Reply to YouTube Comments via Pabbly Connect

Engaging with your audience is vital, and automating replies to comments can enhance interaction on your channel. Using Pabbly Connect, you can set up a system where comments are automatically replied to using AI-generated responses.

To implement this automation, follow these steps:

Connect your YouTube account to Pabbly Connect. Set the trigger to ‘New Comment on Video’. Integrate an AI tool for generating replies. Set the action to ‘Post Comment’ and map the generated reply.

Now, every time a new comment is posted on your videos, a relevant reply will be generated and posted automatically, enhancing your engagement with viewers.


6. Automatically Get YouTube Channel Stats on WhatsApp with Pabbly Connect

For YouTubers who want to keep track of their channel performance without logging in every day, automating the delivery of stats to WhatsApp is a fantastic solution. Pabbly Connect makes this possible by sending daily updates directly to your WhatsApp account.

Follow these steps to set up the automation:

Connect your YouTube account to Pabbly Connect. Set the trigger for ‘Daily Stats’. Connect your WhatsApp account. Choose ‘Send Message’ as the action event and map the stats data.

With this setup, you will receive daily updates about your channel’s performance directly on WhatsApp, making it easier to monitor your growth.


Conclusion

Automating your YouTube channel with Pabbly Connect offers numerous benefits, including saving time and enhancing efficiency. By implementing these six automation ideas, you can streamline your workflow and focus more on content creation. Start using Pabbly Connect today to transform your YouTube management process!

Ensure you check out Pabbly Connect to create business automation workflows and reduce manual tasks. Pabbly Connect currently offer integration with 2,000+ applications.