How to Sync Data Between Two Google Sheets Automatically Using Pabbly Connect

Learn how to automatically sync data between two Google Sheets using Pabbly Connect. Follow this detailed tutorial for step-by-step instructions. Implement the precise methodologies leading organizations use to automate repetitive tasks, illustrated with practical examples designed for immediate application.

Watch Step By Step Video Tutorial Below


1. Accessing Pabbly Connect for Google Sheets Integration

To sync data between two Google Sheets automatically, you will first need to access Pabbly Connect. This powerful automation tool allows you to create workflows that connect different applications seamlessly.

Start by signing up for a free account on the Pabbly Connect website. After signing in, navigate to your dashboard where you can create a new workflow by clicking on the ‘Create Workflow’ button. Name your workflow appropriately, such as ‘Google Sheets to Google Sheets’, to reflect its purpose.


2. Setting Up the Trigger in Pabbly Connect

In the workflow setup, you will need to set up a trigger for your automation. For this, select Google Sheets as the application and choose the trigger event as ‘New or Updated Spreadsheet Row’. This step is crucial as it defines when the automation will be activated.

  • Select Google Sheets as the application.
  • Choose the trigger event ‘New or Updated Spreadsheet Row’.
  • Copy the webhook URL provided by Pabbly Connect.

Next, you will need to configure your Google Sheets to connect with Pabbly Connect. Open your sales sheet in an incognito window to avoid any account conflicts. Go to the Extensions menu, find the ‘Pabbly Connect Webhooks’ option, and select ‘Initial Setup’. Here, paste the webhook URL and specify the trigger column where data entries will be made.


3. Sending Test Data to Pabbly Connect

After setting up the initial connection, it’s time to send test data to Pabbly Connect. In your Google Sheets, click the ‘Send Test’ button within the Pabbly Connect Webhooks setup. This action will send the first row of data from your sales sheet to the workflow.

Once you click the test button, check your Pabbly Connect workflow to confirm that the data has been received successfully. You should see the details of the product, including the name, date, and quantity in the response section. This confirms that your trigger is working correctly and that data is flowing from Google Sheets to Pabbly Connect.


4. Setting Up the Action to Update Inventory

Now that you have the trigger set up, the next step is to set up the action that updates your inventory sheet. In the action step of your workflow, select Google Sheets again and choose the action event ‘Lookup Spreadsheet Rows’. This step will help you fetch the current stock quantity of the product sold.

  • Select Google Sheets as the action application.
  • Choose the action event ‘Lookup Spreadsheet Rows’.
  • Map the product name from the trigger data to search in your inventory sheet.

This action will allow you to look up the stock quantity based on the product sold. After fetching the current stock quantity, you will then need to perform a mathematical operation to subtract the quantity sold from the stock quantity. Use the ‘Number Formatter’ feature in Pabbly Connect to perform this subtraction.


5. Finalizing the Integration and Testing

To complete the integration, you need to update the inventory sheet with the new stock quantity. In the final action step, select ‘Update Cell Value’ in Google Sheets. Map the range where the stock quantity is located and use the result from the subtraction operation as the new value.

After setting everything up, click ‘Save and Send Test Request’ to see if the inventory updates correctly. Check your inventory sheet to confirm that the stock quantity has been updated according to the sales data. With this final step, your automation is complete, and Pabbly Connect will keep your Google Sheets synchronized automatically.


Conclusion

In this tutorial, we explored how to sync data between two Google Sheets automatically using Pabbly Connect. By setting up triggers and actions, you can streamline your data management effectively. Now, every time you update your sales data, your inventory sheet will automatically reflect those changes, saving you time and effort.

Ensure you check out Pabbly Connect to create business automation workflows and reduce manual tasks. Pabbly Connect currently offer integration with 2,000+ applications.

How to Create Contacts in Constant Contact for New Facebook Lead Ads Leads Using Pabbly Connect

Learn how to automate contact creation in Constant Contact for new Facebook Lead Ads leads using Pabbly Connect with this detailed tutorial. Discover hidden automation capabilities within your existing tools. This guide shows you how to connect your essential applications and permanently eliminate redundant manual processes.

Watch Step By Step Video Tutorial Below


1. Setting Up Pabbly Connect for Facebook Lead Ads

To create contacts in Constant Contact for new Facebook Lead Ads leads, you first need to set up Pabbly Connect. This automation tool allows you to connect your Facebook Lead Ads account to Constant Contact seamlessly. Start by signing up for a free Pabbly Connect account.

Once logged in, navigate to the Pabbly Connect dashboard. Click on the ‘Create Workflow’ button and name your workflow, such as ‘Facebook Lead Ads to Constant Contact’. This sets the stage for automating your lead capture process.


2. Connecting Facebook Lead Ads to Pabbly Connect

In this step, you will connect your Facebook Lead Ads account to Pabbly Connect. In the trigger window, choose ‘Facebook Lead Ads’ as the app. Select ‘New Lead’ as the trigger event, then click ‘Connect’ to establish a new connection.

  • Click on the ‘Connect with Facebook Lead Ads’ button.
  • Select the Facebook page associated with your lead ads (e.g., Medicare Hub).
  • Choose the lead generation form you want to capture leads from.

After completing these steps, click on ‘Save and Send Test Request’ to ensure that Pabbly Connect is correctly receiving data from Facebook Lead Ads.


3. Mapping Lead Data to Constant Contact

Next, you will set up the action to map the lead data to Constant Contact using Pabbly Connect. In the action window, select ‘Constant Contact’ as the app and choose ‘Create or Update a Contact’ as the action event. Click ‘Connect’ to link your Constant Contact account.

Once connected, you need to map the details of the lead captured from Facebook. This includes the email address, first name, last name, and phone number. To do this, simply click on each field and select the corresponding data from the dropdown menu provided by Pabbly Connect.

  • Map the email address from the lead data.
  • For the full name, use the Text Formatter to split it into first and last names.
  • Select the appropriate list in Constant Contact where the contact should be added.

After mapping all required fields, click on ‘Save and Send Test Request’ to verify that the contact is created successfully in Constant Contact.


4. Testing the Automation Workflow

Now that your automation is set up, it’s time to test it. Go back to your Facebook Lead Ads testing tool and generate a new test lead. This will simulate a real lead submission and allow you to see if Pabbly Connect successfully adds the new contact to Constant Contact.

After generating the lead, return to Pabbly Connect and check the workflow for the test response. If everything is working correctly, you should see the new lead details reflected in the response. This confirms that your automation is functioning as intended.


5. Conclusion: Automating Contacts with Pabbly Connect

In this tutorial, we explored how to automate the creation of contacts in Constant Contact for new leads generated from Facebook Lead Ads using Pabbly Connect. By following the steps outlined, you can streamline your lead management process efficiently.

Ensure you check out Pabbly Connect to create business automation workflows and reduce manual tasks. Pabbly Connect currently offer integration with 2,000+ applications.

Check out Pabbly Connect – Automate your business workflows effortlessly! Sign Up Free – Start your journey with ease! 10,000+ Video Tutorials – Learn step by step! Join Pabbly Facebook Group – Connect with 21,000+ like minded people!
With Pabbly Connect, you can easily connect multiple applications and automate your workflows, saving time and reducing manual effort. This integration not only enhances productivity but also ensures that your leads are captured and managed effectively.


In conclusion, using Pabbly Connect allows you to automate your contact creation process seamlessly, ensuring that every lead generated is promptly added to your Constant Contact account for further engagement.

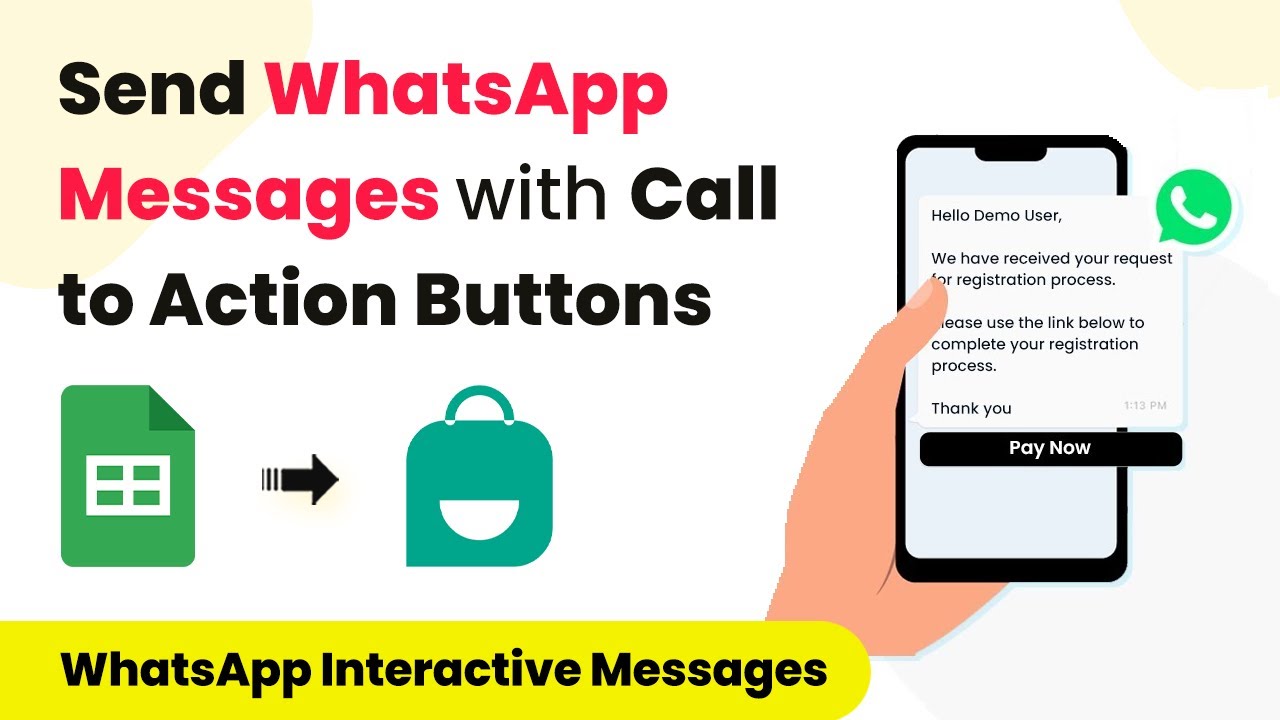
How to Send Interactive WhatsApp Messages with Quick Reply & Call to Action Buttons Using Pabbly Connect

Learn how to send interactive WhatsApp messages with quick reply and call to action buttons using Pabbly Connect for seamless integration. Explore systematic approaches to creating efficient automation solutions that convert technical concepts into practical, implementable instructions.

Watch Step By Step Video Tutorial Below


1. Accessing Pabbly Connect for WhatsApp Integration

To start sending interactive WhatsApp messages, you need to access Pabbly Connect. This platform allows you to integrate various applications, including WhatsApp, Google Sheets, and more. Simply visit the Pabbly Connect website and sign in or create a new account if you are a first-time user.

Once logged into Pabbly Connect, you will see the dashboard. Click on the blue button to create a new workflow. Name your workflow something like ‘Send WhatsApp Messages with Buttons’. This name will help you identify the automation later.


2. Creating the Workflow in Pabbly Connect

After naming your workflow, you will set up the trigger for your automation. In this case, the trigger will be Google Sheets. Select Google Sheets as your trigger application and choose the event ‘New or Updated Row’. This means that whenever a new row is added or updated in your Google Sheets, the automation will initiate. using Pabbly Connect

  • Select Google Sheets as the trigger application.
  • Choose ‘New or Updated Row’ as the trigger event.
  • Copy the webhook URL provided by Pabbly Connect.

Next, head to your Google Sheets, click on Extensions, and then on Pabbly Connect Webhook. Paste the copied URL into the initial setup. This connection allows Pabbly Connect to receive data from your Google Sheets.


3. Setting Up the Interact Application in Pabbly Connect

Now, you need to set up the Interact application to send WhatsApp messages. In your Pabbly Connect workflow, add a new action step and select Interact as the application. Choose the action event ‘Send WhatsApp Message Template’. This action will send the WhatsApp message with quick reply and call to action buttons.

To connect Interact with Pabbly Connect, you will need a secret key from your Interact account. Click on the hyperlink to obtain your secret key. Once you have it, paste it into the connection setup in Pabbly Connect. This step ensures that Pabbly Connect can send messages through your Interact account.


4. Creating Your WhatsApp Message Template

Before sending messages, you must create a message template in Interact. This template can include variables to personalize messages for each recipient. In Interact, navigate to the templates section and click on create new template. Provide a name, select a category, and choose the language for your message.

Compose your message, and include buttons for quick replies and calls to action. For example, you can create a button that says ‘Call Now’ or ‘Visit Website’. After creating the template, submit it for approval. Once approved, you can use it to send messages through Pabbly Connect.


5. Sending Messages in Bulk Using Pabbly Connect

With your automation set up, you can send messages to multiple customers in bulk. In your Pabbly Connect workflow, enable the ‘Send All Data’ option. This feature allows you to automatically send messages to every customer listed in your Google Sheets. using Pabbly Connect

Once you have enabled this setting, Pabbly Connect will handle the process in the background. You can simply close Pabbly Connect, and it will continue to send messages as new data is added to your Google Sheets. This automation saves time and ensures that your customers receive timely communications.


Conclusion

In conclusion, using Pabbly Connect to send interactive WhatsApp messages with quick reply and call to action buttons is a straightforward process. By following the steps outlined in this tutorial, you can automate your messaging efficiently, ensuring your customers receive personalized communication seamlessly.

Ensure you check out Pabbly Connect to create business automation workflows and reduce manual tasks. Pabbly Connect currently offer integration with 2,000+ applications.

How to Create Airtable Records for New or Updated Google Contacts Using Pabbly Connect

Learn how to automate the creation of Airtable records for new or updated Google Contacts with Pabbly Connect in this detailed tutorial. Navigate the automation landscape confidently with clear, structured guidance suitable for professionals regardless of prior technical experience.

Watch Step By Step Video Tutorial Below


1. Setting Up Pabbly Connect for Google Contacts Integration

To begin the automation process, you will need to access Pabbly Connect. This platform facilitates the integration between Google Contacts and Airtable. Start by signing up for a free account on the Pabbly Connect dashboard.

Once logged in, click on the ‘Create Workflow’ button. Name your workflow, for instance, ‘Google Contacts to Airtable’, and then click on ‘Create’. This initiates a new workflow where you can set up triggers and actions.


2. Connecting Google Contacts as the Trigger in Pabbly Connect

In this step, you will connect your Google Contacts to Pabbly Connect. In the trigger window, select Google Contacts from the app list. For the trigger event, choose ‘New or Updated Contact’ from the dropdown menu.

  • Click on ‘Connect’ and then ‘Add New Connection’.
  • Sign in with your Google account and grant necessary permissions.
  • Once connected, click on ‘Save and Send Test Request’ to fetch the latest contact details.

After completing these steps, the details of the most recent contact from Google Contacts will be available in Pabbly Connect, enabling further actions.


3. Searching for Existing Records in Airtable Using Pabbly Connect

Next, you will set up an action step in Pabbly Connect to search for existing records in Airtable. Select Airtable as the app and choose ‘Search Record’ as the action event.

To connect your Airtable account, you will need to enter your API token. Follow the instructions in the Help section to generate this token from your Airtable account. After connecting, select the base and table where you want to search for the contact.

  • Choose the base named ‘Project Data’ and the table named ‘Contacts’.
  • Select the field name to search by, either using mobile number or email address.
  • Map the search value by selecting the corresponding field from the Google Contacts response.

After mapping, click on ‘Save and Send Test Request’ to verify if the contact exists in Airtable. This step is crucial for determining whether to update or create a new record.


4. Updating or Creating Records in Airtable via Pabbly Connect

If the search confirms the contact exists, you will update the record in Airtable. Use the ‘Update Record’ action event in Airtable, and map the fields from the Google Contacts response to the respective Airtable fields.

In cases where the contact does not exist, you will set up a second route using the router feature in Pabbly Connect. This allows you to create a new record in Airtable. Select ‘Create Record’ as the action event and map the necessary fields.

Map the first name, last name, email address, mobile number, and company name from Google Contacts. Ensure all fields are correctly mapped before saving the changes. Click on ‘Save’ to finalize the record creation.

With these configurations, Pabbly Connect ensures that your Airtable records are always up-to-date with your Google Contacts.


5. Testing the Integration Between Google Contacts and Airtable

After setting up the entire workflow, it’s essential to test the integration. Create a new contact in Google Contacts and wait a few minutes for Pabbly Connect to process the information.

Check your Airtable database to see if the new contact has been added. If the contact already exists, verify that the updated information reflects correctly. This testing phase confirms that Pabbly Connect is functioning as intended.

In summary, this integration allows you to seamlessly manage your contacts across platforms, reducing redundancy and enhancing productivity. By automating these processes, you can save time and effort.


Conclusion

In this tutorial, we demonstrated how to use Pabbly Connect to create and update Airtable records based on Google Contacts. This automation streamlines contact management, ensuring that your records are always accurate and up-to-date.

Ensure you check out Pabbly Connect to create business automation workflows and reduce manual tasks. Pabbly Connect currently offer integration with 2,000+ applications.

How to Get RSS Feeds on WhatsApp Automatically Using Pabbly Connect

Learn how to integrate RSS feeds with WhatsApp using Pabbly Connect. This detailed tutorial guides you through the automation process step-by-step. Revolutionize your productivity approach with just a few strategic clicks. Uncover professional methods for connecting applications and creating workflows that reclaim hours of your week.

Watch Step By Step Video Tutorial Below


1. Setting Up Pabbly Connect for RSS Feed Automation

To get started with RSS feeds on WhatsApp automatically, you need to access Pabbly Connect. This platform allows you to create automated workflows that connect various applications.

First, sign up for a free account on the Pabbly Connect website. Once you have your account, log in and select the Pabbly Connect product. You will be directed to the dashboard where you can create new workflows.


2. Creating Your Workflow in Pabbly Connect

After accessing Pabbly Connect, click on the ‘Create Workflow’ button. Name your workflow something descriptive, like ‘RSS Feeds on WhatsApp’. This helps you easily identify it later.

Next, you will see two modules: Trigger and Action. The Trigger is the event that starts the workflow, and the Action is what happens as a result. In this case, select ‘RSS by Pabbly’ as your trigger application and choose ‘New Item in Feed’ as the trigger event.

  • Select ‘RSS by Pabbly’ as the trigger application.
  • Choose ‘New Item in Feed’ as the trigger event.
  • Click on the connect button to establish the connection.

Once connected, you need to provide the RSS feed URL. For example, you can use the NDTV business RSS feed URL. Paste this URL into the designated field and click on ‘Save and Send Test Request’ to fetch the latest feed item.


3. Fetching RSS Feed Details

After clicking on ‘Save and Send Test Request’, Pabbly Connect will retrieve the latest RSS feed details. You will see a response that includes the feed title, publication date, and a link to the feed.

For instance, you might see a title like ‘Who Gained and Who Lost from Budget 2023’ along with a link to the full article. This ensures that you are receiving the most recent updates from your chosen RSS feed.

  • Check the response section for the latest feed details.
  • Verify that the feed title and link match the latest updates.
  • Make sure to note the publication date for reference.

This step is crucial as it sets the foundation for sending the feed to your WhatsApp account using the next action step.


4. Integrating WhatsApp with Pabbly Connect

To send the fetched RSS feed details to WhatsApp, you will need to integrate the WhatsApp application through Pabbly Connect. For this, select the ‘Interact’ application as your action application and choose the action event ‘Send WhatsApp Template Message’.

Upon selecting this, you will be prompted to connect your Interact account. You need to enter your Secret API Key, which can be found in the settings of your Interact application. Once connected, you can proceed to configure the message details.

Enter the Secret API Key from your Interact settings. Provide your WhatsApp number in the correct format. Select or create a message template in the Interact app.

Make sure to fill in the required fields, including the message body, which can include dynamic content from the RSS feed like the title and link. This ensures that each message sent to WhatsApp is personalized with the latest feed information.


5. Testing the Integration and Finalizing

After configuring your WhatsApp message, it’s time to test the integration. Click on the ‘Save and Send Test Request’ button in Pabbly Connect. This will send a test message to your WhatsApp account containing the latest RSS feed details.

Upon successful testing, you should see a message in your WhatsApp that includes the title and link of the RSS feed. For example, it might say, ‘Updates from NDTV on business section: Who Gained and Who Lost from Budget 2023’ along with a link to the article.

Once tested successfully, your automation is complete! Now, every time a new item is added to the RSS feed, you will receive an automatic message on WhatsApp without any manual effort.


Conclusion

In this tutorial, we have effectively demonstrated how to set up an automation using Pabbly Connect to receive RSS feeds directly on WhatsApp. By following the steps outlined, you can stay updated with the latest news effortlessly. This integration not only saves time but also enhances your ability to share important information with friends and family seamlessly.

Ensure you check out Pabbly Connect to create business automation workflows and reduce manual tasks. Pabbly Connect currently offer integration with 2,000+ applications.

Automate Webinar Reminders on WhatsApp with Pabbly Connect

Learn how to send automated webinar reminders on WhatsApp using Pabbly Connect, Google Calendar, and Google Sheets. Step-by-step tutorial included. Explore efficient methods for automating routine tasks with clear, concise instructions suited for both newcomers and experienced professionals.

Watch Step By Step Video Tutorial Below


1. Setting Up Pabbly Connect for Webinar Reminders

To automate sending webinar reminders via WhatsApp, the first step is to set up Pabbly Connect. This powerful automation tool allows integration between multiple applications, making it ideal for your webinar needs. Start by signing up for Pabbly Connect and accessing the dashboard.

Once logged in, click on the ‘Create Workflow’ button. Name your workflow, for example, ‘Webinar Reminders on WhatsApp’. After naming, click on the ‘Create’ button to proceed. This sets the stage for integrating Google Calendar and WhatsApp through Pabbly Connect.


2. Triggering the Workflow with Google Calendar

The next step in this automation involves setting Google Calendar as the trigger. In the trigger section of Pabbly Connect, search for Google Calendar and select it. Choose the trigger event as ‘New Event’ to ensure that every time a webinar is scheduled, it triggers the workflow.

  • Select ‘Google Calendar’ as the application.
  • Connect your Google account by signing in.
  • Choose the calendar you will use for scheduling webinars.

After connecting, click on ‘Save and send test request’. This will fetch the details of the webinar event, including start time and description, which will be used in subsequent steps of the workflow.


3. Fetching Attendee Details from Google Sheets

After setting up the trigger, the next step is to gather the details of attendees from Google Sheets. In Pabbly Connect, add a new action step and select Google Sheets. Choose the action event as ‘Get Rows’ to retrieve the attendee data.

To configure this, select the spreadsheet containing your webinar registrations and specify the data range. Ensure you toggle the ‘Simple Response’ option to off to get the data in array format, allowing the workflow to iterate through each attendee.

  • Select your spreadsheet name from the dropdown.
  • Specify the range (e.g., A2:C6) to fetch attendee details.

Click ‘Save and send test request’ to confirm that the details are fetched correctly. This data will be used in the next steps to send personalized reminders.


4. Sending WhatsApp Reminders Using Pabbly Connect

With the attendee details fetched, the next step is to send WhatsApp reminders. For this, add another action step in Pabbly Connect and select the application for WhatsApp messaging, such as Interact. Choose the action event as ‘Send WhatsApp Template Message’.

Connect your Interact account by entering the API key that you can find in the developer settings of your Interact dashboard. After connecting, map the phone number and template message for the WhatsApp reminder.

Map the phone number from the attendee details. Insert the template code for the reminder message. Define the message content, including personalized variables.

Once everything is set up, click on ‘Save and send test request’. This will send a WhatsApp reminder to the mapped phone number, ensuring attendees receive timely notifications before the webinar starts.


5. Finalizing and Testing the Automation

Having set up the entire automation, the last step is to finalize and test the workflow in Pabbly Connect. Ensure that all steps are correctly configured, and the data flows seamlessly from Google Calendar to Google Sheets and finally to WhatsApp.

To test, create a new event in Google Calendar, and check if the WhatsApp reminders are sent automatically to the registered attendees. This process should occur 15 minutes before the webinar starts, as configured in your workflow settings.

Remember, you can use this workflow repeatedly for future webinars without manual intervention. Simply create new events in your designated Google Calendar, and Pabbly Connect will handle the rest, sending reminders to your attendees automatically.


Conclusion

By using Pabbly Connect, you can effortlessly automate the process of sending webinar reminders via WhatsApp. This integration with Google Calendar and Google Sheets ensures that your attendees are always informed and engaged.

Ensure you check out Pabbly Connect to create business automation workflows and reduce manual tasks. Pabbly Connect currently offer integration with 2,000+ applications.

How to Create Sendinblue Contacts from Google Contacts Using Pabbly Connect

Learn how to automate the creation of Sendinblue contacts from new or updated Google Contacts using Pabbly Connect with this detailed tutorial. Revolutionize your productivity approach with just a few strategic clicks. Uncover professional methods for connecting applications and creating workflows that reclaim hours of your week.

Watch Step By Step Video Tutorial Below


1. Setting Up Pabbly Connect for Google Contacts and Sendinblue Integration

To create Sendinblue contacts from new or updated Google Contacts, the first step is to access Pabbly Connect. This automation platform allows seamless integration between various applications. Start by signing up for a free Pabbly Connect account using the link provided in the description.

Once you have logged into your Pabbly Connect dashboard, click on the ‘Create Workflow’ button. Name your workflow, for example, ‘Google Contacts to Sendinblue’, and click ‘Create’. This opens a new workflow with two windows: the trigger window and the action window.


2. Connecting Google Contacts to Pabbly Connect

In the trigger window, search for Google Contacts to connect it to Pabbly Connect. Select the trigger event as ‘New or Updated Contact’. Next, click on ‘Connect’ and select ‘Add New Connection’. This step is crucial for ensuring that Pabbly Connect can access your Google Contacts.

  • Click on the ‘Sign in with Google’ button.
  • Select your Google account.
  • Scroll down and click ‘Continue’ to authorize the connection.

After connecting, click on ‘Save and Send Test Request’. This will capture the details of the most recent contact created or updated in Google Contacts, demonstrating how Pabbly Connect facilitates the automation process.


3. Creating a Sendinblue Contact from Google Contacts

After successfully connecting Google Contacts, the next step is to set up the action in Pabbly Connect. In the action window, search for Sendinblue and select it. Choose the action event as ‘Create or Update Contact’. This step ensures that the contact details from Google Contacts will be sent to Sendinblue.

Click ‘Connect’ and select ‘Add New Connection’. You will need to enter your Sendinblue API key. To find this key, go to your Sendinblue account, click on your profile icon, and select ‘SMTP & API’. Generate a new API key and copy it to use in Pabbly Connect.

  • Paste the API key into the connection window in Pabbly Connect.
  • Click ‘Save’ to connect your Sendinblue account.
  • Map the email address from Google Contacts to the contact email field in Sendinblue.

Mapping ensures that the details captured from Google Contacts are accurately transferred to Sendinblue, showcasing the power of Pabbly Connect in automating this process.


4. Testing the Automation Workflow in Pabbly Connect

Once the mapping is complete, click on ‘Save and Send Test Request’ in the action window. This action tests whether the new contact from Google Contacts has been successfully added to Sendinblue. You should see a positive response confirming that the contact has been created.

To verify, refresh your Sendinblue contacts page. If the new contact appears, it confirms that your automation through Pabbly Connect is functioning correctly. Testing is essential to ensure that the integration works as intended.

Create a new contact in Google Contacts to further test. Wait for a few minutes for the automation to trigger. Check Sendinblue again for the newly added contact.

This process highlights how Pabbly Connect enables real-time automation between Google Contacts and Sendinblue, making contact management efficient and effortless.


5. Conclusion: Streamlining Contact Management with Pabbly Connect

In this tutorial, we explored how to create Sendinblue contacts from new or updated Google Contacts using Pabbly Connect. By automating this process, users can save significant time and reduce manual errors in managing contacts.

Ensure you check out Pabbly Connect to create business automation workflows and reduce manual tasks. Pabbly Connect currently offer integration with 2,000+ applications.

Check out Pabbly Connect – Automate your business workflows effortlessly! Sign Up Free – Start your journey with ease! 10,000+ Video Tutorials – Learn step by step! Join Pabbly Facebook Group – Connect with 21,000+ like minded people!

With Pabbly Connect, you can easily set up workflows that connect various applications, enhancing your productivity. This integration is just one of the many possibilities that Pabbly Connect offers for automating tasks across different platforms.


Automate Google Forms Responses to Google Chat with Pabbly Connect

Learn how to automatically share Google Forms responses to Google Chat using Pabbly Connect. Step-by-step guide for seamless integration. Eliminate manual repetitive tasks from your workflow. Discover proven automation methods with intuitive steps designed for efficiency-minded professionals.

Watch Step By Step Video Tutorial Below


1. Setting Up Pabbly Connect for Google Forms and Google Chat Integration

To share Google Forms responses to Google Chat automatically, you need to start by accessing Pabbly Connect. This platform allows you to create workflows that connect different applications seamlessly.

First, visit Pabbly Connect and sign up for a free account if you are a new user. Once logged in, navigate to the dashboard and click on the ‘Create Workflow’ button. You will be prompted to name your workflow; use a descriptive name like ‘Share Google Forms Responses to Google Chat Automatically’.


2. Selecting Google Forms and Google Chat in Pabbly Connect

After naming your workflow, the next step is to select the applications involved in the automation. Since we are integrating Google Forms with Google Chat, you will first choose Google Forms as the trigger application.

  • Select Google Forms as the trigger app.
  • Choose the trigger event as ‘New Response in Spreadsheet’.
  • Connect your Google account to Pabbly Connect.

Once you select the trigger, you will receive a webhook URL. This URL will be used to connect your Google Form responses with Pabbly Connect. Copy this URL, as you will need it soon.


3. Configuring Google Sheets for Google Forms Responses

Next, you need to link your Google Form to a Google Sheet. This sheet will collect all the responses from your form submissions. Open the associated Google Sheet and navigate to the Extensions menu. using Pabbly Connect

  • Click on ‘Extensions’ and select ‘Add-ons’.
  • Search for ‘Pabbly Connect WebEx’ and install the add-on.
  • After installation, go to ‘Extensions’ > ‘Pabbly Connect WebEx’ > ‘Initial Setup’.

In the Initial Setup dialog, paste the webhook URL you copied earlier. Specify the trigger column where the data will be entered, which is usually the last column of your responses. Click on ‘Send Test’ to ensure everything is working correctly.


4. Connecting Google Chat to Pabbly Connect

After configuring Google Sheets, the next step is to set up Google Chat as the action application in Pabbly Connect. Select Google Chat from the action application options.

You will need to create a webhook URL for Google Chat. Go to your Google Chat space, click on the arrow next to the space name, and select ‘Manage Webhooks’. Create a new webhook and copy the URL. Return to Pabbly Connect and paste this URL in the required field.


5. Finalizing the Automation and Testing

Now that both applications are connected, you can compose the message that will be sent to Google Chat. Use the data collected from Google Forms to create a formatted message. using Pabbly Connect

Format your message to include the candidate’s name, email, phone number, and position applied. Map the fields from Google Forms to the message in Pabbly Connect. Click on ‘Save and Send Test Request’ to see if the message is sent successfully to Google Chat.

After testing, every new form submission will automatically trigger a message in your Google Chat space, ensuring you receive real-time updates.


Conclusion

By using Pabbly Connect, you can effortlessly automate the sharing of Google Forms responses to Google Chat. This integration streamlines your workflow and ensures timely communication without manual intervention.

Ensure you check out Pabbly Connect to create business automation workflows and reduce manual tasks. Pabbly Connect currently offer integration with 2,000+ applications.

How to Sync Telegram Messages with WhatsApp Automatically Using Pabbly Connect

Learn to automatically sync Telegram messages with WhatsApp using Pabbly Connect. Follow this detailed tutorial for seamless integration. Learn to create powerful connections between your critical applications without requiring specialized programming knowledge or extensive technical background.

Watch Step By Step Video Tutorial Below


1. Accessing Pabbly Connect for Telegram and WhatsApp Integration

To start syncing Telegram messages with WhatsApp automatically, you need to access Pabbly Connect. This powerful automation tool allows you to connect multiple applications seamlessly. First, visit the Pabbly Connect website and log in or sign up for a free account.

Once logged in, you will find the dashboard. Click on the ‘Create Workflow’ button to initiate the integration process. You can name your workflow something descriptive, like ‘Sync Telegram Messages with WhatsApp’. This is the first step in setting up your automation.


2. Creating a Workflow in Pabbly Connect

In this section, you will create a workflow that triggers whenever a new message is received in your Telegram group. In Pabbly Connect, workflows consist of triggers and actions. The trigger will be the receipt of a message in Telegram, and the action will be sending that message to WhatsApp.

  • Click on ‘Create Workflow’ and name it.
  • Select ‘Telegram’ as the trigger application.
  • Choose ‘New Message’ as the trigger event.

After configuring the trigger, click ‘Connect’ to establish the connection between your Telegram account and Pabbly Connect. Follow the on-screen instructions to create a new bot using the BotFather in Telegram, which will help you connect your Telegram account to Pabbly Connect.


3. Connecting Your Telegram Bot to Pabbly Connect

To connect your Telegram bot, you need to create a new bot using the BotFather. Start by sending the command ‘/newbot’ in your Telegram app. You will then be prompted to name your bot and create a unique username. This bot will be used to receive messages from your Telegram group.

Once the bot is created, copy the token provided by BotFather. Return to Pabbly Connect and paste this token into the connection setup. This step is crucial as it allows Pabbly Connect to monitor messages from your Telegram group.

  • Add the bot to your Telegram group.
  • Make the bot an admin of the group to receive messages.

After adding the bot to your group, return to Pabbly Connect and test the connection. This ensures that every message sent in the group will be captured by Pabbly Connect.


4. Sending Telegram Messages to WhatsApp

With the Telegram bot connected, the next step is to set up the action that sends messages to WhatsApp. In Pabbly Connect, select ‘WhatsApp’ as the action application. Choose ‘Send Message’ as the action event. This allows you to configure how messages will be sent to your WhatsApp account.

In this section, you will need to connect your WhatsApp account to Pabbly Connect. You will be prompted to enter your WhatsApp account’s phone number and the template you wish to use for the messages. Ensure you have created an approved message template in your WhatsApp account to use.

Enter your phone number with the country code. Select the message template you created earlier.

After filling in these details, map the variables from the Telegram message to the WhatsApp message template. This ensures that the content of the Telegram message is included in the WhatsApp message.


5. Testing the Integration

After configuring both Telegram and WhatsApp in Pabbly Connect, it’s time to test the integration. Send a message in your Telegram group and observe the functionality. You should receive the same message on your WhatsApp account almost instantly.

This test confirms that the integration is working correctly. If everything is set up properly, every new message in your Telegram group will now be synced to WhatsApp automatically through Pabbly Connect.

Once you confirm that the integration works, you can close Pabbly Connect as it will run in the background, handling all future messages automatically without any manual intervention.


Conclusion

By following this tutorial, you can easily sync your Telegram messages with WhatsApp using Pabbly Connect. This automation saves time and ensures you never miss important messages from your Telegram groups. Start automating your tasks today with Pabbly Connect!

Ensure you check out Pabbly Connect to create business automation workflows and reduce manual tasks. Pabbly Connect currently offer integration with 2,000+ applications.

How to Use Scheduler Inside Pabbly Connect: A Step-by-Step Guide

Learn how to effectively use the Scheduler feature inside Pabbly Connect to automate tasks and integrate applications like Facebook and YouTube effortlessly. This comprehensive guide reveals exactly how to connect your applications and automate repetitive tasks — accessible for professionals of all technical backgrounds.

Watch Step By Step Video Tutorial Below


1. Accessing Pabbly Connect for Scheduling Workflows

To begin using the Scheduler feature inside Pabbly Connect, first, log in to your Pabbly Connect account. Once logged in, navigate to the dashboard where you can create new workflows. The Scheduler allows you to automate tasks at specific times or intervals, making it a powerful tool for managing repetitive tasks.

In the dashboard, click on the ‘Create Workflow’ button. This will open a new workflow setup page where you can select the Scheduler as your trigger. Here, you will set the parameters for how often you want your workflow to run, ensuring that your tasks are executed precisely when needed.


2. Setting Up the Scheduler in Pabbly Connect

When you choose the Scheduler in Pabbly Connect, you will see options for how often you want the workflow to be triggered. You can select from various intervals, such as:

  • At regular intervals (minutes, hours, days)
  • Once on a specific day
  • Every day at a set time
  • Specific days of the week
  • Specific dates of the month

After selecting your desired option, specify the time and frequency. For example, if you want to schedule a workflow to run every 15 minutes, you will select ‘minutes’ and enter ’15’. This flexibility allows you to tailor your automation needs effectively.


3. Example Use Case: Scheduling Messages for Diwali

A practical example of using the Scheduler in Pabbly Connect is sending a WhatsApp message to clients on Diwali Day. To do this, set the Scheduler to trigger once on the specific date and time you wish to send the message. Ensure that the time zone is set correctly to your local time zone, such as Asia/Kolkata.

This setup allows you to automate the process of wishing your clients a Happy Diwali, ensuring that your message is sent out without manual intervention. You can also customize the message content and choose the application through which the message will be sent, such as WhatsApp.


4. Creating Recurring Reminders with Pabbly Connect

Another useful feature of the Scheduler in Pabbly Connect is the ability to create recurring reminders. For instance, if you have a weekly meeting every Sunday, you can set a reminder for your clients to be sent out every Saturday at a specific time. This ensures that your clients are always informed ahead of time.

To set this up, select the days of the week option in the Scheduler and specify Saturday as the day for sending out reminders. You can also choose multiple days if you wish to send reminders on Fridays and Saturdays as well. This flexibility enhances your productivity by automating essential communications.


5. Final Remarks on Using Scheduler in Pabbly Connect

In conclusion, the Scheduler feature in Pabbly Connect is an invaluable tool for automating tasks at specific intervals or times. Whether you want to send out messages for special occasions like Diwali or set reminders for recurring meetings, Pabbly Connect makes it easy to manage these tasks efficiently.

By utilizing the Scheduler, you can streamline your workflow automation, allowing you to focus on other important aspects of your business. Remember, the Scheduler not only saves time but also enhances communication with clients, making it a must-have feature for any professional.

Conclusion

This guide summarizes the key points and helps you understand the essential features and benefits of using this tool.

Ensure you check out Pabbly Connect to create business automation workflows and reduce manual tasks. Pabbly Connect currently offer integration with 2,000+ applications.


In this tutorial, we explored how to leverage the Scheduler feature inside Pabbly Connect to automate workflows effectively. By following the steps outlined, you can enhance your productivity and ensure timely communications with your clients.