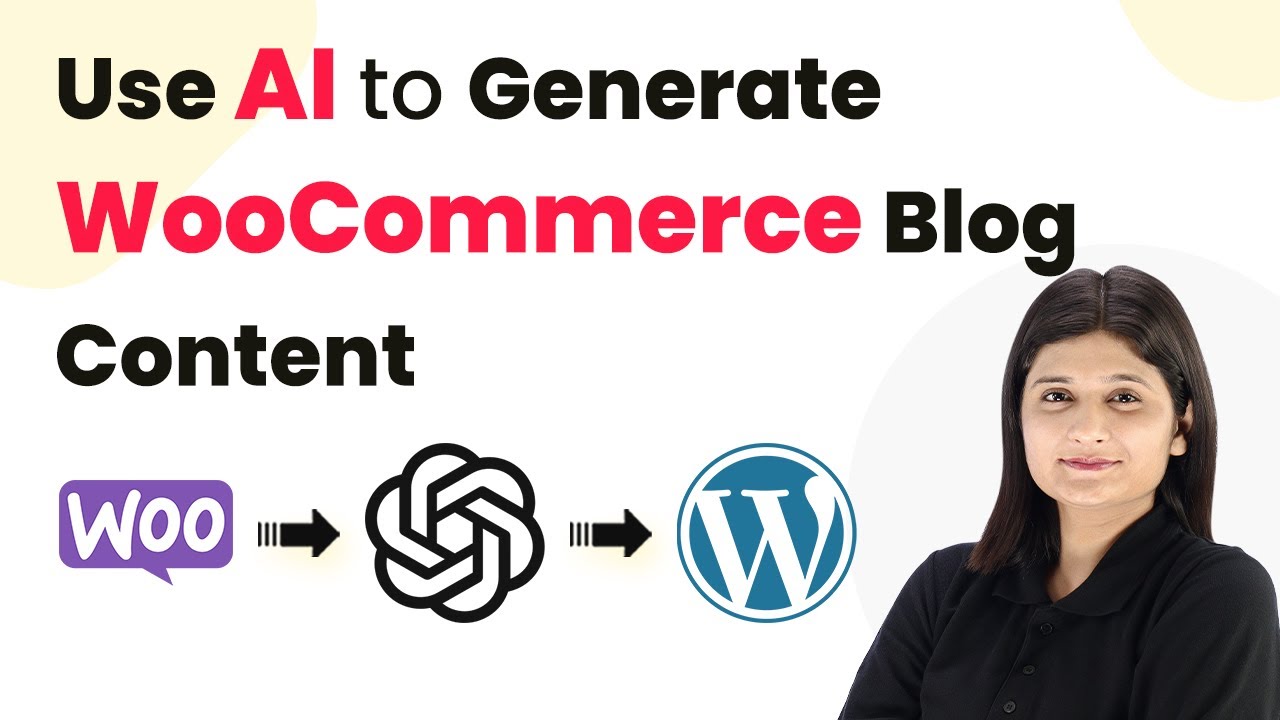
Automatically Create Razorpay Payment Links and Send on WhatsApp Using Pabbly Connect

Learn how to automatically create Razorpay payment links and send them via WhatsApp using Pabbly Connect and Pabbly Connect in this detailed tutorial. Develop expertise in application integration and learn how to design streamlined automation workflows using proven, simplified approaches.

Watch Step By Step Video Tutorial Below


1. Setting Up Pabbly Connect for Payment Automation

To automatically create Razorpay payment links and send them via WhatsApp, you first need to set up Pabbly Connect. Start by visiting the Pabbly Connect website and signing in or creating a new account. Once logged in, access the dashboard and click on the blue button to create a new workflow.

In the workflow creation interface, name your workflow something descriptive, such as ‘Automate Payment Collection with Razorpay and WhatsApp’. After naming, you will see two sections labeled ‘Trigger’ and ‘Action’. The trigger will be the form submission, and the action will be the creation of a payment link in Razorpay.


2. Connecting Pabbly Form Builder with Pabbly Connect

Next, you need to connect your form builder with Pabbly Connect. In this case, we will use Pabbly Form Builder to collect registration details. Choose ‘Pabbly Form Builder’ as your trigger application and select the event ‘New Form Submission’. This means that every time someone submits the registration form, it will trigger the automation.

  • Log in to your Pabbly Form Builder account.
  • Navigate to the integration settings and add a webhook.
  • Paste the webhook URL provided by Pabbly Connect.

Once the webhook is set, perform a test submission of the form to ensure that Pabbly Connect captures the response correctly. You should see the details filled in the Pabbly Connect dashboard, confirming the successful connection.


Now that your form is connected, the next step is to create a payment link in Razorpay using Pabbly Connect. Select Razorpay as your action application and choose the event ‘Create Payment Link’. You will need to connect your Razorpay account by entering your API key and secret.

  • Input the amount for the payment link, e.g., 1000 INR.
  • Set the currency as INR.
  • Map the customer details from the form submission.

After filling in the required fields, save the action. Upon successful execution, you will receive a response containing the generated payment link, which can be used for payment processing.


4. Sending Payment Links via WhatsApp Cloud API

The final step is to send the generated payment link to the customer via WhatsApp. For this, you will need to connect the WhatsApp Cloud API with Pabbly Connect. Choose WhatsApp Cloud API as your action application and select the event ‘Send Template Message’.

Connect your WhatsApp account by entering the necessary credentials. Select the message template that you have created for payment requests. Map the recipient’s phone number and include the payment link in the message body.

After configuring the message, click on save and send the request. You should receive a confirmation that the message has been sent successfully, completing the automation process.


5. Conclusion

In this tutorial, we explored how to automatically create Razorpay payment links and send them via WhatsApp using Pabbly Connect and Pabbly Form Builder. This integration streamlines the payment collection process, making it faster and more efficient for event registrations.

Ensure you check out Pabbly Connect to create business automation workflows and reduce manual tasks. Pabbly Connect currently offer integration with 2,000+ applications.

By leveraging Pabbly Connect, you can automate various workflows and enhance your business operations without any manual intervention.

Automate Certificate Creation for Instamojo Payments with Pabbly Connect

Learn how to automate certificate creation for Instamojo payments using Pabbly Connect. Send certificates via WhatsApp, Email, and SMS easily. Eliminate manual repetitive tasks from your workflow. Discover proven automation methods with intuitive steps designed for efficiency-minded professionals.

Watch Step By Step Video Tutorial Below


1. Setting Up Pabbly Connect for Integration

To start automating certificate creation for Instamojo payments, you need to set up Pabbly Connect. Begin by signing up for a free account at Pabbly Connect and accessing the dashboard. Once you’re logged in, you can create a new workflow that will handle the automation process.

Click on the ‘Create Workflow’ button and give your workflow a relevant name, such as ‘Instamojo Payment Certificate Automation’. This will help you easily identify it later. After naming your workflow, click on the ‘Create’ button to proceed to the workflow page.


2. Setting the Trigger Event with Instamojo

The next step involves setting up the trigger event for your integration in Pabbly Connect. Choose the Instamojo application from the ‘Choose App’ section and select the trigger event as ‘New Sale’. This event will activate the workflow whenever a new payment is made through Instamojo.

  • Select Instamojo as the app.
  • Choose ‘New Sale’ as the trigger event.
  • Copy the webhook URL provided.

After copying the webhook URL, you need to set it up in your Instamojo account. Create a new payment link in Instamojo, and in the smart actions, check the box to add a webhook. Paste the copied URL here and save the settings. This establishes a connection between Instamojo and Pabbly Connect.


3. Capturing Payment Details

Once the webhook is set up, you will need to capture the payment details. This is done by creating an action step in Pabbly Connect. Add another action for Instamojo and select ‘Get Payment Details’ as the action event. This step retrieves detailed information about the payment, including the customer’s name and contact information.

Map the payment ID from the previous step to fetch the relevant customer details. This allows you to access the donor’s name, email address, and WhatsApp number, which will be essential for sending the certificate later in the process.


4. Creating the Certificate Document

Now that you have the payment details, the next step is to create a certificate document using Google Docs through Pabbly Connect. Add a new action step and select Google Docs, then choose ‘Create Document from Template’ as the action event. Connect your Google account to allow Pabbly Connect to create documents.

  • Select the template you created for the certificate.
  • Map the required fields such as certificate number, date, and donor name.
  • Save the document in your preferred Google Drive folder.

This action will generate a new certificate document based on the template and the mapped details, ensuring that each certificate is personalized for the donor.


5. Sending the Certificate via WhatsApp and Email

After creating the certificate, it’s time to send it to the customer. First, you will need to generate a shareable link for the document in Google Drive. Add a new action step, select Google Drive, and choose ‘Share a File with Anyone’. Map the document ID from the previous step to get the shareable link. using Pabbly Connect

Finally, to send the certificate, add another action step for WhatsApp Cloud API. Choose ‘Send Template Message’ and connect your WhatsApp account. Map the recipient’s WhatsApp number and the shareable link of the certificate in the message template. You can also create a similar step for sending an email using Gmail, ensuring that the certificate reaches the donor through multiple channels.


Conclusion

By using Pabbly Connect, you can effortlessly automate the process of creating and sending certificates for Instamojo payments. This integration not only saves time but also enhances customer satisfaction by providing instant confirmation of their donations.

Ensure you check out Pabbly Connect to create business automation workflows and reduce manual tasks. Pabbly Connect currently offer integration with 2,000+ applications.

Integrate Flowlu with Google Sheets Using Pabbly Connect

Learn how to integrate Flowlu with Google Sheets using Pabbly Connect to automate task management efficiently. Step-by-step guide included. Explore systematic approaches to creating efficient automation solutions that convert technical concepts into practical, implementable instructions.

Watch Step By Step Video Tutorial Below


1. Accessing Pabbly Connect for Integration

To start integrating Flowlu with Google Sheets, you need to access Pabbly Connect. Begin by visiting the official website at Pabbly.com/connect. Here, you can sign up for a free account, which provides you with 100 automation tasks each month.

Once you have signed up, log in to your Pabbly Connect dashboard. This is where you will create the workflow that connects Flowlu and Google Sheets. Click on the ‘Create Workflow’ button to begin setting up your automation.


2. Creating a Workflow in Pabbly Connect

After logging into your Pabbly Connect dashboard, you will need to create a new workflow. Name your workflow something relevant, like ‘Send Flowlu Task Data to Google Sheets’. This helps keep your automation organized.

To create the workflow, follow these steps:

  • Click on the ‘Create Workflow’ button.
  • Enter the workflow name.
  • Proceed to set up the trigger and action.

In this workflow, the trigger will be the creation of a new task in Flowlu, and the action will be to add that task’s details into Google Sheets.


3. Setting Up Trigger from Flowlu

The next step in Pabbly Connect is to set up the trigger. Choose Flowlu as your trigger application and select the event ‘Configure Webhooks’. This will provide you with a webhook URL that you will use to connect with Flowlu.

To complete the webhook setup, follow these instructions:

  • Go to Flowlu’s system settings.
  • Click on the Webhooks tab.
  • Create a new webhook using the URL provided by Pabbly Connect.

This setup allows Pabbly Connect to receive data from Flowlu whenever a new task is created.


4. Testing the Connection and Capturing Data

Once the webhook is configured, it’s crucial to test the connection. In Pabbly Connect, you can send an empty notification to ensure that the webhook is active. Click on the ‘Send Empty Notification’ button to verify this.

After confirming the connection, create a test task in Flowlu. Fill in the task details such as title, description, assignee, and dates. Once the task is saved, return to Pabbly Connect and click on ‘Recapture Webhook Response’ to fetch the task data.


5. Adding Task Data to Google Sheets

Now that the task data is captured, the final step is to add it to Google Sheets. In Pabbly Connect, select Google Sheets as the action application and choose the action event ‘Add New Row’.

Connect to your Google account and select the spreadsheet where you want to store the task details. Map the fields from the previous steps, such as task title, description, and dates. Finally, click on ‘Save and Send Test Request’ to add the data into Google Sheets.

After the test, check your Google Sheets to see if the new row has been added successfully with the task details.


Conclusion

In conclusion, using Pabbly Connect to integrate Flowlu with Google Sheets streamlines your task management process. By automating the data transfer, you save time and enhance productivity. Follow these steps to set up your own workflow and enjoy seamless integration.

Ensure you check out Pabbly Connect to create business automation workflows and reduce manual tasks. Pabbly Connect currently offer integration with 2,000+ applications.

Automate File Delivery via WhatsApp with Pabbly Connect and Instamojo Payments

Learn how to automate file delivery to customers on WhatsApp after Instamojo payments using Pabbly Connect. Step-by-step guide included! Master proven automation processes with practical implementation examples and strategic recommendations you can apply immediately in your workflow.

Watch Step By Step Video Tutorial Below


1. Setting Up Pabbly Connect for Automation

To automate file delivery after payments, we will use Pabbly Connect. Start by accessing the Pabbly Connect dashboard. You can do this by visiting Pabbly.com/connect and signing up for a free account if you don’t have one.

Once logged in, click on ‘Create Workflow’. Name your workflow (e.g., ‘Instamojo to WhatsApp’) and click on ‘Create’. This action sets up a trigger and action window where you will configure your automation.


2. Configuring the Instamojo Trigger in Pabbly Connect

In the trigger window, select Instamojo as the app. Set the trigger event to ‘New Sale’. This will allow Pabbly Connect to capture every payment made through your Instamojo account.

  • Select ‘New Sale’ as the trigger event.
  • Copy the webhook URL provided by Pabbly Connect.
  • Integrate this URL into your Instamojo payment link settings.

After setting up the webhook, whenever a customer makes a payment, the details will be sent to Pabbly Connect, allowing you to automate the next steps.


3. Retrieving Customer Payment Details

Once a payment is made, Pabbly Connect will receive a response containing the payment details. To extract customer information, add an action step in your workflow. using Pabbly Connect

Select Instamojo again and choose the action event ‘Get Payment Details’. Connect using your API key and authentication token from your Instamojo account. Then, map the payment ID received in the trigger to retrieve the customer’s information.

  • Enter your API key and authentication token.
  • Map the payment ID from the trigger response.
  • Test the action to ensure customer details are retrieved correctly.

After successfully retrieving the customer details, you can proceed to send a WhatsApp message with the course file.


4. Sending a WhatsApp Message with the Course File

To send the course file via WhatsApp, add another action step and select ‘WhatsApp Cloud API’. Choose the action event ‘Send Template Message’ to send a pre-approved template message. using Pabbly Connect

Connect your WhatsApp Cloud API account by entering the required details, such as the token and phone number ID. Then, select the template you created earlier for sending the course file.

Select the template name from the dropdown. Map the recipient’s phone number without the plus sign but with the country code. Enter the header document URL for the course file.

Once all details are mapped, test the action to confirm that the WhatsApp message is sent successfully to the customer with the file attached.


5. Adding a Filter to Ensure Successful Payments

To enhance your automation, add a filter step to ensure that messages are only sent for successful payments. This can be done by selecting ‘Filter’ in the action step.

Set the filter condition to check if the payment status equals ‘Successful’. This ensures that only confirmed payments will trigger the WhatsApp message.

Select ‘Status’ from the trigger response. Set the filter type to ‘Equals’ and enter ‘Successful’ as the value. Test the filter to verify it works correctly.

With this filter in place, you can confidently automate the delivery of files to customers who have made successful payments using Pabbly Connect.


Conclusion

In this tutorial, we explored how to automate file delivery on WhatsApp after receiving payments through Instamojo using Pabbly Connect. By following these steps, you can streamline your payment processes and enhance customer satisfaction.

Ensure you check out Pabbly Connect to create business automation workflows and reduce manual tasks. Pabbly Connect currently offer integration with 2,000+ applications.

Send Examination Results on WhatsApp from Google Sheets Using Pabbly Connect

Learn how to send examination results on WhatsApp from Google Sheets using Pabbly Connect. Step-by-step tutorial to automate your process! This comprehensive guide reveals exactly how to connect your applications and automate repetitive tasks — accessible for professionals of all technical backgrounds.

Watch Step By Step Video Tutorial Below


1. Accessing Pabbly Connect for Automation

To start sending examination results on WhatsApp from Google Sheets, first, you need to access Pabbly Connect. Open your browser and go to Pabbly Connect. If you don’t have an account, create one for free in just a couple of minutes.

Once you sign in, you will see the Pabbly Connect dashboard. Click on the ‘Create Workflow’ button and name your workflow, for instance, ‘Results on WhatsApp’. This will set up the foundation for your automation process.


2. Setting Up the Trigger in Pabbly Connect

The next step involves configuring the trigger in Pabbly Connect. In the trigger application, search for ‘Google Sheets’ and select it. For the trigger event, choose ‘New or Updated Spreadsheet Row’. This event will monitor any new entries or updates in your Google Sheets.

  • Select the Google Sheets account where your examination results are stored.
  • Copy the Webhook URL provided by Pabbly Connect.
  • Go to your Google Sheets, click on Extensions, then Add-ons, and select Get Add-ons.

Search for ‘Pabbly Connect Webhooks’ and install this add-on. After installation, refresh your Google Sheets. Go back to Extensions, find Pabbly Connect Webhooks, and click on Initial Setup. Paste the copied Webhook URL and set the trigger column to the last column of your data. Click ‘Send Test’ to verify the setup.


3. Sending Examination Results via WhatsApp Cloud API

Now that the trigger is set, it’s time to configure the action step using Pabbly Connect. For the action application, search for ‘WhatsApp Cloud API’ and select it. Choose the action event as ‘Send Template Message’.

  • Connect your WhatsApp Cloud API account by entering the necessary credentials like token and phone number ID.
  • Select the template message you created for sending results.
  • Map the necessary fields such as student name, class, percentage, and result status from the Google Sheets data.

After mapping all required fields, click on ‘Save and Send Test Request’. This will send the WhatsApp message to the student’s number with their examination results. Check the WhatsApp account to confirm receipt of the message.


4. Automating the Process for Future Entries

To ensure that future entries in your Google Sheets are automatically sent via WhatsApp, you can enable the ‘Send on Event’ feature in Pabbly Connect. This allows the automation to trigger every time a new entry is added to the sheet.

Simply return to Google Sheets, go to Extensions, find Pabbly Connect Webhooks, and select ‘Send on Event’. This will ensure that whenever you add a new student’s results, the corresponding WhatsApp message is sent automatically.


5. Testing and Verifying Your Automation Setup

After setting everything up, it’s crucial to test the automation process. Add a new student’s examination results in Google Sheets and verify if the WhatsApp message is sent successfully via Pabbly Connect.

For instance, if you enter a new student named Nitin Kumar with his details, the automation should send a WhatsApp message to his number instantly. This confirms that your integration between Google Sheets and WhatsApp Cloud API through Pabbly Connect is functioning correctly.


Conclusion

In this guide, we explored how to send examination results on WhatsApp from Google Sheets using Pabbly Connect. By automating this process, you can save time and ensure that students receive their results promptly. Implementing this integration can revolutionize how educational institutions communicate with their students.

Ensure you check out Pabbly Connect to create business automation workflows and reduce manual tasks. Pabbly Connect currently offer integration with 2,000+ applications.

Automate Hotel Booking Confirmation Messages with Pabbly Connect and WhatsApp Cloud API

Learn how to send hotel booking confirmation messages automatically via WhatsApp using Pabbly Connect. Follow this detailed tutorial to streamline your booking process. Discover how to seamlessly connect your essential tools through accessible instructions that make powerful automation available to professionals at every skill level.

Watch Step By Step Video Tutorial Below


1. Setting Up Pabbly Connect for Hotel Booking Confirmation

To automate sending hotel booking confirmation messages, you first need to set up Pabbly Connect. Start by visiting the Pabbly Connect dashboard and creating a new workflow. This is crucial for integrating various applications seamlessly.

Navigate to the dashboard and click on the ‘Create Workflow’ button. Name your workflow, for example, ‘Send Hotel Booking Confirmation on WhatsApp’. After naming, click on the ‘Create’ button to proceed. This action initiates the setup process for your automation.


2. Choosing the Trigger Application in Pabbly Connect

In this step, you will select the trigger application in Pabbly Connect. The trigger is the event that starts the automation process. For this integration, choose the ‘P Form Builder’ as your trigger application.

  • Select ‘P Form Builder’ from the app list.
  • Choose the trigger event as ‘New Form Submission’.
  • Copy the provided webhook URL for later use.

Once you have selected the trigger application, you will receive a webhook URL. This URL is essential for connecting your P Form Builder with Pabbly Connect. Follow the instructions provided to set up the webhook properly.


3. Connecting P Form Builder to Pabbly Connect

Now that you have your webhook URL, the next step is to connect it to your P Form Builder application. This step is critical for capturing form submissions effectively.

Open your P Form Builder, select the form you created for hotel bookings, and navigate to the Integrations section. Here, find the Webhooks option and click on ‘Add Webhook’. Paste the webhook URL you copied earlier and click on ‘Save’. This action links your form to Pabbly Connect.

After saving the webhook, you can test the connection by submitting a test form. This will allow Pabbly Connect to capture the response from your form submission, which is crucial for sending the confirmation message later.


4. Sending Confirmation Messages via WhatsApp Cloud API

The final step involves setting up the action to send confirmation messages via WhatsApp using the WhatsApp Cloud API. This is where Pabbly Connect truly shines by automating the message delivery process.

Select ‘WhatsApp Cloud API’ as your action application in Pabbly Connect. Choose the action event as ‘Send Template Message’. If this is your first time connecting, you will need to create a new connection by providing your permanent access token, phone number ID, and business account ID.

  • Ensure you have generated a permanent access token from the Meta for Developers page.
  • Input the phone number ID and business account ID for your WhatsApp Cloud API.
  • Save the connection and proceed to map your message template.

After successfully connecting, select your message template (e.g., ‘Booking Confirmation’) and map the recipient’s WhatsApp number and other dynamic fields. This customization ensures that each customer receives a personalized confirmation message.


5. Conclusion: Automate Your Hotel Booking Confirmations with Pabbly Connect

By following these steps, you can effectively automate the process of sending hotel booking confirmation messages through WhatsApp using Pabbly Connect. This integration not only saves time but also enhances customer communication.

Ensure you check out Pabbly Connect to create business automation workflows and reduce manual tasks. Pabbly Connect currently offer integration with 2,000+ applications.

Check out Pabbly Connect – Automate your business workflows effortlessly! Sign Up Free – Start your journey with ease! 10,000+ Video Tutorials – Learn step by step! Join Pabbly Facebook Group – Connect with 21,000+ like minded people!

With Pabbly Connect, you can streamline your hotel booking process and ensure that every customer receives timely and accurate confirmation messages. Implementing this automation is a game-changer for any hotel business looking to improve customer service.

Start using Pabbly Connect today to simplify your workflow and enhance customer satisfaction!

Send BigCommerce Order Confirmation on WhatsApp Using Pabbly Connect

Learn how to send BigCommerce order confirmations via WhatsApp using Pabbly Connect. This detailed tutorial covers all steps for seamless integration. Implement the precise methodologies leading organizations use to automate repetitive tasks, illustrated with practical examples designed for immediate application.

Watch Step By Step Video Tutorial Below


1. Setting Up Pabbly Connect for BigCommerce Order Confirmation

To send BigCommerce order confirmations via WhatsApp, you need to set up Pabbly Connect. Start by visiting the Pabbly Connect dashboard and signing up for a free account.

After logging in, you will create a new workflow. Click on the ‘Create Workflow’ button and name it ‘Send Order Confirmations on WhatsApp’. This workflow will automate sending order confirmations to customers when they place an order on your BigCommerce store.


2. Creating the Trigger in Pabbly Connect

In this step, you will configure the trigger that activates the workflow. Select BigCommerce as the application for the trigger. Choose the event ‘New Order Created’ to capture order placements automatically.

  • Select BigCommerce from the app list.
  • Choose the trigger event ‘New Order Created’.
  • Click on Connect and add a new connection.

Once connected, you will need to input your BigCommerce credentials, including the Client ID, Access Token, and Store Hash Key. This connection allows Pabbly Connect to receive order data from BigCommerce.


3. Fetching Order Details Using Pabbly Connect

After setting up the trigger, the next step is to fetch detailed information about the order. You will add an action step to retrieve order details from BigCommerce using the ‘Get Order by ID’ action. using Pabbly Connect

In this action step, select BigCommerce again and choose the action event ‘Get Order by ID’. Connect using the existing connection you created earlier. Map the Order ID from the previous step to fetch specific order details, including customer information and product details.


4. Sending Confirmation via WhatsApp Cloud API

Now that you have the order details, it’s time to send the confirmation message through WhatsApp. Add another action step and choose WhatsApp Cloud API as the application.

  • Select the action event ‘Send Template Message’.
  • Connect using the WhatsApp Cloud API credentials.
  • Map the recipient’s WhatsApp number and the message template.

Ensure that your message template includes dynamic fields like customer name and product details. This setup allows Pabbly Connect to personalize the confirmation message for each customer automatically.


5. Testing and Activating the Workflow

Before finalizing, test your workflow to ensure everything is functioning correctly. Click on ‘Save and Send Test Request’ to see if the confirmation message is sent as expected.

If the test is successful, activate your workflow. From now on, every time an order is placed in BigCommerce, Pabbly Connect will automatically send a confirmation message via WhatsApp to the customer, streamlining your order process.


Conclusion

Using Pabbly Connect, you can efficiently send BigCommerce order confirmations through WhatsApp. This integration enhances customer communication and saves time, allowing you to focus on growing your e-commerce business.

Ensure you check out Pabbly Connect to create business automation workflows and reduce manual tasks. Pabbly Connect currently offer integration with 2,000+ applications.

Automate Razorpay Order Confirmation Messages on WhatsApp with Pabbly Connect

Learn how to automatically send Razorpay order confirmations on WhatsApp using Pabbly Connect. Follow this detailed step-by-step tutorial for seamless integration. Discover how to seamlessly connect your essential tools through accessible instructions that make powerful automation available to professionals at every skill level.

Watch Step By Step Video Tutorial Below


1. Accessing Pabbly Connect for Integration

To start sending Razorpay order confirmations on WhatsApp automatically, you need to access Pabbly Connect. Begin by visiting the Pabbly Connect dashboard at Pabbly.com/connect. Here, you can sign up for a free account, which takes just a couple of minutes.

Once registered, log in to your Pabbly Connect account. You will be greeted by the dashboard where you can create your workflow. This platform allows you to set up automation without any coding skills, making it accessible for everyone.


2. Creating a Workflow in Pabbly Connect

In this step, you will create a workflow to automate the process of sending payment confirmations. Click on the ‘Create Workflow’ button on your Pabbly Connect dashboard. Name your workflow, such as ‘Send Payment Confirmations on WhatsApp,’ and click on the create button. using Pabbly Connect

  • Click on the ‘Create Workflow’ button.
  • Name your workflow appropriately.
  • Select Razorpay as the trigger application.
  • Choose the trigger event as ‘Payment Captured’.

After selecting Razorpay, you will receive a webhook URL. This URL is crucial for connecting Razorpay to Pabbly Connect, allowing it to capture payment details automatically.


3. Setting Up the Webhook in Razorpay

Now that you have the webhook URL from Pabbly Connect, navigate to your Razorpay dashboard. Go to the ‘Settings’ section, and select ‘Webhooks’. Here, you can add a new webhook by clicking on the ‘Add New Webhook’ button.

  • Paste the webhook URL you copied from Pabbly Connect.
  • Select the event ‘Payment Captured’ to ensure data is sent to your workflow.
  • Click on ‘Create Webhook’ to save your settings.

Once the webhook is set up, Pabbly Connect will wait for a payment response from Razorpay, which will trigger the automation workflow.


4. Testing the Integration with a Demo Payment

To ensure everything is working correctly, perform a test payment through your Razorpay payment page. Fill in the necessary customer details, including their WhatsApp number, and complete the payment process. using Pabbly Connect

Upon successful payment, navigate back to Pabbly Connect. You should see that the payment details have been captured successfully in your workflow. This includes the customer’s name, email, and WhatsApp number.

At this point, you can verify that Pabbly Connect has received the payment data, which is essential for sending the confirmation message on WhatsApp.


5. Sending Confirmation Messages via WhatsApp Cloud API

Now that you have the payment details, it’s time to send a confirmation message using the WhatsApp Cloud API. Add another action step in Pabbly Connect and select ‘WhatsApp Cloud API’ as the application.

Choose the action event as ‘Send Template Message’. Connect your WhatsApp Cloud API by entering the required credentials, including your access token and phone number ID. Once connected, select the message template you created for payment confirmations.

Map the recipient’s WhatsApp number from the captured payment details. Insert dynamic variables for the customer name and payment amount in the message body. Test the action to ensure the message is sent successfully.

After testing, you should see a confirmation message delivered to the customer’s WhatsApp, confirming their payment automatically. This completes the automation process using Pabbly Connect.


Conclusion

In this tutorial, we explored how to use Pabbly Connect to automate sending Razorpay order confirmations on WhatsApp. By following these steps, you can streamline your payment confirmation process and enhance customer satisfaction.

Ensure you check out Pabbly Connect to create business automation workflows and reduce manual tasks. Pabbly Connect currently offer integration with 2,000+ applications.

With Pabbly Connect, integrating various applications is simple and efficient, allowing businesses to save time and reduce manual efforts.

Automate Data Extraction from Email to MyPipeline with Pabbly Connect

Learn how to automate data extraction from email and add contacts in MyPipeline using Pabbly Connect with this detailed step-by-step tutorial. Build sophisticated automated workflows in less time than you think. This guide translates complex integrations into straightforward steps for immediate implementation.

Watch Step By Step Video Tutorial Below


1. Introduction to Pabbly Connect for Email Automation

In this tutorial, we will explore how to use Pabbly Connect to automate the process of extracting data from emails and adding contacts to MyPipeline. This integration streamlines the workflow by eliminating the need for manual data entry.

By utilizing Pabbly Connect, users can effortlessly capture lead information from incoming emails and ensure that it is automatically added to their CRM. This not only saves time but also minimizes errors associated with manual data handling.


2. Setting Up Your Pabbly Connect Workflow

To start, you need to access your Pabbly Connect dashboard. Go to your browser and search for Pabbly.com, then click on the ‘Sign Up Free’ option to create an account or log in if you already have one.

Once you’re in the dashboard, click on ‘Create Workflow’ and name your workflow, for example, ‘Gmail to MyPipeline’. After naming, click on ‘Create’ to proceed with setting up the automation.

  • Navigate to the ‘Trigger’ window in your workflow.
  • Select ‘Email Parser’ as your trigger app.
  • Copy the provided email address for forwarding emails.

With the email address copied, you can now set up forwarding in your Gmail account to ensure all incoming emails are sent to this address.


3. Configuring Email Forwarding in Gmail

In your Gmail account, click on the settings icon and select ‘See all settings’. Navigate to the ‘Forwarding and POP/IMAP’ tab and click on ‘Add a forwarding address’.

Paste the email address from Pabbly Connect and confirm it. Gmail will send a confirmation code to that address, which you need to retrieve and enter to verify the forwarding setup.

  • Click on ‘Proceed’ after adding the forwarding address.
  • Check your Email Parser for the confirmation email.
  • Copy the confirmation code and paste it back in Gmail.

After verifying, make sure to select the option to forward a copy of incoming emails and save your changes. This setup will allow Pabbly Connect to capture all emails sent to your Gmail account.


4. Testing the Email Parser with Pabbly Connect

Now that the forwarding is set up, it’s time to test the integration. Send a test email to your Gmail account. Ensure it includes relevant details that you want to capture.

Return to Pabbly Connect and click on ‘Re-capture Email Parser Response’. This will allow the workflow to fetch the latest email data sent to your Gmail account.

Once the email is captured, you will see all the details populated in the response from the Email Parser. This includes the sender’s name and email address, which you will need for the next steps.


5. Adding Contacts to MyPipeline Using Pabbly Connect

To add the email sender as a contact in MyPipeline, you will need to use the ‘Text Formatter’ feature in Pabbly Connect to split the full name into first and last names.

After setting up the Text Formatter to split the name, you can proceed to add a new action step. Search for MyPipeline and select ‘Create Contact’ as the action event.

Connect your MyPipeline account by entering the API key. Map the first name, last name, email address, and any other required fields. Click on ‘Save and Send Test Request’ to finalize the addition.

Once the test is successful, you can check your MyPipeline account to see the new contact added automatically. This showcases the power of Pabbly Connect in streamlining your CRM processes.


Conclusion

In this tutorial, we demonstrated how to use Pabbly Connect to automate the extraction of data from emails and add contacts in MyPipeline. This integration not only saves time but also enhances accuracy in managing leads.

Ensure you check out Pabbly Connect to create business automation workflows and reduce manual tasks. Pabbly Connect currently offer integration with 2,000+ applications.

By following the steps outlined, you can create a seamless workflow that automatically captures and organizes your email leads, ensuring you never miss an opportunity.

Get YouTube Channel Stats on Your WhatsApp Every Day Using Pabbly Connect

Learn how to get daily YouTube channel stats sent to your WhatsApp using Pabbly Connect and WhatsApp Cloud API in this step-by-step tutorial. Develop expertise in application integration and learn how to design streamlined automation workflows using proven, simplified approaches.

Watch Step By Step Video Tutorial Below


1. Access Pabbly Connect to Start Automation

To begin using Pabbly Connect for integrating YouTube and WhatsApp, first, navigate to the Pabbly Connect dashboard. Open your browser and search for ‘Pabbly Connect’. If you do not have an account, click on ‘Sign Up’ to create a free account, which takes just a few minutes.

Once logged in, you will be directed to your dashboard. Here, click on the ‘Create Workflow’ button. You will be prompted to name your workflow; for this tutorial, name it ‘YouTube to WhatsApp’. Click on ‘Create’ to proceed with the setup.


2. Setting Up the Trigger in Pabbly Connect

In this section, you will set up the trigger that will initiate the workflow. Click on the trigger window and search for ‘Schedule’ in the app selection. The schedule feature in Pabbly Connect allows you to specify how often the workflow should run.

  • Select ‘Every Day’ from the dropdown menu.
  • Enter the time in UTC format; for example, if you want to receive updates at 9:00 AM IST, enter 3:30 AM UTC.

After setting the schedule, click ‘Save’. This will ensure that your workflow runs daily at the specified time to fetch the YouTube channel stats.


3. Fetching YouTube Channel Stats

Next, you will configure the action to fetch stats from your YouTube channel. In the action window, search for ‘YouTube’ and select it as the app. For the action event, choose ‘Get Channel Stats’. This step is crucial as it retrieves the necessary statistics from your YouTube account.

To connect your YouTube account with Pabbly Connect, click on ‘Add New Connection’. You will be prompted to select your Google account associated with YouTube. After selecting your account, click ‘Continue’ to authorize the connection.

Once connected, you will need to enter your YouTube Channel ID. To find this, go to your YouTube channel and copy the ID from the URL. Paste this ID into Pabbly Connect and click ‘Save and Send Test Request’. You should see a response displaying your channel’s stats, including total views and subscriber count.


4. Sending YouTube Stats to WhatsApp Using Cloud API

Now that you have your YouTube stats, the next step is to send this information to WhatsApp. In the action window, click ‘Add Action Step’ and search for ‘WhatsApp Cloud API’. Choose ‘Send Template Message’ as the action event. using Pabbly Connect

To connect your WhatsApp Cloud API account, click ‘Add New Connection’ and enter the required details, including your temporary access token, phone number ID, and WhatsApp business account ID. These details can be found in your WhatsApp Cloud API account.

  • Copy the phone number ID and paste it into Pabbly Connect.
  • Enter the WhatsApp business account ID and the temporary access token.

After connecting, select the message template you created for sending stats. Ensure you fill in the recipient’s mobile number (without the plus sign) and map the required body fields with the data fetched from YouTube. Click ‘Save and Send Test Request’ to send a test message to your WhatsApp.


5. Automating the Process for Daily Updates

With everything set up, your workflow is now ready to run automatically. The Pabbly Connect platform will trigger the workflow daily at the specified time, fetch the latest YouTube stats, and send them to your WhatsApp account.

To ensure everything is working correctly, you can test the automation by checking your WhatsApp for the message. The message should include your name, channel name, total views, and subscriber count, formatted as per the template you created.

This setup not only saves time but also ensures you stay updated with your YouTube channel’s performance without manually checking. You can also explore integrating more applications through Pabbly Connect for further automation needs.


Conclusion

In this tutorial, you learned how to set up an automation using Pabbly Connect to receive daily YouTube channel stats on WhatsApp. This integration streamlines the process, allowing you to stay informed effortlessly.

Ensure you check out Pabbly Connect to create business automation workflows and reduce manual tasks. Pabbly Connect currently offer integration with 2,000+ applications.