5 Best Automations to Improve Your Medical Office Work with Pabbly Connect

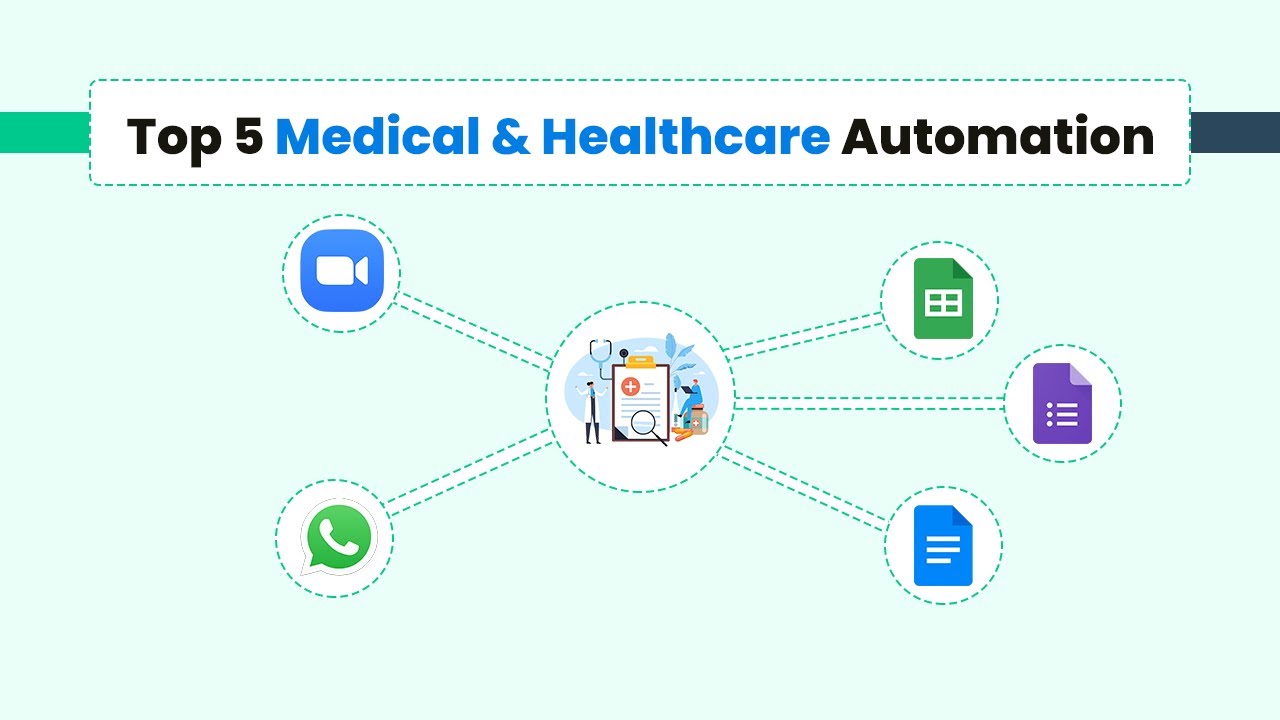
Discover the top 5 automations using Pabbly Connect to enhance efficiency in your medical office. Streamline operations with WhatsApp, Google Sheets, and more! Master proven automation processes with practical implementation examples and strategic recommendations you can apply immediately in your workflow.

Watch Step By Step Video Tutorial Below


1. Send Medical Test Reports via WhatsApp Using Pabbly Connect

The first automation we will discuss is how to send medical test reports to patients automatically via WhatsApp using Pabbly Connect. This automation helps save time by eliminating the need to manually send reports to each patient. You simply need to enter patient details and their respective reports into a Google Sheets spreadsheet.

Once you have set up your spreadsheet, Pabbly Connect will trigger the workflow to generate and send the reports automatically to the patient’s WhatsApp. This process not only enhances productivity but also ensures timely delivery of reports, leading to improved patient satisfaction.


2. Automate Online Appointments with Pabbly Connect

The second automation focuses on managing online appointments for medical practitioners. With the rise of telemedicine, patients often prefer online consultations. By integrating an appointment scheduling application with Pabbly Connect, you can automatically share appointment details with patients via WhatsApp.

To set this up, connect your booking application, such as Acuity Scheduling, to Pabbly Connect. After a patient books an appointment, the workflow will trigger, creating an online meeting using Zoom and sending the details directly to the patient’s WhatsApp. This automation streamlines the entire online consultation process.


3. Send Quotations from WordPress Using Pabbly Connect

For the third automation, we will look at sending quotations to patients who inquire through your WordPress website. By using the Elementor form plugin and integrating it with Pabbly Connect, you can automate the process of delivering quotations via WhatsApp.

Here’s how to set it up:

  • Integrate the Elementor form with Pabbly Connect.
  • Use a WhatsApp API such as 360 Dialogue to send messages.
  • Automate the delivery of quotations based on inquiries.

This setup allows you to efficiently manage inquiries without manual intervention, ultimately enhancing your productivity.


4. Streamline Administrative Tasks with Pabbly Connect

The fourth automation is aimed at streamlining administrative tasks within healthcare facilities. By connecting Google Sheets with a WhatsApp API provider through Pabbly Connect, you can send updates regarding patient admissions and movements, such as transfers from ICU to HDU.

This automation ensures that family members receive timely updates about their loved ones’ conditions, improving communication and patient care. The workflow can be set up easily within Pabbly Connect, allowing you to keep all stakeholders informed without additional effort.


5. Send Registration Confirmation Messages via WhatsApp Using Pabbly Connect

The final automation involves sending confirmation messages for registrations using Google Forms and a WhatsApp API provider like YT. By utilizing Pabbly Connect, you can automate the process of confirming registrations and sending messages directly to patients’ WhatsApp accounts.

This setup is straightforward and can be implemented with just a few clicks in Pabbly Connect. It eliminates the need for manual confirmations, ensuring efficiency in your healthcare operations.


Conclusion

In summary, using Pabbly Connect for automating processes in your medical office can significantly enhance efficiency and patient care. By integrating applications such as WhatsApp, Google Sheets, and Zoom, you can streamline operations and improve your overall workflow.

Ensure you check out Pabbly Connect to create business automation workflows and reduce manual tasks. Pabbly Connect currently offer integration with 2,000+ applications.

How to Export/Import Customers from One WooCommerce Website to Another Using Pabbly Connect

Learn how to seamlessly export and import customers between WooCommerce websites using Pabbly Connect with this detailed step-by-step tutorial. Build sophisticated automated workflows in less time than you think. This guide translates complex integrations into straightforward steps for immediate implementation.

Watch Step By Step Video Tutorial Below


1. Setting Up Pabbly Connect for WooCommerce Integration

To begin the process of exporting and importing customer data between WooCommerce websites, you need to access Pabbly Connect. This powerful automation tool allows you to create workflows that facilitate the transfer of customer data seamlessly. Start by signing up for a free account on the Pabbly Connect website, where you will receive free automation tasks each month.

After signing up, log into your account and navigate to the dashboard. From here, click on the ‘Create Workflow’ button to initiate a new workflow. You can name this workflow something like ‘Customer Data Transfer’ and then click on the ‘Create’ button to proceed. This action will take you to a setup page where you can configure the trigger and actions needed for your automation.


2. Scheduling the Workflow in Pabbly Connect

The next step involves scheduling your workflow to run at a specific time. This is crucial for ensuring that all customer data is exported from the old store to the new one at once. In your workflow configuration, select the ‘Scheduler’ feature from the available options. This allows you to set up when you want the workflow to run. using Pabbly Connect

  • Choose the frequency of the workflow execution.
  • Select the ‘Once’ option for a single execution.
  • Set the date and time for the workflow to run.

After configuring these settings, click on ‘Save’ to finalize the scheduling. This ensures that on the specified date and time, the workflow will automatically execute, fetching customer data from your old WooCommerce store.


3. Fetching Customer Data from WooCommerce

With the workflow scheduled, the next step is to set up the action that fetches customer data from your old WooCommerce store. In Pabbly Connect, search for and select the ‘WooCommerce’ app, and choose the action event labeled ‘Get All Customers.’ This action will retrieve all customer data from your old store. using Pabbly Connect

To connect your WooCommerce account, click on ‘Connect’ and then select ‘Add New Connection.’ You will need to enter the Consumer Key, Consumer Secret, and the website URL of your old WooCommerce store. To obtain these keys, navigate to the WooCommerce settings in your WordPress dashboard, then go to the ‘Advanced’ tab and select ‘REST API’ to generate the necessary API keys.


4. Iterating Through Customer Data with Pabbly Connect

After fetching the customer data, you will receive it in an array format. To process this data effectively, you will use the ‘Iterator’ feature in Pabbly Connect. This feature allows you to handle each customer record individually, starting from the first customer in the array.

To set this up, click on the plus icon to add another action step, select the ‘Iterator’ app, and choose the array from the previous WooCommerce step. This will enable you to loop through each customer record. Once the iterator is set up, you can proceed to map the customer details to the new store.

  • Select customer fields to map, such as email, first name, and last name.
  • Ensure that all required fields are filled out for the new store.

Once you have configured the iterator, you are ready to add the customers to your new WooCommerce store.


5. Adding Customers to the New WooCommerce Store

The final step in this process is to add the customer data to your new WooCommerce store. Again, in Pabbly Connect, select the ‘WooCommerce’ app and choose the action event ‘Add New Customer.’ This action will allow you to input the customer details retrieved from the iterator. using Pabbly Connect

Just like before, connect your new WooCommerce store by entering the Consumer Key, Consumer Secret, and website URL. After connecting, you will see fields for customer details. Map the data from the iterator to these fields, ensuring that all necessary information is included.

After completing the mapping, click on the ‘Save and Send Test Request’ button to verify the connection. If successful, the new customer will be added to your new WooCommerce store, confirming that the automation is working as intended. You can refresh your customer section in WooCommerce to see the newly added customer.


Conclusion

In this tutorial, we explored how to use Pabbly Connect to automate the export and import of customer data between WooCommerce websites. By following these steps, you can save time and effort while ensuring a seamless transition of customer information. This automation runs in the background, allowing for efficient data management without manual intervention.

Ensure you check out Pabbly Connect to create business automation workflows and reduce manual tasks. Pabbly Connect currently offer integration with 2,000+ applications.

Automate Saving Ideas from Slack to Notion with Pabbly Connect

Learn how to automate saving ideas and feedback from Slack to Notion using Pabbly Connect. Step-by-step guide for seamless integration. Explore efficient methods for automating routine tasks with clear, concise instructions suited for both newcomers and experienced professionals.

Watch Step By Step Video Tutorial Below


1. Access Pabbly Connect for Automation

To automate saving ideas or feedback from Slack into Notion, you first need to access Pabbly Connect. This powerful integration platform allows you to connect multiple applications seamlessly.

Begin by visiting the Pabbly Connect website. If you are a new user, sign up for a free account to access monthly tasks for testing automation workflows. Existing users can simply log in to their accounts to get started.


2. Create a Workflow in Pabbly Connect

After logging into Pabbly Connect, the next step is to create a workflow. Click on the blue button labeled ‘Create Workflow’ and provide a descriptive name for your automation.

For this integration, name your workflow something like ‘When New Messages are Posted in Slack, Save Those Messages in Notion’. After naming your workflow, click on the ‘Create’ button to proceed.


3. Set Up Trigger and Action for Slack and Notion

In this section, you will set up the trigger and action for your automation using Pabbly Connect. Choose Slack as your trigger application and select the event ‘When New Message is Posted’. This will allow Pabbly Connect to capture messages from your Slack channel.

To connect to your Slack account, click on the ‘Connect’ button and authorize Pabbly Connect to access your Slack channels. Select the specific channel, such as ‘Announcements’, where messages will be captured.

  • Select Slack as the trigger application.
  • Choose ‘When New Message is Posted’ as the trigger event.
  • Authorize Pabbly Connect to access your Slack account.

Once the connection is established, you can test it by posting a message in the selected Slack channel. Pabbly Connect will capture the details of the message for further processing.


4. Fetch User Details from Slack

After capturing the message, the next step is to fetch user details using Pabbly Connect. You will need to add another action step by selecting Slack again and choosing the action event ‘Get User by ID’. This allows you to retrieve the name and email of the user who posted the message.

Map the user ID from the previous step to fetch the corresponding user details. Once the user details are retrieved, you will have access to the user’s name and email address, which are essential for saving the data in Notion.

  • Select Slack as the action application.
  • Choose ‘Get User by ID’ as the action event.
  • Map the user ID to fetch user details.

This step ensures that every message saved in Notion includes the relevant user information, enhancing the context of the feedback or ideas shared.


5. Save Captured Data to Notion

The final step in this automation process is saving the captured data into Notion using Pabbly Connect. Select Notion as the action application and choose the action event ‘Create Database Item’. This allows you to create a new entry in your Notion database for each message received from Slack.

Map the required fields such as the message, user name, user email, and channel name to their corresponding columns in your Notion database. Once the mapping is complete, click on the ‘Save and Send Test Request’ button to verify that the data is being saved correctly.

With this setup, every new message posted in your Slack channel will automatically be saved in your Notion database, allowing you to track ideas and feedback efficiently.


Conclusion

By using Pabbly Connect, you can automate the process of saving ideas and feedback from Slack into Notion seamlessly. This integration not only saves time but also ensures that all important discussions are captured and organized in one place.

Ensure you check out Pabbly Connect to create business automation workflows and reduce manual tasks. Pabbly Connect currently offer integration with 2,000+ applications.

With just a few steps, you can create workflows that enhance your productivity and keep your team aligned. Start using Pabbly Connect today to streamline your automation needs!

How to Create Google Contacts for New Leads in Facebook Lead Ads Using Pabbly Connect

Learn how to automate the creation of Google Contacts for new leads generated from Facebook Lead Ads using Pabbly Connect. Follow our step-by-step tutorial! Transform complex automation concepts into accessible, actionable steps that eliminate unnecessary manual work while maximizing existing application capabilities.

Watch Step By Step Video Tutorial Below


1. Setting Up Pabbly Connect for Facebook Lead Ads

To begin automating the creation of Google Contacts for new leads in Facebook Lead Ads, first access Pabbly Connect. This platform allows you to seamlessly integrate various applications without the need for coding. Sign up for free to get started with Pabbly Connect and log into your account.

Once logged in, navigate to the Pabbly Connect dashboard. Click on the ‘Create Workflow’ button to initiate your automation process. Name your workflow something descriptive, such as ‘Facebook Lead Ads to Google Contacts’ and click the ‘Create’ button to proceed.


2. Creating the Trigger for New Leads in Facebook Lead Ads

In this section, we will set up the trigger that will activate the automation whenever a new lead is generated through Facebook Lead Ads. Select Facebook Lead Ads from the ‘Choose App’ field in Pabbly Connect. Next, choose the trigger event as ‘New Lead’.

  • Select ‘Add New Connection’ and click ‘Connect with Facebook Lead Ads’.
  • You may be prompted to log into your Facebook account if not already logged in.
  • Choose the Facebook page where your lead ads are running.

After selecting your Facebook page, you will need to choose the specific lead ad form associated with it. This is crucial as it determines which leads will be captured. Once you’ve selected the correct form, you can proceed to create a test lead to ensure everything is functioning correctly.


3. Testing the Lead Ad Form in Pabbly Connect

Now, it’s time to test the lead ad form to generate a sample lead. Use the Facebook Lead Ads testing tool to fill out the form with dummy data. This step is essential to ensure that Pabbly Connect successfully captures the lead information.

Fill in the required fields such as first name, last name, email address, and phone number. After completing the form, submit it. You should see a confirmation that a new test lead has been generated. Click on the ‘Save and Send Test Request’ button in Pabbly Connect to capture the lead data.

  • Ensure all fields are filled accurately to retrieve the correct data.
  • Check the response section to confirm that the lead details are captured correctly.

Once the lead data is captured successfully, you can move on to the next step of creating a Google Contact.


4. Creating Google Contacts from Captured Leads

With the lead data captured, the next step is to create a contact in Google Contacts using Pabbly Connect. In the action step, search for Google Contacts and select it. Choose the action event as ‘Create Contact’.

Connect your Google account by selecting ‘Add New Connection’ and signing in. After successfully connecting, map the lead data captured earlier to the respective fields in Google Contacts, such as first name, last name, and email address.

Map the first name and last name fields with the corresponding data from the lead. You can also include optional fields like phone number or gender if available.

Once all data is mapped correctly, click on the ‘Save and Send Test Request’ button to create the contact. Check your Google Contacts to confirm that the new lead has been added successfully.


5. Conclusion: Automate Your Lead Management with Pabbly Connect

By following these steps, you can efficiently automate the process of creating Google Contacts for new leads generated from Facebook Lead Ads using Pabbly Connect. This integration allows you to manage your leads seamlessly without manual input, saving you time and enhancing productivity.

Ensure you check out Pabbly Connect to create business automation workflows and reduce manual tasks. Pabbly Connect currently offer integration with 2,000+ applications.

Set up this automation once, and it will run in the background, ensuring that every new lead is added to your Google Contacts automatically. Start using Pabbly Connect today to streamline your lead management process!


How to Automate Slack Channel Messages to Google Sheets with Pabbly Connect

Learn how to automate the process of getting Slack channel messages into Google Sheets using Pabbly Connect. Step-by-step guide included! Implement the precise methodologies leading organizations use to automate repetitive tasks, illustrated with practical examples designed for immediate application.

Watch Step By Step Video Tutorial Below


1. Accessing Pabbly Connect for Slack and Google Sheets Integration

To automate the process of getting Slack channel messages to Google Sheets, you will first need to access Pabbly Connect. This platform enables seamless integration between various applications, including Slack and Google Sheets.

Start by visiting Pabbly Connect at Pabbly.com/connect. If you are a new user, sign up for a free account to explore the automation features. Once signed in, navigate to the dashboard where you can begin creating your workflow.


2. Creating a Workflow in Pabbly Connect

Once you are on the Pabbly Connect dashboard, click on the blue button labeled ‘Create Workflow’. You will be prompted to name your workflow. For this tutorial, name it ‘When New Message is Posted in Slack Channel, Add Messages in Sheet Automatically’.

  • Click ‘Create’ to proceed.
  • You will see two boxes for Trigger and Action.
  • Select Slack for the Trigger and Google Sheets for the Action.

By selecting these applications, you are defining the automation process where a new message in Slack will trigger an action in Google Sheets.


3. Connecting Slack to Pabbly Connect

Now, you need to connect Slack to Pabbly Connect. Click on ‘Connect to Slack’ and then ‘Add New Connection’. You will be required to authorize Pabbly Connect to access your Slack account.

After clicking ‘Allow’, your Slack account will be connected. You will see a list of channels available in your Slack account. Choose the specific channel from which you want to capture messages. For this example, select the ‘Paypal Payment’ channel.


4. Capturing Messages from Slack Channel

Once you have selected the Slack channel, click on ‘Save and Send Test Request’. This action will allow Pabbly Connect to capture the details of the latest message posted in the channel.

After posting a test message in the selected Slack channel, you will see the captured message details in the response section. This confirms that the integration is working correctly and that Pabbly Connect is successfully retrieving messages from Slack.

  • Make sure to check the user ID and message text in the response.
  • This information will be needed for the next steps in the integration process.

This step verifies that your connection between Slack and Pabbly Connect is functioning correctly.


5. Sending Data to Google Sheets

After capturing the Slack message, the next step is to send this data to Google Sheets using Pabbly Connect. Click on the ‘+’ icon to create another action step and choose Google Sheets.

Select the action event as ‘Add a New Row’. Connect your Google Sheets account by clicking ‘Add New Connection’. Once connected, select the specific spreadsheet you want to use for storing the messages.

Map the fields from Slack to the respective columns in Google Sheets. Manually enter the channel name, and map the user name and email from the Slack response. Finally, map the message text to the corresponding column.

Click ‘Save and Send Test Request’ to ensure that the data is correctly added to your Google Sheets. This completes the automation process, where every new message in your Slack channel will now automatically populate in your Google Sheets.


Conclusion

In conclusion, using Pabbly Connect to automate the integration of Slack channel messages into Google Sheets is a straightforward process. By following the steps outlined above, you can efficiently manage your data without manual intervention. This integration not only saves time but also enhances productivity by ensuring that all important messages are captured in real-time.

Ensure you check out Pabbly Connect to create business automation workflows and reduce manual tasks. Pabbly Connect currently offer integration with 2,000+ applications.

Automate Google Drive Folder Creation for Clients with Pabbly Connect and Content Snare

Learn how to automate Google Drive folder creation for clients using Pabbly Connect and Content Snare. Follow this detailed tutorial for seamless integration. Implement the precise methodologies leading organizations use to automate repetitive tasks, illustrated with practical examples designed for immediate application.

Watch Step By Step Video Tutorial Below


1. Setting Up Pabbly Connect for Automation

To automate Google Drive folder creation for clients, start by accessing Pabbly Connect. This powerful integration tool allows you to connect various applications seamlessly.

First, sign up for a free account on Pabbly Connect. After signing in, navigate to the dashboard and click on the ‘Create Workflow’ button. Name your workflow, for example, ‘Content Snare Request to Google Drive Folder’ and click the create button to proceed.


2. Configuring the Trigger Event with Content Snare

In this section, you will set up the trigger event that initiates the automation process. Select the trigger application as Pabbly Connect and search for ‘Content Snare’ to choose it.

  • Choose the trigger event as ‘Request Published’.
  • Copy the webhook URL provided by Pabbly Connect.
  • Navigate to Content Snare, go to settings, and add a new webhook using the copied URL.

Finally, select the event that triggers the workflow and click on the update button to save your settings. Once the webhook is updated, you can perform a test submission to ensure it captures the data correctly.


3. Creating a Google Drive Folder Automatically

Now that you have set up the trigger, the next step is to create a folder in Google Drive using Pabbly Connect. Search for ‘Google Drive’ in the action application section.

  • Select the action event as ‘Create a File or Folder’.
  • Connect your Google account by signing in and granting access.
  • Specify the folder name using the client’s unique ID from the previous step.

After mapping the folder name, click on ‘Save and Send Test Request’. This action will create a new folder in your Google Drive, which can be verified in your Drive account.


4. Sharing the Google Drive Folder with the Client

Once the folder is created, you can share it with your client automatically using Pabbly Connect. Click the plus icon to add another action step and select ‘Share a File or Folder by ID’.

Use the existing Google Drive connection for this action. Map the folder ID from the previous step to share the correct folder. Enter the client’s email address and set the sharing permissions.

Finally, click on ‘Save and Send Test Request’ to share the folder with your client. This automation will ensure that every time a request is published in Content Snare, a folder will be created and shared automatically.


5. Conclusion

By using Pabbly Connect, you can automate the creation and sharing of Google Drive folders for your clients efficiently. This integration with Content Snare simplifies client data management, saving you time and effort.

Ensure you check out Pabbly Connect to create business automation workflows and reduce manual tasks. Pabbly Connect currently offer integration with 2,000+ applications.

Once set up, this automation will run in the background, creating and sharing folders automatically whenever you publish a request in Content Snare, enhancing your workflow significantly.


How to Update HubSpot Contacts with New Jotform Submissions Using Pabbly Connect

Learn how to automate updating HubSpot contacts with new Jotform submissions using Pabbly Connect. Step-by-step guide to streamline your workflow. Master proven automation processes with practical implementation examples and strategic recommendations you can apply immediately in your workflow.

Watch Step By Step Video Tutorial Below


1. Access Pabbly Connect for Integration

To update HubSpot contacts with new Jotform submissions, you will first need to access Pabbly Connect. Start by visiting the Pabbly website where you can log in or sign up for a new account. Once logged in, you will see various automation tools available through Pabbly Connect.

After accessing Pabbly Connect, locate the ‘Create Workflow’ button on the dashboard. Click on it and give your workflow a name, such as ‘Update HubSpot Contact from Jotform Submission’. This will set the foundation for the automation process.


2. Set Up Jotform as the Trigger Application

In the workflow, you need to set Jotform as the trigger application. This means that whenever a new form is submitted in Jotform, it will initiate the workflow in Pabbly Connect. Select Jotform from the list of applications and choose the trigger event, which is ‘New Response’.

  • Select the form you want to connect.
  • Copy the webhook URL provided by Pabbly Connect.
  • Paste the URL into the Jotform integrations settings.

Once the integration is complete, any submission made in the selected Jotform will trigger the workflow in Pabbly Connect. You can test this by submitting a form to see if the data is captured in your Pabbly workflow.


3. Search for the HubSpot Contact

After setting up Jotform, the next step in Pabbly Connect is to search for the corresponding contact in HubSpot. This involves selecting HubSpot as the action application and choosing the ‘Search for a Contact’ event. This will ensure that the automation only proceeds if the contact exists in HubSpot.

You will need to connect your HubSpot account by selecting it from the connection options. Then, set the matching property to email, as it is unique and will help identify the correct contact. Fill in the email field with the value received from the Jotform submission.


4. Update the HubSpot Contact Information

The final step is to update the HubSpot contact with the new information received from the Jotform submission. In Pabbly Connect, select the ‘Update a Contact’ action. Here, you will use the contact ID obtained from the previous search step to specify which contact to update.

  • Map the first name and last name from the Jotform response.
  • Update the phone number with the new value from the submission.
  • Do not change the email field to avoid creating duplicates.

After mapping the necessary fields, save the changes and test the workflow. Once the test is successful, you can check your HubSpot account to confirm that the contact information has been updated correctly.


Conclusion

Using Pabbly Connect, you can seamlessly update HubSpot contacts with new Jotform submissions. This automation not only saves time but also ensures that your CRM data remains accurate and up-to-date. By following the steps outlined, you can create a powerful integration that enhances your workflow efficiency.

Ensure you check out Pabbly Connect to create business automation workflows and reduce manual tasks. Pabbly Connect currently offer integration with 2,000+ applications.

How to Send Twilio SMS for New Zoho Forms Submissions Using Pabbly Connect

Learn how to automate sending Twilio SMS messages for new Zoho Forms submissions using Pabbly Connect in this step-by-step tutorial. Transform complex automation concepts into accessible, actionable steps that eliminate unnecessary manual work while maximizing existing application capabilities.

Watch Step By Step Video Tutorial Below


1. Setting Up Pabbly Connect for Zoho Forms and Twilio Integration

To send Twilio SMS messages for new Zoho Forms submissions, first, you need to access Pabbly Connect. This platform enables seamless automation between applications like Zoho Forms and Twilio.

Start by visiting the Pabbly Connect website. If you don’t have an account, click on ‘Sign Up for Free’; otherwise, log in using your credentials. Once logged in, select the option to create a new workflow, which will guide you through the integration process.


2. Creating a Workflow in Pabbly Connect

After logging into Pabbly Connect, click on the ‘Create Workflow’ button. Name your workflow something descriptive, like ‘Send SMS from Twilio for Submission in Zoho Forms’. This will help you identify the workflow later.

Once created, you will see two sections: Trigger and Action. The trigger represents the event that starts the workflow, while the action is what happens in response. For this integration, select Zoho Forms as the trigger application and choose the event ‘New Form Submitted’.


3. Configuring Zoho Forms for Pabbly Connect

To link Zoho Forms to Pabbly Connect, you will receive a webhook URL. This URL is essential for capturing form submissions. Open your Zoho Forms account in a new tab and navigate to the form you want to integrate.

Click on ‘Edit’, then select the ‘Integrations’ tab. Scroll down to find the ‘Webhooks’ section and click on ‘Configure Webhooks’. Here, paste the webhook URL you copied from Pabbly Connect. Set the content type to ‘application/json’ and save the changes.

  • Log into your Zoho Forms account.
  • Edit the desired form and navigate to Integrations.
  • Paste the webhook URL and set the content type.

Now, fill out the form to test if Pabbly Connect captures the submission correctly. After submitting, return to Pabbly Connect to see if the data has been received.


4. Setting Up Twilio SMS Action in Pabbly Connect

With the data captured from Zoho Forms, the next step is to configure Twilio as the action application in Pabbly Connect. Select Twilio from the action options and choose the event ‘Send SMS Message’.

To connect your Twilio account, you will need to enter your Account SID and Auth Token, which can be found on your Twilio dashboard. Once connected, you can set up the SMS message details, including the sender’s number and the recipient’s number, which is the phone number captured from the Zoho Forms submission.

  • Select Twilio as the action application.
  • Enter your Twilio Account SID and Auth Token.
  • Set the SMS body and recipient number using the mapped data.

Once everything is set, click on ‘Save and Send Test Request’ to verify that the SMS is sent successfully. You should see a confirmation message indicating that the SMS has been dispatched.


5. Testing the Integration and Finalizing the Workflow

After setting up the SMS action in Pabbly Connect, it’s crucial to test the entire workflow. Fill out the Zoho Form again to ensure that the SMS is sent correctly upon submission. Check your Twilio account to confirm the SMS was received.

If everything works smoothly, you can finalize your workflow in Pabbly Connect. This integration allows you to automatically send confirmation SMS messages for every new submission received through your Zoho Forms.

In summary, the integration between Zoho Forms and Twilio through Pabbly Connect streamlines the process of sending SMS notifications, enhancing user engagement and response times.


Conclusion

This tutorial demonstrates how to send Twilio SMS messages automatically for new Zoho Forms submissions using Pabbly Connect. By following the steps outlined, you can create efficient workflows that enhance communication and automate tasks seamlessly.

Ensure you check out Pabbly Connect to create business automation workflows and reduce manual tasks. Pabbly Connect currently offer integration with 2,000+ applications.

Automate WhatsApp Notifications for OneDrive File Uploads with Pabbly Connect

Learn how to send WhatsApp notifications automatically when a file is uploaded to OneDrive using Pabbly Connect. Follow our detailed step-by-step tutorial. Discover hidden automation capabilities within your existing tools. This guide shows you how to connect your essential applications and permanently eliminate redundant manual processes.

Watch Step By Step Video Tutorial Below


1. Setting Up Pabbly Connect for Automation

To start sending notifications on WhatsApp when a file is uploaded in OneDrive, you need to set up Pabbly Connect. First, visit Pabbly.com/connect and sign in or create a new account. Pabbly Connect allows seamless integration between various applications.

Once logged in, click on the ‘Create Workflow’ button. Name your workflow something like ‘When File is Uploaded in OneDrive, Send WhatsApp Notification’. This will help you identify the automation later. After naming, click on the ‘Create’ button to proceed.


2. Connecting OneDrive to Pabbly Connect

In this section, you will connect OneDrive to Pabbly Connect for monitoring file uploads. Select Microsoft OneDrive as your trigger application. Choose the event as ‘New File Created’ to detect when a file is uploaded.

Next, click on the ‘Connect’ button and choose to add a new connection. You will be prompted to provide access to your OneDrive account. Follow the on-screen instructions to authorize Pabbly Connect. Once connected, specify the folder name where the files will be uploaded.

  • Select the correct folder name, ensuring it matches exactly.
  • Choose the event type as ‘New File Created’.
  • Click on ‘Save and Send Test Request’ to verify the connection.

After testing, if successful, you will receive a response confirming the connection. This means Pabbly Connect is now monitoring your OneDrive folder for new files.


3. Setting Up WhatsApp Cloud API in Pabbly Connect

Now that OneDrive is connected, it’s time to set up WhatsApp Cloud API in Pabbly Connect. Select WhatsApp Cloud API as your action application. You will need to create a new connection to send messages.

For this, you will need your WhatsApp Business Account ID, phone number ID, and a temporary access token. You can find these details in your WhatsApp Cloud API dashboard. Once you have these, enter them into Pabbly Connect to establish the connection.

  • Copy the temporary access token from your WhatsApp API dashboard.
  • Enter the phone number ID and WhatsApp Business Account ID as required.
  • Click ‘Save’ to connect WhatsApp with Pabbly Connect.

Once connected, you will be able to select the message template you want to use for notifications. Ensure your template is approved by WhatsApp for it to work correctly.


4. Configuring WhatsApp Notifications in Pabbly Connect

With both OneDrive and WhatsApp connected, you can now configure the specific notification message. Choose the message template that you want to send when a new file is uploaded.

In the message configuration, you will need to map the variables such as the file name and the download link. This allows Pabbly Connect to personalize the message sent to WhatsApp users.

Select the template you created for file notifications. Map the file name and link to the respective fields in the message. Ensure the recipient’s phone number is in the correct format.

Once everything is set, click on ‘Save and Send Test Request’ to test the notification. If successful, you will see the message arrive on the specified WhatsApp number.


5. Conclusion: Automating WhatsApp Notifications with Pabbly Connect

In conclusion, using Pabbly Connect to automate WhatsApp notifications for OneDrive file uploads is a straightforward process. By following the steps outlined, you can ensure that every time a file is uploaded, a notification is sent automatically.

Ensure you check out Pabbly Connect to create business automation workflows and reduce manual tasks. Pabbly Connect currently offer integration with 2,000+ applications.

This integration saves time and keeps your team informed without manual intervention. With Pabbly Connect, you can enhance productivity and streamline your workflow effectively.

Start using Pabbly Connect today to automate your tasks and improve communication in your team!


How to Send Microsoft Outlook Emails with New Microsoft Excel Rows Using Pabbly Connect

Learn how to automate sending emails from Microsoft Outlook using new rows in Microsoft Excel with Pabbly Connect. Step-by-step tutorial included. Build sophisticated automated workflows in less time than you think. This guide translates complex integrations into straightforward steps for immediate implementation.

Watch Step By Step Video Tutorial Below


1. Setting Up Pabbly Connect for Microsoft Outlook Emails

To send Microsoft Outlook emails using new Microsoft Excel rows, you first need to access Pabbly Connect. This automation platform allows seamless integration between Microsoft Excel and Outlook.

Begin by signing up for a free account on Pabbly Connect. Once logged in, navigate to the dashboard. Click on the ‘Create Workflow’ button and name your workflow, such as ‘Excel to Outlook Emails’. This name helps you identify the workflow later.


2. Configuring Microsoft Excel as the Trigger App

In this step, you will configure Microsoft Excel as the trigger application in Pabbly Connect. Click on the trigger field, and from the dropdown, select Microsoft Excel.

  • Choose the trigger event as ‘New Row in Worksheet’.
  • Click the ‘Connect’ button and establish a new connection with Microsoft Excel.
  • Select your workbook and worksheet where the email data is stored.

After saving the configuration, Pabbly Connect will fetch the most recent row added in your Excel sheet, capturing the necessary details such as name, email, and email content.


3. Setting Up Microsoft Outlook as the Action App

Next, you will set up Microsoft Outlook as the action app within Pabbly Connect. Search for ‘Microsoft Office 365’ in the action step.

  • Select the action event as ‘Send Email’.
  • Click the ‘Connect’ button and authorize your Microsoft Office 365 account.
  • Fill in the email subject, content type, and body using the data fetched from Excel.

Mapping the email fields is crucial, as it ensures that the correct data is sent to the right recipients. This setup allows Pabbly Connect to automatically send emails to the specified addresses whenever a new row is added.


4. Testing the Integration with Pabbly Connect

Now that both applications are configured, it’s time to test the integration. Click on the ‘Save and Send Test Request’ button in Pabbly Connect to initiate a test email.

Check your Microsoft Outlook inbox to confirm that the test email was successfully sent. You should see the email with the subject and content you specified. This step validates that your workflow is correctly set up and functional.


5. Final Steps and Automation with Pabbly Connect

Once the test is successful, your automation is complete! With Pabbly Connect, you only need to set up this workflow once, and it will run in the background.

Every time you add a new row to your Excel sheet, an email will automatically be sent through Microsoft Outlook based on the details provided. This automation saves you time and effort in sending emails manually.


Conclusion

In this tutorial, we have demonstrated how to use Pabbly Connect to automate sending Microsoft Outlook emails using new rows in Microsoft Excel. This powerful integration streamlines your email communication process and enhances productivity.

Ensure you check out Pabbly Connect to create business automation workflows and reduce manual tasks. Pabbly Connect currently offer integration with 2,000+ applications.