How to Build an AI Agent to Auto-Summarize Google Drive Grant Proposals Using Pabbly Connect

Learn how to use Pabbly Connect to build an AI agent that auto-summarizes Google Drive grant proposals efficiently. Step-by-step tutorial included. Revolutionize your productivity approach with just a few strategic clicks. Uncover professional methods for connecting applications and creating workflows that reclaim hours of your week.

Watch Step By Step Video Tutorial Below


1. Accessing Pabbly Connect for Integration

To begin utilizing Pabbly Connect for automating the summarization of Google Drive grant proposals, first, navigate to the Pabbly Connect website. You can do this by typing Pabbly.com/connect in your browser’s address bar. Here, you will need to sign in to your existing account or create a new one if you’re a first-time user.

Once logged in, you will be directed to the Pabbly dashboard. From here, locate and click on the Pabbly Connect option. This will take you to the main interface where all your workflows are managed. You are now ready to create a new workflow that integrates Google Drive with OpenAI and Google Docs.


2. Creating the Workflow in Pabbly Connect

With Pabbly Connect open, it’s time to create a new workflow. Click on the Create Workflow button. You will need to name your workflow, for instance, Auto-Summarize Google Drive Grant Proposals, and select a folder for organization.

  • Choose a clear and descriptive name for your workflow.
  • Select the folder where the workflow will be saved.

After naming your workflow, you will see two boxes labeled Trigger and Action. The trigger will be set to Google Drive, which will initiate the workflow whenever a new file is added to your specified folder. The action will involve using OpenAI to summarize the document and then creating a Google Doc with the summary.


3. Setting Up the Google Drive Trigger

To configure the Google Drive trigger in Pabbly Connect, select Google Drive as the trigger application. Then, choose the event New File in Specific Folder. You will be prompted to connect your Google account.

Once connected, specify the folder where you will upload grant proposals. This is crucial as the automation will only trigger for files in this folder. After saving the connection, you can upload a sample grant proposal to test the setup.


4. Integrating OpenAI for Document Summarization

Next, you will set up OpenAI as the action step in your Pabbly Connect workflow. Select OpenAI and choose the event Extract Content from PDF/Image. You will need to connect to OpenAI by providing your API key, which you can obtain from the OpenAI dashboard.

  • Enter your OpenAI API key in the designated field.
  • Select the AI model, such as GPT-4 Mini, for summarization tasks.

In the prompt section, type Summarize grant proposals. This will instruct OpenAI on how to process the document. After setting this up, save the action step to continue.


5. Creating Google Docs for Summary Output

Finally, you will add another action step to create a Google Doc for the summary output. Select Google Docs and choose the event Create Blank Document. Connect to your Google account if you haven’t done so already.

After creating the document, you will use the document ID from the previous step to append the summary generated by OpenAI. This ensures that the summary is saved directly into the newly created Google Doc.

Once all steps are configured, you can test the entire workflow. Upon successful execution, every time you upload a new grant proposal to Google Drive, Pabbly Connect will automatically generate a summary and create a Google Doc containing it.


Conclusion

In this tutorial, we explored how to build an AI agent to auto-summarize Google Drive grant proposals using Pabbly Connect. By automating this process, you can save time and streamline your workflow effectively. Utilizing Pabbly Connect for integrating Google Drive, OpenAI, and Google Docs enhances productivity and ensures that your grant proposals are summarized efficiently.

Ensure you check out Pabbly Connect to create business automation workflows and reduce manual tasks. Pabbly Connect currently offer integration with 2,000+ applications.

How to Create an AI Agent to Generate Images in Trello Card Using Pabbly Connect

Learn how to create an AI agent that generates images in Trello cards using Pabbly Connect. Step-by-step guide to integrate Trello and OpenAI seamlessly. Revolutionize your productivity approach with just a few strategic clicks. Uncover professional methods for connecting applications and creating workflows that reclaim hours of your week.

Watch Step By Step Video Tutorial Below


1. Accessing Pabbly Connect for AI Image Generation

To create an AI agent that generates images in Trello cards, you first need to access Pabbly Connect. Start by opening your browser and navigating to the Pabbly Connect landing page.

Once there, you will see two options: ‘Sign In’ and ‘Sign Up Free.’ If you are new to Pabbly Connect, click on ‘Sign Up Free’ to create your account. After signing in, click on ‘Access Now’ under Pabbly Connect to enter the dashboard.


2. Creating a Workflow in Pabbly Connect

After accessing the dashboard, the next step is to create a new workflow for your AI agent. Click on the ‘Create Workflow’ button and provide a name for your workflow, such as ‘AI Agent for Trello Image Generation.’ Select the appropriate folder within your Pabbly Connect account and click on ‘Create’ to proceed. using Pabbly Connect

  • Click on ‘Create Workflow’.
  • Name your workflow accordingly.
  • Select the desired folder for your workflow.

Once the workflow is created, you will see the trigger and action windows. The trigger is where you set the event that starts the workflow, while the action is what happens as a result. In this case, the trigger will be a new card added to Trello.


3. Setting Up Trello Trigger in Pabbly Connect

To set up the Trello trigger, you will select Trello as the application in the trigger window. Choose the trigger event as ‘New Card Added’ and then click on ‘Connect’ to establish a connection with your Trello account. using Pabbly Connect

To connect Trello, you will need to enter your Trello username, API key, and token. You can find your username in your Trello profile settings. For the API key and token, navigate to the Trello developer key section and follow the instructions to generate them.

  • Select Trello as the application.
  • Choose ‘New Card Added’ as the trigger event.
  • Enter your Trello account details to establish the connection.

After connecting, select the Trello board and the specific list from which you want to capture new cards. Once you’ve done this, click on ‘Save and Send Test Request’ to confirm the connection.


4. Filtering Trigger Events for New Cards

After setting up the trigger, you will need to filter the events to ensure that the AI agent only responds to new card creations. Click on the action step and select the ‘Filter by Pabbly’ option. using Pabbly Connect

Set the filter type to ‘Equals to’ and specify the value as ‘action_create_card’. This step is crucial to prevent the AI agent from triggering for any other updates to existing cards.

Select ‘Filter by Pabbly’ in the action step. Set filter type to ‘Equals to’. Enter the value as ‘action_create_card’.

Once the filter is set up, click on ‘Save and Send Test Request’ to verify that it is functioning correctly. This ensures that your AI agent will only act on new cards added to Trello.


5. Generating Images with OpenAI

With the trigger and filtering steps complete, the next action is to send the card title to OpenAI to generate an image. In the action step, select OpenAI and choose ‘Generate Image’ as the action event. Connect your OpenAI account by entering your API key, which can be generated from your OpenAI dashboard. using Pabbly Connect

In the OpenAI action settings, map the prompt to the card title captured from Trello. Specify the number of images to generate and the desired size, such as HD. Click on ‘Save and Send Test Request’ to generate the image based on the prompt.

Select OpenAI and choose ‘Generate Image’. Map the prompt to the card title from Trello. Specify image settings and click ‘Save and Send Test Request’.

Once the image is generated, you will receive a response containing the image URL. This URL will be used in the final step to update the Trello card with the generated image.


Conclusion: Updating Trello Card with Generated Image

In the final step, you will update the Trello card with the generated image. Select Trello again in the action step and choose ‘Create Attachment on Card’ as the action event. Connect to your existing Trello account and select the same board and list as before.

Ensure you check out Pabbly Connect to create business automation workflows and reduce manual tasks. Pabbly Connect currently offer integration with 2,000+ applications.

Check out Pabbly Connect – Automate your business workflows effortlessly! Sign Up Free – Start your journey with ease! 10,000+ Video Tutorials – Learn step by step! Join Pabbly Facebook Group – Connect with 21,000+ like minded people!
Map the card ID from the trigger step to ensure the image is attached to the correct card. Then, provide the image URL received from OpenAI as the attachment URL. Click on ‘Save and Send Test Request’ to complete the workflow.

After successfully running the workflow, check your Trello board to see the generated image attached to the corresponding card. This integration showcases the power of Pabbly Connect in automating tasks between Trello and OpenAI seamlessly.

How to Use Pabbly Connect with AI Agent to Rate Leads and Update Google Sheets

Learn how to automate lead rating and updates in Google Sheets using Pabbly Connect and AI Agent. Step-by-step tutorial included. Explore efficient methods for automating routine tasks with clear, concise instructions suited for both newcomers and experienced professionals.

Watch Step By Step Video Tutorial Below


1. Accessing Pabbly Connect for Lead Rating

To begin using Pabbly Connect for lead rating, first access the platform by visiting the Pabbly Connect website. Sign in or create a new account if you are a first-time user. The dashboard will display various options for workflow creation.

Once logged in, click on the ‘Create Workflow’ button. Name your workflow, for example, ‘AI Agent for Lead Rating,’ and select the appropriate folder for your automation. This is where you will set up the integration process to connect Google Forms and Google Sheets through the AI agent.


2. Setting Up Google Forms with Pabbly Connect

In this step, you will connect Google Forms to Pabbly Connect. Start by selecting Google Forms as your trigger app within the workflow. Choose the trigger event as ‘New Response Received’ to capture submissions directly from your form.

  • Select Google Forms as the app.
  • Choose ‘New Response Received’ as the trigger event.
  • Copy the webhook URL provided by Pabbly Connect.

Next, integrate this webhook URL into your Google Sheets by using the Pabbly Connect Webhooks add-on. Go to Extensions > Add-ons > Get Add-ons, search for Pabbly Connect Webhooks, and install it. After installation, refresh your Google Sheets, and set up the add-on using the copied webhook URL to ensure that every new submission triggers the workflow.


3. Sending Data to AI Agent for Lead Analysis

After setting up Google Forms, the next step is to send the captured data to the AI agent. In the action step of your workflow, select OpenAI from the app options and choose the action event as ‘Chat GPT Structured AI Output.’ This will allow you to analyze the lead’s information effectively. using Pabbly Connect

To connect your OpenAI account, enter your API key, which can be obtained from your OpenAI dashboard. After making the connection, select the AI model you wish to use for lead analysis—GPT-4 is recommended for better results. You will also need to set up your prompts for analyzing lead details.

  • Enter your OpenAI API key to connect.
  • Choose the AI model (e.g., GPT-4).
  • Set up structured prompts for lead analysis.

Once the prompts are configured, map the responses from Google Forms to the action step, ensuring that the AI agent receives all necessary lead information for accurate rating and analysis.


4. Updating Google Sheets with AI Responses

After the AI agent processes the lead data, you will want to update the Google Sheets with the analysis results. In the next action step of your workflow, select Google Sheets again and choose the action event as ‘Update Row.’ This will allow you to add the AI-generated rating, summary, and remarks back into the Google Sheets.

To configure this step, connect your Google Sheets account to Pabbly Connect and select the correct spreadsheet and sheet where the form responses are stored. Use the row index from the trigger step to specify which row to update with the AI’s feedback.

Connect your Google Sheets account. Select the spreadsheet and sheet for updates. Map the row index and AI response fields appropriately.

After mapping the necessary fields, click ‘Save and Send Test Request’ to ensure that the updates are applied correctly. Check your Google Sheets to verify that the AI-generated data has been accurately recorded.


5. Conclusion: Automating Lead Rating with Pabbly Connect

In this tutorial, we explored how to automate the process of lead rating and updating Google Sheets using Pabbly Connect and an AI agent. By integrating Google Forms, OpenAI, and Google Sheets through Pabbly Connect, users can streamline their lead management effectively.

Ensure you check out Pabbly Connect to create business automation workflows and reduce manual tasks. Pabbly Connect currently offer integration with 2,000+ applications.

This integration not only saves time but also enhances the accuracy of lead analysis, making it easier for businesses to prioritize their leads based on AI-driven insights. Start using Pabbly Connect today to automate your workflows and improve your lead management process.

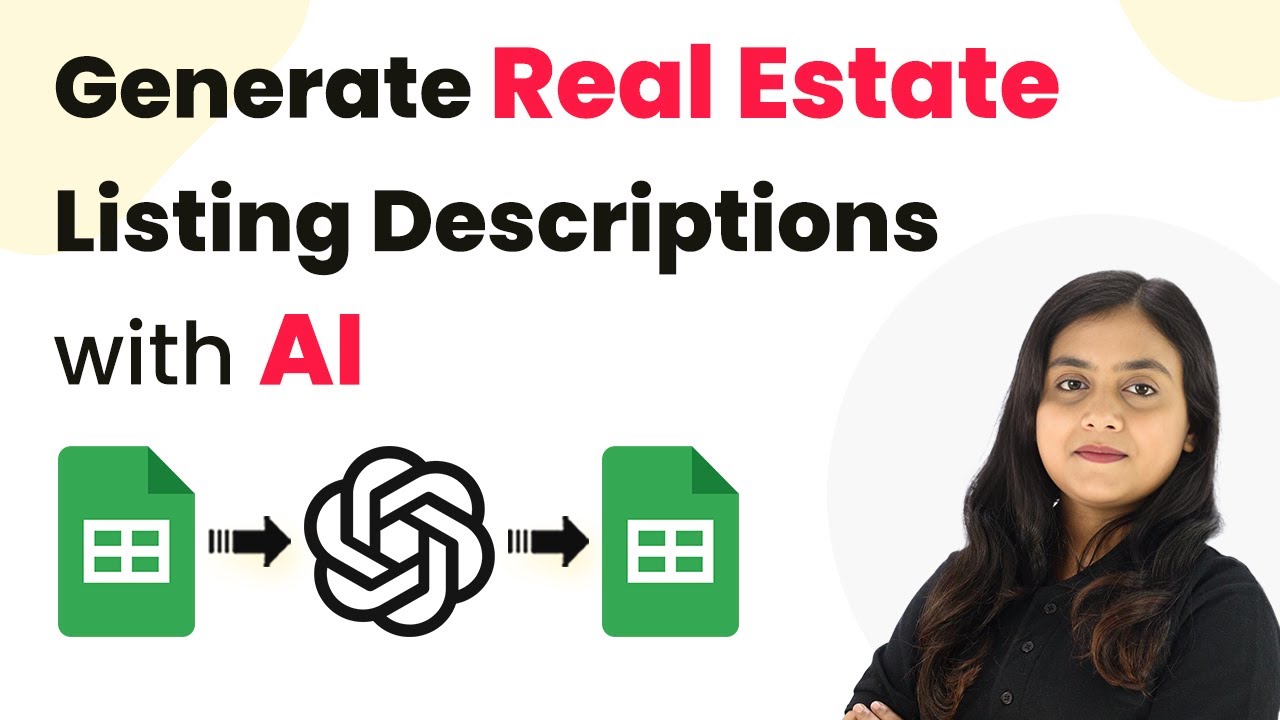
How to Auto-Generate Real Estate Listing Descriptions with AI Using Pabbly Connect

Learn how to use Pabbly Connect to automatically generate real estate listing descriptions with AI, integrating Google Sheets and OpenAI seamlessly. Discover hidden automation capabilities within your existing tools. This guide shows you how to connect your essential applications and permanently eliminate redundant manual processes.

Watch Step By Step Video Tutorial Below


1. Accessing Pabbly Connect for Automation

To start auto-generating real estate listing descriptions with AI, you will first need to access Pabbly Connect. This platform allows you to create automated workflows that integrate various applications seamlessly.

Begin by visiting the Pabbly Connect website. If you’re a new user, you can sign up for free and receive 100 free tasks each month. Existing users can sign in directly. Once logged in, you will see the Pabbly apps window. Click on the Pabbly Connect option to access the dashboard.


2. Creating a Workflow in Pabbly Connect

After accessing Pabbly Connect, the next step is to create a workflow. This is essential for automating the process of generating real estate descriptions. Click on the ‘Create Workflow’ button in the top right corner.

  • Name your workflow as ‘AI Agent to Auto-generate Real Estate Listing Descriptions’.
  • Select a folder where you want to save this workflow.
  • Click on the ‘Create’ button to finalize your workflow.

Once your workflow is created, you will see two windows: the trigger window and the action window. The trigger is the event that starts the workflow, while the action is what happens as a result. This setup is crucial for the automation process.


3. Setting Up Google Sheets as a Trigger

For this automation, Google Sheets will serve as the trigger application. You need to select ‘Google Sheets’ and set the trigger event to ‘New or Updated Spreadsheet Row’. This means that whenever a new property listing is added to your Google Sheets, it will trigger the workflow.

Pabbly Connect will provide you with a webhook URL that you need to copy. This URL is essential for linking your Google Sheets with Pabbly Connect. Open your Google Sheets, go to Extensions > Add-ons > Get Add-ons, and search for ‘Pabbly Connect Webhooks’ to install it.


4. Configuring the Action with OpenAI

After setting up Google Sheets as the trigger, the next step is to configure the action using OpenAI. Select OpenAI as the action application and choose ‘Chat GPT’ as the action event. This integration allows you to generate AI-driven descriptions based on the property details entered in your spreadsheet.

To connect OpenAI with Pabbly Connect, click on ‘Add New Connection’ and enter your OpenAI token. You can generate this token from your OpenAI account. Once connected, you will need to select the AI model, which can be GPT-4 mini or any other model of your choice.

  • Enter a prompt that instructs the AI to generate a real estate listing description.
  • Map the data fields from the previous step to ensure the AI generates content based on the correct property details.

After configuring the prompt and mapping the necessary data, click on the ‘Test Request’ button to see if the AI generates the description correctly. This step verifies that your integration is functioning as intended.


5. Updating Google Sheets with AI-Generated Description

Once the AI generates the property description, the final step is to update your Google Sheets with this information. Add another action step in your workflow and select Google Sheets again, this time setting the action event to ‘Update Row’. using Pabbly Connect

Connect to your Google Sheets account and choose the specific spreadsheet and sheet where the data is stored. Map the row index and the AI-generated description field to ensure the new description is saved in the correct location.

Finally, click on the ‘Save and Send Test Request’ button. If everything is configured correctly, the AI-generated description will be automatically added to your Google Sheets, completing the automation process.


Conclusion

Using Pabbly Connect, you can efficiently automate the generation of real estate listing descriptions with AI. This integration allows you to save time and streamline your workflow, ensuring every property listing is professionally described without manual effort. Start leveraging Pabbly Connect today to enhance your real estate business.

Ensure you check out Pabbly Connect to create business automation workflows and reduce manual tasks. Pabbly Connect currently offer integration with 2,000+ applications.

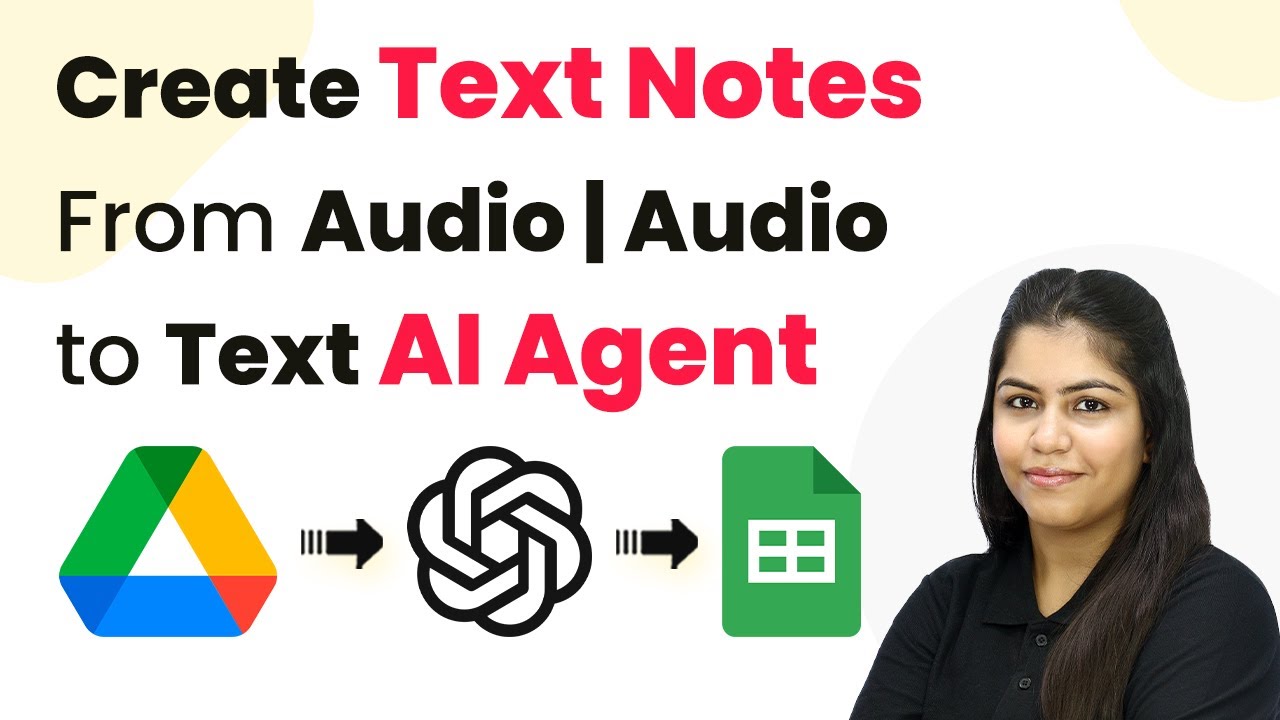
How to Create Text Notes From Audio Using Pabbly Connect

Learn how to convert audio files to text notes using Pabbly Connect. This detailed tutorial covers the integration of Google Drive, Open AI, and Google Sheets.

Watch Step By Step Video Tutorial Below


1. Accessing Pabbly Connect for Audio to Text Automation

To start converting audio files into text notes, you first need to access Pabbly Connect. Open your browser and navigate to Pabbly.com/connect. This platform will serve as the central hub for integrating various applications needed for this task.

Once on the Pabbly Connect landing page, you will see options to sign in or sign up. If you are a new user, click on the ‘Sign up for free’ button to create an account and enjoy free tasks each month. Existing users can click on ‘Sign in’ to access their dashboard.


2. Creating a Workflow in Pabbly Connect

After signing in, you will land on the Pabbly Connect dashboard. Here, click on the ‘Create Workflow’ button to start setting up your automation. Name your workflow, such as ‘How to Create Text Notes From Audio,’ and select a folder to save it in. using Pabbly Connect

  • Click on the ‘Create’ button to proceed.
  • You will be directed to the workflow window where you can set up triggers and actions.

The trigger is essential as it defines when the automation will start. In this case, you will select Google Drive as the trigger application. This means whenever an audio file is added to Google Drive, the workflow will be initiated.


3. Setting Up Google Drive as the Trigger

To set up Google Drive as your trigger in Pabbly Connect, search for Google Drive and select it. For the trigger event, choose ‘New File in a Specific Folder’ and click on ‘Connect’.

You will need to add a new connection by clicking on the blue button that says ‘Sign in with Google’. Select your Gmail account and allow the necessary permissions to connect your Google Drive account with Pabbly Connect.

  • Select the folder in Google Drive where your audio files will be uploaded.
  • Ensure the folder is set to be shareable with permissions for anyone with the link to edit.

Once the folder is selected, click on ‘Save and Send Test Request’. This action will test the connection and ensure that Pabbly Connect can access your audio files.


4. Transcribing Audio Using Open AI

After successfully setting up Google Drive, the next step is to transcribe the audio file using Open AI. In Pabbly Connect, add Open AI as the action application and choose ‘Generate Transcript’ as the action event.

Similar to the previous step, you will need to connect your Open AI account. If you haven’t connected it before, click ‘Add a New Connection’ and provide your API key from the Open AI platform. Once connected, map the audio file URL from the previous trigger step to the appropriate field.

Select the model as ‘Whisper’ for audio transcription. Click on ‘Save and Send Test Request’ to generate the transcription.

Once the transcription is generated, you will see the results displayed in Pabbly Connect. This transcription will serve as the basis for creating structured text notes.


5. Adding Transcription to Google Sheets

The final step is to add the generated transcription and notes to Google Sheets. In Pabbly Connect, select Google Sheets as the action application and choose ‘Add New Row’ as the action event.

Connect your Google Sheets account by selecting your Gmail and allowing permissions. Once connected, choose the specific spreadsheet and sheet where you want to add the data.

Map the episode title, summary, and notes in the respective fields. Click on ‘Save and Send Request’ to finalize the addition of the new row.

With this, the details will be added to your Google Sheets, and you have successfully completed the workflow using Pabbly Connect. Now, every time you upload an audio file to Google Drive, it will automatically transcribe and add the notes to your spreadsheet.


Conclusion

In this tutorial, we explored how to convert audio files into text notes using Pabbly Connect. By integrating Google Drive, Open AI, and Google Sheets, you can automate the transcription process efficiently. This setup not only saves time but also enhances productivity by organizing your audio content into structured notes.

Ensure you check out Pabbly Connect to create business automation workflows and reduce manual tasks. Pabbly Connect currently offer integration with 2,000+ applications.

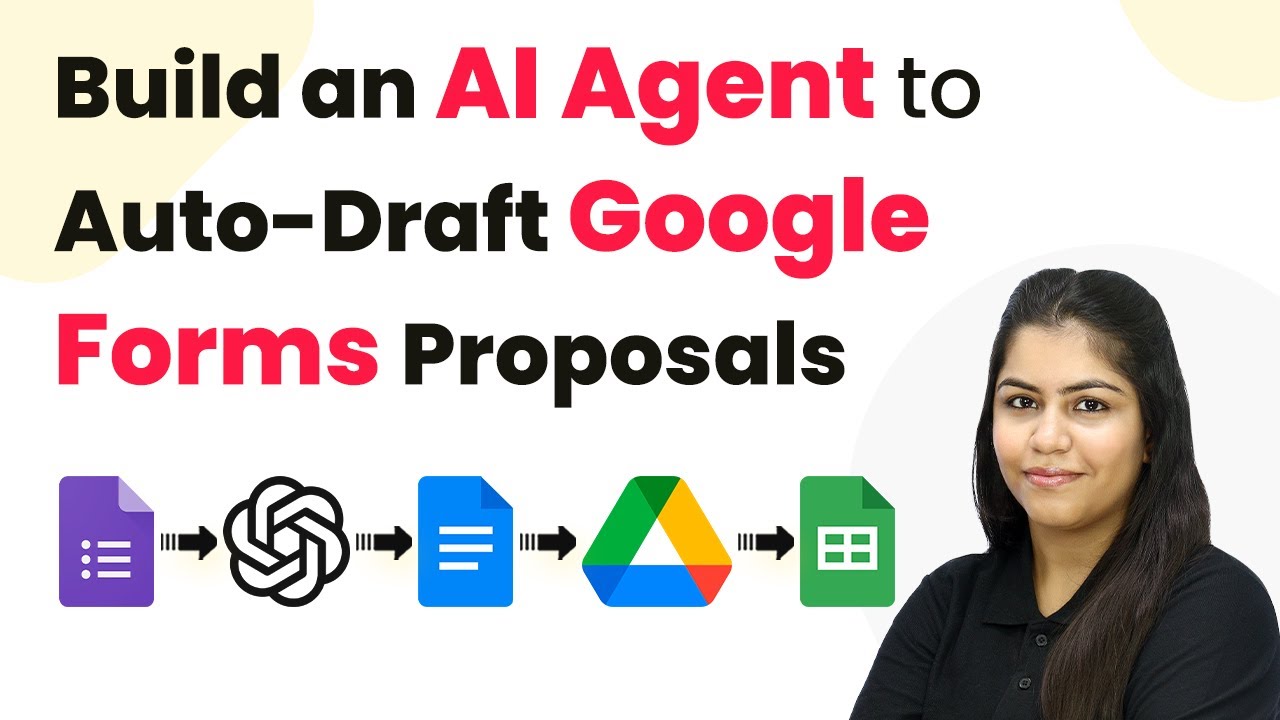
How to Build an AI Agent to Auto-Draft Google Forms Proposals with Pabbly Connect

Learn how to use Pabbly Connect to create an AI agent that auto-drafts Google Forms proposals efficiently. Follow our step-by-step tutorial for seamless integration. Build sophisticated automated workflows in less time than you think. This guide translates complex integrations into straightforward steps for immediate implementation.

Watch Step By Step Video Tutorial Below


1. Accessing Pabbly Connect for Automation

To start building your AI agent to auto-draft Google Forms proposals, you need to access Pabbly Connect. First, open your browser and navigate to the Pabbly Connect landing page by searching for ‘Pabbly.com/connect’. Here, you will find options to sign in or sign up for free.

If you are a new user, click on the ‘Sign up for free’ button to create an account. Existing users can click on ‘Sign in’. After signing in, access the Pabbly Connect dashboard and look for the option labeled ‘Create Workflow’ to begin your automation setup.


2. Creating Your Workflow in Pabbly Connect

After accessing your Pabbly Connect dashboard, click on the ‘Create Workflow’ button. You will be prompted to name your workflow. Enter a suitable name, such as ‘AI Agent to Auto-Draft Google Forms Proposals’ and select a folder to save it in. using Pabbly Connect

  • Name your workflow appropriately.
  • Choose a folder to organize your workflows.
  • Click ‘Create’ to finalize the workflow setup.

Once the workflow is created, you will enter the workflow window where you can set up your trigger and action steps. The trigger will be set to Google Forms, which will initiate the workflow whenever a new response is received.


3. Setting Up Google Forms as Trigger in Pabbly Connect

In the workflow window, select Google Forms as your trigger application. Set the trigger event to ‘New Response Received’. Pabbly Connect will provide you with a webhook URL that you need to copy for connecting your Google Forms.

To connect Google Forms to Pabbly Connect, log into your Google Forms account. Ensure that the last question in your form is set as required for the trigger to work. After confirming this, link your Google Forms to a Google Sheets document where responses will be stored.

  • Copy the provided webhook URL.
  • Set the last question in your Google Form as required.
  • Link the Google Form to Google Sheets to store responses.

Once the setup is complete, return to Pabbly Connect and click on ‘Send Test’ to verify that the connection is working correctly. You should see the test response captured in your Pabbly Connect workflow.


4. Integrating the AI Agent with Pabbly Connect

Now that the trigger is set up, it’s time to integrate your AI agent. Select the AI agent application from the action step options in Pabbly Connect. Choose the action event as ‘Chat GPT’ and proceed to connect your OpenAI account.

To establish this connection, you will need an API key from OpenAI. Follow the prompts to generate a new secret key. Once you have the API key, paste it into Pabbly Connect and select the AI model you wish to use, such as GPT-4. Set up your prompt to instruct the AI on how to draft the proposal based on the client information received.

Select the AI agent application in Pabbly Connect. Generate and paste the OpenAI API key into the workflow. Configure the prompt to guide the AI in drafting the proposal.

Once you have set up the AI agent, map the relevant fields from the Google Form responses to ensure the proposal draft is generated dynamically based on client input.


5. Finalizing and Sharing the Proposal Document

After the AI agent generates the proposal draft, the next step is to create a Google Docs document to store the draft. Add another action step in Pabbly Connect and select Google Docs. Choose the action event as ‘Create a Blank Document’ and connect your Google Docs account.

Provide a name for the document, such as ‘[Project Title] Proposal Draft’. Once the document is created, add another action step to append the proposal content generated by the AI agent into this document. Finally, use Google Drive to make the document shareable and update the Google Sheets with the link to the proposal draft.

Create a new document in Google Docs to store the proposal. Append the generated proposal content to the document. Share the document via Google Drive and update the Google Sheets with the document link.

With these steps completed, your automation is now fully functional. Whenever a new response is received in Google Forms, Pabbly Connect will trigger the workflow, generate the proposal, and store it in Google Docs while updating the Google Sheets with the relevant link.


Conclusion

In this tutorial, we explored how to use Pabbly Connect to create an AI agent that auto-drafts Google Forms proposals. By following the outlined steps, you can streamline your proposal drafting process, saving time and increasing efficiency. Implement this automation to enhance your workflow today!

Ensure you check out Pabbly Connect to create business automation workflows and reduce manual tasks. Pabbly Connect currently offer integration with 2,000+ applications.

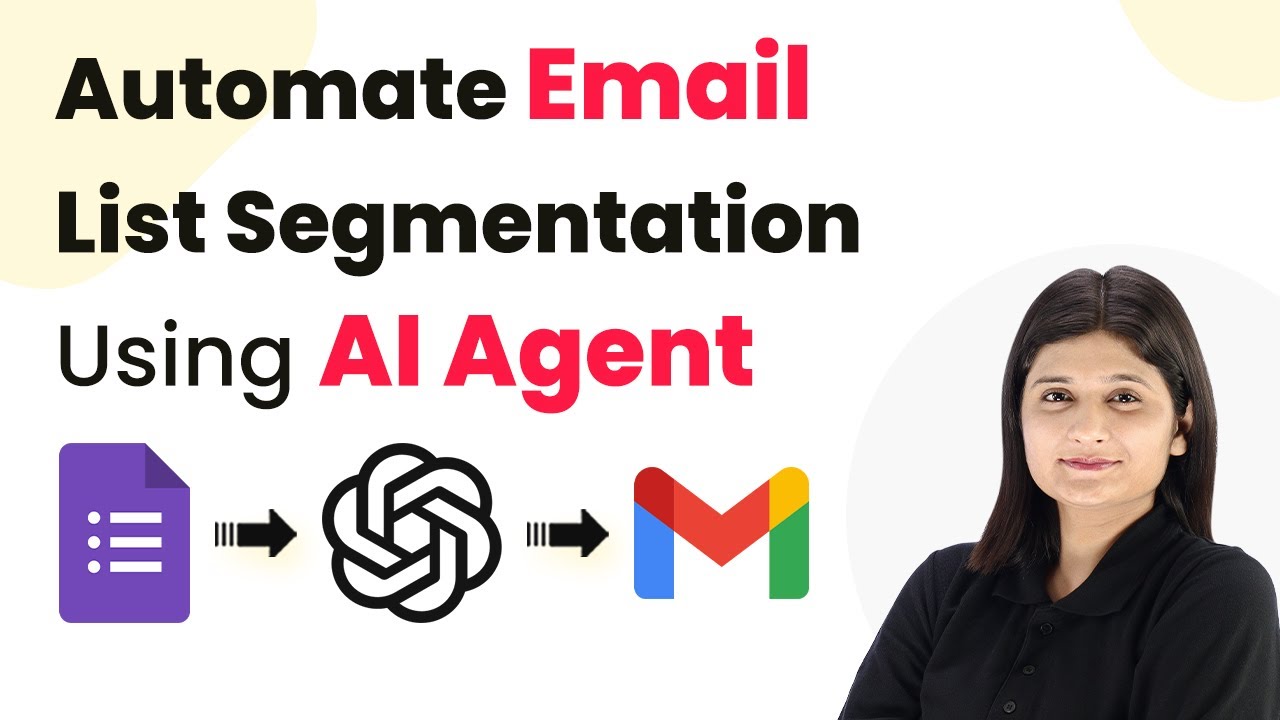
Automate Email List Segmentation Using Pabbly Connect

Learn how to automate email list segmentation using Pabbly Connect, integrating Google Forms, OpenAI, and Gmail for personalized email marketing. Master proven automation processes with practical implementation examples and strategic recommendations you can apply immediately in your workflow.

Watch Step By Step Video Tutorial Below


1. Accessing Pabbly Connect for Automation

To automate email list segmentation using Pabbly Connect, the first step is to access the platform. You can do this by visiting Pabbly Connect at Pabbly.com/connect in your browser. Once there, you’ll need to sign in or create an account to start using the automation features.

After logging in, you will be directed to the Pabbly Connect dashboard where you can create and manage your workflows. To set up automation for email list segmentation, click on the ‘Create Workflow’ button. Here, you will name your workflow, for example, ‘Automate Email List Segmentation Using AI Agent’, and select a folder to save it in.


2. Setting Up Google Forms with Pabbly Connect

In this section, we will connect Google Forms to Pabbly Connect to capture new form submissions. Start by selecting Google Forms as your trigger application. The trigger event will be ‘New Response Received’. This means that every time a new response is submitted, it will initiate the workflow.

  • Select Google Forms as the trigger application.
  • Choose ‘New Response Received’ as the trigger event.
  • Copy the webhook URL provided by Pabbly Connect.

Next, go to your Google Form, navigate to the responses section, and link it to a Google Sheets spreadsheet. This will allow the responses to be captured automatically. Ensure that all required fields are set up correctly before testing the integration.


3. Integrating OpenAI for Email List Segmentation

Once Google Forms is connected to Pabbly Connect, the next step is to integrate OpenAI to segment the email list based on the responses. Select OpenAI as the action application and choose ‘Chat GPT Structured AI Output’ as the action event. This step will allow you to categorize the subscriber information effectively.

In the OpenAI connection setup, you will need to provide an API key. After entering the key, you will create a prompt that instructs the AI to categorize subscribers based on their goals and interactions. Use the data collected from Google Forms to fill in the necessary fields by mapping them to your prompt.

  • Select the AI model as GPT-4 Mini.
  • Enter a prompt that categorizes the subscriber based on their details.
  • Map the fields from Google Forms to the prompt.

After setting up the mapping, you can test the action to ensure that OpenAI is correctly segmenting the email list based on the provided information.


4. Sending Personalized Emails Using Gmail

The final step in this automation process is to send personalized emails using Gmail through Pabbly Connect. For this, select Gmail as your action application and choose ‘Send Email V1’ as the action event. Connect your Gmail account to allow Pabbly Connect to send emails on your behalf.

In the email setup, you will map the recipient’s email address from the Google Forms response. Additionally, you will craft a personalized message using the output generated from OpenAI. This will ensure that the emails sent are tailored to each subscriber’s specific needs and preferences.

Map the recipient’s email address from the form response. Enter a subject and sender name for the email. Use the content generated by OpenAI for the email body.

After completing the email setup, click on ‘Save and Send Test Request’ to ensure that the email is sent successfully. You can check your Gmail to confirm the receipt of the personalized email.


5. Conclusion

In this tutorial, we demonstrated how to automate email list segmentation using Pabbly Connect, integrating Google Forms, OpenAI, and Gmail. By following these steps, you can efficiently manage your email marketing efforts and send personalized messages to your subscribers.

Ensure you check out Pabbly Connect to create business automation workflows and reduce manual tasks. Pabbly Connect currently offer integration with 2,000+ applications.

Check out Pabbly Connect – Automate your business workflows effortlessly! Sign Up Free – Start your journey with ease! 10,000+ Video Tutorials – Learn step by step! Join Pabbly Facebook Group – Connect with 21,000+ like minded people!
This process not only saves time but also enhances customer engagement through tailored communication. Start using Pabbly Connect today to streamline your email marketing automation!

Convert RSS Feeds into WordPress Posts Using Pabbly Connect

Learn how to automate converting RSS feeds into WordPress posts using Pabbly Connect and OpenAI. Step-by-step guide included! Explore efficient methods for automating routine tasks with clear, concise instructions suited for both newcomers and experienced professionals.

Watch Step By Step Video Tutorial Below


1. Accessing Pabbly Connect for Integration

To convert RSS feeds into WordPress posts, the first step is to access Pabbly Connect. Simply type ‘Pabbly.com/connect’ in your browser to reach the Pabbly Connect landing page. Once there, you’ll need to sign in or sign up for a free account if you’re a new user.

After signing in, you will be directed to the Pabbly dashboard. Here, you can manage all your workflows. Click on the ‘Create Workflow’ button to start building your automation. Name your workflow appropriately, such as ‘Convert RSS Feeds into WordPress Posts Using AI Agent’ and select a folder to save it.


2. Setting Up the RSS Trigger in Pabbly Connect

In this step, you will configure the RSS trigger using Pabbly Connect. The trigger event is essential as it initiates the automation whenever there is a new feed item. Select ‘RSS by Pabbly’ as your trigger application and choose the event ‘New Item in Feed’.

  • Select ‘RSS by Pabbly’ as the trigger application.
  • Choose the event ‘New Item in Feed’.
  • Enter your RSS feed URL.

Once you have entered the feed URL and selected the filter type, click on ‘Save and Send Test Request’. This action will fetch the latest feed item from your RSS source, which is crucial for the next steps in your automation.


3. Integrating OpenAI for Content Generation

Next, you will integrate OpenAI to generate blog content based on the RSS feed fetched through Pabbly Connect. Add an action step by selecting OpenAI as your application and choose the action event ‘Chat GPT’.

To connect OpenAI, you must enter your API token. If you don’t have an existing connection, create a new API key in your OpenAI account, then paste it into the required field in Pabbly Connect. Select the AI model (e.g., GPT-4 Mini) and enter a prompt to instruct OpenAI on what to generate.

  • Select the AI model from the dropdown.
  • Enter a prompt for content generation based on the RSS feed.
  • Use mapping to dynamically insert content from the RSS feed.

After configuring these settings, click on ‘Save and Send Test Request’ to generate the blog post content based on the latest RSS feed item.


4. Posting the Generated Content to WordPress

With the blog post content generated, the next step is to post it on your WordPress site using Pabbly Connect. Add another action step and select WordPress as your application. Choose the action event ‘Create a Post’.

To establish this connection, enter your WordPress login credentials and base URL. The base URL is generally your website URL up to the ‘/wp-json/’ part. After connecting, fill in the required fields for post type, title, and content using the mapped data from the OpenAI response.

Select ‘Post’ as the post type. Map the title and content from the OpenAI response. Set the status to ‘Publish’ for immediate posting.

Once all fields are filled, click on ‘Save and Send Test Request’. This action will create a new post in your WordPress site automatically, completing the integration process.


5. Conclusion

In this tutorial, we demonstrated how to automate the process of converting RSS feeds into WordPress posts using Pabbly Connect and OpenAI. By following the outlined steps, you can streamline your content creation process and keep your WordPress site updated effortlessly.

Ensure you check out Pabbly Connect to create business automation workflows and reduce manual tasks. Pabbly Connect currently offer integration with 2,000+ applications.

Check out Pabbly Connect – Automate your business workflows effortlessly! Sign Up Free – Start your journey with ease! 10,000+ Video Tutorials – Learn step by step! Join Pabbly Facebook Group – Connect with 21,000+ like minded people!
Utilizing Pabbly Connect allows you to create dynamic workflows that save time and enhance productivity. Start automating your content management today!

How to Analyze and Categorize User Requests and Send on Discord Channel Using Pabbly Connect

Learn how to analyze and categorize user requests and send them to Discord channels using Pabbly Connect. Follow this step-by-step tutorial for seamless integration. Explore efficient methods for automating routine tasks with clear, concise instructions suited for both newcomers and experienced professionals.

Watch Step By Step Video Tutorial Below


1. Accessing Pabbly Connect for User Request Automation

To analyze and categorize user requests, you need to access Pabbly Connect. Start by navigating to Pabbly.com/connect in your browser. This platform serves as the central hub for integrating various applications, including Discord and Google Forms.

Once on the Pabbly Connect landing page, you have two options: sign in if you are an existing user or click on the ‘Sign Up Free’ button to create a new account. After logging in, you will be directed to the ‘All Apps’ page. From there, click on ‘Access Now’ under Pabbly Connect to reach the dashboard.


2. Creating a Workflow in Pabbly Connect

In the Pabbly Connect dashboard, click on the ‘Create Workflow’ button to initiate a new automation process. You can name this workflow something like ‘AI Agent for User Request Analysis’. This workflow will play a crucial role in capturing user requests and sending them to Discord channels based on their categories. using Pabbly Connect

  • Click on ‘Create Workflow’.
  • Enter a name for your workflow.
  • Select the appropriate folder for your Pabbly Connect account.

After naming your workflow, click on ‘Create’. You will now see two windows: the trigger window and the action window. The trigger window is where you will set up the Google Forms integration, while the action window will handle the categorization and sending of requests to Discord channels.


3. Setting Up Google Forms with Pabbly Connect

To capture user requests, select Google Forms as your trigger application. In the trigger event dropdown, choose ‘New Response Received’. Pabbly Connect will generate a webhook URL that you need to integrate into your Google Form.

Open your Google Form and link it to a Google Sheet to store responses. Under the ‘Responses’ tab, click on ‘Link to Sheets’ and create a new spreadsheet. After that, install the Pabbly Connect Webhooks add-on from the Google Workspace Marketplace to set up the webhook.

  • Copy the webhook URL from Pabbly Connect.
  • Go to Google Sheets and access the add-on.
  • Configure the initial setup by entering the webhook URL.

Once the webhook is set up, every new response in your Google Form will automatically trigger the workflow in Pabbly Connect, capturing user requests effectively.


4. Sending Requests to OpenAI for Categorization

Next, you will need to send the captured responses to OpenAI for analysis and categorization. In the action step of your Pabbly Connect workflow, select OpenAI as the application and choose the action event ‘Chat GPT Structured Output’. Connect your OpenAI account using the API key. using Pabbly Connect

To get the API key, log into your OpenAI account, navigate to the API key section, and create a new secret key. Paste this API key into Pabbly Connect to establish the connection. Specify the AI model you wish to use, such as GPT-4, and configure the prompts for categorizing user requests.

Select the AI model for analysis. Enter the system and user prompts for categorization. Map the Google Form responses to the respective fields.

This step allows OpenAI to categorize the requests into relevant types such as bug report, feature request, general inquiry, or user feedback, which will be used to determine the appropriate Discord channel for sending the messages.


5. Sending Messages to Discord Channels Based on Categories

After categorizing the requests, you will set up routing conditions in Pabbly Connect to send messages to the appropriate Discord channels. Using the router feature in Pabbly Connect, create different routes for each category of request. using Pabbly Connect

For each route, specify the filter condition based on the category identified by OpenAI. For example, if the category is ‘bug report’, the message will be sent to the bug report channel in Discord. Generate a webhook URL for each Discord channel and configure the message content to include user details and the summary provided by OpenAI.

Create a route for each category of request. Set up filter conditions for routing. Map the user details and summary in the message.

Once configured, every time a new request is received and categorized, the AI agent will automatically send a message to the designated Discord channel, ensuring efficient communication and tracking of user feedback or requests.


Conclusion

In this tutorial, we explored how to analyze and categorize user requests and send them to Discord channels using Pabbly Connect. By setting up a workflow that integrates Google Forms, OpenAI, and Discord, you can automate the process of handling user feedback effectively. Start utilizing Pabbly Connect to streamline your communication and enhance user experience.

Ensure you check out Pabbly Connect to create business automation workflows and reduce manual tasks. Pabbly Connect currently offer integration with 2,000+ applications.

How to Generate Outlook Email Summaries Using AI Agent with Pabbly Connect

Learn how to generate Outlook email summaries using AI Agent and Pabbly Connect in this detailed tutorial. Step-by-step guidance for integration and automation. Implement the precise methodologies leading organizations use to automate repetitive tasks, illustrated with practical examples designed for immediate application.

Watch Step By Step Video Tutorial Below


1. Accessing Pabbly Connect for Email Summaries

To generate Outlook email summaries using AI Agent, you first need to access Pabbly Connect. Start by navigating to the Pabbly Connect website, where you can either sign in or create a new account.

If you are new to Pabbly Connect, click on the ‘Sign Up Free’ button to set up your account. Existing users can simply sign in to access their dashboard. Once logged in, click on ‘Access Now’ under Pabbly Connect to reach the dashboard.


2. Creating a Workflow in Pabbly Connect

After accessing Pabbly Connect, you will need to create a workflow for your AI agent. Click on the ‘Create Workflow’ button and name it, for example, ‘AI Agent for Email Summary’. You can choose any folder for your workflow. using Pabbly Connect

  • Click on ‘Create’ to open the workflow editor.
  • The interface consists of a trigger window and an action window.
  • Triggers indicate when an action should occur, while actions define what happens.

Now that you have set up your workflow, you can proceed to connect your Outlook account to Pabbly Connect as the first step in this automation process.


3. Connecting Outlook to Pabbly Connect

The next step is to connect your Outlook account with Pabbly Connect. In the trigger step, search for ‘Microsoft Office’ and select it. Choose ‘New Email Beta’ as the trigger event and click on ‘Connect’.

To establish the connection, click on ‘Connect with Microsoft Office 365’. A pop-up will appear, allowing you to log into your Outlook account. After logging in, scroll down and click ‘Accept’ to grant permissions. Once connected, click on ‘Save and Send Test Request’ to capture the details of the latest email.

  • The most recent email’s details, such as sender name and subject, will be captured.
  • You will see the email’s body content and other relevant information.

This step successfully connects your Outlook account with Pabbly Connect, enabling the automation of email summaries.


4. Sending Email to AI for Summarization

After capturing the email details, the next step is to send this information to an AI platform for summarization. In the action step, search for ‘OpenAI’ and select it. Choose ‘Chat GPT’ as the action event and click on ‘Connect’.

You will need to enter your OpenAI API key to connect. To obtain this, go to your OpenAI account, navigate to the API key section, and create a new secret key. Copy the key and paste it into Pabbly Connect.

Select a model, such as GPT-4 Mini, for processing the email. Enter a prompt specifying that the AI should summarize the email content.

This integration with Pabbly Connect allows the AI to generate concise summaries of the emails, which can then be sent to Slack.


5. Sending the Summary to Slack

The final step involves sending the email summary to a Slack channel. Click on ‘Add Action Step’ and search for ‘Slack’. Select it and choose ‘Send Channel Message’ as the action event. Click on ‘Connect’ and establish a connection with your Slack account. using Pabbly Connect

Once connected, select the channel where you want to send the summaries. You can customize the message to include the sender’s name, subject, and the summary generated by the AI. Use the mapping feature to populate these fields with the data captured earlier.

Enter a message format, such as ‘New Email Alert’. Map the sender name, subject line, and summary to the message.

Click on ‘Save and Send Test Request’ to send the message to your Slack channel. This confirms that the integration is working correctly, and you can see the summary posted in your Slack channel.


Conclusion

Using Pabbly Connect, you can efficiently generate Outlook email summaries with the help of an AI agent. This integration allows for seamless automation between Outlook and Slack, enhancing productivity and communication.

Ensure you check out Pabbly Connect to create business automation workflows and reduce manual tasks. Pabbly Connect currently offer integration with 2,000+ applications.