Automate YouTube Comment Replies with Pabbly Connect and ChatGPT

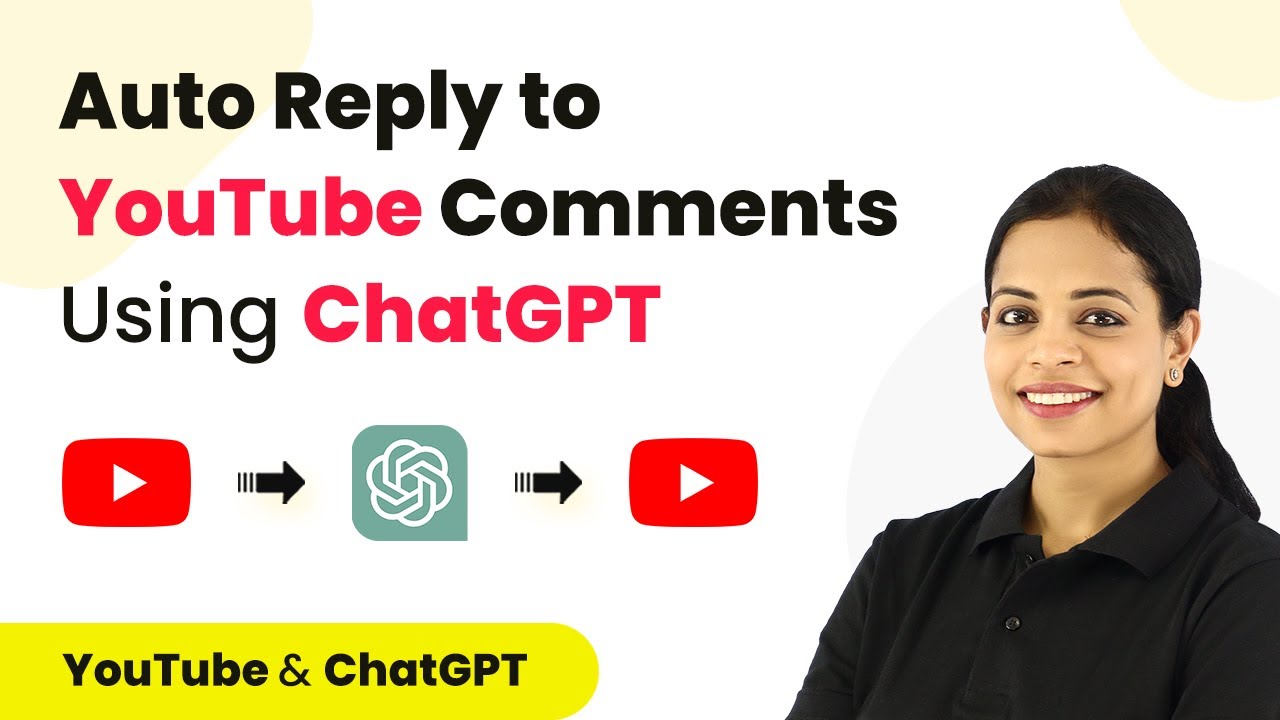
Learn how to automatically reply to YouTube comments using ChatGPT integrated with Pabbly Connect. Follow our step-by-step guide to set it up easily! Master proven automation processes with practical implementation examples and strategic recommendations you can apply immediately in your workflow.

Watch Step By Step Video Tutorial Below


1. Access Pabbly Connect for YouTube Comment Automation

To automate replies to YouTube comments using ChatGPT, start by accessing Pabbly Connect. Go to the URL Pabbly.com/connect to reach the platform’s landing page. Here, you can either sign in if you are an existing user or sign up for a new account, which gives you 100 free tasks to explore the application.

After logging into Pabbly Connect, you will be directed to the dashboard. From there, click on the ‘Create Workflow’ button to initiate the automation process. You will need to name your workflow; something like ‘Reply to YouTube Video Comments Using ChatGPT’ would be appropriate.


2. Set Up YouTube as the Trigger Application

In your newly created workflow on Pabbly Connect, the first step is to set YouTube as the trigger application. Click on the trigger section and search for YouTube. Select the trigger event as ‘New Comment on a Video’ to ensure that the workflow will run each time a new comment is posted on your videos.

  • Select the YouTube account you want to connect.
  • Authorize Pabbly Connect to access your YouTube account.
  • Choose the specific channel for which you want to automate replies.

After setting up the trigger, Pabbly Connect will check for new comments every 10 minutes, ensuring that your workflow remains up-to-date with the latest interactions on your videos.


3. Connect ChatGPT to Generate Replies

Next, you will set ChatGPT as the action application in Pabbly Connect. Click on the action step and select ChatGPT. The action event should be set to ‘Ask ChatGPT’ to generate replies based on the comments received. This is where the magic happens.

To connect ChatGPT, you will need an API key from OpenAI. Go to your OpenAI account, navigate to the API Keys section, and create a new secret key. Copy this key and return to Pabbly Connect to paste it into the required field. This step is crucial for authenticating your requests.


4. Reply to YouTube Comments Using Generated Responses

After generating a reply with ChatGPT, the next step is to post this reply back to the original YouTube comment. Add another action step in Pabbly Connect and select YouTube again. This time, choose the action event ‘Reply to Comment’. This allows you to post the generated response directly to the comment on your video.

  • Map the reply text generated by ChatGPT to the reply field.
  • Map the comment ID from the first step to identify which comment to reply to.
  • Save and send your test request to ensure everything is working correctly.

Once you have completed this setup, refresh your YouTube video page to see the automated reply appear under the original comment, confirming that the integration was successful.


5. Test the Integration in Real-Time

After configuring the workflow in Pabbly Connect, it’s essential to test the integration. Post a new comment on your YouTube video to see if the automation triggers correctly. Remember that the polling time for the YouTube trigger is set to 10 minutes, so you may need to wait briefly for the reply to be posted.

Once the waiting period is over, check the comment section of your video. If everything is set up correctly, you should see a reply generated by ChatGPT in response to your comment. This successful interaction showcases the power of Pabbly Connect in automating your YouTube comment management.


Conclusion

By following these steps, you can effectively automate replies to YouTube comments using ChatGPT integrated with Pabbly Connect. This not only saves time but also enhances viewer engagement on your channel. Start using Pabbly Connect today to streamline your YouTube interactions!

Ensure you check out Pabbly Connect to create business automation workflows and reduce manual tasks. Pabbly Connect currently offer integration with 2,000+ applications.

Top Workflows of February 2023 with Pabbly Connect

Discover the top workflows of February 2023 using Pabbly Connect to integrate applications like Microsoft Excel, Notion, and WhatsApp seamlessly. Navigate the automation landscape confidently with clear, structured guidance suitable for professionals regardless of prior technical experience.

Watch Step By Step Video Tutorial Below


1. Sync Microsoft Excel with Notion Using Pabbly Connect

To sync Microsoft Excel with Notion, you will first need to set up Pabbly Connect. This integration allows you to add a new row in Excel whenever a new database item is created in Notion. Start by logging into your Pabbly Connect account.

Next, create a new workflow in Pabbly Connect and select Notion as the trigger application. Choose the trigger event ‘New Database Item’. After that, connect your Notion account by following the prompts. You will then select your specific database from which the data will flow into Microsoft Excel.


2. Send WhatsApp Messages on Status Updates with Pabbly Connect

Using Pabbly Connect, you can automate WhatsApp messages based on status changes in Google Sheets. First, create a new workflow and set Google Sheets as the trigger application. Choose the event ‘Updated Row’ to monitor changes in your sheet.

  • Connect your Google Sheets account and select the sheet you want to monitor.
  • Next, set the action application to WhatsApp or Twilio for sending messages.
  • Customize the message content based on the status updates from your Google Sheet.

Once this is set up, every time there’s a status update, the designated WhatsApp message will be sent automatically. This workflow ensures timely communication based on the changes you make in Google Sheets.


3. Send Interactive WhatsApp Messages with Pabbly Connect

To send interactive WhatsApp messages with quick replies and call-to-action buttons, use Pabbly Connect to connect Google Sheets with your WhatsApp account. Start by creating a new workflow and setting Google Sheets as the trigger application with the event ‘New Row’.

Afterward, choose the action application as Interact, where you can format your WhatsApp message to include quick reply buttons. This feature is useful for engaging users directly through WhatsApp messages.

  • Customize the message to include your call-to-action buttons.
  • Map the fields from Google Sheets to the message template in Interact.

With this setup, any new row added to your Google Sheet will trigger an interactive WhatsApp message to be sent automatically, enhancing user engagement.


4. Automatically Copy Files in Google Drive Using Pabbly Connect

For automating file management, Pabbly Connect allows you to copy files from one Google Drive folder to another. Set up a new workflow in Pabbly Connect, selecting Google Drive as both the trigger and action application.

Choose the trigger event ‘New File in Specific Folder’ and specify the folder you want to monitor. Then, for the action event, select ‘Copy File’ and designate the destination folder. This setup ensures that any new file added to the monitored folder is automatically copied to the specified location.

This automation is particularly useful for maintaining organized file storage without manual intervention. You can easily manage files across different folders in Google Drive.


5. Send WhatsApp Messages from Notion Using Pabbly Connect

To send WhatsApp messages directly from Notion, leverage Pabbly Connect to create a seamless workflow. Start by setting Notion as the trigger application and select ‘New Database Item’ as the event.

Next, connect your Notion account and specify the database you want to track. Then set Interact as the action application to send the WhatsApp message. Customize the message content to include the details from the new database item.

Map the necessary fields from Notion to the message template in Interact. Test the workflow to ensure messages are sent correctly.

This integration allows you to keep users informed instantly about new entries in your Notion database, enhancing communication and efficiency.


Conclusion

In February 2023, Pabbly Connect showcased powerful workflows integrating applications like Microsoft Excel, Notion, and WhatsApp. By automating these processes, users can enhance productivity and streamline their tasks effectively.

Ensure you check out Pabbly Connect to create business automation workflows and reduce manual tasks. Pabbly Connect currently offer integration with 2,000+ applications.

Automate Your Social Media Posts with Pabbly Connect and Writesonic

Learn how to automate social media posts using Pabbly Connect and Writesonic. This step-by-step guide covers integration with Facebook, Instagram, Twitter, and more. Learn to create powerful connections between your critical applications without requiring specialized programming knowledge or extensive technical background.

Watch Step By Step Video Tutorial Below


1. Setting Up Pabbly Connect for Automation

To automate social media posts, start by accessing Pabbly Connect. This automation tool allows you to create workflows that integrate various applications seamlessly. Begin by signing up for a free account on the Pabbly Connect website.

Once signed in, navigate to your dashboard and click on the ‘Create Workflow’ button. Name your workflow, for example, ‘Create Social Media Content’, and click on the ‘Create’ button to proceed. This sets up the foundation for your automation.


2. Setting Up Google Sheets as the Trigger

In Pabbly Connect, the next step is to set Google Sheets as the trigger application. Select Google Sheets and choose the ‘New or Updated Spreadsheet Row’ event. This will allow your workflow to trigger whenever a new row is added to your spreadsheet. using Pabbly Connect

  • Open your Google Sheet in an incognito window to avoid account conflicts.
  • Install the Pabbly Connect Webhooks add-on from the Google Workspace Marketplace.
  • Enter the Webhook URL provided by Pabbly Connect in the add-on’s initial setup.

After setting up the Webhook URL, select the trigger column, which is where you will enter the details of your social media posts. This setup ensures that every time you add a new post title and platform in the designated column, it will activate the workflow.


3. Using Writesonic to Generate Content

After setting up the trigger, the next step is to integrate Writesonic to generate content based on the titles entered in Google Sheets. In Pabbly Connect, add a new action step and select Writesonic as the application. using Pabbly Connect

Choose the ‘Chat Sonic’ action event, which functions similarly to ChatGPT. Connect your Writesonic account by entering the API key available in your Writesonic dashboard. This key allows Pabbly Connect to communicate with Writesonic to generate unique content.


4. Posting to Social Media Platforms

The final step in the workflow is to post the generated content to your desired social media platforms. Select Facebook Pages as the action application in Pabbly Connect and choose ‘Create Page Post’ as the action event. using Pabbly Connect

  • Connect your Facebook account and authorize Pabbly Connect to post on your behalf.
  • Select the Facebook page where you want to post the content.
  • Map the generated content from Writesonic into the message field for the post.

After mapping the content, click on ‘Save and Send Test Request’ to create a test post. You should see your new post appear on your Facebook page, confirming that the integration is successful.


5. Conclusion

By using Pabbly Connect, you can automate the process of creating and posting social media content effortlessly. This integration with Writesonic allows you to generate high-quality posts automatically, saving you time and effort in your social media marketing strategy.

Ensure you check out Pabbly Connect to create business automation workflows and reduce manual tasks. Pabbly Connect currently offer integration with 2,000+ applications.

With this setup, simply enter your post titles in Google Sheets, and the workflow will handle the rest, posting your content to various platforms like Facebook, Instagram, and Twitter automatically.


Automate Gmail Notifications to Google Chat with Pabbly Connect

Learn how to automate Gmail notifications to Google Chat using Pabbly Connect. Follow our detailed tutorial for seamless integration. Explore efficient methods for automating routine tasks with clear, concise instructions suited for both newcomers and experienced professionals.

Watch Step By Step Video Tutorial Below


1. Setting Up Pabbly Connect for Gmail and Google Chat Integration

To start automating Gmail notifications to Google Chat, first, you need to set up Pabbly Connect. This powerful integration platform facilitates seamless communication between your Gmail and Google Chat applications. If you don’t have an account, you can create one for free in just two minutes.

After logging into your Pabbly Connect dashboard, click on the blue button to create a new workflow. Name your workflow, such as ‘When new email is received in Gmail, notify team on Google Chat.’ This naming convention helps you keep track of your automations efficiently.


2. Configuring the Trigger in Pabbly Connect

In this step, you will configure the trigger for your automation in Pabbly Connect. The trigger will be set to activate when a new email is received in your Gmail account. You will find two boxes labeled ‘Trigger’ and ‘Action’ on your screen. Select Gmail as the trigger application.

  • Choose the trigger event as ‘New Email Received’.
  • Connect your Gmail account to Pabbly Connect.
  • Test the trigger to ensure it’s working correctly.

Once the trigger is set up, Pabbly Connect will automatically monitor your Gmail for any new incoming emails, allowing you to proceed to the next step of sending notifications to Google Chat.


3. Using Email Parser in Pabbly Connect

To effectively connect Gmail with Pabbly Connect, you will utilize the Email Parser feature. This feature allows you to extract relevant information from incoming emails. First, copy the email address provided by Pabbly Connect for parsing.

Next, go to your Gmail settings, navigate to the ‘Forwarding and POP/IMAP’ tab, and add the copied email address as a forwarding address. Confirm the forwarding request by entering the verification code sent to the Pabbly Connect email address. This step ensures that all emails received in your Gmail will be forwarded to Pabbly Connect for processing.


4. Setting Up the Action to Send Notifications to Google Chat

Now that you have configured the trigger, it’s time to set up the action in Pabbly Connect. Select Google Chat as the action application and choose the action event as ‘Create Message’. This action will send a notification to your Google Chat group whenever a new email is received.

  • Enter the Google Chat webhook URL, which can be obtained from your Google Chat settings.
  • Compose the message to be sent, such as ‘Hello team, a new email has been received from [Freelancer Name].’
  • Test the action to verify that messages are sent correctly to Google Chat.

With these steps completed, Pabbly Connect will ensure that your team is notified in real-time whenever a new email arrives in your Gmail account.


5. Applying Filters for Specific Notifications

To refine your automation further, you can set up filters in Pabbly Connect. This feature allows you to specify conditions under which notifications will be sent to Google Chat. For instance, you can filter emails based on the subject line or sender’s email address.

To apply filters, select the filter option in Pabbly Connect and define your conditions. For example, set a condition that the subject line must contain the word ‘blog submission’ or that the sender’s email must match the freelancer’s email address. This ensures that your team only receives relevant notifications.

By implementing these filters, Pabbly Connect will only send notifications for specific types of emails, reducing noise and improving communication efficiency within your team.


Conclusion

In this tutorial, we explored how to automate Gmail notifications to Google Chat using Pabbly Connect. By following the steps outlined, you can ensure that your team is promptly informed about new emails without manual checking. This automation not only saves time but also enhances team collaboration. Start using Pabbly Connect today to streamline your email notifications!

Ensure you check out Pabbly Connect to create business automation workflows and reduce manual tasks. Pabbly Connect currently offer integration with 2,000+ applications.

How to Generate Video Descriptions Automatically Using Pabbly Connect and Writesonic

Learn how to generate video descriptions automatically using Pabbly Connect with Writesonic, YouTube, and Google Sheets. Step-by-step tutorial included. Revolutionize your productivity approach with just a few strategic clicks. Uncover professional methods for connecting applications and creating workflows that reclaim hours of your week.

Watch Step By Step Video Tutorial Below


1. Accessing Pabbly Connect for Video Description Generation

To begin generating video descriptions automatically, access Pabbly Connect by visiting the official website. Here, you can either sign in if you’re an existing user or sign up for a free account if you’re new. Upon signing up, you will receive 100 free tasks to start your automation journey.

Once logged in, navigate to the dashboard where you can create a new workflow. Click on the ‘Create Workflow’ button, which will allow you to name your workflow. For this tutorial, the objective is to generate unique video descriptions automatically using Writesonic.


2. Setting Up YouTube as the Trigger Application in Pabbly Connect

In this step, you will set up YouTube as the trigger application in Pabbly Connect. The trigger event will be set to ‘New Video in Channel with Video URL’. This means that every time a new video is uploaded to your YouTube channel, the workflow will be activated.

  • Select YouTube as the trigger application.
  • Choose the trigger event: New Video in Channel with Video URL.
  • Connect your YouTube account to Pabbly Connect.

After connecting, the system will automatically fetch your Channel ID and other relevant data. This step is crucial as it allows Pabbly Connect to monitor your YouTube channel for new uploads every 10 minutes.


3. Integrating Writesonic to Generate Video Descriptions

Next, you will integrate Writesonic to generate descriptions for the videos uploaded on YouTube. In Pabbly Connect, select Writesonic as the action application, and choose the event ‘Chat Sonic’. This action will allow you to utilize Writesonic’s AI capabilities to create unique video descriptions.

To connect Writesonic, you will need an API key. Access your Writesonic account, navigate to your profile settings, and copy the API key. Paste this key into Pabbly Connect to establish the connection.

  • Input the video title from the YouTube trigger into the Writesonic input text field.
  • Select to enable or disable Google results in your description generation.
  • Click ‘Save and Send Test Request’ to generate the description.

This integration allows Pabbly Connect to pass the video title to Writesonic, which will generate a tailored description based on the title provided.


4. Adding Generated Descriptions to Google Sheets

After generating a video description with Writesonic, the next step is to store this information in Google Sheets. In Pabbly Connect, add another action step and select Google Sheets as the application. Choose the action event ‘Add New Row’ to input the new description along with the video title.

Connect your Google Sheets account to Pabbly Connect and select the spreadsheet where you want to store the video title and description. Map the video title from the YouTube trigger and the generated description from Writesonic into the respective fields in Google Sheets.

Select the spreadsheet and sheet where the data will be added. Map the video title and description fields correctly. Click ‘Save and Send Test Request’ to confirm the integration.

This step ensures that every time a new video is uploaded, the description is automatically added to your Google Sheets, allowing you to keep track of all video descriptions easily.


5. Testing the Integration for Success

To ensure that the entire integration works seamlessly, upload a new video to your YouTube channel. After the video is uploaded, wait for 10 minutes, which is the polling time set in Pabbly Connect. This allows the trigger to check for new uploads.

After 10 minutes, check your Google Sheets to see if the new video title and its corresponding description have been added. This final step confirms that the automation process is functioning correctly and that Pabbly Connect has successfully integrated YouTube, Writesonic, and Google Sheets.

With this setup, you can automate the tedious task of writing video descriptions, saving you time and effort while enhancing your YouTube channel’s productivity.


Conclusion

This tutorial demonstrates how to automate video description generation using Pabbly Connect, Writesonic, and Google Sheets. By following the steps outlined, you can efficiently create and store video descriptions automatically, enhancing your workflow significantly.

Ensure you check out Pabbly Connect to create business automation workflows and reduce manual tasks. Pabbly Connect currently offer integration with 2,000+ applications.

Integrate Google Sheets, OpenAI, and Trello with Pabbly Connect

Learn how to create Trello cards using Google Sheets and OpenAI with Pabbly Connect in this detailed step-by-step tutorial. Discover hidden automation capabilities within your existing tools. This guide shows you how to connect your essential applications and permanently eliminate redundant manual processes.

Watch Step By Step Video Tutorial Below


1. Overview of Pabbly Connect for Integration

Pabbly Connect serves as the central platform that facilitates the integration of Google Sheets, OpenAI, and Trello. By using Pabbly Connect, you can automate the process of creating Trello cards based on data entered into Google Sheets. This integration allows you to leverage OpenAI’s capabilities to generate content automatically for your Trello cards.

To get started, sign in or create an account on the Pabbly Connect website. Once logged in, navigate to the dashboard where you can create a new workflow. This initial setup is crucial for connecting your applications seamlessly.


2. Setting Up Google Sheets as a Trigger in Pabbly Connect

In this section, we will set up Google Sheets as the trigger application in Pabbly Connect. The trigger event is defined as a new or updated spreadsheet row. This means whenever a new topic is entered in your Google Sheets, it will initiate the workflow.

  • Open Pabbly Connect and create a new workflow.
  • Select Google Sheets as the trigger application.
  • Choose the event ‘New or Updated Spreadsheet Row’.

After selecting the trigger, Pabbly Connect will provide a webhook URL. You will need to copy this URL and set it up in your Google Sheets using the Pabbly Connect Webhooks add-on. This step is essential for establishing communication between Google Sheets and Pabbly Connect.


3. Connecting Google Sheets to Pabbly Connect

To connect Google Sheets to Pabbly Connect, you will need to install the Pabbly Connect Webhooks add-on in Google Sheets. This add-on will allow you to send data from your spreadsheet to Pabbly Connect seamlessly.

  • Go to Google Sheets and enter your topic in a new row.
  • Click on Extensions, then Add-ons, and select Get Add-ons.
  • Search for Pabbly Connect Webhooks and install it.

After installation, go back to Extensions, select Pabbly Connect Webhooks, and enter the webhook URL you copied earlier. Set the trigger column to the last updated column in your spreadsheet. This configuration ensures that any new data entered will trigger the workflow in Pabbly Connect.


4. Generating Content with OpenAI

Once Google Sheets is set up as a trigger, the next step is to use OpenAI to generate content based on the topics you input. In Pabbly Connect, select OpenAI as the action application and configure it to generate content.

Here’s how to set it up:

Choose OpenAI as the action application in Pabbly Connect. Select the event ‘Generate Content’. Connect your OpenAI account using the API key.

Map the topic from Google Sheets into the prompt field in OpenAI. Set the maximum token limit for the content generation, and once configured, send a test request. The response will include the generated content which will be used for the Trello card.


5. Creating Trello Cards Using Pabbly Connect

After generating the content with OpenAI, the final step is to create a Trello card using the information generated. In Pabbly Connect, select Trello as the action application and configure it to create a card.

Follow these steps to complete the integration:

Choose Trello as the action application in Pabbly Connect. Select the event ‘Create Card’. Connect your Trello account using the API key.

Map the card name to the topic from Google Sheets and the description to the content generated by OpenAI. After saving and sending the test request, check Trello to confirm that the card has been created successfully with the desired content.


Conclusion

In this tutorial, we demonstrated how to integrate Google Sheets, OpenAI, and Trello using Pabbly Connect. By following the steps outlined, you can automate the creation of Trello cards based on topics entered in Google Sheets, with content generated by OpenAI. This integration streamlines your workflow and enhances productivity.

Ensure you check out Pabbly Connect to create business automation workflows and reduce manual tasks. Pabbly Connect currently offer integration with 2,000+ applications.

Automatically Reply to YouTube Video Comments Using Pabbly Connect

Learn how to automatically respond to YouTube comments using Pabbly Connect and Write Sonic. This step-by-step guide covers the entire integration process. Follow this definitive guide to creating powerful automated workflows with straightforward, efficiency-focused solutions that save valuable time.

Watch Step By Step Video Tutorial Below


1. Setting Up Pabbly Connect for YouTube Comment Automation

To automatically reply to YouTube comments, first, you need to access Pabbly Connect. This platform serves as the central integration tool that connects YouTube with Write Sonic for automated responses. Start by signing up for a free account on the Pabbly Connect website.

Once you are signed in, navigate to the dashboard and click on the ‘Create Workflow’ button. Name your workflow appropriately, such as ‘Auto Reply to YouTube Comments.’ After naming, click on the create button to proceed with the setup.


2. Triggering the Event from YouTube Comments

In this step, you will set up the trigger for your automation. Select YouTube as your trigger application in Pabbly Connect. The trigger event you need to choose is ‘New Comment on Channel.’ This event will initiate the workflow whenever a new comment is posted on your YouTube channel.

  • Select ‘YouTube’ as the trigger application.
  • Choose ‘New Comment on Channel’ as the trigger event.
  • Connect your YouTube account by clicking on the ‘Connect’ button.

After connecting, select your channel name from the dropdown menu and set the maximum results to 20. This means that every 10 minutes, the workflow will check for new comments on your channel and trigger the automation.


3. Generating Replies Using Write Sonic

Now that you have set up the trigger, the next step is to generate replies for the comments using Write Sonic. In Pabbly Connect, add an action step and select Write Sonic as the action application. The action event you need is ‘ChatSonic.’

To connect Write Sonic, you will need your API key. Go to your Write Sonic dashboard, find the API dashboard, and toggle the ChatSonic API on. Copy the API key and paste it into Pabbly Connect. For the input text, type a prompt like ‘Write a reply for this YouTube comment.’ Map the comment text from the previous step into the input text field.


4. Replying to Comments on YouTube

After generating a response with Write Sonic, the final step is to send the reply back to YouTube. In Pabbly Connect, add another action step and select YouTube again. This time, choose the action event ‘Reply to Comment.’

Connect to YouTube using the existing connection. For the reply text, map the message generated from Write Sonic. Additionally, you will need to map the comment ID from the previous steps to ensure the reply is associated with the correct comment.


5. Conclusion: Automating Your YouTube Comment Replies

By following these steps, you have successfully set up an automation in Pabbly Connect to reply to YouTube comments automatically. This integration not only saves time but also enhances your interaction with viewers, improving your channel’s engagement.

Ensure you check out Pabbly Connect to create business automation workflows and reduce manual tasks. Pabbly Connect currently offer integration with 2,000+ applications.

Now, whenever new comments are posted, your replies will be generated and sent automatically, allowing you to focus on creating more content. Embrace the power of automation with Pabbly Connect to streamline your YouTube engagement.


Automate Sending Email Attachments to Google Chat with Pabbly Connect

Learn how to automate sending email attachments from Gmail to Google Chat using Pabbly Connect. Step-by-step tutorial for seamless integration. Implement the precise methodologies leading organizations use to automate repetitive tasks, illustrated with practical examples designed for immediate application.

Watch Step By Step Video Tutorial Below


1. Introduction to Pabbly Connect for Gmail and Google Chat Integration

To send email attachments on Google Chat automatically, we will utilize Pabbly Connect. This powerful automation platform allows seamless integration between Gmail and Google Chat, ensuring notifications are sent whenever a new email with an attachment is received.

First, access your Pabbly Connect account or create a new one if you haven’t already. Once logged in, you can create a workflow that triggers notifications on Google Chat based on incoming emails in Gmail.


2. Setting Up Your Workflow in Pabbly Connect

After logging into Pabbly Connect, click on the blue ‘Create Workflow’ button. Name your workflow something descriptive, like ‘Get Notifications on Google Chat About Incoming Emails on Gmail’. Then, click on the ‘Create’ button to proceed.

Now, you will see two boxes for trigger and action. Choose the Email Parser as your trigger application instead of Gmail directly. This feature in Pabbly Connect allows you to capture incoming emails effectively. Copy the provided email address from the Email Parser setup.

  • Log into your Gmail account.
  • Go to Settings and find the ‘Forwarding and POP/IMAP’ tab.
  • Add the Email Parser email address for forwarding.

After setting this up, every new email received at your Gmail account will also be sent to Pabbly Connect via the Email Parser.


3. Verifying Email Forwarding in Gmail

To ensure your Gmail is correctly set up to forward emails to Pabbly Connect, you need to verify the forwarding address. Click on ‘Proceed’ after adding the Email Parser email address, and a confirmation code will be sent to that email. Check the response in Pabbly Connect to retrieve this code.

Once you have the confirmation code, return to your Gmail settings and enter the code to verify. Make sure to enable the option to forward a copy of incoming emails. Save your changes to complete this setup.

Now, Pabbly Connect will capture every email that arrives in your Gmail, including any attachments. This sets the stage for the next steps, where you will filter and send notifications to Google Chat.


4. Filtering Emails and Sending Notifications to Google Chat

With your Gmail account now connected to Pabbly Connect, you can set conditions to filter which emails trigger notifications. For instance, if you only want notifications for job applications, you can set conditions based on keywords in the email subject or body.

In Pabbly Connect, you can add conditions to check if the subject line contains specific words like ‘job’ or ‘resume’. If any of these conditions are met, the automation will proceed to send a notification to Google Chat.

  • Select the condition type (e.g., contains).
  • Input your keywords for filtering.
  • Save your filter settings.

Once the conditions are set, Pabbly Connect will only send notifications for relevant emails, enhancing your team’s efficiency in managing incoming messages.


5. Finalizing Google Chat Notifications with Pabbly Connect

To send notifications to Google Chat, you need to connect your Google Chat account to Pabbly Connect. Select Google Chat as your action application and choose ‘Create Message’ as the action event.

Here, you will need to provide a webhook URL from your Google Chat space. Create a new webhook in Google Chat, copy the URL, and paste it into Pabbly Connect. Compose the message that will be sent to your team, including details from the incoming email.

After setting up the message, you can map the relevant fields from the previous email response. This ensures that every notification sent to Google Chat will include the sender’s name, email content, and attachment link.


Conclusion

By following this tutorial, you can effectively use Pabbly Connect to automate the process of sending email attachments from Gmail to Google Chat. This integration helps streamline communication and ensures your team stays updated on important emails effortlessly. Start automating today with Pabbly Connect for enhanced productivity!

Ensure you check out Pabbly Connect to create business automation workflows and reduce manual tasks. Pabbly Connect currently offer integration with 2,000+ applications.

How to Produce Creative Newsletters with Pabbly Connect and WR Sonic

Learn how to automate creative newsletters using Pabbly Connect with WR Sonic, Facebook, and YouTube. Step-by-step tutorial for seamless integration. Navigate the automation landscape confidently with clear, structured guidance suitable for professionals regardless of prior technical experience.

Watch Step By Step Video Tutorial Below


1. Accessing Pabbly Connect for Newsletter Automation

To start producing creative newsletters, you need to access Pabbly Connect. First, type the URL Pabbly.com/connect in your browser. This will lead you to the landing page of Pabbly Connect.

Once there, you will see options to either sign in or sign up for free. If you are a new user, click on ‘Sign Up’ to create an account and receive 100 free tasks. If you already have an account, click on ‘Sign In’ to access your dashboard.


2. Creating a Workflow in Pabbly Connect

After signing in, you will find a blue button labeled ‘Create Workflow’ on your dashboard. Click on it to begin setting up your automation. You will be prompted to name your workflow. using Pabbly Connect

  • Name your workflow something descriptive, such as ‘Produce Creative Newsletters with WR Sonic’.
  • Click on ‘Create’ to proceed to the next step.

In this section, you will define your trigger and action events. The trigger will be your data source, and the action will be the response to that trigger.


3. Setting the Trigger Event with Airtable

Your trigger application will be Airtable, which allows you to create and manage spreadsheets. Select Airtable and choose the trigger event as ‘New Record’. This means that every time a new record is added, the workflow will activate. using Pabbly Connect

Pabbly Connect checks for new data in Airtable every 10 minutes. To connect Airtable with Pabbly Connect, click on ‘Connect’ and then select ‘Add New Connection’. You will need to provide a personal access token from your Airtable account.

  • Log in to your Airtable account and navigate to the API section.
  • Create a new token with the necessary scopes for reading and writing data.

Once you have your token, paste it in Pabbly Connect and save the connection. Now, select the base and table from your Airtable account where your newsletter titles will be stored.


4. Generating Content with WR Sonic

After setting up the trigger, it’s time to add the action application, which will be WR Sonic. This AI tool will generate the newsletter content based on the title added to Airtable. Click on ‘Add Action’ and select WR Sonic. using Pabbly Connect

You will need to connect WR Sonic by providing an API key. Log into your WR Sonic account, go to the API dashboard, and toggle the API option to activate it. Copy the API key and paste it into Pabbly Connect.

Input the prompt for WR Sonic, such as ‘Write a newsletter on the title’. Map the title from the previous step to ensure it uses the latest data.

Once you send the test request, WR Sonic will generate the newsletter content, which you can then use to update your Airtable record.


5. Updating Airtable with the Generated Newsletter

The final step is to update your Airtable spreadsheet with the generated newsletter content. Add another action in Pabbly Connect and select Airtable again. This time, choose the action event as ‘Update Record’. using Pabbly Connect

Connect to your existing Airtable connection and select the base and table where the newsletter content will be stored. Map the title and the generated newsletter content to the respective fields in Airtable.

Ensure you have the correct record ID selected for updating the right entry. Click on ‘Save and Send Test Request’ to finalize the update.

After completing this step, your Airtable will be updated with the new newsletter content generated by WR Sonic, confirming that the integration is successful.


Conclusion

By following these steps, you can effectively produce creative newsletters using Pabbly Connect alongside WR Sonic and Airtable. This automation not only saves time but also ensures that your newsletters are generated consistently and efficiently.

Ensure you check out Pabbly Connect to create business automation workflows and reduce manual tasks. Pabbly Connect currently offer integration with 2,000+ applications.

Integrate HubSpot with Typeform Using Pabbly Connect

Learn how to create or update HubSpot contacts from new Typeform entries using Pabbly Connect in this detailed tutorial. This comprehensive guide reveals exactly how to connect your applications and automate repetitive tasks — accessible for professionals of all technical backgrounds.

Watch Step By Step Video Tutorial Below


1. Setting Up Pabbly Connect for Integration

To begin integrating HubSpot and Typeform, you first need to access Pabbly Connect. Start by signing in to your Pabbly account. If you don’t have one, you can create an account easily.

Once logged in, navigate to the Pabbly Connect dashboard. Click on the big blue button labeled ‘Create Workflow’. This is the first step in setting up your integration process.


2. Creating the Workflow in Pabbly Connect

After clicking ‘Create Workflow’, name your workflow something descriptive, like ‘Create HubSpot Contacts from Typeform Entries’. This helps in identifying your workflow later on. using Pabbly Connect

  • Click on ‘Create’ to proceed.
  • You will see two boxes: one for the trigger and one for the action.
  • Select ‘Typeform’ as your trigger application.

This setup indicates that the workflow will be triggered by new entries in Typeform. Click on ‘Connect’ to establish a connection with your Typeform account.


3. Configuring Typeform Integration

Once connected, choose the event as ‘New Entry’. This means that whenever a new submission is made in your Typeform, the workflow will activate.

After selecting the form, you will need to fill it out to test the integration. Open the form link in a new tab and submit test data. This data will be captured by Pabbly Connect.

  • Fill in the required fields like first name, last name, email, and phone number.
  • Click on ‘Save and Send Test Request’ in Pabbly Connect.
  • Ensure that the response is captured successfully.

Once the data is captured, you can proceed to the next step of the integration.


4. Setting Up HubSpot Integration

Now, select ‘HubSpot CRM’ as the action application. The event you want to choose here is ‘Create Contact’. This action will create a new contact in HubSpot using the data received from Typeform.

Connect your HubSpot account by clicking on ‘Add New Connection’. After authorization, you need to map the fields from Typeform to HubSpot. This is where Pabbly Connect facilitates the transfer of data.

Map the first name, last name, email, and phone number from Typeform to the corresponding fields in HubSpot. Make sure to fill in all required fields marked in HubSpot. Click ‘Save and Send Test Request’ to check if the contact is created successfully.

After testing, ensure there are no errors in the response. If successful, save your workflow.


5. Verifying the Integration

To confirm that the integration works, go back to your HubSpot account. Check if the new contact has been created with the information you submitted through Typeform.

You should see the contact’s details like name, email, phone number, and any other information you mapped. This verification step is crucial to ensure that Pabbly Connect is functioning as intended.

If the contact appears correctly, your automation is successful. You can now automate future entries without manual input. Consider exploring more integrations with Pabbly Connect for other applications.

This completes the integration process between Typeform and HubSpot using Pabbly Connect.


Conclusion

In this tutorial, we explored how to create or update HubSpot contacts from new Typeform entries using Pabbly Connect. This powerful integration automates the process, saving you time and ensuring accurate data entry.

Ensure you check out Pabbly Connect to create business automation workflows and reduce manual tasks. Pabbly Connect currently offer integration with 2,000+ applications.